PNI Escort HP 8500 CB Radio and MP3 Player Instrukcja obsługi
- Kategoria
- Odtwarzacze MP3 / MP4
- Typ
- Instrukcja obsługi

PNI Escort HP 8500
CB radio & MP3 Player/CB радио и MP3 плейър/CB-Radio & MP3-
Player/Radio CB y reproductor MP3/Radio CB et lecteur MP3/CB rádió és
MP3 lejátszó/Radio CB e lettore MP3/CB-radio & MP3-speler/CB radio i
odtwarzacz MP3/Statie radio CB si MP3 player
EN User manual ............... 3
BG Ръководство за употреба ........ 19
DE Benutzerhandbuch ............ 37
ES Manual de usuario ............ 54
FR Manuel utilisateur ............ 71
HU Használati utasítás ............ 88
IT Manuale utente ............. 104
NL Handleiding .............. 120
PL Instrukcja obsługi ............ 137
RO Manual de utilizare ............ 153


3User manual
English
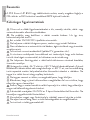
Introduction
PNI Escort HP 8500 is a multifunctional device that incorporates the features
of a CB radio and an MP3 player with FM function.
Special warnings
Read the warnings below to prevent fire, personal injury, radio or antenna
damage.
Do not try to adjust the radio while driving. Doing so exposes you to the
risk of accidents.
This radio on is designed for 12V/24V DC power supply.
Do not place the radio on an excessively dusty, damp or unstable surface.
Do not connect the antenna during transmission, risk of burns or electric
shock.
Please keep away from interfering devices (such as TV, generator, etc.).
Those who use pacemakers are advised to keep their distance from the
antenna during transmission and especially not to touch it.
Do not place metal objects near the internal electrical part of the radio;
danger of electric shock.
Avoid exposing the radio to temperatures below -26°C and above + 80°C.
The temperature on board a vehicle can sometimes exceed + 80°C, which can
cause irreparable damage to the radio in the event of prolonged exposure. Do
not expose the radio to sunlight for a long time.
Do not put anything on the radio, it will prevent it from cooling down.
Check that the vehicle battery is suciently charged to avoid rapid
discharge.
It is important to turn o the radio before starting the engine to avoid
damage caused by high starting voltage.
When replacing the fuse, you must use a 2A 250V type F fuse. Do not use
a higher value fuse.
If an abnormal odor or smoke is detected coming out from the radio, close
the radio immediately.
Do not transmit for a long time, the radio may heat up and malfunction.
Keep the radio away from children.

User manual 4
English
Other warnings
Before connecting or using this product, please read the instructions for use
carefully. Keep this manual for future reference.
Connect the antenna before using the radio. Check the antenna SWR before
transmitting. Too high SWR can lead to the destruction of radio terminals,
internal components that are not covered by the warranty.
There are no user-serviceable radio components. For repairs, contact an
authorized service center.
Use a suitable power supply to prevent the risk of fire.
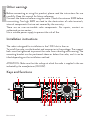
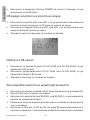
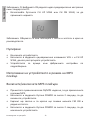
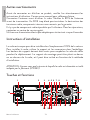
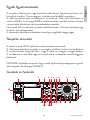
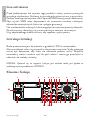
Installation instructions
The radio is designed for installation in the 1 DIN slot in the car.
To install the radio, use the bracket and accessories in the package. The support
bolts must be tightened to prevent the radio from vibrating while moving. The
mounting bracket can be positioned above or below the radio, and it can be
tilted depending on the installation method.
ATTENTION: Make sure that the voltage at which the radio is supplied is the one
indicated by the manufacturer (12V/24V).
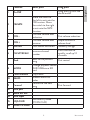
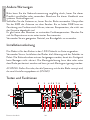
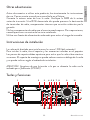
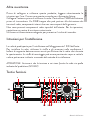
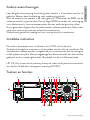
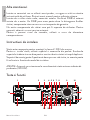
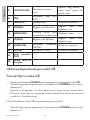
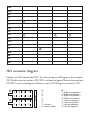
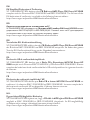
Keys and functions
AUX AUDIO
USB
MP3
SP
MIC
CB
POWER
VOL
-
MEM
FUNC
SQ
ASQ
SQ
ASQ ASQ
MODE BAND
EQ
LOUD
RFG
M1
M3
AM/FM
DW
M2
M4
LOCK
VOL
+
UP
SCAN
-+
CH
DN
SCAN
CH
1 2 345 6 78 9 10
11
12
13 14
15
16
17
1819
20
21
22
24 23
25
26

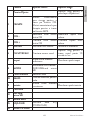
5User manual
English
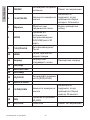
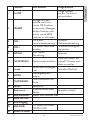
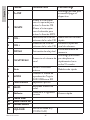
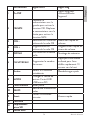
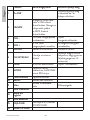
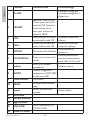
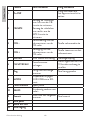
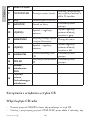
Function Short press Long press
1On/O Long press to turn the
device on/o
2CB/MP3
Move the switch to
the left to activate the
CB function. Move
the switch to the right
to activate the MP3
function.
3VOL - CB radio volume level
reduction Fast volume reduction
4VOL + CB radio volume level
increase Rapid increase in
volume level
5DW/M2 Dual Watch activation Memory storage
6CH UP/SCAN Increase channel
number
Press and hold to
quickly scroll up 10
channels
7Back Back to the previous
song Fast rewind
8MODE Change playback source
AUX/USB/micro SD
card
9PLAY/PAUSE Play/Pause
10 BAND Manual search for
radios
11 Forward Forward to the next
song Fast forward
12 USB port
13 Micro SD slot
14 AUX input
15 EQ/LOUD Activate EQ mode
(POP/LOUD)
16 AUDIO 3.5mm

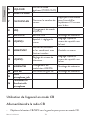
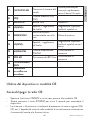
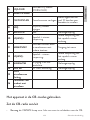
User manual 6
English
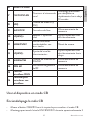
17 CH DN/SCAN Decrease channel
number
Press and hold to
quickly scroll down 10
channels
18 ASQ SQ/ASQ mode change
19 M4/LOCK Key lock Memory storage
20 SQ/ASQ+ Squelch + level
adjustment Quick Squelch level
adjustment up
21 MEM/FUNC Activate functions by
combining with other
keys Access menu
22 SQ/ASQ- Squelch level
adjustment - Quick Squelch level
adjustment down
23 M3/AM/FM AM/FM modulation
change Memory storage
24 RFG M1 RF Gain Activation Memory storage
25 RJ45
microphone jack
26 Connector for
Headset with
microphone
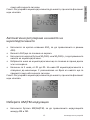
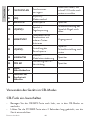
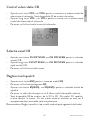
Using the device in CB mode
Turn the CB radio on/o
• Move the CB/MP3 button to the left to switch to CB mode.
• Press and hold the POWER key for about 2 seconds to turn on the device.
• The screen will light up and briefly display the current norm (EU, EC, etc.),
after which it will remain on the standard display mode with the channel
number and active functions.
Note: From the factory, the CB radio comes preset to EU standard.
• Press and hold the POWER key for about 2 seconds to turn o the device.

7User manual
English
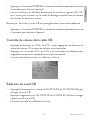
CB radio volume control
• Briefly press VOL- or VOL + to increase or decrease the volume level. 25
volume levels are available.
• Press and hold the VOL- or VOL + key to quickly increase or decrease the
volume level.
• The current volume level will be displayed on the screen.
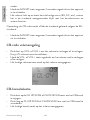
CB channel selection
• Briefly press the CH UP SCAN or CH DN SCAN key to change the CB
channel.
• Long press CH UP SCAN or CH DN SCAN to quickly change the CB
channel.
• The current channel will be displayed on the screen.
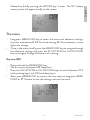
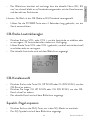
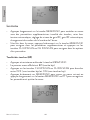
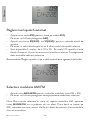
Adjust squelch level
• Briefly press the ASQ key to switch to SQ mode.
• The SQ icon will be displayed on the screen.
• Briefly press the SQ/ASQ- or SQ/ASQ + key to change the squelch level.
• The selected squelch level will be displayed in the upper right corner of the
screen.
• 28 levels are available, from 00 to 28. On level 00 the squelch is fully
open. As the number of levels increases, only the strongest signals will be
received.
Tip: Adjust the squelch to the level where the background noise disappears.

User manual 8
English
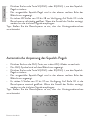
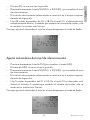
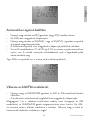
Automatic squelch level adjustment
• Briefly press the ASQ key to switch to ASQ mode.
• The ASQ icon will be displayed on the screen.
• Briefly press the SQ/ASQ- or SQ/ASQ + key to change the squelch level.
• The selected squelch level will be displayed in the upper right corner of the
screen.
• 5 levels are available, from 01 to 05. On level 00 the squelch is open to
the maximum. As the number of levels increases, only the strongest signals
will be received.
Tip: Adjust the squelch to the level where the background noise disappears.
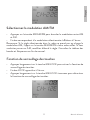
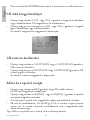
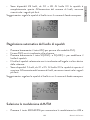
Select AM/FM modulation
• Press the M3/AM/FM key to switch the modulation between AM and FM.
• The icon corresponding to the selected modulation will be displayed on the
screen.
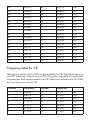
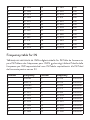
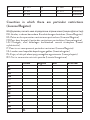
Note: If the rule selected in the radio does not support AM modulation,
pressing the M3/AM/FM key will have no eect. If you want to switch to AM,
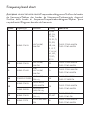
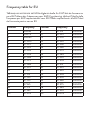
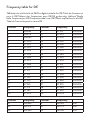
change the rule first. Check the table of bands and frequencies at the end of
the manual.

9User manual
English
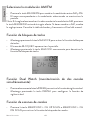
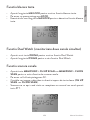
Key lock function
• Long press the M4/LOCK key to activate the key lock function.
• The LOCK icon will appear on the screen.
• Long press the M4/LOCK key again to deactivate the key lock function.
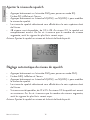
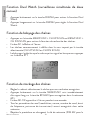
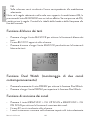
Dual Watch function (monitoring two channels
simultaneously)
• Briefly press the DW/M2 key to activate the Dual Watch function.
• Long press the DW/M2 key to set the Dual Watch function
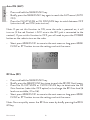
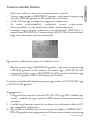
Channel scan function
• Press the MEM/FUNC + CH UP SCAN or MEM/FUNC + CH DN
SCAN key to activate the channel scan function.
• The SC icon will be displayed on the screen.
• The channels will start scrolling in the direction imposed by the selected
key (CH UP SCAN or CH DN SCAN).
• Scanning will stop when the radio receives a signal or when you press the
PTT key.

User manual 10
English
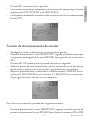
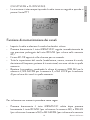
Channel storage function
• Set the radio and select the channel you want to save.
• Briefly press the MEM/FUNC key followed immediately by long pressing
the RFG/M1 key (to save to the M1 memory).
• The M1-OK icon will appear on the screen for one second.
• All channel settings (modulation, norm, channel number, frequency
deviation, transmission power) will be saved in that memory.
• Repeat the procedure, changing the memory key (DW M2 for memory 2,
M3 AM/FM for memory 3, and M4 LOCK for memory 4) to save other
channels to those memories.
To call up a memory, proceed as follows:
• Briefly press the MEM/FUNC key immediately followed by briefly
pressing the RFG/M1 key (to call the M1 memory) or DW M2 (to call the
M2 memory) or M3 AM/FM (to call the M3 memory) or M4 LOCK (to
call M4 memory).
To exit memory mode, briefly press the CH UP SCAN or CH UP SCAN key.
Notes:
1. When you are on a certain memory (M1, M2, M3 or M4) you can change
the band, modulation or deviation (DW), but this information will not be
saved.
2. If you call up a certain memory, but no information has been saved in that
memory, the NC icon will be displayed on the screen.
3. To delete a memory, enter that memory (by briefly pressing MEM/FUNC
+ RFG/M1, for example). Then briefly press the MEM/FUNC key again

11 User manual
English
followed by briefly pressing the RFG/M1 key 3 times. The NC (empty
memory) icon will appear briefly on the screen.
The menu
• Long press MEM/FUNC key to access the menu with additional settings:
key tone, auto power o, RF Gain level setting, RF Gain automatic, screen
light color change.
• Once in the menu, briefly press the MEM/FUNC key to navigate through
the additional settings and press the CH UP SCAN or CH DN SCAN
keys to navigate through the options of a setting.
Key tone (BP)
• Press and hold the MEM/FUNC key.
• The first menu displayed is BP (beep key).
• Press the CH UP SCAN or CH DN SCAN keys to switch between OFF
(without beep keys) and ON (with beep keys).
• Short press MEM/FUNC to move to the next menu or long press MEM/
FUNC or PTT button to save the settings and exit the menu.

User manual 12
English
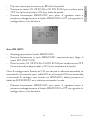
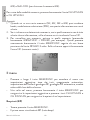
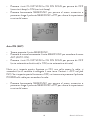
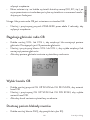
Auto ON (AUT)
• Press and hold the MEM/FUNC key.
• Briefly press the MEM/FUNC key again to reach the AUT menu (AUTO
ON).
• Press the CH UP SCAN or CH DN SCAN keys to switch between OFF
(auto start o) and ON (auto start on).
Note: If you set this function to ON, once the radio is powered on, it will
turn on (if the red Contact + ACC wire in the ISO jack is connected to the
contact). If you set this function to OFF, you will need to press the POWER
button on the radio to turn on the radio.
• Short press MEM/FUNC to move to the next menu or long press MEM/
FUNC or PTT button to save the settings and exit the menu.
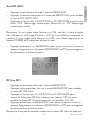
RF Gain (RF)
• Press and hold the MEM/FUNC key.
• Briefly press the MEM/FUNC key twice to reach the RF (RF Gain) menu.
• Press the CH UP SCAN or CH DN SCAN keys to deactivate the RF
Gain function (select the OFF option) or to change the RF Gain level (6
levels are available, 01 to 06).
• Short press MEM/FUNC to move to the next menu or long press MEM/
FUNC or PTT button to save the settings and exit the menu.
Note: You can quickly access the RF Gain menu by briefly pressing the RFG/
M1 key.

13 User manual
English
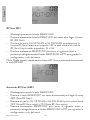
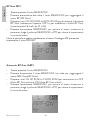
Automatic RF Gain (ARF)
• Press and hold the MEM/FUNC key.
• Press the MEM/FUNC key three times briefly to reach the ARF (Auto
RF Gain) menu.
• Press the CH UP SCAN or CH DN SCAN keys to switch between OFF
(Auto RF Gain active) and ON (Auto RF Gain active).
• Briefly press MEM/FUNC to move to the next menu or long press MEM/
FUNC or PTT button to save the settings and exit the menu
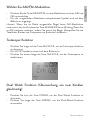
Screen backlight color (BLC)
• Press and hold the MEM/FUNC key.
• Briefly press the MEM/FUNC key four times to reach the BLC (backlight
color) menu.
• Press the CH UP SCAN or CH DN SCAN keys to select the desired
color. 7 colors are available (blue, red, purple, green, cyan, yellow, light
blue), plus the OFF function (no backlight.)
• Short press MEM/FUNC to move to the next menu or long press MEM/
FUNC or PTT button to save the settings and exit the menu.

User manual 14
English
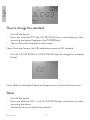
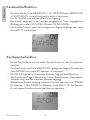
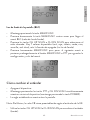
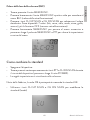
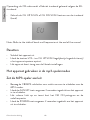
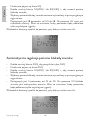
How to change the standard
• Turn o the device.
• Press and hold the PTT and CH DN SCAN keys simultaneously while
restarting the device (long press the POWER key).
• The set rule will be displayed on the screen.
Note: From the factory, the CB radio comes preset to EU standard.
• Use the CH UP SCAN or CH DN SCAN keys to change the standard
(band)
Note: Refer to the table of bands and frequencies at the end of the manual.
Reset
• Turn o the device.
• Press and hold the VOL + and CH UP SCAN keys simultaneously while
restarting the device.
• The device returns to the factory defaults.

15 User manual
English
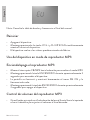
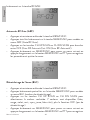
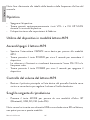
Using the device in MP3 player mode
Turn the MP3 player on/o
• Move the CB/MP3 switch to the right to switch to MP3 mode.
• Press and hold the POWER key for about 2 seconds to turn on the device.
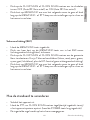
• The screen will light up and briefly display the FM ON icon and the radio
frequency.
• Press and hold the POWER key for about 2 seconds to turn o the device.
MP3 player volume control
• Rotate the main button on the right side of the front panel to the left or
right to adjust the volume to the desired level.
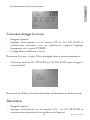
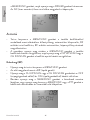
Choose the playback source
• Press the MODE key to switch between modes: BT (Bluetooth), USB,
SD, FM (FM Radio).
Note: If you have not inserted a USB stick or micro SD card into the player,
you will not be able to switch to these modes.
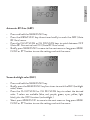
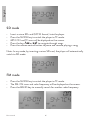
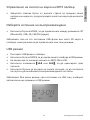
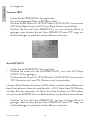
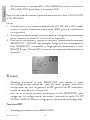
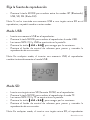
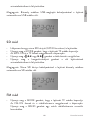
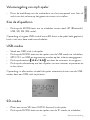
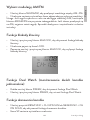
USB mode
• Insert a USB stick into the player.
• Press the MODE key to switch the player to USB mode.
• MP3-ON and USB icons will be displayed on the screen.
• Press the keys ▌
◄◄ or ►►▌ to navigate through songs.
• Press the volume control button to pause and resume playing a song.
Note: In any mode, by inserting a USB stick, the player will automatically
switch to USB mode.

User manual 16
English
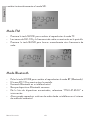
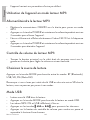
SD mode
• Insert a micro SD card (FAT32 format) into the player.
• Press the MODE key to switch the player to TF mode.
• MP3-ON and TF icons will be displayed on the screen.
• Press the keys ▌
◄◄ or ►►▌ to navigate through songs.
• Press the volume control button to pause and resume playing a song.
Note: In any mode, by inserting a micro SD card, the player will automatically
switch to SD mode.
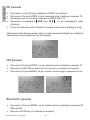
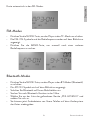
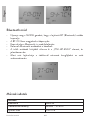
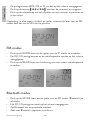
FM mode
• Press the MODE key to switch the player to TF mode.
• The FM-ON icons and radio frequency will be displayed on the screen.
• Press the BAND key to manually search for another radio frequency.

17 User manual
English
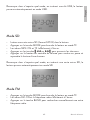
Bluetooth mode
• Press the MODE key to switch the player to BT (Bluetooth) mode.
• The BT-ON icon will be displayed on the screen.
• Turn on Bluetooth on your mobile phone.
• Search for Bluetooth devices nearby.
• From the list of found devices, select “PNI-HP-8500” and log in.
• You can now play audio files from your phone on the car’s audio system.
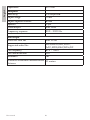
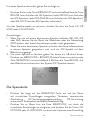
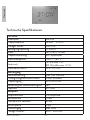
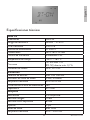
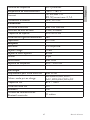
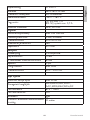
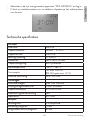
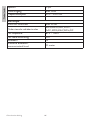
Technical specifications
CB radio
Modulation AM/FM
Frequency range 26.965 - 27.405
Frequent error ±300 Hz
Supply voltage 12 V/24 V
Dimensions 180 x 160 x 52 mm
Frequency control PLL synthesizer
Working temperature -26°C ~ +80°C
Current TX: 4W max. 2 A
RX: SQ open max. 0.7 A
Antenna connector UHF, SO-239
Transmission
Emission power max. 4 W AM/FM
Background noise emissions < 4W(-54 dBM)
Frequency response 300-3000 Hz
Modulation signal distortion <8%

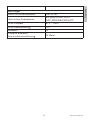
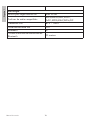
User manual 18
English
Impedance 50 Ohm
Reception
Sensitivity 0.25uv@12dB
Reject image 70 dB
Reject adjacent channel 60 dB
Squelch < 1µV
Audio output max. 40W
Frequency response 300 - 3000 Hz
MP3 Player
Micro SD card slot max. 32Gb
Supported audio files MP3,WMA,APE,FLAC,
AAC,MP4,M4A,WAV,AIF
FM frequency 87.5 – 108.0
FM radio distortion <5%
Bluetooth Yes
Maximum Bluetooth communication
distance 10 meters

Ръководство за употреба
Български
19
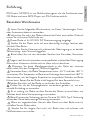
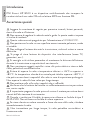
Въведение
PNI Escort HP 8500 е многофункционално устройство, което включва
характеристиките на CB радио и MP3 плейър с FM функция.
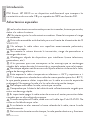
Специални предупреждения
Прочетете предупрежденията по-долу, за да предотвратите
пожар, телесни наранявания, повреда на радиото или антената.
Не се опитвайте да регулирате радиото, докато шофирате. Това ви
излага на риск от злополуки.
Това включено радио е предназначено за 12V/24V DC захранване.
Не поставяйте радиото върху прекалено прашна, влажна или
нестабилна повърхност.
Не свързвайте антената по време на предаване, риск от изгаряне
или токов удар.
Моля, пазете се от смущаващи устройства (като телевизор,
генератор и др.).
Тези, които използват пейсмейкъри, се съветват да спазват
дистанция от антената по време на предаване и особено да не я
докосват.
Не поставяйте метални предмети близо до вътрешната
електрическа част на радиото; опасност от токов удар.
Избягвайте да излагате радиото на температури под -26°C и над +
80°C. Температурата на борда на превозно средство понякога може
да надвиши + 80°C, което може да причини непоправими щети на
радиото в случай на продължително излагане. Не излагайте радиото
на слънчева светлина за дълго време.
Не поставяйте нищо на радиото, това ще му попречи да изстине.
Проверете дали акумулаторът на автомобила е достатъчно
зареден, за да избегнете бързо разреждане.
Важно е да изключите радиото преди стартиране на двигателя,
за да избегнете повреда, причинена от високо пусково напрежение.
Когато сменяте предпазителя, трябва да използвате предпазител
2A 250V тип F. Не използвайте предпазител с по-висока стойност.
Ако се открие необичайна миризма или дим, излизащ от радиото,
незабавно затворете радиото.

Ръководство за употреба
Български
20
Не предавайте дълго време, радиото може да се нагрее и да не
работи.
Пазете радиото далеч от деца.
Други предупреждения
Преди да свържете или използвате този продукт, моля, прочетете
внимателно инструкциите за употреба. Запазете това ръководство за
бъдещи справки.
Преди да използвате радиото, свържете антената. Проверете КСВ на
антената преди предаване. Твърде високият КСВ може да доведе до
унищожаване на радиотерминали, вътрешни компоненти, които не
са обхванати от гаранцията.
Няма радио компоненти, обслужвани от потребителя. За ремонт се
свържете с оторизиран сервизен център.
Използвайте подходящо захранване, за да предотвратите опасността
от пожар.
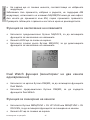
Инструкции за инсталация
Радиото е предназначено за монтаж в 1 DIN слот в автомобила.
За да инсталирате радиото, използвайте скобата и аксесоарите в
опаковката. Опорните болтове трябва да бъдат затегнати, за да
се предотврати вибрацията на радиото по време на движение.
Монтажната скоба може да бъде позиционирана над или под радиото
и може да се накланя в зависимост от метода на монтаж.
ВНИМАНИЕ: Уверете се, че напрежението, при което се захранва
радиото, е посоченото от производителя (12V/24V).
Strona się ładuje...
Strona się ładuje...
Strona się ładuje...
Strona się ładuje...
Strona się ładuje...
Strona się ładuje...
Strona się ładuje...
Strona się ładuje...
Strona się ładuje...
Strona się ładuje...
Strona się ładuje...
Strona się ładuje...
Strona się ładuje...
Strona się ładuje...
Strona się ładuje...
Strona się ładuje...
Strona się ładuje...
Strona się ładuje...
Strona się ładuje...
Strona się ładuje...
Strona się ładuje...
Strona się ładuje...
Strona się ładuje...
Strona się ładuje...
Strona się ładuje...
Strona się ładuje...
Strona się ładuje...
Strona się ładuje...
Strona się ładuje...
Strona się ładuje...
Strona się ładuje...
Strona się ładuje...
Strona się ładuje...
Strona się ładuje...
Strona się ładuje...
Strona się ładuje...
Strona się ładuje...
Strona się ładuje...
Strona się ładuje...
Strona się ładuje...
Strona się ładuje...
Strona się ładuje...
Strona się ładuje...
Strona się ładuje...
Strona się ładuje...
Strona się ładuje...
Strona się ładuje...
Strona się ładuje...
Strona się ładuje...
Strona się ładuje...
Strona się ładuje...
Strona się ładuje...
Strona się ładuje...
Strona się ładuje...
Strona się ładuje...
Strona się ładuje...
Strona się ładuje...
Strona się ładuje...
Strona się ładuje...
Strona się ładuje...
Strona się ładuje...
Strona się ładuje...
Strona się ładuje...
Strona się ładuje...
Strona się ładuje...
Strona się ładuje...
Strona się ładuje...
Strona się ładuje...
Strona się ładuje...
Strona się ładuje...
Strona się ładuje...
Strona się ładuje...
Strona się ładuje...
Strona się ładuje...
Strona się ładuje...
Strona się ładuje...
Strona się ładuje...
Strona się ładuje...
Strona się ładuje...
Strona się ładuje...
Strona się ładuje...
Strona się ładuje...
Strona się ładuje...
Strona się ładuje...
Strona się ładuje...
Strona się ładuje...
Strona się ładuje...
Strona się ładuje...
Strona się ładuje...
Strona się ładuje...
Strona się ładuje...
Strona się ładuje...
Strona się ładuje...
Strona się ładuje...
Strona się ładuje...
Strona się ładuje...
Strona się ładuje...
Strona się ładuje...
Strona się ładuje...
Strona się ładuje...
Strona się ładuje...
Strona się ładuje...
Strona się ładuje...
Strona się ładuje...
Strona się ładuje...
Strona się ładuje...
Strona się ładuje...
Strona się ładuje...
Strona się ładuje...
Strona się ładuje...
Strona się ładuje...
Strona się ładuje...
Strona się ładuje...
Strona się ładuje...
Strona się ładuje...
Strona się ładuje...
Strona się ładuje...
Strona się ładuje...
Strona się ładuje...
Strona się ładuje...
Strona się ładuje...
Strona się ładuje...
Strona się ładuje...
Strona się ładuje...
Strona się ładuje...
Strona się ładuje...
Strona się ładuje...
Strona się ładuje...
Strona się ładuje...
Strona się ładuje...
Strona się ładuje...
Strona się ładuje...
Strona się ładuje...
Strona się ładuje...
Strona się ładuje...
Strona się ładuje...
Strona się ładuje...
Strona się ładuje...
Strona się ładuje...
Strona się ładuje...
Strona się ładuje...
Strona się ładuje...
Strona się ładuje...
Strona się ładuje...
Strona się ładuje...
Strona się ładuje...
Strona się ładuje...
Strona się ładuje...
Strona się ładuje...
Strona się ładuje...
Strona się ładuje...
Strona się ładuje...
Strona się ładuje...
Strona się ładuje...
Strona się ładuje...
Strona się ładuje...
Strona się ładuje...
Strona się ładuje...
Strona się ładuje...
Strona się ładuje...
Strona się ładuje...
Strona się ładuje...
-
 1
1
-
 2
2
-
 3
3
-
 4
4
-
 5
5
-
 6
6
-
 7
7
-
 8
8
-
 9
9
-
 10
10
-
 11
11
-
 12
12
-
 13
13
-
 14
14
-
 15
15
-
 16
16
-
 17
17
-
 18
18
-
 19
19
-
 20
20
-
 21
21
-
 22
22
-
 23
23
-
 24
24
-
 25
25
-
 26
26
-
 27
27
-
 28
28
-
 29
29
-
 30
30
-
 31
31
-
 32
32
-
 33
33
-
 34
34
-
 35
35
-
 36
36
-
 37
37
-
 38
38
-
 39
39
-
 40
40
-
 41
41
-
 42
42
-
 43
43
-
 44
44
-
 45
45
-
 46
46
-
 47
47
-
 48
48
-
 49
49
-
 50
50
-
 51
51
-
 52
52
-
 53
53
-
 54
54
-
 55
55
-
 56
56
-
 57
57
-
 58
58
-
 59
59
-
 60
60
-
 61
61
-
 62
62
-
 63
63
-
 64
64
-
 65
65
-
 66
66
-
 67
67
-
 68
68
-
 69
69
-
 70
70
-
 71
71
-
 72
72
-
 73
73
-
 74
74
-
 75
75
-
 76
76
-
 77
77
-
 78
78
-
 79
79
-
 80
80
-
 81
81
-
 82
82
-
 83
83
-
 84
84
-
 85
85
-
 86
86
-
 87
87
-
 88
88
-
 89
89
-
 90
90
-
 91
91
-
 92
92
-
 93
93
-
 94
94
-
 95
95
-
 96
96
-
 97
97
-
 98
98
-
 99
99
-
 100
100
-
 101
101
-
 102
102
-
 103
103
-
 104
104
-
 105
105
-
 106
106
-
 107
107
-
 108
108
-
 109
109
-
 110
110
-
 111
111
-
 112
112
-
 113
113
-
 114
114
-
 115
115
-
 116
116
-
 117
117
-
 118
118
-
 119
119
-
 120
120
-
 121
121
-
 122
122
-
 123
123
-
 124
124
-
 125
125
-
 126
126
-
 127
127
-
 128
128
-
 129
129
-
 130
130
-
 131
131
-
 132
132
-
 133
133
-
 134
134
-
 135
135
-
 136
136
-
 137
137
-
 138
138
-
 139
139
-
 140
140
-
 141
141
-
 142
142
-
 143
143
-
 144
144
-
 145
145
-
 146
146
-
 147
147
-
 148
148
-
 149
149
-
 150
150
-
 151
151
-
 152
152
-
 153
153
-
 154
154
-
 155
155
-
 156
156
-
 157
157
-
 158
158
-
 159
159
-
 160
160
-
 161
161
-
 162
162
-
 163
163
-
 164
164
-
 165
165
-
 166
166
-
 167
167
-
 168
168
-
 169
169
-
 170
170
-
 171
171
-
 172
172
-
 173
173
-
 174
174
-
 175
175
-
 176
176
-
 177
177
-
 178
178
-
 179
179
-
 180
180
-
 181
181
-
 182
182


PNI Escort HP 8500 CB Radio and MP3 Player Instrukcja obsługi
- Kategoria
- Odtwarzacze MP3 / MP4
- Typ
- Instrukcja obsługi
w innych językach
Powiązane artykuły
-
PNI HP72 Escort HP 72 Portable CB Radio Instrukcja obsługi
-
-
PNI Escort HP 7120 Instrukcja obsługi
-
PNI HP-6550 Instrukcja obsługi
-
-
PNI EXTRA 48 Instrukcja obsługi
-
PNI HP 446 Instrukcja obsługi
-
PNI Escort HP82 Instrukcja obsługi
-
-
PNI HP 8024 Instrukcja obsługi
Inne dokumenty
-
Midland M-MINI Instrukcja obsługi
-
Albrecht AE 6110, Mini-CB Funk, Multi Instrukcja obsługi
-
Albrecht AE 6110 VOX, Mini-CB Funk, Multi Instrukcja obsługi
-
PRESIDENT Lincoln II Instrukcja obsługi
-
PRESIDENT MC Kinley TXPR600 Instrukcja obsługi
-
Midland M-88 CB-Funkgerät Instrukcja obsługi
-
-
-
-
PRESIDENT Harry 3 Instrukcja obsługi