
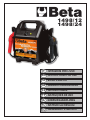
1498/12
1498/24
ISTRUZIONI PER L’USOIT
INSTRUCTIONS FOR USEEN
MODE D’EMPLOIFR
GEBRAUCHSANWEISUNGDE
INSTRUCCIONESES
INSTRUÇÕES DE USOPT
GEBRUIKSAANWIJZINGNL
INSTRUKCJA OBSŁUGIPL
HASZNÁLATI ÚTMUTATÓ
HU

2
ISTRUZIONI PER L’USO
IT
AVVIATORE PER AUTO 12V PORTATILE ART. 1498/12
AVVIATORE PER AUTO E VEICOLI COMMERCIALI 12-24V PORTATILE ART. 1498/24
MANUALE D’USO ED ISTRUZIONI PER AVVIATORE PORTATILE PRODOTTO DA:
BETA UTENSILI S.P.A. Via A. Volta 18, 20845, Sovico (MB) ITALIA
Documentazione redatta originariamente in lingua ITALIANA.
Conservare accuratamente le istruzioni di sicurezza e consegnarle al personale utilizzatore.
DESTINAZIONE D’USO
L’avviatore portatile per auto e veicoli commerciali, è destinato al seguente uso:
• Per l’avviamento di auto e veicoli commerciali con batteria a 12V/24V.
Non sono consentite le seguenti operazioni:
• È vietato l’uso su batterie diverse da 12V/24V.
• È vietato l’utilizzo al di fuori delle prescrizioni tecniche contenute nella tabella DATI TECNICI.
• È vietato l’utilizzo in ambienti umidi, bagnati o esposti ad intemperie.
• È vietato l’utilizzo per tutte quelle applicazioni diverse da quelle indicate.
SICUREZZA DELLA POSTAZIONE DI LAVORO
Non utilizzare l’avviatore in ambienti contenenti atmosfere potenzialmente esplosive o materiali
inammabili perché possono svilupparsi scintille in grado di incendiare polveri o vapori.
Impedire che bambini o visitatori possano avvicinarsi alla postazione di lavoro mentre si sta
operando con l’avviatore. La presenza di altre persone provoca distrazione e può comportare la
perdita del controllo durante l’utilizzo.
Non inalare eventuali gas nocivi sprigionati dalla batteria del veicolo, durante l’operazione di
avviamento del motore.
Durante le operazioni di collegamento, allontanare il volto dalla batteria del veicolo. Le sostanze
contenute all’interno della batteria sono corrosive; qualora vi fosse un contatto accidentale
dell’acido, con la pelle o con gli occhi, sciacquare immediatamente con acqua e consultare un medico.
Non invertire mai la polarità fra le pinze del dispositivo e i morsetti della batteria; l’inversione
di polarità può causare esplosioni, danni al veicolo, al dispositivo e alle persone.
Collegare sempre il conduttore di uscita con pinza rossa (+) al polo positivo della batteria,
il conduttore di uscita con pinza nera (-) alla massa del veicolo.
Non mettere mai in contatto diretto o indiretto i morsetti del dispositivo (per esempio attraverso
collegamenti metallici).
Non far cadere utensili metallici sulla batteria del veicolo, si può vericare un corto circuito della
batteria stessa.
Utilizzare l’avviatore in una zona asciutta evitando umidità.
IMPORTANTE LEGGERE COMPLETAMENTE IL PRESENTE MANUALE
PRIMA DI UTILIZZARE IL DISPOSITIVO. IN CASO DI MANCATO RISPETTO
DELLE NORME DI SICUREZZA E DELLE ISTRUZIONI OPERATIVE,
POSSONO VERIFICARSI SERI INFORTUNI.
ATTENZIONE

3
ISTRUZIONI PER L’USO
IT
SICUREZZA AVVIATORE PORTATILE
• Controllare prima dell’utilizzo che l’avviatore non abbia subito danneggiamenti, e che non vi siano cavi
scoperti o parti usurate.
• Non utilizzare il dispositivo se è danneggiato, poiché vi è rischio di scosse elettriche, non cercare
di aprirlo o modicarlo.
• Per mantenere in perfetta efcienza la batteria interna, ricaricare l’avviatore dopo ogni utilizzo,
o una volta ogni tre mesi se non utilizzato per un lungo periodo. In questo modo si mantiene in perfetta
efcienza la batteria interna.
• Non manomettere il circuito elettronico dell’avviatore.
• Collegare il caricatore dell’avviatore alla presa di rete, assicurandosi che la tensione di rete sia quella
indicata sul dispositivo di alimentazione (Vedere tabella DATI TECNICI).
• A ricarica ultimata non lasciare il dispositivo collegato al carica batteria per un lungo periodo.
• Non utilizzare il dispositivo in ambienti umidi, bagnati, non esporlo a pioggia. Ambienti umidi
e contaminati aumentano il rischio di scosse elettriche.
INDICAZIONE PER LA SICUREZZA DEL PERSONALE
• Si raccomanda la massima attenzione, avendo cura di concentrarsi sempre sulle proprie azioni.
Non utilizzare il dispositivo in caso di stanchezza o sotto l’effetto di droghe, bevande alcoliche
o medicinali.
• Utilizzare sempre i seguenti dispositivi individuale di protezione:
• scarpe di sicurezza
• occhiali di protezione
• guanti di protezione per agenti sici
• Effettuare tutte le operazioni previste in ambienti adeguatamente areati ed asciutti.
• Non mettere mai in contatto fra di loro i morsetti delle due pinze (rossa (+) positiva;
nero(-) negativo).
• Assicurarsi che i cavi dell’avviatore siano lontani da ventole, parti in movimento e dal condotto
del carburante.
• Non indossare vestiti larghi, non portare bracciali, catenine o oggetti metallici quando si lavora
sul veicolo.
• Prima di riporre l’avviatore assicurarsi che sia raffreddato raggiungendo la temperatura ambiente.

4
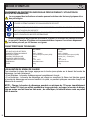
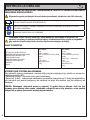
DISPOSITIVI DI PROTEZIONE INDIVIDUALI PREVISTI DURANTE L’UTILIZZO DELL’AVVIATORE
PORTATILE
VISUALIZZAZIONE LIVELLO DI CARICA
Per visualizzare il livello di carica premere Il pulsante giallo posto frontalmente sull’avviatore, si accen-
deranno i led:
• Accensione di 4 led l’avviatore è completamente carico.
• Accensione di 5 led carica massima avviatore (l’accensione del 5° led viene visualizzata quando
l’avviatore è ancora collegato alla presa di alimentazione, o per alcuni secondi quando viene
scollegato dall’alimentatore).
NOTA: Ricaricare l’avviatore per almeno 12 ore subito dopo l’acquisto. Se non viene utilizzato,
per un lungo periodo, ricaricare l’avviatore almeno una volta ogni tre mesi, in questo modo si
mantiene in perfetta efcienza la batteria interna.
ISTRUZIONI PER L’USO
IT
DATI TECNICI
DA UTILIZZARE PER BATTERIE
CARICATORE TENSIONE NOMINALE
BATTERIA INTERNA
CORRENTE DI SPUNTO
LUNGHEZZA CAVO MORSETTI
TEMPERATURA DI UTILIZZO
DIMENSIONI
PESO
Art. 1498/12
12V
230V ~ 50/60Hz
12V-Ermetica al piombo (AGM)
2200A
1m
-10°C +40°C
400x330x140 mm
13kg
Art. 1498/24
12-24V
230V ~ 50/60Hz
12V-Ermetica al piombo (AGM)
4200A (12V) – 2100A (24V)
1.5m
-10°C +40°C
400x330x190 mm
17kg
UTILIZZARE SEMPRE CALZATURE DI SICUREZZA
UTILIZZARE SEMPRE GUANTI DI PROTEZIONE PER AGENTI FISICI DURANTE L’UTILIZZO DEL DISPOSITIVO
INDOSSARE SEMPRE GLI OCCHIALI PROTETTIVI
La mancata osservanza delle seguenti avvertenze può causare lesioni siche e/o patologie
Può essere necessario l’utilizzo di ulteriori dispositivi di protezione individuali da utilizzare
in funzione dei valori riscontrati nell’indagine di igiene ambientale/analisi rischi, nell’even-
tualità che i valori superino i limiti previsti dalle vigenti normative.

5
RICARICA DELL’AVVIATORE PORTATILE art. 1498/12
• Collegare il caricatore alla presa di rete di alimentazione 230V, inserire lo spinotto del caricatore alla
presa di carica collocata sul frontale dell’avviatore.
• Durante la carica sul caricatore si accenderà il led rosso, successivamente a carica completata
diventerà verde.
• Vericare la carica dell’avviatore come indicato al punto visualizzazione livello di carica.
• A ricarica ultimata non lasciare l’avviatore collegato al carica batteria per un lungo periodo,
staccare la presa di alimentazione.
• Non utilizzare l’avviatore mentre è sotto carica.
• Utilizzare solo il caricatore dato in dotazione.
Per effettuare la ricarica tramite l’accendisigari dell’auto, utilizzare il cavo fornito in dotazione (avviare
prima il veicolo).
RICARICA DELL’AVVIATORE PORTATILE art. 1498/24
NOTA: la ricarica dell’avviatore deve essere fatta solo in modalità 12V, non deve mai essere fatta
in modalità 24V. In modalità 24V la presa accendisigari non è attiva.
• Ruotare il selettore in posizione 12V, posto sulla parte posteriore dell’avviatore.
• Collegare il caricatore alla presa di rete di alimentazione 230V, inserire lo spinotto del caricatore alla
presa di carica collocata sul frontale dell’avviatore.
• Durante la carica si accendono i led sul caricatore (Charging - 50% - 75% - Full)
• A ne carica tutti i led saranno accesi e successivamente lampeggeranno ad intermittenza. La carica
è stata completata correttamente.
• A carica ultimata non lasciare l’avviatore collegato al carica batteria per un lungo periodo, staccare la
presa di alimentazione.
• Non utilizzare l’avviatore mentre è sotto carica.
• Utilizzare solo il caricatore dato in dotazione.
Per effettuare la ricarica tramite l’accendisigari dell’auto, utilizzare il cavo fornito in dotazione (avviare
prima il veicolo).
UTILIZZO DELL’AVVIATORE PORTATILE - AVVIAMENTO VEICOLI
• Vericare sempre che le caratteristiche tecniche della batteria del veicolo siano idonee per avviatori
da 12V o 24V.
• La non corrispondenza tra il voltaggio dell’avviatore e la tensione dell’impianto del veicolo può
causare esplosioni, danni al veicolo, all’avviatore ed alle persone.
• Vericare che l’avviatore non sia collegato alla rete elettrica.
• Per l’avviatore 12V-24V selezionare il voltaggio corretto mediante il selettore.
• Individuare il polo corrispondente alla massa del veicolo; in genere è collegata al morsetto negativo.
• Collegare sempre il conduttore di uscita con pinza rossa (+) al polo positivo della batteria,
il conduttore di uscita con pinza nera (-) alla massa del veicolo.
• Non invertire mai la polarità; l’inversione di polarità può causare esplosioni, danni al veicolo,
all’avviatore ed alle persone.
• Assicurarsi che i cavi dell’avviatore siano lontani da ventole, parti in movimento e dal condotto del
carburante.
• Assicurarsi che l’avviatore sia in una posizione stabile che non possa cadere con le vibrazioni
del veicolo.
• Se entro 10 secondi non si riesce ad avviare il veicolo, non insistere con tentativi successivi.
• Prima di procedere con un nuovo avviamento lasciare riposare l’avviatore per almeno 3 minuti,
in modo da evitare il danneggiamento l’avviatore stesso.
• Al termine dell’operazione scollegare prima il conduttore con pinza nera (-) dalla massa del veicolo
e riporla subito nel proprio alloggiamento.
• Scollegare il conduttore con pinza rossa dal morsetto positivo (+) dalla batteria e riporla subito
nel proprio alloggiamento
ISTRUZIONI PER L’USO
IT

6
SOSTITUZIONE DEL FUSIBILE DELL’ALIMENTATORE (SPINA ACCENDISIGARI)
Il fusibile è alloggiato all’interno della spina dell’accendisigari. Assicurarsi che l’alimentatore non sia
collegato alla rete elettrica.
Allentare manualmente la ghiera posta sulla testa della spina, estrarre il fusibile danneggiato e sostitu-
irlo con un fusibile con le stesse caratteristiche tecniche. Chiudere la ghiera bloccandola manualmente.
POSSIBILI PROBLEMI
DOMANDE GENERALI E RISPOSTE
ISTRUZIONI PER L’USO
IT
PROBLEMA RISOLUZIONE
Si accendono solo uno o due led, state cer-
cando di ricaricare l’avviatore da più di 24 ore
mentre gli altri led non si accendono.
Vericare che siano accesi i led sull’alimentatore.
Vericare che il fusibile nella spina dell’accendisi-
gari dell’alimentatore non sia difettoso.
Contattare il rivenditore.
Nessun led si accende, ma quando il ca-
ricatore è inserito nell’avviatore tutti i led si
accendono.
Batteria difettosa. Probabile causa è l’utilizzo trop-
po intensivo dell’avviatore senza lasciarlo raffred-
dare. Vericare anche le istruzioni di utilizzo.
L’avviatore è completamente carico ma non
funziona.
Assicuratevi che i cavi siano ben collegati ai poli
della batteria.
Art. 1498/24 l’avviatore funziona solo a 12V
ma non a 24V.
Una delle due batterie è difettosa, oppure il se-
lettore non funziona correttamente. Contattare il
rivenditore.
Durante la carica, sull’alimentatore dell’av-
viatore 12V-24V si è acceso il led “FAULT”.
Contattare il rivenditore.
DOMANDA RISPOSTA
Quanti avviamenti può effettuare l’avviatore
con una carica?
Da 1 a 30, dipende da temperatura, condizioni generali
del veicolo, tipo e dimensioni del motore.
La batteria dell’avviatore può essere sostituita? Si, contattare il rivenditore.
Qual è la temperatura di stoccaggio ideale?
La temperatura ottimale per preservare la batteria
interna è di 25°C.
Posso caricare l’avviatore con un caricatore
con caratteristiche analoghe?
No, utilizzare soltanto il caricatore fornito in dota-
zione con il prodotto, eventualmente si può riordi-
nare presso il rivenditore.

7
ISTRUZIONI PER L’USO
IT
MANUTENZIONE
Gli interventi di manutenzione e di riparazione devono essere eseguiti da personale specializzato. Per
tali interventi potete rivolgervi al centro riparazioni di Beta Utensili S.P.A.
SMALTIMENTO
Il simbolo del cassonetto barrato riportato sull’apparecchiatura o sulla confezione indica che il prodotto,
alla ne della sua vita utile, deve essere smaltito separatamente dagli altri riuti urbani.
L’utilizzatore che intendesse smaltire questo strumento può:
- Consegnarlo presso un centro di raccolta di riuti elettronici od elettrotecnici.
- Riconsegnarlo al proprio rivenditore al momento dell’acquisto di uno strumento equivalente.
- Nel caso di prodotti ad uso esclusivo professionale, contattare il produttore che dovrà disporre
una procedura per il corretto smaltimento.
Il corretto smaltimento di questo prodotto permette il riutilizzo delle materie prime in esso contenute ed
evita danni all’ambiente ed alla salute umana.
Lo smaltimento abusivo del prodotto costituisce una violazione della norma sullo smaltimento di riuti
pericolosi, comporta l’applicazione delle sanzioni previste.
GARANZIA
Questa attrezzatura è fabbricata e collaudata secondo le norme attualmente vigenti nella
Comunità Europea. E’ coperta da garanzia per un periodo di 12 mesi per uso professionale o
24 mesi per uso non professionale.
Vengono riparati guasti dovuti a difetti di materiale o di produzione, mediante ripristino o so-
stituzione dei pezzi difettosi a nostra discrezione. L’effettuazione di uno o più interventi nel periodo di
garanzia non modica la data di scadenza della stessa.
Non sono soggetti a garanzia difetti dovuti all’usura, all’uso errato od improprio e a rotture causate da
colpi e/o cadute. La garanzia decade quando vengono apportate modiche, quando lo strumento viene
manomesso, quando viene inviato all’assistenza smontato.
Sono espressamente esclusi danni causati a persone e/o cose di qualsiasi genere e/o natura, diretti
e/o indiretti.
DICHIARAZIONE DI CONFORMITÀ UE
Dichiariamo sotto la nostra responsabilità che il prodotto descritto è conforme a tutte le disposizioni
pertinenti alle seguenti Direttive:
• Direttiva Compatibilità Elettromagnetica (E.M.C.) 2014/30/UE;
• Direttiva Bassa Tensione (L.V.D.) 2014/35/UE;
• Direttiva sulla restrizione dell’uso di determinate sostanze pericolose nelle apparecchiature elettriche
ed elettroniche (Ro.H.S.) 2011/65/UE;
Il Fascicolo Tecnico è disponibile presso:
BETA UTENSILI S.P.A.
Via A. Volta 18,
20845 Sovico (MB)
ITALIA
Data 02/05/2017

8
ISTRUZIONI PER L’USO
I
INSTRUCTIONS FOR USE
EN
PORTABLE CAR STARTER, 12V ITEM 1498/12
PORTABLE CAR AND COMMERCIAL VEHICLE STARTER, 12-24V ITEM 1498/24
OPERATING MANUAL AND INSTRUCTIONS FOR PORTABLE STARTER MANUFACTURED BY:
BETA UTENSILI S.P.A. Via A. Volta 18, 20845, Sovico (MB) ITALY
Original documentation drawn up in ITALIAN.
Store the safety instructions with care and hand them over to the users.
PURPOSE OF USE
The portable car and commercial vehicle starter can be used for the following purpose:
• Starting cars and commercial vehicles with 12V/24V batteries
The portable car starter must not be used for the following operations:
• Use on any batteries other than 12V/24V batteries.
• Use outside the technical specications contained in the TECHNICAL DATA table.
• Use in humid or wet environments, or in bad weather.
• Use for any applications other than stated ones.
WORK AREA SAFETY
Do not operate the starter in environments containing potentially explosive atmospheres,
because sparks may be generated, which can ignite the dust or fumes.
Keep children and bystanders away from your workplace while operating the starter.
Distractions from other people can cause you to lose control over the starter during use.
Do not inhale any harmful gases that may be released by the battery of the vehicle while starting
the engine.
During connection operations, keep your face away from the battery of the vehicle. The battery
contains corrosive substances; in the event of accidental contact of acid with your skin or eyes, rinse
immediately with water and seek medical advice.
Never reverse polarity between the clamps of the device and the battery clips; reversed polarity can
cause explosions or damage to the vehicle, the device and people.
Always connect the output lead with red clamp (+) to the positive post of the battery, and the output
lead with black clamp (-) to the vehicle’s chassis.
Never bring the terminals of the device into direct or indirect contact (e.g. through metal connections).
Do not drop any metal tools on the battery of the vehicle: the battery may short-circuit.
Use the starter in a dry area, avoiding humidity.
IMPORTANT! READ THIS MANUAL CAREFULLY BEFORE USING THE
DEVICE. FAILURE TO COMPLY WITH THE SAFETY STANDARDS AND
OPERATING PROCEDURES MAY RESULT IN SERIOUS INJURY.
CAUTION

9
ISTRUZIONI PER L’USO
I
INSTRUCTIONS FOR USE
EN
PORTABLE STARTER SAFETY
• Before use, check that the starter has not been damaged, and that there are no uncovered cables
or worn parts.
• Do not use the device when damaged, to avoid the risk of electric shocks; do not try to open or modify it.
• To maintain the internal battery in full working order, charge the starter after each use, or every three
months, if not used for a long period of time.
• Do not damage the electronic circuit of the starter.
• Connect the charger of the starter to the mains power supply, making sure that the mains voltage
matches that stated on the power supply device. (See TECHNICAL DATA table)
• When charge is complete, do not leave the device connected to the battery charger for a long period.
• Do not use the device in humid or wet environments; do not expose it to rain. Wet and contaminated
environments increase the risk of electric shocks.
PERSONNEL SAFETY
• Stay alert; watch what you are doing. Do not use the device while tired or under the inuence of drugs,
alcohol, or medications
• Always use the following personal protective equipment:
• safety shoes
• eye protection
• protective gloves against physical agents.
• Use the starter in well-aired, dry rooms.
• Never allow the clips of the clamps (positive-red and negative-red) to touch together.
• Check that the cables of the starter are kept away from fans, moving parts and the fuel pipe.
• Do not wear loose clothing, jewellery or metal objects when working on the vehicle.
• Before replacing the starter, make sure that it has cooled down and reached room temperature.

10
ISTRUZIONI PER L’USO
I
INSTRUCTIONS FOR USE
EN
PERSONAL PROTECTIVE EQUIPMENT TO WEAR WHILE OPERATING PORTABLE STARTER
TECHNICAL DATA
ALWAYS WEAR SAFETY SHOES
ALWAYS USE PROTECTIVE GLOVES AGAINST PHYSICAL AGENTS WHILE OPERATING DEVICE
ALWAYS WEAR EYE PROTECTION
Failure to observe the following warnings may result in physical injury and/or disease.
Additional personal protective equipment to wear according to the values found in the
environmental hygiene/risk analysis survey if the values exceed the limits under current
regulations.
FOR USE WITH BATTERIES
CHARGER VOLTAGE RATING
INTERNAL BATTERY
PICK-UP CURRENT
CLIP CABLE LENGTH
OPERATING TEMPERATURE
DIMENSIONS
WEIGHT
Item 1498/12
12V
230V ~ 50/60Hz
12V-sealed lead acid battery (AGM)
2200A
1m
-10°C +40°C
400x330x140 mm
13kg
Item 1498/24
12-24V
230V ~ 50/60Hz
2x12V-sealed lead acid battery (AGM)
4200A (12V) – 2100A (24V)
1.5m
-10°C +40°C
400x330x190 mm
17kg
CHARGE LEVEL DISPLAY
To display the level of charge, press the yellow button on the front of the starter; the LEDs will turn on:
• 4 LEDs - starter is fully charged.
• 5 LEDs - maximum starter charge (the 5th LED will be displayed when the starter is still connected
to the mains power supply, or for a few seconds when it is disconnected from the power supply).
NB: Charge the starter for at least 12 hours immediately after purchase. If not used for a long
period of time, charge the starter at least every three months, to maintain the internal battery in
full working order.

11
ISTRUZIONI PER L’USO
I
INSTRUCTIONS FOR USE
EN
CHARGING PORTABLE STARTER item 1498/12
• Connect the charger to the mains power supply (230V); t the plug of the charger into the charging
socket on the front of the starter.
• The LED will be red while charging and will turn green when charging is complete.
• Check the battery charging status of the starter as instructed in the section “Charge level display”.
• When charge is complete, do not leave the starter connected to the battery charger for a long period;
disconnect the power supply socket.
• Do not use the starter while it is charging.
• Only use the charger supplied with the starter.
To charge the starter through the cigarette lighter socket of the car, use the cable supplied with it (start
the vehicle before charging
CHARGING PORTABLE STARTER item 1498/24
NB: The starter can only be charged via 12V; it must not be charged via 24V. The cigarette lighter
socket is not enabled in the 24V mode.
• Turn the selector switch on the back of the starter to 12V.
• Connect the charger to the mains power supply (230V); t the plug of the charger into the charging
socket on the front of the starter.
• The LEDs on the starter will turn on while charging (Charging - 50% - 75% - Full).
• When charge is complete, all the LEDs will be on; then they will start ashing. The starter has been
charged correctly.
• When charge is complete, do not leave the starter connected to the battery charger for a long period;
disconnect the power supply socket.
• Do not use the starter while it is charging.
• Only use the charger supplied with the starter.
To charge the starter through the cigarette lighter socket of the car, use the cable supplied with it (start
the vehicle before charging
USING PORTABLE STARTER – STARTING VEHICLES
• Always check that the specications of the vehicle battery suit 12V or 24V starters.
• If the voltage of the starter does not match the voltage of the vehicle’s system, explosions
or damage to the vehicle, the starter and people may be caused.
• Check that the starter is not connected to the mains.
• For the 12V-24V starter, use the selector switch to select the correct voltage.
• Find the post corresponding to the vehicle’s chassis; this is usually connected to the negative clip.
• Always connect the output lead with red clamp (+) to the positive post of the battery, and the
output lead with black clamp (-) to the vehicle’s chassis.
• Never reverse polarity; reversed polarity can cause explosions or damage to the vehicle, the
starter and people.
• Check that the cables of the starter are away from fans, moving parts and the fuel pipe.
• Make sure that the starter is kept rm, to prevent if from falling as the result of the vehicle’s vibrations.
• If the vehicle cannot be started within 10 seconds, do not try again.
• Before attempting a new start, leave the starter to idle for at least 3 minutes, to prevent it from getting
damaged.
• After use, disconnect the output lead with black clamp (-) from the vehicle’s chassis, and immediately
replace it in its case.
• Then disconnect the output lead with red clamp from the positive battery clip (+), and immediately
replace it in its case.

12
ISTRUZIONI PER L’USO
I
INSTRUCTIONS FOR USE
EN
REPLACING POWER SUPPLY FUSE (CIGARETTE LIGHTER PLUG)
The fuse is located in the cigarette lighter plug. Make sure that the power supply is not connected
to the mains.
Loosen the ring nut on the plug head by hand; remove the damaged fuse and replace it with a fuse
with the same characteristics. Lock the ring nut by hand.
TROUBLESHOOTING
GENERAL QUESTIONS AND ANSWERS
PROBLEM SOLUTION
Only one or two LEDs go on; you have been
trying to charge the starter for over 24 hours,
and the other LEDs do not go on.
Check that the LEDs on the power supply are on.
Check that the fuse in the cigarette lighter plug of
the power supply is not defective.
Please contact your dealer.
No LEDs turn on, but when the charger is
plugged in, all the LEDs turn on.
Defective battery. The starter may have been
subjected to excessively intensive use, without ha-
ving been allowed to cool down. Please also refer
to the operating instructions
The starter is fully charged, but it does not
work.
Check that that the cables are rmly connected to
the posts of the battery.
Item 1498/24 – The starter works at 12V, but
it does not work at 24V.
Either battery is defective, or the selector switch
does not work properly. Please contact your
dealer.
While charging, the “FAULT” LED goes on on
the power supply of the 12V-24V starter.
Please contact your dealer.
QUESTION ANSWER
How many starts can the starter perform with
one charge?
The number may vary from 1 to 30, depending on the
temperature, the general condition of the vehicle, the
type and dimensions of the engine.
Can the battery of the starter be replaced? Yes, it can. Please contact your dealer.
Which is the optimal storage temperature?
The optimal temperature to preserve the internal
battery is 25 °C.
Can I charge the starter with a charger with
similar characteristics?
No, you can’t. You can only use the charger sup-
plied with the product. You can reorder the charger
from your dealer, if need be.

13
ISTRUZIONI PER L’USO
I
INSTRUCTIONS FOR USE
EN
MAINTENANCE
Maintenance and repair jobs must be carried out by trained personnel. For such jobs, you can contact
Beta Untensili S.P.A.’s repair centre.
DISPOSAL
The crossed-out wheelie bin symbol on the equipment or packaging means that the product should be
collected separately from other types of urban waste at the end of its useful life.
Any user who is going to dispose of this tool can:
- deliver it to an appropriate collection facility for electronic or electrotechnical equipment;
- return it to the dealer upon purchase of a new, equivalent item of equipment;
- in case of a product for professional use only, contact the manufacturer which will arrange for
the product to be properly disposed of.
Proper disposal of this product allows the raw materials contained in it to be reused and prevents da-
mage to the environment or human health.
Illegal disposal of this product is a violation of the provision concerning the disposal of hazardous waste
and will give way to the application of such nes as provided for under current regulations.
WARRANTY
This tool is manufactured and tested in accordance with current EU regulations. It is covered
by a 12-month warranty for professional use or a 24-month warranty for nonprofessional use.
We will repair any breakdowns caused by material or manufacturing defects by xing the de-
fective pieces or replacing them at our discretion.
Should assistance be required once or several times during the warranty period, the expiry date of this
warranty will remain unchanged.
This warranty will not cover defects due to wear, misuse or breakdowns caused by blows and/or falls.
In addition, this warranty will no longer be valid if any changes are made, or if the tool is damaged or
sent to the customer service in pieces.
This warranty explicitly excludes any damage to people and/or things, whether direct or consequential.
EU DECLARATION OF CONFORMITY
We hereby declare, assuming full responsibility, that the described product complies with all the
relevant provisions of the following Directives:
• Electromagnetic Compatibility Directive (EMC) 2014/30/EU;
• Low Voltage Directive (LVD) 2014/35/EU;
• Directive concerning the restriction of the use of certain hazardous substances in electric and
electronic equipment (RoHS) 2011/65/EU.
The Technical Brochure is available at:
BETA UTENSILI S.P.A.
Via A. Volta 18,
20845 Sovico (MB)
ITALY
Date 02/05/2017

14
MODE D’EMPLOI
FR
BOOSTER DE DÉMARRAGE PORTATIF 12 V POUR AUTOMOBILES ART. 1498/12
BOOSTER DE DÉMARRAGE 12-24V PORTATIF
POUR AUTOMOBILES ET VÉHICULES COMMERCIAUX
NOTICE D’UTILISATION ET INSTRUCTIONS POUR BOOSTER DE DÉMARRAGE 1498LT/12
PRODUIT PAR:
BETA UTENSILI S.P.A. Via A. Volta 18, 20845, Sovico (MB) ITALIE
Documentation rédigée à l’origine en langue ITALIENNE.
Garder scrupuleusement les instructions sur la sécurité et les remettre au personnel concerné.
DESTINATION D’UTILISATION
Le booster de démarrage portatif pour automobiles et véhicules commerciaux est destiné à
l'usage suivant :
• Démarrage d'automobiles et de véhicules commerciaux avec batterie à 12V/24V.
Les opérations suivantes ne sont pas autorisées:
• Il est interdit de l'utiliser sur des batteries autres que de 12V/24V.
• Utilisation interdite en dehors des prescriptions techniques contenues dans le tableau
DONNÉES TECHNIQUES;
• Utilisation interdite dans des milieux humides, mouillés ou exposés aux intempéries;
• Il est interdit de l'utiliser pour toutes les applications non envisagées dans les présentes instructions.
SÉCURITÉ DU POSTE DE TRAVAIL
Ne pas utiliser le booster de démarrage dans des lieux présentant des atmosphères potentiellement
explosives car les étincelles peuvent donner feu aux poussières ou aux vapeurs.
Empêcher que des enfants ou des visiteurs s’approchent du poste de travail pendant les opérations
avec le booster de démarrage. La présence d’autres personnes peut distraire l’opérateur qui peut
perdre le contrôle du booster de démarrage.
Ne pas inhaler de gaz nocifs libérés par la batterie du véhicule pendant l'opération de mise en
marche du moteur.
Pendant les opérations de branchement, éloigner le visage de la batterie du véhicule.
Les substances se trouvant dans la batterie sont corrosives ; en cas de contact accidentel de l’acide
avec la peau ou les yeux, rincer immédiatement à l'eau et consulter un médecin.
Ne jamais inverser la polarité des pinces du dispositif et les bornes de la batterie ; l'inversion de la
polarité peut provoquer des explosions, des dommages au véhicule, au dispositif et aux personnes.
Brancher systématiquement le conducteur de sortie avec pince rouge (+) au pôle positif de la
batterie et le conducteur de sortie avec pince noire (-) à la masse du véhicule.
Ne jamais mettre les bornes du dispositif en contact direct ou indirect (par exemple à travers les
branchements métalliques).
Ne pas faire tomber d'outils métalliques sur la batterie du véhicule qui pourrait provoquer un
court-circuit de la batterie.
Utiliser le booster de démarrage dans une zone sèche en évitant l'humidité.
IL EST IMPORTANT DE LIRE COMPLÈTEMENT LE PRÉSENT MANUEL
AVANT D'UTILISER LE DISPOSITIF. EN CAS DE NON-RESPECT DES
NORMES DE SÉCURITÉ ET DES INSTRUCTIONS POUR LE FONCTION-
NEMENT, DE SÉRIEUX ACCIDENTS PEUVENT SE PRODUIRE.
ATTENTION
ART. 1498/24

15
MODE D’EMPLOI
FR
SÉCURITÉ DU BOOSTER PORTATIF
• Avant l'utilisation, contrôler que le booster de démarrage n'ait pas été endommagé, qu'il ne présente
pas de câbles découverts ou de pièces usées.
• Ne pas utiliser le dispositif s'il est endommagé car cela pourrait provoquer des secousses électriques.
Ne pas essayer de l'ouvrir ou de le modier.
• Pour une parfaite efcience de la batterie interne dans le temps, recharger le booster de démarrage
après chaque utilisation, ou une fois tous les trois mois en cas d'inutilisation prolongée.
Ainsi, la batterie interne reste parfaitement efciente.
• Ne pas intervenir sur le circuit électronique du booster de démarrage.
• Brancher le chargeur du booster de démarrage à la prise de courant en s'assurant que la tension de
réseau soit celle indiquée sur le dispositif d'alimentation (Consulter le tableau DONNÉES
TECHNIQUES).
• Lorsque la recharge est terminée, ne pas laisser le dispositif branché à la batterie pendant une période
prolongée.
• Ne pas utiliser le dispositif dans des milieux humides, mouillés, ne pas l'exposer à la pluie. Les milieux
humides et contaminés augmentent le risque de secousses électriques.
RECOMMANDATIONS POUR LA SÉCURITÉ DU PERSONNEL
• La plus grande attention doit être apportée aux actions effectuées. Ne pas utiliser le dispositif en cas
de fatigue ou sous l’effet de drogues, de boissons alcoolisées ou de médicaments.
• Utiliser systématiquement les équipements de protection individuelle suivants :
• chaussures de sécurité;
• lunettes de protection;
• gants de protection contre les agents physiques.
• Effectuer toutes les opérations prévues dans des milieux sufsamment aérés et secs.
• Ne jamais mettre en contact entre elles les bornes des deux pinces (rouge (+) positive;
noire (-) négative.
• S'assurer que les câbles du booster de démarrage soient loin de ventilateurs, de pièces en
mouvement et du conduit du carburant.
• Ne pas porter de vêtements larges, de bracelets, de chainettes ou d'objets métalliques pendant
le travail sur le véhicule.
• Avant de ranger le booster de démarrage, s'assurer qu'il revienne à une température ambiante.

16
MODE D’EMPLOI
FR
ÉQUIPEMENTS DE PROTECTION INDIVIDUELLE PRÉVUS PENDANT L'UTILISATION DU
BOOSTER DE DÉMARRAGE
CARACTÉRISTIQUES TECHNIQUES
UTILISER SYSTÉMATIQUEMENT DES CHAUSSURES DE SÉCURITÉ
PORTER SYSTÉMATIQUEMENT DES GANTS DE PROTECTION CONTRE LES AGENTS PHYSIQUES PEN-
DANT L'UTILISATION DU DISPOSITIF
UTILISER SYSTÉMATIQUEMENT DES GANTS DE PROTECTION CONTRE LES AGENTS PHYSIQUES PEN-
DANT L’UTILISATION DU BOOSTER DE DÉMARRAGE
Le non-respect des indications suivantes peuvent entraîner des lésions physiques et/ou
des pathologies.
Autres équipements de protection individuelle à utiliser en fonction des valeurs relevées
au cours de l’analyse d’hygiène environnementale/des risques si les valeurs dépassent
les limites prévues par les normes en vigueur.
UTILISATION POUR BATTERIES
CHARGEUR TENSION NOMINALE
BATTERIE INTERNE
COURANT DE DÉCOLLAGE
LONGUEUR CÂBLE BORNES
TEMPÉRATURE D'UTILISATION
DIMENSIONS
POIDS
Art. 1498/12
12V
230V ~ 50/60Hz
12V-hermétique au plomb (AGM)
2200A
1m
-10°C +40°C
400x330x140 mm
13kg
Art. 1498/24
12-24V
230V ~ 50/60Hz
2x12V-hermétique au plomb (AGM)
4200A (12V) – 2100A (24V)
1.5m
-10°C +40°C
400x330x190 mm
17kg
VISUALISATION DU NIVEAU DE CHARGE
Pour visualiser le niveau de charge, appuyer sur la touche jaune placée sur le devant du booster de
démarrage, les Led s'éclaireront :
• 4 Led éclairées : le booster de démarrage est complètement chargé ;
• 5 Led éclairées : le booster de démarrage est chargé au maximum (la 5ème Led s'éclaire quand
le booster de démarrage est encore branché à la prise, ou pendant quelques secondes lorsqu'il est
débranché du courant).
NOTE : Charger le booster de démarrage pendant un minimum de 12 heures immédiatement
après l'achat. S'il n'est pas utilisé pendant une longue période, recharger le booster de démar-
rage au moins une fois tous les trois mois ; de cette façon, la batterie interne reste en parfait
état de marche.

17
MODE D’EMPLOI
FR
RECHARGE DU BOOSTER DE DÉMARRAGE PORTATIF art. 1498/12
• Brancher le chargeur à la prise de courant 230V, insérer la che du chargeur à la prise de chargement
placée sur le devant du booster de démarrage.
• Pendant la charge, la Led rouge s'éclairera et deviendra verte lorsque la charge sera terminée.
• Vérier la charge du booster de démarrage conformément au point « Visualisation du niveau de charge ».
• Lorsque la recharge est effectuée, ne pas laisser le booster de démarrage branché pendant une
période prolongée, le débrancher de la prise de courant.
• Ne pas utiliser le booster de démarrage pendant qu'il est en recharge.
• Utiliser uniquement le chargeur fourni.
Pour effectuer la recharge en se branchant à l'allume-cigare de l'automobile, utiliser le câble fourni
(après avoir démarré le véhicule).
RECHARGE DU BOOSTER DE DÉMARRAGE PORTATIF art. 1498/24
NOTE : la recharge du booster de démarrage doit se faire uniquement en modalité 12V,
jamais en modalité 24V. En modalité 24V, la prise allume-cigare n'est pas active.
• Tourner le sélecteur, situé sur la partie arrière du booster de démarrage, sur 12V.
• Brancher le chargeur à la prise de courant 230V, insérer la che du chargeur à la prise de chargement
placée sur le devant du booster de démarrage.
• Pendant la charge, les Led situées sur le chargeur s'éclairent (Charging - 50% - 75% - Full).
• À la n de la charge, toutes les Led seront éclairées puis clignoteront. La charge a été correctement
effectuée.
• Lorsque la recharge est effectuée, ne pas laisser le booster de démarrage branché au chargeur de
batterie pendant une période prolongée, débrancher la prise.
• Ne pas utiliser le booster de démarrage pendant qu'il est en recharge.
• Utiliser uniquement le chargeur fourni.
Pour effectuer la recharge en se branchant à l'allume-cigare de l'automobile, utiliser le câble fourni
(après avoir démarré le véhicule).
UTILISATION DU BOOSTER DE DÉMARRAGE - DÉMARRAGE DES VÉHICULES
• Vérier systématiquement que les caractéristiques techniques de la batterie du véhicule soient appro-
priées aux boosters de démarrage de 12V ou 24V.
• La différence entre le voltage du booster de démarrage et la tension du système du véhicule
peut provoquer des explosions, des dommages au véhicule, au booster de démarrage et aux
personnes.
• Vérier que le booster de démarrage ne soit pas branché au réseau électrique.
• Pour le booster de démarrage de 12V-24V, sélectionner le voltage correct au moyen du sélecteur.
• Vérier le pôle correspondant à la masse du véhicule, généralement reliée à la borne négative.
• Brancher systématiquement le conducteur de sortie avec pince rouge (+) au pôle positif de la
batterie et le conducteur de sortie avec pince noire (-) à la masse du véhicule.
• Ne jamais inverser la polarité ; l’inversion de polarité peut provoquer des explosions, des
dommages au véhicule, au booster de démarrage et aux personnes.
• S'assurer que les câbles du booster de démarrage soient loin de ventilateurs, de pièces
en mouvement et du conduit du carburant.
• S'assurer que le booster de démarrage soit dans une position stable et qu'il ne risque pas de tomber
à cause des vibrations du véhicule.
• Si le véhicule ne se met pas en marche dans les 10 secondes, ne pas insister.
• Avant de procéder à un nouveau démarrage, laisser reposer le booster de démarrage pendant au
moins 3 minutes pour ne pas risquer de l'endommager.
• À la n de l'opération, débrancher préalablement le conducteur avec pince noire (-) de la masse du
véhicule et le remettre immédiatement dans son compartiment.
• Débrancher le conducteur avec pince rouge de la borne positive (+) de la batterie et le remettre
immédiatement dans son compartiment.

18
MODE D’EMPLOI
FR
REMPLACEMENT DU FUSIBLE DE L'ALIMENTATEUR (FICHE DE L'ALLUME-CIGARE)
Le fusible est logé à l'intérieur de la che de l’allume-cigare. S'assurer que l'alimentateur ne soit pas
branché au réseau électrique.
Desserrer manuellement la douille située sur la tête de la che, extraire le fusible endommagé et le
remplacer par un fusible ayant les mêmes caractéristiques techniques. Fermer la douille en la bloquant
manuellement.
PROBLÈMES POTENTIELS
QUESTIONS GÉNÉRALES ET RÉPONSES
PROBLÈME RÉSOLUTION
Une ou deux Led s'éclairent, vous essayez
de recharger le booster de démarrage depuis
plus de 24 heures et les autres Led ne s'é-
clairent pas.
Vérier que les Led sur l'alimentateur soient éclai-
rées.
Vérier que le fusible dans la che de l'allume-
cigare de l'alimentateur ne soit pas défectueux.
Contacter le vendeur.
Aucune Led ne s'éclaire, mais lorsque le
chargeur est inséré dans le booster de
démarrage, toutes les Led s'éclairent.
Batterie défectueuse. La cause probable est l'u-
tilisation trop intensive du booster de démarrage
sans le laisser refroidir. Vérier également les in-
structions d'utilisation.
Le booster de démarrage est complètement
chargé mais ne fonctionne pas.
S'assurer que les câbles soient correctement
branchés aux pôles de la batterie.
Art. 1498/24 le booster de démarrage fon-
ctionne seulement à 12V mais pas à 24V.
L'une des deux batteries est défectueuse, ou le
sélecteur ne fonctionne pas correctement. Con-
tacter le vendeur.
Pendant la charge, sur l'alimentateur du boo-
ster de démarrage 12V-24V, la Led “FAULT”
s'est éclairée.
Contacter le vendeur.
QUESTION RÉPONSE
Combien de démarrages peut effectuer le
booster de démarrage avec une charge ?
De 1 à 30, cela dépend de la température, des condi-
tions générales du véhicule, du type de moteur et de
ses dimensions.
Est-il possible de remplacer la batterie du boo-
ster de démarrage ?
Oui, contacter le vendeur.
Quelle est la température de stockage idéale ?
La température idéale pour préserver la batterie
interne est de 25 °C.
Puis-je charger le booster de démarrage
avec un chargeur ayant les mêmes caractéri-
stiques ?
Non, utilisez uniquement le chargeur fourni avec
le produit, Il peut éventuellement être commandé
chez le vendeur.

19
MODE D’EMPLOI
FR
MAINTENANCE
Les interventions de maintenance et de réparation doivent être effectuées par un personnel spécialisé.
Pour ces interventions, vous pouvez vous adresser au centre des réparations de Beta Utensili S.p.A.
ÉCOULEMENT
Le symbole du bac barré reporté sur l'appareil ou sur l'emballage indique que le produit, à la n de sa
durée de vie, doit être écoulé séparément des autres déchets urbains.
L’utilisateur qui doit écouler cet instrument peut :
- le remettre à un centre de collecte de déchets électroniques ou électrotechniques ;
- le retourner au vendeur au moment de l'achat d'un instrument équivalent ;
- en cas de produit à usage professionnel exclusif, contacter le producteur qui devra disposer d'une
procédure pour l'écoulement correct.
L'écoulement correct de ce produit permet la réutilisation des matières premières qui le composent et
évite les dommages à l'environnement et à la santé humaine.
L'écoulement illégal du produit représente une violation de la norme sur l'écoulement des déchets
dangereux et comporte l'application des sanctions prévues.
GARANTIE
Cet outil est fabriqué et testé conformément aux normes actuellement en vigueur dans la
Communauté Européenne et est couvert par une garantie de 12 mois pour une utilisation
professionnelle et de 24 mois pour une utilisation non professionnelle.
Toutes les pannes dues à un défaut matériel ou de production seront réparées, en ajustant ou
en remplaçant les pièces défectueuses à notre discrétion. La réalisation d’une ou de plusieurs interven-
tions pendant la période de garantie n’en modie pas la date d’échéance.
La garantie ne couvre pas les problèmes dus à l’usure des composants, à un usage erroné ou incorrect
de l’outil, aux ruptures causées pas des coups et/ou des chutes.
La garantie déchoit en cas de modications apportées, d'interventions sur l'instrument, d'envoi à l'assi-
stance de l'instrument démonté.
Tous les dommages causés aux personnes et/ou aux biens, directs et/ou indirects et de quelque genre
ou nature que ce soit, sont exclus de la garantie.
DÉCLARATION DE CONFORMITÉ UE
Nous déclarons sous notre pleine responsabilité que le produit est conforme à toutes les dispositions
pertinentes aux Directives :
• Directive Compatibilité Électromagnétique (E.M.C.) 2014/30/UE;
• Directive Basse Tension (L.V.D.) 2014/35/UE;
• Directive sur la restriction de l'emploi de certaines substances dangereuses dans les appareils
électriques et électroniques (Ro.H.S.) 2011/65/UE.
Le Fascicule Technique est disponible chez :
BETA UTENSILI S.P.A.
Via A. Volta 18,
20845 Sovico (MB)
ITALIE
Date: le 02/05/2017

20
ISTRUZIONI PER L’USO
I
GEBRAUCHSANWEISUNG
DE
PKW-ANLASSER 12V, TRAGBAR ART. 1498/12
PKW- UND NUTZFAHRZEUGANLASSER 12-24V, TRAGBAR ART. 1498/24
GEBRAUCHS- UND BEDIENUNGSANLEITUNG FÜR TRAGBAREN ANLASSER HERGESTELLT VON:
BETA UTENSILI S.P.A. Via A. Volta 18, 20845, Sovico (MB) ITALIEN
Dokumentation Original in ITALIENISCHER SPRACHE verfasst.
Die Sicherheitsanweisungen sorgfältig aufbewahren und dem Bedienerpersonal übergeben.
BESTIMMUNGSZWECK
Der tragbare PKW- und Nutzfahrzeuganlasser ist für den folgenden Gebrauch bestimmt:
• Für das Starten von PKWs und Nutzfahrzeugen mit 12V/24V-Batterie.
Unzulässig sind die folgenden Arbeitsvorgänge:
• Unzulässig ist der Gebrauch an anderen Batterien als 12V/24V-Batterien.
• Unzulässig ist die Verwendung, die nicht mit den in der Tabelle TECHNISCHE DATEN enthaltenen
technischen Vorschriften übereinstimmt.
• Unzulässig ist der Gebrauch in feuchten, nassen oder Witterungseinüssen ausgesetzten Umgebungen.
• Unzulässig ist der Gebrauch für alle jene Anwendungen, die hier nicht aufgeführt sind.
SICHERHEIT DES ARBEITSPLATZES
Die Starthilfe nicht in explosionsfähiger Umgebung verwenden, da sich Funken entwickeln können,
die Staub oder Dämpfe entammen könnten.
Dafür sorgen, dass sich Kinder oder Besucher nicht dem Arbeitsplatz nähern können, wenn Sie mit der
Starthilfe arbeiten. Der Aufenthalt anderer Personen lenkt bei der Arbeit ab, wodurch die Kontrolle über die
Starthilfe verloren gehen könnte.
Keine schädlichen von der Batterie des Fahrzeugs während den Motorstartvorgängen freigesetzten
Gase einatmen.
Während der Verbindungsvorgänge das Gesicht von der Fahrzeugbatterie fernhalten. Die Substanzen in
der Batterie sind korrosiv; falls die Haut oder die Augen aus Versehen mit der Säure in Berührung kommen
sollten, unverzüglich mit Wasser ausspülen und einen Arzt kontaktieren
Niemals die Polarität zwischen den Zangen des Gerätes und den Klemmen der Batterie umkehren; das
Umkehren der Polarität kann Explosionen, Schäden am Fahrzeug, am Gerät und an Personen verursachen.
Stets den Ausgangsleiter mit roter Zange (+) an den Pluspol der Batterie und den Ausgangsleiter mit
schwarzer Zange (-) an die Masse des Fahrzeugs anschließen.
Die Klemmen des Gerätes niemals in direkten oder indirekten Kontakt bringen (zum Beispiel durch Metall
verbindungen).
Lassen Sie keine Werkzeuge aus Metall auf die Fahrzeugbatterie fallen, da dies zu einem Kurzschluss der
Batterie führen kann.
Die Starthilfe in einer trockenen Umgebung verwenden und Feuchtigkeit vermeiden.
WICHTIG! VOR DEM GEBRAUCH DES GERÄTES MUSS DIESE BEDIE-
NUNGSANLEITUNG VOLLSTÄNDIG GELESEN WERDEN. DIE NICHTEINHAL-
TEUNG DER SICHERHEITSVORSCHRIFTEN UND DER BETRIEBSANLEITUN-
GEN KANN ZU SCHWEREN VERLETZUNGEN FÜHREN
ACHTUNG
Strona się ładuje...
Strona się ładuje...
Strona się ładuje...
Strona się ładuje...
Strona się ładuje...
Strona się ładuje...
Strona się ładuje...
Strona się ładuje...
Strona się ładuje...
Strona się ładuje...
Strona się ładuje...
Strona się ładuje...
Strona się ładuje...
Strona się ładuje...
Strona się ładuje...
Strona się ładuje...
Strona się ładuje...
Strona się ładuje...
Strona się ładuje...
Strona się ładuje...
Strona się ładuje...
Strona się ładuje...
Strona się ładuje...
Strona się ładuje...
Strona się ładuje...
Strona się ładuje...
Strona się ładuje...
Strona się ładuje...
Strona się ładuje...
Strona się ładuje...
Strona się ładuje...
Strona się ładuje...
Strona się ładuje...
Strona się ładuje...
Strona się ładuje...
Strona się ładuje...
-
 1
1
-
 2
2
-
 3
3
-
 4
4
-
 5
5
-
 6
6
-
 7
7
-
 8
8
-
 9
9
-
 10
10
-
 11
11
-
 12
12
-
 13
13
-
 14
14
-
 15
15
-
 16
16
-
 17
17
-
 18
18
-
 19
19
-
 20
20
-
 21
21
-
 22
22
-
 23
23
-
 24
24
-
 25
25
-
 26
26
-
 27
27
-
 28
28
-
 29
29
-
 30
30
-
 31
31
-
 32
32
-
 33
33
-
 34
34
-
 35
35
-
 36
36
-
 37
37
-
 38
38
-
 39
39
-
 40
40
-
 41
41
-
 42
42
-
 43
43
-
 44
44
-
 45
45
-
 46
46
-
 47
47
-
 48
48
-
 49
49
-
 50
50
-
 51
51
-
 52
52
-
 53
53
-
 54
54
-
 55
55
-
 56
56


Beta 014980490 Instrukcja obsługi
- Kategoria
- Ładowarki do akumulatorów
- Typ
- Instrukcja obsługi
w innych językach
- español: Beta 014980490 Instrucciones de operación
- italiano: Beta 014980490 Istruzioni per l'uso
- Deutsch: Beta 014980490 Bedienungsanleitung
- português: Beta 014980490 Instruções de operação
- français: Beta 014980490 Mode d'emploi
- Nederlands: Beta 014980490 Handleiding
Powiązane artykuły
Inne dokumenty
-
Bahco BBA1224-3200 Instrukcja obsługi
-
Silverline 465032 Instrukcja obsługi
-
Expert E200401 Instrukcja obsługi
-
GYS STARTPACK TRUCK Instrukcja obsługi
-
Denver Electronics JST-9200 Waterproof IP66 Jump Starter Instrukcja obsługi
-
Telwin TEL2824 Instrukcja obsługi
-
Perel AJUS7 Instrukcja obsługi
-
Facom B124.1 Instrukcja obsługi
-
-
Facom B12.1C Instrukcja obsługi