Sparky Group BR2 7,2 Li HD Instrukcja obsługi
- Typ
- Instrukcja obsługi

59 – 69
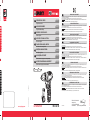
WKRĘTARKА AKUMULATOROWА
Instrukcja oryginalna
© 2011 SPARKY
www.sparkygroup .com
BR2 7.2Li HD
7.2V Lithium-Ion
1109R01
1 – 11
CORDLESS DRILL / DRIVER
Original instructions
24 – 35
PERCEUSE / VISSEUSE SANS FIL
Notice originale
70 – 82
АККУМ. ДРЕЛЬ ШУРУПОВЕРТ
83 – 95
АКУМУЛАТОРНА БОРМАШИНА / ВИНТОВЕРТ
12 – 23
AKKU-BOHRSCHRAUBER
Originalbetriebsanleitung
SPARKY Power Tools GmbH
Leipziger Str. 20
10117 Berlin, DEUTSCHLAND
Geschäftsführer Dipl.-Kfm., Dipl.-Ing. Stanislav Petkov
DECLARATION OF CONFORMITY
We declare under our sole responsibility that this product is in conformity with the provisions of the following directives and the
corresponding harmonized standards:
BR2 7.2Li HD:
2006/42/EC, 2004/108/EC, EN 60745-1, EN 60745-2-1, EN 60745-2-2, EN 55014-1, EN 55014-2
Charger: 2006/95/EC, 2004/108/EC, EN 60335-1, EN 60335-2-29, EN 62233, EN 55014-1, EN 55014-2, EN 61000-3-2, EN 61000-3-3
KONFORMITÄTSERKLÄRUNG
Hiermit versichern wir unsere persönliche Haftung, daß dieses Erzeugnis den Anordnungen folgender Richtlinien und entpsrechender
harmonisierten Standards entspricht:
BR2 7.2Li HD:
2006/42/EC, 2004/108/EC, EN 60745-1, EN 60745-2-1, EN 60745-2-2, EN 55014-1, EN 55014-2
Ladegerät: 2006/95/EC, 2004/108/EC, EN 60335-1, EN 60335-2-29, EN 62233, EN 55014-1, EN 55014-2, EN 61000-3-2,
EN 61000-3-3
Die technischen Unterlagen werden bei SPARKY ELTOS AG, Kubrat Str.9, 5500 Lovetch, Bulgarien, aufbewahrt.
DECLARATION DE CONFORMITE
Nous déclarons sous notre propre responsabilité que ce produit est conformé aux directives, respectivement les standards harmonisés:
BR2 7.2Li HD:
2006/42/EC, 2004/108/EC, EN 60745-1, EN 60745-2-1, EN 60745-2-2, EN 55014-1, EN 55014-2
Chargeur: 2006/95/EC, 2004/108/EC, EN 60335-1, EN 60335-2-29, EN 62233, EN 55014-1, EN 55014-2, EN 61000-3-2, EN 61000-3-3
Le dossier technique est conservé par SPARKY ELTOS AD, 9, rue Kubrat, Lovech, Bulgarie.
DICHIARAZIONE DI CONFORMITÀ
Noi dichiariamo la nostra personale responsabilità, affermando che questo prodotto è in conformità delle seguenti direttive, rispettivamente
norme armonizzate:
BR2 7.2Li HD:
2006/42/EC, 2004/108/EC, EN 60745-1, EN 60745-2-1, EN 60745-2-2, EN 55014-1, EN 55014-2
Caricabatteria: 2006/95/EC, 2004/108/EC, EN 60335-1, EN 60335-2-29, EN 62233, EN 55014-1, EN 55014-2, EN 61000-3-2,
EN 61000-3-3
Il fascicolo tecnico viene custodito presso la SPARKY ELTOS, 5500 Lovech, via Kubrat n. 9, Bulgaria
DECLARACIÓN DE CONFORMIDAD
Declaramos bajo nuestra exclusiva responsabilidad que este producto cumple con lo estipulado en las siguientes directrices y en las
correspondientes normas armonizadas:
BR2 7.2Li HD:
2006/42/EC, 2004/108/EC, EN 60745-1, EN 60745-2-1, EN 60745-2-2, EN 55014-1, EN 55014-2
Caricabatteria: 2006/95/EC, 2004/108/EC, EN 60335-1, EN 60335-2-29, EN 62233, EN 55014-1, EN 55014-2, EN 61000-3-2,
EN 61000-3-3
El expediente técnico está archivado en SPARKY ELTOS SA, C/ Kubrat, 9, 5500 Lovech, Bulgaria.
DEKLARACjA ZGODNOśCI
BR2 7.2Li HD:
2006/42/EC, 2004/108/EC, EN 60745-1, EN 60745-2-1, EN 60745-2-2, EN 55014-1, EN 55014-2
2006/95/EC, 2004/108/EC, EN 60335-1, EN 60335-2-29, EN 62233, EN 55014-1, EN 55014-2, EN 61000-3-2,
EN 61000-3-3
ДЕКЛАРАЦИЯ О СООТВЕТСТВИИ
BR2 7.2Li HD:
2006/42/EC, 2004/108/EC, EN 60745-1, EN 60745-2-1, EN 60745-2-2, EN 55014-1, EN 55014-2
2006/95/EC, 2004/108/EC, EN 60335-1, EN 60335-2-29, EN 62233, EN 55014-1, EN 55014-2, EN 61000-3-2,
EN 61000-3-3
ДЕКЛАРАЦИЯ ЗА СЪОТВЕТСТВИЕ
BR2 7.2Li HD:
2006/42/EC, 2004/108/EC, EN 60745-1, EN 60745-2-1, EN 60745-2-2, EN 55014-1, EN 55014-2
2006/95/EC, 2004/108/EC, EN 60335-1, EN 60335-2-29, EN 62233, EN 55014-1, EN 55014-2, EN 61000-3-2,
EN 61000-3-3
36 – 46
AVVITATORE / TRAPANO A BATTERIA
Istruzioni originali
47 – 58
TALADRO ATORNILLADOR A BATERÍA
Instrucciones de uso originales
BLACK PANTONE185
BLACK PANTONE185

АКУМУЛАТОРНА БОРМАШИНА / ВИНТОВЕРТ
BR2 7.2Li HD
СПАРКИ ЕЛТОС АД
Продуктът е маркиран със знак
ЗАРЯДНО УСТРОЙСТВО ЗА АКУМУЛАТОРНИ БАТЕРИИ
за обща употреба
EN 62233, EN 55014-1, EN 55014-2,
EN 61000-3-2, EN 61000-3-3
11
СПАРКИ ЕЛТОС АД
Продуктът е маркиран със знак
SPARKY Power Tools GmbH
Leipziger Str. 20
10117 Berlin,
GERMANY
SPARKY Power Tools GmbH
Leipziger Str. 20
10117 Berlin,
GERMANY
инж. Станислав Петков
инж. Станислав Петков
1
4
2
3
5
10
11
A
7
5
6
10
8 21
3
4
9
BLACK PANTONE185
BLACK PANTONE185

1
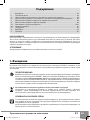
EN
Contents
I - Introduction .................................................................................................................................... 1
II - Technical specications ................................................................................................................ 3
III - General power tool safety warnings ............................................................................................ 4
IV - Additional safety rules for cordless drills / drivers ....................................................................... 5
V - Additional instructions for work with the charger ........................................................................ 6
VI - Additional instructions for work with the battery pack ................................................................ 6
VII - Know your product ..................................................................................................................... A/8
VIII - Operation ....................................................................................................................................... 8
IX - Maintenance ................................................................................................................................ 10
X - Environmental Protection.............................................................................................................. 10
XI - Warranty ........................................................................................................................................ 11
UNPACKING
Due to modern mass production techniques, it is unlikely that your power tool is faulty or that a part is
missing. If you nd anything wrong, do not operate the tool until the parts have been replaced or the fault
has been rectied. Failure to do so could result in serious personal injury.
ASSEMBLY
This SPARKY cordless drill / driver is packed fully assembled.
BR2 7.2Li HD – Original instructions
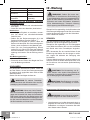
I - Introduction
Your new SPARKY power tool will more than satisfy your expectations. It has been manufactured under
stringent SPARKY Quality Standards to meet superior performance criteria. You will nd your new tool
easy and safe to operate, and, with proper care, it will give you many years of dependable service.
WARNING:
Carefully read through this entire Instruction Manual before using your new SPARKY power tool.
Take special care to heed the Warnings. Your SPARKY power tool has many features that will
make your job faster and easier. Safety, performance, and dependability have been given top
priority in the development of this tool, making it easy to maintain and operate.
Do not dispose of electrical products together with household waste!
Waste electrical products should not be disposed of with household waste. Please recycle where
facilities exist. Check with your local authority or retailer for recycling advice.
ENVIRONMENTAL PROTECTION
The machine, accessories and packaging should be sorted for environmental-friendly recycling.
The plastic components are labelled for categorised recycling.
pages BR2-7.2LiHD.indd 1 9.11.2011 г. 09:43:13 ч.

2
BR2 7.2Li HD
EN
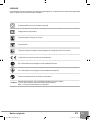
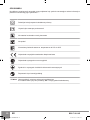
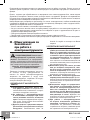
DESCRIPTION OF SYMBOLS
The rating plate on your tool may show symbols. These represent important information about the product
or instructions on its use.
Double insulated for additional protection
Indoor use only
Do not expose to rain ot water
Do not burn
Always charge the battery pack between temperatures 0ºC to 40ºC
Conforms to relevant European safety standards
Conforms to the requirements of Russian standards
Conforms to the requirements of Ukrainian standards
Refer to original instructions.
YYWww
Production period, where the variable symbols are:
YY- last two digits of the year of manufacture, ww - calendar week number
pages BR2-7.2LiHD.indd 2 9.11.2011 г. 09:43:13 ч.

3
Original instructions
EN
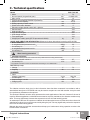
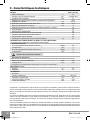
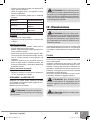
II - Technical specications
Model BR2 7.2Li HD
▪ Motor V 7.2
▪ No load speed (1st gear/2nd gear) min
-1
0-190/0-600
▪ Max. torque Nm 13
▪ Torque control settings (number of positions) 19+1
▪ Keyless chuck capacity mm 0.6-6
▪ Drilling capacity in steel / wood mm 4 / 6
▪ Wood screw max. diameter mm 6
▪ Electronic trigger speed control, left - right run Yes
▪ Electric brake Yes
▪ Auto spindle lock Yes
▪ LED work area light Yes
▪ LED charge indicator Yes
▪ Two-speed gear Yes
▪ Weight (incl. battery pack) (EPTA procedure 01/2003) kg 0.7
NOISE AND VIBRATION INFORMATION (Measured values determined according to EN 60745.)
▪ Noise emission
A-weighted sound pressure level L
pA
dB(A) 60
Uncertainty К
pA
dB 3
A-weighted sound power level L
wA
dB(A) 71
Uncertainty К
wA
dB 3
Wear hearing protection!
▪ Vibration emission *
Total vibration values (vector sum in the three axes) determined according to EN 60745:
Vibration emission vallue a
h,D
m/s
2
0.7
Uncertainty К
h,D
m/s
2
0.15
* The vibration emission values are determined according to 6.2.7 EN 60745-1
BATTERY (Li-Ion):
▪ Voltage V 7.2
▪ Capacity Ah 1.3
CHARGER
▪ Input:
Voltage / frequency V~Hz 230~50
Consumption W 32
▪ Output voltage / current V/A 8 / 3
▪ Charging time min 30
The vibration emission level given in this information sheet has been measured in accordance with a
standardised test given in EN 60745 and may be used to compare one tool with another. It may be used
for a preliminary assessment of exposure.
The declared vibration emission level represents the main applications of the tool. However if the tool is
used for different applications, with different accessories or poorly maintained, the vibration emission may
differ. This may signicantly increase the exposure level over the total working period.
An estimation of the level of exposure to vibration should also take into account the times when the tool is
switched off or when it is running but not actually doing the job. This may signicantly reduce the exposure
level over the total working period.
Maintain the power tool and the accessories and keep your hands warm during operation to reduce the
harmful effect of vibrations.
pages BR2-7.2LiHD.indd 3 9.11.2011 г. 09:43:13 ч.

4
BR2 7.2Li HD
EN
III - General power tool
safety warnings
WARNING! Read all safety warn-
ings and all instructions. Failure to follow the
warnings and instructions may result in electric
shock, re and/or serious injury.
Save all warnings and instructions for
future reference.
The term “power tool” in the warnings refers to
your mains-operated (corded) power tool or bat-
tery-operated (cordless) power tool.
1. WORK AREA SAFETY
a) Keep work area clean and well lit. Clut-
tered or dark areas invite accidents.
b) Do not operate power tools in explosive
atmospheres, such as in the presence of
flammable liquids, gases or dust. Power
tools create sparks which may ignite the dust
or fumes.
c) Keep children and bystanders away
while operating a power tool. Distractions
can cause you to lose control.
2. ELECTRICAL SAFETY
a) Power tool plugs must match the outlet.
Never modify the plug in any way. Do not use
any adapter plugs with earthed (grounded)
power tools. Unmodified plugs and matching
outlets will reduce risk of electric shock.
b) Avoid body contact with earthed or
grounded surfaces, such as pipes, radia-
tors, ranges and refrigerators. There is an
increased risk of electric shock if your body is
earthed or grounded.
c) Do not expose power tools to rain or wet
conditions. Water entering a power tool will
increase the risk of electric shock.
d) Do not abuse the cord. Never use the
cord for carrying, pulling or unplugging
the power tool. Keep cord away from
heat, oil, sharp edges or moving parts.
Damaged or entangled cords increase the
risk of electric shock.
e) When operating a power tool outdoors,
use an extension cord suitable for out-
door use. Use of a cord suitable for outdoor
use reduces the risk of electric shock.
f) If operating a power tool in a damp loca-
tion is unavoidable, use a residual current
device (RCD) protected supply. Use of an
RCD reduces the risk of electric shock.
3. PERSONAL SAFETY
a) Stay alert, watch what you are doing and
use common sense when operating a
power tool. Do not use a power tool while
you are tired or under the influence of
drugs, alcohol or medication. A moment
of inattention while operating power tools
may result in serious personal injury.
b) Use personal protective equipment. Al-
ways wear eye protection. Protective equip-
ment such as dust mask, non-skid safety
shoes, hard hat, or hearing protection used
for appropriate conditions will reduce personal
injuries.
c) Prevent unintentional starting. Ensure
the switch is in the off-position before
connecting to power source and/or bat-
tery pack, picking up or carrying the tool.
Carrying power tools with your finger on the
switch or energising power tools that have
the switch on invites accidents.
d) Remove any adjusting key or wrench be-
fore turning the power tool on. A wrench
or a key left attached to a rotating part of the
power tool may result in personal injury.
e) Do not overreach. Keep proper footing
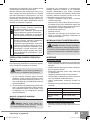
Dust from material such as paint containing lead, some wood species, minerals and metal may be harm-
ful. Contact with or inhalation of the dust may cause allergic reactions and/or respiratory diseases to the
operator or bystanders.
Certain kinds of dust are classied as carcinogenic such as oak and beech dust especially in conjunction
with additives for wood conditioning (chromate, wood preservative). Material containing asbestos must
only be treated by specialists.
▪ Where the use of a dust extraction device is possible it shall be used.
▪ To achieve a high level of dust collection, use vacuum cleaner for wood or for wood and/or minerals
together with this tool.
▪ The work place must be well ventilated.
▪ The use of a dust mask of filter class P2 is recommended.
Follow national requirements for the materials you want to work with.
pages BR2-7.2LiHD.indd 4 9.11.2011 г. 09:43:13 ч.

5
Original instructions
EN
and balance at all times. This enables bet-
ter control of the power tool in unexpected
situations.
f) Dress properly. Do not wear loose cloth-
ing or jewellery. Keep your hair, cloth-
ing and gloves away from moving parts.
Loose clothes, jewellery or long hair can be
caught in moving parts.
g) If devices are provided for the connec-
tion of dust extraction and collection fa-
cilities, ensure these are connected and
properly used. Use of dust collection can
reduce dust-related hazards.
4. POWER TOOL USE AND CARE
a) Do not force the power tool. Use the cor-
rect power tool for your application. The
correct power tool will do the job better and
safer at the rate for which it was designed.
b) Do not use the power tool if the switch
does not turn it on and off. Any power tool
that cannot be controlled with the switch is
dangerous and must be repaired.
c) Disconnect the plug from the power
source and/or the battery pack from the
power tool before making any adjust-
ments, changing accessories, or storing
power tools. Such preventive safety meas-
ures reduce the risk of starting the power tool
accidentally.
d) Store idle power tools out of the reach
of children and do not allow persons
unfamiliar with the power tool or these
instructions to operate the power tool.
Power tools are dangerous in the hands of
untrained users.
e) Maintain power tools. Check for misalign-
ment or binding of moving parts, break-
age of parts and any other condition that
may affect the power tool’s operation. If
damaged, have the power tool repaired
before use. Many accidents are caused by
poorly maintained power tools.
f) Keep cutting tools sharp and clean.
Properly maintained cutting tools with sharp
cutting edges are less likely to bind and are
easier to control.
g) Use the power tool, accessories and tool
bits etc. in accordance with these in-
structions, taking into account the work-
ing conditions and the work to be per-
formed. Use of the power tool for operations
different from those intended could result in
a hazardous situation.
5. SERVICE
a) Have your power tool serviced by a quali-
fied repair person using only identical
replacement parts. This will ensure that the
safety of the power tool is maintained.
IV - Additional safety
rules for cordless
drills / drivers
▪ Be aware that this tool is always in operat-
ing condition, because it does not have to be
plugged into an electrical outlet. Always set the
trigger switch to the locked OFF position when
installing or removing the battery pack.
▪ If possible, always use clamps or a vice to hold
your work.
▪ Do not touch the bit after operation. It will be
very hot.
▪ When using the drill, use safety equipment
including safety glasses and ear defenders.
Wear a dust mask if the drilling operation cre-
ates dust.
▪ The dust, separated while processing materi-
als, containing quartz (SiO
2
) is dangerous to
your health. Do not process materials contain-
ing asbestos.
▪ The tool must be used only for its prescribed
purpose. Any use other than those mentioned
in this Manual will be considered a case of mis-
use. The user and not the manufacturer shall
be liable for any damage or injury resulting from
such cases of misuse.
▪ To use this tool properly, you must observe the
safety regulations, the assembly instructions
and the operating instructions to be found in
this Manual. All persons who use and service
the machine have to be acquainted with this
Manual and must be informed about its poten-
tial hazards. Children and frail people must not
use this tool. Children should be supervised
at all times if they are in the area in which the
tool is being used. It is also imperative that you
observe the accident prevention regulations in
force in your area. The same applies for gen-
eral rules of occupational health and safety.
▪ The manufacturer shall not be liable for any
changes made to the tool nor for any damage
resulting from such changes.
Even when the tool is used as prescribed it is not
possible to eliminate all residual risk factors. The
following hazards may arise in connection with
the tool’s construction and design:
pages BR2-7.2LiHD.indd 5 9.11.2011 г. 09:43:13 ч.

6
BR2 7.2Li HD
EN
▪ Damage to the lungs if an effective dust mask
is not worn.
▪ Damage to hearing if effective ear defenders
are not worn.
V - Additional instructions
for work with the
charger
▪ Before using the charger, read all the instruc-
tions and cautionary markings on the charger
and battery pack as well as the instructions on
using the battery pack.
▪ Only charge your batteries indoors as the
charger is designed for indoor use only.
WARNING: If the battery pack is
cracked or damaged in any other way, do not
insert it in the charger. There is a danger of
electric shock.
WARNING: Do not allow any liquid to
come into contact with the charger. There is a
danger of electric shock.
▪ The charger is not intended for any use other
than charging the exact type of SPARKY re-
chargeable battery pack as supplied with the
charger. Any other use may result in the risk of
fire or electric shock.
▪ The charger and battery packs supplied with it
are specifically designed to work together. Do
not attempt to charge the battery pack with any
other charger than the one supplied.
▪ Do not place any object on top of the charger
as it could cause overheating. Do not place the
charger near any heat source.
▪ Do not pull on the lead of the charger to discon-
nect it from the power source.
▪ Make sure that the charger cord is positioned
where it will not be stepped on, tripped over or
otherwise subjected to damage or stress.
▪ Do not use an extension cord unless it is abso-
lutely necessary. The use of an improper exten-
sion cord could cause the risk of fire or electric
shock.
▪ Do not use the charger if it has been subjected
to a heavy knock, dropped or otherwise dam-
aged in any way. Do not operate charger with
damaged cord or plug - have them replaced
immediately. Take the charger to an authorised
service centre for a check or repair.
▪ If the replacement of the supply cord is neces-
sary, this has to be done by the manufacturer or
his agent in order to avoid a safety hazard.
▪ Do not disassemble the charger. Take it to an
authorised service centre when service or re-
pair is required. Incorrect re-assembly may re-
sult in the risk of fire or electric shock.
▪ To reduce the risk of an electric shock, unplug
the charger from the power supply before at-
tempting to clean it. Removing the battery alone
does not reduce the risk.
▪ Never attempt to connect two chargers togeth-
er.
▪ Do not store or use the tool and battery pack in
locations where the temperature may reach or
exceed 104°F (40°C) such as alongside sheds,
trailers or metal structures during summer.
▪ The charger is designed for use from a stand-
ard household electrical supply (230–240V).
Do not attempt to connect the charger to a sup-
ply with a different supply.
▪ If you wish to charge a second battery pack,
unplug the charger from the mains supply and
leave it for at least 15 minutes. After this time
you can charge a second battery pack.
▪ Under certain conditions, with the charger
plugged in to the power supply, the exposed
charging contacts inside the charger can be
shorted by foreign material. Foreign materials
of a conductive nature such as, but not limited
to, steel wool, aluminium foil, or any build-up
of metallic particles should be kept away from
charger cavities. Always unplug the charger
from the power supply when there is no bat-
tery pack in the cavity. Unplug charger before
attempting to clean.
▪ Do not freeze or immerse charger in water or
any other liquid.
VI - Additional instructions
for work with the
battery pack
▪ The battery pack for this tool has been shipped
in a low charge condition. You should charge
the battery pack fully before use.
WARNING: If the battery pack is
cracked or damaged in any other way, do not
insert it in the charger. There is a danger of
electric shock.
pages BR2-7.2LiHD.indd 6 9.11.2011 г. 09:43:13 ч.

7
Original instructions
EN
▪ To ensure the longest battery life and best bat-
tery performance, always charge the battery
when the air temperature is between 18–24°C.
Do not charge the battery pack when the tem-
perature is below 0°C, or above 40°C. This is
important. Failure to observe this safety rule
could cause serious damage to the battery
pack.
▪ The charger and battery pack may become
warm to touch while charging. This is a normal
condition, and does not indicate a problem.
▪ To prevent overheating, do not charge battery
packs in direct sunlight in hot weather or near
heat sources.
▪ Do not charge inside a box or container of any
kind. The battery must be placed in a well ven-
tilated area during charging.
▪ When the battery is defective, liquid can escape
and come into contact with adjacent compo-
nents. Check any parts concerned. Clean such
parts or replace them, if required.
▪ If the battery pack does not charge properly:
(1) Check current at receptacle by plugging in a
lamp or other appliance.
(2) Move charger and battery pack to a location
where the surrounding air temperature is approxi-
mately 65°F–75°F (18°C–24°C).
(3) If charging problems persist, take or send
the tool, battery pack and charger to your local
service centre.
▪ The battery pack should be recharged when it
fails to produce sufficient power on jobs, which
were easily done previously. DO NOT CON-
TINUE to use under these conditions. Follow
the charging procedure. The Li- ion battery
can be charged at any time without reducing its
service life. Interrupting the charging procedure
does not damage the battery.
▪ Do not incinerate the battery pack even if it is
seriously damaged or can no longer hold a
charge. The battery pack can explode in a fire.
▪ To facilitate the cooling of the battery pack after
use, avoid placing the charger or battery pack
in a warm environment such as in a metal shed,
or an uninsulated trailer.
WARNING: Never attempt to open the
battery pack for any reason. If the plastic hous-
ing of the battery pack breaks or cracks, return
to a service centre for recycling.
READ ALL OF THE INSTRUCTIONS IN THE
CHARGER SECTION OF THIS MANUAL BE-
FORE ATTEMPTING TO CHARGE THE BAT-
TERY PACK FOR YOUR TOOL.
▪ Always use correct SPARKY battery pack (the
one supplied with tool or a replacement pack
exactly like it). Never install any other battery
pack. It will ruin your tool and may create a haz-
ardous condition.
▪ Charge battery packs only in SPARKY charg-
ers.
▪ Use an environmentally safe disposal unit at a
municipal waste disposal centre to dispose of a
damaged or worn out battery.
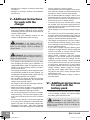
FITTING AND REMOVING THE
BATTERY PACK
To remove the battery from the machine: press
the battery release buttons (4) and take the bat-
tery out of the tool.
WARNING: Always set the forward/re-
verse switch (3) in central position before any
work on the machine e. g. tting and removing
a battery, changing the bit,, transport, mainte-
nance and storage.
To install the battery: Insert the charged battery
into the opening at the base of the power tool until
the battery is securely latched with a click.
BATTERY CHARGING
▪ Insert the plug of the charger in the socket. The
green LED on the charging indicator (10) will
start to glow thus indicating that the charger is
in standby state.
▪ Insert the battery (5) in the charger socket (9)
considering the polarity. (Fig. 1)
▪ A new battery will work properly after five cy-
cles of charging and discharging. Charge and
discharge a battery, which is not used for a long
time, for two to three times to function well.
▪ When the battery working time is remarkably
short despite full charging, the life of the battery
may be over. Replace the battery immediately.
WARNING: The battery will be fully
charged after approximately 30 min, remove it
from the charger after this time.
Charging indication:
▪ The green LED starts to glow upon plugging the
charger in the mains.
▪ The green LED ceases to glow and the red LED
lights up after the battery has been placed in
the charger, thus indicating the beginning of the
charging process.
pages BR2-7.2LiHD.indd 7 9.11.2011 г. 09:43:13 ч.

8
BR2 7.2Li HD
EN
During the charging process the charger and bat-
tery might become warm. This is a normal condi-
tion, and does not indicate a problem.
▪ After completion of charging which takes ap-
proximately 30 min, the red LED ceases to glow
and the green LED lights up.
The charger features thermal overload protection
for the battery. Nevertheless we recommend with-
drawing the battery from the charger upon expir-
ing of the charging time. You may use additionally
an electric timer in order to control the charging
time.
TO OBTAIN THE BEST LIFE FOR THE
BATTERY
▪ When battery is not in use, keep it away from
other metal objects like paper clips, coins, keys,
nails, screws, or other small metal objects that
can make a connection from one terminal to
another. Shorting the battery terminals together
may cause fire or explosion.
▪ Always unplug the charger when not in use and
store in a dry secure place.
▪ Do not charge battery packs and do not store
the charger in premises where the temperature
may drop under 0ºC or exceed +40ºC.
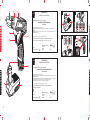
VII - Know your product
Before using the power tool, familiarize yourself
with all operating features and safety require-
ments.
Use the tool and accessories only for the applica-
tions intended. All other applications are expressly
ruled out.
1. Keyless chuck
2. Speed selector switch
3. Forward/reverse switch
4. Battery release buttons
5. Battery
6. ON/OFF trigger switch
7. LED light
8. Torque adjustment collar
9. Charger
10. LED charge state indicator
VIII - Operation
LED WORK AREA LIGHT
The machine is equipped with LED light (7) to il-
luminate the work area and improve visibility when
drilling in areas with insufcient light. To turn the
LED light on and off depress the LED light but-
ton (6).
REVERSING
The extreme position of lever (3) to the right (viewed
from the rear) is equivalent to anti-clockwise rotation,
the extreme position to the left - to clockwise rotation.
When the ON/OFF switch (6) is depressed lever (3)
can not be actuated. (Fig. 2)
WARNING: Reversing can be performed
only when the spindle is not rotating!
Drilling and tightening screws are performed with le-
ver in extreme position to the left. Removal of screws
is performed with lever in extreme position to the
right.
SWITCHING ON - SWITCHING OFF
Switching on: press ON/OFF switch (6).
Switching off: release ON/OFF switch (6).
The power tool is equipped with a brake. The spin-
dle stops rotating immediately after releasing the
switch lever.
SMOOTH ELECTRONIC RPM CONTROL
Light pressure on ON/OFF trigger switch (6) re-
sults in low rotation speed, further pressing the
switch results in smooth increase of the rpm to
maximum upon reaching the extreme position.
ADJUSTING THE TORQUE
Rotate the torque adjustment collar (8) behind the
chuck, to adjust the torque to each of 19 settings.
The range of 19 torque settings allows better con-
trol when using the drill as a screwdriver thus pre-
venting over-tightening of the screws.
The numbers circling the collar are used to indi-
cate the level of torque. The larger the number on
the collar, the higher the torque. To select any of
the numbers, rotate the collar (8) until the desired
number aligns with the arrow head indicator on
the housing of the machine.
Screwdriving
Set the torque adjustment collar (8) against
one of 19 positions.
Select low setting range for working with
small screws or in soft materials.
Select high setting range for working with
large screws or in hard materials.
pages BR2-7.2LiHD.indd 8 9.11.2011 г. 09:43:13 ч.

9
Original instructions
EN
Drilling
Set the torque adjustment collar (8)
against this symbol to choose drilling in
metal, wood, etc.
The power tool is equipped with an electric
brake. The spindle stops rotation immedi-
ately after the switch has been released.
At overloading in drilling mode release the
switch immediately to prevent prolonged
overloading and overheating the motor.
SPEED SELECTOR SWITCH (FIG. 3)
The two-speed selector switch (2) enables you
to select the appropriate gear with the optimum
speed and torque to suit the application.
WARNING: When changing the gear
ensure the drill is switched off.
1. To select the low gear (low speed, high torque
setting), push the gear selector (2) backward.
The digit 1 on the switch will be displayed.
2. To select the high gear (high speed, low torque
setting), push the gear selector (2) forward.
The digit 2 on the switch will be displayed.
INSERTING AND REMOVING BITS (FIG. 4)
WARNING: Remove the battery or set
the forward/reverse switch (3) in central (neu-
tral) position (A).
The drill is tted with auto spindle lock which
means if you try to rotate the chuck by hand the
spindle will automatically lock. This means you
only need to grasp the chuck and rotate the chuck
housing to remove or t accessories.
▪ Hold the machine with one hand and rotate the
chuck with the other hand.
- To open the chuck, rotate it anti-clockwise. (B)
- To close the chuck, rotate it clockwise. (D)
▪ Insert the bit. (C)
▪ Close the chuck.
▪ Perform a test run to check that the bit is prop-
erly clamped in the centre.
REPLACING THE CHUCK
WARNING: Replacing the chuck must
be performed only in authorised service cen-
tres. Please do not attempt to replace the chuck
with available tools otherwise you may damage
the cordless drill/driver.
DRILLING
Drilling metal
▪ For maximum performance, use high speed
steel bits for drilling in metal or steel.
▪ Ensure that the torque adjustment collar (8) is at
position “drill bit”.
▪ Begin drilling at very low speed to prevent the
bit from slipping off the starting point.
▪ Always clamp sheet metal.
▪ Support thin metal with a block of wood to avoid
distorting it.
▪ Use a punch to mark the centre of the hole.
▪ Use a suitable lubricant for the material you are
working on.
Material Lubricant
Steel Oil
Aluminium Turpentine or parafn
Brass, copper or
cast iron
Do not lubricate
Drilling plastics and plastic coated chipboard
▪ Use high speed drill bits.
▪ Refer to “Drilling wood” below.
Drilling wood
▪ For maximum performance, use high speed
steel bits for wood drilling.
▪ Ensure that the torque adjustment collar (8) is at
position “drill bit”.
▪ Begin drilling at very low speed to prevent the
bit from slipping off the starting point. Increase
the speed as the drill bites into the material.
▪ When drilling through holes, place a block of
wood behind the work piece to prevent ragged or
splintered edges on the back side of the hole.
All drilling operations
▪ Use only sharp drill bits.
▪ Mark off the centre of the hole using a centre
punch or nail.
SCREWING / UNSCREWING
Select the appropriate torque by placing one of
the numbers, marked on the torque adjustment
collar (8), against the arrow on the tool housing.
Insert the necessary bit.
pages BR2-7.2LiHD.indd 9 9.11.2011 г. 09:43:13 ч.

10
BR2 7.2Li HD
EN
WARNING: Over-tightening can result
in the screw breaking or damage to the end of
the driver bit.
WARNING: If the machine is held at
an angle to the screw being tightened, the head
of the screw may be damaged, or the specied
torque may not be transmitted to the screw. Al-
ways keep the machine and the screw being
tightened in a straight line.
IX - Maintenance
WARNING: Always set the forward/re-
verse switch (6) in central position before any
work on the machine e. g. tting and removing
a battery, tool change, transport, maintenance
and storage.
Regularly check that all the xing screws are tight.
They may vibrate loose over time.
CLEANING
For safe operation always keep the machine and
its ventilation slots clean.
Regularly check to see if any dust or foreign matter
has entered the grills near the motor and around
the switches. Use a soft brush to remove any ac-
cumulated dust. Wear safety glasses to protect
your eyes whilst cleaning.
If the body of the tool needs cleaning, wipe it with
a soft damp cloth. A mild detergent can be used.
WARNING: Never use alcohol, petrol or
other cleaning agent. Never use caustic agents
to clean plastic parts.
WARNING: Water must never come
into contact with the tool.
CHARGER CLEANING INSTRUCTIONS
WARNING: Disconnect the charger
from the AC outlet before cleaning.
▪ Dirt and grease may be removed from the ex-
terior of the charger using a cloth or soft non-
metallic brush. Do not use water or any clean-
ing solutions.
IMPORTANT! To assure product safety and reli-
ability, repairs, maintenance and adjustment (in-
cluding brush inspection and replacement) should
be performed by certied service centres or other
qualied service organisations, always using gen-
uine replacement parts.
X - Environmental
Protection
The machine, accessories and packaging should
be sorted for environmental-friendly recycling.
For EU-countries only:
Do not dispose of the power tool into
household waste! According to the guidelines
2002/96/EC, power tools, which are not usable,
should be recycled.
Batteries:
Do not dispose of the power tool or
the battery into household waste, re
or water. All type of batteries should be
sorted for environmental-friendly recy-
cling or destroyed.
For EU-countries only:
Defective or worn out batteries must be recycled
according to the guidelines 91/157/EEC.
pages BR2-7.2LiHD.indd 10 9.11.2011 г. 09:43:13 ч.

11
Original instructions
EN
XI - Warranty
The guarantee period for SPARKY power tools is
determined in the guarantee card.
Faults due to normal wear, overloading or improp-
er handling will be excluded from the guarantee.
Faults due to defective materials implemented as
well as defects in workmanship will be corrected
free of charge through replacement or repair.
The complaints for defective SPARKY power
tools will be recognized if the machine is sent
back to the dealer or is presented to the author-
ised warranty service centre undismantled, in its
initial condition.
Notes
Carefully read the entire Original Instructions be-
fore using this product.
The manufacturer reserves the right to change
specications without notice.
Specications may differ from country to country.
pages BR2-7.2LiHD.indd 11 9.11.2011 г. 09:43:13 ч.

12
DE
BR2 7.2Li HD
I - Einleitung
Das von Ihnen erworbene SPARKY Elektrowerkzeug wird Ihre Erwartungen übersteigen. Es ist gemäß
den hohen Qualitätsstandards von SPARKY hergestellt, die den strengen Anforderungen des Verbrau-
chers entsprechen. Einfach in der Bedienung und ungefährlich bei richtiger Handhabung, wird dieses
Gerät bei bestimmungsgemäßem Gebrauch Ihnen lange zuverlässig dienen.
WARNUNG!
Lesen Sie die ganze Bedienungsanleitung aufmerksam durch, bevor Sie das neu erworbene SPAR-
KY – Elektrowerkzeug in Betrieb nehmen. Beachten Sie besonders die Texte, die mit dem Wört
„Warnung“ beginnen. Ihr SPARKY - Elektrowerkzeug besitzt viele Eigenschaften, die Ihre Arbeit
erleichtern werden. Bei der Entwicklung dieses Elektrowerkzeuges ist höchste Aufmerksamkeit der
Sicherheit, den Betriebseigenschaften und der Zuverlässigkeit gewidmet worden, die es einfach zur
Wartung und Bedienung machen.
Entsorgen Sie das Elektrowerkzeug nicht zusammen mit dem Hausmüll!
Die Abfälle von elektrischen Erzeugnissen sollen nicht zusammen mit dem Hausmüll gesammelt
werden. Für eine umweltgerechte Entsorgung geben Sie Ihren alten / defekten Elektrogeräte
bitte in der nächsten kommunalen Sammelstelle ab.
UMWELTSCHUTZ
Angesichts des Umweltschutzes sollen das Elektrowerkzeug, die Zubehörteile und die Verpackung
zwecks Wiederverwendung der darin enthaltenen Rohstoffe einer geeigneten Wiederverwertung
zugeführt werden,
Zum sortenreinen Recycling sind die Teile, hergestellt aus Kunststoffen, entsprechend
gekennzeichnet.
AUSPACKEN
Überprüfen Sie unmittelbar nach dem Auspacken ob sämtliche Bestandteile und das beschriebene
Zubehör mitgeliefert wurden. Sollte dies nicht der Fall sein, wenden Sie sich bitte umgehend an Ihren
Fachhändler bei dem der Akkuschrauber gekauft wurde. Dies trifft auch dann zu, wenn Sie den Ein-
druck haben mit dem Gerät ist etwas nicht in Ordnung. Eine Nichtbeachtung dieser Empfehlung kann zu
schweren Unfällen führen.
ZUSAMMENBAU
Die Akku-Bohrschrauber werden verpackt und vollständig montiert geliefert.
Inhalt
I - Einleitung ..................................................................................................................................... 12
II - Technische Daten ......................................................................................................................... 14
III - Allgemeine Sicherheitshinweise für Elektrowerkzeuge ............................................................ 15
IV - Zusätzliche Sicherheitshinweise für die Arbeit mit Akku-Bohrschraubern ..............................17
V - Zusätzliche Vorschriften für die Arbeit mit dem Ladegerät ........................................................17
VI - Zusätzliche Vorschriften für die Arbeit mit den Batterien .......................................................... 18
VII - Elemente des Elektrowerkzeugs ............................................................................................ A/20
VIII - Arbeitshinweise ............................................................................................................................ 20
IX - Wartung ........................................................................................................................................ 22
X - Entsorgung .................................................................................................................................... 23
XI - Garantie ....................................................................................................................................... 23
pages BR2-7.2LiHD.indd 12 9.11.2011 г. 09:43:13 ч.

13
Originalbetriebsanleitung
DE
BEDEUTUNG DER SYMBOLE
Auf dem Typenschild des Elektrowerkzeuges sind spezielle Symbole dargestellt. Sie stellen wichtige
Information über das Produkt oder Instruktionen für seine Nutzung dar.
Doppelte Isolierung für zusätzlichen Schutz
Nicht im Freien verwenden
Vor Regen und Feuchtigkeit
Nicht verbrennen
Akku bei Temperaturen zwischen 0ºC bis 40ºC auaden
Entspricht den Europäischen Sicherheitsstandards
Entspricht den Anforderungen der russischen normativen Dokumente
Entspricht den Anforderungen der ukrainischen normativen Dokumenten
Lesen Sie die Originalbetriebsanleitung
YYWww
Zeitabschnitt der Produktion, wobei die variablen Symbole sind:
YY- letzte zwei Ziffern des Kalenderjahres der Produktion,
ww - laufende Kalenderwoche
pages BR2-7.2LiHD.indd 13 9.11.2011 г. 09:43:13 ч.

14
DE
BR2 7.2Li HD
II - Technische Daten
Modell BR2 7.2Li HD
▪ Motor: V 7.2
▪ Leerlaufdrehzahl (I Geschwindigkeit/II Geschwindigkeit) min
-1
0-190/0-600
▪ Maximales Drehmoment Nm 13
▪ Drehmomenteinstellung: (Anzahl der Teilstellungen) 19+1
▪ Bohrfutterkapazität mm 0.6-6
▪ Max. Querschnitt von Bohrern für Stahl / Holz mm 4 / 6
▪ Maximale Größe von Holzschrauben mm 6
▪ Elektronische Drehzahleinstellung, Rechts- Links - Lauf ja
▪ Motorbremse jа
▪ Selbstarretierende Spindel ja
▪ Leuchtdiodenbeleuchtung des Arbeitsgebiets ja
▪ Leuchtdiodenanzeige des Ladevorgangs ja
▪ Zweistufiges Getriebe ja
▪ Gewicht (mit Batterie) (EPTA Prozedur 01/2003) kg
GERÄUSCH-/VIBRATIONSINFORMATION (Messwerte ermittelt entsprechend EN 60745.)
▪ Geräuschemissionswerte:
Der A-bewertete Schalldruckpegel L
pA
dB(A) 60
Unsicherheit К
pA
dB 3
Der A-bewertete Schalleistungspegel L
wA
dB(A) 71
Unsicherheit К
wA
dB 3
Gehörschutz tragen!
▪ Schwingungsemissionswerte *
Schwingungsgesamtwerte (Vektorsumme dreier Richtungen) ermittelt entsprechend EN 60745:
Schwingungsemissionswert a
h,D
m/s
2
0.7
Unsicherheit К
h,D
m/s
2
0.15
* Messwerte ermittelt nach 6.2.7 EN 60745-1.
BATTERIE (Li-ion):
▪ Spannung: V 7.2
▪ Kapazität Ah 1.3
LADEGER ÄT:
▪ Eingang:
Spannung / Frequenz V~Hz 230~50
Leistungsaufnahme W 32
▪ Ausgangsspannung / Strom V/A 8 / 3
▪ Ladezeit min 30
Der in diesen Anweisungen angegebene Schwingungspegel ist entsprechend einem in EN 60745 ge-
normten Messverfahren gemessen worden und kann für den Vergleich von Elektrowerkzeugen mitein-
ander verwendet werden. Er eignet sich auch für eine vorläuge Einschätzung der Schwingungsbelas-
tung.
Der angegebene Schwingungspegel repräsentiert die hauptsächlichen Anwendungen des Elektrowerk-
zeugs. Wenn allerdings das Elektrowerkzeug für andere Anwendungen, mit abweichenden Einsatzwerk-
zeugen oder ungenügender Wartung eingesetzt wird, kann der Schwingungspegel abweichen. Dies
kann die Schwingungsbelastung über den gesamten Arbeitszeitraum deutlich erhöhen.
Für eine genaue Abschätzung der Schwingungsbelastung sollten auch die Zeiten berücksichtigt werden,
in denen das Gerät abgeschaltet ist oder zwar läuft, aber nicht tatsächlich im Einsatz ist. Dies kann die
Schwingungsbelastung über den gesamten Arbeitszeitraum deutlich reduzieren.
Pegen Sie das Gerät und die Einsatzwerkzeuge mit Sorgfalt. Halten Sie Ihre Hände warm während der
Arbeit – dies wird die schädliche Einwirkung erhöhter Schwingungen reduzieren.
pages BR2-7.2LiHD.indd 14 9.11.2011 г. 09:43:13 ч.

15
Originalbetriebsanleitung
DE
Stäube von Materialien wie bleihaltigem Anstrich, einigen Holzarten, Mineralien und Metall können ge-
sundheitsschädlich sein. Berühren oder Einatmen der Stäube können allergische Reaktionen und/oder
Atemwegserkrankungen des Benutzers oder in der Nähe bendlicher Personen hervorrufen.
Bestimmte Stäube wie Eichen- oder Buchenstaub gelten als krebserzeugend, besonders in Verbindung
mit Zusatzstoffen zur Holzbehandlung (Chromat, Holzschutzmittel). Asbesthaltiges Material darf nur von
Fachleuten bearbeitet werden.
▪ Benutzen Sie möglichst eine Staubabsaugung.
▪ Um bei der Arbeit mit diesem Elektrowerkzeug ein gutes Staubabfangen zu gewährleisten, benutzen
Sie einen Staubabsauger, der für Holzstaub oder für Holz- und mineralischen Staub bestimmt ist.
▪ Sorgen Sie für gute Belüftung des Arbeitsplatzes.
▪ Es wird empfohlen, eine Atemschutzmaske mit Filterklasse P2 zu tragen.
Beachten Sie in Ihrem Land gültige Vorschriften für die zu bearbeitenden Materialien.
III - Allgemeine
Sicherheitshinweise
für Elektrowerkzeuge
WARNUNG! Lesen Sie alle Sicher-
heitshinweise und Anweisungen. Versäum-
nisse bei der Einhaltung der Sicherheitshin-
weise und Anweisungen können elektrischen
Schlag, Brand und/oder schwere Verletzungen
verursachen.
Bewahren Sie alle Sicherheitshinweise und
Anweisungen für die Zukunft auf.
Der in den Sicherheitshinweisen verwendete
Begriff „Elektrowerkzeug“ bezieht sich auf netz-
betriebene Elektrowerkzeuge (mit Netzkabel)
und auf akkubetriebene Elektrowerkzeuge (ohne
Netzkabel).
1. ARBEITSPLATZSICHERHEIT
a) Halten Sie Ihren Arbeitsbereich sauber
und gut beleuchtet. Unordnung oder unbe-
leuchtete Arbeitsbereiche können zu Unfäl-
len führen.
b) Arbeiten Sie mit dem Elektrowerkzeug
nicht in explosionsgefährdeter Umge-
bung, in der sich brennbare Flüssigkei-
ten, Gase oder Stäube befinden. Elektro-
werkzeuge erzeugen Funken, die den Staub
oder die Dämpfe entzünden können.
c) Halten Sie Kinder und andere Personen
während der Benutzung des Elektro-
werkzeugs fern. Bei Ablenkung können Sie
die Kontrolle über das Gerät verlieren.
2. ELEKTRISCHE SICHERHEIT
a) Der Anschlussstecker des Elektrowerk-
zeuges muss in die Steckdose passen.
Der Stecker darf in keiner Weise verän-
dert werden. Verwenden Sie keine Adap-
terstecker gemeinsam mit schutzgeer-
deten Elektrowerkzeugen. Unveränderte
Stecker und passende Steckdosen verrin-
gern das Risiko eines elektrischen Schla-
ges.
b) Vermeiden Sie Körperkontakt mit ge-
erdeten Oberflächen wie von Rohren,
Heizungen, Herden und Kühlschränken.
Es besteht ein erhöhtes Risiko durch elektri-
schen Schlag, wenn Ihr Körper geerdet ist.
c) Halten Sie Elektrowerkzeuge von Regen
oder Nässe fern. Das Eindringen von Was-
ser in ein Elektrowerkzeug erhöht das Risiko
eines elektrischen Schlages.
d) Zweckentfremden Sie das Kabel nicht,
um das Elektrowerkzeug zu tragen, auf-
zuhängen oder um den Stecker aus der
Steckdose zu ziehen. Halten Sie das Ka-
bel fern von Hitze, Öl, scharfen Kanten
oder sich bewegenden Geräteteilen. Be-
schädigte oder verwickelte Kabel erhöhen
das Risiko eines elektrischen Schlages.
e) Wenn Sie mit einem Elektrowerkzeug
im Freien arbeiten, verwenden Sie nur
Verlängerungskabel, die auch für den
Außenbereich geeignet sind. Die Anwen-
dung eines für den Außenbereich geeigne-
ten Verlängerungskabels verringert das Risi-
ko eines elektrischen Schlages.
f) Wenn der Betrieb des Elektrowerkzeuges
in feuchter Umgebung nicht vermeidbar
ist, verwenden Sie einen Fehlerstrom-
schutzschalter. Der Einsatz eines Fehler-
stromschutzschalters vermindert das Risiko
eines elektrischen Schlages.
3. SICHERHEIT VON PERSONEN
a) Seien Sie aufmerksam, achten Sie darauf,
was Sie tun, und gehen Sie mit Vernunft
an die Arbeit mit einem Elektrowerk-
zeug. Benutzen Sie kein Elektrowerk-
pages BR2-7.2LiHD.indd 15 9.11.2011 г. 09:43:13 ч.

16
DE
BR2 7.2Li HD
zeug, wenn Sie müde sind oder unter
dem Einfluss von Drogen, Alkohol oder
Medikamenten stehen. Ein Moment der
Unachtsamkeit beim Gebrauch des Elektro-
werkzeuges kann zu ernsthaften Verletzun-
gen führen.
b) Tragen Sie persönliche Schutzausrüs-
tung und immer eine Schutzbrille. Das
Tragen persönlicher Schutzausrüstung, wie
Staubmaske, rutschfeste Sicherheitsschu-
he, Schutzhelm oder Gehörschutz, je nach
Art und Einsatz des Elektrowerkzeuges, ver-
ringert das Risiko von Verletzungen.
c) Vermeiden Sie eine unbeabsichtigte In-
betriebnahme. Vergewissern Sie sich,
dass das Elektrowerkzeug ausgeschaltet
ist, bevor Sie es an die Stromversorgung
und/oder den Akku anschließen, es auf-
nehmen oder tragen. Wenn Sie beim Tra-
gen des Elektrowerkzeuges den Finger am
Schalter haben oder das Gerät eingeschaltet
an die Stromversorgung anschließen, kann
dies zu Unfällen führen.
d) Entfernen Sie Einstellwerkzeuge oder
Schraubenschlüssel, bevor Sie das Elek-
trowerkzeug einschalten. Ein Werkzeug
oder Schlüssel, der sich in einem drehenden
Geräteteil befindet, kann zu Verletzungen
führen.
e) Vermeiden Sie eine abnormale Körper-
haltung. Sorgen Sie für einen siche-
ren Stand und halten Sie jederzeit das
Gleichgewicht. Dadurch können Sie das
Elektrowerkzeug in unerwarteten Situatio-
nen besser kontrollieren.
f) Tragen Sie geeignete Kleidung. Tragen
Sie keine weite Kleidung oder Schmuck.
Halten Sie Haare, Kleidung und Hand-
schuhe fern von sich bewegenden Tei-
len. Lockere Kleidung, Schmuck oder lange
Haare können von sich bewegenden Teilen
erfasst werden.
g) Wenn Staubabsaug- und -auffangeinrich-
tungen montiert werden können, verge-
wissern Sie sich, dass diese angeschlos-
sen sind und richtig verwendet werden.
Verwendung einer Staubabsaugung kann
Gefährdungen durch Staub verringern.
4. VERWENDUNG UND BEHANDLUNG
DES ELEKTROWERKZEUGES
a) Überlasten Sie das Gerät nicht. Verwen-
den Sie für Ihre Arbeit das dafür bestimm-
te Elektrowerkzeug. Mit dem passenden
Elektrowerkzeug arbeiten Sie besser und
sicherer im angegebenen Leistungsbereich.
b) Benutzen Sie kein Elektrowerkzeug,
dessen Schalter defekt ist. Ein Elektro-
werkzeug, das sich nicht mehr ein- oder
ausschalten lässt, ist gefährlich und muss
repariert werden.
c) Ziehen Sie den Stecker aus der Steckdo-
se und/oder entfernen Sie den Akku, be-
vor Sie Geräteeinstellungen vornehmen,
Zubehörteile wechseln oder das Gerät
weglegen. Diese Vorsichtsmaßnahme ver-
hindert den unbeabsichtigten Start des Elek-
trowerkzeuges.
d) Bewahren Sie unbenutzte Elektrowerk-
zeuge außerhalb der Reichweite von Kin-
dern auf. Lassen Sie Personen das Gerät
nicht benutzen, die mit diesem nicht ver-
traut sind oder diese Anweisungen nicht
gelesen haben. Elektrowerkzeuge sind ge-
fährlich, wenn Sie von unerfahrenen Perso-
nen benutzt werden.
e) Pflegen Sie Elektrowerkzeuge mit Sorg-
falt. Kontrollieren Sie, ob bewegliche
Teile einwandfrei funktionieren und nicht
klemmen, ob Teile gebrochen oder so
beschädigt sind, dass die Funktion des
Elektrowerkzeuges beeinträchtigt ist.
Lassen Sie beschädigte Teile vor dem
Einsatz des Gerätes reparieren. Viele Un-
fälle haben ihre Ursache in schlecht gewar-
teten Elektrowerkzeugen.
f) Halten Sie Schneidwerkzeuge scharf
und sauber. Sorgfältig gepflegte Schneid-
werkzeuge mit scharfen Schneidkanten ver-
klemmen sich weniger und sind leichter zu
führen.
g) Verwenden Sie Elektrowerkzeug, Zu-
behör, Einsatzwerkzeuge usw. entspre-
chend diesen Anweisungen. Berücksich-
tigen Sie dabei die Arbeitsbedingungen
und die auszuführende Tätigkeit. Der
Gebrauch von Elektrowerkzeugen für ande-
re als die vorgesehenen Anwendungen kann
zu gefährlichen Situationen führen.
5. SERVICE
a) Lassen Sie Ihr Elektrowerkzeug nur von
qualifiziertem Fachpersonal und nur mit
Original-Ersatzteilen reparieren. Damit
wird sichergestellt, dass die Sicherheit des
Elektrowerkzeuges erhalten bleibt.
pages BR2-7.2LiHD.indd 16 9.11.2011 г. 09:43:13 ч.

17
Originalbetriebsanleitung
DE
IV - Zusätzliche
Sicherheitshinweise
für die Arbeit mit
Akku-Bohrschraubern
▪ Beachten Sie bitte, das das Werkzeug bei ein-
gesetzter und geladener Batterie immer ein-
satzbereit ist da es unabhängig vom Stromnetz
arbeitet. Stellen Sie immer den Schalter auf die
Stellung AUS, wenn Sie die Batterie einsetzen
oder herausnehmen.
▪ Wenn es möglich ist verwenden Sie eine Klem-
me oder einen Schraubstock, um das zu bear-
beitende Material zu fixieren.
▪ Unmittelbar nach der Arbeit mit der Bohrma-
schine den Bohrer nicht berühren. Er ist sehr
heiß.
▪ Wenn Sie mit einer Bohrmaschine arbeiten,
verwenden Sie eine Schutzausrüstung, die
Schutzbrille und Gehörschutz beinhaltet. Tra-
gen Sie eine Staubschutzmaske, wenn sich
beim Bohren Staub bildet.
▪ Der Staub, der sich beim Bohren von Materia-
lien bildet, die Quarz enthalten (Siliziumdioxid),
schadet Ihrer Gesundheit. Materialien, die As-
best enthalten dürfen nicht bearbeitet werden.
▪ Das Elektrowerkzeug darf nur für den entspre-
chenden Zweck verwendet werden. Jeder an-
derer Gebrauch, der sich von dem in dieser
Gebrauchsanleitung beschriebenen Zwecken
unterscheidet, wird als inkorrekt angesehen.
Die Verantwortung für alle Schäden oder Ver-
letzungen, die von einem inkorrekten Gebrauch
verursacht werden, wird vom Verbraucher ge-
tragen und nicht vom Hersteller.
▪ Um mit diesem Elektrowerkzeug richtig zu ar-
beiten, müssen Sie die hier gegebenen Sicher-
heitshinweise, die allgemeinen Vorschriften
und Arbeitshinweise befolgen. Alle Nutzer soll-
ten diese Gebrauchsanleitung kennen und mit
den potenziellen Risiken bei der Arbeit mit die-
sem Elektrowerkzeug bekannt gemacht wer-
den. Kinder und körperlich schwache Personen
dürfen mit dem Elektrowerkzeug nicht arbeiten.
Kinder müssen unter ständiger Kontrolle sein,
wenn sie sich in der Nähe befinden und man
mit dem Elektrowerkzeug arbeitet. Es ist unbe-
dingt notwendig, dass Sie die örtlichen Unfall-
verhütungsvorschriften beachten. Das gleiche
gilt für die Vorschriften zur Arbeitssicherheit.
▪ Der Hersteller trägt keine Verantwortung für
vom Verbraucher gemachte Änderungen am
Elektrowerkzeug oder für Schäden, die von
solchen Änderungen verursacht wurden.
Sogar, wenn das Elektrowerkzeug für die entspre-
chende Zwecke verwendet wird, ist es nicht mög-
lich alle restlichen Risikofaktoren zu eliminieren.
Die unten genannten Gefahren können im Zu-
sammenhang mit den Konstruktionsbesonder-
heiten und dem Design des Elektrowerkzeugs
entstehen.
▪ Lungenprobleme, wenn man keine effektive
Staubschutzmaske verwendet.
▪ Gehörprobleme, wenn man keinen effektiven
Gehörschutz verwendet.
V - Zusätzliche
Vorschriften für
die Arbeit mit
dem Ladegerät
▪ Bevor Sie das Ladegerät verwenden, lesen Sie
bitte alle Hinweise und Warnungen, die sich an
ihm und dem Batteriesatz befinden, sowie auch
die Gebrauchshinweise für die Batterien.
▪ Laden Sie Ihre Batterien nur in geschlossenen
aber gut belüfteten Räumen.
WARNUNG: Wenn die Batterie in ir-
gendeiner Weise beschädigt wurde, setzen Sie
sie nicht in das Ladegerät ein. Es besteht die
Gefahr eines Stromschlags.
WARNUNG: Lassen Sie nicht zu, dass
Wasser in das Ladegerät eintritt. Es besteht die
Gefahr eines Stromschlags.
▪ Das Ladegerät ist nur für die Arbeit mit einer
SPARKY-Batterie, die im Lieferumfang ist,
vorgesehen. Die Anwendung jeder anderen
Batterie kann einen Brand oder Stromschlag
verursachen.
▪ Das Ladegerät und die im Lieferumfang enthal-
tene Batterie sind speziell aufeinander abge-
stimmt. Laden Sie die Batterie nicht mit einem
anderen Ladegerät.
▪ Legen Sie keine Gegenstände auf das Ladege-
rät, weil dies zu einer Überhitzung führen kann.
Lagern Sie das Ladegerät nicht in der Nähe
von Wärmequellen.
▪ Wenn Sie das Ladegerät vom Stromnetz tren-
pages BR2-7.2LiHD.indd 17 9.11.2011 г. 09:43:14 ч.

18
DE
BR2 7.2Li HD
nen wollen, ziehen Sie das Kabel nicht aus dem
Ladegerät.
▪ Legen Sie das Netzanschlusskabel des La-
degerätes so, das nicht draufgetreten werden
kann, man nicht drüber stolpert oder die Gefahr
einer Beschädigung besteht.
▪ Verwenden Sie keine Verlängerungskabel, au-
ßer wenn es unbedingt notwendig ist. Die An-
wendung eines ungeeigneten Verlängerungs-
kabels kann einen Brand oder Stromschlag
verursachen.
▪ Benutzen Sie das Ladegerät nicht, wenn es
einen starken Schlag bekommen hat, fallen
gelassen wurde oder auf sonst irgendeine
Weise beschädigt wurde. Arbeiten Sie mit dem
Ladegerät nicht, wenn sein Kabel oder die
Steckdose beschädigt sind – sie müssen sofort
gewechselt werden. Geben Sie das Ladegerät
einem autorisierten Service zur Kontrolle oder
Reparatur.
▪ Falls das Versorgungskabel beschädigt wird,
sollte der Ersatz nur durch den Hersteller oder
durch einen seiner Servicetechniker durchge-
führt werden.
▪ Nehmen Sie das Ladegerät nicht auseinander.
Für Reparaturarbeiten wenden Sie sich an
einen autorisierten Service. Eine fehlerhafte
Montage kann einen Brand oder Stromschlag
verursachen.
▪ Um das Risiko eines Stromschlags zu mindern,
vor einer Reinigung, trennen Sie das Ladege-
rät von der Stromversorgung. Die Entnahme
der Batterie selbst mindert dieses Risiko nicht.
▪ Versuchen Sie nie zwei Ladegeräte miteinan-
der zu verbinden.
▪ Lagern Sie und verwenden Sie das Ladegerät
und die Batterien nicht in Räumen, in denen die
Temperatur +40ºC oder mehr übersteigt, z.B.
Vordächer, Wohnwagen oder Metallkonstrukti-
onen im Sommer.
▪ Dieses Ladegerät ist für ein normales Strom-
netz mit einer Spannung (230-240 V) vorge-
sehen. Versuchen Sie nicht das Ladegerät an
einem Stromnetz mit anderer Versorgungs-
spannung zu betreiben.
▪ Wenn Sie eine weitere Batterie laden wollen,
trennen Sie das Ladegerät vom Versorgungs-
netz und lassen Sie es sich mindestens 15
Minuten lang abkühlen. Erst nach dieser Zeit
können Sie die nächste Batterie laden.
▪ Unter bestimmten Bedingungen, kann bei ei-
nem Ladegerät, welches im Versorgungsnetz
angeschlossen ist, ein Fremdkörper einen
Kurzschluss zwischen den offenen Kontakten
im Ladegerät verursachen. Leitfähige Materi-
alien, z.B. Stahlwolle, Alu-Folie, oder sonstige
metallische Materialien, müssen weit von den
Ladegerätöffnungen aufbewahrt werden. Tren-
nen Sie das Ladegerät immer vom Netz wenn
Sie keine Batterie aufladen.
▪ Frieren Sie das Ladegerät nicht ein oder tau-
chen Sie es nicht in Wasser oder andere Flüs-
sigkeiten ein.
VI - Zusätzliche
Vorschriften für
die Arbeit mit
den Batterien
Die Batterie für dieses Elektrowerkzeug wird nicht
voll aufgeladen geliefert. Vor dem Arbeitsbeginn
muss die Batterie voll geladen werden.
WARNUNG: Falls die Batterie Risse hat
oder auf irgendeiner anderen Weise beschädigt
ist, legen Sie sie nicht in das Ladegerät ein. Es
besteht die Gefahr eines Stromschlags.
▪ Maximale Lebensdauer und Betriebseigen-
schaften können nur erreicht werden, wenn
die Batterie bei einer Umgebungstemperatur
von 18ºC–24ºC geladen wird. Bei einer Umge-
bungstemperatur unter +4ºC oder über +40ºC
darf die Batterie nicht geladen werden. Das ist
von großer Bedeutung und ist eine Vorausset-
zung für die Verhinderung von ernsthaften Be-
schädigungen der Batterie.
▪ Während des Ladevorgangs können das La-
degerät und die Batterie warm werden. Das ist
normal und ist kein Zeichen für Probleme.
▪ Um eine Überhitzung zu verhindern, laden
Sie die Batterien nicht unter direkter Sonnen-
strahlung, wenn das Wetter heiß ist, oder in der
Nähe von Wärmequellen.
▪ Laden Sie die Batterie nicht in einer Kabine oder
einem Container. Während des Ladevorgangs
muss sich die Batterie in einem gut belüfteten
Raum befinden.
▪ Bei einer defekten Akkubatterie könnte von ihr
Elektrolyt herausfliessen, in folge dessen die
Nebenbauteile beschädigt zu werden. Prüfen
Sie die daneben eingebauten Bauteile, reinigen
Sie die Letzten und falls erforderlich ersetzen
Sie diese.
▪ Wenn die Batterie nicht normal geladen wird:
(1) Überprüfen Sie, mit Hilfe einer Lampe oder
pages BR2-7.2LiHD.indd 18 9.11.2011 г. 09:43:14 ч.
Strona jest ładowana ...
Strona jest ładowana ...
Strona jest ładowana ...
Strona jest ładowana ...
Strona jest ładowana ...
Strona jest ładowana ...
Strona jest ładowana ...
Strona jest ładowana ...
Strona jest ładowana ...
Strona jest ładowana ...
Strona jest ładowana ...
Strona jest ładowana ...
Strona jest ładowana ...
Strona jest ładowana ...
Strona jest ładowana ...
Strona jest ładowana ...
Strona jest ładowana ...
Strona jest ładowana ...
Strona jest ładowana ...
Strona jest ładowana ...
Strona jest ładowana ...
Strona jest ładowana ...
Strona jest ładowana ...
Strona jest ładowana ...
Strona jest ładowana ...
Strona jest ładowana ...
Strona jest ładowana ...
Strona jest ładowana ...
Strona jest ładowana ...
Strona jest ładowana ...
Strona jest ładowana ...
Strona jest ładowana ...
Strona jest ładowana ...
Strona jest ładowana ...
Strona jest ładowana ...
Strona jest ładowana ...
Strona jest ładowana ...
Strona jest ładowana ...
Strona jest ładowana ...
Strona jest ładowana ...
Strona jest ładowana ...
Strona jest ładowana ...
Strona jest ładowana ...
Strona jest ładowana ...
Strona jest ładowana ...
Strona jest ładowana ...
Strona jest ładowana ...
Strona jest ładowana ...
Strona jest ładowana ...
Strona jest ładowana ...
Strona jest ładowana ...
Strona jest ładowana ...
Strona jest ładowana ...
Strona jest ładowana ...
Strona jest ładowana ...
Strona jest ładowana ...
Strona jest ładowana ...
Strona jest ładowana ...
Strona jest ładowana ...
Strona jest ładowana ...
Strona jest ładowana ...
Strona jest ładowana ...
Strona jest ładowana ...
Strona jest ładowana ...
Strona jest ładowana ...
Strona jest ładowana ...
Strona jest ładowana ...
Strona jest ładowana ...
Strona jest ładowana ...
Strona jest ładowana ...
Strona jest ładowana ...
Strona jest ładowana ...
Strona jest ładowana ...
Strona jest ładowana ...
Strona jest ładowana ...
Strona jest ładowana ...
Strona jest ładowana ...
Strona jest ładowana ...
-
 1
1
-
 2
2
-
 3
3
-
 4
4
-
 5
5
-
 6
6
-
 7
7
-
 8
8
-
 9
9
-
 10
10
-
 11
11
-
 12
12
-
 13
13
-
 14
14
-
 15
15
-
 16
16
-
 17
17
-
 18
18
-
 19
19
-
 20
20
-
 21
21
-
 22
22
-
 23
23
-
 24
24
-
 25
25
-
 26
26
-
 27
27
-
 28
28
-
 29
29
-
 30
30
-
 31
31
-
 32
32
-
 33
33
-
 34
34
-
 35
35
-
 36
36
-
 37
37
-
 38
38
-
 39
39
-
 40
40
-
 41
41
-
 42
42
-
 43
43
-
 44
44
-
 45
45
-
 46
46
-
 47
47
-
 48
48
-
 49
49
-
 50
50
-
 51
51
-
 52
52
-
 53
53
-
 54
54
-
 55
55
-
 56
56
-
 57
57
-
 58
58
-
 59
59
-
 60
60
-
 61
61
-
 62
62
-
 63
63
-
 64
64
-
 65
65
-
 66
66
-
 67
67
-
 68
68
-
 69
69
-
 70
70
-
 71
71
-
 72
72
-
 73
73
-
 74
74
-
 75
75
-
 76
76
-
 77
77
-
 78
78
-
 79
79
-
 80
80
-
 81
81
-
 82
82
-
 83
83
-
 84
84
-
 85
85
-
 86
86
-
 87
87
-
 88
88
-
 89
89
-
 90
90
-
 91
91
-
 92
92
-
 93
93
-
 94
94
-
 95
95
-
 96
96
-
 97
97
-
 98
98


Sparky Group BR2 7,2 Li HD Instrukcja obsługi
- Typ
- Instrukcja obsługi
w innych językach
Powiązane dokumenty
-
Sparky Group GUR 10.8 Li HD Instrukcja obsługi
-
-
Sparky Group BUR2 18Li HD Instrukcja obsługi
-
-
-
-
-
-
Sparky Group BPR 15Li Instrukcja obsługi
-
Inne dokumenty
-
Ingersoll-Rand IQV20 W7152P Instrukcja obsługi
-
Skil 2770 Instrukcja obsługi
-
Skil 2712MA Instrukcja obsługi
-
-
Bort BSM-250 Instrukcja obsługi
-
Skil 2321 AB Instrukcja obsługi
-
-
Ferm CDM1129 Instrukcja obsługi
-
-
Defort DED-250N Instrukcja obsługi