Strona się ładuje...

Produkt zgodny z normami: EN71, EN62115, ASTM F963
Product complies with: EN71, EN62115, ASTM F963
Produkt konform mit den Normen: EN71, EN62115, ASTM F963
INSTRUKCJA UŻYTKOWANIA/
USER MANUAL/
BEDIENUNGSANLEITUNG
POJAZD AKUMULATOROWY
BATTERY OPERATED RIDE-ON CAR
BATTERIEBETRIEBENES FAHRZEUG
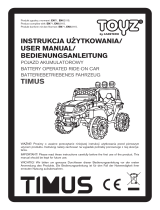
DODGE CHARGER
WAŻNE! Prosimy o uważne przeczytanie niniejszej instrukcji użytkowania przed pierwszym
użyciem produktu. Instrukcję należy zachować na wypadek potrzeby ponownego z niej skorzys-
tania.
IMPORTANT! Please read these instructions carefully before the first use of the product. This
manual should be kept for future use.
WICHTIG! Wir bitten um genaues Durchlesen dieser Bedienungsanleitung vor der ersten
Anwendung des Produkts. Die Bedienungsanleitung ist für den Fall der Notwendigkeit ihrer
erneuten Nutzung aufzubewahren.

Thank you for choosing the Toyz by Caretero DODGE CHARGER battery
operated ride-on car. You bought a modern, high quality product.
We are sure it will help your child in safe, harmonious growth.
We encourage you to learn about our full offer on our website: www.toyz.pl
Should you have any remarks about this product, feel free to share them with us.
Toyz by Caretero TEAM.
Wir danken Ihnen für den Kauf des batteriebetriebenen Fahrzeugs Toyz by
Caretero DODGE CHARGER. Sie haben ein modernes Produkt von hoher
Qualität erworben.
Wir sind überzeugt, dass es Ihrem Kind Sicherheit garantiert und es bei der
harmonischen Entwicklung unterstützt. Wir laden Sie herzlich dazu ein, sich mit
unserem vollständigen Angebot auf der Website www.toyz.pl bekannt zu machen.
Außerdem nehmen wir gern Anmerkungen und Hinweise zur Nutzung unserer
Produkte entgegen.
Toyz by Caretero MANNSCHAFT.
Dziękujemy za zakup pojazdu akumulatorowego Toyz by Caretero DODGE
CHARGER.
Kupili Państwo nowoczesny produkt wysokiej jakości.
Jesteśmy przekonani, że zapewni on Państwa maluchowi bezpieczeństwo i pomoże
w jego harmonijnym rozwoju.
Zachęcamy do zapoznania się z naszą kompletną ofertą na stronie www.toyz.pl.
Czekamy również na wszelkie uwagi dotyczące użytkowania naszych produktów.
Zespół marki Toyz by Caretero.

3
PL LISTA CZĘŚCI
1. karoseria
2. przednie koło
3. podkładka
4. nakrętka
5. kołpak przedni
6. tylne koło
7. siedzisko
UWAGA: Przed złożeniem samochodu należy sprawdzić, czy w pudełku znajdują się wszystkie wymien-
ione części.
1 pc
2 pc
6 pc
4 pc
2 pc
2 pc
1 pc
8. kierownica
9. szyba
10. lusterko
11. zderzak
12. śruba
13. silnik
14. ładowarka
15. kołpak tylny
1 pc
1 pc
2 pc
1 pc
1 pc
2 pc
1 pc
2 pc
1.
2.
3.
3.
3.
4.
4.
15.
5.
6.
7.
8.
9.
10.
10.
11.
12.
13.
kołpak przeni kołpak tylny

PL DANE TECHNICZNE
akumulator
silnik
ładowarka
maksymalne obciążenie
czas użytkowania
prędkość
wiek użytkownika
PL INSTRUKCJA UŻYTKOWANIA
PL INSTRUKCJA MONTAŻU
OSTRZEŻENIA: Produkt może być złożony wyłącznie przez osobę dorosłą. Produkt nie jest odpowiedni
dla dzieci poniżej 3. roku życia. Przed pierwszym użyciem, koniecznie naładuj akumulatory do pełna
(około 10-12 godzin), w przeciwnym razie może dojść do nieodwracalnego uszkodzenia akumulatorów.
Pojazd powinien być zawsze używany pod nadzorem osoby dorosłej. Produkt zawiera małe elementy,
Pojazdu nie wolno używać w ciemności. Napotkanie przez dziecko niespodziewanych przeszkód może
być przyczyną wypadku. Pojazdu należy używać tylko w ciągu dnia lub na dobrze oświetlonym terenie.
Nie zaleca się jazdy po mokrych powierzchniach lub zboczach o nachyleniu powyżej 15 stopni. Nie
należy korzystać z pojazdu na zewnątrz w czasie opadów deszczu lub śniegu. Przed zmianą kierunku z
jazdy w przód/tył należy całkowicie zatrzymać pojazd. Regularnie sprawdzaj wszystkie połączenia kabli,
akumulatorów. Sprawdzaj wszystkie elementy pojazdu, czy nie uległy uszkodzeniu. Jeśli jakikolwiek
element pojazdu uległ uszkodzeniu, zaprzestań użytkowania pojazdu i skontaktuj się ze sprzedawcą. Jeśli
nie używasz pojazdu przez dłuższy czas, odłącz kable od akumulatorów. Bezpieczny okres użytkowania
produktu wynosi 3 lata.
4
12V 7Ah (1 sztuka)
12V 40W (2 sztuki)
wejście: AC220V, 50Hz, wyjście: DC12V 1A
30 kg
do 2 godzin po pełnym naładowaniu
2 - 6 km/h
3-8 lat
Na przednią oś nałóż kolejno:
podkładkę, przednie koło i kolejną
podkładkę. Zabezpiecz zamontowa-
ne elementy przykręcając nakrętkę.
Zamocuj przedni kołpak. Powtórz
całość po drugiej stronie pojazdu.

5
Na tylną oś nałóż kolejno: silnik,
tylne koło i podkładkę. Zabezpiecz
zamontowane elementy przykręca-
jąc nakrętkę. Zamocuj tylny kołpak.
Powtórz całość po drugiej stronie
pojazdu.
Wykręć z kierownicy śrubę i nakręt-
kę. Połącz kable wystające z karo-
serii z odpowiadającymi kablami
kierownicy. Nałóż kierownicę na
pręt wystający z karoserii jednocze-
śnie chowając kable. Zabezpiecz
całość wykręconymi wcześniej
śrubą i nakrętką.
Połącz kable świateł przedniej
szyby z odpowiadającymi kablami
wystającymi z karoserii. Schowaj
kable w otworze aby zapobiec
przerwaniu ich podczas instalacji
szyby. Dopasuj zaczepy przedniej
szyby z otworami w karoserii, doci-
śnij aby zaczepy zaklinowały się w
otworach.

6
Dopasuj boczne lusterka do odpo-
wiadających im otworów w karose-
rii. Dociśnij aby zaczepy zaklinowały
się w otworach.
Dopasuj zderzak do odpowiadają-
cych mu otworów w karoserii.
Dociśnij aby zaczepy zaklinowały
się w otworach.

7
PL FUNKCJE POJAZDU
1. Pedał gazu
2. Przełącznik świateł
3. Przycisk zmiany kierunku jazdy
4. Przycisk zmiany prędkości jazdy
5. Włącznik pojazdu
6. Panel multimedialny
7. Mikrofon megafonu
Podłącz czerwony kabel do akumulatora (a). Umieść siedzisko tak aby
przednie zaczepy pasowały do otworów w karoserii (b). Przykręć
siedzisko w tylnej części za pomocą dołączonej śruby.

8
1. Jazda do przodu
2. Jazda do tyłu
3. Przycisk zmiany szybkości
4. Przysick stop
5. Skręt w lewo
6. Skręt w prawo
7. Wskaźnik LED
8. Przycisk parowania pilota z pojazdem
PAROWANIE PILOTA Z POJAZDEM
Umieść dwie baterie AAA w pilocie zdalnego sterowania.
Upewnij się że pojazd jest WYŁĄCZONY.
Przytrzymaj przycisk parowania (8.) przez 3 sekundy. Gdy wskaźnik LED na pilocie zacznie
połyskiwać, włącz pojazd przyciskiem nznajdującym się na desce rozdzielczej.
Gdy wskaźnik LED przestanie migotać, pilot będzie sparowany z pojazdem.
PL FUNKCJE PILOTA
1.
2.
3.
4.
5.
6.
7.
8.

opis problemu prawdopodobna przyczyna rozwiązywanie problemu
pojazd nie jedzie
pojazd jedzie powoli
zbyt niskie napięcie akumulatorów
uszkodzony akumulator
naładuj akumulatory do pełna
użyj włącznika zasilania
wymień akumulator na nowy
podłącz ponownie złącza kabli
napraw lub wymień silnik
popraw montaż koła
wymień bezpiecznik na nowy
wyłączone zasilanie
niski stan akumulatorów
zużycie akumulatorów
uszkodzona ładowarka lub akumulator
ładowarka nie podłączona
akumulatory nie naładowane do pełna
zużycie akumulatorów
poluzowane okablowanie
zużycie silnika
wyładowanie baterii pilota
uszkodzenie odbiornika
uszkodzenie silnikagłośna praca pojazdu
zacinanie się podczas jazdy
akumulatory nie ładują się
krótki zasięg
odłączenie kabli
uszkodzony silnik
poluzowanie tylnego koła
przepalony bezpiecznik
uszkodzenie silnika
nierówna nawierzchnia
przeciążenie
uszkodzenie gniazda ładowania
uszkodzenie nadajnika
zakłócenia elektromagnetyczne
pilot nie działa
pojazd poza zasięgiem
naładuj akumulatory do pełna
wymień akumulatory na nowe
wymień element na nowy
podłącz ładowarkę do gniazdka
naładuj akumulatory do pełna
wymień akumulatory na nowe
podłącz ponownie okablowanie
wymień silnik na nowy
wymień baterie na nowe
wymień na nowy
napraw lub wymień silnik
wymień silnik na nowy
używaj pojazdu na równej drodze
maksymalna ładowność to 25 kg
wymień gniazdo na nowe
wymień na nowy
oddal się od pola magnetycznego
podejdź bliżej do pojazdu
9

10
UWAGI DO ŁADOWANIA AKUMULATORÓW
• Przed pierwszym użyciem pojazdu, koniecznie naładuj baterie do pełna. Zawsze podłączaj najpierw
końcówkę ładowarki do gniazda ładowania, a następnie włóż wtyczkę ładowarki do gniazdka (ładowa-
rkę
może obsługiwać wyłącznie osoba dorosła, nigdy nie pozwalaj swojemu dziecku na używanie ładowarki).
• Kiedy pojazd zaczyna tracić moc (jeździ z dużo mniejszą prędkością, niż normalnie), koniecznie
rozpocznij ładowanie akumulatorów przed całkowitym ich rozładowaniem.
Ładowanie powinno odbywać się w sposób ciągły przez 10-12 godzin. Nie należy ładować akumulatorów
dłużej niż 20 godzin.
• Normalnym zjawiskiem jest nagrzewanie się akumulatorów i ładowarki podczas ładowania (max. 60°C).
• Nigdy nie załączaj pojazdu podczas ładowania akumulatorów.
• Do ładowania używaj wyłącznie ładowarki dostarczonej z pojazdem. Nie używaj innych akumulatorów niż
te dostarczone z pojazdem.
• Nigdy nie używaj nowych i starych baterii oraz baterii różnego typu jednocześnie (zasilanie pilota).
• Akumulatory powinny być ładowane przynajmniej raz w miesiącu, także wtedy, gdy pojazd nie jest
używany. Ma to zabobiec całkowitemu rozładowaniu akumulatorów i jego potencjalnemu uszkodzeniu.
• Nigdy nie doprowadzaj do zwarcia układu elektrycznego.
• Gniazdo zasilania znajduje się w karoserii nad pedałem gazu.
• Podczas ładowania PRZEŁĄCZNIK ZASILANIA
powinien znajdować się w pozycji OFF.
ZAPOBIEGANIE POŻAROWI I PORAŻENIU PRĄDEM:
• NIGDY nie dokonuj zmian w instalacji elektrycznej.
Manipulowanie przy instalacji elektrycznej może
spowodować porażenie prądem, pożar lub wybuch, a
także trwale uszkodzić instalację.
• Nie dopuszczaj do bezpośredniego kontaktu pomiędzy
zaciskami. Może to wywołać pożar lub wybuch.
• Nie dopuszczaj do kontaktu baterii lub ich części z
jakimikolwiek płynami.
• Ładowarki nie należy otwierać. Nieosłonięte przewody i
obwody elektryczne wewnątrz obudowy mogą
spowodować porażenie prądem.
• Hermetyczny akumulator kwasowo-ołowiowy należy poddać recyklingowi lub składować w sposób
przyjazny dla środowiska.
• Nie należy wrzucać akumulatora kwasowo-ołowiowego do ognia. Może dojść do wybuchu lub wycieku.
• Nie należy wyrzucać akumulatora kwasowo-ołowiowego do zwykłego śmietnika. Spalanie, składowanie
lub mieszanie hermetycznych akumulatorów kwasowo-ołowiowych z odpadami komunalnymi jest
niezgodne z prawem.
• Oddaj zużyty akumulator do lokalnego autoryzowanego punktu recyklingu akumulatorów
kwasowo-ołowiowych, na przykład do sprzedawcy akumulatorów samochodowych.
• Aby uzyskać więcej informacji na temat przyjaznego środowisku recyklingu i utylizacji akumulatorów
kwasowo-ołowiowych, skontaktuj się z lokalnymi organami odpowiedzialnymi za gospodarowanie
odpadami.
• Akumulator może ładować wyłącznie osoba dorosła. Przed użyciem należy naładować baterię!
PL ŁADOWANIE AKUMULATORA
PL UTYLIZACJA AKUMULATORA
Gniazdo
ładowania

11
8. steering wheel
9. windscreen
10. rearview mirror
11. bumper
12. screw
13. motor
14. charger
15. rear hubcap
1 pc
2 pc
6 pc
4 pc
2 pc
2 pc
1 pc
1 pc
1 pc
2 pc
1 pc
1 pc
2 pc
1 pc
2 pc
EN LIST OF PARTS
1. vehicle body
2. front wheels
3. washer
4. nut
5. front hubcap
6. rear wheel
7. seat
WARNING: Before assembling the car, check that all the parts listed are in the box.
1.
2.
3.
3.
3.
4.
4.
15.
5.
6.
7.
8.
9.
10.
10.
11.
12.
13.
front hubcap rear hubcap

EN TECHNICAL DATA
battery
engine
charger
maximum load
time of use
speed
age of use
EN INSTRUCTIONS FOR USE
EN ASSEMBLY INSTRUCTIONS
WARNINGS: Product may only be assembled by an adult. The product is not suitable for children under
3 years of age. Before the first use, be sure to fully charge the batteries (about 10-12 hours), otherwise
the batteries may be irreparably damaged.
The vehicle should always be used under adult supervision. The product contains small parts, The
vehicle must not be used in the dark. If a child encounters unexpected obstacles, it may cause an
accident. The vehicle should only be used during the day or in well-lit areas. Driving on wet surfaces or
slopes greater than 15 degrees is not recommended. Do not use your vehicle outdoors in rain or
snowfall. The vehicle must be brought to a complete stop before changing direction from forward /
reverse. Regularly check all connections of cables and batteries. Check all vehicle components for
damage. If any part of the vehicle is damaged, stop using the vehicle and contact your dealer. If you are
not using the vehicle for a long time, disconnect the cables from the batteries. The safe working life of
the product is 3 years.
12
12V 7Ah (1 piece)
12V 40W (2 pieces)
input: AC220V, 50Hz, output: DC12V 1A
30 kg
up to 2 hours when fully charged
2 - 6 km/h
3-8 years
Put on the front axle in sequence:
washer, front wheel and another
washer. Secure the mounted
elements by screwing the nut.
Attach the front cap. Repeat on the
other side of the vehicle.

13
Put on the rear axle in sequence:
engine, rear wheel and washer.
Secure the mounted elements by
screwing the nut. Attach the rear
hubcap. Repeat on the other side
of the vehicle.
Remove the bolt and nut from the
steering wheel. Connect the cables
coming out of the body with the
corresponding cables of the
steering wheel. Put the steering
wheel on the rod protruding from
the body while hiding the cables.
Secure everything with the previo-
usly removed bolt and nut.
Connect the wires of the wind-
shield lights to the corresponding
wires extending from the body.
Hide the cables in the opening to
prevent them from breaking when
installing the glass. Match the
hooks of the windshield with the
holes in the bodywork, press so
that the hooks are wedged in the
holes.

14
Align the side mirrors with the
corresponding holes in the body-
work. Press down so that the tabs
are wedged in the holes.
Align the bumper with the corre-
sponding holes in the bodywork.
Press down so that the tabs are
wedged in the holes.

15
PL FUNKCJE POJAZDU
Connect the red cable to the battery (a). Position the seat so that the
front hooks fit into the holes in the body (b). Screw the seat on the
back with the supplied screw.
1. Accelerator pedal
2. Light switch
3. Driving direction change button
4. Driving speed change button
5. Vehicle switch
6. Multimedia panel
7. Megaphone microphone

16
1. Drive forward
2. Reverse driving
3. Speed change button
4. Press stop
5. Turn left
6. Right turn
7. LED indicator
8. Button for pairing the remote control with the vehicle
PAIRING THE REMOTE CONTROL WITH THE VEHICLE
Place two AAA batteries in the remote control.
Make sure the vehicle is turned OFF.
Hold the pairing button (8.) for 3 seconds. When the LED indicator on the remote
control flashes, turn on the vehicle using the n button on the dashboard.
When the LED indicator stops flashing, the remote control will be paired with the
vehicle.
EN REMOTE FUNCTIONS
1.
2.
3.
4.
5.
6.
7.
8.

EN TROUBLESHOOTING
wyładowanie baterii pilota
uszkodzenie odbiornika
uszkodzenie nadajnika
zakłócenia elektromagnetyczne
pilot nie działa
pojazd poza zasięgiem
wymień baterie na nowe
wymień na nowy
wymień na nowy
oddal się od pola magnetycznego
podejdź bliżej do pojazdu
17
problem description probable cause solution
the car is not moving
the car is moving slowly
low battery voltage
damaged battery
charge the batteries fully up
turn the car on with the power switch
replace the battery with a new one
connect the cables back up
repair or replace the motor
adjust the rear wheel
replace the fuse with a new one
power is off
low battery voltage
batteries worn out
AC adapter or battery damaged
AC adapter not connected
batteries not fully charged
worn out
loose cables
damaged motor
RC batteries depleted
receiver damaged
damaged motor loud noises
jamming during driving
batteries do not charge up
short range
cables disconnected
damaged motor
rear wheel loose
blown fuse
damaged motor
uneven terrain
overloading
charging socket damaged
transmitter damaged
electromagnetic interference
RC not working
car out of range
charge the batteries fully up
replace the battery with a new one
replace with new one
connect the plug into a socket
charge the batteries fully up
replace the battery with a new one
connect the cables back together
repair or replace the motor
replace batteries with new
replace the receiver unit
repair or replace the motor
repair or replace the motor
use the car on flat surfaces
max. user weight is 25 kg
replace the socket with new one
replace the RC
move away from the EMI source
stand closer to the car

18
BATTERY CHARGING NOTES
• Before first use of the car, charge the batteries up fully. Always insert the adapter's tip into the socket in
the car first and then put the plug into the socket (the charging process should be always carried out by
an adult, never allow your child to use the AC adapter).
• When the car begins to lose power (moves much slower than usual), charge the batteries before they
become completely depleted.
Battery charging should last about 10-12 hours. Do not charge the batteries for a period longer than 20
hour.
• It is typical, that the adapter and the batteries become hot during the charging process (max 60°C).
• Never turn the car ON while charging the batteries. The POWER SWITCH must be turned in OFF
position when charging.
• Always use the AC adapter included with the car. Never use other batteries than those supplied with
the car.
• The batteries need to be charged at least once a month, even when the car is not being used. This is to
prevent from fully discharging and potential damaging the batteries.
• Never short-circuit the power layout.
• PREVENT FIRE AND ELECTRIC SHOCK:
• Use the only rechargeable battery and charger
supplied with your vehicle. NEVER substitute the
battery or the charger with another brand. Using
another battery or charger my cause a fire or explosion.
• Do not use the battery or charger for any other
product. Overheating, fire or explosion could occur.
• NEVER modify the electric circuit system. Tampering
with the electric system may cause a shock, fire or
explosion or my permanently damage the system.
• Do not allow direct contact between battery terminals.
Fire or explosion can occur.
• Do not allow any type of liquid on the battery or its
components.
• Do not open the battery. Battery contains lead acid
and other materials that are toxic and corrosive.
EN BATTERY CHARGING
EN DISPOSAL OF BATTERY
• Your sealed lead-acid battery must be recycled or disposed of in an environmentally sound manner.
• Do not dispose of your lead-acid battery in a fire. The battery may explode or leak.
• Do not dispose of a lead-acid battery in your regular, household trash. The incineration, land filling or
mixing of sealed lead-acid batteries with household trash is prohibited by law.
• Return an exhausted battery to your local approved lead-acid battery recycle, such as a local seller of
automotive batteries.
• Contact your local waste management officials for other information regarding the environmentally
sound recycling and disposal of lead-acid batteries.
• The battery must be charged only by adult. Please charge the product before using!

19
1.
2.
3.
3.
3.
4.
4.
15.
5.
6.
7.
8.
9.
10.
10.
11.
12.
13.
Vorderrad Radkappe hintere Kappe
DE LISTE DER TEILE
1. Karosserie
2. Vorderrad
3. Unterlegscheibe
4. Mutter
5. Vorderrad Radkappe
6. Hinterrad
7. Sitzplatz
HINWEIS: Bitte überprüfen Sie vor dem Zusammenbau des Fahrzeugs, ob alle aufgeführten Teile im
Karton enthalten sind.
1 pc
2 pc
6 pc
4 pc
2 pc
2 pc
1 pc
8. Lenkrad
9. Glas
10. Spiegel
11. Stoßstange
12. Schraube
13. Motor
14. Ladegerät
15. hintere Kappe
1 pc
1 pc
2 pc
1 pc
1 pc
2 pc
1 pc
2 pc

12V 7Ah (1 Stück)
12V 40W (2 Stück)
Eingang: AC220V, 50Hz, Ausgabe: DC12V 1A
30 kg
bis zu 2 Stunden nach voll aufladen
2 - 6 km/h
3-8 Jahre
DE TECHNISCHE DATEN
batterie
motor
AC-Ladegerät Eingang
maximale Belastung
Betriebszeit nach dem Laden der Batterie
Geschwindigkeit
Alter des Nutzers
DE WARNUNGEN
DE INSTALLATIONSANLEITUNG
WARNUNGEN: Das Produkt darf ausschließlich von erwachsenen Personen zusammengesetzt werden.
Das Produkt ist für Kinder unter dem 3. Lebensjahr nicht geeignet. Vor der ersten Nutzung sind die
Batterien unbedingt vollständig zu laden (etwa 10–12 Stunden), andernfalls kann es zu einer unumkehr-
baren Beschädigung der Batterien kommen. Das Fahrzeug darf nur unter Aufsicht eines Erwachsenen
genutzt werden. Das Fahrzeug darf nicht in der Nähe von Treppen / öffentlichen Straßen / Fahrzeugen
oder an anderen Gefahrenstellen genutzt werden. Das Fahrzeug darf nur von einem Kind gleichzeitig
genutzt werden. Das Maximalgewicht des Nutzers beträgt 100 kg.
Während der Nutzung des Fahrzeugs muss das Kind auf dem Sitz sitzen. Ein Aufstehen während der
Fahrt muss verhindert werden. Während der Fahrt darf der Hebel zur Richtungsänderung nach
vorn /nach hinten nicht plötzlich betätigt werden. Es sind regelmäßig alle Kabelverbindungen und
Batterien zu überprüfen. Prüfen Sie alle Fahrzeugelemente auf Beschädigungen. Sollte irgendein
Element des Fahrzeugs beschädigt sein, dann ist die Nutzung sofort einzustellen und der Verkäufer zu
kontaktieren. Wird das Auto über längere Zeit nicht genutzt, sollten die Kabel von den Batterien
abgeklemmt werden. Der sichere Nutzungszeitraum des Produkts beträgt 3 Jahre.
20
Auf die Vorderachse der Reihe
nach aufsetzen: Unterlegscheibe,
Vorderrad und eine weitere Unterle-
gscheibe. Sichern Sie die montier-
ten Elemente durch Aufschrauben
der Mutter. Bringen Sie die vordere
Kappe an. Auf der anderen Fah-
rzeugseite wiederholen.
1/30