
I www.russellhobbs.com
28270-56
r
GB
DE
FR
NL
IT
ES
PT
DK
SE
NO
FI
RU
CZ
SK
PL
HR
SI
GR
HU
TR
RO
BG
AE
UA

2
e
f
g
j
h
A
h
B
i
h
E
k
h
C
h
D

3
Read the instructions, keep them safe, pass them on if you pass the appliance on. Remove all packaging before use.
IMPORTANT SAFEGUARDS
Follow basic safety precautions, including:
This appliance can be used by children aged from 8 years and above and persons with reduced physical,
sensory or mental capabilities or lack of experience and knowledge if they have been supervised/instructed
and understand the hazards involved. Children shall not play with the appliance. Cleaning and user
maintenance shall not be done by children unless they are older than 8 and supervised. Keep the appliance
and cable out of reach of children under 8 years.
If the cable is damaged, it must be replaced by the manufacturer, its service agent, or someone similarly
qualied, to avoid hazard.
Don’t immerse the appliance in liquid.
h The surfaces of the appliance will get hot.
The control panel must be removed before washing the cooking pot. Dry the cooking pot thoroughly before
using the appliance again.
b Do not use this appliance near bathtubs, showers, basins or other vessels containing water.
• Leave a space of at least 50 mm all round the appliance.
• Use extreme caution when moving the appliance when it contains hot food or hot liquids.
• Use oven gloves or similar protection when removing the lid. Beware of escaping steam when removing the lid.
• Do not use this appliance outdoors.
• Don’t cover the appliance or put anything on top of it.
• Unplug the appliance when not in use, before moving and before cleaning.
• Don’t use accessories or attachments other than those we supply.
• Don’t use the appliance for any purpose other than those described in these instructions.
• Don’t operate the appliance if it’s damaged or malfunctions.
• Don’t place the cooking pot on any surface aected by heat. Always place the pot onto a trivet or heat-proof mat.
• The base of the cooking pot has a rough surface and can leave scratches or other marks on delicate or polished surfaces. Always place protective
padding under the cooking pot to protect these types of surface.
HOUSEHOLD USE ONLY
PARTS
1. Glass lid
2. Cooking pot
3. Handles
4. Control panel
5. Steaming rack
6. Roasting rack
BEFORE USING FOR THE FIRST TIME
Remove any packaging material and labels. Wash the removable parts in warm soapy water, rinse well, drain, and air dry.
CONTROLS
The following table give a brief description of the control panel functions.
Keep Warm Selects the keep warm mode. Roast Selects the roast mode.
Steam Selects the steamer mode. Sous Vide Selects the sous vide mode.
Rice Selects the rice cooking mode. Temperature Used to select temperature values for adjustment.
Boil Selects the boil mode. Time Used to select time values for adjustment.
Sear Selects the sear mode.
u d
Used to increase/decrease temperature or time values.
Slow Cook High Used to select the slow cooker high
setting mode.
I/O Used to start or stop the appliance.
Slow Cook Low Used to select the slow cooker low setting
mode.
GB
DE
FR
NL
IT
ES
PT
DK
SE
NO
FI
RU
CZ
SK
PL
HR
SI
GR
HU
TR
RO
BG
AE
UA

4
ASSEMBLY
The control panel can be removed when you are serving food or for when you are cleaning the unit.
To t:
With the plug removed from the power socket, slide the conrtol panel into the front of the cooking pot (g. A).
To remove:
Remove the mains plug from the power socket and then slide the control panel out from the cooking pot.
TEMPERATURE UNITS
To switch back and forth between °F and °C hold the Temperature button for 3 seconds.
COOKING FUNCTIONS
Sear: Use your multicooker to sauté, sear and fry.
Roast: Perfect for roast joints using the included roasting rack.
Sous Vide: Sous-vide is a method of cooking food inside a sealed pouch in a water bath at an accurately regulated temperature. Sealing the food in
pouches retains the juices and subtle avours that would otherwise be lost during conventional cooking.
Slow Cook: Perfect for casseroles, soups, stews, and combinations of meats and vegetables.
Steam: Steam vegetables, sh, etc. using the included steaming rack.
Rice: Make perfect rice automatically.
Boil: Use for boiling ingredients, making soups, making pasta etc.
Keep Warm: Allows you to keep cooked food warm before serving.
SEAR
1. Plug in the appliance. The main control display will ash “----”. This indicates that the heat is o and the appliance is ready to be programmed.
2. Press the Sear button.
3. The display will ash and show a default time of 30 minutes.
4. To adjust the cooking time, use the u and d buttons. The maximum cooking time is 1 hour.
5. Press the I/O button. The display will stop ashing and the cooking pot will start to heat up.
6. When the temperature of the unit reaches approx. 220°C the time will begin to count down.
7. Add butter, oil, etc. to the cooking pot and use it in the same way as you would use a frying pan.
8. When nished, press the I/O button.
9. Unplug the appliance when not in use and always allow it to completely cool before cleaning and storing.
• Do not use the lid when using the sear function.
ROAST
1. Place the roasting rack into the cooking pot and add the ingredients (g. B).
2. Plug in the appliance. The main control display will ash “----”. This indicates that the heat is o and the appliance is ready to be programmed.
3. Press the Roast button.
4. The display will change to the default temperature of 204°C. To change the temperature, use the u and d buttons. The range is approx. 65 to 215°C.
5. Next, press the Time button. The default cooking time is 1 hour 30 minutes. To adjust the cooking time, use the u and d buttons. The maximum
cooking time is 20 hours.
6. Once you have set the temperature and time, press the I/O button. The display will stop ashing and cooking will start.
• When the cooking time has ended, the unit will beep three times and automatically switch to the keep warm setting. The display will ash and start
counting up from zero (00:00) to 4 hours (04:00).
• After the keep warm setting has been on for 4 hours, the unit will stop heating and return to the default display: “----”.
• Note: Do not keep foods on the keep warm setting for more than 4 hours.
• Unplug the appliance when not in use and always allow it to completely cool before cleaning and storing.
Tips
• The approximate maximum capacity for roasting is a 1.8–2.2 kg. chicken or a 1.3–1.8 kg. roast.
• If you desire the deeper avor of browned meat use the Sear function before roasting to brown the meat.
• Always roast with the lid on. Open the lid as little as possible to ensure even cooking and to keep heat from escaping.
• Using a meat thermometer can help signicantly improve and give a more accurate end result.
SOUS VIDE
For Sous Vide cooking you will need a bag or pouch to put the ingredients into from which you can remove as much of the air as possible, and then seal.
PREPARATION
Place the ingredients into your chosen bag or pouch. Use one bag per portion. Try to keep portions similar in size. Before sealing the bag, you need to
remove as much air out of it as possible.
For ‘Zipper lock’ style bags:
1. Hand Method (g. D)

5
Place the bag onto a at surface and, using your hand, carefully push out as much of the air from the bag as you can. Be careful not to squash or damage
the ingredients when you do this. Then, close the seal on the bag.
2. Water Immersion Method (g. E)
Fill a container big enough to hold the zip bag and ingredients with cold water. Put the ingredients into the bag and close the seal almost all of the way
just leaving a small opening at one corner. Slowly push the bag into the water leaving the unsealed corner sticking up out of the water. When you do this,
make sure than no water accidentally enters the bag. As you immerse the bag, the water will push almost all of the remaining air out. Finally, seal the
corner and remove the bag from the container.
For Silicon bags:
Follow the instructions provided by the manufacturer of the bag.
For Vacuum pack machines:
A purpose made vacuum sealer suitable for food use is perfect for sous vide cooking. Use the correct bags as recommended by the manufacturer, and
follow the instructions that come with the machine.
USING THE SOUS VIDE MODE
1. Add hot water and ll the cooking pot to approximately half way. Use water from the hot water tap (not boiling). Try and get the temperature of the
water as close as you can to the temperature you are cooking at as this will cut down any unnecessary waiting time. Use a mixture of hot and cold
water as required. If the water that you put in the cooker is at a temperature that is very dierent from the temperature you will be cooking at, the
appliance will take a lot longer to either heat the water up or cool it down to the selected temperature.
2. Plug in the appliance. The main control display will ash “----”. This indicates that the heat is o and the appliance is ready to be programmed.
3. Put the bagged food into the cooking pot ensuring that it is fully submerged. Add additional water if needed.
4. Cover with the glass lid.
5. Press the Sous Vide button.
6. The default cooking temperature is set at 57°C. To change the temperature, use the u and d buttons. The range is approx. 38 to 96°C.
7. Next, press the Time button. The default cooking time is 1 hour. To adjust the cooking time, use the u and d buttons. The maximum cooking time
is 20 hours.
8. Press the I/O button. The display will stop ashing and the cooking pot will start to heat up.
9. At this point the water will start heating up to the target temperature. The amount of time that takes varies. The bagged food can stay in the water
during the heating up time as long as the set temperature is 55°C or above. The cooking cycle timer will only begin to count down once the water
has reached the target temperature.
• When the cooking time has ended, the unit will beep three times and automatically switch to the keep warm setting. The display will ash and start
counting up from zero (00:00) to 4 hours (04:00).
• After the keep warm setting has been on for 4 hours, the unit will stop heating and return to the default display: “----”.
• Note: Do not keep foods on the keep warm setting for more than 4 hours.
• Unplug the appliance when not in use and always allow it to completely cool before cleaning and storing.
Finishing Steps
Some foods can be eaten straight after cooking. For steaks and other meats, searing after cooking is essential for the best avour and texture.
• Use your multicooker’s Sear function to sear the edges and sides of the meat to your preference (up to 2 minutes per side).
NOTES ON COOKING TIMES AND FOOD SAFETY
To minimise the risks of illness due to improperly cooked food, please note the following :
• Cooking food at the right temperature and for the correct length of time will ensure that any harmful bacteria are killed. Always check the advice on
food packaging and follow the cooking instructions provided.
• For food safety reasons, food cooked below 55ºC (e.g. steak) should not be cooked for longer than 2 hours and must be seared on the outside.
• Fish is often cooked at temperatures lower than 55ºC and if you intend to do this, it is important that you buy sh that is classed as Sushi grade (i.e.
sh that can be eaten raw).
• Do not take meat out early. Let it cook at least for the minimum length of time on the chart at the correct temperature.
• It is OK to leave meat in longer than the minimum time range. Fish is the exception to this rule. Fish will get mushy if overcooked using the sous vide
function.
• Always check that food is correctly cooked through (e.g. for pork, poultry, etc. till the juices run clear). Cook sh till the esh is opaque throughout.
• Adding chilled ingredients straight from the refrigerator can rapidly decrease the temperature of the water and therefore add signicantly to the
overall cooking time. In a similar way, adding a lot of ingredients to the cooking pot can also lower the water temperature.
Sous Vide Cooking GUIDE Table
Food Temperature
Time (hours)
Notes
min. max.
Beef steaks (llet, ribeye, sirloin,
rump, etc.)
Medium rare: 56ºC 1 1 ½
Timings based on a 200 - 250 g portion.Medium: 60ºC 1 ½ 2
Well done: 68ºC 2 2 ½
Lamb, veal, duck, venison, etc.
(cutlets, loin, steaks, etc.)
Pink: 56ºC 1 ½ 3 ½
Timings based on a 200 - 250 g portion.
Well done: 68ºC 2 4
Pork (chops, llet, loin, etc.)
Juicy/tender: 63ºC 1 ½ 3
Timings based on a 200 - 250 g portion.
Well done: 70ºC 3 5
Chicken breast
Juicy/tender: 60ºC 1 ½ 3
Timings based on a 200 - 250 g portion.
Well done: 70ºC 2 4
GB
DE
FR
NL
IT
ES
PT
DK
SE
NO
FI
RU
CZ
SK
PL
HR
SI
GR
HU
TR
RO
BG
AE
UA

6
Food Temperature
Time (hours)
Notes
min. max.
Chicken leg, wing, thigh
Juicy/tender: 63ºC 3 ½ 5 ½
Well done: 72ºC 4 ½ 6 ½
Fish, (salmon, cod, etc.)
Soft, aky 55ºC 1 2
Timings based on a 150 - 200 g portion.
Firm, well cooked 65ºC 1 ½ 2 ½
Root vegetables (carrots, swede,
celeriac, etc.)
80ºC 4 6 Cut into even sized pieces, 15-20 mm in size.
SLOW COOKING
THE BENEFITS OF SLOW COOKING
• Health: The gentle cooking action reduces damage to vitamins and retains more of the nutrients and avours.
• Economy: Long, slow cooking can tenderise the cheaper, tougher cuts of meat, and uses about a quarter of the power of the small ring on the
average hob.
• Convenience: Prepare the ingredients the night before, put them in the slow cooker before you leave, and have a delicious meal waiting for you
when you get home.
USING THE SLOW COOKING MODE
1. Add the ingredients to the cooking pot and cover with the glass lid.
2. Plug in the appliance. The main control display will ash “----”. This indicates that the heat is o and the appliance is ready to be programmed.
3. Press the Slow Cook High or Slow Cook Low button as desired.
4. The display will show a ashing default time. For the low setting, the default cooking time is 8 hours and for the high setting the default time is 4
hours. To adjust the cooking time, use the u and d buttons. The maximum cooking time is 20 hours.
5. Press the I/O button to begin cooking. The display will stop ashing and the “:“ between the numbers will ash, indicating the unit is cooking.
• When the cooking time has ended, the unit will beep three times and automatically switch to the keep warm setting. The display will ash and start
counting up from zero (00:00) to 4 hours (04:00).
• After the keep warm setting has been on for 4 hours, the unit will stop heating and return to the default display: “----”.
• Note: Do not keep foods on the keep warm setting for more than 4 hours.
• Unplug the appliance when not in use and always allow it to completely cool before cleaning and storing.
Making Adjustments During Cooking
You may adjust the time during the cooking cycle by pressing the u and d buttons. After 3 seconds of no buttons being pressed, the numbers will stop
ashing and the new time for cooking will begin.
GENERAL TIPS
• Keep in mind that ingredients used straight from the fridge can increase the cooking time.
• Try not to open the lid unnecessarily during cooking. A lot of heat can escape when you do this and it can take your multi cooker a long time to
recover.
• When testing a dish to see if it’s cooked, don’t forget that root vegetables usually take longer to cook.
• Thaw frozen food completely before adding it to the cooking pot.
• Pre-browning meat beforehand is not strictly necessary but can help seal in the moisture and add depth to the avour. Use your multi cooker’s sear
function to brown meat.
• Store ingredients prepared beforehand (e.g. the night before) in containers in the fridge. Don’t put the multi cooker or the cooking pot into the
fridge.
• When cooking with rice, use at least 150ml (¼ pt) of cooking liquid for each 100g (4 oz) of rice.
• Pasta isn’t suitable for slow cooking, it becomes too soft. If your recipe requires pasta, it should be pre-cooked and then stirred in 30-40 minutes
before the end of the cooking time.
• After all the ingredients are put into the cooking pot, it shouldn’t be more than about three quarters full. If you overll, it may spit hot liquid or
overow during use.
• If the nished dish is too liquid, it can be thickened using a little cornour, arrowroot, etc. For each 250-300 ml of liquid, mix together 2 tbsp of
cornour with enough water to form a thin paste. Add the paste to the dish approx. 30-45 minutes before the end of cooking. Alternatively, stir in
ready-made gravy granules following the manufacturer’s instructions.
COOKING GUIDELINES
Vegetables
Slow cooking is ideal for vegetables. There’s little evaporation, so all the juices and avours are retained.
Root vegetables like potato, carrot, turnip, and swede, need more slow cooking than meat. Cut them into bite-size pieces and immerse in the cooking
liquid. Place the vegetables as close to the bottom of the pot as possible.
Quickly cooked vegetables, like peas and sweetcorn, should be added half an hour before the end of cooking.

7
Pulses (Beans, Peas and Lentils)
Some dried pulses (lentils, peas, etc.) may need soaking before use. Always check any recommendations on the packaging before using.
WARNING dried beans (e.g. red kidney beans, cannellini, etc.) should be soaked for a minimum of 8 hours and boiled for at least 10 minutes before adding
to the slow cooker. They’re poisonous if eaten raw or undercooked.
Meat and Poultry
• Slow cooking tenderises cheaper cuts, and reduces shrinkage and evaporation, retaining avour and nutritional value. The leanest cuts of meat are
best for slow cooking.
• Trim excess fat from the meat because this can add to the liquid during cooking in the form of fat.
• Where possible, use chicken without skin.
• Cut the meat into evenly sized cubes (approx. 2.5 cm) for casseroles and stews.
CONVERTING RECIPES FROM A TRADITIONAL OVEN
These times are approximate and can vary depending on the ingredients and quantities. Always check that the food is thoroughly cooked before serving.
Oven cooking time (minutes) Time on low (hours) Time on high (hours)
15-30 4-6 1-2
30-60 6-8 2-4
60-180 8-12 4-7
STEAM
1. Fill the cooking pot with water to a depth of approx. 2 - 2.5 cm. This will give you approx. 30 minutes of steaming. Don’t add too much water
otherwise the ingredients will be submerged.
2. Place the steaming rack into the cooking pot (g. C). Add ingredients such as fresh vegetables cut to a uniform size to the cooking pot and cover with
glass lid.
3. Plug in the appliance. The main control display will ash “----”. This indicates that the heat is o and the appliance is ready to be programmed.
4. Press the Steam button.
5. The display will ash and show a default time of 30 minutes. To adjust the cooking time, use the u and d buttons. The maximum cooking time is 2
hours.
6. Press the I/O button. The display will stop ashing and the cooking pot will start to heat up.
7. When the temperature of the unit reaches 100°C the time will begin to count down.
8. When the cooking time has ended, the unit will stop heating and return to the default display: “----”.
Tip
• Keep an eye on fresh vegetables and don’t overcook. Aim for brightly colored and slightly softened but not limp. Refer to your recipe for precise
times.
Suggested Steaming Times
These foods are best cooked using your steamer from cold.
Food (fresh) Notes Time (minutes)
Broccoli Cut into 1-2 cm orets/pieces 13-15
Green Beans Lay at on the steaming rack 13-15
Carrots Sliced approx. 1 cm thick 17-19
Cabbage (savoy) Shred or cut into pieces 11-13
Asparagus Lay at on the steaming rack 11-13
Courgettes Sliced approx. 1 cm thick 9-11
Sprouts Whole (approx. 2 cm in diameter) 13-15
Cauliower Cut into 1-2 cm orets/pieces 15-17
Sweetcorn Whole, on the cob 17-21
Potatoes New potatoes or potatoes cut into 1-2 cm pieces 21-23
Boiled egg Soft / Medium / Hard / Well done 5-6/7-8/9-10/11-12
Poached egg Place in a ramekin or small dish 5-6
Chicken breast Buttery or dice into 1-2cm pieces 12-14
Salmon/round sh Cod, Haddock, etc. 7-9
Flat white sh Plaice, Sole, Basa, etc. 3-4
Steak sh Tuna, Swordsh, etc. 7-9
Kale/cavolo nero Cut into pieces 9-11
King prawns
Remove shells. Steam for 2-3 minutes or until the prawns have cooked all the way through. Stir half way through
cooking.
GB
DE
FR
NL
IT
ES
PT
DK
SE
NO
FI
RU
CZ
SK
PL
HR
SI
GR
HU
TR
RO
BG
AE
UA

8
RICE
1. Plug in the appliance. The main control display will ash “----”. This indicates that the heat is o and the appliance is ready to be programmed.
2. Add the rice according to the table and t the glass lid.
3. Press the Rice button. The display will show “----”.
4. Press the I/O button. The unit will beep once. The display will cycle through dashes. (- . . . ), (. - . .), (. . - .), (. . . -). This will continue to run through the
entire cooking cycle. Keep the lid closed throughout the cooking cycle to ensure that the rices is cooked correctly.
5. The rice is cooked when the temperature reaches approx. 105°C, the liquid in the pot has been absorbed by the rice, and the excess has boiled o.
• When cooking has ended, the unit will automatically switch to the keep warm setting. The display will ash and start counting up from zero (00:00)
to 4 hours (04:00).
• After the keep warm setting has been on for 4 hours, the unit will stop heating and return to the default display: “----”.
• Note: Do not keep foods on the keep warm setting for more than 4 hours.
• Unplug the appliance when not in use and always allow it to completely cool before cleaning and storing.
6. When nished, press the I/O button.
7. Unplug the appliance when not in use and always allow it to completely cool before cleaning and storing.
Tip
• Allow rice to rest on the keep warm settings for at least 15 minutes before serving.
Rice Cooking Chart
Rice (grams) Water (ml) Approx. number of servings
FOR WHITE RICE
100 240 1-2
200 480 2-4
300 720 3-5
FOR BROWN RICE
100 320 1-2
200 640 2-4
300 960 3-5
• For other types of rice not listed in the cooking chart or when in doubt, follow the package directions.
BOIL
1. Add water and ingredients and t the glass lid.
2. Plug in the appliance. The main control display will ash “----”. This indicates that the heat is o and the appliance is ready to be programmed.
3. Press the Boil button.
4. The default cooking time is 30 minutes. To adjust the cooking time, use the u and d buttons. The maximum cooking time is 2 hours.
5. Press the I/O button. The display will stop ashing and the cooking pot will start to heat up.
6. When the temperature of the unit reaches 100°C, it will beep twice and the time will begin to count down.
7. When the cooking time has ended, the unit will stop heating and return to the default display: “----”.
• IMPORTANT: If you are making pasta, make sure that the water is boiling before adding the pasta.
KEEP WARM
• IMPORTANT: Do not use the Keep Warm setting to cook. Only use it to keep warm cooked food that is already hot.
1. Start with already cooked and hot ingredients in the cooking pot, covered with the glass lid.
2. Press the Keep Warm button.
3. Press the I/O button.
• The display will start counting up from zero (00:00) to 4 hours (04:00).
• After the keep warm setting has been on for 4 hours, the unit will stop heating and return to the default display: “----”.
• Note: Do not keep foods on the keep warm setting for more than 4 hours.
• Unplug the appliance when not in use and always allow it to completely cool before cleaning and storing.

9
SERVING FOOD
Once the food is cooked, you can serve it directly from the cooking pot.
1. Switch o (I/O) and unplug your multicooker.
2. Slide out the control panel from the cooking pot.
3. Use the handles to carry the cooking pot and its contents to the table and serve.
• Take great care when carrying the cooking pot as it, and the ingredients will be HOT! Always use the carrying handles and oven gloves if necessary.
• Make sure that the surface on which you place the cooking pot will not be damaged by heat. Prepare the serving area by putting down a heat
resistant pad or suitable trivet before you place the cooking pot down.
CARE AND MAINTENANCE
1. Unplug the appliance and let it cool down before cleaning or storing away.
2. Remove the control panel and wipe it with a damp cloth. DO NOT immerse the control panel in water or any other liquid.
3. The cooking pot and glass lid can be cleaned in the dishwasher, or handwashed in warm soapy water.
4. Allow to dry thoroughly before storing or using again.
• Don’t use harsh or abrasive cleaners, solvents, scourers, wire wool, or soap pads.
RECYCLING
W
To avoid environmental and health problems due to hazardous substances, appliances and rechargeable and non-rechargeable
batteries marked with one of these symbols must not be disposed of with unsorted municipal waste. Always dispose of electrical and
electronic products and, where applicable, rechargeable and non-rechargeable batteries, at an appropriate ocial recycling/collection
point.
GB
DE
FR
NL
IT
ES
PT
DK
SE
NO
FI
RU
CZ
SK
PL
HR
SI
GR
HU
TR
RO
BG
AE
UA

10
Lesen Sie die Anleitung, bewahren Sie sie auf und falls Sie das Gerät an Dritte abgeben, geben Sie auch die Anleitung mit. Entfernen Sie die Verpackung
vollständig, bevor Sie das Gerät einschalten.
WICHTIGE SICHERHEITSHINWEISE
Beachten Sie bitte folgende grundlegende Vorsichtsmaßnahmen:
Dieses Gerät ist für die Nutzung von Kindern ab 8 Jahren und älter sowie von Personen mit eingeschränkten
physischen, sensorischen und geistigen Fähigkeiten geeignet, wenn ihnen die Handhabung erklärt wurde/
sie dabei beaufsichtigt werden und ihnen die damit verbundenen Gefahren bewusst sind. Kinder sollten
nicht mit dem Gerät spielen. Die Reinigung und Instandhaltung des Geräts darf nicht von Kindern
durchgeführt werden, es sei denn sie sind älter als 8 Jahre und werden dabei beaufsichtigt. Bewahren Sie das
Gerät und das Kabel außer Reichweite von Kindern unter 8 Jahren auf.
Weist das Kabel Beschädigungen auf, muss es vom Hersteller, einer Wartungsvertretung des Herstellers oder
einer qualizierten Fachkraft ersetzt werden, um eine mögliche Gefährdung auszuschließen.
b Verwenden Sie das Gerät nicht in der Nähe einer Badewanne, einem Behälter oder anderen Gefäßen, die
Wasser enthalten.
¬ Die Oberäche des Geräts erhitzt sich.
Die Kontrollanzeige muß vor dem Reinigen aus dem Kochtopf entfernt werden. Trocknen Sie den Kochtopf
gründlich, bevor Sie das Gerät erneut verwenden.
• Lassen Sie um das Gerät herum mindestens einen Abstand von 50mm.
• Bewegen Sie das Gerät nur mit äußerster Vorsicht, wenn es heiße Lebensmittel oder heiße Flüssigkeiten enthält.
• Tragen Sie Ofenhandschuhe oder ähnliche Schutzbekleidung, wenn Sie den Deckel abnehmen. Lassen Sie beim Abnehmen des Deckels besondere
Vorsicht walten, denn dabei kann Dampf austreten.
• Decken Sie das Gerät nicht ab und stellen Sie nichts darauf ab.
• Netzstecker des Geräts vor Umräumen und Säubern herausziehen und Gerät abkühlen lassen.
• Benutzen Sie das Gerät ausschließlich zu den in diesen Anweisungen beschriebenen Zwecken.
• Gerät keinesfalls benutzen, wenn es beschädigt ist oder Fehlfunktion zeigt.
• Stellen Sie den Garbehälter nicht auf Flächen, die durch Hitze beeinträchtigt werden können. Stellen Sie den Behälter stets auf einen Untersetzer
oder eine hitzebeständige Unterlage.
• Die raue Oberäche des Grundgeräts kann zu Kratzern oder anderen Schrammen auf empndlichen oder glänzenden Oberächen führen. Legen
Sie stets eine Schutzunterlage unter den Garbehälter, um derartige Oberächen nicht zu beschädigen.
NUR FÜR DEN GEBRAUCH IM HAUSHALT
BESTANDTEILE
1. Glasdeckel
2. Garbehälter
3. Grie
4. Bedienfeld
5. Bratenrost
6. Dämpfeinsatz
STEUERUNG
In der folgenden Übersicht nden Sie eine kurze Beschreibung aller Funktionen der Kontrollanzeige.
Warmhalten Aktiviert den Warmhalte-Modus. Braten Aktiviert den Modus zur Zubereitung eines Bratens.
Dämpfen Aktiviert den Modus zum Dampfgaren. Sous-vide Aktiviert den Modus zum Vakuumgaren.
Reis Aktiviert den Modus zum Kochen von Reis. Temperatur Damit werden die Temperatureinstellungen angepasst.
Kochen Aktiviert den Modus zum Kochen. Zeit Damit werden die Zeiteinstellungen angepasst.
Anbraten Aktiviert den Modus zum scharfen Anbraten.
u d
Damit können Sie die Temperatur- und Zeiteinstellungen nach oben /
unten anpassen.
Schongaren Hoch Damit wird der Modus zum Schongaren
auf der Stufe „Hoch" aktiviert.
I/O Damit schalten Sie das Gerät ein oder aus.
Schongaren Niedrig Damit wird der Modus zum
Schongaren auf der Stufe „Niedrig" aktiviert.
MONTAGE
Die Kontrollanzeige kann entfernt werden, wenn Sie Essen servieren oder wenn Sie das Gerät reinigen wollen.
Einsetzen:
Der Netzstecker sollte vom Stromnetz getrennt sein, bevor Sie die Kontrollanzeige in die Front des Kochtopfs einsetzen, indem Sie sie hineinschieben (Abb. A).

11
Entfernen:
Trennen Sie den Netzstecker vom Stromnetz und ziehen Sie anschließend die Kontrollanzeige aus dem Kochtopf heraus.
TEMPERATUREINHEITEN
Um zwischen °F und °C umzuschalten, halten Sie die Temperaturtaste 3 Sekunden lang gedrückt.
VERRIEGELN UND ENTRIEGELN DES DECKELS
1. Setzen Sie den Garbehälter in das Grundgerät ein.
2. Setzen Sie den Deckel (mit befestigter Deckelabdichtung) auf den Garbehälter.
3. Klappen Sie die Metallklemmen an beiden Grien nach oben, so dass sie unter den Haken am Deckel xiert werden können (Abb. A).
4. Verriegeln Sie beide Grie, indem Sie sie nach unten klappen (Abb. B). Um den Deckel ordnungsgemäß zu verriegeln, ist es ratsamer, beide Grie
gleichzeitig herunterzuklappen als nacheinander.
5. Zum Entriegeln drücken Sie den oberen Teil der Grie nach oben in die oene, entriegelte Position. Önen Sie anschließend die Metallklemmen,
indem Sie sie von den Haken am Deckel lösen und sie dann nach unten klappen.
WICHTIG
• Tragen Sie das Gerät stets mit Hilfe der beiden Grie. Vergewissern Sie sich, dass Sie den unteren Teil der Grie gut festhalten, um zu verhindern, dass
diese sich beim Tragen unerwartet entriegeln. Heben Sie das Gerät auf keinen Fall am Deckelgri hoch. Entfernen Sie vor dem Tragen des Geräts das
Thermometer.
• Vergewissern Sie sich, dass die Deckelabdichtung befestigt ist. Ohne sie funktioniert der Verriegelungsmechanismus nicht ordnungsgemäß.
• Achten Sie beim Befestigen der Abdichtung darauf, dass die Dichtlippe nach unten zeigt (Abb. C).
GARFUNKTIONEN
Anbraten: Verwenden Sie Ihren Multifunktionskocher zum Sautieren, scharfen Anbraten und braten.
Braten: Eignet sich ideal für die Zubereitung von Braten unter Verwendung des im Lieferumfang enthaltenen Bratenrosts.
Niedrigtemperaturgaren: Ideal für die Zubereitung von Schmorgerichten, Suppen, Eintöpfen und einer Kombination aus Fleisch und Gemüse geeignet.
Sous-Vide: Sous-Vide-Garen bezeichnet eine Gartechnik, bei der Lebensmittel in einem Kunststobeutel verschlossen bei genau regulierten
Temperaturen im Wasserbad zubereitet werden. Durch das Verschließen der Lebensmittel in Beuteln bleibt das Fleisch im Gegensatz zu herkömmlichen
Zubereitungsarten saftig und geschmacksintensiv.
Thermometer: Ideal für die Zubereitung von Braten und größeren Stücken Fleisch geeignet. Durch den Einsatz des Thermometers können Sie sich
vergewissern, ob das Fleisch nicht zu lange gart und austrocknet.
Dämpfen: Gemüse, Fisch etc. unter Verwendung des im Lieferumfang enthaltenen Dämpfeinsatzes dämpfen.
Reis: Kinderleicht den perfekten Reis kochen.
Kochen: Zum Kochen von Lebensmitteln, Suppen, Pasta und vielem mehr geeignet.
Warmhalten: Geeignet, um Speisen vor dem Servieren warmzuhalten.
ANBRATEN
1. Schließen Sie das Gerät an das Stromnetz an. Im Hauptbedienfeld blinkt „----” auf. Das heißt, dass das Gerät nicht aufheizt und programmiert werden
kann.
2. Drücken Sie die Anbraten-Taste.
3. Der Display blinkt und zeigt die standardmäßig eingestellte Zeit von 30 Minuten an.
4. Sie können die Garzeit mit Hilfe der u und d anpassen. Die maximal einstellbare Garzeit beträgt 1 Stunde.
5. Drücken Sie die I/O Taste. Der Display hört auf zu blinken und der Kochtopf wird erhitzt.
6. Hat der Kocher eine Temperatur von etwa 220°C erreicht, läuft die eingestellte Zeit rückwärts.
7. Geben Sie Butter, Öl etc. in den Kochtopf und benutzen Sie ihn so, wie Sie eine Pfanne benutzen würden.
8. Ist die Zubereitung abgeschlossen, drücken Sie die I/O Taste.
9. Trennen Sie das Gerät vom Stromnetz, wenn es nicht verwendet wird, und lassen Sie es vor der Reinigung und Aufbewahrung stets vollständig
abkühlen.
• Setzen Sie den Deckel nicht auf den Topf, wenn Sie die Anbraten-Funktion benutzen.
BRATEN
1. Setzen Sie den Bratenrost in den Kochtopf ein und geben Sie die Zutaten hinzu (Abb. B).
2. Schließen Sie das Gerät an das Stromnetz an. Im Hauptbedienfeld blinkt „----” auf. Das heißt, dass das Gerät nicht aufheizt und programmiert werden
kann.
3. Drücken Sie die Braten-Taste.
4. Auf dem Display wird jetzt die standardmäßig eingestellte Temperatur von 204°C angezeigt. Sie können die Temperatureinstellung mit Hilfe der u
und d Tasten ändern. Der einstellbare Temperaturbereich liegt zwischen 65°C und 215°C.
5. Drücken Sie anschließend die Zeit-Taste. Die standardmäßig eingestellte Garzeit beträgt 1 Stunde 30 Minuten. Sie können die Garzeit mit Hilfe der
u und d Tasten anpassen. Die maximal einstellbare Garzeit beträgt 20 Stunden.
6. Sobald Sie die Temperatur und Zeit eingestellt haben, drücken Sie die I/O Taste. Der Display hört auf zu blinken und der Garvorgang beginnt.
• Nach Ende der Zubereitungszeit piept das Gerät drei Mal und schaltet automatisch in die Warmhalte-Einstellung um. Der Display blinkt und die Zeit
läuft von Null (00:00) bis zu 4 Stunden (04:00).
• Nachdem die Warmhalte-Einstellung 4 Stunden lang in Betrieb war, hört das Gerät auf zu heizen und schaltet zurück auf die Standardanzeige: „----”.
• Hinweis: Halten Sie Lebensmittel nicht länger als 4 Stunden mit der Warmhalte-Einstellung warm.
GB
DE
FR
NL
IT
ES
PT
DK
SE
NO
FI
RU
CZ
SK
PL
HR
SI
GR
HU
TR
RO
BG
AE
UA

12
• Trennen Sie das Gerät vom Stromnetz, wenn es nicht verwendet wird, und lassen Sie es vor der Reinigung und Aufbewahrung stets vollständig
abkühlen.
Tipps
• Das ungefähre Höchstgewicht für einen Braten liegt bei einem Hühnchen zwischen 1,8 und 2,2 kg bzw. zwischen 1,3 und 1,8 kg für einen Rostbraten.
• Bevorzugen Sie den kräftigeren Geschmack von gebräuntem Fleisch, verwenden Sie vor der Zubereitung des Bratens die Anbraten-Funktion.
• Setzen Sie stets den Deckel auf, wenn Sie einen Braten zubereiten. Önen Sie den Deckel ein wenig, damit der Braten gleichmäßig gegart wird und
Hitze entweichen kann.
• Der Einsatz eines Bratenthermometers kann die Zubereitung wesentlich verbessern und führt zu einem präziserem Endergebnis.
SOUSVIDEFUNKTION
Für das Sous-Vide-Garen benötigen Sie einen Beutel, in den Sie die Zutaten legen und dem so viel Luft wie möglich entzogen werden kann, bevor er
luftdicht verschlossen wird.
VORBEREITUNG
Legen Sie die Zutaten in den von Ihnen ausgewählten Beutel. Verwenden Sie jeweils einen Beutel pro Portion. Achten Sie darauf, dass die Portionen
möglichst gleichgroß ausfallen. Bevor der Beutel verschlossen wird, ist es erforderlich, ihm so viel Luft wie möglich zu entziehen.
Bei wiederverschließbaren Zipperbeuteln:
1. Manuelle Methode (Abb. D)
Legen Sie den Beutel auf eine ebene Fläche und pressen Sie mit Ihren Händen so viel Luft wie möglich aus dem Beutel heraus. Achten Sie darauf, die
Zutaten dabei nicht zu zerquetschen oder zu beschädigen. Verschließen Sie den Beutel anschließend.
2. Wasserbadmethode (Abb. E)
Füllen Sie kaltes Wasser in einen Behälter, der groß genug ist, dass der Zipperbeutel und die Zutaten hineinpassen. Geben Sie die Zutaten in den Beutel
und schließen Sie den Verschluss fast vollständig, so dass dieser nur auf einer Seite ein kleines Stück oen bleibt. Tauchen Sie den Beutel langsam in das
Wasser und halten Sie dabei die unverschlossene Önung über dem Wasserspiegel. Achten Sie auch darauf, dass kein Wasser ausversehen in den Beutel
eindringt. Beim Eintauchen des Beutels wird die verbliebene Luft fast vollständig durch das Wasser verdrängt. Im letzten Schritt verschließen Sie den
Beutel vollständig und nehmen ihn aus dem Behälter.
Bei Silikonbeuteln:
Befolgen Sie die vom Hersteller des Beutels angegebenen Anweisungen.
Bei Vakuumierern:
Ein Vakuumierer, der zum Verpacken von Lebensmitteln eingesetzt wird, eignet sich ideal für das Sous-Vide-Garen. Verwenden Sie ordnungsgemäße, vom
Hersteller empfohlene Beutel und befolgen Sie die dem Gerät beiliegenden Anweisungen.
SO VERWENDEN SIE DEN SOUSVIDEMODUS
1. Befüllen Sie den Garbehälter ungefähr bis zur Hälfte mit heißem Wasser. Verwenden Sie dafür heißes Wasser aus der Leitung (nicht kochendes).
Achten Sie darauf, dass das Wasser bereits möglichst dieselbe Temperatur wie die Gartemperatur hat, um unnötige Wartezeiten zu verkürzen.
Mischen Sie je nach Bedarf heißes mit kaltem Wasser. Sollte die Temperatur des Wassers, das Sie zum Garen benutzen, stark von der von Ihnen
eingestellten Gartemperatur abweichen, benötigt das Gerät viel länger, um das Wasser entweder zu erhitzen oder auf die gewählte Temperatur
abzukühlen.
2. Schließen Sie das Gerät an das Stromnetz an. Im Hauptbedienfeld blinkt „----” auf. Das heißt, dass das Gerät nicht aufheizt und programmiert werden
kann.
3. Legen Sie die im Beutel verstauten Zutaten in den Garbehälter und vergewissern Sie sich, dass diese vollständig vom Wasser bedeckt sind.
4. Setzen Sie den Glasdeckel auf.
5. Drücken Sie die Sous-vide-Taste.
6. Die standardmäßig eingestellte Gartemperatur beträgt 57°C. Sie können die Temperatureinstellung mit Hilfe der u und d Tasten ändern. Der
einstellbare Temperaturbereich liegt in etwa zwischen 38°C und 96°C.
7. Drücken Sie anschließend die Zeit-Taste. Die standardmäßig eingestellte Garzeit beträgt 1 Stunde. Sie können die Garzeit mit Hilfe der u und d
Tasten anpassen. Die maximal einstellbare Garzeit beträgt 20 Stunden.
8. Drücken Sie die I/O Taste. Der Display hört auf zu blinken und der Kochtopf wird erhitzt.
9. Jetzt wird auch das Wasser auf die vorab eingestellte Temperatur erhitzt. Dies dauert unterschiedlich lange. Die verpackten Speisen können
währenddessen im Wasser bleiben, solange die gewählte Temperatur 55°C oder mehr beträgt. Der Timer für den Garzyklus beginnt erst dann
rückwärts zu laufen, wenn das Wasser auf die vorab eingestellte Temperatur erhitzt wurde.
• Nach Ende der Zubereitungszeit piept das Gerät drei Mal und schaltet automatisch in die Warmhalte-Einstellung um. Der Display blinkt und die Zeit
läuft von Null (00:00) bis zu 4 Stunden (04:00).
• Nachdem die Warmhalte-Einstellung 4 Stunden lang in Betrieb war, hört das Gerät auf zu heizen und schaltet zurück auf die Standardanzeige: „----”.
• Hinweis: Halten Sie Lebensmittel nicht länger als 4 Stunden mit der Warmhalte-Einstellung warm.
• Trennen Sie das Gerät vom Stromnetz, wenn es nicht verwendet wird, und lassen Sie es vor der Reinigung und Aufbewahrung stets vollständig
abkühlen.
Letze Schritte
Einige Lebensmittel können direkt nach der Zubereitung verzehrt werden. Steaks und anderes Fleisch sollte nach dem Garen noch einmal angebraten
werden, damit sich sein Geschmack und die Textur vollständig entfalten können.
• Verwenden Sie die Anbraten-Funktion Ihres Multifunktionskochers, um das Fleisch nach Belieben von allen Seiten anzubraten (jede Seite bis zu 2
Minuten).

13
HINWEISE ZU GARZEITEN UND LEBENSMITTELSICHERHEIT
Um die Gefahr von Krankheiten auf Grund von unzureichend gegarten Lebensmitteln zu minimieren, beachten Sie bitte die folgenden Hinweise:
• Die Zubereitung der Lebensmittel bei der richtigen Temperatur und entsprechend der korrekten Zubereitungsdauer führt dazu, dass schädliche
Bakterien abgetötet werden. Überprüfen Sie stets die Hinweise auf Lebensmittelverpackungen und befolgen Sie die dort angegebenen
Zubereitungsanweisungen.
• Aus Gründen der Lebensmittelsicherheit sollten Lebensmittel, die unter 55°C zubereitet werden (z.B. Steak), nicht länger als 2 Stunden garen.
Außerdem müssen sie von außen scharf angebraten werden.
• Fisch wird häug bei Temperaturen unter 55°C gegart. Sie sollten in diesem Fall unbedingt darauf achten, dass Sie qualitativ hochwertigen Fisch
kaufen, der auch für die Zubereitung von Sushi verwendet werden kann (d.h. Fisch, der roh verzehrt werden kann).
• Nehmen Sie Fleisch nicht vorzeitig heraus. Halten Sie wenigstens die Mindestgardauer entsprechend der Übersicht bei korrekter Temperatur ein.
• Fleisch kann problemlos länger als die angegebene Mindestgardauer gegart werden. Fisch stellt eine Ausnahme dar, da er zu weich wird, wenn er zu
lange mit der Sous-Vide-Methode gart.
• Vergewissern Sie sich stets, dass die Lebensmittel ordnungsgemäß durchgegart sind (dies ist z.B. bei Schweineeisch, Geügel etc. der Fall, wenn der
austretende Bratensaft klar ist). Garen Sie Fisch solange, bis sein Fleisch komplett weißlich ist.
ÜBERSICHT SOUS-VIDE-GARANLEITUNG
Lebensmittel Temperatur
Zeit (Stunden)
Hinweise
min. max.
Rindersteaks
Englisch: 56ºC 1 1 ½
Zeitangaben basieren auf einer Portion von
200 - 250 g
Rosa: 60ºC 1 ½ 2
Durch: 68ºC 2 2 ½
Lamm, Kalb, Ente, Wild etc.
Rosa: 56ºC 1 ½ 3 ½
Zeitangaben basieren auf einer Portion von
200 - 250 g
Durch: 68ºC 2 4
Schwein
Juicytender: 63ºC 1 ½ 3
Zeitangaben basieren auf einer Portion von
200 - 250 g
Durch: 70ºC 3 5
Hühnerbrust
Saftig/zart: 60ºC 1 ½ 3
Zeitangaben basieren auf einer Portion von
200 - 250 g
Durch: 70ºC 2 4
Hähnchenkeule, -ügel, -oberkeule
Saftig/zart: 63ºC 3 ½ 5 ½
Durch: 72ºC 4 ½ 6 ½
Fisch
Weich, locker 55ºC 1 2
Zeitangaben basieren auf einer Portion von
150 - 200 g
Fest, gut durchgegart 65ºC 1 ½ 2 ½
Wurzelgemüse 80ºC 4 6
In gleichgroße Stücke schneiden, 15 - 20
mm groß
SCHONGAREN
VORTEILE BEIM SCHONGAREN
Gesundheit: Durch das langsame Garen gehen weniger Vitamine verloren und Nähr- und Geschmacksstoe bleiben weitestgehend erhalten.
Wirtschaftlichkeit: Durch langsames, zeitintensives Kochen können auch weniger teure, festere Fleischsorten zart zubereitet werden, außerdem wird
beim Schongaren 25 Prozent weniger Energie verbraucht als beim Einsatz einer kleinen Kochplatte eines durchschnittlichen Kochfelds.
Bequemlichkeit: Bereiten Sie die Zutaten einen Abend zuvor vor und geben Sie sie in den Schongarer, bevor Sie am nächsten Tag gehen. Wenn Sie
wieder nach Hause kommen, wartet ein schmackhaftes fertig zubereitetes Essen auf Sie.
USING THE SLOW COOKING MODE
1. Geben Sie die Zutaten in den Garbehälter und setzen Sie den Deckel auf.
2. Schließen Sie das Gerät an das Stromnetz an. Im Hauptbedienfeld blinkt „----” auf. Das heißt, dass das Gerät nicht aufheizt und programmiert werden
kann.
3. Drücken Sie nach Bedarf die Schongaren Hoch- oder Schongaren Niedrig-Taste.
4. Auf dem Display blinkt die standardmäßig eingestellte Garzeit auf. Diese beträgt für die Einstellung „Niedrig” 8 Stunden und für die Einstellung
„Hoch” 4 Stunden. Sie können die Garzeit mit Hilfe der u und d Tasten anpassen. Die maximal einstellbare Garzeit beträgt 20 Stunden.
5. Drücken Sie die I/O Taste, um die Zubereitung zu starten. Der Display hört auf zu blinken und der „:” zwischen den Zahlen fängt wiederum an zu
blinken und zeigt so an, dass die Zubereitung begonnen hat.
• Nach Ende der Zubereitungszeit piept das Gerät drei Mal und schaltet automatisch in die Warmhalte-Einstellung um. Der Display blinkt und die Zeit
läuft von Null (00:00) bis zu 4 Stunden (04:00).
• Nachdem die Warmhalte-Einstellung 4 Stunden lang in Betrieb war, hört das Gerät auf zu heizen und schaltet zurück auf die Standardanzeige: „----”.
• Hinweis: Halten Sie Lebensmittel nicht länger als 4 Stunden mit der Warmhalte-Einstellung warm.
• Trennen Sie das Gerät vom Stromnetz, wenn es nicht verwendet wird, und lassen Sie es vor der Reinigung und Aufbewahrung stets vollständig
abkühlen.
Anpassungen während der Zubereitung vornehmen
Sie können die Zeiteinstellung mit Hilfe der u und d Tasten anpassen. Wenn nach 3 Sekunden keine Taste mehr gedrückt wird, hören die Zahlen auf zu
blinken und die neue Garzeit fängt an zu laufen.
GB
DE
FR
NL
IT
ES
PT
DK
SE
NO
FI
RU
CZ
SK
PL
HR
SI
GR
HU
TR
RO
BG
AE
UA

14
ALLGEMEINE HINWEISE
• Berücksichtigen Sie, dass Zutaten, die direkt aus dem Kühlschrank kommen, unter Umständen eine längere Zubereitungszeit benötigen.
• Achten Sie möglichst darauf, den Deckel während der Zubereitung nicht unnötigerweise zu önen. Dabei kann viel Hitze entweichen und der
Multifunktionskocher braucht lange, um diese wieder aufzubauen.
• Wenn Sie prüfen, ob ein Gericht gar ist, denken Sie daran, dass Wurzelgemüse in der Regel länger zum Garen benötigt.
• Tauen Sie tiefgefrorene Speisen vollständig auf, bevor Sie sie in den Kochtopf geben.
• Es ist nicht unbedingt erforderlich, Fleisch vor der Zubereitung anzubraten, aber es bleibt dadurch schön saftig und geschmacksintensiv. Verwenden
Sie die Anbraten-Funktion Ihres Multifunktionskochers, um das Fleisch anzubraten.
• Bewahren Sie Zutaten, die Sie im Vorfeld vorbereitet haben (z.B. am Abend zuvor), in einem Behälter im Kühlschrank auf. Stellen Sie nicht den
Multifunktionskocher oder den Kochtopf in den Kühlschrank.
• Beim Kochen von Reis sollten Sie mindestens 150 ml Flüssigkeit auf jeweils 100 g Reis verwenden.
• Pasta eignet sich nicht für die Zubereitung im Schongarverfahren, da die Nudeln zu weich werden. Sollten Sie ein Pastagericht zubereiten wollen,
sollten Sie die Pasta vorkochen und 30 - 40 min vor Ablauf der Zubereitungszeit zu den restlichen Zutaten hinzugeben.
• Nachdem Sie alle Zutaten in den Kochtopf gegeben haben, sollte dieser nicht mehr als dreiviertelvoll sein. Benden sich zu viele Zutaten im Topf,
kann es während der Zubereitung zum Überkochen kommen oder heiße Flüssigkeit herausspritzen.
• Ist das fertige Gericht zu dünnüssig, kann es mit Hilfe von etwas Speisestärke oder Pfeilwurzelmehl usw. angedickt werden. Für jeweils 250 - 300 ml
Flüssigkeit vermengen Sie 2 Esslöel Speisestärke mit so viel Wasser, dass das Ganze eine dünnüssige Paste ergibt. Geben Sie die Paste etwa 30 - 45
min vor Ablauf der Zubereitungszeit zum Gericht hinzu. Alternativ können Sie fertigen Soßenbinder nach Angaben des Herstellers unterrühren.
ZUBEREITUNGSEMPFEHLUNGEN
Gemüse
Wurzelgemüse wie Kartoeln, Möhren, Speise- und Steckrüben müssen länger im Schongarverfahren zubereitet werden als Fleisch. Schneiden Sie es in
mundgerechte Stücke und bedecken Sie diese mit der Garüssigkeit. Legen Sie das Gemüse so dicht wie möglich auf den Boden des Topfes.
Gemüse, das nur eine kurze Garzeit benötigt, wie Erbsen und Mais, sollte eine halbe Stunde vor Ablauf der Zubereitungszeit hinzugegeben werden.
Hülsenfrüchte (Bohnen, Erbsen und Linsen)
Einige Hülsenfrüchte (Linsen, Erbsen usw.) müssen vor der Zubereitung möglicherweise noch in Wasser eingeweicht werden. Achten Sie vor der
Zubereitung stets auf die Empfehlungen auf der Verpackung.
WARNUNG Trockenbohnen (z.B. Rote Kidneybohnen, Cannellini-Bohnen usw.) sollten mindestens 8 Stunden lang eingeweicht und mindestens 10 min
vorgekocht werden, bevor Sie sie in den Schongarer geben. Werden sie roh oder halbgar verzehrt, sind sie giftig.
Fleisch und Geügel
• Beim Schongarverfahren wird auch Fleisch, das qualitativ nicht ganz so hochwertig ist, schön zart, da es bei der Zubereitung nicht so sehr schrumpft
und weniger Flüssigkeit austritt. Gleichzeitig bleiben Geschmacks- und Nährstoe erhalten. Magere Stücke eignen sich am besten für die
Zubereitung im Schongarverfahren.
• Entfernen Sie überschüssiges Fett vom Fleisch, da es in üssiger Form austritt und zu mehr Gesamtüssigkeit während der Zubereitung führt.
• Verwenden Sie, wenn möglich, Hühnchen ohne Haut.
• Schneiden Sie für die Zubereitung von Schmorgerichten und Eintöpfen das Fleisch in gleichgroße Würfel (ca. 2,5 cm).
ÜBERTRAGUNG VON GERICHTEN, DIE IM HERKÖMMLICHEN BACKOFEN ZUBEREITET WERDEN
Es handelt sich im Folgenden um ungefähre Zeitangaben, die von den Zutaten und der Menge abhängig sind. Vergewissern Sie sich vor dem Servieren
stets, ob die Speisen tatsächlich gar sind.
Zubereitungszeit im Backofen (in Minuten) Zeit im Modus Schongaren Niedrig (Stunden) Zeit im Modus Schongaren Hoch (Stunden)
15-30 4-6 1-2
30-60 6-8 2-4
60-180 8-12 4-7
DÄMPFEN
1. Füllen Sie Wasser in den Kochtopf, bis er etwa 2 - 2,5 cm hoch gefüllt ist. Dies reicht für eine Dämpfzeit von ungefähr 30 Minuten. Geben Sie nicht zu
viel Wasser hinzu, da die Zutaten nicht vollständig davon bedeckt sein dürfen.
1. Setzen Sie den Dämpfeinsatz in den Kochtopf ein (Abb. C). Geben Sie in gleich große Stücke geschnittenes Gemüse in den Kochtopf und setzen Sie
den Glasdeckel auf.
2. Schließen Sie das Gerät an das Stromnetz an. Im Hauptbedienfeld blinkt „----” auf. Das heißt, dass das Gerät nicht aufheizt und programmiert werden
kann.
3. Drücken Sie die Dämpfen-Taste.
4. Der Display blinkt und zeigt die standardmäßig eingestellte Zeit von 30 Minuten an. Sie können die Garzeit mit Hilfe der u und d Tasten anpassen.
Die maximal einstellbare Garzeit beträgt 2 Stunden.
5. Drücken Sie die I/O Taste. Der Display hört auf zu blinken und der Kochtopf wird erhitzt.
6. Hat der Kocher eine Temperatur von etwa 100°C erreicht, läuft die Zeit rückwärts.
7. Sobald die Garzeit abgelaufen ist, wird der Kocher nicht mehr erhitzt und die Standardeinstellung “----” wird auf dem Display angezeigt.
Tipp
• Achten Sie bei der Zubereitung von frischem Gemüse darauf, dass es nicht zerkocht. Das fertige Gemüse sollte seine Farbe nicht verlieren und nicht
zu weich sein. Halten Sie sich an die genauen Zeitangaben aus Ihrem Rezept.
Empfohlene Garzeiten
Die folgenden Zutaten sollten beigegeben werden, solange Ihr Dampfgarer noch kalt ist.

15
Lebensmittel (frisch) Hinweise Zeit (in Minuten)
Brokkoli
In 1-2 cm große Röschen/Stücke geschnitten
13-15
Grüne Bohnen
Flach auf den Dämpfeinsatz legen
13-15
Karotten
In 1 cm dicke Stücke geschnitten
17-19
Kohl (Wirsing)
Zerkleinert oder in Stücke geschnitten
11-13
Spargel
Flach auf den Dämpfeinsatz legen
11-13
Zucchini
In 1 cm dicke Stücke geschnitten
9-11
Rosenkohl
im Ganzen (ca. 2 cm im Durchmesser)
13-15
Blumenkohl
In 1-2 cm große Röschen/Stücke geschnitten
15-17
Mais
im Ganzen, am Kolben
17-21
Kartoeln
Kartoeln oder Frühkartoeln in 1-2 cm große Stücke geschnitten
21-23
Gekochtes Ei
Weich / Medium / Hart / Durchgegart
5-6/7-8/9-10/11-12
Pochiertes Ei
In einem Auauörmchen oder einer kleinen Schüssel
5-6
Hähnchenbrust
Im Schmetterlingsschnitt aufgeschnitten oder in 1-2 cm großen Stücken
12-14
Lachs/Rundsch
Kabeljau, Schellsch, etc.
7-9
Plattsch, Weißsch
Scholle, Seezunge, Pangasius, etc.
3-4
Steaksch
Thunsch, Schwertsch, etc.
7-9
Grün-/Palmkohl
In Stücke geschnitten
9-11
Riesengarnelen
Entfernen Sie die Schalen. Garen Sie die Garnelen 2-3 Minuten lang oder bis sie komplett durchgegart sind. Nach
halber Garzeit umrühren.
REIS
1. Schließen Sie das Gerät an das Stromnetz an. Im Hauptbedienfeld blinkt „----” auf. Das heißt, dass das Gerät nicht aufheizt und programmiert werden
kann.
2. Geben Sie soviel Reis, wie in der Tabelle angegeben, hinzu und setzen Sie den Glasdeckel auf.
3. Drücken Sie die Reis-Taste. Auf dem Display wird “----” angezeigt.
4. Drücken Sie die I/O Taste. Das Gerät piept einmal. Auf dem Display erscheinen aufeinanderfolgend Bindestriche (- . . . ), (. - . .), (. . - .), (. . . -). Diese
werden über den gesamten Garzyklus hinweg angezeigt. Halten Sie den Deckel während des gesamten Garvorgangs geschlossen, damit
gewährleistet ist, dass der Reis richtig gekocht wird.
5. Der Reis ist fertig, sobald die Temperatur ca. 105°C erreicht hat, die Flüssigkeit im Topf durch den Reis absorbiert wurde und überschüssiges Wasser
verkocht ist.
• Sobald der Garvorgang abgeschlossen ist, schaltet das Gerät automatisch in den Warmhalten-Modus. Der Display blinkt und die Zeit läuft von Null
(00:00) bis zu 4 Stunden (04:00).
• Nachdem die Warmhalte-Einstellung 4 Stunden lang in Betrieb war, hört das Gerät auf zu heizen und schaltet zurück auf die Standardanzeige: „----”.
• Hinweis: Halten Sie Lebensmittel nicht länger als 4 Stunden mit der Warmhalte-Einstellung warm.
6. Ist die Zubereitung abgeschlossen, drücken Sie die I/O Taste.
7. Trennen Sie das Gerät vom Stromnetz, wenn es nicht verwendet wird, und lassen Sie es vor der Reinigung und Aufbewahrung stets vollständig
abkühlen.
Tipp
• Lassen Sie den Reis bis mindestens 15 Minuten vor dem Servieren im Warmhalten-Modus ziehen.
Übersicht Reiszubereitung
Reis (Gramm) Wasser (ml) Ungefähre Portionsangabe
FÜR WEIßEN REIS
100 240 1-2
200 480 2-4
300 720 3-5
FÜR BRAUNEN REIS
100 320 1-2
200 640 2-4
300 960 3-5
• Befolgen Sie bei anderen Reissorten, die nicht in der Übersicht aufgelistet sind, die Angaben auf der Verpackung.
GB
DE
FR
NL
IT
ES
PT
DK
SE
NO
FI
RU
CZ
SK
PL
HR
SI
GR
HU
TR
RO
BG
AE
UA

16
KOCHEN
1. Geben Sie Wasser und Zutaten hinzu und setzen Sie den Glasdeckel auf.
2. Schließen Sie das Gerät an das Stromnetz an. Im Hauptbedienfeld blinkt „----” auf. Das heißt, dass das Gerät nicht aufheizt und programmiert werden
kann.
3. Drücken Sie die Kochen-Taste.
4. Die standardmäßig eingestellte Garzeit beträgt 30 Minuten. Sie können die Garzeit mit Hilfe der u und d Tasten anpassen. Die maximal
einstellbare Garzeit beträgt 2 Stunden.
5. Drücken Sie die I/O Taste. Der Display hört auf zu blinken und der Kochtopf wird erhitzt.
6. Hat der Kocher eine Temperatur von etwa 100°C erreicht, piept er zwei Mal und die Zeit läuft rückwärts.
7. Sobald die Garzeit abgelaufen ist, wird der Kocher nicht mehr erhitzt und die Standardeinstellung “----” wird auf dem Display angezeigt.
• WICHTIG: Vergewissern Sie sich bei der Zubereitung von Pasta, dass das Wasser kocht, bevor Sie die Nudeln hinzugeben.
WARMHALTEN
• WICHTIG: Verwenden Sie die Warmhalten-Funktion nicht zum Kochen. Nutzen Sie sie nur zum Warmhalten von gekochten Speisen, die bereits heiß
sind.
1. Starten Sie die Funktion bei geschlossenem Glasdeckel mit bereits zubereiteten und heißen Speisen im Kochtopf.
2. Drücken Sie die Warmhalten-Taste.
3. Drücken Sie die I/O Taste.
• Die Zeit auf dem Display läuft von Null (00:00) bis zu 4 Stunden (04:00).
• Nachdem die Warmhalte-Einstellung 4 Stunden lang in Betrieb war, hört das Gerät auf zu heizen und schaltet zurück auf die Standardanzeige: „----”.
• Hinweis: Halten Sie Lebensmittel nicht länger als 4 Stunden mit der Warmhalte-Einstellung warm.
• Trennen Sie das Gerät vom Stromnetz, wenn es nicht verwendet wird, und lassen Sie es vor der Reinigung und Aufbewahrung stets vollständig
abkühlen.
SPEISEN SERVIEREN
Sobald die Speisen zubereitet sind, können Sie sie direkt aus dem Kochtopf servieren.
1. Schalten Sie den Multifunktionskocher aus (I/O) und trennen Sie ihn vom Stromnetz.
2. Ziehen Sie die Kontrollanzeige aus dem Kochtopf heraus.
3. Tragen Sie den Kochtopf samt Inhalt an den Grien festhaltend zum Tisch und servieren Sie die Speisen.
• Tragen Sie den Kochtopf mit äußerster Vorsicht, da der Topf und sein Inhalt HEIß sind! Nutzen Sie stets die Grie und bei Bedarf Ofenhandschuhe
zum Tragen.
• Vergewissern Sie sich, dass die Fläche, auf der Sie den Kochtopf abstellen, nicht durch die Hitze beschädigt werden kann. Legen Sie dort, wo Sie die
Speisen servieren wollen, eine hitzebeständige Unterlage oder einen geeigneten Untersetzer hin, bevor Sie den Kochtopf abstellen.
PFLEGE UND WARTUNG
1. Trennen Sie das Gerät vom Stromnetz, wenn es nicht verwendet wird, und lassen Sie es vor der Reinigung und Aufbewahrung stets vollständig
abkühlen.
2. Nehmen Sie die Kontrollanzeige heraus und wischen Sie sie mit einem feuchten Tuch ab. Tauchen Sie die Kontrollanzeige NICHT in Wasser oder eine
andere Flüssigkeit.
3. Der Kochtopf und der Glasdeckel können im Geschirrspüler oder per Hand mit warmem Seifenwasser gereinigt werden.
4. Lassen Sie alle Teile gut trocknen, bevor Sie das Gerät verstauen.
• Verwenden Sie keine scharfen oder aggressiven Reinigungs- oder Lösemittel, Topfreiniger, Stahlwolle oder Seifenpads.
RECYCLING
W
Um negative Auswirkungen auf Umwelt und Gesundheit durch gefährliche Stoe zu vermeiden, dürfen Geräte sowie
wiederauadbare und nicht wiederauadbare Batterien, die mit einem dieser Symbole gekennzeichnet sind, nicht über den normalen
Hausmüll entsorgt werden. Entsorgen Sie elektrische und elektronische Produkte und gegebenenfalls wiederauadbare und nicht
wiederauadbare Batterien immer an einer oziellen Recyclingstelle.

17
Lisez les instructions, conservez-les et transférez-les si vous transférez l’appareil. Retirez tous les emballages avant utilisation.
PRÉCAUTIONS IMPORTANTES
Suivez les précautions essentielles de sécurité, à savoir:
Cet appareil peut être utilisé par des enfants âgés de 8 ans et plus et par des personnes aux aptitudes
physiques, sensorielles ou mentales réduites ou ne possédant pas l’expérience et les connaissances
susantes, pour autant que ces personnes soient supervisées/aient reçu des instructions et soient
conscientes des risques encourus. Les enfants ne peuvent pas jouer avec l’appareil. Le nettoyage et
l’entretien par l’utilisateur ne doivent pas être eectués par des enfants, à moins qu’ils ne soient âgés de plus
de 8 ans et qu’ils soient supervisés. Tenez l’appareil et le câble hors de portée des enfants de moins de 8 ans.
Si le câble est abîmé, vous devez le faire remplacer par le fabricant, un de ses techniciens agréés ou une
personne également qualiée, pour éviter tout danger.
b Veillez à ne pas utiliser cet appareil à proximité de baignoires, douches, lavabos ou autres récipients
contenant de l’eau.
¬ Les surfaces de l’appareil vont s’échauer.
Le panneau de contrôle doit être retiré avant de laver la mijoteuse. Veillez à sécher soigneusement la
mijoteuse avant d’utiliser à nouveau l’appareil.
• Laissez un espace libre d’au moins 50 mm autour de l’appareil.
• Soyez extrêmement prudent(e) lorsque vous déplacez l’appareil quand il contient des aliments chauds ou des liquides chauds.
• Utiliser des gants de cuisine ou une protection similaire pour enlever le couvercle. Prenez garde à la vapeur qui s’échappe lorsque vous enlevez le
couvercle.
• Ne recouvrez pas l’appareil et ne posez rien dessus.
• Débranchez l’appareil lorsque vous ne l’utilisez pas, avant de le déplacer et avant de le nettoyer.
• N’utilisez pas l’appareil à d’autres ns que celles décrites dans ce mode d’emploi.
• N’utilisez pas l’appareil s’il est endommagé ou ne fonctionne pas correctement.
• Ne placez pas la cuve de cuisson sur une surface aectée par la chaleur. Placez toujours la cuve sur un sous-plat ou un tapis résistant à la chaleur.
• La base de la cuve de cuisson a une surface rugueuse et peut laisser des rayures ou d’autres marques sur des surfaces délicates ou polies. Placez dans
tous les cas une protection rembourrée sous la cuve de cuisson pour protéger ce type de surface.
USAGE MÉNAGER UNIQUEMENT
PIÈCES
1. Couvercle en verre
2. Cuve de cuisson
3. Poignées
4. Panneau de contrôle
5. Grille de cuisson à la vapeur
6. Grille de rôtissage
AVANT LA PREMIÈRE UTILISATION
Retirez tous les matériaux d’emballage et les étiquettes. Lavez les parties amovibles à l’eau chaude savonneuse, rincez-les bien, égouttez-les et séchez-les
à l’air.
COMMANDES
Le tableau suivant donne une brève description des fonctions du panneau de contrôle.
Maintien au chaud Sélectionne le mode de Maintien au
chaud.
Rôti Sélectionne le mode de rôtissage.
Vapeur Sélectionne le mode de cuisson à la vapeur. Sous Vide Sélectionne le mode de cuisson sous vide.
Riz Sélectionne le mode de cuisson du riz.
Température Permet de sélectionner les valeurs de température
pour le réglage.
Bouillir Sélectionne le mode d'ébullition.
Temps Fonction utilisée pour sélectionner les valeurs de temps pour
le réglage.
Saisir Sélectionne le mode de saisie.
u d
Utilisé pour augmenter/diminuer les valeurs de température ou de
temps.
Cuisson lente haute puissance Permet de sélectionner le
mode haute puissance de la mijoteuse.
I/O Utilisé pour démarrer ou arrêter l'appareil.
Cuisson lente basse puissance Permet de sélectionner le
mode basse puissance de la mijoteuse.
GB
DE
FR
NL
IT
ES
PT
DK
SE
NO
FI
RU
CZ
SK
PL
HR
SI
GR
HU
TR
RO
BG
AE
UA

18
MONTAGE
Le panneau de contrôle peut être retiré lorsque vous servez de la nourriture ou lorsque vous nettoyez l’appareil.
Fixation :
La che étant retirée de la prise de courant, faites glisser le panneau de contrôle à l’avant de la mijoteuse (FigureA).
Retrait :
Retirez la che de la prise de courant, puis faites glisser le panneau de contrôle hors de la mijoteuse.
UNITÉS DE TEMPÉRATURE
Pour passer des degrés Fahrenheit (°F) aux degrés Celsius (°C), maintenez le bouton Température enfoncé pendant 3 secondes.
FONCTIONS DE CUISSON
Saisir : Utilisez votre multicuiseur pour rissoler, saisir et frire.
Rôtir : Parfait pour rôtir les pièces de viande avec la grille de rôtissage fournie.
Sous Vide : Sous-vide est une méthode de cuisson des aliments à l’intérieur d’un sachet scellé dans un bain-marie à une température réglée avec
précision. En scellant les aliments dans des sachets, on conserve les jus et les saveurs subtiles qui sont habituellement perdus lors de la cuisson
conventionnelle.
Cuisson lente : Idéale pour les ragoûts, les soupes, les plats mijotés et les plats de viandes et de légumes.
Sonde de température : Idéal pour la cuisson des rôtis et autres gros morceaux de viande. La sonde de température permet de s’assurer que la pièce de
viande ne soit pas trop cuite et ne sèche pas.
Vapeur : Pour cuire à la vapeur des légumes, du poisson, etc. avec le grille pour cuisson à la vapeur fournie.
Riz : Pour préparer automatiquement un riz parfait.
Bouillir : Fonction utilisée pour faire bouillir des ingrédients, préparer des soupes, des pâtes, etc.
Maintien au chaud : Vous permet de garder les aliments cuits au chaud avant de les servir.
SAISIR
UTILISATION DU MODE DE CUISSON LENTE
1. Branchez l’appareil. L’achage du panneau de contrôle clignote “----”. Ceci indique que la température de cuisson est éteinte et que l’appareil est
prêt à être programmé.
2. Appuyez sur le bouton Saisir.
3. L’écran clignote et ache une durée par défaut de 30 minutes.
4. Pour ajuster le temps de cuisson, utilisez les boutons u et d. Le temps de cuisson maximum est d’une heure.
5. Appuyez sur le bouton I/O. L’achage cesse de clignoter et la mijoteuse commence à chauer.
6. Lorsque la température de l’appareil atteint environ 220° C, la durée commence le compte à rebours.
7. Ajoutez du beurre, de l’huile, etc. dans la mijoteuse et utilisez-la de la même manière que vous utiliseriez une poêle à frire.
8. Lorsque vous avez terminé, appuyez sur le bouton I/O.
9. Débranchez l’appareil lorsqu’il n’est pas utilisé et laissez-le toujours refroidir complètement avant de le nettoyer et de le ranger.
• N’utilisez pas le couvercle lorsque vous utilisez la fonction de saisie.
RÔTIR
1. Placez la grille de rôtissage dans la mijoteuse et ajoutez les ingrédients (FigureB).
2. Branchez l’appareil. L’achage du panneau de contrôle clignote “----”. Ceci indique que la température de cuisson est éteinte et que l’appareil est
prêt à être programmé.
3. Appuyez sur le bouton Rôtir.
4. L’achage passe à la température par défaut de 204° C. Pour modier la température, utilisez les boutons u et d. La plage est d’environ 65 à 215° C.
5. Ensuite, appuyez sur le boutonTemps. Le temps de cuisson par défaut est de 1 heure 30 minutes. Pour ajuster le temps de cuisson, utilisez les
boutons u et d. Le temps de cuisson maximal est de 20 heures.
6. Une fois que vous avez réglé la température et l’heure, appuyez sur le bouton I/O. L’achage cesse de clignoter et la cuisson commence.
• Lorsque le temps de cuisson est écoulé, l’appareil émet trois bips sonores et passe automatiquement au mode de maintien au chaud. L’achage
clignote et commence à compter de zéro (00:00) à 4 heures (04:00).
• Après 4 heures de maintien au chaud, l’appareil cesse de chauer et revient à l’achage par défaut : “----”.
• Remarque: Veillez à ne pas utiliser la fonction de maintien au chaud pendant plus de 4 heures.
• Débranchez l’appareil lorsqu’il n’est pas utilisé et laissez-le toujours refroidir complètement avant de le nettoyer et de le ranger.
Conseils
• La capacité maximale approximative pour le rôtissage est de 1,8-2,2kg de poulet ou de 1,3-1,8kg de rôti.
• Si vous souhaitez obtenir la saveur plus profonde de la viande rissolée, utilisez la fonction Saisir avant de rôtir pour faire dorer la viande.
• Veillez à toujours rôtir la viande avec le couvercle. Ouvrez le couvercle le moins possible pour assurer une cuisson uniforme et pour empêcher la
chaleur de s’échapper.
• L’utilisation d’un thermomètre à viande peut contribuer de manière signicative à améliorer le résultat et à obtenir un résultat nal plus précis.

19
FONCTION SOUS VIDE
Pour la cuisson Sous Vide, vous aurez besoin d’un sachet ou d’une poche dans laquelle vous pourrez mettre les ingrédients et retirer autant d’air que
possible, avant de la sceller.
PRÉPARATION
Placez les ingrédients dans le sachet ou la poche de votre choix. Utilisez un sachet par portion. Veillez à utiliser des portions de taille similaire. Avant de
sceller le sachet, vous devez en retirer le plus d’air possible.
Pour les sachets avec fermeture à glissière :
1. Méthode manuelle (Figure D)
Placez le sachet sur une surface plane et, en vous aidant de votre main, faites sortir avec précaution autant d’air que possible du sachet. Veillez à ne pas
écraser ou endommager les ingrédients lorsque vous réalisez cette opération. Ensuite, fermez le joint d’étanchéité du sachet.
2. Méthode d’immersion dans l’eau (Figure E)
Remplissez d’eau froide un récipient susamment grand pour contenir le sachet avec fermeture à glissière et les ingrédients. Placez les ingrédients dans
le sachet et fermez le joint d’étanchéité pratiquement jusqu’au bout en laissant une petite ouverture dans un coin. Poussez lentement le sachet dans l’eau
en laissant le coin non scellé hors de l’eau. Lorsque vous réalisez cette opération, assurez-vous que de l’eau ne pénètre pas accidentellement dans le
sachet. Lorsque vous immergez le sachet, l’eau pousse presque tout l’air restant à l’extérieur. Pour terminer, scellez le coin et retirez le sachet du récipient.
Pour les sachets en silicone :
Suivez les instructions fournies par le fabricant du sachet.
Pour machines d’emballage sous vide :
Une scelleuse sous vide spécialement conçue pour une utilisation alimentaire est parfaite pour la cuisson sous vide. Utilisez les sachets recommandés par
le fabricant et suivez les instructions fournies avec la machine.
UTILISATION DU MODE DE CUISSON SOUS VIDE
1. Ajoutez de l’eau chaude et remplissez la cuve de cuisson jusqu’à environ la moitié. Utilisez l’eau du robinet d’eau chaude (pas de l’eau bouillante).
Essayez de faire en sorte que la température de l’eau soit aussi proche que possible de la température de cuisson, étant donné que cela réduira le
temps d’attente inutile. Utilisez un mélange d’eau chaude et d’eau froide au besoin. Si la température de l’eau que vous mettez dans le cuiseur est
très diérente de la température de cuisson, l’appareil mettra beaucoup plus de temps à chauer ou à refroidir l’eau à la température sélectionnée.
2. Branchez l’appareil. L’achage du panneau de contrôle clignote “----”. Ceci indique que la température de cuisson est éteinte et que l’appareil est
prêt à être programmé.
3. Placez le sachet avec les aliments dans la cuve de cuisson en vous assurant d’immerger entièrement le sachet. Ajoutez de l’eau au besoin. Si vous
placez plusieurs éléments simultanément, utilisez la grille fournie pour les séparer.
4. Couvrez la mijoteuse avec le couvercle en verre.
5. Appuyez sur le bouton Sous Vide.
6. La température de cuisson par défaut est xée à 57°C. Pour modier la température, utilisez les boutons u et d. La plage est d’environ 38 à 96° C.
7. Ensuite, appuyez sur le bouton Temps. Le temps de cuisson par défaut est d’une heure. Pour ajuster le temps de cuisson, utilisez les boutons u et
d. Le temps de cuisson maximal est de 20 heures.
8. Appuyez sur le bouton I/O. L’achage cesse de clignoter et la mijoteuse commence à chauer.
9. À ce stade, l’eau commence à se réchauer jusqu’à atteindre la température souhaitée. Le temps nécessaire varie. Les aliments en sachet peuvent
rester dans l’eau pendant le temps de chauage pour autant que la température réglée soit supérieure ou égale à 55°C. Le compte à rebours du
temporisateur du cycle de cuisson ne commence que lorsque l’eau a atteint la température cible.
• Lorsque le temps de cuisson est écoulé, l’appareil émet trois bips sonores et passe automatiquement au mode de maintien au chaud. L’achage
clignote et commence à compter de zéro (00:00) à 4 heures (04:00).
• Après 4 heures de maintien au chaud, l’appareil cesse de chauer et revient à l’achage par défaut : “----”.
• Remarque: Veillez à ne pas utiliser la fonction de maintien au chaud pendant plus de 4 heures.
• Débranchez l’appareil lorsqu’il n’est pas utilisé et laissez-le toujours refroidir complètement avant de le nettoyer et de le ranger.
Étapes Finales
Certains aliments peuvent être consommés immédiatement après la cuisson. Pour les steaks et autres viandes, la saisie après cuisson est essentielle pour
obtenir la meilleure saveur et la meilleure texture.
• Utilisez la fonction Saisir de votre multicuiseur pour saisir les bords et les côtés de la viande selon vos préférences (jusqu’à 2 minutes par côté).
OBSERVATIONS SUR LES TEMPS DE CUISSON ET LA SÉCURITÉ ALIMENTAIRE
An de minimiser les risques de maladies dues à des aliments mal cuits, veuillez noter ce qui suit :
• La cuisson des aliments à la bonne température et pendant la durée de cuisson appropriée permettra d’éliminer toutes les bactéries nocives. Vériez
toujours les conseils gurant sur l’emballage des aliments et suivez les instructions de cuisson fournies.
• Pour des raisons de salubrité alimentaire, les aliments cuits à une température inférieure à 55°C (p. ex., les steaks) ne doivent pas être cuits pendant
plus de deux heures et doivent être saisis à l’extérieur.
• Le poisson est souvent cuit à des températures inférieures à 55°C et si vous avez l’intention de le faire, il est important d’acheter du poisson classé
dans la catégorie Sushi (c.-à-d. du poisson qui peut être consommé cru).
• Ne sortez pas la viande plus tôt que prévu. Laissez-la cuire au moins pendant la durée de cuisson minimale gurant sur le tableau et à la bonne
température.
• Vous pouvez laisser la viande dans la cuve de cuisson plus longtemps que la durée minimale. Le poisson fait exception à cette règle. Le poisson se
ramollit s’il est trop cuit en utilisant la fonction de cuisson sous vide.
• Vériez toujours que les aliments sont bien cuits (p. ex. pour le porc, la volaille, etc., jusqu’à ce que le jus soit clair). Faites cuire le poisson jusqu’à ce
que la chair soit complètement opaque.
GB
DE
FR
NL
IT
ES
PT
DK
SE
NO
FI
RU
CZ
SK
PL
HR
SI
GR
HU
TR
RO
BG
AE
UA

20
TABLEAU DE CUISSON SOUS VIDE
Aliment Température
Durée (heures)
Remarques
min. max.
Steaks de bœuf
À point : 56ºC 1 1 ½
La durée de cuisson est basée sur une
portion de 200 à 250 g.
Entre à point et bien cuit : 60ºC 1 ½ 2
Bien cuit : 68ºC 2 2 ½
Agneau, veau, canard, gibier, etc.
Saignant : 56ºC 1 ½ 3 ½
La durée de cuisson est basée sur une
portion de 200 à 250 g.
Bien cuit : 68ºC 2 4
Porc
Juteux/tendre : 63ºC 1 ½ 3
La durée de cuisson est basée sur une
portion de 200 à 250 g.
Bien cuit : 70ºC 3 5
Poitrine de poulet
Juteux/tendre : 60ºC 1 ½ 3
La durée de cuisson est basée sur une
portion de 200 à 250 g.
Bien cuit : 70ºC 2 4
Pilon, aile, cuisse de poulet
Juteux/tendre : 63ºC 3 ½ 5 ½
Bien cuit : 72ºC 4 ½ 6 ½
Poisson
Tendre, oconneux 55ºC 1 2
La durée de cuisson est basée sur une
portion de 150 à 200 g.
Ferme, bien cuit 65ºC 1 ½ 2 ½
Légumes-racines 80ºC 4 6
Coupez en morceaux de taille égale, de 15 à
20 mm.
CUISSON LENTE
LES AVANTAGES DE LA CUISSON LENTE
Santé: L’action de la cuisson douce permet de mieux préserver les vitamines et de conserver une plus grande quantité de nutriments et de saveurs.
Économie: Une cuisson longue et lente peut attendrir les pièces de viande plus dures et plus économiques et utilise environ un quart de la puissance de
la petite plaque de cuisson.
Commodité: Préparez les ingrédients la veille, placez-les dans la mijoteuse avant de partir et un délicieux repas vous attendra à votre retour à la maison.
UTILISATION DU MODE DE CUISSON LENTE
1. Ajoutez les ingrédients dans la cuve de cuisson et placez le couvercle.
2. Branchez l’appareil. L’achage du panneau de contrôle clignote “----”. Ceci indique que la température de cuisson est éteinte et que l’appareil est
prêt à être programmé.
3. Appuyez sur le boutonCuisson lente haute puissance ou Cuisson lente basse puissance selon votre choix.
4. L’écran ache une durée par défaut qui clignote. Pour le réglage basse puissance, le temps de cuisson par défaut est de 8 heures et pour le réglage
haute puissance, le temps par défaut est de 4 heures. Pour ajuster le temps de cuisson, utilisez les boutons u et d. Le temps de cuisson maximal est
de 20 heures.
5. Appuyez sur la touche I/O pour commencer la cuisson. L’achage cesse de clignoter et les signes “:“ entre les numéros clignotent, indiquant que
l’appareil est en cours de cuisson.
• Lorsque le temps de cuisson est écoulé, l’appareil émet trois bips sonores et passe automatiquement au mode de maintien au chaud. L’achage
clignote et commence à compter de zéro (00:00) à 4 heures (04:00).
• Après 4 heures de maintien au chaud, l’appareil cesse de chauer et revient à l’achage par défaut : “----”.
• Remarque: Veillez à ne pas utiliser la fonction de maintien au chaud pendant plus de 4 heures.
• Débranchez l’appareil lorsqu’il n’est pas utilisé et laissez-le toujours refroidir complètement avant de le nettoyer et de le ranger.
Eectuez des réglages pendant la cuisson
Vous pouvez régler la durée en appuyant sur les touches u et d. Après 3 secondes sans aucune opération sur les boutons, les chires cessent de
clignoter et la nouvelle durée de cuisson commence.
CONSEILS GÉNÉRAUX
• Tenez compte du fait que les ingrédients que vous sortez directement du réfrigérateur peuvent augmenter le temps de cuisson.
• Veillez à ne pas ouvrir le couvercle inutilement pendant la cuisson. Une grande quantité de chaleur peut s’échapper lorsque vous faites cela et votre
multicuiseur peut mettre beaucoup de temps à récupérer la température de cuisson.
• Lorsque vous testez un plat pour savoir s’il est cuit, n’oubliez pas que les légumes racines prennent généralement plus de temps à cuire.
• Décongelez complètement les aliments surgelés avant de les introduire dans la mijoteuse.
• Il n’est pas strictement nécessaire de faire rissoler la viande au préalable, mais cela peut aider à sceller l’humidité et à ajouter de la profondeur à la
saveur. Utilisez la fonction de saisie de votre multicuiseur pour dorer la viande.
• Rangez les ingrédients préparés à l’avance (par exemple, la veille) dans des récipients dans le réfrigérateur. Ne mettez pas le multicuiseur ou la
mijoteuse dans le réfrigérateur.
• Pour la cuisson du riz, utilisez au moins 150ml de liquide de cuisson pour 100g de riz.
• Les pâtes ne sont pas adaptées à la cuisson lente, elles deviennent trop molles. Si votre recette inclut des pâtes, il convient de les précuire et de les
incorporer ensuite à la préparation 30 à 40 minutes avant la n du temps de cuisson.
Strona się ładuje...
Strona się ładuje...
Strona się ładuje...
Strona się ładuje...
Strona się ładuje...
Strona się ładuje...
Strona się ładuje...
Strona się ładuje...
Strona się ładuje...
Strona się ładuje...
Strona się ładuje...
Strona się ładuje...
Strona się ładuje...
Strona się ładuje...
Strona się ładuje...
Strona się ładuje...
Strona się ładuje...
Strona się ładuje...
Strona się ładuje...
Strona się ładuje...
Strona się ładuje...
Strona się ładuje...
Strona się ładuje...
Strona się ładuje...
Strona się ładuje...
Strona się ładuje...
Strona się ładuje...
Strona się ładuje...
Strona się ładuje...
Strona się ładuje...
Strona się ładuje...
Strona się ładuje...
Strona się ładuje...
Strona się ładuje...
Strona się ładuje...
Strona się ładuje...
Strona się ładuje...
Strona się ładuje...
Strona się ładuje...
Strona się ładuje...
Strona się ładuje...
Strona się ładuje...
Strona się ładuje...
Strona się ładuje...
Strona się ładuje...
Strona się ładuje...
Strona się ładuje...
Strona się ładuje...
Strona się ładuje...
Strona się ładuje...
Strona się ładuje...
Strona się ładuje...
Strona się ładuje...
Strona się ładuje...
Strona się ładuje...
Strona się ładuje...
Strona się ładuje...
Strona się ładuje...
Strona się ładuje...
Strona się ładuje...
Strona się ładuje...
Strona się ładuje...
Strona się ładuje...
Strona się ładuje...
Strona się ładuje...
Strona się ładuje...
Strona się ładuje...
Strona się ładuje...
Strona się ładuje...
Strona się ładuje...
Strona się ładuje...
Strona się ładuje...
Strona się ładuje...
Strona się ładuje...
Strona się ładuje...
Strona się ładuje...
Strona się ładuje...
Strona się ładuje...
Strona się ładuje...
Strona się ładuje...
Strona się ładuje...
Strona się ładuje...
Strona się ładuje...
Strona się ładuje...
Strona się ładuje...
Strona się ładuje...
Strona się ładuje...
Strona się ładuje...
Strona się ładuje...
Strona się ładuje...
Strona się ładuje...
Strona się ładuje...
Strona się ładuje...
Strona się ładuje...
Strona się ładuje...
Strona się ładuje...
Strona się ładuje...
Strona się ładuje...
Strona się ładuje...
Strona się ładuje...
Strona się ładuje...
Strona się ładuje...
Strona się ładuje...
Strona się ładuje...
Strona się ładuje...
Strona się ładuje...
Strona się ładuje...
Strona się ładuje...
Strona się ładuje...
Strona się ładuje...
Strona się ładuje...
Strona się ładuje...
Strona się ładuje...
Strona się ładuje...
Strona się ładuje...
Strona się ładuje...
Strona się ładuje...
Strona się ładuje...
Strona się ładuje...
Strona się ładuje...
Strona się ładuje...
Strona się ładuje...
Strona się ładuje...
Strona się ładuje...
Strona się ładuje...
Strona się ładuje...
Strona się ładuje...
Strona się ładuje...
Strona się ładuje...
Strona się ładuje...
Strona się ładuje...
Strona się ładuje...
Strona się ładuje...
Strona się ładuje...
Strona się ładuje...
Strona się ładuje...
Strona się ładuje...
Strona się ładuje...
Strona się ładuje...
Strona się ładuje...
Strona się ładuje...
Strona się ładuje...
Strona się ładuje...
Strona się ładuje...
Strona się ładuje...
Strona się ładuje...
Strona się ładuje...
Strona się ładuje...
-
 1
1
-
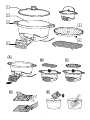 2
2
-
 3
3
-
 4
4
-
 5
5
-
 6
6
-
 7
7
-
 8
8
-
 9
9
-
 10
10
-
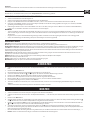 11
11
-
 12
12
-
 13
13
-
 14
14
-
 15
15
-
 16
16
-
 17
17
-
 18
18
-
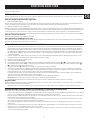 19
19
-
 20
20
-
 21
21
-
 22
22
-
 23
23
-
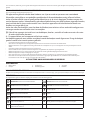 24
24
-
 25
25
-
 26
26
-
 27
27
-
 28
28
-
 29
29
-
 30
30
-
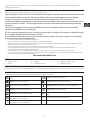 31
31
-
 32
32
-
 33
33
-
 34
34
-
 35
35
-
 36
36
-
 37
37
-
 38
38
-
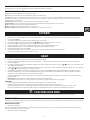 39
39
-
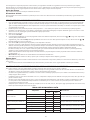 40
40
-
 41
41
-
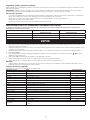 42
42
-
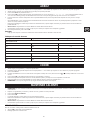 43
43
-
 44
44
-
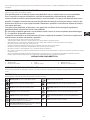 45
45
-
 46
46
-
 47
47
-
 48
48
-
 49
49
-
 50
50
-
 51
51
-
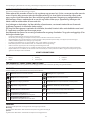 52
52
-
 53
53
-
 54
54
-
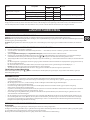 55
55
-
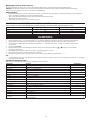 56
56
-
 57
57
-
 58
58
-
 59
59
-
 60
60
-
 61
61
-
 62
62
-
 63
63
-
 64
64
-
 65
65
-
 66
66
-
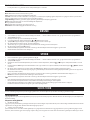 67
67
-
 68
68
-
 69
69
-
 70
70
-
 71
71
-
 72
72
-
 73
73
-
 74
74
-
 75
75
-
 76
76
-
 77
77
-
 78
78
-
 79
79
-
 80
80
-
 81
81
-
 82
82
-
 83
83
-
 84
84
-
 85
85
-
 86
86
-
 87
87
-
 88
88
-
 89
89
-
 90
90
-
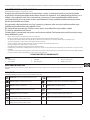 91
91
-
 92
92
-
 93
93
-
 94
94
-
 95
95
-
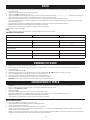 96
96
-
 97
97
-
 98
98
-
 99
99
-
 100
100
-
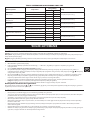 101
101
-
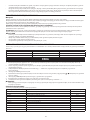 102
102
-
 103
103
-
 104
104
-
 105
105
-
 106
106
-
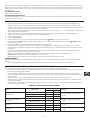 107
107
-
 108
108
-
 109
109
-
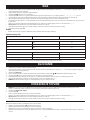 110
110
-
 111
111
-
 112
112
-
 113
113
-
 114
114
-
 115
115
-
 116
116
-
 117
117
-
 118
118
-
 119
119
-
 120
120
-
 121
121
-
 122
122
-
 123
123
-
 124
124
-
 125
125
-
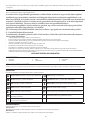 126
126
-
 127
127
-
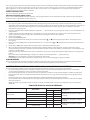 128
128
-
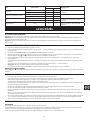 129
129
-
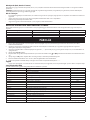 130
130
-
 131
131
-
 132
132
-
 133
133
-
 134
134
-
 135
135
-
 136
136
-
 137
137
-
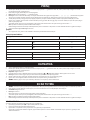 138
138
-
 139
139
-
 140
140
-
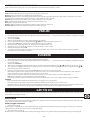 141
141
-
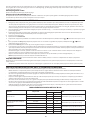 142
142
-
 143
143
-
 144
144
-
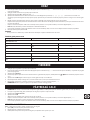 145
145
-
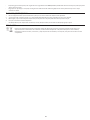 146
146
-
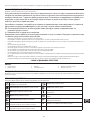 147
147
-
 148
148
-
 149
149
-
 150
150
-
 151
151
-
 152
152
-
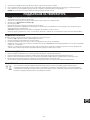 153
153
-
 154
154
-
 155
155
-
 156
156
-
 157
157
-
 158
158
-
 159
159
-
 160
160
-
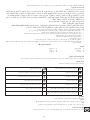 161
161
-
 162
162
-
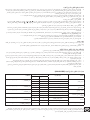 163
163
-
 164
164
-
 165
165
-
 166
166
-
 167
167
-
 168
168


w innych językach
- čeština: Russell Hobbs 28270-56 Uživatelský manuál
- español: Russell Hobbs 28270-56 Manual de usuario
- italiano: Russell Hobbs 28270-56 Manuale utente
- Deutsch: Russell Hobbs 28270-56 Benutzerhandbuch
- slovenčina: Russell Hobbs 28270-56 Používateľská príručka
- svenska: Russell Hobbs 28270-56 Användarmanual
- português: Russell Hobbs 28270-56 Manual do usuário
- français: Russell Hobbs 28270-56 Manuel utilisateur
- Türkçe: Russell Hobbs 28270-56 Kullanım kılavuzu
- English: Russell Hobbs 28270-56 User manual
- dansk: Russell Hobbs 28270-56 Brugermanual
- русский: Russell Hobbs 28270-56 Руководство пользователя
- suomi: Russell Hobbs 28270-56 Ohjekirja
- Nederlands: Russell Hobbs 28270-56 Handleiding
- română: Russell Hobbs 28270-56 Manual de utilizare
Powiązane artykuły


Inne dokumenty
-
Silvercrest SMUD 860 A1 Instrukcja obsługi
-
LG MS5642G Instrukcja obsługi
-
Bosch HBC84K553N Instrukcja obsługi
-
LG MH6043HM Instrukcja obsługi
-
Bosch HB84K.52B Instrukcja obsługi
-
LG MS2342BS Instrukcja obsługi
-
Amica PT4011 Instrukcja obsługi
-
-
Tesla MultiCook M50 Instrukcja obsługi
-
Gorenje SVI6B Instrukcja obsługi