Silvercrest SMUD 860 A1 Instrukcja obsługi
- Typ
- Instrukcja obsługi

IAN 271293
MULTI COOKER SMUD 860 A1
MULTI COOKER
Operating instructions
MULTIKOCHER
Bedienungsanleitung
MULTIFUNKČNÍ VAŘIČ
Návod k obsluze
MULTIVARIČ
Návod na obsluhu
MULTICOOKER - WIELOFUNKCYJNE
URZĄDZENIE DO GOTOWANIA
Instrukcja obsługi

GB Operating instructions Page 1
PL Instrukcja obsługi Strona 69
CZ Návod k obsluze Strana 137
SK Návod na obsluhu Strana 205
DE / AT / CH Bedienungsanleitung Seite 273
Before reading, unfold the page containing the illustrations and familiarise yourself with all functions of
the device.
Przed przeczytaniem proszę rozłożyć stronę z ilustracjami, a następnie proszę zapoznać się z wszystkimi
funkcjami urządzenia.
Před čtením si otevřete stranu s obrázky a potom se seznamte se všemi funkcemi přístroje.
Pred čítaním si odklopte stranu s obrázkami a potom sa oboznámte so všetkými funkciami prístroja.
Klappen Sie vor dem Lesen die Seite mit den Abbildungen aus und machen Sie sich anschließend mit allen
Funktionen des Gerätes vertraut.

A

C
B

GB
│
1 ■
SMUD 860 A1
Contents
Introduction ...................................................2
Intended use ..................................................2
Package contents ..............................................2
Description of the appliance .....................................3
Technical data .................................................4
Safety instructions .............................................4
Assembly and setting up ........................................7
Before first use ................................................8
Operation ....................................................9
Button functions .......................................................... 9
General ...............................................................10
Programme overview .....................................................11
Use of the standard programme ............................................ 12
Multi-function programme .................................................27
Keep-warm function ......................................................28
Delayed cooking/timer ...................................................28
Cleaning and care .............................................29
Storage .....................................................32
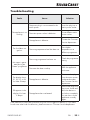
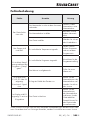
Troubleshooting ..............................................33
Warranty and service ..........................................34
Disposal .....................................................35
Importer .....................................................35
Recipes ......................................................36
Multi-function programme .................................................36
"Bake" programme .......................................................41
"Sear" programme .......................................................43
"Rice" programme ....................................................... 45
"Rice pudding" programme ................................................48
"Pasta" programme ...................................................... 50
"Yoghurt" programme .................................................... 53
"Cake" programme ......................................................53
"Slow cooking" programme ................................................56
"Steam" programme ...................................................... 59
"Potatoes" programme .................................................... 62
"Soup" programme ......................................................63
"Stew" programme ....................................................... 64
"Jam" programme .......................................................66

■ 2
│
GB
SMUD 860 A1
Introduction
Congratulations on the purchase of your new appliance.
You have selected a high-quality product. The operating instructions are part of
this product. They contain important information on safety, usage and disposal.
Before using the product, familiarise yourself with all operating and safety instruc-
tions. Use the product only as described and for the specified areas of application.
Please also pass on these operating instructions to any future owner.
Intended use
This appliance is intended exclusively for the preparation of food. This appliance
is intended solely for use in private households. Do not use it for commercial
purposes.
Package contents
Multi Cooker (base) with inner bowl
Steamer
Measuring cup
Spoon
Ladle
Quick guide
Operating instructions
NOTE
Check contents for completeness and damage immediately after unpacking.
Contact Customer Services if necessary.

GB
│
3 ■
SMUD 860 A1
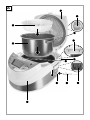
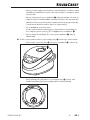
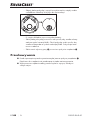
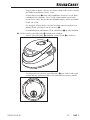
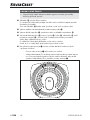
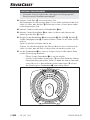
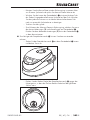
Description of the appliance
Figure A:
Appliance lid
Steam vent
Lifting aid
Condensation collector
Handle
Lid release
Socket
Connection plug
Cutlery bracket
Base
- Inner bowl
3 Steamer
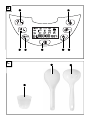
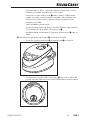
Figure B:
! Temperature button
. Timer button
0 Start button
6 Menu button
1 Stop button
% min/- button
+ h/+ button
Figure C:
, Measuring cup
Spoon
/ Ladle

■ 4
│
GB
SMUD 860 A1
Technical data
Rated voltage: 220 - 240 V
~
, 50/60 Hz
Max. power consumption: 860 W
Safety instructions
DANGER – RISK OF ELECTRIC SHOCK!
► Do not use the appliance outdoors.
► To prevent accidents, have defective plugs and/or power
cables replaced immediately by an authorised specialist
technician or our Customer Service department.
► Do not kink or crush the power cable. Keep the power cable
well away from sources of heat.
► Never handle the plug or the power cable with wet hands.
► Always remove the inner bowl from the base before cleaning
it in water!
NEVER immerse the appliance in water or any other
liquid!
WARNING! RISK OF INJURY!
► Cooking appliances should be set up in a stable location
using the handles to avoid spillage of hot liquids.
► This appliance must not to be used by children under the age
of 8.
► This appliance may be used by children aged 8 and above
if they are under constant supervision.
► Cleaning and maintenance may not be carried out by children.
► Children must not use the appliance as a plaything.

GB
│
5 ■
SMUD 860 A1
WARNING! RISK OF INJURY!
► Children younger than 8 years of age must be kept away
from the appliance and the power cable.
► This appliance may be used by persons with limited physical,
sensory or mental capabilities or lack of experience and
knowledge, provided that they are under supervision or
have been told how to use the appliance safely and are
aware of the potential risks.
► To ensure that you can disconnect the appliance quickly in
the event of an emergency, do not use extension cables.
► Do not operate the appliance if it has been dropped or is
damaged in any way. Have the appliance checked and/or
repaired by qualified technicians if necessary.
► Hot steam is released during operation, especially when the
lid is opened. Keep a safe distance away from the steam.
► Ensure that all parts are completely dry before pouring oil or
liquid fat into the appliance. Otherwise, hot oil or fat could
splatter out.
► Use the inner bowl only with the supplied base.
► Ensure that all parts of the appliance are completely dry before
operating the appliance. Dry all parts properly after cleaning.
Caution! Hot surface!

■ 6
│
GB
SMUD 860 A1
WARNING! RISK OF INJURY!
► Some parts of the appliance become very hot during operation.
Touching these may cause serious burns.
► After use, always use oven gloves to touch the inner bowl
and the lifting aids on the inner bowl. Risk of burns!
► Never pour liquids directly into the base! Always insert the
inner bowl first.
WARNING! RISK OF FIRE!
► Do not use the appliance near hot surfaces.
► Never leave the appliance unattended while it is being used.
► Do not use an external timing switch or a separate remote
control system to operate the appliance.
CAUTION! MATERIAL DAMAGE!
► Do not place the appliance close to open flames or other
sources of heat (heating, direct sunlight, gas stoves, etc.).
► Never place the appliance in a fitted cupboard, recesses or
similar.
► Be careful when using metallic, pointed, or sharp objects to
remove food from the appliance. These can damage the
coating of your appliance!
► Do not cut any food in the inner bowl! This can damage the
coating of your appliance.

GB
│
7 ■
SMUD 860 A1
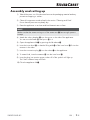
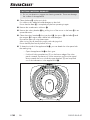
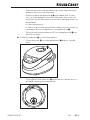
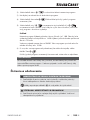
Assembly and setting up
1) Take all the parts out of the box and remove the packaging material and any
protective wrapping or stickers.
2) Clean all components as described in the section "Cleaning and Care".
Ensure that all parts are completely dry.
3) Place the appliance on a clean and level heat-resistant surface.
NOTE
Make sure that the steam coming out of the steam vent has enough space to
escape.
4) Attach the cutlery bracket onto the mount on the side of the appliance.
You can store the ladle / and spoon in it.
5) Open the appliance lid by pressing the lid release .
6) Insert the inner bowl - so that the lifting aids of the inner bowl - fit into the
recesses in the sides.
7) Insert the connection plug into the socket on the appliance.
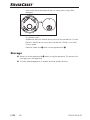
8) To steam food, insert the steamer 3 into the inner bowl -.
9) Insert the plug into a mains power socket. All of the symbols will light up.
The "Start" indicator lamp will flash.
10) Close the appliance lid .

■ 8
│
GB
SMUD 860 A1
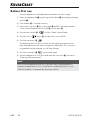
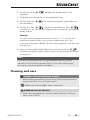
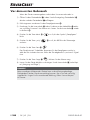
Before first use
Once the appliance is assembled and connected to the mains supply:
1) Open the appliance lid by pressing the lid release and opening the appli-
ance lid .
2) If the steamer 3 is inserted, remove it.
3) Remove the inner bowl - by its lifting aids and fill it with approximately
1 litre of water. Replace the inner bowl - into the base .
4) Press the menu button 6
until the "Steam" symbol flashes.
5) Press the "min/-
" button % until the timer is set to 00:30.
6) Press the start button 0
.
The appliance heats up. As soon as the correct steaming temperature has
been reached, the time will start counting down backwards. As soon as the
programmed time has elapsed, you will hear 5 beeps.
7) Press the stop button 1
. Tip the water away.
8) Allow the appliance to cool down and clean the inner bowl - (see section
"Cleaning and maintenance").
NOTE
The first time the appliance heats up, some odour may be generated due to
production-related residue. This is normal and is completely harmless. Ensure
sufficient ventilation; for example, by opening a window.

GB
│
9 ■
SMUD 860 A1
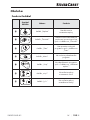
Operation
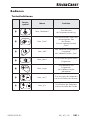
Button functions
Button
symbols
Name Function
!
"Temperature" button
Activates the temperature
setting.
.
"Timer" button
Activates the timer to start the
appliance after a time delay.
Includes "Timer" indicator lamp.
0
"Start" button
Starts the selected programme.
Includes "Start" indicator lamp.
6
"Menu" button
For selecting the desired
programme.
1
"Stop" button
For stopping a programme.
Includes indicator lamp
"keep warm"
%
"min/-" button
For reducing the temperature
and setting the minutes.
+
"h/+" button
For increasing the temperature
and setting the hours.

■ 10
│
GB
SMUD 860 A1
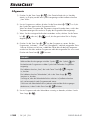
General
1) Press the stop button 1 . The appliance is in standby mode: All symbols
are shown on the display; the "start" indicator lamp flashes.
2) To select a programme, press the menu button 6
until the symbol of the
desired programme flashes.
If this programme allows you to set a temperature, the temperature indication on
the bottom left of the display will show the set value.
3) If you want to change the preset cooking time, press the h/+ +
or min/-
%
buttons until the desired time is shown on the display.
4) Press the start button 0
to start the programme. In the "Sear", "Pasta", and
"Steam" programmes, the set time starts counting down in 1-minute steps once the
device has reached the desired temperature. In all other programmes, the set time
counts down immediately after you press the start button 0 .
NOTE
During the cooking process, the symbol and the symbol , the remaining
duration of the programme, and the symbol of the currently active programme
are displayed.
The indicator lamp "Start", which is integrated into the "Start" button 0
, is lit.
The indicator lamp "Keep Warm", which is integrated into the "Stop"
button1
, is lit.
It indicates that the keep-warm function is activated (indicator lamp on) and
will start automatically after the programme finishes.
You can deactivate the keep-warm function at any time during the cooking
process by pressing the start button 0
.
5) To interrupt a programme or the keep-warm function, press the stop button 1
.

GB
│
11 ■
SMUD 860 A1
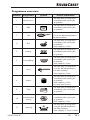
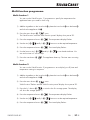
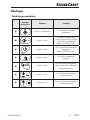
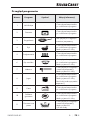
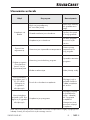
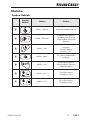
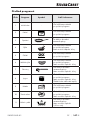
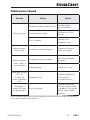
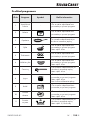
Programme overview
Number Programme Symbol Further information
1 Multi-function -
- The time starts counting down
immediately after starting the
programme.
2 Bake
- The time starts counting down
immediately after starting the
programme.
3 Sear
The time starts counting down as
soon as the desired temperature
has been reached.
4 Rice
- The time starts counting down
immediately after starting the
programme.
- Max. capacity: 4 litres
5 Heat-up
- The time starts counting down
immediately after starting the
programme.
6 Rice pudding
- The time starts counting down
immediately after starting the
programme.
- Max. capacity: 4 litres
7Pasta
- The time starts counting down
once the desired temperature
has been reached.
- Max. capacity: 4 litres
8 Yoghurt
- The time starts counting down
immediately after starting the
programme.
- Max. capacity: 4 litres
- No keep-warm function
9 Cake
- The time starts counting down
immediately after starting the
programme.
10
Low-temperature
cooking
- The time starts counting down
immediately after starting the
programme.
- Max. capacity: 4 litres
11 Steaming
- The time starts counting down
once the desired temperature
has been reached.
- Max. capacity: 2.5 litres of water

■ 12
│
GB
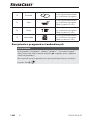
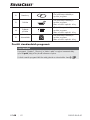
SMUD 860 A1
12 Potatoes
- The time starts counting down
immediately after starting the
programme.
13 Soup
- The time starts counting down
immediately after starting the
programme.
- Max. capacity: 4 litres
14 Stew
- The time starts counting down
immediately after starting the
programme.
- Max. capacity: 4 litres
15 Jam
- The time starts counting down
immediately after starting the
programme.
- Max. capacity: 4 litres
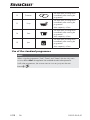
Use of the standard programme
NOTE
When using the programmes "Sear", "Pasta", and "Steam", the time only starts
to count down after the appliance has reached the desired temperature.
In all other programmes, the counter starts as soon as you press the start
button 0 .

GB
│
13 ■
SMUD 860 A1
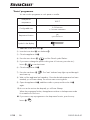
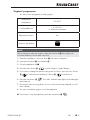
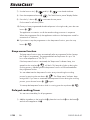
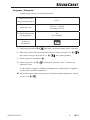
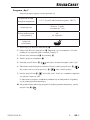
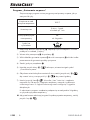
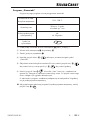
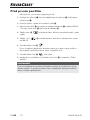
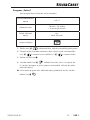
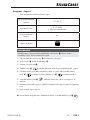
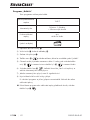
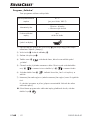
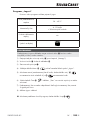
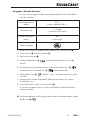
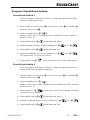
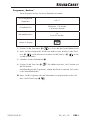
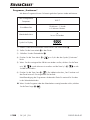
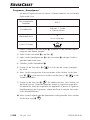
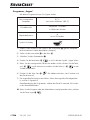
"Bake" programme
You can use this programme like an oven.
fixed pre-set
temperature
145°C
Configurable time
10 minutes to 2.5 hours
in 5-minute increments
Keep-warm function
yes
up to 24 hours
Symbol in the display
1) Press the menu button 6 until the "Bake" symbol flashes.
2) If you want to change the preset cooking time of 30 minutes, press the min/-
button %
to set the minutes and the h/+ button + to set the hours.
3) Close the appliance lid .
4) Press the start button 0
. The "start" indicator lamp lights up and the time
starts counting down.
When the programme finishes, the appliance switches to the keep-warm mode
for a maximum of 24 hours.
■ If you want to stop a programme or the keep-warm function, press the stop
button 1
.

■ 14
│
GB
SMUD 860 A1
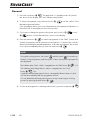
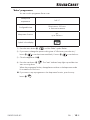
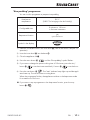
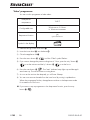
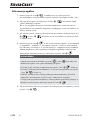
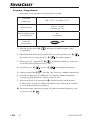
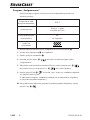
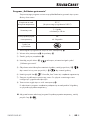
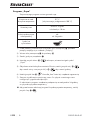
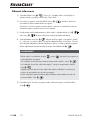
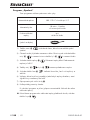
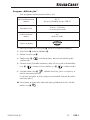
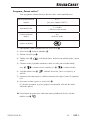
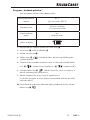
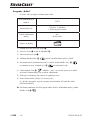
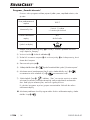
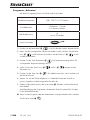
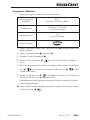
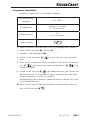
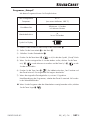
"Sear" programme
You can use this programme to sear meat or fish.
Configurable tempera-
ture
approx. 100–170°C in increments of 5°C
Configurable time
10 minutes to 1 hour
in 5-minute increments
Keep-warm function
yes
up to 24 hours
Symbol in the display
1) Press the menu button 6 until the "Sear" symbol flashes.
2) If you want to change the preset cooking time of 30 minutes, press the min/-
button %
to set the minutes and the h/+ button + to set the hours.
3) Press the temperature button !
. The temperature display flashes.
The pre-set temperature is 140°C.
4) Use the min/- %
and h/+ + buttons to set the required temperature.
5) Press the start button 0
. The "start" indicator lamp lights up and the appli-
ance heats up.
6) Wait until the appliance has heated up. As soon as the temperature has been
reached, you will hear a beep and the set time will start counting down.
7) Place the ingredients into the inner bowl -. Flip the food as necessary.
When the programme finishes, the appliance switches to the keep-warm mode
for a maximum of 24 hours.
■ If you want to stop a programme or the keep-warm function, press the stop
button 1
.

GB
│
15 ■
SMUD 860 A1
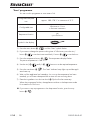
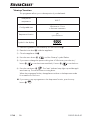
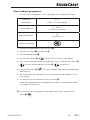
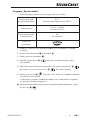
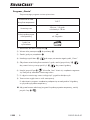
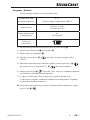
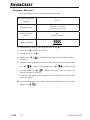
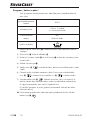
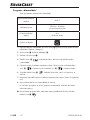
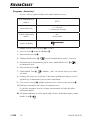
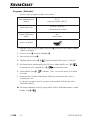
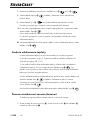
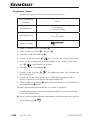
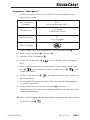
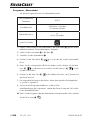
"Rice" programme
You can use this programme to cook rice.
fixed pre-set
temperature
115°C (140°C at the end of the programme)
Configurable time
20 minutes to 2 hours
in 1-minute increments
Keep-warm function
yes
up to 24 hours
Symbol in the display
1) Place the rinsed rice into the inner bowl -.
2) Add water to the inner bowl -. See the recipes for the amounts required
(see section "Recipes")!
3) Insert the inner bowl - into the base .
4) Close the appliance lid .
5) Press the menu button 6
until the "Rice" symbol flashes.
6) If you want to change the preset cooking time of 30 minutes, press the min/- %
button to set the minutes and the h/+ + button to set the hours.
7) Press the start button 0
. The "start" indicator lamp lights up and the appli-
ance heats up. The set time starts counting down.
When the programme finishes, the appliance switches to the keep-warm mode
for a maximum of 24 hours.
■ If you want to stop a programme or the keep-warm function, press the stop
button 1
.

■ 16
│
GB
SMUD 860 A1
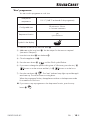
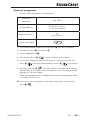
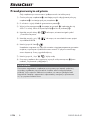
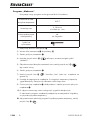
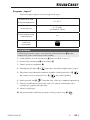
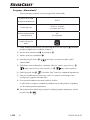
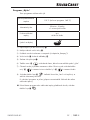
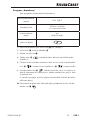
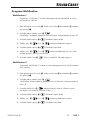
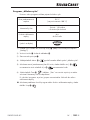
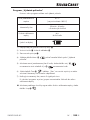
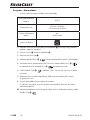
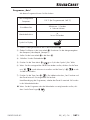
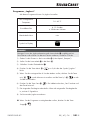
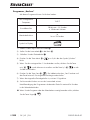
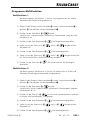
"Heat-up" function
This programme allows you to reheat previously cooked meals.
fixed pre-set
temperature
105°C
Configurable time
10 minutes to 1 hour
in 5-minute increments
Keep-warm function
yes
up to 24 hours
Symbol in the display
1) Place the ingredients to be heated up into the inner bowl -.
2) Place the inner bowl - inside the appliance.
3) Close the appliance lid .
4) Press the menu button 6
until the "Heat-up" symbol flashes.
5) If you want to change the preset cooking time of 20 minutes, press the min/-
button %
to set the minutes and the h/+ button + to set the hours.
6) Press the start button 0
. The "start" indicator lamp lights up and the appli-
ance heats up. The set time starts counting down.
When the programme finishes, the appliance switches to the keep-warm mode
for a maximum of 24 hours.
■ If you want to stop a programme or the keep-warm function, press the stop
button 1 .
Strona się ładuje...
Strona się ładuje...
Strona się ładuje...
Strona się ładuje...
Strona się ładuje...
Strona się ładuje...
Strona się ładuje...
Strona się ładuje...
Strona się ładuje...
Strona się ładuje...
Strona się ładuje...
Strona się ładuje...
Strona się ładuje...
Strona się ładuje...
Strona się ładuje...
Strona się ładuje...
Strona się ładuje...
Strona się ładuje...
Strona się ładuje...
Strona się ładuje...
Strona się ładuje...
Strona się ładuje...
Strona się ładuje...
Strona się ładuje...
Strona się ładuje...
Strona się ładuje...
Strona się ładuje...
Strona się ładuje...
Strona się ładuje...
Strona się ładuje...
Strona się ładuje...
Strona się ładuje...
Strona się ładuje...
Strona się ładuje...
Strona się ładuje...
Strona się ładuje...
Strona się ładuje...
Strona się ładuje...
Strona się ładuje...
Strona się ładuje...
Strona się ładuje...
Strona się ładuje...
Strona się ładuje...
Strona się ładuje...
Strona się ładuje...
Strona się ładuje...
Strona się ładuje...
Strona się ładuje...
Strona się ładuje...
Strona się ładuje...
Strona się ładuje...
Strona się ładuje...
Strona się ładuje...
Strona się ładuje...
Strona się ładuje...
Strona się ładuje...
Strona się ładuje...
Strona się ładuje...
Strona się ładuje...
Strona się ładuje...
Strona się ładuje...
Strona się ładuje...
Strona się ładuje...
Strona się ładuje...
Strona się ładuje...
Strona się ładuje...
Strona się ładuje...
Strona się ładuje...
Strona się ładuje...
Strona się ładuje...
Strona się ładuje...
Strona się ładuje...
Strona się ładuje...
Strona się ładuje...
Strona się ładuje...
Strona się ładuje...
Strona się ładuje...
Strona się ładuje...
Strona się ładuje...
Strona się ładuje...
Strona się ładuje...
Strona się ładuje...
Strona się ładuje...
Strona się ładuje...
Strona się ładuje...
Strona się ładuje...
Strona się ładuje...
Strona się ładuje...
Strona się ładuje...
Strona się ładuje...
Strona się ładuje...
Strona się ładuje...
Strona się ładuje...
Strona się ładuje...
Strona się ładuje...
Strona się ładuje...
Strona się ładuje...
Strona się ładuje...
Strona się ładuje...
Strona się ładuje...
Strona się ładuje...
Strona się ładuje...
Strona się ładuje...
Strona się ładuje...
Strona się ładuje...
Strona się ładuje...
Strona się ładuje...
Strona się ładuje...
Strona się ładuje...
Strona się ładuje...
Strona się ładuje...
Strona się ładuje...
Strona się ładuje...
Strona się ładuje...
Strona się ładuje...
Strona się ładuje...
Strona się ładuje...
Strona się ładuje...
Strona się ładuje...
Strona się ładuje...
Strona się ładuje...
Strona się ładuje...
Strona się ładuje...
Strona się ładuje...
Strona się ładuje...
Strona się ładuje...
Strona się ładuje...
Strona się ładuje...
Strona się ładuje...
Strona się ładuje...
Strona się ładuje...
Strona się ładuje...
Strona się ładuje...
Strona się ładuje...
Strona się ładuje...
Strona się ładuje...
Strona się ładuje...
Strona się ładuje...
Strona się ładuje...
Strona się ładuje...
Strona się ładuje...
Strona się ładuje...
Strona się ładuje...
Strona się ładuje...
Strona się ładuje...
Strona się ładuje...
Strona się ładuje...
Strona się ładuje...
Strona się ładuje...
Strona się ładuje...
Strona się ładuje...
Strona się ładuje...
Strona się ładuje...
Strona się ładuje...
Strona się ładuje...
Strona się ładuje...
Strona się ładuje...
Strona się ładuje...
Strona się ładuje...
Strona się ładuje...
Strona się ładuje...
Strona się ładuje...
Strona się ładuje...
Strona się ładuje...
Strona się ładuje...
Strona się ładuje...
Strona się ładuje...
Strona się ładuje...
Strona się ładuje...
Strona się ładuje...
Strona się ładuje...
Strona się ładuje...
Strona się ładuje...
Strona się ładuje...
Strona się ładuje...
Strona się ładuje...
Strona się ładuje...
Strona się ładuje...
Strona się ładuje...
Strona się ładuje...
Strona się ładuje...
Strona się ładuje...
Strona się ładuje...
Strona się ładuje...
Strona się ładuje...
Strona się ładuje...
Strona się ładuje...
Strona się ładuje...
Strona się ładuje...
Strona się ładuje...
Strona się ładuje...
Strona się ładuje...
Strona się ładuje...
Strona się ładuje...
Strona się ładuje...
Strona się ładuje...
Strona się ładuje...
Strona się ładuje...
Strona się ładuje...
Strona się ładuje...
Strona się ładuje...
Strona się ładuje...
Strona się ładuje...
Strona się ładuje...
Strona się ładuje...
Strona się ładuje...
Strona się ładuje...
Strona się ładuje...
Strona się ładuje...
Strona się ładuje...
Strona się ładuje...
Strona się ładuje...
Strona się ładuje...
Strona się ładuje...
Strona się ładuje...
Strona się ładuje...
Strona się ładuje...
Strona się ładuje...
Strona się ładuje...
Strona się ładuje...
Strona się ładuje...
Strona się ładuje...
Strona się ładuje...
Strona się ładuje...
Strona się ładuje...
Strona się ładuje...
Strona się ładuje...
Strona się ładuje...
Strona się ładuje...
Strona się ładuje...
Strona się ładuje...
Strona się ładuje...
Strona się ładuje...
Strona się ładuje...
Strona się ładuje...
Strona się ładuje...
Strona się ładuje...
Strona się ładuje...
Strona się ładuje...
Strona się ładuje...
Strona się ładuje...
Strona się ładuje...
Strona się ładuje...
Strona się ładuje...
Strona się ładuje...
Strona się ładuje...
Strona się ładuje...
Strona się ładuje...
Strona się ładuje...
Strona się ładuje...
Strona się ładuje...
Strona się ładuje...
Strona się ładuje...
Strona się ładuje...
Strona się ładuje...
Strona się ładuje...
Strona się ładuje...
Strona się ładuje...
Strona się ładuje...
Strona się ładuje...
Strona się ładuje...
Strona się ładuje...
Strona się ładuje...
Strona się ładuje...
Strona się ładuje...
Strona się ładuje...
Strona się ładuje...
Strona się ładuje...
Strona się ładuje...
Strona się ładuje...
Strona się ładuje...
Strona się ładuje...
Strona się ładuje...
Strona się ładuje...
Strona się ładuje...
Strona się ładuje...
Strona się ładuje...
Strona się ładuje...
Strona się ładuje...
Strona się ładuje...
Strona się ładuje...
Strona się ładuje...
Strona się ładuje...
Strona się ładuje...
Strona się ładuje...
Strona się ładuje...
Strona się ładuje...
Strona się ładuje...
Strona się ładuje...
Strona się ładuje...
Strona się ładuje...
Strona się ładuje...
Strona się ładuje...
Strona się ładuje...
Strona się ładuje...
Strona się ładuje...
Strona się ładuje...
Strona się ładuje...
Strona się ładuje...
Strona się ładuje...
Strona się ładuje...
Strona się ładuje...
Strona się ładuje...
Strona się ładuje...
Strona się ładuje...
Strona się ładuje...
Strona się ładuje...
Strona się ładuje...
Strona się ładuje...
Strona się ładuje...
Strona się ładuje...
Strona się ładuje...
Strona się ładuje...
Strona się ładuje...
Strona się ładuje...
Strona się ładuje...
Strona się ładuje...
Strona się ładuje...
Strona się ładuje...
Strona się ładuje...
Strona się ładuje...
Strona się ładuje...
Strona się ładuje...
Strona się ładuje...
-
 1
1
-
 2
2
-
 3
3
-
 4
4
-
 5
5
-
 6
6
-
 7
7
-
 8
8
-
 9
9
-
 10
10
-
 11
11
-
 12
12
-
 13
13
-
 14
14
-
 15
15
-
 16
16
-
 17
17
-
 18
18
-
 19
19
-
 20
20
-
 21
21
-
 22
22
-
 23
23
-
 24
24
-
 25
25
-
 26
26
-
 27
27
-
 28
28
-
 29
29
-
 30
30
-
 31
31
-
 32
32
-
 33
33
-
 34
34
-
 35
35
-
 36
36
-
 37
37
-
 38
38
-
 39
39
-
 40
40
-
 41
41
-
 42
42
-
 43
43
-
 44
44
-
 45
45
-
 46
46
-
 47
47
-
 48
48
-
 49
49
-
 50
50
-
 51
51
-
 52
52
-
 53
53
-
 54
54
-
 55
55
-
 56
56
-
 57
57
-
 58
58
-
 59
59
-
 60
60
-
 61
61
-
 62
62
-
 63
63
-
 64
64
-
 65
65
-
 66
66
-
 67
67
-
 68
68
-
 69
69
-
 70
70
-
 71
71
-
 72
72
-
 73
73
-
 74
74
-
 75
75
-
 76
76
-
 77
77
-
 78
78
-
 79
79
-
 80
80
-
 81
81
-
 82
82
-
 83
83
-
 84
84
-
 85
85
-
 86
86
-
 87
87
-
 88
88
-
 89
89
-
 90
90
-
 91
91
-
 92
92
-
 93
93
-
 94
94
-
 95
95
-
 96
96
-
 97
97
-
 98
98
-
 99
99
-
 100
100
-
 101
101
-
 102
102
-
 103
103
-
 104
104
-
 105
105
-
 106
106
-
 107
107
-
 108
108
-
 109
109
-
 110
110
-
 111
111
-
 112
112
-
 113
113
-
 114
114
-
 115
115
-
 116
116
-
 117
117
-
 118
118
-
 119
119
-
 120
120
-
 121
121
-
 122
122
-
 123
123
-
 124
124
-
 125
125
-
 126
126
-
 127
127
-
 128
128
-
 129
129
-
 130
130
-
 131
131
-
 132
132
-
 133
133
-
 134
134
-
 135
135
-
 136
136
-
 137
137
-
 138
138
-
 139
139
-
 140
140
-
 141
141
-
 142
142
-
 143
143
-
 144
144
-
 145
145
-
 146
146
-
 147
147
-
 148
148
-
 149
149
-
 150
150
-
 151
151
-
 152
152
-
 153
153
-
 154
154
-
 155
155
-
 156
156
-
 157
157
-
 158
158
-
 159
159
-
 160
160
-
 161
161
-
 162
162
-
 163
163
-
 164
164
-
 165
165
-
 166
166
-
 167
167
-
 168
168
-
 169
169
-
 170
170
-
 171
171
-
 172
172
-
 173
173
-
 174
174
-
 175
175
-
 176
176
-
 177
177
-
 178
178
-
 179
179
-
 180
180
-
 181
181
-
 182
182
-
 183
183
-
 184
184
-
 185
185
-
 186
186
-
 187
187
-
 188
188
-
 189
189
-
 190
190
-
 191
191
-
 192
192
-
 193
193
-
 194
194
-
 195
195
-
 196
196
-
 197
197
-
 198
198
-
 199
199
-
 200
200
-
 201
201
-
 202
202
-
 203
203
-
 204
204
-
 205
205
-
 206
206
-
 207
207
-
 208
208
-
 209
209
-
 210
210
-
 211
211
-
 212
212
-
 213
213
-
 214
214
-
 215
215
-
 216
216
-
 217
217
-
 218
218
-
 219
219
-
 220
220
-
 221
221
-
 222
222
-
 223
223
-
 224
224
-
 225
225
-
 226
226
-
 227
227
-
 228
228
-
 229
229
-
 230
230
-
 231
231
-
 232
232
-
 233
233
-
 234
234
-
 235
235
-
 236
236
-
 237
237
-
 238
238
-
 239
239
-
 240
240
-
 241
241
-
 242
242
-
 243
243
-
 244
244
-
 245
245
-
 246
246
-
 247
247
-
 248
248
-
 249
249
-
 250
250
-
 251
251
-
 252
252
-
 253
253
-
 254
254
-
 255
255
-
 256
256
-
 257
257
-
 258
258
-
 259
259
-
 260
260
-
 261
261
-
 262
262
-
 263
263
-
 264
264
-
 265
265
-
 266
266
-
 267
267
-
 268
268
-
 269
269
-
 270
270
-
 271
271
-
 272
272
-
 273
273
-
 274
274
-
 275
275
-
 276
276
-
 277
277
-
 278
278
-
 279
279
-
 280
280
-
 281
281
-
 282
282
-
 283
283
-
 284
284
-
 285
285
-
 286
286
-
 287
287
-
 288
288
-
 289
289
-
 290
290
-
 291
291
-
 292
292
-
 293
293
-
 294
294
-
 295
295
-
 296
296
-
 297
297
-
 298
298
-
 299
299
-
 300
300
-
 301
301
-
 302
302
-
 303
303
-
 304
304
-
 305
305
-
 306
306
-
 307
307
-
 308
308
-
 309
309
-
 310
310
-
 311
311
-
 312
312
-
 313
313
-
 314
314
-
 315
315
-
 316
316
-
 317
317
-
 318
318
-
 319
319
-
 320
320
-
 321
321
-
 322
322
-
 323
323
-
 324
324
-
 325
325
-
 326
326
-
 327
327
-
 328
328
-
 329
329
-
 330
330
-
 331
331
-
 332
332
-
 333
333
-
 334
334
-
 335
335
-
 336
336
-
 337
337
-
 338
338
-
 339
339
-
 340
340
-
 341
341
-
 342
342
-
 343
343
-
 344
344


Silvercrest SMUD 860 A1 Instrukcja obsługi
- Typ
- Instrukcja obsługi
w innych językach
- Deutsch: Silvercrest SMUD 860 A1 Bedienungsanleitung
- slovenčina: Silvercrest SMUD 860 A1 Návod na používanie
Powiązane artykuły
Inne dokumenty
-
Russell Hobbs 28270-56 Instrukcja obsługi
-
Panasonic SRTMJ501 Instrukcja obsługi
-
-
Bosch MUC28B64DE/01 Instrukcja obsługi
-
Profi Cook PC-SV 1112 Instrukcja obsługi
-
ProfiCook PC-SV 1126 Instrukcja obsługi
-
Morphy Richards 48730 Instrukcja obsługi
-
Ninja MC501 Skrócona instrukcja obsługi
-
Oursson MP5010PSD Instrukcja obsługi
-