Silvercrest SGS 100 A1 Operating Instructions Manual
- Typ
- Operating Instructions Manual

FACIAL SAUNA SGS 100 A1
FACIAL SAUNA
Operating instructions
ARCSZAUNA
Kezelési útmutató
OBLIČEJOVÁ SAUNA
Návod k obsluze
GESICHTSSAUNA
Bedienungsanleitung
SAUNA DO TWARZY
Instrukcja obsługi
OBRAZNA SAVNA
Navodilo za uporabo
SAUNA NA TVÁR
Návod na obsluhu
IAN 114213
GRa114213_Gesichtssauna_Cover_LB4.indd 2 15.06.15 11:06

English..................................................................................... 2
Polski .................................................................................... 12
Magyar ................................................................................. 24
Slovenšina ........................................................................... 36
esky .................................................................................... 46
Slovenina............................................................................. 56
Deutsch ................................................................................. 68
ID: SGS 100 A1_15_V1.4
BB*5$B*HVLFKWVVDXQDB%ERRN6HLWH'RQQHUVWDJ-XOL

Overview / Przegld / Áttekintés / Pregled / Pehled / Prehad /
Übersicht
1
2
4
5
10
6
11
8
7
3
E
C
A
B
9
D
11
BB*5$B*HVLFKWVVDXQDB%ERRN6HLWH'RQQHUVWDJ-XOL

2
GB
Contents
1. Overview ........................................................................................ 2
2. Intended purpose ............................................................................ 3
3. Safety information ........................................................................... 4
4. Items supplied ................................................................................. 5
5. Before using for the first time ........................................................... 6
6. Assembly ......................................................................................... 6
6.1 Herbs and oil ....................................................................................... 6
6.2 Set-up with face mask............................................................................ 6
6.3 Set-up with nose mask ........................................................................... 6
7. Operation ........................................................................................ 7
7.1 Switching on and off ............................................................................. 7
7.2 Switching off automatically..................................................................... 7
7.3 Face mask............................................................................................ 7
7.4 Nose mask........................................................................................... 8
8. Cleaning .......................................................................................... 8
9. Storage ........................................................................................... 9
10. Disposal .......................................................................................... 9
11. Troubleshooting ............................................................................... 9
12. Technical specifications .................................................................... 9
13. Warranty of the HOYER Handel GmbH ........................................... 10
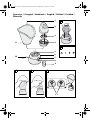
1. Overview
1 Face mask with aroma reservoir
2 Nose mask
3 Lid for the aroma reservoirs
4 Aroma reservoir for the nose mask
5 Water container
6 Base unit
7 On/off switch / steam flow rate controller
8 LED, lights up when the device is switched on
9 Measuring beaker
10 Connector cable with mains plug
11 Manual steam flow rate controller
BB*5$B*HVLFKWVVDXQDB%ERRN6HLWH'RQQHUVWDJ-XOL

3
GB
Thank you for your trust!
Congratulations on the purchase of your new
facial sauna
.
For a safe handling of the product and in or-
der to get to know the entire scope of fea-
tures:
• Thoroughly read these operat-
ing instructions prior to initial
commissioning.
• Above all, observe the safety in-
structions!
• The device should only be used
as described in these operating
instructions.
• Keep these operating instruc-
tions for reference.
• If you pass the device on to
someone else, please include
these operating instructions. The
operating instructions are a part
of the product.
We hope you enjoy using your new facial
sauna!
Symbols on your device
The symbol indicates that the nose mask 2
may only be used with stage I.
2. Intended purpose
The facial sauna is used for facial beauty
care by steam.
The device is designed for private home use
and must not be used for commercial pur-
poses.
The device must only be used indoors.
Foreseeable misuse
WARNING! Risk of injury!
This device does not replace a medical inha-
lation device.
The facial sauna must not be used if you suf-
fer from one of the following diseases.
- Skin inflammations
- Wounds/swellings in the face
-Skin reddening
- Diabetes
- Eczema or psoriasis
- Heart disease.
If in doubt, ask you doctor whether the use
of the facial sauna is medically compatible
for you.
WARNING! Risk of material dam-
age!
Please do not add any additives to the water
in the water tank such as e.g. oils. After the
water has evaporated these additives may
burn in and cause damage to the water
tank.
NOTE:
For safety reasons the device switches off
automatically if the water in the water con-
tainer has evaporated. Before the device
can then be switched back on again, the
mains plug must be disconnected once
and then re-connected.
BB*5$B*HVLFKWVVDXQDB%ERRN6HLWH'RQQHUVWDJ-XOL

4
GB
3. Safety information
Warnings
If necessary, the following warnings will be used in these operating instructions:
DANGER! High risk: failure to observe this warning may result in injury to life and
limb.
WARNING! Moderate risk: failure to observe this warning may result in injury or serious
material damage.
CAUTION: low risk: failure to observe this warning may result in minor injury or material
damage.
NOTE: circumstances and specifics that must be observed when handling the device.
Instructions for safe operation
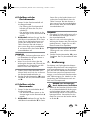
~
This device can be used by children from the age of 8 and people
with restricted physical, sensory or intellectual abilities or people
without adequate experience and/or understanding, if they are su-
pervised or instructed on how to use this device safely and if they
are aware of the resulting danger. Children must not play with the
device. Cleaning and user maintenance must not be performed by
children unless they are older than 8 years and supervised.
~
Keep children under the age of 8 away from the device and the
power cable.
~
If you use the facial sauna in a bathroom, always pull out the mains
plug afterwards. The proximity of water represents a hazard even
when the device is switched off.
~
If the mains power cable of this device should become damaged, it
must be replaced by the manufacturer, the manufacturer's customer
service department or a similarly qualified specialist, in order to
avoid any hazards.
~
In order to avoid the accumulation of grease or the drying in of oth-
er residues, all device parts used must be cleaned after each use.
DANGER for children
~ Packing materials are not children's
toys. Children should not be allowed to
play with the plastic bags: there is a risk
of suffocation!
DANGER to or from pets and
livestock
~ Electrical devices can also represent a
hazard to pets and livestock. In addi-
tion, animals can also cause damage to
the device. For this reason you should
keep animals away from electrical de-
vices at all times.
BB*5$B*HVLFKWVVDXQDB%ERRN6HLWH'RQQHUVWDJ-XOL

5
GB
DANGER! Risk of electric
shock due to moisture
~ Do not use this device in the vi-
cinity of bathtubs, showers,
washbasins or other vessels
containing water.
~ Never place the device anywhere that it
could fall into water while plugged in.
~ Protect the device from moisture, water
drops and water splashes.
~ The device, the power cable and the
mains plug must not be immersed in wa-
ter or any other liquids.
~ If liquid gets into the device, remove the
mains plug immediately. Have the de-
vice checked before reusing.
~ If the device has fallen into water, pull
out the mains plug immediately, and
only then remove the device from the
water. Do not use the device again, and
have it checked by a specialist.
~ Never touch the device with wet hands.
DANGER! Risk of electric
shock
~ Do not use the device if the device or
the power cable has any visible dam-
age, or if the device has previously
been dropped.
~ Lay the power cable such that no one
can step on it, get caught on it, or trip
over it.
~ Only connect the mains plug to a prop-
erly installed and easily accessible wall
socket whose voltage corresponds to
the specifications on the rating plate.
The wall socket must continue to be eas-
ily accessible after the device is
plugged in.
~ Ensure that the power cable cannot be
damaged by sharp edges or hot points.
Do not wrap the power cable around the
device (Danger! Risk of cable damage!).
~ Ensure that the power cable cannot be
trapped or crushed.
~ To pull the mains plug out of the wall
socket, always pull on the mains plug,
and never on the power cable.
~ Disconnect the mains plug from the wall
socket,…
… after every use,
… if there is a fault,
… when you are not using the device,
… before you clean the device and
… during thunderstorms.
DANGER! Fire hazard!
~ Never leave the device unattended
while it is plugged in.
~ Never heat the device if it doesn't con-
tain any water.
DANGER! Risk of injury
through burning/scalding
~ The water is boiling in the water con-
tainer during operation. Any contact
with boiling water or hot steam may
cause serious injury.
~ Do not touch the hot inner parts of the
device.
~ Allow the device to cool down com-
pletely before you transport or clean it.
~ Allow all parts to cool down before re-
moving them from the device.
WARNING! Risk of material damage
~ Use the original accessories only.
~ Never place the device on hot surfaces
(e.g. hob plates) or near heat sources or
open fire.
~ Do not use any astringent or abrasive
cleaning agents.
~ Do not expose the device to tempera-
tures below -10 °C or above +40 °C.
4. Items supplied
1 base unit 6
1 face mask 1
1 nose mask 2
1 aroma reservoir for the nose mask 4
1 lid for the aroma reservoirs 3
1 measuring beaker 9
1 operating instructions
BB*5$B*HVLFKWVVDXQDB%ERRN6HLWH'RQQHUVWDJ-XOL

6
GB
5. Before using for the
first time
• Remove all packing material.
• Check that the device is undamaged.
• Place the device on level, water insensi-
tive and (to the maximum extent possi-
ble) non-slip ground.
• Select the location such that you can
comfortably sit in front of the device.
6. Assembly
You can use the facial sauna either with the
face mask 1 or the nose mask 2.
Fill in water
WARNING! Risk of material dam-
age!
~ Please do not add any additives to the
water in the water container 5 such as
e.g. oils. After the water has evaporat-
ed these additives may burn in and
cause damage to the water container 5.
• Use the measuring beaker 9 to add up
to 50 ml tap water to the water contain-
er 5; at most up to the marking MAX.
6.1 Herbs and oil
In the aroma reservoirs 1 and 4 you can
place herbs, teas or (on a pad of cotton
wool) oils. These will then pass their benefi-
cial effect on to you together with the steam.
Tips
• If you are not sure with regard to the ef-
fect of herbs or oils, ask your pharma-
cist or read the package leaflet.
• Always add only just a few drops of oil
to a cotton wool pad.
• If you wish to use very fine herbs or
even powders, ensure that these do not
ingress into the water container 5. It is
best if you first place such herbs/pow-
ders into a small filter bag or place the
same on a cotton wool pad.
6.2 Set-up with face mask
1. Place the face mask
1
on the basic unit
6
.
- The opening of the face mask 1 is lo-
cated above the on/off switch 7.
- The lateral lugs must fit into the re-
cesses on the basic unit 6.
2. If required: If necessary, take the lid
3 off the aroma reservoir 1. For this,
grab both lugs and pull off the lid 3 up-
wards. Fill some tea or herbs into the
inner ring of the aroma reservoir 1 and
replace the lid 3 of the aroma reser-
voir.
NOTES:
• Please add oils one drop at a time to a
cotton wool pad and place the same
into the aroma reservoir 1.
• If you are not sure about the effect of the
herbs or oils (stinging eyes etc.), ask a
pharmacist before first use.
3. Turn the face mask
1
a bit to the left until
it is firmly connected to the basic unit
6
.
4. Connect the mains plug 10 with a wall
socket. The on/off switch 7 is set to 0.
6.3 Set-up with nose mask
1. Place the aroma reservoir 4 onto the
basic unit 6.
- The lateral lugs must fit into the re-
cesses on the basic unit 6.
2. If required: If necessary, take the lid
3 off the aroma reservoir 4. For this,
grab both lugs and pull off the lid 3 up-
wards. Fill some tea or herbs into the
inner ring of the aroma reservoir 4 and
then replace the lid 3 of the aroma res-
ervoir.
BB*5$B*HVLFKWVVDXQDB%ERRN6HLWH'RQQHUVWDJ-XOL

7
GB
NOTES:
• Please add oils one drop at a time to a
cotton wool pad and place the same
into the aroma reservoir 4.
• If you are not sure about the effect of the
herbs or oils (stinging eyes etc.), ask a
pharmacist before first use.
3. Place the nose mask 2 with its aperture
pointing toward the front onto the aro-
ma reservoir 4.
4. Connect the mains plug 10 with a wall
socket. The on/off switch 7 is set to 0.
7. Operation
The heat and moisture of the steam opens
the pores and thus provides for a better re-
moval of any impurities. Using the facial
sauna you prepare your skin optimally for
further applications, such as for example
face masks or deep cleansing. Naturally, the
use of the facial sauna is also simply just fan-
tastically relaxing.
DANGER! Risk of injury
through burning/scalding
~ The water is boiling in the water con-
tainer 5 during operation. Any contact
with boiling water or hot steam may
cause serious injury. Use the device
only with one of the two attachments 1
or 2.
NOTE: what to do when you are not
feeling well
~ If you do not feel well during the use of
the facial sauna or your breathing be-
comes restricted in any way (shortness
of breath), stop using the device imme-
diately and switch the device off.
7.1 Switching on and off
By turning the on/off switch /steam flow
rate controller 7 you switch the device on
and off and control the steam quantity in two
stages.
- 0: device is switched off
- 1: lower steam quantity
- 2: higher steam quantity (only for
use with the face mask)
7.2 Switching off
automatically
For safety reasons the device switches off au-
tomatically if the water in the water contain-
er 5 has evaporated. Before the device can
then be switched back on again, the mains
plug 10 must be disconnected once and
then re-connected.
7.3 Face mask
1. Prepare the face mask as described
(see “Assembly” on page 6).
2. Switch the on/off switch/steam flow
rate controller 7 to I or 2. The LED 8
lights up.
3. Figure C: after approx. 2-3 minutes,
steam is generated. Hold your face into
the face mask. Close your eyes and en-
joy the beneficial effect of the steam.
4. Figure E: the steam quantity can also
be set by means of the manual steam
flow rate controller 11. For more
steam, you push the controller into the
direction MAX, for less steam you
push the controller into the direction
MIN.
NOTE: the deeper you hold your face into
the face mask, the more intensive the effect
of the steam will be. If this becomes too
much for you, take your head a little out of
the face mask.
BB*5$B*HVLFKWVVDXQDB%ERRN6HLWH'RQQHUVWDJ-XOL

8
GB
5. Switch the on/off switch/steam flow
rate controller 7 to 0. The LED 8 extin-
guishes and the device is switched off.
6. Wait for the device to completely cool
down.
7. Pull out the mains plug 10.
8. By a slight turn to the right you release
the face mask 1 and take it off.
9. If necessary, you take off the lid of the
aroma reservoir 3 and dispose of the
content of the aroma reservoir.
7.4 Nose mask
DANGER! Hazard caused by
hot steam!
~ Figure B: the distance to the water
container is significantly less during use
of the nose mask 2 and the steam effect
is significantly higher. Therefore, the
nose mask 2 may only be used with
stage I.
1. Prepare the nose mask as described
(see “Assembly” on page 6).
2. Switch the on/off switch/steam flow
rate controller 7 to I. The LED 8 lights
up.
3. Figure D: after approx. 2-3 minutes,
steam is generated. Hold your nose
into the nose mask 2. Close your eyes
and enjoy the beneficial effect of the
steam.
NOTE: the closer you place your nose to the
nose mask 2, the more intensive the effect of
the steam on the nasal mucosa will be. If this
becomes too much for you, take your nose a
little out of the nose mask 2.
4. Switch the on/off switch/steam flow
rate controller 7 to 0. The LED 8 extin-
guishes and the device is switched off.
5. Wait for the device to completely cool
down.
6. Pull out the mains plug 10.
7. Pull off the nose mask 2 from the aro-
ma reservoir 4.
8. By a slight turn to the right you release
the aroma reservoir 4 and take it off.
9. If necessary, you take off the lid 3 of
the aroma reservoir 4 and dispose of
the content of the aroma reservoir.
8. Cleaning
DANGER!
~ Pull out the mains plug 10 from the wall
socket before cleaning the facial sauna.
~ Allow the device to cool down com-
pletely before you transport or clean it.
~ Allow all parts to cool down before re-
moving them from the device.
WARNING! Risk of material damage!
~ Do not use any astringent or abrasive
cleaning agents.
Clean the device and the parts used after
every use.
• Wipe off the basic unit 6, using a light-
ly moistened cloth.
• Wipe the water container 5 with a
damp cloth and dry it.
Cleaning the parts
1. All accessory parts used such as face
mask 1, nose mask 2, aroma reservoir
4 and the lid 3 of the aroma reservoir
need to be cleaned with warm soap
water.
2. Rinse off with clear water.
3. Dry off all accessory parts.
BB*5$B*HVLFKWVVDXQDB%ERRN6HLWH'RQQHUVWDJ-XOL

9
GB
9. Storage
• Store the device in a dry place and out
of the reach of children.
10. Disposal
The symbol showing a wheel-
ie bin crossed through indi-
cates that the product requires
separate refuse collection in
the European Union. This ap-
plies to the product and all ac-
cessories marked with this symbol. Products
marked as such may not be discarded with
normal domestic waste, but must be taken to
a collection point for recycling electrical and
electronic devices. Recycling helps to reduce
the consumption of raw materials and protect
the environment. For information on disposal
and the location of the nearest recycling yard,
contact e.g. your City Cleaning Department
or refer to the Yellow Pages.
Packaging
When disposing of the packaging, make
sure you comply with the environmental reg-
ulations applicable in your country.
11. Troubleshooting
If your device fails to function as required,
please try this checklist first. Perhaps there is
only a minor problem, and you can solve it
yourself.
DANGER! Risk of electric
shock! Do not attempt to repair
the device yourself under any cir-
cumstances.
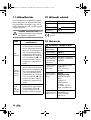
12. Technical
specifications
Subject to technical modification.
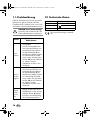
Fault
Possible causes /
Action
No
function
• Has the device been con-
nected to the power supply?
• Has the dry run protection
switched off the device auto-
matically when the water in
the water container 5 had
evaporated? Switch the on/
off switch 7 to 0 (off) and
pull the mains plug 10 out
of the wall socket. Reconnect
the mains plug with the wall
socket.
Cannot
be
switched
on.
• Has the dry run protection
switched off the device auto-
matically when the water in
the water container 5 had
evaporated? Switch the on/
off switch 7 to 0 (off) and
pull the mains plug 10 out
of the wall socket. Reconnect
the mains plug with the wall
socket.
Less
steam
than nor-
mal.
• Have you placed a larger
quantity of herbs or a cotton
wool pad in the aroma res-
ervoir 1 or 4 ? This may re-
duce the quantity of steam.
Model: SGS 100 A1
Mains voltage: 220-240 V ~ 50 Hz
Protection class: II
Power rating: 100 W
BB*5$B*HVLFKWVVDXQDB%ERRN6HLWH'RQQHUVWDJ-XOL

10
GB
13. Warranty of the
HOYER Handel GmbH
Dear Customer,
your device is provided with a 3 year war-
ranty starting with the purchase date. In the
event of product defects, you are entitled to
statutory rights against the vendor. These
statutory rights are not restricted by our war-
ranty presented in the following.
Warranty conditions
The warranty period starts with the purchase
date. Please keep the original purchase re-
ceipt in a safe place. This document is re-
quired to verify the purchase.
If within three years from the purchase date
of this product a material or factory defect
occurs, the product will be repaired or re-
placed by us – at our discretion – free of
charge to you. This warranty implies that
within the period of three years the defective
device and the purchase receipt are present-
ed, including a brief written description of
the defect and the time it occurred.
If the defect is covered by our warranty, the
repaired or a new product will be returned
to you. No new warranty period starts with
a repair or replacement of the product.
Warranty period and statutory
claims for defects
The warranty period is not extended when
the warranty has been claimed. This also ap-
plies to replaced and repaired parts. Any
damages and defects already existing at the
time of purchase must be reported immedi-
ately upon unpacking. Repairs arising after
the expiration of the warranty period are
subject to a charge.
Warranty coverage
The device was produced carefully according
to strict quality guidelines and tested diligent-
ly prior to delivery.
The warranty applies to material or factory
defects. This warranty does not include prod-
uct parts that are subject to standard wear
and therefore can be considered wear parts;
the same applies to damages at fragile parts,
e.g. switches, rechargeable batteries or parts
made of glass.
This warranty expires if the product is dam-
aged, not used as intended or not serviced.
For the proper operation of the product, all in-
structions listed in the operating instructions
must be observed carefully. Any form of use
and handling that is advised against in the
operating instructions or warned against
must always be avoided.
The product is only intended for private and
not for commercial use. In the case of incor-
rect and improper treatment, use of force and
interventions not performed by our author-
ised Service Centre, the warranty shall cease.
Handling in case of a warranty
claim
In order to ensure prompt processing of your
matter, please observe the following notes:
• Please keep the article number
IAN: 114213
and the purchase receipt
as a purchase verification for all inquiries.
• If faulty operation or other defects occur,
first contact the Service Centre listed in
the following by telephone or email.
• Then, you are able to send a product re-
ported as defective free of charge to the
service address specified to you, includ-
ing the purchase receipt and the infor-
mation on the defect and when it
occurred.
Please visit www.lidl-service.com to
download this and many other
manuals, product videos and soft-
ware.
BB*5$B*HVLFKWVVDXQDB%ERRN6HLWH'RQQHUVWDJ-XOL

11
GB
Service Centre
Service Great Britain
Tel.: 0871 5000 720 (£ 0.10/Min.)
E-Mail: hoyer@lidl.co.uk
Service Ireland
Tel.: 1890 930 034
(0,08 EUR/Min., (peak))
(0,06 EUR/Min., (off peak))
E-Mail: hoyer@lidl.ie
IAN: 114213
Supplier
Please note that the following address is no
service address. First contact the afore-
mentioned Service Centre.
HOYER Handel GmbH
Kühnehöfe 5
22761 Hamburg
Germany
GB
IE
BB*5$B*HVLFKWVVDXQDB%ERRN6HLWH'RQQHUVWDJ-XOL

12 PL
Spis treci
1. Przegld ........................................................................................ 12
2. Przeznaczenie urzdzenia .............................................................. 13
3. Wskazówki bezpieczestwa .......................................................... 14
4. Zakres dostawy ............................................................................ 16
5. Przed pierwszym uyciem ............................................................. 16
6. Monta .......................................................................................... 16
6.1 Zioa i olejki ....................................................................................... 16
6.2 Monta z nakadk do twarzy .............................................................. 17
6.3 Monta z nakadk do inhalacji nosa ................................................... 17
7. Obsuga ........................................................................................ 17
7.1 Wczanie i wyczanie ...................................................................... 18
7.2 Automatyczne wyczanie ................................................................... 18
7.3 Nakadka do twarzy ........................................................................... 18
7.4 Nakadka do inhalacji nosa ................................................................. 18
8. Czyszczenie ................................................................................... 19
9. Przechowywanie ........................................................................... 19
10. Utylizacja ...................................................................................... 20
11. Rozwizywanie problemów .......................................................... 20
12. Dane techniczne ............................................................................. 21
13. Gwarancja firmy HOYER Handel GmbH ......................................... 21
1. Przegld
1 Nakadka do twarzy z pojemnikiem na olejki eteryczne
2 Nakadka do inhalacji nosa
3 Pokrywa pojemnika na olejki eteryczne
4 Pojemnik na olejki eteryczne do nakadki do inhalacji nosa
5 Pojemnik na wod
6 Modu podstawowy
7 Wycznik / Regulator iloci pary
8 Dioda (LED), wieci si, gdy urzdzenie jest wczone
9 Zbiornik z miark
10 Przewód zasilajcy z wtyczk sieciow
11 Rczny regulator iloci pary
BB*5$B*HVLFKWVVDXQDB%ERRN6HLWH'RQQHUVWDJ-XOL

13PL
Serdecznie dzikujemy
za Pastwa zaufanie!
Gratulujemy zakupu nowej sauny do twarzy.
Aby móc bezpiecznie posugiwa si pro-
duktem i pozna cay zakres jego moliwo-
ci:
• Przed pierwszym uruchomie-
niem naley dokadnie przeczy-
ta niniejsz instrukcj obsugi.
• Przede wszystkim naley prze-
strzega wskazówek bezpie-
czestwa!
• Urzdzenie wolno obsugiwa
wycznie w sposób opisany w
niniejszej instrukcji obsugi.
• Prosimy o zachowanie niniejszej
instrukcji obsugi.
• W przypadku przekazania urz-
dzenia innym osobom naley
doczy do niego instrukcj ob-
sugi. Instrukcja obsugi stanowi
cz produktu.
yczymy Pastwu zadowolenia z nowej
sauny do twarzy!
Symbole na urzdzeniu
Symbol wskazuje na to, e nakadk do in-
halacji nosa 2 naley uywa tylko na po-
ziomie I.
2. Przeznaczenie
urzdzenia
Sauna do twarzy suy do pielgnacji kosme-
tycznej twarzy za pomoc pary wodnej.
Urzdzenie jest przeznaczone do uytku
prywatnego i nie moe by uywane do ce-
lów komercyjnych.
Urzdzenie moe by uywane wycznie
wewntrz pomieszcze.
Niewaciwe uytkowanie
OSTRZEENIE przed obraeniami!
Urzdzenie nie zastpuje inhalatora do ce-
lów medycznych.
Zabronione jest korzystanie z sauny do twa-
rzy w przypadku wystpowania poniszych
schorze:
- stany zapalne skóry,
- rany/obrzk twarzy,
- zaczerwienienie skóry,
-cukrzyca,
- egzema lub uszczyca,
- choroby serca.
W razie wtpliwoci naley skonsultowa z
lekarzem moliwo korzystania z sauny do
twarzy.
OSTRZEENIE przed szkodami mate-
rialnymi!
Nie wlewa adnych dodatków, np. olej-
ków, do wody w pojemniku na wod. Po
wyparowaniu wody dodatki mog si wy-
pali i uszkodzi pojemnik.
WSKAZÓWKA:
Ze wzgldów bezpieczestwa urzdze-
nie automatycznie si wyczy po odpa-
rowaniu wody wypeniajcej pojemnik na
wod. Przed ponownym wczeniem
urzdzenia naley wyj wtyczk siecio-
w i ponownie j podczy.
BB*5$B*HVLFKWVVDXQDB%ERRN6HLWH'RQQHUVWDJ-XOL

14 PL
3. Wskazówki bezpieczestwa
Wskazówki ostrzegawcze
W miejscach wymagajcych zwrócenia uwagi uyto w niniejszej instrukcji obsugi nastpu-
jcych wskazówek ostrzegawczych:
NIEBEZPIECZESTWO! Wysokie ryzyko: Zlekcewaenie tego ostrzeenia
moe by przyczyn uszczerbku na zdrowiu i zagroenia ycia.
OSTRZEENIE! rednie ryzyko: Zlekcewaenie tego ostrzeenia moe by przyczyn
obrae ciaa lub powanych szkód materialnych.
OSTRONIE: Niskie ryzyko: Zlekcewaenie tego ostrzeenia moe by przyczyn lek-
kich obrae ciaa lub szkód materialnych.
WSKAZÓWKA: Sytuacje i cechy, które powinny by brane pod uwag podczas pracy z
urzdzeniem.
Wskazówki gwarantujce bezpieczn prac
~
Urzdzenie moe by uywane przez dzieci od ósmego roku y-
cia i osoby o obnionych zdolnociach fizycznych, sensorycznych
bd umysowych albo niemajce dowiadczenia i / lub wiedzy o
jego obsudze, jeli znajduj si one pod nadzorem innych osób
lub zostay poinstruowane w zakresie bezpiecznego uywania
urzdzenia i zrozumiay zwizane z tym zagroenia. Dzieci nie
mog bawi si urzdzeniem. Czyszczenie i konserwacja nie
mog by wykonywane przez dzieci, chyba e maj one wicej
ni 8 lat i znajduj si pod odpowiednim nadzorem.
~
Dzieci poniej ósmego roku ycia nie mog zblia si do urz-
dzenia i przewodu zasilajcego.
~
W przypadku korzystania z sauny do twarzy w azience po za-
koczeniu jej uywania naley wyj wtyczk z gniazdka. Bli-
sko wody stwarza zagroenie równie po wyczeniu
urzdzenia.
~
W przypadku uszkodzenia przewodu sieciowego urzdzenia
musi by on wymieniony przez producenta, jego serwis lub wy-
kwalifikowan osob, co wykluczy ewentualne zagroenia.
~
Aby unikn gromadzenia tustych osadów lub zasuszonych pozo-
staoci naley po kadym uyciu wyczyci wszystkie uywane
czci urzdzenia.
NIEBEZPIECZESTWO dla
dzieci!
~ Materia opakowania nie jest zabawk
dla dzieci. Dzieci nie mog bawi si
workami z tworzywa sztucznego. Istnie-
je niebezpieczestwo uduszenia.
BB*5$B*HVLFKWVVDXQDB%ERRN6HLWH'RQQHUVWDJ-XOL

15PL
NIEBEZPIECZESTWO dla i ze
strony zwierzt domowych i
hodowlanych
~ Urzdzenia elektryczne mog by tak-
e ródem zagroe dla zwierzt do-
mowych i hodowlanych. Równie
same zwierzta mog spowodowa
uszkodzenie urzdzenia. Z tego wzgl-
du nie pozwala na zblianie si zwie-
rzt do urzdze elektrycznych.
NIEBEZPIECZESTWO
poraenia prdem
spowodowane wilgoci
~ Urzdzenia nie naley uy-
wa w pobliu wanien, natry-
sków, umywalek oraz innych
naczy zawierajcych wod.
~ Nigdy nie odstawia urzdzenia w taki
sposób, by podczone do zasilania
mogo wpa do wody.
~
Urzdzenie naley chroni przed wilgo-
ci oraz kroplami wody.
~ Urzdzenie, przewód zasilajcy oraz
wtyczka sieciowa nie powinny by za-
nurzane w wodzie i w innych cieczach.
~ Jeli do urzdzenia dostanie si jaka-
kolwiek ciecz, natychmiast wyj wtycz-
k. Przed ponownym uruchomieniem
naley zleci sprawdzenie urzdzenia.
~ Jeeli urzdzenie jednak wpadnie do
wody, to naley natychmiast wycign
wtyczk sieciow z gniazdka, a dopie-
ro póniej samo urzdzenie. W takim
przypadku urzdzenia nie wolno uy-
wa, lecz naley zleci jego sprawdze-
nie przez specjalistyczny serwis.
~ Urzdzenia nie wolno obsugiwa mo-
krymi rkoma.
NIEBEZPIECZESTWO
poraenia prdem
~ Nie wcza
urzdzenia po wczeniej-
szym upadku oraz wtedy, gdy ono
samo lub kabel zasilajcy maj widocz-
ne uszkodzenia.
~ Przewód zasilajcy naley ukada w
taki sposób, aby wykluczy ryzyko
ewentualnego nadepnicia, zaczepie-
nia lub potknicia.
~ Wtyczk sieciow naley podcza
wycznie do prawidowo zainstalowa-
nego i atwo dostpnego gniazdka, któ-
rego napicie odpowiada danym
umieszczonym na tabliczce znamiono-
wej. Gniazdko musi by atwo dostp-
ne równie po podczeniu
urzdzenia.
~ Naley zwróci uwag na to, aby prze-
wód zasilajcy nie uleg uszkodzeniu w
wyniku kontaktu z ostrymi krawdziami
lub gorcymi elementami. Przewodu za-
silajcego nie wolno owija wokó urz-
dzenia (niebezpiecze
stwo uszkodzenia
przewodu!).
~ Zwraca uwag na to, aby przewód
zasilajcy nie by zakleszczony lub
zgnieciony.
~ Przy wyciganiu wtyczki sieciowej z
gniazdka naley zawsze cign za
wtyczk, w adnym wypadku nie wolno
cign za przewód.
~ Wtyczk sieciow naley wycign z
gniazdka...
… po kadym uyciu,
… w przypadku wystpienia usterki,
… w przypadku nieuywania urzdze-
nia,
… przed czyszczeniem urzdzenia
oraz
…podczas burzy.
NIEBEZPIECZESTWO poaru
~ Podczonego urzdzenia nie wolno
pozostawia bez nadzoru.
~ Nigdy nie wcza urzdzenia bez wo-
dy.
BB*5$B*HVLFKWVVDXQDB%ERRN6HLWH'RQQHUVWDJ-XOL

16 PL
NIEBEZPIECZESTWO
odniesienia obrae na
skutek poparzenia
~ Podczas pracy urzdzenia woda gotuje
si w pojemniku na wod. Kontakt z go-
tujc wod lub gorc par wodn
moe prowadzi do powanych obra-
e ciaa.
~ Nie wolno dotyka gorcych czci we-
wntrznych urzdzenia.
~ Przed transportowaniem lub czyszcze-
niem naley poczeka, a urzdzenie
cakowicie ostygnie.
~ Wszystkie dodatkowe akcesoria naley
schodzi przed ich zdemontowaniem z
urzdzenia.
OSTRZEENIE przed szkodami
materialnymi
~ Naley uywa wycznie oryginal-
nych akcesoriów.
~
Nigdy nie naley ka urzdzenia na
gorcych powierzchniach (np. pytach
kuchennych), w pobliu róde ciepa
lub otwartego ognia.
~ Nie wolno uywa ostrych lub rysuj-
cych rodków czyszczcych.
~ Urzdzenia nie wolno wystawia na
temperatury poniej -10°C lub powyej
+40°C.
4. Zakres dostawy
1 modu podstawowy 6
1 nakadka do twarzy 1
1 nakadka do inhalacji nosa 2
1 pojemnik na olejki eteryczne do nakadki
do inhalacji nosa 4
1 pokrywa pojemnika na olejki eteryczne 3
1 zbiornik z miark 9
1 instrukcja obsugi
5. Przed pierwszym
uyciem
• Usun cao materiau opakowanio-
wego.
• Sprawdzi, czy urzdzenie nie jest
uszkodzone.
• Ustawi urzdzenie na równym i moli-
wie antypolizgowym podou, odpor-
nym na dziaanie wody.
• Wybra miejsce tak, aby mona byo
wygodnie usi.
6. Monta
Saun do twarzy mona uywa z nakad-
k do twarzy 1 lub nakadk do inhalacji
nosa 2.
Wlewanie wody
OSTRZEENIE przed szkodami mate-
rialnymi!
~ Nie wlewa adnych dodatków, np.
olejków, do wody w pojemniku na
wod 5. Po wyparowaniu wody dodat-
ki mog si wypali i uszkodzi pojem-
nik na wod 5.
• Zbiornikiem z miark 9 wla maks.
50 ml wody wodocigowej do pojemni-
ka na wod 5; maksymalnie do ozna-
czenia MAX.
6.1 Zioa i olejki
W pojemniku na olejki eteryczne 1 i 4 mo-
na umieci zioa, herbatk lub wla na wa-
cik olejki eteryczne. Zawarte w nich
zwizki wymieszane z par wodn maj
kojce, przynoszce ulg dziaanie.
Porady
• W razie wtpliwoci co do dziaania
zió lub olejków naley skontaktowa
si z farmaceut lub zapozna si z tre-
ci ulotki doczonej do opakowania.
BB*5$B*HVLFKWVVDXQDB%ERRN6HLWH'RQQHUVWDJ-XOL

17PL
• Na wacik naley wla tylko kilka kropli
olejku.
• W przypadku korzystania z bardzo
drobnych lub sproszkowanych zió na-
ley uwaa, aby nie przedostay si
do pojemnika na wod 5. Najlepiej
woy takie zioa / proszek do maej
torebki filtrujcej lub pooy na waci-
ku.
6.2 Monta z nakadk do
twarzy
1. Naoy nakadk do twarzy 1 na mo-
du podstawowy 6.
- Otwór nakadki do twarzy 1 znajdu-
je si nad wycznikiem 7.
- Boczne noski musz zosta dopaso-
wane do wyci moduu podstawo-
wego 6.
2. W razie potrzeby: Ewentualnie
zdj pokrywk 3 z pojemnika na olej-
ki eteryczne 1. W tym celu naley
chwyci za oba noski i zdj pokryw-
k 3 w kierunku do góry. Napeni we-
wntrzny piercie pojemnika na olejki
eteryczne 1 niewielk iloci herbaty
lub zió, a nastpnie naoy pokryw
3 pojemnika na olejki eteryczne.
WSKAZÓWKI:
• Skropi wacik olejkiem i woy go do
pojemnika na olejki eteryczne 1.
• W razie wtpliwoci co do dziaania
zió lub olejków (pieczenie oczu itp.)
przed ich pierwszym uyciem naley
skontaktowa si z farmaceut.
3. Obróci nakadk do twarzy 1 troch
w lewo, a do stabilnego poczenia z
moduem podstawowym 6.
4. Woy wtyczk sieciow 10 do
gniazdka. Wycznik 7 znajduje si w
pozycji 0.
6.3 Monta z nakadk do
inhalacji nosa
1. Zaoy pojemnik na olejki eteryczne
4
na modu podstawowy
6
.
- Boczne noski musz zosta dopaso-
wane do wyci moduu podstawo-
wego 6.
2.
W razie potrzeby:
Ewentualnie
zdj pokrywk 3 z pojemnika na olej-
ki eteryczne 4. W tym celu naley
chwyci za oba noski i zdj pokryw-
k 3 w kierunku do góry.
Napeni we-
wntrzny piercie pojemnika na olejki
eteryczne
4
niewielk iloci herbaty
lub zió, a nastpnie naoy pokryw
3
pojemnika na olejki eteryczne.
WSKAZÓWKI:
• Skropi wacik olejkiem i woy go do
pojemnika na olejki eteryczne 4.
• W razie wtpliwoci co do dziaania
zió lub olejków (pieczenie oczu itp.)
przed ich pierwszym uyciem naley
skontaktowa si z farmaceut.
3. Naoy nakadk do inhalacji nosa 2
na pojemnik na olejki eteryczne 4
otworem skierowanym do przodu.
4. Woy wtyczk sieciow 10 do
gniazdka. Wycznik 7 znajduje si w
pozycji 0.
7. Obsuga
Ciepo i wilgo otwiera pory i umoliwia
lepsze usunicie zanieczyszcze. Za pomo-
c sauny do twarzy mona optymalnie przy-
gotowa skór do dalszych zabiegów, np.
do naoenia maseczki lub gbokiego
oczyszczania. Korzystanie z sauny do twa-
rzy ma równie wspaniale odprajce
dziaanie.
BB*5$B*HVLFKWVVDXQDB%ERRN6HLWH'RQQHUVWDJ-XOL

18 PL
NIEBEZPIECZESTWO odnie-
sienia obrae na skutek po-
parzenia
~ Podczas pracy urzdzenia woda gotuje
si w pojemniku na wod 5. Kontakt z
gotujc wod lub gorc par wodn
moe prowadzi do powanych obra-
e ciaa. Urzdzenia naley uywa
wycznie z jedn z nakadek 1 lub 2.
WSKAZÓWKA: Zachowanie w przy-
padku zego samopoczucia
~ Jeeli podczas korzystania z sauny do
twarzy pojawi si dusznoci lub ze
samopoczucie, naley natychmiast
przerwa zabieg i wyczy urzdze-
nie.
7.1 Wczanie i wyczanie
Obrót wycznika / regulatora iloci pary
7
powoduje wczenie i wyczenie urzdze-
nia oraz dwustopniow regulacj iloci pary.
- 0: urzdzenie wyczone
- 1: mniejsza ilo pary
- 2: wiksza ilo pary (tylko w przy-
padku stosowania nakadki do twa-
rzy)
7.2 Automatyczne
wyczanie
Ze wzgldów bezpieczestwa urzdzenie
automatycznie si wyczy po odparowaniu
wody wypeniajcej pojemnik na wod
5
.
Przed ponownym wczeniem urzdzenia
naley wyj wtyczk sieciow
10
i ponow-
nie j podczy.
7.3 Nakadka do twarzy
1. Przygotowa nakadk do twarzy
zgodnie z opisem (patrz „Monta” na
stronie 16).
2. Ustawi wycznik / regulator iloci
pary 7 na I lub 2. Dioda LED 8 zaczy-
na wieci.
3. Ilustracja C: Po upywie ok. 2–3 mi-
nut urzdzenie zaczyna produkowa
par. Przyoy twarz do nakadki. Za-
mkn oczy i korzysta z kojcego,
przynoszcego ulg dziaania pary.
4. Ilustracja E: Ilo pary mona usta-
wi równie za pomoc rcznego re-
gulatora iloci pary 11. Aby
wytworzy wicej pary, naley przesu-
n regulator w kierunku MAX
, aby
wytworzy mniej pary, przesun regu-
lator w kierunku MIN.
WSKAZÓWKA: Im gbiej twarz woy-
my w urzdzenie, tym intensywniejsze b-
dzie dziaanie pary. Jeeli dziaanie bdzie
zbyt intensywne, mona gow nieco odsu-
n z urzdzenia.
5. Ustawi wycznik / regulator iloci
pary 7 na 0. Dioda LED 8 zganie i
urzdzenie zostanie wyczone.
6. Odczeka a do cakowitego scho-
dzenia urzdzenia.
7. Wycign wtyczk sieciow 10 z
gniazdka.
8. Zdj nakadk do twarzy 1, obraca-
jc j lekko w prawo.
9. Ew. zdj pokryw pojemnika na olej-
ki eteryczne 3 i usun zawarto po-
jemnika.
7.4 Nakadka do inhalacji
nosa
NIEBEZPIECZESTWO ze stro-
ny gorcej pary wodnej!
~ Ilustracja B: Przy korzystaniu z na-
kadki do instalacji nosa 2 odstp mi-
dzy twarz a pojemnikiem z wod jest
znacznie mniejszy, zatem dziaanie
pary jest znacznie intensywniejsze. Dla-
BB*5$B*HVLFKWVVDXQDB%ERRN6HLWH'RQQHUVWDJ-XOL
Strona się ładuje...
Strona się ładuje...
Strona się ładuje...
Strona się ładuje...
Strona się ładuje...
Strona się ładuje...
Strona się ładuje...
Strona się ładuje...
Strona się ładuje...
Strona się ładuje...
Strona się ładuje...
Strona się ładuje...
Strona się ładuje...
Strona się ładuje...
Strona się ładuje...
Strona się ładuje...
Strona się ładuje...
Strona się ładuje...
Strona się ładuje...
Strona się ładuje...
Strona się ładuje...
Strona się ładuje...
Strona się ładuje...
Strona się ładuje...
Strona się ładuje...
Strona się ładuje...
Strona się ładuje...
Strona się ładuje...
Strona się ładuje...
Strona się ładuje...
Strona się ładuje...
Strona się ładuje...
Strona się ładuje...
Strona się ładuje...
Strona się ładuje...
Strona się ładuje...
Strona się ładuje...
Strona się ładuje...
Strona się ładuje...
Strona się ładuje...
Strona się ładuje...
Strona się ładuje...
Strona się ładuje...
Strona się ładuje...
Strona się ładuje...
Strona się ładuje...
Strona się ładuje...
Strona się ładuje...
Strona się ładuje...
Strona się ładuje...
Strona się ładuje...
Strona się ładuje...
Strona się ładuje...
Strona się ładuje...
Strona się ładuje...
Strona się ładuje...
Strona się ładuje...
Strona się ładuje...
Strona się ładuje...
Strona się ładuje...
Strona się ładuje...
Strona się ładuje...
-
 1
1
-
 2
2
-
 3
3
-
 4
4
-
 5
5
-
 6
6
-
 7
7
-
 8
8
-
 9
9
-
 10
10
-
 11
11
-
 12
12
-
 13
13
-
 14
14
-
 15
15
-
 16
16
-
 17
17
-
 18
18
-
 19
19
-
 20
20
-
 21
21
-
 22
22
-
 23
23
-
 24
24
-
 25
25
-
 26
26
-
 27
27
-
 28
28
-
 29
29
-
 30
30
-
 31
31
-
 32
32
-
 33
33
-
 34
34
-
 35
35
-
 36
36
-
 37
37
-
 38
38
-
 39
39
-
 40
40
-
 41
41
-
 42
42
-
 43
43
-
 44
44
-
 45
45
-
 46
46
-
 47
47
-
 48
48
-
 49
49
-
 50
50
-
 51
51
-
 52
52
-
 53
53
-
 54
54
-
 55
55
-
 56
56
-
 57
57
-
 58
58
-
 59
59
-
 60
60
-
 61
61
-
 62
62
-
 63
63
-
 64
64
-
 65
65
-
 66
66
-
 67
67
-
 68
68
-
 69
69
-
 70
70
-
 71
71
-
 72
72
-
 73
73
-
 74
74
-
 75
75
-
 76
76
-
 77
77
-
 78
78
-
 79
79
-
 80
80
-
 81
81
-
 82
82


Silvercrest SGS 100 A1 Operating Instructions Manual
- Typ
- Operating Instructions Manual
w innych językach
- Deutsch: Silvercrest SGS 100 A1
- slovenčina: Silvercrest SGS 100 A1
Powiązane artykuły
-
Silvercrest SDBK 2400 D3 Operating Instructions Manual
-
-
-
-
-
Silvercrest SHGB 50 A1 Operating Instructions Manual
-
-
Silvercrest SEF 2300 B2 Operating Instructions Manual
Inne dokumenty
-
Beurer FS 60 Instrukcja obsługi
-
-
Beurer SI 40 Instrukcja obsługi
-
-
ULTIMATE SPEED UAMM 12 A1 Operating Instructions Manual
-
Dometic DSP2012C Instrukcja instalacji
-
Clatronic GS 3656 Instrukcja obsługi
-
-
HQ Aromathérapie Instrukcja obsługi