
For your own safety, we recommend that you read
these instructions carefully and observe them.
Make sure you keep the instructions for future reference!
Ze względu na własne bezpieczeństwo zalecamy przeczytanie
niniejszej instrukcji obsługi oraz jej stosowanie. Instrukcję obsługi
należy koniecznie zachować w celu późniejszego przeczytania!
Saját biztonsága érdekében ajánljuk, hogy ezt a használati út-
mutatót olvassa el végig és a használatnál vegye azt figyelembe.
Feltétlenül őrizze meg az útmutatót későbbi utánaolvasás
céljából.
Za vašo varnost vam priporočamo, da v celoti preberete ta
navodila za uporabo in jih tudi upoštevate. Obvezno jih shranite
za poznejšo morebitno ponovno branje!
Pro Vaši bezpečnost Vám doporučujeme si podrobně
přečíst tento návod k obsluze a dodržovat jej.
Bezpodmínečně ho uschovejte pro pozdější nahlédnutí!
Kvôli Vašej vlastnej bezpečnosti Vám doporučujeme prečítať si
tento návod až do konca a ho dodržiavať. Odložte ho pre
prípad, že by ste ho potrebovali prečítať ešte raz!
Zu Ihrer eigenen Sicherheit empfehlen wir Ihnen, diese
Bedienungsanleitung komplett durchzulesen und zu beachten.
Bewahren Sie sie unbedingt für späteres Nachlesen auf!
IAN 90095
Ski & Snowboarding
Helmet
Ski- und
SnowboardHelm
Bedienungsanleitung
Sí- éS Snowboard
védőSiSak
Használati útmutató
lyžařSká a Snowboar-
dová Helma
Návod k obsluze
Ski & Snowboarding
Helmet
Instructions for use
kaSk narciarSki i Snow-
boardowy
Instrukcja obsługi
Čelada za SmuČanje in
deSkanje
Navodilo za uporabo
lyžiarSka a Snow-
boardová Helma
Návod na obsluhu
DELTA-SPORT HANDELSKONTOR GMBH
Wragekamp 6
D-22397 Hamburg
Version: 2013/IIV
Delta-Sport-Nr.: ES-1656
IAN 90095

1
2
8
7
10
11
6
5
9
3
4
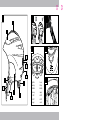
a b
loosen
luźniej
bővebb
naprej
rozšířit
rozšíriť
weiter
tighten
mocniej
szűkebb
tesneje
zúžit
zúžiť
enger
c
d e
F

5

6
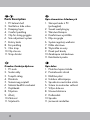
Parts Description
1. PC helmet shell
2. Ventilation slide valve
3. Damping layer
4. Comfort padding
5. Clip for skiing goggles
6. Size adjustment system
7. Rotary knob
8. Ear padding
9. Chin strap
10. Clip closure
11. Strap divider
Opis elementów składowych
1. Skorupa kasku z PC
(poliwęglan)
2. Suwak wentylacyjny
3. Warstwa tłumiąca
4. Komfortowa wyściółka
5. Klips na gogle
6. System regulacji wielkości
7. Kółko obrotowe
8. Wyściółka na uszy
9. Pasek pod brodę
10. Zamknięcie zatrzaskowe
11. Rozdzielacz paska
Oznaka i funkcija dijelova
1. PC-sisak
2. Sisakrostély
3. Tompító réteg
4. Párnázás
5. Síszemüveg csíptető
6. Méretet beállító szerkezet
7. Hajtókerék
8. Fülpárna
9. Állszíj
10. Zárócsat
11. Szíjelosztó
Opis delov
1. Plastična lupina čelade
2. Prezračevalni drsnik
3. Blažilna plast
4. Udobno oblazinjenje
5. Sponka za smučarska očala
6. Sistem za nastavitev velikosti
7. Vrtljivo kolesce
8. Ušesne blazinice
9. Podbradnik
10. Sponka
11. Jermenski razdelilec

7
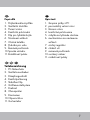
Teilebezeichnung
1. PC-Helmschale
2. Ventilationsschieber
3. Dämpfungsschicht
4. Komfortpolsterung
5. Skibrillen-Clip
6. Größenverstellsystem
7. Drehrad
8. Ohrenpolster
9. Kinnriemen
10. Clipverschluss
11. Gurtverteiler
Popis dílů
1. Polykarbonátová přilba
2. Ventilační zástrčka
3. Tlumicí vrstva
4. Komfortní polstrování
5. Klip pro lyžařské brýle
6. Nastavení velikosti
7. Otočné kolečko
8. Poduška pro ucho
9. Řemínek pod bradu
10. Sponka uzávěru
11. Rozdělovač pásku
Opis častí
1. škrupina prilby z PC
2. posúvateľný vetrací otvor
3. tlmiaca vrstva
4. komfortné polstrovanie
5. úchytka na lyžiarske okuliare
6. mechanizmus na nastavenie
veľkosti
7. otočný regulátor
8. chránič uší
9. remienok pod bradu
10. svorkový uzáver
11. rozdeľovač pásky

8
Congratulations!
With your purchase you have decided on a high-quality product. Get
to know the product before you start to use it. Carefully read the fol-
lowing operating instructions. Use the product only as described and
only for the given areas of application. Keep these instructions safe.
When passing the product on to a third party, always make sure that
the documentation is included.
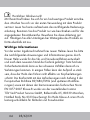
Important information
Before using your new helmet please take a moment to read the
following instructions for its use and care.
This helmet was developed for skiing and snowboarding and is
manufactured using state of the art processes. However, even the
highest safety standards do not exclude the possibility of injury
in a serious accident. The impact may be so great that the helmet
will not offer its wearer effective head protection. Conformity with
the demands of Appendix II of the European directive 89 / 686 /
European Economic Community (and later modifications) as well as
with those of the harmonising technical norm Class EN1077:2007 B
was certified by the officials responsible at the TÜV Süd Product
Service GmbH, Ridlerstraße 65, 80339 München, Notified Body
No 0123.
GB

9
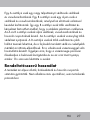
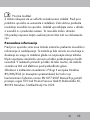
A Class A helmet is a high performance protective helmet for
skiers and snowboarders. A Class B helmet is a helmet for skiers and
snowboarders for which the requirements are a little less restrictive.
A Class B helmet can thus offer more air circulation and comfort,
without giving up too much protection. Class A and Class B helmets
are for alpine skiers, snowboarders and similar groups. Class A hel-
mets offer comparatively more protection, Class B helmets can offer
more ventilation and allow better hearing. However, they protect a
smaller area of the head and give a lower measure of protection.
This ski helmet is suitable for use with ski goggles. Be sure the ski gog-
gles accurately fit into the helmet opening and doesn’t press into the
bridge of your nose when the helmet is tightly closed.
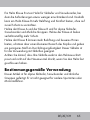
Intended use
This product is manufactured for alpine skiers, snowboarders and
similar groups. It is not suitable for other sports or motorcyclists.
GB

10
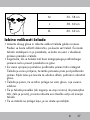
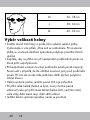
M
L
XL
56 - 58cm
58 - 60cm
60 - 62cm
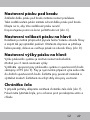
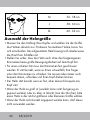
Selecting the helmet size
• Choose your helmet by measuring the circumference of your head
with a flexible tape measure. Always try on a couple of different
sizes before buying. When wearing the helmet, the skin of your
temples should move with it.
• Make sure that the helmet does not move around too much when
the chin strap is open.
• The chin strap must fit securely. It should sit comfortably under the
chin, as far back towards the neck as possible. Fasten it as tight as
possible. It is correctly fitted when you find it difficult to insert your
finger between the chinstrap and neck, yet are still able to breathe
and swallow easily. Make sure that the helmet does not restrict
your movements, e.g. when turning your head to look behind you.
• The helmet fits correctly if it’s tight but comfortable on the head.
• If the helmet is too large (wiggly, can’t be tightened securely) or
too small (pressure, forehead is uncovered) please select the next
larger or smaller size helmet.
• Do not use the helmet if you are unable to correctly adjust it.
GB

11
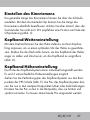
Adjusting the chin strap
The overall length of the chin strap is adjusted with loop. The length
of the chin strap can also be adjusted with the strap distributor clip.
Be sure the strap distributor is not bothersome. We recommend posi-
tioning it at the end of the ear pad (Fig. C).
Harness adjustment
Use the dial to adjust the helmet to your head size to ensure the hel-
met is seated optimally. Turn the dial to the right to tighten the helmet
harness and to the left to loosen the harness (Fig. D).
Harness height adjustment
The height of the harness system is adjustable. There are 3 different
height adjustments. Pull the connector pin on the harness system out
of the tab locations in the EPS shell (Fig. E).
The pins on the harness system can now be moved to a higher or
lower tab location. Firmly press the pins into the latching points until
you can hear and feel them lock in. Always be sure both pins lock in.
Forehead protection
Flap the additional forehead protection down as necessary (Fig. F).
If you are wearing skiing goggles this offers protections against
incoming wind and cold.
GB

12
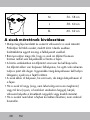
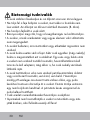
Safety instructions
• The helmet must fit securely and the chin strap must be firmly
closed.
• Do not tip the helmet back as this will leave your forehead
unprotected. The straps must be positioned over the jaw bones
(Fig. B).
• Do not wear any head covering under the helmet.
• Ensure that the airflow inside the helmet is not restricted.
• Do not make any changes to the helmet, its structure or the
individual components.
• Do not paint the helmet or put stickers or labels on it.
• The helmet is intended to protect your head in the event of an
impact. After just one (even light) impact this protection is no longer
guaranteed. Discontinue using the helmet after an impact or colli-
sion, rendered unusable and disposed of, even if there is no visible
damage.
• Do not use petroleum-containing solvents or detergents to clean
either the interior or exterior of your helmet. Use pH-neutral soap
diluted in clean water, and rub it into the helmet carefully using
a soft cloth. Wipe dry with a fluff-free cloth. The ear cushions can
be cleaned with a little soap and a soft brush. The visor should be
cleaned with soap and water only, and left to air-dry.
Do not expose the visor to sources of heat!
GB

13
• Only use genuine spare parts for your helmet.
• Do not allow children to wear this helmet while climbing
or playing as this carries a risk of strangulation.
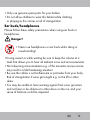
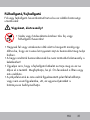
Ear buds/headphones
Please follow these safety precautions when using ear buds or
headphones:
Danger!
• Never use headphones or ear buds whilst skiing or
snowboarding!
•During ascent or while waiting be sure to keep the volume at a
level that allows you to hear all ambient noise and announcements.
• Not observing announcements e.g. of the mountain rescue service
may result in a life threatening situation!
• Be sure the cables is not bothersome or protrudes from your body.
Risk of strangulation if wires get caught e.g. on the lift or other
skiers.
• You may be unable to hear warning signals from snow groomers
and not hear or be oblivious to other skiers on the run, and your
sense of balance could be impaired.
GB

14 GB
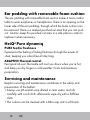
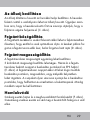
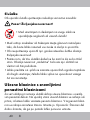
Ear padding with removable foam cushion
The ear padding with removable foam section makes it more comfor-
table to wear earphones or headphones. There is an opening on the
lower side of the ear padding, through which the foam cushion can
be removed. There is a marked punched out area that you can push
out. Caution: keep this punched out area in a safe place in order to
replace it when necessary.
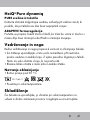
HeiQ
®
Pure dynamiq
PURE Textile freshness
Experience the feeling of lasting freshness through the power of
silver, keeping you odour-free all day lang.
ADAPTIVE Thermal control
Feel good all over The textile will cool you down when you’re hot,
and keep you dry longer in cold weather Cools and minimises
perspiration.
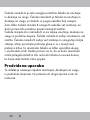
Servicing and maintenance
Regular servicing and maintenance contributes to the safety and
preservation of the helmet.
• Always use pH-neutral soap diluted in clear water, and rub
carefully with a soft cloth. Afterwards wipe dry with a fluff-free
cloth.
• The cushion can be cleaned with a little soap and a soft brush.

15
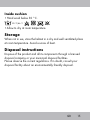
Inside cushion
• Hand wash below 30 °C.
30 °C/86 °F
• Allow to dry at room temperature.
Storage
When not in use, store the helmet in a dry and well ventilated place
at room temperature. Avoid sources of heat.
Disposal instructions
Dispose of the product and all its components through a licensed
disposal company or your municipal disposal facilities.
Please observe the current regulations. If in doubt, consult your
disposal facility about an environmentally friendly disposal.
GB

16
3-year warranty
The product was produced with great care and under constant
supervision. You receive a three-year warranty for this product from
the date of purchase. Please retain your receipt.
The warranty applies only to material and workmanship and does
not apply to misuse or improper handling. Your statutory rights, espe-
cially the warranty rights, are not affected by this warranty.
With regard to complaints, please contact the following service
hotline or contact us by e-mail. Our service employees will advise
as to the subsequent procedure as quickly as possible. We will be
personally available to discuss the situation with you.
Any repairs under the warranty, statutory guarantees or through
goodwill do not extend the warranty period. This also applies to
replaced and repaired parts.
Repairs after the warranty are subject to a charge.
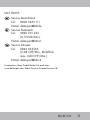
IAN: 90095
Service Great Britain
Tel.: 0871 5000 720
(£ 0.10/Min.)
E-Mail: deltaspor[email protected]
You can also find spare parts for your product at:
www.delta-sport.com, category Service - Lidl Spare Parts Service
GB

17
Gratulujemy!
Przez Państwa zakup wybraliście produkt o wysokiej jakości. Przed
pierwszym użyciem zapoznajcie się z produktem. W tym celu prze-
czytajcie następującą instrukcję obsługi. Z produktu należy korzystać
jedynie jak to zostało opisane i w podanych zakresach zastosowa-
nia. Zachować niniejszą instrukcję. W razie przekazania produktu
osobom trzecim dołączyć do niego wszystkie dokumenty.
Ważne informacje
Przed pierwszym użyciem kasku należy dokładnie przeczytać
następujące informacje oraz wskazówki. Niniejszy kask opracowano
do jazdy na nartach i snowboardu i wyprodukowano według
najnowszego stanu techniku. Mimo najwyższego standartu
bezpieczeństwa może dojść do urazów podczas ciężkich wypad-
ków.
W niektórych przypadkach uderzenie może być tak mocne, że
kask nie ochroni skutecznie przed urazami głowy. Zgodność z wy-
mogami według załącznika II Wytycznych Europejskich 89/686/
EWG (i późniejszych modyfikacji) jak również ze zgodną z nimi
Normą Techniczną EN1077:2007 klasa B została potwierdzona
przez wystawiającą instancję TÜV Süd Product Service GmbH,
Ridlerstraße 65, 80339 München, Notified Body No 0123.
PL

18
Kask klasy A jest kaskiem ochronnym dla narciarzy i snowboard-
zistów na najwyższym poziomie. Kask klasy B jest kaskiem dla
narciarzy i snowboardzistów, których wymagania są nieco mniejsze.
Dlatego kask klasy B oferuje większą cyrkulację powietrza i wyższy
komfort, nie ryzygnując z ochrony. Kaski klasy A i klasy B służą
narciarzom alpińskim, snowboarderom i podobnym grupom.
Kaski klasy A oferują stosunkowo więcej ochrony. Kaski klasy B
oferują lepszą cyrkulację powietrza i lepszą słyszalność, chronią
jednak mniejszą część głowy i są mniej odporne na przenikanie.
Ten kask narciarski przeznaczony jest do użytku z goglami nar-
ciarskimi.
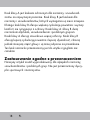
Zastosowanie zgodne z przeznaczeniem
Niniejszy artykuł został wyprodukowany dla alpejskich narciarzy,
snowboardzistów i podobnych grup. Nie jest przeznaczony dyscy-
plin sportowych i motorzystów.
PL

19
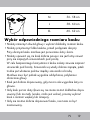
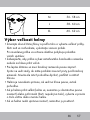
M
L
XL
56 - 58 cm
58 - 60 cm
60 - 62 cm
Wybór odpowiedniego rozmiaru kasku
• Należy zmierzyć obwód głowy i wybrać dokładny rozmiar kasku.
• Należy przymierzyć kilka kasków, przed podjęciem decyzji.
Przy ubranym kasku możliwe jest poruszanie skóry skroni.
• Należy upewnić się, że kask dobrze pasuje i nie jest luźny nawet
przy nie zapiętych sznureczkach pod prodą.
W celu bezpiecznego korzystania z kasku należy zawsze zapinać
sznureczki pod brodą. Sznureczki są wtedy dobrze zapięte, jeżeli
trudne jest włożenie palców między sznureczki a brodę.
Możliwe musi być jednak wygodne oddychanie, połykanie i
obracanie głowy.
• Kask jest dobrze dopasowany, gdy mocno ale wygodnie leży na
głowie.
• Gdy kask jest za duży (kiwa się, nie może zostać dokładnie dopa-
sowany) lub za mały (uciska, czoło jest wolne), prosimy wybrać
kask o rozmiar większy lub mniejszy.
• Gdy nie można dobrze dopasować kasku, nie może on być
zastosowany.
PL

20
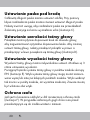
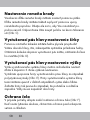
Ustawianie paska pod brodą
Całkowitą długość paska można ustawiać szlufką. Przy pomocy
klipsa rozdzielacza paska można również ustawiać długość paska.
Należy zwrócić uwagę, aby rozdzielacz paska nie przeszkadzał.
Zalecamy pozycję na końcu wyściełania ucha (ilustracja C).
Ustawianie szerokości taśmy głowy
Pokrętłem można płynnie dopasować kask do obwodu głowy,
aby zagwarantować optymalne dopasowanie kasku. Aby ciaśniej
ustawić taśmę głowy, należy przekręcić pokrętło w prawo a
przekręcając w lewo powiększa się taśmę głowy (ilustracja D).
Ustawianie wysokości taśmy głowy
Wysokość taśmy głowy można indywidualnie ustawić. Możliwe są 3
różne ustawienia wysokości.
Pociągnąć łączniki systemu taśmy głowy z punktów zaskoku skorupy
EPS (ilustracja E). Wtyki systemu taśmy głowy mogą zostać zamoco-
wane wyżej lub niżej na kolejnych punktach zaskoku. Wtyki wetknąć
tak mocno w punkty zaskoku, aż wyraźnie zaskoczą. Zawsze muszą
być włożone oba wtyki.
Ochrona czoła
Jeśli jest to konieczne odchylić w dół rozszerzoną ochronę czoła
(ilustracja F). W przypadku założonych gogli chroni ona przed
przedostającym się do środka wiatrem i zimnem.
PL

21
Wskzówki bezpieczeństwa
• Kask musi być dobrze dopasowany i sznurki muszą być zamknięte
pod brodą.
• Nie przesuwać kasku na kark ponieważ w przeciwnym razie nie
jest chronione czoło. Pasek musi być przeprowadzony pod kością
szczękową (ilustracja B).
• Nie nosić pod kaskiem nakryć głowy.
• Należy upewnić się, czy cyrkulacja powietrza nie jest ograniczona.
• Nie wolno dokonywać żadnych zmian na kasku, w jego strukturze
ani w jego poszczególnych częściach.
• Kasku nie wolno malować, nie wolno na niego naklejać nalepek
lub etykietek.
• Kask powinien chronić głowę w razie upadku. Po wyłącznie
jednym jedynym (nawet lekkim) zderzeniu ochrona ta nie jest już
zagwarantowana. Po upadku względnie zderzeniu nie powinno
się więcej korzystać z kasku, zniszczyć go i usunąć, również gdy
nie wykazuje widocznych uszkodzeń.
• Kasku nie wolno czyścić środkami zawierającymi naftę, rozpusz
czalniki lub środki żrące, ani z zewnątrz, ani od środka.
Należy zawsze używać delikatnych środków czyszczących,
rozpuszczonych w wodzie, o neutralnym ph i miękkiej ściereczki.
Kask należy wysuszyć suchą ściereczką. Poduszki należy czyścić
miękką szczoteczką z małą ilością mydła.
PL

22
• Należy stosować jedynie oryginalne części zamienne.
• Kaski nie powinny byc noszone przez dzieci przy wspinaniu sie lub
innych zabawach, przy których istnieje mozliwosc uduszenia!
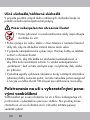
Słuchawki
Przy zastosowaniu słuchawek należy przestrzegać następujących
wskazówek bezpieczeństwa:
Uwaga niebezpieczeństwo utraty życia!
• Nigdy nie stosować podczas jazdy na nartach i
snowboardzie słuchawek!
• Podczas wjazdu na górę lub oczekiwania, głośność ustawić
jedynie tak, aby móc słyszeć odgłosy otoczenia i komunikaty.
• Przy nieprzestrzeganiu ogłoszeń np. pogotowia górskiego istnieje
niebezpieczeństwo utraty życia!
• Należy zwrócić uwagę, aby kabel słuchawek nie przeszkadzał
i nie odstawał. Istnieje niebezpieczeństwo „uduszenia“ np. gdy
zawiśnie się na windzie lub zaczepi się o innego narciarza.
• Sygnały ostrzegawcze ratraka i innych narciarzy na trasie mogą
zostać nie dosłyszane i nie zarejestrowane, zmysł równowagi
może zostać naruszony.
PL
Strona się ładuje...
Strona się ładuje...
Strona się ładuje...
Strona się ładuje...
Strona się ładuje...
Strona się ładuje...
Strona się ładuje...
Strona się ładuje...
Strona się ładuje...
Strona się ładuje...
Strona się ładuje...
Strona się ładuje...
Strona się ładuje...
Strona się ładuje...
Strona się ładuje...
Strona się ładuje...
Strona się ładuje...
Strona się ładuje...
Strona się ładuje...
Strona się ładuje...
Strona się ładuje...
Strona się ładuje...
Strona się ładuje...
Strona się ładuje...
Strona się ładuje...
Strona się ładuje...
Strona się ładuje...
Strona się ładuje...
Strona się ładuje...
Strona się ładuje...
Strona się ładuje...
Strona się ładuje...
Strona się ładuje...
Strona się ładuje...
Strona się ładuje...
Strona się ładuje...
Strona się ładuje...
Strona się ładuje...
Strona się ładuje...
Strona się ładuje...
Strona się ładuje...
Strona się ładuje...
Strona się ładuje...
Strona się ładuje...
Strona się ładuje...
Strona się ładuje...
Strona się ładuje...
Strona się ładuje...
Strona się ładuje...
Strona się ładuje...
Strona się ładuje...
Strona się ładuje...
Strona się ładuje...
Strona się ładuje...
-
 1
1
-
 2
2
-
 3
3
-
 4
4
-
 5
5
-
 6
6
-
 7
7
-
 8
8
-
 9
9
-
 10
10
-
 11
11
-
 12
12
-
 13
13
-
 14
14
-
 15
15
-
 16
16
-
 17
17
-
 18
18
-
 19
19
-
 20
20
-
 21
21
-
 22
22
-
 23
23
-
 24
24
-
 25
25
-
 26
26
-
 27
27
-
 28
28
-
 29
29
-
 30
30
-
 31
31
-
 32
32
-
 33
33
-
 34
34
-
 35
35
-
 36
36
-
 37
37
-
 38
38
-
 39
39
-
 40
40
-
 41
41
-
 42
42
-
 43
43
-
 44
44
-
 45
45
-
 46
46
-
 47
47
-
 48
48
-
 49
49
-
 50
50
-
 51
51
-
 52
52
-
 53
53
-
 54
54
-
 55
55
-
 56
56
-
 57
57
-
 58
58
-
 59
59
-
 60
60
-
 61
61
-
 62
62
-
 63
63
-
 64
64
-
 65
65
-
 66
66
-
 67
67
-
 68
68
-
 69
69
-
 70
70
-
 71
71
-
 72
72
-
 73
73
-
 74
74


Crivit 90095 Instructions For Use Manual
- Typ
- Instructions For Use Manual
- Niniejsza instrukcja jest również odpowiednia dla
w innych językach
- Deutsch: Crivit 90095
- slovenčina: Crivit 90095
Powiązane artykuły
Inne dokumenty
-
 Lumos Lumos Matrix User Manua
-
Kinderkraft SAFETY-Fahrradhelm Instrukcja obsługi
-
Bontrager Helmet Instrukcja obsługi
-
LIVARNO 282530 Instrukcja obsługi
-
-
Bell Bike Helmet Instrukcja obsługi
-
Philips GC9685/80 Skrócona instrukcja obsługi
-
Parkside PFSH 3 A2 Original Instructions Manual
-
 KED Quicksafe Instructions For Use Manual

