Triton T12 DD Operating/Safety Instructions Manual
- Typ
- Operating/Safety Instructions Manual

Version date: 15.03.17
tritontools.com
T12 DD
T12 Drill Driver 12V
Operating & Safety Instructions
Bedienings- en
veiligheidsvoorschriften
Instruções de
Operação e Segurança
Instructions d’utilisation
et consignes de sécurité
Gebrauchs- und
Sicherheitsanweisung
Istruzioni per l’uso
e la sicurezza
Instrucciones de
uso y de seguridad
Instrukcja obsługi
i bezpieczeństwa
Инструкции по эксплуатации и
правила техники безопасности
Kezelési és
biztonsági utasítások
Provozní a
bezpečnostní pokyny
Prevádzkové a
bezpečnostné pokyny
Çalışma ve
Güvenlik Talimatları
687235_Manual.indd 1 15/03/2017 10:27


4
GB
Original Instructions
Symbols
The rating plate on your tool may show symbols. These represent important information about
the product or instructions on its use.
Specification
Model no.: T12DD
Voltage: 12V DC
No load speed: 0–400 & 0–1300min-1
Gears: 2
Speed control: Trigger
Max torque: 22Nm
Torque settings: 17+1
Chuck size: 10mm
Bit holder size: ¼”
Drilling capacity (wood): 20mm
Drilling capacity (metal): 6mm
Weight: 1.18kg (including battery)
Thank you for purchasing this Triton tool. This manual contains information necessary
for safe and effective operation of this product. This product has unique features and,
even if you are familiar with similar products, it is necessary to read this manual
carefully to ensure you fully understand the instruction. Ensure all users of the tool
read and fully understand this manual.
Introduction
Wear hearing protection
Wear eye protection
Wear breathing protection
Wear head protection
Wear hand protection
Read instruction manual
Caution!
Charger: Class II construction (double insulated for additional protection)
For indoors use only (battery charger and PSU)
DO NOT incinerate batteries!
Internal time-lag fuse with rated current 3.15A
Environmental Protection Waste electrical products and batteries, including
Li-Ion batteries, should not be disposed of with household waste. Please recycle
where facilities exist. Check with your local authority or retailer for recycling
advice.
Conforms to relevant legislation and safety standards.
T-130˚
T3.15A
VVolts
Hz Hertz
~, AC Alternating current
,DC Direct current
A, mA Ampere, milli-Amp
W, kW Watt, kilowatt
noNo load speed
/min or min-1 Operations per minute
bpm Blows (impacts) per minute (drill)
Ah Amp hours (battery capacity)
°Degrees
dB(A) Decibel sound level (A weighted)
ØDiameter
m/s2Metres per second squared (vibration
magnitude)
Technical Abbreviations Key
Battery
Battery Charger
Voltage: 12V DC
Capacity: 1.5Ah (3.0Ah optional)
Type: Li-ion
Charger type: Intelligent
Charging time: 1.5Ah: 1 hour 100% charge, ½ hour
80% charge
3.0Ah: 2 hour 100% charge, 1 hour
80% charge
Input voltage: 220–240V AC 50/60Hz, 60W
Output voltage: 12V DC 1500mA
Protection class:
687235_Manual.indd 4 15/03/2017 10:27

5
GB
Sound and Vibration Information
Sound pressure LPA:65dB(A)
Sound power LWA: 76dB(A)
Uncertainty K: 3dB
Weighted vibration ah (main handle): <2.5m/s2
WARNING: Always wear ear protection where the sound level exceeds 85dB(A) and limit the
time of exposure if necessary. If sound levels are uncomfortable, even with ear protection, stop
using the tool immediately and check the ear protection is correctly fitted and provides the
correct level of sound attenuation for the level of sound produced by your tool.
WARNING: User exposure to tool vibration can result in loss of sense of touch, numbness,
tingling and reduced ability to grip. Long-term exposure can lead to a chronic condition. If
necessary, limit the length of time exposed to vibration and use anti-vibration gloves. Do not
operate the tool with hands below a normal comfortable temperature, as vibration will have a
greater effect. Use the figures provided in the specification relating to vibration to calculate the
duration and frequency of operating the tool.
Sound and vibration levels in the specification are determined according to international
standards. The figures represent normal use for the tool in normal working conditions. A poorly
maintained, incorrectly assembled, or misused tool, may produce increased levels of noise
and vibration. www.osha.europa.eu provides information on sound and vibration levels in the
workplace that may be useful to domestic users who use tools for long periods of time.
General Safety
WARNING Read all safety warnings and all instructions. Failure to follow the warnings
and instructions may result in electric shock, fire and/or serious injury.
WARNING: This appliance is not intended for use by persons (including children) with
reduced, physical or mental capabilities or lack of experience or knowledge unless they
have been given supervision or instruction concerning use of the appliance by a person
responsible for their safety. Children must be supervised to ensure that they do not play
with the appliance.
Save all warnings and instructions for future reference.
The term “power tool” in the warnings refers to your mains-operated (corded) power tool or
battery-operated (cordless) power tool.
1) Work area safety
a) Keep work area clean and well lit. Cluttered or dark areas invite accidents.
b) Do not operate power tools in explosive atmospheres, such as in the presence of
flammable liquids, gases or dust. Power tools create sparks which may ignite the dust or
fumes.
c) Keep children and bystanders away while operating a power tool. Distractions can
cause you to lose control.
2) Electrical safety
a) Power tool plugs must match the outlet. Never modify the plug in any way. Do not
use any adapter plugs with earthed (grounded) power tools. Unmodified plugs and
matching outlets will reduce risk of electric shock.
b) Avoid body contact with earthed or grounded surfaces, such as pipes, radiators,
ranges and refrigerators. There is an increased risk of electric shock if your body is
earthed or grounded.
c) Do not expose power tools to rain or wet conditions. Water entering a power tool will
increase the risk of electric shock.
d) Do not abuse the cord. Never use the cord for carrying, pulling or unplugging the
power tool. Keep cord away from heat, oil, sharp edges or moving parts. Damaged or
entangled cords increase the risk of electric shock.
e) When operating a power tool outdoors, use an extension cord suitable for outdoor
use. Use of a cord suitable for outdoor use reduces the risk of electric shock.
f) If operating a power tool in a damp location is unavoidable, use a residual current
device (RCD) protected supply. Use of an RCD reduces the risk of electric shock.
3) Personal safety
a) Stay alert, watch what you are doing and use common sense when operating a power
tool. Do not use a power tool while you are tired or under the influence of drugs,
alcohol or medication. A moment of inattention while operating power tools may result in
serious personal injury.
b) Use personal protective equipment. Always wear eye protection. Protective equipment
such as dust mask, non-skid safety shoes, hard hat, or hearing protection used for
appropriate conditions will reduce personal injuries.w
c) Prevent unintentional starting. Ensure the switch is in the off-position before
connecting to power source and/or battery pack, picking up or carrying the tool.
Carrying power tools with your finger on the switch or energising power tools that have the
switch on invites accidents.
d) Remove any adjusting key or wrench before turning the power tool on. A wrench or a
key left attached to a rotating part of the power tool may result in personal injury.
e) Do not overreach. Keep proper footing and balance at all times. This enables better
control of the power tool in unexpected situations.
f) Dress properly. Do not wear loose clothing or jewellery. Keep your hair, clothing and
gloves away from moving parts. Loose clothes, jewellery or long hair can be caught in
moving parts.
g) If devices are provided for the connection of dust extraction and collection facilities,
ensure these are connected and properly used. Use of dust collection can reduce dust-
related hazards.
4) Power tool use and care
a) Do not force the power tool. Use the correct power tool for your application. The
correct power tool will do the job better and safer at the rate for which it was designed.
b) Do not use the power tool if the switch does not turn it on and off. Any power tool that
cannot be controlled with the switch is dangerous and must be repaired.
c) Disconnect the plug from the power source and/or the battery pack from the power
tool before making any adjustments, changing accessories, or storing power tools.
Such preventive safety measures reduce the risk of starting the power tool accidentally.
d) Store idle power tools out of the reach of children and do not allow persons
unfamiliar with the power tool or these instructions to operate the power tool. Power
tools are dangerous in the hands of untrained users.
e) Maintain power tools. Check for misalignment or binding of moving parts, breakage
of parts and any other condition that may affect the power tool’s operation. If
damaged, have the power tool repaired before use. Many accidents are caused by
poorly maintained power tools.
f) Keep cutting tools sharp and clean. Properly maintained cutting tools with sharp cutting
edges are less likely to bind and are easier to control.
g) Use the power tool, accessories and tool bits etc. in accordance with these
instructions, taking into account the working conditions and the work to be
performed. Use of the power tool for operations different from those intended could result
in a hazardous situation.
5) Service
a) Have your power tool serviced by a qualified repair person using only identical
replacement parts. This will ensure that the safety of the power tool is maintained.
687235_Manual.indd 5 15/03/2017 10:27

6
GB
Battery Charger Safety
Use the battery charger correctly
• Refer to the section of this manual relating to use of the battery charger before attempting
to charge the battery.
• Do not attempt to use the charger with any batteries other than those supplied. Keep your
battery charger clean; foreign objects or dirt may cause a short or block air vents. Failure
to follow these instructions may cause overheating or fire
• If the supply cord is damaged, it must be replaced by the manufacturer, its service agent
or similarly qualified persons in order to avoid a hazard
WARNING: Do not recharge non-rechargeable batteries.
Use batteries correctly
• Only charge batteries using the charger provided
• Only use batteries provided with this power tool, or others recommended by the supplier
• Keep batteries clean; foreign objects or dirt may cause a short
• Allow batteries to cool for 15 minutes after charging or heavy use. Failure to follow these
instructions may cause overheating or fire
• When not in use, batteries should be stored at room temperature (approximately 20°C)
• Ensure batteries cannot accidentally short in storage
Battery and charger safety features
The battery and charger are fitted with a number of safety features that may be triggered
during charging operation:
• Over-charge protection: Charger automatically switches off when the battery has
reached full charge capacity, protecting the internal components of the battery
• Over-discharge protection: Prevents the battery from discharging beyond the
recommended lowest safety voltage
• Over-heat protection: Sensor switches off the tool if the battery becomes too hot during
operation. This can happen if the tool is overloaded or being used for extended periods
of time. Up to 30 minutes’ cooling time may be required, depending on the ambient
temperature
• Overload protection: Battery temporarily stops if it is overloaded or the maximum
current draw is exceeded, protecting the internal components. The battery will resume
normal operation when the current draw returns to a normal safe level. This may take a
few seconds
• Short circuit protection: The battery will stop working immediately if a short circuit
occurs; this prevents damage to the battery or tool
Drill Safety Warnings
WARNING: It is imperative to follow all national safety regulations concerning installation,
operation, and maintenance.
a) DO NOT allow anyone under the age of 18 years to use this tool, and ensure that
operators are qualified and familiar with the operating and safety instructions.
b) Wear ear protectors when impact drilling. Exposure to noise can cause hearing loss.
c) Use auxiliary handle(s) if supplied with the tool. Loss of control can cause personal
injury.
d) Hold power tool by insulated gripping surfaces when performing an operation where
the cutting accessory may contact hidden wiring or its own cord. Cutting accessory
contacting a ‘live’ wire may make exposed metal parts of the power tool ‘live’ and could
give the operator an electric shock.
e) Battery chargers are for indoors use only. Ensure that the power supply and charger are
protected against moisture at all times.
f) When using the drill, use safety equipment including safety glasses or shield, ear
defenders, and protective clothing including safety gloves. Wear respiratory protection
suitable for the work being undertaken. A minimum rating of FFP2 is recommended. If
operating the tool causes discomfort in any way, stop immediately and review your method
of use.
g) Use metal and voltage detectors to locate concealed electric, water or gas lines. Avoid
touching live components or conductors.
h) Ensure that the lighting is adequate.
i) Ensure that the drill bit is securely fixed in the chuck. Insecure drill bits can be ejected
from the machine causing a hazard.
j) Ensure the drill bit is not in contact with the workpiece prior to starting up the tool.
k) Before drilling, check there is sufficient clearance for the drill bit under the
workpiece.
l) DO NOT exert pressure on to the tool. To do so would shorten its service life.
m) Drill bits get hot during operation, allow to cool prior to handling them.
n) NEVER use your hands to remove sawdust, chips or waste close by the bit.
o) If you are interrupted when operating the drill, complete the process and switch off
before looking up.
p) Where possible, use clamps or a vice to hold your work.
q) Examine the chuck regularly for signs of wear or damage. Have damaged parts
repaired by a qualified service centre.
r) ALWAYS wait until the drill has come to a complete stop before putting it down.
s) Periodically check all nuts, bolts and other fixings and tighten where necessary.
Product Familiarisation
1. Chuck
2. Quick-Release Collar
3. Torque Adjustment Collar
4. Speed Selector
5. Forward/Reverse Selector
6. Battery Release Grips
7. 1.5Ah Battery
8. Trigger Switch
9. LED Guide Light
10. Magnetic 6mm/¼” Hex Drive
11. 1hr Battery Charger
Accessories (not shown):
• 1 x 1.5Ah Battery
• 1 x Soft Carry Case
Intended Use
General purpose drill for driving screws and for light drilling applications (excluding masonry).
This drill is optimally configured for driving screws and fasteners.
Unpacking Your Tool
• Carefully unpack and inspect your new drill. Familiarise yourself with all its features and
functions
• Ensure that all parts of the tool are present and in good condition. If any parts are missing
or damaged, have such parts replaced before attempting to use this tool
Before Use
• This drill driver’s battery has been shipped in low-charge condition. Charge the battery
before use.
Battery charger operation
• The charger and battery may become warm while charging. This is normal and does not
indicate a problem
• Use the charger at normal room temperatures whenever possible. To prevent overheating,
do not cover the charger and do not charge the battery in direct sunlight or near sources
of heat
If the battery does not charge properly:
• Check current at power outlet by plugging in a lamp or other appliance
• If charging problems persist, have the drill, battery and battery charger checked by an
authorised Triton power tool technician
Charging the battery
1. Depress the Battery Release Grips (6) and remove the battery from the tool
2. Insert the battery into the Battery Charger (11). Do not use excessive force when inserting
the battery. If it does not slide into place easily, it is not being inserted correctly
Note: Initially, only the green LED may flash as it evaluates the status of the battery. When
charging the red LED will illuminate and the green LED will be OFF. When the battery is fully
charged the red LED will be OFF and the green LED will illuminate. The battery charger will
constantly monitor the condition of the battery when charging.
3. Remove the battery as soon as possible when completely charged
4. Disconnect the charger from the power supply and store in a clean, dry environment, out of
the reach of children
• Normal battery charging time is approximately 1 hour for a recently discharged battery at
normal temperature
• Charging times may vary, for example, initial first-charge when new or using the optional
high-capacity battery
• It is not necessary to completely discharge the battery before recharging but you should not
attempt to recharge a battery that is already fully charged
• Battery charging can be interrupted at any point to use the battery. Under normal
conditions, the charger charges at a higher rate, reducing the charging rate as the battery
approaches full charge. An 80% charge is achieved after approximately ½ hour of charging
687235_Manual.indd 6 15/03/2017 10:27

7
GB
3.0Ah High Capacity Battery (optional accessory)
A high-capacity battery is available that provides double the capacity. It also allows the drill driver
to stand vertically which may be advantageous for some uses. Please note the full charging time
will be approximately 2 hours for the high-capacity battery and 1 hour for 80% charge.
Battery Charging Table
Red LED Green LED
Charger plugged in OFF Flashing
Charger evaluating battery OFF Flashing
Fast charging ON OFF
Highly discharged battery slow charging Flashing OFF
Abnormal battery temperature charging Flashing OFF
Fully charged OFF ON
Battery or charger fault Flashing Flashing
Temporary abnormal temperature condition ON ON
Note:
If the lights on the battery charger fail to illuminate according to the chart above, or indicate
a fault condition:
• Check the battery is firmly seated in the battery charger
• Check all connections and that mains power is switched on
Initial charge
• The initial charge will vary depending on the existing charge in the battery. Allow the battery
to reach full charge as indicated on the charger
• After discharging, recharge the battery completely, as indicated by the LED on the battery
charger, for the next 4–5 uses. This will ensure that the battery is performing to its highest
capacity
• Subsequent full charges will take approximately 1 hour; however, the battery can be
recharged when the battery is only partially discharged
Re-charging the battery
• After use, a Lithium-Ion battery must be allowed to cool down before charging
• If a hot battery is inserted into the charger, both LEDs will illuminate. The charger will begin
to charge when the battery has cooled sufficiently (this may take several minutes)
Installing the battery
• The battery should fit easily into the battery charger or drill driver unit. If the battery is
difficult to fit, check the condition of the battery and contacts
Battery – length of service
• The length of service from each charging cycle will depend on the type of workload.
The battery charger and battery for this drill have been designed to provide a long and
trouble-free working life. The charger intelligently monitors the condition of the battery and
selects the ideal charging rate for the condition of the battery. It protects the battery from
over-charging or charging at too high a rate. However, like all batteries, performance will be
reduced over time
To maximise battery life
• Store and charge your battery in a cool area. Temperatures above or below normal room
temperature will reduce battery life
• DO N OT store Lithium-Ion batteries in a discharged condition. Recharge them immediately
after they are discharged. For long term storage, store fully charged
• All batteries gradually lose their charge, even Lithium-Ion batteries, but the discharge rate is
very low. If the drill is stored for long periods of time without use, recharge the battery every
three to four months and disconnect the battery from the power tool before storing. This
practice will prevent the Lithium-Ion battery being damaged when stored
Operation
Using the Quick-Release Collar
• This drill driver is fitted with a Quick-Release collar that allows the chuck to be removed,
revealing a magnetic 6mm/¼” Hex Drive. This allows fast working with both a fitted drill
bit in the chuck, and the use of screwdriver bits in the bit holder. There is no need to
remove the drill bit from the chuck before using the screwdriver bits with this drill driver
To remove the Chuck:
• Hold the Quick-Release Collar (2) and move towards the Chuck (1) then hold both together
and pull the Chuck away from the drill driver
To re-fit the Chuck:
• Align the hex fitting of the Chuck with the hex socket of the Magnetic 6mm/¼” Hex Drive
(10) and push the Chuck into position while holding the Quick-Release Collar. A small
amount of sideways movement may be required to allow the Chuck to fit. Once fitted,
move the Quick-Release Collar towards the Torque Adjustment Collar (3) to secure the
Chuck. Check the Chuck is secure by holding only the Chuck and try to lightly pull it
from the tool
• The Quick-Release mechanism is simple and fast to operate, allowing the drill driver
greater flexibility and speed in operation, although a small amount of practice may be
necessary to become accustomed to this feature
Fitting a drill or driver bit
WARNING: DO NOT fit any attachment with a maximum speed lower than the no load
speed of the machine.
Note: Screwdriver bits can also be fitted directly into the Magnetic 6mm/¼” Hex Drive (10)
when the Chuck is removed.
1. Rotate the Chuck (1) collar clockwise and insert the bit into the Chuck
2. Rotate the Chuck collar anti-clockwise to secure the drill bit
Note: DO NOT run the tool while tightening or releasing the Chuck. Ideally, select the locked
middle position of the Forward/Reverse Selector (5)
3. When the bit is held tightly, test it is positioned centrally by running the tool. The bit
should rotate smoothly without uneven rotation. If the bit is not central, release the Chuck,
reposition the bit and retighten the Chuck
Direction control
• The rotation direction can be set using the Forward/Reverse Selector (5)
• To set the Chuck’s rotation clockwise, push the Forward/Reverse Selector to the left
• To set the Chuck’s rotation anti-clockwise, push the Forward/Reverse Selector to the right
• To lock the Chuck and prevent rotation, set the Forward/Reverse Selector to the middle
position
IMPORTANT: DO NOT attempt to move the Forward/Reverse Selector when the tool is running.
Speed control
This drill driver has a 2-speed gearbox:
• 1st gear range: 0–400min-1
• 2nd gear range: 0–1300min-1
Note: Use the Speed Selector (4) to set the gear. Forward for 1st gear, back for 2nd gear.
Note: The 1st gear would be used normally for driving screws, for example, and offers higher
torque and superior control at low rpm. The 2nd gear would normally be used exclusively
for drilling.
Torque control
• This drill driver is fitted with torque control, which limits the torque output of the drill,
enabling screws to be driven without the risk of damage
• There are 17 torque settings and one drill setting. The lower the number, the lower the
torque
• To adjust the torque, select the 1st gear and rotate the Torque Adjustment Collar (3) until the
setting you require is aligned with the arrow on the drill driver housing
• Check that the torque setting is correct by practising first on a piece of scrap material
• For drilling, select the correct gear, rotate the clutch ring to the drill symbol. This will lock
the control for maximum torque
WARNING: The drill driver can be fitted with a drive adaptor for use with driving nuts and bolts.
DO NOT attempt to use this tool in the drill position when doing so. Use the 17 torque settings
and the 1st gear to allow the torque clutch to protect the tool from excessive load. The use of a
wrench to loosen or tighten the nut/bolt is recommended. This allows the tool to speed up the
operation, without risk of damage, when high torque is required at the beginning or end of the
operation.
Switching on
• To start the tool, squeeze the Trigger Switch (8). The LED Guide Light (9) will illuminate
• Further pressure on the Trigger Switch will increase the tool’s running speed
Note: It is possible the drill driver may switch off during heavy use due to thermal protection
of the battery and internal components. This may prevent the tool being used again for a short
period of time and does not represent a fault.
Drilling guidance
• Use sharp drill bits and ensure that drill bits are suitable for the material being drilled
• Begin drilling at slow speeds by partially squeezing the Trigger Switch (8)
• Reduce pressure on the Trigger Switch when the drill bit is about to break through to the
other side of material
• Avoid splintering on breakthrough by either clamping a piece of scrap wood to the back
of the workpiece or by continuing the hole from the back of the workpiece when the drill
bit first breaks through
687235_Manual.indd 7 15/03/2017 10:27

8
GB
Drilling metal
• Support thin material with a piece of scrap wood
• Mark the intended hole position using a hammer and centre punch
• Use only HSS (High Speed Steel) drill bits or others recommended for drilling into metal
• Prior to drilling large holes use a smaller bit to drill a pilot hole
• Use a suitable lubricant to prolong the service life of the drill bit and produce good results
Accessories
A full range of accessories and products is available from your Triton stockist.
• T12B – T12 1.5Ah Li-Ion Battery 12V
• T12HCB – Hi-Cap Battery 3.0Ah 12V
Additional Triton products compatible with the included batteries:
• T12CH – T12 Combi Hammer Drill 12V
• T12AD – T12 Angle Drill 12V
• T12ID – T12 Impact Driver 12V
• T12RS – T12 Reciprocating Saw 12V
• T12OT – T12 Oscillating Multi-Tool 12V
• T12FL – 12V Swivel Head Torch
Maintenance
Cleaning
• Keep your machine clean at all times. Dirt and dust will cause internal parts to wear
quickly and shorten the machine’s service life.
• Clean the body of your machine with a soft brush or dry cloth.
• If available, use clean, dry, compressed air to blow through the ventilation holes
Storage
• Store this tool and accessories in its case if supplied or a dry, secure place out of the
reach of children
• Always remove the battery before storing this tool
• If storing for an extended period of time, store the battery at full-charge, separate from the
tool, and ensure the battery is recharged every 3 months
Disposal
• Always adhere to national regulations when disposing of power tools that are no longer
functional and are not viable for repair.
• Do not dispose of power tools, or other waste electrical and electronic equipment (WEEE),
with household waste
• Contact your local waste disposal authority for information on the correct way to dispose
of power tools
687235_Manual.indd 8 15/03/2017 10:27

9
GB
Guarantee
To register your guarantee visit our web site at
www.tritontools.com* and enter your details.
Your details will be included on our mailing list (unless indicated otherwise) for
information on future releases. Details provided will not be made available to any third
party.
Purchase Record
Date of Purchase: ___ / ___ / ____
Model: T12DD Retain your receipt as proof of purchase art pr
Triton Precision Power Tools guarantees to the purchaser of this product that if any
part proves to be defective due to faulty materials or workmanship within 3 YEARS from
the date of original purchase,
Triton will repair, or at its discretion replace, the faulty part free of charge.
This guarantee does not apply to commercial use nor does it extend to normal wear and
tear or damage as a result of accident, abuse or misuse.
* Register online within 30 days.
Terms & conditions apply.
This does not affect your statutory rights oves to be defecti
Notified body: TÜV SÜD Product Service
The technical documentation is kept by: Triton Tools
Date: 12/07/2016
Signed:
Mr Darrell Morris
Managing Director
Name and address of the manufacturer:
Powerbox International Limited, Company No. 06897059. Registered address: Powerbox,
Boundary Way, Lufton Trading Estate, Yeovil, Somerset BA22 8HZ, United Kingdom.
CE Declaration of Conformity
The undersigned: Mr Darrell Morris
as authorised by: Triton Tools
Declares that
This declaration has been issued under the sole responsibility of the manufacturer.
The object of the declaration is in conformity with the relevant Union harmonisation
Legislation.
Identification code: T12DD
Description: 12V Drill Driver
Conforms to the following directives and standards:
• Machinery Directive 2006/42/EC
• EMC Directive 2014/30/EU
• RoHS Directive 2011/65/EU
• EN 60745-1:2009+A11:2010
• EN 60745-2-2:2003+A1:2008
• EN 60745-2-1:2010
• EN 55014-1:2006+A2:2011
• EN 55014-2:1997+A2:2008
687235_Manual.indd 9 15/03/2017 10:27

10
GB
10
NL
Technische afkortingen en symbolen
Specificaties
Model nr.: T12DD
Spanning: 12V DC
Onbelaste snelheid: 0 - 400 en 0 – 1300min-1
Versnellingen: 2
Snelheidscontrole: Trekker schakelaar
Max koppel: 22Nm
Boorhouder grootte: 10mm
Koppelstanden: 17+1
Boorcapaciteit (hout): 20mm
Boorcapaciteit (metaal): 6mm
Gewicht: 1.18kg (incl. accu)
Draag gehoorbescherming
Draag een veiligheidsbril
Draag een stofmasker
Draag een veiligheidshelm
Draag handschoenen
Lees de handleiding
Voorzichtig!
Beschermingsklasse II (dubbel geïsoleerd)
Enkel geschikt voor binnen gebruik!
Verbrand batterijen/accu’s niet!
Smeltzekering met een maximale elektrische stroom van 3,15 A.
Milieubescherming Elektrische producten mogen niet met het normale huisvuil
worden weggegooid. Indien de mogelijkheid bestaat, dient u het product te
recyclen. Vraag de plaatselijke autoriteiten of winkelier om advies betreffende
recyclen.
Voldoet aan de relevante wetgeving en veiligheidsnormen
Beschrijving symbolen
Op het gegevensplaatje van uw gereedschap kunnen zich symbolen bevinden. Deze
vertegenwoordigen belangrijke productinformatie en gebruiksinstructies.
Introductie
Hartelijk dank voor de aanschaf van dit Triton-gereedschap. Deze instructies bevatten
informatie die u nodig hebt voor een veilige en doeltreffende bediening van dit product.
Dit product heeft een aantal unieke eigenschappen. Lees daarom deze handleiding altijd
door, ook als u al bekend bent met bandschuurmachine, zodat u alle voordelen van dit
unieke ontwerp kunt benutten
Houd deze handleiding bij de hand en zorg ervoor dat alle gebruikers van dit
gereedschap de handleiding hebben gelezen en volledig hebben begrepen.
Vertaling van de originele instructies
T-130˚
T3.15A
VVolt
Hz Hertz
~, AC Wisselspanning
, DC Gelijkspanning
A, mA Ampère, milliampère
W, kW Watt, kilowatt
n0Onbelaste snelheid
/min or min-1 Operaties per minuut
bpm Slagen per minuut (boormachine)
Ah Ampère-uur (accu capaciteit)
°Graden
dB(A) Decibel geluidsniveau (A)
ØDiameter
m/s2Meters per seconde (trilling)
Accu
Oplader
Spanning: 12V AC
Capaciteit: 1.5Ah (3.0Ah optioneel)
Type: Li-ion
Oplader type: Intelligent
Laadtijd: 1,5 Ah: 1 uur 100% lading, ½ uur 80%
lading
3,0 Ah: 2 uur 100% lading, 1 uur 80%
lading
Ingaande spanning: EU: 220-240 V AC 50/60 Hz, 60W
Uitgangsspanning: 12V DC 1500mA
Beschermingsklasse:
687235_Manual.indd 10 15/03/2017 10:27

11
GB
11
NL
Geluid en trilling
Geluidsdruk: 65dB(A)
Geluidsvermogen: 76dB(A)
Onzekerheid: 3dB
Trilling: <2.5m/s2
WAARSCHUWING: Bij een geluidsintensiteit van 85 dB(A) of hoger is het dragen van
gehoorbescherming en het limiteren van de blootstellingstijd vereist. Bij oncomfortabel
hoge geluidsniveaus, zelfs met het dragen van gehoorbescherming, stopt u het gebruik
van de machine onmiddellijk. Controleer de pasvorm en het geluiddempingsniveau van de
bescherming.
WAARSCHUWING: Blootstelling aan trilling resulteert mogelijk in gevoelloosheid, tinteling en
een vermindert gripvermogen. Langdurige blootstelling kan leiden tot chronische condities.
Limiteer de blootstellingsduur en draag anti-vibratie handschoenen. Vibratie heeft een grotere
invloed op handen met een temperatuur lager dan een normale, comfortabele temperatuur.
Maak gebruik van de informatie in de specificaties voor het bereken van de gebruiksduur en
frequentie van de machine.
Geluids- en trillingsniveaus in de specificaties zijn bepaald in overeenstemming met
internationale normen. De waarden gelden voor een normaal gebruik in normale
werkomstandigheden. Een slecht onderhouden, onjuist samengestelde of onjuist gebruikte
machine produceert mogelijk hogere geluids- en trillingsniveaus. www.osha.europa.eu biedt
informatie met betrekking tot geluids- en trillingsniveaus op de werkplek wat mogelijk nuttig is
voor regelmatige gebruikers van machines.
Algemene veiligheid
WAARSCHUWING Lees alle bediening- en veiligheidsvoorschriften. Het niet opvolgen van
alle voorschriften die hieronder vermeld staan, kan resulteren in een elektrische schok, brand
en/of ernstig letsel.
WAARSCHUWING: De machine is niet geschikt voor gebruik door personen met een
verminderde mentale of fysieke gesteldheid of een gebrek aan ervaring, tenzij de persoon
wordt begeleid of geïnstrueerd door een persoon verantwoordelijk voor de veiligheid
Bewaar deze voorschriften voor toekomstig gebruik.
De term “elektrisch gereedschap” in alle hieronder vermelde waarschuwingen heeft
betrekking op uw elektrische gereedschap dat op de stroom is aangesloten (met een snoer) of
met een accu wordt gevoed (snoerloos).
1) Veiligheid in de werkruimte
a) Houd de werkruimte schoon en zorg voor een goede verlichting. Rommelige en donkere
ruimtes leiden vaak tot ongelukken.
b) Werk niet met elektrisch gereedschap in explosieve omgevingen, bijvoorbeeld in de
aanwezigheid van ontvlambare vloeistoffen, gassen of stof. Elektrisch gereedschap
brengt vonken teweeg die stof of dampen kunnen doen ontbranden.
c) Houd kinderen en omstanders uit de buurt wanneer u elektrisch gereedschap bedient.
Door afleiding kunt u de controle over het gereedschap verliezen.
2) Elektrische veiligheid
a) De stekkers van het elektrische gereedschap moeten passen bij het stopcontact. Pas
de stekker niet aan. Gebruik geen adapterstekkers bij geaard elektrisch gereedschap.
Het gebruik van ongewijzigde stekkers en passende stopcontacten vermindert het risico op
een elektrische schok.
b) Vermijd lichamelijk contact met geaarde oppervlakken zoals pijpen, radiatoren,
fornuizen en koelkasten. Het risico op een elektrische schok neemt toe als uw lichaam
geaard wordt.
c) Laat elektrisch gereedschap niet nat worden. Wanneer elektrisch gereedschap nat
wordt, neemt het risico op een elektrische schok toe.
d) Beschadig het snoer niet. Gebruik het snoer nooit om het elektrisch gereedschap te
dragen, te trekken of om de stekker uit het stopcontact te trekken. Houd het snoer uit
de buurt van hitte, olie, scherpe randen of bewegende delen. Een beschadigd of in de
knoop geraakt snoeren verhoogt het risico op een elektrische schok toe.
e) Wanneer u elektrisch gereedschap buiten gebruikt, maak dan gebruik van een
verlengsnoer dat geschikt is voor gebruik buitenshuis. Gebruik een verlengsnoer dat
geschikt is voor gebruik buitenshuis om het risico op een elektrische schok te verminderen.
f) Indien het onvermijdelijk is elektrisch gereedschap te gebruiken in een vochtige
omgeving, gebruik dan een energiebron met een aard lek beveiliging (Residual
Currency Device). Het gebruik van een RCD vermindert het risico op een elektrische schok.
g) WAARSCHUWING: Wanneer de machine in Australië of Nieuw-Zeeland gebruikt wordt,
met een lekstroom van 30 mA of lager, is het gebruik van een aardlekschakelaar
aanbevolen
3) Persoonlijke veiligheid
a) Blijf alert en gebruik uw gezonde verstand wanneer u elektrisch gereedschap
bedient. Gebruik het elektrisch gereedschap niet wanneer u vermoeid bent of onder
invloed van drugs, alcohol of medicijnen. Onoplettendheid tijdens het bedienen van
elektrisch gereedschap kan leiden tot ernstig letsel.
b) Maak gebruik van persoonlijke bescherming. Draag altijd een veiligheidsbril.
Passende bescherming voor de omstandigheden, zoals een stofmasker, niet-slippende
veiligheidsschoenen een helm of gehoorbescherming, vermindert het risico op persoonlijk
letsel.
c) Zorg ervoor dat het apparaat niet per ongeluk wordt gestart. Controleer of de
schakelaar in de ‘uit’ stand staat voordat u de stekker in het stopcontact steekt. Het
dragen van elektrisch gereedschap met uw vinger op de schakelaar of het aansluiten op
de stroom van elektrisch gereedschap met de schakelaar ingeschakeld kan tot ongelukken
leiden.
d) Verwijder alle stel- of moersleutels voordat u het elektrische gereedschap
inschakelt. Een moer- of stelsleutel die zich op een draaiend onderdeel van het elektrische
gereedschap bevindt, kan leiden tot letsel.
e) Reik niet te ver. Blijf altijd stevig en in balans staan. Zo houdt u meer controle over het
elektrische gereedschap in onverwachte situaties.
f) Draag geschikte kleding. Draag geen loshangende kleding of sieraden. Houd haren,
kleding en handschoenen uit de buurt van bewegende delen. Loshangende kleding,
sieraden en los hangende haren kunnen vast komen te zitten in bewegende delen.
g) Als er onderdelen voor stofafvoer- en stofverzameling worden meegeleverd, sluit deze
dan aan en gebruik deze op de juiste wijze. Het gebruik van deze onderdelen kan het
risico op stofgerelateerde ongelukken verminderen.
4) Gebruik en verzorging van elektrisch gereedschap
a) Forceer elektrisch gereedschap niet. Gebruik elektrisch gereedschap dat geschikt
is voor het werk dat u wilt uitvoeren. Geschikt elektrisch gereedschap werkt beter en
veiliger op een passende snelheid.
b) Gebruik het elektrische gereedschap niet als de schakelaar het apparaat niet in- en
uitschakelt. Elektrisch gereedschap dat niet bediend kan worden met de schakelaar is
gevaarlijk en moet gerepareerd worden.
c) Haal de stekker uit het stopcontact voordat u instellingen aanpast, toebehoren
verwisselt of het elektrische gereedschap opbergt. Dergelijke voorzorgsmaatregelen
verminderen het risico op het per ongeluk starten van het elektrische gereedschap.
d) Berg elektrisch gereedschap dat niet in gebruik is op buiten bereik van kinderen
en laat mensen die niet bekend zijn met het elektrische gereedschap of met deze
instructies het elektrische gereedschap niet bedienen. Elektrisch gereedschap is
gevaarlijk in de handen van onervaren gebruikers.
e) Onderhoud uw elektrisch gereedschap. Controleer op foutieve uitlijning of het
vastslaan van bewegende delen, gebroken onderdelen en elke andere afwijking die
de werking van het elektrische gereedschap zou kunnen beïnvloeden. Indien het
elektrische gereedschap beschadigd is, moet u het laten repareren voordat u het
weer gebruikt. Veel ongelukken worden veroorzaakt door slecht onderhouden elektrisch
gereedschap.
f) Houd snijwerktuigen scherp en schoon. Goed onderhouden snijwerktuigen met scherpe
messen slaan minder snel vast en zijn gemakkelijker te bedienen.
g) Gebruik het elektrische gereedschap, toebehoren en onderdelen, etc. volgens deze
instructies en volgens bestemming voor het specifieke type elektrisch gereedschap,
en houd daarbij rekening met de werkomstandigheden en het uit te voeren werk.
Gebruik van elektrisch gereedschap voor werkzaamheden die verschillen van die waarvoor
het apparaat bestemd is, kan leiden tot gevaarlijke situaties.
5) Onderhoud
a) Laat uw elektrische gereedschap onderhouden door een gekwalificeerde vakman en
gebruik alleen identieke vervangstukken. Zo bent u er zeker van dat de veiligheid van
het elektrische gereedschap gewaarborgd blijft.
687235_Manual.indd 11 15/03/2017 10:27

12
GB
12
NL
Acculader veiligheid
Juist gebruik van de oplader
• Raadpleeg het deel in deze handleiding wat betrekking heeft op het gebruik van de
oplader, voor het opladen van de accu.
• Gebruik de oplader niet in combinatie met een accu, anders dan die verstrekt bij de
machine. Houd dwe oplader schoon; stof en/of vuil kan leiden tot kortsluiting en een
geblokkeerde ventilatie wat kan resulteren in oververhitting en/of brand
• Wanneer het stroomsnoer beschadigt is, laat u deze door de fabrikant vervangen om
gevaren te voorkomen
Waarschuwing: Herlaad geen niet-oplaadbare accu’s
Juist gebruik van de accu
• Laad de accu alleen op met de oplader verstrekt bij de machine
• Gebruik enkel de bijgeleverde accu, of accu’s aangeraden door de leverancier
• Houd uw accu schoon; stof en/of vuil kan leiden tot kortsluiting
• Laat de accu, na het opladen of na lang gebruik, 15 minuten afkoelen. Het falen van het
opvolgen van deze instructies kan leiden tot oververhitting en/of brand
• Wanneer accu’s niet in gebruik zijn bergt u deze op een droge plek, met een
kamertemperatuur van ± 20 ˚C op
• Zorg ervoor dat de accu’s, wanneer opgeborgen, niet kunnen zorgen voor een kortsluiting
Accu en oplader veiligheidskenmerken
De accu en de oplader zijn voorzien van een aantal veiligheidskenmerken welke tijdens opladen
of gebruik getriggerd kunnen worden
• Overlading bescherming: De oplader schakelt automatisch uit wanneer de accu volledig
is opgeladen om zo de interne delen van de accu te beschermen tegen beschadigen
• Ontlading bescherming: Beschermt de accu tegen ontlading verder dan het aangeraden
laagste spanningspunt
• Oververhittingsbescherming: Een ingebouwde sensor schakelt de machine uit wanneer
de accu te heet wordt. Dit kan gebeuren wanneer de belasting te groot is en wanneer de
machine voor langere periode gebruikt wordt. Afhankelijk van de temperatuur heeft de
accu mogelijk een koelperiode van 30 minuten nodig.
• Overbelasting bescherming: De accu stopt tijdelijk wanneer deze wordt overbelast of
wanneer de maximale spanning wordt overschreden om zo de interne onderdelen te
beschermen tegen beschadiging. De accu zal de werking hervatten wanneer de spanning
terug op een veilig niveau komt. Dit duurt mogelijk een aantal seconden.
• Kortsluiting bescherming: De accu stopt onmiddellijk wanneer kortsluiting plaats vindt.
Dit voorkomt beschadiging aan de accu en de machine.
Veiligheid voor accuboormachines
Belangrijk: Het is noodzakelijk alle nationale veiligheidsregels met betrekking tot installatie,
gebruik en onderhoud op te volgen
a) Laat personen jonger dan 18 jaar de boorhamer niet gebruiken. Tevens horen alle
gebruikers met de gebruik- en veiligheidsinstructies bekend te zijn
b) Draag gehoorbescherming bij het gebruik in de hamerstand. Blootstelling aan hoge
geluidsniveaus resulteert mogelijk in gehoorbeschadiging
c) Gebruik wanneer mogelijk de hulphandvaten. Het verliezen van de controle over de
machine resulteert mogelijk in persoonlijk letsel
d) Houdt de machine bij de geïsoleerde grip vast, wanneer de machine tijdens gebruik
in contact kan komen met stroomdraad. Aanraking met stroomdraad kan resulteren in
elektrische schok
e) Opladers zijn enkel geschikt voor binnen gebruik. Zorg ervoor dat de stroombron en
oplader te allen tijde beschermt zijn tegen vocht
f) Bij het gebruik van de boorhamer is de volgende veiligheidsuitrusting verplicht:
veiligheidsbril, gehoorbescherming en handschoenen. Wanneer het boren stof produceert
draagt u een stofmasker. Een minimale waardering van FFP2 is aanbevolen. Wanneer het
gebruik van de machine op enige wijze voor ongemak zorgt, stopt u het werk onmiddellijk.
g) Gebruik metaal- en spanningszoekers voor het vinden van verborgen water- , gas- en/
of elektrische leidingen. Vermijdt het contact met componenten die onder spanning staan
h) Zorg voor een goede verlichting
i) Zorg ervoor dat beitel of boor bits stevig in de boorhouder vast zitten. Losse bits kunnen
losschieten en ongelukken veroorzaken
j) Breng het bit in contact met het werkstuk voordat u de machine start
k) Controleer voordat u begint met boren of er genoeg vrije ruimte is onder het werkstuk
l) Oefen geen druk op de boorhamer uit waar dit de levensduur verslechterd
m) Boor bits worden tijdens gebruik erg heet. Laat ze na gebruik afkoelen.
n) Verwijder zaagsel of vuil dicht bij het boor bit niet met uw handen
o) Wanneer u tijdens het gebruik van de boorhamer gestoord wordt, maakt u het werk af
en schakelt u de machine uit voordat u opkijkt
p) Maak wanneer mogelijk gebruik van klemmen of bankschroeven voor het klemmen van
het werkstuk
q) Controleer de boorhouder regelmatig op tekenen van slijtage en/of schade. Beschadigde
onderdelen horen door een gekwalificeerd persoon vervangen te worden
r) Wacht met het neerleggen van de boor totdat deze volledig tot stilstand is gekomen
s) Controleer bouten, moeren en andere bevestigingsmiddelen regelmatig en draai deze
wanneer nodig vast
Onderdelenlijst
1. Boorhouder
2. Ontkoppelkraag
3. Koppel verstelkraag
4. Snelheidsregelaar
5. Rotatierichting schakelaar
6. Accu verlosschakels
7. 1.5 Ah accu
8. Trekker schakelaar
9. LED geleidingslicht
10. Magnetische 6 mm bit houder
11. 1 uur oplader
Accessoires (niet afgebeeld):
1 x 1,5 Ah accu
1 x zachte opbergkoffer
Gebruiksdoel
Accuboormachine voor het indraaien van schroeven en lichte boorwerkzaamheden (exclusief
beton). De boor is optimaal geconfigureerd voor het indraaien van schroeven en andere
bevestigingsmiddelen
Het uitpakken van uw gereedschap
• Pak uw toestel / gereedschap uit. Inspecteer het en zorg dat u met alle kenmerken en
functies vertrouwd raakt
• Controleer of alle onderdelen aanwezig zijn en in goede staat verkeren. Als er onderdelen
ontbreken of beschadigd zijn, zorg dan dat deze vervangen worden voor u dit toestel /
gereedschap gebruikt
Voor gebruik
• De boormachine wordt verscheept met een laag geladen accu. Laad deze voor gebruik
volledig op.
Laadprocedure
• De accu en oplader worden tijdens het opladen mogelijk warm. Dit is normaal en duidt
niet op problemen
• Gebruik de oplader op normale kamertemperaturen. Om oververhitting te voorkomen
bedekt u de oplader niet en houdt u de oplader buiten direct zonlicht
Wanneer de accu niet normaal laadt:
• Controleer de spanning van het stopcontact door het aansluiten van bijvoorbeeld een lamp
• Wanneer het probleem aanhoudt, laat de boormachine door een elektricien of technici nakijken
Het opladen van de accu
1. Druk de accu verlosschakels (6) in en haal de accu van de boormachine
2. Plaats de accu in de oplader (11). Deze horen soepel samen te klikken
LET OP: Het groene lampje brand mogelijk om zo het laadniveau weer te geven. Tijdens
het opladen brand het rode lampje en dooft het groene lampje. Wanneer de accu volledig is
opgeladen dooft het rode lampje en brand het groene lampje.
3. Wanneer de accu is opgeladen haalt u deze onmiddellijk van de oplader
4. Ontkoppel de oplader van de stroombron en berg deze op een schone en droge plek, buiten
het bereik van kinderen op
• De normale oplaadtijd van een accu op normale temperatuur is ongeveer 1 uur
• Oplaadtijden verschillen
• Het is niet nodig de accu volledig te ontladen voordat deze opgeladen kan worden. Een
volle accu hoort niet verder geladen te worden
• Het laden van de accu kan op elk moment onderbroken worden. Aan het eind van de
laadcyclus laadt de accu minder snel op. Een 80% laadniveau wordt in ongeveer een
half uur bereikt
3.0 Ah hi-cap accu (optioneel accessoire)
Een hi-cap accu met het dubbele vermogen is verkrijgbaar. Deze accu dient tevens als
standaard voor de boormachine. De volledige laadtijd van deze accu bedraagt ongeveer 2 uur
en 1 uur voor een laadniveau van 80%.
687235_Manual.indd 12 15/03/2017 10:27

13
GB
13
NL
Accu laadtabel
Rood LED Groen LED
Oplader is ingeplugd Uit Knippert
Oplader evalueert de accu Uit Knippert
Snelle lading Aan Uit
Erg laag accuniveau Langzame lading Knippert Uit
Abnormale accu temperatuur Knippert Uit
Volledig opgeladen Uit Aan
Accu of oplader foutief Knippert Knippert
Tijdelijk abnormale temperatuur Aan Aan
LET OP:
Wanneer de lichtjes op de oplader onjuist functioneren als hierboven beschreven:
• Controleer of de accu juist in de oplader is geplaatst
• Controleer alle aansluitingen
Aanvankelijk opladen
• De aanvankelijke oplaadtijd varieert afhankelijk van het laadniveau van de accu. Laad de
accu volledig op
• Voor de eerste 4-5 ontlaadt u de accu volledig voordat u deze oplaad. Dit maximaliseert
de accuprestatie
• Opvolgende ladingen duren ongeveer 1 uur
Het herladen van de accu
• Een li-ion accu heeft na gebruik tijd nodig om af te koelen voor deze opgeladen kan worden
• Wanneer een hete accu op de oplader geplaatst wordt zal het groene lichtje branden. De
oplader laad de accu op wanneer deze is afgekoeld (dit kan enkele minuten duren)
Het installeren van de accu
• De accu hoort gemakkelijk in de oplader te klikken. Zo niet controleert u de accu en de
aansluiting
Accu gebruiksduur
• De gebruiksduur van de accu na elke laadcyclus hangt af van de werklast. Deze boor
accu is ontworpen voor het geven van maximale, probleemloze levensduur. De oplader
selecteert de optimale ladingssnelheid. Zoals elke andere accu zal ook deze accu
uiteindelijk verslijten
Het maximaliseren van de levensduur
• Laad en berg uw accu in een koele ruimte op. Temperaturen boven normale
kamertemperatuur reduceert de levensduur van de accu
• Berg de accu nooit op wanneer deze volledig ontladen is. Laad accu’s wanneer volledig
ontladen gelijk weer op
• Alle accu’s verliezen geleidelijk hun lading. Hoe hoger de opberg temperatuur des te
sneller ontladen accu’s. Wanneer uw boor voor langere tijd opgeborgen wordt zonder
gebruikt te worden, hoort u de accu elke 3-4 maanden op te laden. Zo wordt de
levensduur van de accu verlengd
Bediening
Het vervangen van de boorhouder
• De boormachine is voorzien van een snel te verwisselen boorhouder. Dit maakt het
mogelijk de boorhouder te verwijderen wat een 6 mm magnetische bit houder onthuld.
Zo kan de boormachine zowel met een boor in de houder als met een schroefbit in de bit
houder gebruikt worden.
Het ontkoppelen van de boorhouder
• Houdt de ontkoppelkraag (2) vast, beweeg deze naar de boorhouder (1), houdt deze samen
en trek de boorhouder van de boormachine
Het herplaatsen van de boorhouder
• Lijn de fitting van de boorhouder met het contact van de bit houder (10) uit en duw de
boorhouder in positie. Een lichte zijwaartse beweging is daarbij mogelijk vereist. Wanneer
in plaats schuift u de ontkoppelkraag naar de koppel verstelkraag (3) toe om de houder te
vergrendelen. Controleer de bevestiging door licht aan de boorhouder te trekken
• Het snel-verlossysteem is erg gemakkelijk in gebruik
Het bevestigen van een boor of schroef bit
WAARSCHUWING: Bevestig geen boren en schroef bits met een maximale snelheid lager
dan die van de machine
LET OP: Schroef bits kunnen tevens direct in de magnetische houder (10) geplaats worden
wanneer de boorhouder niet bevestigd is
1. Draai de boorhouder (1) rechtsom en plaats een boor of schroefbit
2. Draai de boorhouder linksom om het bit te vergrendelen.
LET OP: Schakel de machine tijdens het vergrendelen of ontgrendelen van bits niet in.
Vergrendel de rotatierichting schakelaar (5) in de middenpositie
3. Wanneer het bit in de houder vergrendeld is controleert u of het gecentreerd in de
boorhouder zit door de machine in te schakelen. Het bit hoort soepel te roteren. Wanneer
het bit niet centraal in de houder zit herpositioneert u het bit
Rotatierichting
• De rotatierichting kan geselecteerd worden met behulp van de rotatierichting schakelaar (5)
• Om de boorhouder rechtsom te laten roteren, drukt u de schakelaar naar links
• Om de boorhouder linksom te laten roteren, drukt u de schakelaar naar rechts
• Wanneer de schakelaar in de middenstand staat is de boor vergrendeld
BELANGRIJK: Probeer de schakelaar niet te verplaatsen wanneer de boorhouder roteert
Snelheidscontrole
De versnellingsbak van de boormachine heeft twee standen:
• Eerste versnelling: 0 – 400 min-1
• Tweede versnelling: 0 – 1300 min-1
Let op: Gebruik de snelheidsregelaar (4) om de versnelling te selecteren. Naar voren voor het
de eerste versnelling en naar achteren voor de tweede versnelling
Let op: De eerste versnelling wordt gebruikt voor het indrijven van schroeven met een hoge
koppel. De tweede versnelling wordt gebruikt voor boren
Koppelcontrole
• De boormachine is voorzien van een koppelcontrole. Deze limiteert de koppel uitgang van
de machine om beschadiging bij de ingang van schroeven te voorkomen
• Er zijn 17 koppelstanden en één boorstand. Hoe lager het cijfer des te lager de koppel
• Om de koppel aan te passen draait u aan de koppel verstelkraag (3) tot het juiste cijfer
door de pijl op de behuizing van de machine wordt aangewezen
• Controleer of de koppelinstelling juist is door deze op een stuk afvalmateriaal te testen
• Voor boren draait u de kraag en selecteert u het boor symbool. Dit geeft de machine
maximale koppel
WAARSCHUWING: De boormachine kan voorzien worden van een aandrijfadapter voor het
indrijven van bouten en moeren. Met de aandrijfadapter bevestigt, gebruikt u de machine NIET
in de boorstand. Gebruik de 17 koppelstanden zodat de machine beschermd wordt tegen
overbelasting. Het gebruik van een moersleutel voor het aan- of losdraaien van de bout/moer
is aangeraden.
De boormachine inschakelen
• Om de boormachine te starten drukt u de trekker schakelaar (8) in. Het LED lichtje (9)
zal branden
• Door de druk op de schakelaar te verhogen, zal de boor/het schroefbit sneller roteren
Let op: Tijdens zwaar gebruik machine springt de thermische beveiliging mogelijk in waardoor
de machine automatisch uitschakelt. De machine kan mogelijk voor korte periode niet meer
gebruikt worden.
Boor geleiding
• Gebruik scherpe boor bits en zorg ervoor dat de bits geschikt zijn voor het te boren
materiaal
• Begin het boren langzaam door de trekker schakelaar gedeeltelijk in te drukken
• Verminder de boorsnelheid wanneer de boor het werkstuk bijna doorboort
• Om versplintering bij de doorboring van het werkstuk te voorkomen klemt u een stuk
afval materiaal op de achterzijde van het werkstuk, of boor vanuit de achter zijde van het
werkstuk wanneer de boor het werkstuk net doorboort
Het boren in metaal
• Ondersteun dunne voorwerpen met afvalmateriaal
• Markeer het te boren gat met een hamer en priem
• Gebruik alleen HSS boren of boren aangeraden voor het boren in metaal
• Voordat u grote gaten boort, boort u een klein lei gat
• Gebruikt een juist smeermiddel om de levensduur van de boor verlengen en voor het
verkrijgen van goede resultaten
687235_Manual.indd 13 15/03/2017 10:27

14
GB
14
NL
Accessoires
Verschillende accessoires en verbruiksmiddelen zijn verkrijgbaar bij uw Triton handelaar
• T12B – T12 1,5 Ah Li-ion accu 12 V
• T12HCB – Hi-Cap accu 3,0 Ah 12 V
Triton machine die compatible zijn met de inbegrepen accu’s
• T12CH – T12 combiboorhamer 12 V
• T12AD – T12 hoekboormachine 12 V
• T12ID – T12 accuslagschroevendraaier 12 V
• T12RS – T12 reciprozaag 12 V
• T12OT – T12 oscillerende Multitool 12V
• T12FL – 12V zaklamp met draaikop
Onderhoud
Schoonmaak
• Houd uw machine te allen tijde schoon. Vuil en stof kunnen de interne onderdelen snel
doen slijten en zo de levensduur van de machine verminderen
• Maak de behuizing van de machine met een zachte borstel of een droge doek schoon
• Blaas wanneer mogelijk droge perslucht door de ventilatiegaten van de machine.
Opberging
• Berg de machine en accessoires op een droge en veilige plaats, buiten het bereik van
kinderen op
• Verwijder de accu voordat u de machine opbergt
• Voor langdurige opberging laad u de accu volledig op, bergt u deze apart op en laad u
deze elke 3 maanden op
Verwijdering
• Bij de verwijdering van elektrische machines neemt u de nationale voorschriften in acht.
• Elektrische en elektronische apparaten en accu’s mogen niet met uw huishoudelijk afval
worden weggegooid
• Neem contact op met uw gemeente voor informatie betreffende de verwijdering van
elektrisch gereedschap
687235_Manual.indd 14 15/03/2017 10:27

15
GB
15
NL
Garantie
Om uw garantie te registreren, gaat u naar onze website op www.tritontools.com* en
voert u uw gegevens in.
Uw gegevens worden opgeslagen in onze mailinglist (tenzij u anders aangeeft) voor
informatie over nieuwe producten. De ingevulde gegevens worden aan geen enkele
andere partij beschikbaar gesteld.
Aankoopgegevens
Datum van aankoop: ___ / ___ / ____
Model: T12DD
Bewaar uw aankoopbon als aankoopbewijs rt pr
Triton Precision Power Tools garandeert de koper van dit product dat indien een
onderdeel defect is vanwege fouten in materiaal of uitvoering binnen 3 jaar na de datum
van de oorspronkelijke aankoop,
Triton het defecte onderdeel gratis repareert of, naar eigen inzicht, vervangt.
Deze garantie heeft geen betrekking op commercieel gebruik en strekt zich niet uit tot
normale slijtage of schade ten gevolge van een ongeluk, verkeerd gebruik of misbruik.
* Registreer online binnen 30 dagen.
Algemene voorwaarden van toepassing.
Keuringsinstantie: TÜV SÜD Product Service
De technische documentatie wordt bijgehouden door: Triton Tools
Datum: 12-07-2016
Handtekening:
Darrell Morris
Algemeen directeur
Naam en adres van fabrikant:
Powerbox International Limited, handelsregister nummer 06897059.
Geregistreerd adres: Powerbox, Boundary Way, Lufton Trading Estate, Yeovil, Somerset
BA22 8HZ, Verenigd Koninkrijk
EG-verklaring van overeenstemming
De ondergetekende: Mr. Darrell Morris
Gemachtigd door: Triton Tools
Verklaart dat
Deze verklaring wordt verstrekt onder de volledige verantwoordelijkheid van de fabrikant.
Het hierboven beschreven voorwerp is conform de desbetreffende communautaire
harmonisatiewetgeving
Identificatienummer: T12DD
Beschrijving: Accuboormachine, 12 V
Voldoet aan de volgende richtlijnen:
• Machinerichtlijn 2006/42/EG
• Elektromagnetische verenigbaarheid 2004/30/EG
• RoHS-richtlijn 2011/65/EU
• EN 60745-1:2009+A11:2010
• EN 60745-2-2:2003+A1:2008
• EN 60745-2-1:2010
• EN 55014-1:2006+A2:2011
• EN 55014-2:1997+A2:2008
687235_Manual.indd 15 15/03/2017 10:27

16
GB
16
FR
Symboles
La plaque signalétique figurant sur votre outil peut présenter des symboles. Ces symboles
constituent des informations importantes relatives au produit ou des instructions concernant
son utilisation.
Introduction
Nous vous remercions d’avoir choisi cet équipement Triton. Ces instructions contiennent
les informations nécessaires au fonctionnement efficace et sûr de ce produit. Veuillez lire
attentivement ce manuel pour vous assurer de tirer pleinement avantage des caractéristiques
uniques de votre nouvel équipement.
Gardez ce manuel à portée de main et assurez-vous que tous les utilisateurs l’aient lu et bien
compris avant toute utilisation.
Traduction des instructions originales
Port de protection auditive
Port de lunettes de sécurité
Port de masque respiratoire
Port de casque
Port de gants
Lire le manuel d’instructions
Attention !
Construction de classe II (Double isolation pour une protection supplémentaire)
Pour usage intérieur uniquement (chargeur de batterie et unité alimentation)
NE PAS incinérer les batteries !
Smeltzekering met een maximale elektrische stroom van 3,15 A.
Protection de l’environnement Les appareils électriques usagés ne doivent
pas être jetés avec les ordures ménagères. Veuillez les recycler dans les centres
prévus à cet effet. Pour de plus amples informations, veuillez contacter votre
municipalité ou point de vente.
Conforme à la réglementation et aux normes de sécurité pertinentes.
T-130˚
T3.15A
Technische afkortingen en symbolen
Caractéristiques techniques
Numéro du modèle: T12DD
Tension: 12V CC
Vitesse à vide: 0 - 400 tr/min et 0 - 1300 tr/min
Vitesses: 2
Contrôle de la vitesse: Par pression de la gâchette
Couple max: 22Nm
Mandrin: 10mm
Réglages du couple: 17+1
Capacité de perçage (bois): 20mm
Capacité de perçage (métal): 6mm
Poids: 1.18kg (avec la batterie)
VVolt
Hz Hertz
~, AC Courant alternatif
, DC Courant continu
A, mA Ampère, Milliampère
W, kW Watt, kilowatt
n0Vitesse à vide
/min or min-1 (opérations) par minute
bpm Blows (impacts) per minute (drill)
Ah Ampères par heure (Résistance de la batterie)
°Degrés
dB(A) Puissance acoustique en décibel (A pondéré)
ØDiamètre
m/s2Mètres par seconde au carré (magnitude des
vibrations)
Batterie
Chargeur
Tension: 12V AC
Capacité: 1.5Ah (3.0 Ah en option)
Type: Li-ion
Type: Intelligent
Temps de charge: Batterie 1.5 Ah : Charge à 100 % en 1
heure et à 80 % en une demi-heure
Batterie 3.0 Ah : Charge à 100 % en 2
heures et à 80 % en une heure
Tension d’entrée: 220-240 V CA 50/60Hz, 60 W
Tension de sortie: 12V CC 1 500 mA
Classe de protection:
687235_Manual.indd 16 15/03/2017 10:27

17
GB
17
FR
Informations sur le niveau
d’intensité sonore et vibratoire
Pression acoustique LPA: 65dB(A)
Puissance acoustique LWA:76dB(A)
Incertitude K: 3dB
Vibration pondérée ah (poignée
principale)
<2.5m/s2
ATTENTION : Portez toujours des protections auditives lorsque le niveau d’intensité est
supérieur à 85 dB(A) et limitez le temps d’exposition si nécessaire. Si l’intensité sonore devient
inconfortable, même avec les protections, arrêtez immédiatement d’utiliser l’appareil, vérifiez
que les protections sont bien en places et adaptés avec le niveau sonore produit par l’appareil.
ATTENTION : L’exposition de l’utilisateur aux vibrations peut engendrer une perte du toucher,
des engourdissements, des picotements et ainsi réduire la capacité de préhension. De longues
expositions peuvent également provoquer ces symptômes de façon chronique. Si nécessaire,
limitez le temps d’exposition aux vibrations et portez des gants anti-vibrations. N’utilisez pas
cet appareil lorsque la température de vos mains est en dessous des températures normales,
car l’effet vibratoire en est accentué. Référez-vous au cas de figures des caractéristiques
relatives aux vibrations pour calculer le temps et fréquence d’utilisation de l’appareil.
Les niveaux sonores et vibratoires indiqués dans la section « Caractéristiques techniques
» du présent manuel sont déterminés en fonction de normes internationales. Ces données
correspondent à un usage normal de l’appareil, et ce dans des conditions de travail normales.
Un appareil mal entretenu, mal assemblé ou mal utilisé peut augmenter les niveaux sonores
et vibratoires. Le site www.osha.europa.eu offre de plus amples informations sur les niveaux
sonores et vibratoires sur le lieu de travail, celles-ci pourront être utiles à tout particulier
utilisant des outils électriques pendant des périodes prolongées.
Consignes de sécurité générales
relatives à l’utilisation d’appareils
électriques
AVERTISSEMENT : Veuillez lire toutes les consignes de sécurité et toutes les
instructions. Le non-respect des instructions et consignes de sécurité peut entraîner un
risque de décharge électrique, d’incendie et/ou se traduire par des blessures graves.
AVERTISSEMENT : Cet appareil n’est pas prévu pour être utilisé par des personnes
(enfants y compris) ayant des capacités mentales ou physiques réduites ou manquant
d’expérience à moins qu’ils soient supervisés ou qu’une personne responsable de leur
sécurité leur donne des instructions concernant l’utilisation de cet appareil.
Veuillez conserver ces instructions et consignes de sécurité pour référence ultérieure.
L’expression « appareil/outil électrique » employée dans les présentes consignes recouvre
aussi bien les appareils filaires à brancher sur secteur que les appareils sans fils fonctionnant
avec batterie.
1. Sécurité sur la zone de travail
a. Maintenir une zone de travail propre et bien éclairée. Des zones encombrées et mal
éclairées sont sources d’accidents.
b. Ne pas utiliser d’outils électriques dans des environnements explosifs, tels qu’à
proximité de liquides, de gaz ou de poussières inflammables. Les outils électriques
produisent des étincelles susceptibles d’enflammer la poussière ou les vapeurs présentes.
c. Éloigner les enfants et toute personne se trouvant à proximité pendant l’utilisation
d’un outil électrique. Ceux-ci pourraient vous distraire et vous faire perdre la maîtrise
de l’appareil.
2. Sécurité électrique
a. Les prises des outils électriques doivent correspondre aux prises du secteur. Ne
modifiez jamais la prise en aucune façon. N’utilisez jamais d’adaptateur avec les
outils électriques mis à la terre. Des prises non modifiées, adaptées aux boîtiers de prise
de courant, réduiront les risques de décharge électrique.
b. Éviter le contact corporel avec les surfaces mises à la terre telles que tuyaux,
radiateurs, cuisinières et réfrigérateurs. Le risque de décharge électrique est plus
important si votre corps est mis à la terre.
c. Ne pas exposer votre outil électrique à la pluie ou à l’humidité. L’infiltration d’eau dans
un outil électrique augmentera le risque de décharge électrique.
d. Ne pas maltraiter le cordon électrique. N’utilisez jamais le cordon électrique pour
porter, tirer ou débrancher l’outil électrique. Conservez le cordon électrique à l’écart
de la chaleur, de l’essence, de bords tranchants ou de pièces en mouvement. Un
cordon électrique endommagé ou entortillé accroît le risque de décharge électrique.
e. Au cas où l’outil électroportatif serait utilisé à l’extérieur, servez-vous d’une rallonge
appropriée à une utilisation en extérieur. Cela réduit le risque de décharge électrique.
f. Si une utilisation de l’outil dans un environnement humide ne peut être évitée, utilisez
une alimentation protégée par un disjoncteur différentiel. L’utilisation d’un disjoncteur
différentiel réduit le risque de décharge électrique.
g. Lorsqu’utilisé en Australie ou en Nouvelle Zélande, il est recommandé que cet appareil
soit toujours alimenté via un disjoncteur différentiel ayant un courant résiduel de 30 mA
ou moins.
3. Sécurité des personnes
a. Rester vigilant et faire preuve de sens lors de la manipulation de l’outil. Ne pas utiliser
d’outil électrique en état de fatigue ou sous l’influence de drogues, d’alcool ou de
médicaments. Un moment d’inattention pendant l’utilisation d’un outil électrique peut se
traduire par des blessures graves.
b. Porter des équipements de protection. Porter toujours des lunettes de protection. Le
port d’équipements de protection tels que des masques à poussières, des chaussures de
sécurité antidérapantes, un casque de sécurité ou des protections antibruit, selon le travail
à effectuer, réduira le risque de blessures aux personnes.
c. Éviter tout démarrage accidentel. S’assurer que l’interrupteur marche-arrêt soit en
position d’arrêt (Off) avant de brancher l’outil sur l’alimentation secteur. Porter un outil
électrique tout en maintenant le doigt posé sur l’interrupteur ou brancher un outil électrique
dont l’interrupteur est sur la position de marche (On) est source d’accidents.
d. Enlever toute clé ou tout instrument de réglage avant de mettre l’outil électrique en
marche. Une clé ou un instrument de réglage laissé fixé à un élément en rotation de l’outil
électrique peut entraîner des blessures physiques.
e. Ne pas essayer d’atteindre une zone hors de portée. Se tenir toujours en position
stable et conserver l’équilibre. Cela permet de mieux contrôler l’outil électrique dans des
situations inattendues.
f. Porter des vêtements appropriés. Ne pas porter de vêtements amples ou des bijoux
pendants. Les vêtements amples, les bijoux pendants ou les cheveux longs peuvent être
happés par les pièces en mouvement.
g. Si l’outil est pourvu de dispositifs destinés au raccord d’équipements d’extraction et
de récupération de la poussière/sciure, s’assurer qu’ils soient bien fixés et utilisés
correctement. L’utilisation de ces dispositifs peut réduire les risques dus à la poussière.
4. Utilisation et entretien des outils électriques
a. Ne pas surcharger l’outil électrique. Utiliser l’outil électrique approprié au travail
à effectuer. Un outil électrique adapté et employé au rythme pour lequel il a été conçu
permettra de réaliser un travail de meilleure qualité et dans de meilleures conditions de
sécurité.
b. Ne pas utiliser un outil électrique dont l’interrupteur marche-arrêt est hors service.
Tout outil électrique dont la commande ne s’effectue plus par l’interrupteur marche-arrêt
est dangereux et doit être réparé.
c. Débrancher l’outil électrique avant d’effectuer tout réglage, changement d’accessoire
ou avant de le ranger. De telles mesures préventives réduiront les risques de démarrage
accidentel.
d. Ranger les outils électriques inutilisés hors de portée des enfants et ne pas permettre
l’utilisation de ces outils aux personnes novices ou n’ayant pas connaissance de
ces instructions. Les outils électriques sont dangereux dans les mains d’utilisateurs
inexpérimentés.
e. Veiller à l’entretien des outils électriques. Vérifier que les éléments rotatifs soient bien
alignés et non grippés. S’assurer de l’absence de pièces cassées ou endommagées
susceptibles de nuire au bon fonctionnement de l’outil. Si l’outil électrique est
endommagé, le faire réparer avant toute utilisation. De nombreux accidents sont causés
par l’utilisation d’outils électriques mal entretenus.
f. Garder les outils de coupe affûtés et propres. Des outils de coupe bien entretenus,
aux tranchants bien affûtés, sont moins susceptibles de se gripper et sont plus faciles à
contrôler.
g. Utiliser l’outil électrique, les accessoires et les outils à monter, etc., conformément
à ces instructions et selon l’utilisation prévue pour le type d’outil donné, en tenant
compte des conditions de travail et de la tâche à réaliser. Toute utilisation de cet outil
électrique autre que celle pour laquelle il a été conçu peut entraîner des situations à risque
et entraînerait une annulation de sa garantie.
5. Entretien
a. Ne faire réparer l’outil électrique que par un réparateur qualifié utilisant uniquement
des pièces de rechange identiques. Cela permettra d’assurer la sécurité continue de
cet outil électrique.
687235_Manual.indd 17 15/03/2017 10:27

18
GB
18
FR
Consignes de sécurité relatives aux
chargeurs de batteries
Utilisation correcte du chargeur de batterie
• Reportez-vous la section du présent manuel traitant de l’utilisation du chargeur de batterie
avant de commencer à charger la batterie.
• N’utilisez PAS le chargeur pour d’autres batteries que celles fournies. Maintenez le
chargeur propre car les objets étrangers et la saleté peuvent entraîner un court-circuit
ou boucher les orifices de ventilation. Le non-respect de ces consignes peut amener
l’appareil à surchauffer ou à prendre feu.
• Si le cordon électrique est endommagé, il doit être remplacé par un centre de réparation
agréé afin d’éviter tout risque.
AVERTISSEMENT: N’essayez PAS de recharger une batterie non rechargeable.
Utilisation correcte des batteries
• Veuillez ne charger les batteries de l’appareil qu’à l’aide du chargeur fourni.
• N’utilisez avec cet appareil que les batteries fournies ou des batteries recommandées par
votre fournisseur.
• Maintenez les batteries propres car les objets étrangers et la saleté peuvent entraîner
un court-circuit.
• Laissez la batterie refroidir 15 minutes après toute recharge ou utilisation prolongée. Le
non-respect de ces consignes peut amener l’appareil à surchauffer ou à prendre feu.
• Lorsqu’elles ne sont pas utilisées, les batteries doivent être rangées dans un endroit sec
proche de la température ambiante (20 ˚C).
• Assurez-vous que les batteries ne peuvent pas se court-circuiter accidentellement
pendant la période de rangement.
Dispositifs de sécurité de la batterie et du chargeur
La batterie et le chargeur sont équipés d’un certain nombre de dispositifs de sécurité qui
peuvent se mettre en marche lors de la recharge ou pendant l’utilisation :
• Protection contre la surcharge: le chargeur s’arrête automatiquement lorsque la batterie
a atteint sa capacité de charge maximale afin de protéger les composants internes.
• Protection contre la sur-décharge: évite à la batterie d’être déchargée au-delà de la
tension minimale recommandée.
• Protection contre la surchauffe: des capteurs arrêtent la batterie lorsque celle-ci
surchauffe. Cela arrive lorsque le moteur de l’outil est surchargé ou en cas d’utilisation
prolongée. En fonction de la température ambiante, l’outil devra refroidir 30 minutes avant
d’en reprendre l’utilisation.
• Protection contre la surcharge: la batterie s’arrête temporairement si elle est surchargée
ou en cas de dépassement de l’intensité maximale absorbée. La batterie reprendra ses
opérations normales lorsque l’intensité absorbée sera revenue au niveau approprié. Cette
opération peut prendre quelques secondes.
• Protection contre un court-circuit: la batterie s’arrêtera immédiatement lors d’un court-
circuit, cela évite d’endommager la batterie ou l’outil.
Consignes de Sécurité Supplément Pour les Outils de
Percage
AVERTISSEMENT: Il est impératif de suivre toutes les réglementations nationales de
sécurité concernant l’installation, le fonctionnement et l’entretien de l’appareil.
a) Il est INTERDIT à toute personne de moins de 18 ans d’utiliser cet appareil. Tout
utilisateur de l’appareil doit être formé à l’utilisation d’une perceuse et doit connaitre
les consignes de sécurité et les instructions d’utilisation.
b) Utilisez des protections auditives lorsque vous utilisez une perceuse à percussion.
L’exposition au bruit peut causer une perte auditive.
c) Utilisez la/les poignée(s) auxiliaire(s) lorsqu’elle(s) est/sont fournie(s). La perte de
contrôle peut donner lieu à des blessures.
d) Tenez l’outil électrique par sa poignée isolante, lorsque vous percez un accessoire de
perçage pourrait rentrer en contact avec des câbles et fils cachés. Lorsqu’ils sont en
contact avec un câble sous tension, peuvent exposer les pièces métallique de l’outil à une
tension et peuvent entraîner un choc électrique.
e) Les chargeurs de batterie sont prévus pour un usage intérieur uniquement.
Assurez-vous que la source d’alimentation et le chargeur soient protégés de l’humidité
en permanence.
f) L’utilisation d’une perceuse demande le port d’équipements de sécurité tels que
lunettes ou visière de sécurité, casque anti-bruit et habillement protecteur tel que
gants de sécurité. Portez un masque protecteur adapté à la tâche. Un indice minimal
FFP2 est recommandé. Si l’utilisation de cet outil vous cause une gêne quelconque, arrêtez
immédiatement et revoyez votre méthode d’utilisation.
g) Détectez la présence de câbles électriques et de conduites d’eau ou de gaz à l’aide
d’un détecteur de métal et de tension. Ne touchez pas les composants ou conducteurs
électriques sous tension.
h) Assurez-vous de disposer d’un éclairage suffisant.
i) Assurez-vous que les forets soient bien fixés dans le mandrin. Les forets mal insérés
peuvent être éjectés de la machine et représentent un danger.
j) Assurez-vous que le foret ne soit pas en contact avec la pièce de travail avant de
mettre la perceuse en marche.
k) Avant de commencer le perçage, assurez-vous de disposer de suffisamment
d’espace libre sous la pièce à percer.
l) N’exercez PAS de pression sur l’appareil car cela réduirait sa durée de vie utile.
m) Les accessoires (mèches, etc.) pourront avoir atteint des températures élevées lors
du perçage, laissez-les refroidir avant de les manipuler.
n) Ne retirez jamais la sciure ou la poussière avec les mains à proximité de la mèche.
o) Si l’on vous interrompt pendant le perçage, terminez l’opération et éteignez l’appareil
avant de vous concentrer sur l’évènement.
p) Dans la mesure du possible, et s’il y a lieu, immobilisez bien la pièce de travail.
q) Examinez le mandrin régulièrement à la recherche de tout signe d’usure ou de
dommage. Faites réparer les pièces endommagées par un centre de réparation homologué.
r) Attendez TOUJOURS que la machine soit parvenue à un arrêt complet avant de la
déposer.
s) Vérifiez régulièrement que les écrous, boulons et autres dispositifs de fixation soient
bien serrés.
Descriptif produit
1. Mandrin
2. Bague de serrage (avec desserrage rapide)
3. Bague de réglage de présélection du couple
4. Sélecteur de vitesse
5. Sélecteur du sens de rotation
6. Boutons de relâche de la batterie
7. Batterie 1,5 Ah
8. Gâchette
9. Guide de lumière LED
10. Porte-embout ¼’’ hexagonal magnétique
11. Chargeur de batterie 1 h
Accessoires (non montrés) :
• Batterie 1.55 Ah
• Sacoche de transport
Usage conforme
Perceuse-visseuse pour le serrage de vis et pour applications légères de perçage (non adaptée
au perçage de maçonnerie). Cette perceuse-visseuse est particulièrement adaptée pour
réaliser des opérations de vissage.
Déballage
• Déballez le produit avec soin. Veillez à retirer tout le matériau d’emballage et familiarisez-
vous avec toutes les caractéristiques du produit.
• Si des pièces sont endommagées ou manquantes, faites-les réparer ou remplacer avant
d’utiliser l’appareil.
Avant utilisatio
• Cette perceuse-visseuse a été envoyée en condition de faible charge. Chargez la batterie
avant utilisation.
Utilisation du chargeur de batterie
• Le chargeur et la batterie peuvent devenir chauds pendant la charge. Ceci est tout à fait
normal et n’indique pas un signe de problème
• Si possible, utilisez le chargeur dans une pièce à température ambiante. Pour éviter de
surchauffer, ne pas couvrir le chargeur et ne chargez pas la batterie directement au soleil
ou une source de chaleur.
Si la batterie ne se charge pas correctement
• Vérifiez le courant de la prise en branchant une lampe ou autre appareil.
• Si le problème persiste, faites contrôler l’outil par un électricien ou un technicien
spécialisé.
Charger la batterie
1. Appuyez sur les deux boutons de relâche de la batterie (6) et retirez la batterie de la
visseuse.
2. Insérez la batterie dans le chargeur (11). Ne pas exercer de force excessive pour insérer la
batterie. Si elle ne glisse pas facilement, la batterie n’est pas insérer correctement.
Remarque: Au début, seul le témoin lumineux vert peut clignoter pour indiquer l’évaluation de
l’état de charge de la batterie. Lors de la charge, le témoin lumineux vert s’éteint, et le rouge
s’allume. Lorsque la batterie est entièrement chargée, le vert s’allume et le rouge s’éteint. Le
chargeur contrôle à tout moment les conditions de charge.
3. Retirez la batterie dès que la charge est pleine.
687235_Manual.indd 18 15/03/2017 10:27

19
GB
19
FR
4. Débranchez le chargeur de sa source d’alimentation, et rangez-le dans un endroit propre,
sec et hors de portée des enfants.
• Le temps normal de charge est d’1 heure environ pour une batterie récemment déchargée
sous des conditions normales de température. Le temps de charge varie selon ses
conditions
• Il n’y pas besoin d’attendre que la batterie soit totalement déchargée avant de recharger,
mais ne recharger pas la batterie si elle est déjà entièrement chargée
• Vous pouvez arrêter la charge à tout moment pour utiliser la batterie. Sous des conditions
normales, le taux de charge diminue au fur et mesure que la batterie est pleine. 80% de
la charge est obtenue en ½ heure
Batterie haute capacité 3,0 Ah (accessoire optionnel)
La batterie haute capacité est disponible pour doubler la capacité. Elle permet de maintenir la
perceuse verticalement. À noter que le temps de charge pour cette batterie est de 2 heures
pour une charge complète et d’une heure pour une charge à 80 %.
Table d’indication de charge
Voyant LED rouge Voyant LED vert
Chargeur branché éteint clignotant
Chargeur évaluant la charge éteint clignotant
Charge rapide allumé éteint
Très peu de batterie, charge lente clignotant éteint
Température de charge anormale clignotant éteint
Entièrement chargée éteint allumé
Défaut de batterie ou du chargeur clignotant clignotant
Condition temporaire de température de
charge anormale
allumé allumé
Remarque: Si les lumières du chargeur n’indiquent aucune des situations décrites ci-dessus
ou indiquent un défaut :
• Vérifiez que la batterie soit correctement positionner sur le chargeur
• Vérifiez tous les branchements
Charge initiale
• La charge initiale dépend de l’état de charge de la batterie. Rechargez jusqu’à ce que le
chargeur indique qu’elle soit entièrement pleine.
• Déchargez la batterie puis rechargez-la pour 3-5 heures, et re-décharger-la. Répétez
cette opération 4-5 fois afin d’assurer une meilleure performance de charge de la batterie.
• Les prochaines charges ne dureront que 1 heure, voire moins si la batterie n’est pas
complètement déchargée.
Charges suivantes
• Après utilisation, il est recommandé de laisser refroidir une batterie en lithium-ion avant
de charger.
• Si une batterie est insérée dans le chargeur alors qu’elle est toujours chaude, le témoin
vert s’allumera .Il faudra attendre quelques minutes que la batterie refroidisse pour que le
chargeur commence à charger.
Insertion de la batterie
• N’exercez pas de force inutile pour insérer la batterie. Si elle ne s’insère pas facilement,
positionner la batterie correctement afin qu’elle glisse facilement dans le compartiment
(ou il est possible que la batterie et/ ou la visseuse soient endommagées).
Autonomie de la batterie
• La durée de charge dépendra des travaux effectués. La batterie a également été
conçue pour offrir une longue durée de vie maximale. Le chargeur intelligent contrôle
les conditions de charge et régule le taux de charge en fonction de l’état de charge de
la batterie. Ce qui protège la batterie d’être surchargée ou de charger avec un taux trop
important. Cependant, comme toutes les batteries, le phénomène d’usure dans le temps
est possible.
Maximiser la durée de vie de la batterie
• Rangez et chargez votre batterie dans un endroit frais. Des pièces à température au-
dessus ou en dessous de la normale peuvent diminuer la durée de vie de la batterie.
• NE JAMAIS ranger une batterie Li-ion alors qu’elle est déchargée. Toujours recharger
immédiatement après qu’elle ait été déchargée.
• Toutes les batteries perdent graduellement leur charge. Plus la température est élevée,
plus elles se déchargent vite. Si vous rangez la batterie pour une longue période sans
l’utiliser, il est recommandé de recharger la batterie tous les mois ou les deux mois .Ceci
augmentera la durée de vie de la batterie.
Instructions d’utilisation
Utilisation de la bague à dégagement rapide
• Cette perceuse-visseuse est dotée d’un mécanisme de changement rapide de mandrin
révélant un conducteur hexagonal magnétique de 6 mm / 1/4”. Cela permet de fixer
facilement et rapidement tout mandrin compatible avec ce mécanisme sur le porte-
embout. Il n’est pas nécessaire de retirer le foret de perçage du mandrin avant d’utiliser
un embout de vissage avec la fonction visseuse.
Retirer le mandrin:
• Tirez sur la bague de serrage (2), et avec un mouvement de torsion retirez le mandrin (1)
pour l’enlever de l’arbre.
Replacer le mandrin:
• Alignez l’emmanchement hex du mandrin avec la douille hex du porte-embout (10) et
mettre le mandrin en position tout en tenant la bague de serrage. De petits à-coups
latéraux peuvent être nécessaires pour le mettre en place. Une fois en place, ramenez
la bague de serrage vers la bague de réglage de présélection du couple. Vérifiez que le
mandrin soit bien sécurisé en tirant dessus et en tenant la perceuse par le mandrin.
• La relâche rapide du système est simple pour vous permettre de travailler plus
efficacement, cependant un peu de pratique est nécessaire pour profiter pleinement de
cet avantage.
Fixer un foret ou un embout de vissage
ATTENTION: NE JAMAIS fixer des accessoires ayant une vitesse maximale inférieure à la
vitesse à vide de la visseuse.
Remarque: Les embouts de vissage peuvent être fixés directement sur le porte-embout
1/4”magnétique (10) lorsque le mandrin est enlevé.
1. Tourner la bague du mandrin (1) dans le sens des aiguilles d’une montre et insérez le foret
ou l’embout dans le mandrin.
2. Tourner la bague du mandrin dans le sens contraire des aiguilles d’une montre pour
maintenir en toute sécurité le foret ou l’embout.
Remarque: NE jamais actionner l’outil lors du serrage ou desserrage du mandrin. De préférence,
choisissez la position de blocage du sélecteur du sens de rotation (5).
3. Lorsque le foret ou l’embout est maintenu correctement dans le mandrin, actionnez la
perceuse pour vérifier qu’il soit bien centré. Si la rotation n’est pas régulière recommencez
l’opération.
Choisir le sens de rotation
• Le sens de rotation se sélectionne avec le sélecteur de rotation (5)
• Pour une rotation dans le sens des aiguilles d’une montre, poussez le sélecteur vers la
gauche.
• Pour une rotation dans le sens contraire des aiguilles d’une montre, poussez le sélecteur
vers la droite.
• Lorsque le sélecteur est positionne au milieu, la perceuse-visseuse est bloquée.
IMPORTANT: N’essayez PAS de changer le sens de rotation alors que l’appareil est en marche.
Contrôle de la vitesse
Cette perceuse –visseuse possède une boite de vitesse à deux réglages:
• Première plage de vitesse : de 0 à 400 tr/min
• Seconde plage de vitesse : de 0 à 1 300 tr/min
Remarque: Utilisez le sélecteur de vitesse (4). Faites glisser le sélecteur vers l’avant pour la
première vitesse, vers l’arrière pour la seconde.
Remarque: La première plage de vitesse est généralement utilisée pour guider les vis, en
donnant un couple important et un meilleur contrôle à faible vitesse. La seconde plage de vitesse
est utilisée exclusivement pour percer.
Réglage de couple
• Cette perceuse –visseuse possède un contrôle de couple, qui limite le couple appliqué à
l’embout, ce qui permet d’effectuer un vissage sans risque d’endommagement
• Il y a 17 paramètres de couple pour le vissage et un pour le perçage. Plus le numéro du
paramètre est petit, plus le couple est faible.
• Pour ajuster le couple, faites tourner la bague de réglage de présélection du couple,
jusqu’à ce que le numéro du paramètre voulu s’aligne avec la flèche indiquée sur la
perceuse-visseuse.
• Vérifiez que le paramètre de couple a bien été choisi en effectuant un test sur un support
quelconque.
• Pour le perçage, faites tourner la bague jusqu’au symbole de la perceuse. Le contrôle du
couple sera paramétré au maximum.
ATTENTION: Un adaptateur peut être installé sur la perceuse pour visser des écrous et des
boulons. Ne jamais utiliser cet adaptateur en mode perceuse. Utilisez les 17 réglages
du sélecteur de couple et la première vitesse pour empêcher toute surcharge de travail.
L’utilisation d’une clé pour serrer ou desserrer les écrous et les boulons est recommandée.
Ce qui permet de travailler également plus rapidement et en toute sécurité, surtout
lorsqu’un couple important est requis au début et à la fin d’un travail.
687235_Manual.indd 19 15/03/2017 10:27

20
GB
20
FR
Mise en marche
• Pour démarrer la perceuse, appuyez sur la gâchette(8).Le guide de lumière LED s’allumera
automatiquement.
• Une pression plus importante sur la gâchette augmente la vitesse de rotation
Remarque: Il est possible que la perceuse s’éteigne lors de travaux important à cause du
déclenchement de la protection thermique de la batterie et des composants internes. La
perceuse pourra être utilisée après un certain moment, cela n’est donc pas un défaut de
l’appareil
Conseils pour le perçage
• Utilisez un foret tranchant et assurez-vous qu’il soit compatible avec le matériau à percer.
• Commencez par percer à faible vitesse en appuyant partiellement sur le bouton
d’activation (8).
• Réduisez la pression exercée sur la perceuse lorsque le foret est sur le point de
transpercer le matériau.
• Pour éviter que le matériau se fende lors de la percée, vous pouvez, soit contre poser un
morceau de bois sur la partie arrière de la pièce de travail, soit continuer de percer depuis
l’autre côté (si le foret a commencé à transpercer la pièce.
Perçage du métal
• Pour les métaux peu épais, aidez-vous d’une pièce de bois.
• Marquez l’endroit où vous souhaitez percer avec un marteau et un poinçon.
• N’utilisez que des forets en acier rapide HSS ou tout autre foret spécialement
recommandé pour le métal.
• Pour des perçages larges, effectuez d’abord un pré-perçage avec un foret de plus petit
diamètre pour s’en servir de guide.
• Appliquez un lubrifiant sur vos forets pour garantir un meilleur résultat, mais également
pour les conserver plus longtemps.
Accessoires
Une gamme complète d’accessoires et d’autres produits sont disponibles auprès de votre
Triton.
• T12B : Batterie Li-ion 1,5 Ah 12 V T12
• T12HCB : Batterie haute capacité 3,0 Ah 12 V
Autres outils Triton compatibles avec les batteries fournies:
• T12CH : Perceuse à percussion sans fil 12 V T12
• T12AD : Perceuse d’angle 12 V T12
• T12ID : Visseuse à chocs 12 V T12
• T12RS : Scie sabre 12 V T12
• T12OT : Outil oscillant multifonction 12 V T12
• T12FL : Torche à tête pivotante sans batterie T12
Entretien
Nettoyage
• Gardez l’appareil propre en permanence. La poussière et la saleté provoquent l’usure
rapide des éléments internes et réduisent la durée de vie de l’appareil.
• Nettoyez le boîtier de la machine à l’aide d’une brosse souple ou d’un chiffon
sec.
• Si vous en avez la possibilité, nettoyez les orifices de ventilation à l’air comprimé propre
et sec (le cas échéant
Entreposage
• Ranger cet outil et ces accessoires dans sa sacoche, dans un endroit sûr, sec et hors
portée des enfants.
• Pensez à toujours retirer la batterie de l’appareil avant de le ranger.
• Si vous envisagez d’entreposer votre appareil pour une longue durée, rangez la batterie
après l’avoir rechargée complètement au préalable, et conservez-la séparée de l’appareil.
Veillez à recharger la batterie une fois tous les 3 mois.
Traitement des déchets
• Lorsque l’appareil n’est plus en état de fonctionner et qu’il n’est pas réparable, veillez à
recycler l’appareil toujours conformément aux régulations nationales.
• Ne jetez pas les outils électriques, batteries et autres équipements électriques ou
électroniques (DEEE) avec les ordures ménagères.
• Contactez les autorités locales compétentes en matière de gestion des déchets pour vous
informer de la procédure à suivre pour recycler les outils électriques.
687235_Manual.indd 20 15/03/2017 10:27
Strona się ładuje...
Strona się ładuje...
Strona się ładuje...
Strona się ładuje...
Strona się ładuje...
Strona się ładuje...
Strona się ładuje...
Strona się ładuje...
Strona się ładuje...
Strona się ładuje...
Strona się ładuje...
Strona się ładuje...
Strona się ładuje...
Strona się ładuje...
Strona się ładuje...
Strona się ładuje...
Strona się ładuje...
Strona się ładuje...
Strona się ładuje...
Strona się ładuje...
Strona się ładuje...
Strona się ładuje...
Strona się ładuje...
Strona się ładuje...
Strona się ładuje...
Strona się ładuje...
Strona się ładuje...
Strona się ładuje...
Strona się ładuje...
Strona się ładuje...
Strona się ładuje...
Strona się ładuje...
Strona się ładuje...
Strona się ładuje...
Strona się ładuje...
Strona się ładuje...
Strona się ładuje...
Strona się ładuje...
Strona się ładuje...
Strona się ładuje...
Strona się ładuje...
Strona się ładuje...
Strona się ładuje...
Strona się ładuje...
Strona się ładuje...
Strona się ładuje...
Strona się ładuje...
Strona się ładuje...
Strona się ładuje...
Strona się ładuje...
Strona się ładuje...
Strona się ładuje...
Strona się ładuje...
Strona się ładuje...
Strona się ładuje...
Strona się ładuje...
Strona się ładuje...
Strona się ładuje...
Strona się ładuje...
Strona się ładuje...
Strona się ładuje...
Strona się ładuje...
Strona się ładuje...
Strona się ładuje...
-
 1
1
-
 2
2
-
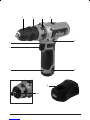 3
3
-
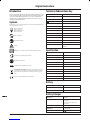 4
4
-
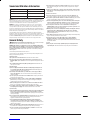 5
5
-
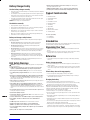 6
6
-
 7
7
-
 8
8
-
 9
9
-
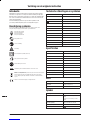 10
10
-
 11
11
-
 12
12
-
 13
13
-
 14
14
-
 15
15
-
 16
16
-
 17
17
-
 18
18
-
 19
19
-
 20
20
-
 21
21
-
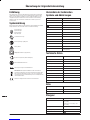 22
22
-
 23
23
-
 24
24
-
 25
25
-
 26
26
-
 27
27
-
 28
28
-
 29
29
-
 30
30
-
 31
31
-
 32
32
-
 33
33
-
 34
34
-
 35
35
-
 36
36
-
 37
37
-
 38
38
-
 39
39
-
 40
40
-
 41
41
-
 42
42
-
 43
43
-
 44
44
-
 45
45
-
 46
46
-
 47
47
-
 48
48
-
 49
49
-
 50
50
-
 51
51
-
 52
52
-
 53
53
-
 54
54
-
 55
55
-
 56
56
-
 57
57
-
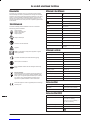 58
58
-
 59
59
-
 60
60
-
 61
61
-
 62
62
-
 63
63
-
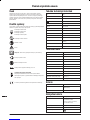 64
64
-
 65
65
-
 66
66
-
 67
67
-
 68
68
-
 69
69
-
 70
70
-
 71
71
-
 72
72
-
 73
73
-
 74
74
-
 75
75
-
 76
76
-
 77
77
-
 78
78
-
 79
79
-
 80
80
-
 81
81
-
 82
82
-
 83
83
-
 84
84


Triton T12 DD Operating/Safety Instructions Manual
- Typ
- Operating/Safety Instructions Manual
w innych językach
- italiano: Triton T12 DD
- slovenčina: Triton T12 DD
- français: Triton T12 DD
- Türkçe: Triton T12 DD
- Nederlands: Triton T12 DD
Powiązane artykuły
Inne dokumenty
-
Sparky Group BUR2 18Li HD Instrukcja obsługi
-
Sparky Group BR 15E Instrukcja obsługi
-
Parkside X14.4-LI Instrukcja obsługi
-
Stanley KFMCD011 Instrukcja obsługi
-
-
-
Ferm CDM1134 Instrukcja obsługi
-
-
-
Rebel RB-1033 Instrukcja obsługi