Sony CDP-CE405 Instrukcja obsługi

Kategoria
Odtwarzacze CD
Typ
Instrukcja obsługi

Ten podręcznik jest również odpowiedni dla

3-810-585-51 (1)
1995 by Sony Corporation
Operating Instructions
Instrukcja obslugi
MMMMMMMMMMMMMM
EN
PL
RF
CDP-CE405
2
EN
WARNING
To prevent fire or shock
hazard, do not expose the unit
to rain or moisture.
To avoid electrical shock, do
not open the cabinet. Refer
servicing to qualified
personnel only.
The laser component in this product
is capable of emitting radiation
exceeding the limit for Class 1.
This appliance is classified as a CLASS 1
LASER product. The CLASS 1 LASER
PRODUCT MARKING is located on the
rear exterior.
The following caution label is located
inside of the unit.
Precautions
On safety
Caution — The use of optical
instruments with this product will
increase eye hazard.
Should any solid object or liquid fall
into the cabinet, unplug the player and
have it checked by qualified personnel
before operating it any further.
On power sources
Before operating the player, check that
the operating voltage of the player is
identical with your local power
supply. The operating voltage is
indicated on the nameplate at the rear
of the player.
The player is not disconnected from
the AC power source (mains) as long
as it is connected to the wall outlet,
even if the player itself has been
turned off.
If you are not going to use the player
for a long time, be sure to disconnect
the player from the wall outlet. To
disconnect the AC power cord (mains
lead), grasp the plug itself; never pull
the cord.
AC power cord must be changed only
at the qualified service shop.
On placement
Place the player in a location with
adequate ventilation to prevent heat
build-up in the player.
Do not place the player on a soft
surface such as a rug that might block
the ventilation holes on the bottom.
Do not place the player in a location
near heat sources, or in a place subject
to direct sunlight, excessive dust or
mechanical shock.
On operation
If the player is brought directly from a
cold to a warm location, or is placed in
a very damp room, moisture may
condense on the lenses inside the
player. Should this occur, the player
may not operate properly. In this case,
remove the disc and leave the player
turned on for about an hour until the
moisture evaporates.
On adjusting volume
Do not turn up the volume while
listening to a portion with very low
level inputs or no audio signals. If you
do, the speakers may be damaged
when a peak level portion is played.
On cleaning
Clean the cabinet, panel and controls
with a soft cloth slightly moistened
with a mild detergent solution. Do not
use any type of abrasive pad, scouring
powder or solvent such as alcohol or
benzine.
If you have any questions or
problems concerning your player,
please consult your nearest Sony
dealer.
Welcome!
Thank you for purchasing the Sony
Compact Disc Player. Before operating
the unit, please read this manual
thoroughly and retain it for future
reference.
About This Manual
The instructions in this manual are for
model CDP-CE405.
Conventions
Instructions in this manual describe
the controls on the player.
You can also use the controls on the
remote if they have the same or
similar names as those on the player.
The following icons are used in this
manual:
Indicates that you can do the
task using the remote.
Indicates hints and tips for
making the task easier.
Getting Started
EN
3
EN
Getting Started
Unpacking ........................................................................................................ 4
Hooking Up the System ................................................................................. 4
Playing a CD ........................................................................................................ 6
Playing CDs
Using the Display ........................................................................................... 8
Replacing Discs While Playing a Disc ......................................................... 8
Locating a Specific Disc ................................................................................. 9
Locating a Specific Track or a Point in a Track .......................................... 9
Playing Tracks Repeatedly .......................................................................... 10
Playing in Random Order (Shuffle Play) .................................................. 10
Creating Your Own Programme (Programme Play) ............................... 11
Recording From CDs
Recording Your Own Programme ............................................................. 12
Recording a CD by Specifying Tape Length (Time Edit) ........................ 13
Fading In or Out ............................................................................................ 13
Adjusting the Recording Level (Peak Search) .......................................... 14
Additional Information
Notes on CDs ................................................................................................. 15
Troubleshooting ............................................................................................ 15
Specifications ................................................................................................. 15
Index
Index ............................................................................................................... 16
TABLE OF CONTENTS
Getting Started
4
EN
Unpacking
Check that you received the following items:
Audio connecting cord (1)
Remote commander (remote) (1)
Sony SUM-3 (NS) batteries (2)
Inserting batteries into the remote
You can control the player using the supplied remote.
Insert two R6 (size AA) batteries by matching the +
and – on the batteries. When using the remote, point it
at the remote sensor g on the player.
Hooking Up the System
Overview
This section describes how to hook up the CD player to
an amplifier. Be sure to turn off the power of each
component before making the connections.
CD player
Amplifier
: Signal flow
White
(L)
Red
(R)
White
(L)
Red
(R)
What cords will I need?
Audio cord (supplied) (1)
To mains
To mains
Line output
(L)
Line output
(R)
Audio input
(L)
Audio input
(R)
When to replace batteries
With normal use, the batteries should last for about six
months. When the remote no longer operates the player,
replace all the batteries with new ones.
Notes
Do not leave the remote near an extremely hot or humid
place.
Do not drop any foreign object into the remote casing,
particularly when replacing the batteries.
Do not expose the remote sensor to direct sunlight or
lighting apparatuses. Doing so may cause a malfunction.
If you don’t use the remote for an extended period of time,
remove the batteries to avoid possible damage from battery
leakage and corrosion.
Getting Started
Getting Started
5
EN
Hookups
When connecting an audio cord, be sure to match the
colour-coded cord to the appropriate jacks on the
components: Red (right) to Red and White (left) to
White. Be sure to make connections firmly to avoid
hum and noise.
AmplifierCD player
You can adjust the output level to the amplifier
Press LINE OUT LEVEL +/– on the remote. You can
reduce the output level up to –20␣ dB.
When you reduce the output level,
FADE
appears in the
display.
When you turn off the player, the output level
automatically returns to the maximum level.
Note
If you press the LINE OUT LEVEL +/– buttons on the remote
while recording, the recording level will change even when it
is preset on the tape deck, etc.
Connecting the mains lead
Connect the mains lead to a wall outlet.
Transporting the player
Before transporting the player, follow the procedure
below to return the internal mechanisms back to their
original position.
1 Remove all the discs from the disc tray.
2 Press § OPEN/CLOSE to close the disc tray.
“no DISC” appears in the display.
3 Wait for 10 seconds, then press POWER to turn off
the player.
INPUT
CD
L
R
LINE OUT
L
R
Basic Operations
6
EN
1
2
3
Playing a CD
23564
With the label side up
Disc number
4
5
See pages 4 – 5 for the hookup
information.
Turn on the amplifier and select the CD player position so that
you can listen to the sound from this player.
Press POWER to turn on the player.
Press §␣ OPEN/CLOSE, and place a disc on the disc tray.
To place other discs, press DISC SKIP and place the discs in the
order you want to play.
Each time you press the button, the disc tray turns and you can
place the discs in the empty disc compartments. The player
plays the disc in front of you first.
Press CONTINUE to select ALL DISCS or 1 DISC Continuous
Play mode.
Each time you press CONTINUE, “ALL DISCS” or “1␣ DISC”
appears in the display.
When you select
ALL DISCS
1␣ DISC
The player plays
All discs in the player consecutively in the order of
disc number
Only the disc you’ve selected
POWER
CONTINUE SHUFFLE PROGRAM CHECK CLEAR REPEAT
DISC 1 DISC 2 DISC 3 DISC 4 DISC 5
MUSIC SCAN
FADER TIME
12345678910
>
10
EDIT/
TIME FADE
PEAK
SEARCH
AMS
OPEN/CLOSE
DISC SKIP
EX-CHANGE
DISC CHECK
ON OFF
7
EN
Basic Operations
Basic Operations
Press
P
P or ·
±
DISC SKIP
DISC 1–5
§␣ OPEN/CLOSE
6
Press ·.
The disc tray closes and the player plays all the tracks once
(Continuous Play). Adjust the volume on the amplifier.
You can select the disc you
want to start playing first
Press one of the DISC 1–5
buttons.
You can adjust the output
level to the amplifier
Press LINE OUT LEVEL +/–
on the remote. You can
reduce the output level up to
–20␣ dB.
When you reduce the output
level,
FADE
appears in the
display.
When you turn off the
player, the output level
automatically returns to the
maximum level.
Note
If you press the LINE OUT
LEVEL +/– buttons on the
remote while recording, the
recording level will change even
when it is preset on the tape
deck, etc.
To stop playback
Press p.
To
Pause
Resume play after pause
Go to the next track
Go back to the preceding track
Go to the next disc
Select a disc directly
Stop play and remove the CD
DISC 1–5
·
≠/ ±
pP
DISC SKIP § OPEN/CLOSE
Playing CDs
8
EN
Using the Display
You can check information about the disc using the
display.
Checking the total number and playing
time of the tracks
Press TIME before you start playing.
The display shows the current disc number, the total
number of tracks, total playing time and music
calendar.
Total playing timeCurrent disc number
Total number of tracks
Music calendar
The information also appears when you press
§␣ OPEN/CLOSE to close the disc tray.
The tracks numbered over 20 cannot be displayed in
the music calendar.
Notes on the disc number indications
The red circle around a disc number indicates the disc is
ready to be played.
When all the tracks on a disc have been played, the semi-
circle around the disc number disappears.
When a disc compartment is recognized as empty, the semi-
circled disc number disappears.
Display information while playing a disc
While playing a disc, the display shows the current
disc number, track number, playing time of the track
and the music calendar.
TIME
Playing CDs
Current disc number
Music calendarCurrent track number
Playing time
The track numbers in the music calendar disappear
after they are played.
Checking the remaining time
Each time you press TIME while playing a disc, the
display changes as shown in the chart below.
Press TIME.
Press TIME.
Remaining time
on the disc
Playing time and
number of the
current track
Remaining time
on the current
track
If the track number exceeds 24,
“–␣ –␣ .␣ –␣ –” appears instead of the
remaining time.
This information is available only in
Continuous Play mode.
Press TIME.
Replacing Discs While Playing
a Disc
You can open the disc tray while playing a disc so that
you can check what discs are to be played next and
replace discs without interrupting playback of the
current disc.
DISC SKIPEX-CHANGE
1 Press EX-CHANGE.
The disc tray opens and two disc compartments
appear. Even if the player is playing a disc, it
doesn’t stop playing.
2 Replace discs in the compartments with new ones.
The player plays the disc on the left side
compartment after the current disc, and then the
one on the right side compartment.
12345
678910
1 2 3 4 5
DISC
TRACK
MIN SEC
DISCSALL
12345
678910
1 2 3 4 5
DISC
TRACK
MIN SEC
DISCSALL
12345
678910
1 2 3 4 5
DISC
TRACK
MIN SEC
DISCSALL
12345
678910
1 2 3 4 5
DISC
TRACK
MIN SEC
DISCSALL
12345
678910
1 2 3 4 5
DISC
TRACK
MIN SEC
DISCSALL
Playing CDsPlaying CDs
9
EN
3 Press DISC SKIP.
The disc tray turns and other two disc
compartments appear.
4 Replace discs in the compartments with new ones.
5 Press EX-CHANGE.
The disc tray closes.
While the disc tray is open by pressing EX-CHANGE
If the playback of the current disc ends, the player stops
playing. If the disc is played in 1␣ DISC Repeat Play mode
(see page 10), the current disc starts playing again.
In ALL DISCS Shuffle Play mode (see page 10), tracks are
reshuffled on the current disc.
In Programme Play mode (see page 11), only the tracks on
the current disc are played.
Do not push the disc tray to close it in Step 5, as you may
damage the player.
Locating a Specific Disc
You can locate any disc before or while playing a disc.
To locate
The next disc
A specific disc directly
A disc while checking the
labels
A disc by scanning the first
track of each disc for 10
seconds
You can extend the playing time during scanning the
discs
Press DISC CHECK repeatedly until the playing time
you want (10, 20 or 30) appears in the display. Each time
you press the button, the playing time changes cyclically.
Press
DISC SKIP while playing a disc
DISC 1 – 5
DISC CHECK while the disc
tray is open. The disc tray turns
to show you each disc label.
When the disc you want comes
in front of you, press · to
start playing.
DISC CHECK before you start
playing while the disc tray is
closed. When you find the disc
you want, press · to start
playing.
DISC 1 – 5 DISC SKIPDISC CHECK ·
Notes
When you press DISC CHECK, the play mode
automatically changes to ALL DISCS Continuous Play
mode.
When you’ve opened the disc tray by pressing
EX-CHANGE, you cannot use the DISC CHECK function.
Even if you press DISC CHECK while “REPEAT” appears
in the display (see page 10), the player stops after scanning
all the discs once.
Locating a Specific Track or a
Point in a Track
You can quickly locate any track while playing a disc
using the /± (AMS: Automatic Music Sensor)
buttons or number buttons. You can also locate a
specific point in a track while playing a disc.
MUSIC SCAN
>10
Number buttons
0/)/±·
Number buttons
>10
(
=/+
0/)
To locate
The next or
succeeding tracks
The current or
preceding tracks
A specific track
directly
A track by scanning
each track for 10
seconds
(Music Scan)
A point while
monitoring the sound
A point quickly by
observing the display
during pause
Press
± repeatedly until you find the
track
repeatedly until you find the
track
Number button of the track
MUSIC SCAN before you start
playing. When you find the track you
want, press · to start playing.
) (forward) or 0 (backward) and
hold down until you find the point
) (forward) or 0 (backward) and
hold down until you find the point.
You will not hear the sound during the
operation.
Playing CDs
10
EN
Playing in Random Order
(Shuffle Play)
You can have the player “shuffle” tracks and play in a
random order. The player shuffles all the tracks on all
discs or on the disc you’ve specified.
When you directly locate a track numbered over 10
Press >10 first, then the corresponding number buttons.
To enter “0,” use button 10.
Example: To play track number 30
Press >10 first, then 3 and 10.
You can extend the playing time during Music Scan
Press MUSIC SCAN repeatedly until the playing time
you want (10, 20 or 30) appears in the display. Each time
you press the button, the playing time changes cyclically.
Note
If “ ” appears in the display, the disc has reached the end
while you were pressing ). Press 0 or to go back.
Playing Tracks Repeatedly
You can play discs/tracks repeatedly in any play
mode.
REPEAT
The player repeats
All the tracks on all discs
All the tracks on the current
disc
All the tracks on all discs in
random orders
All the tracks on the current
disc in random orders
The same programme
Press REPEAT while playing a disc.
“REPEAT” appears in the display. The player repeats
the discs/tracks as follows:
When the disc is played in
Continuous Play
(ALL DISCS) (page 6)
Continuous Play
(1␣ DISC) (page 6)
Shuffle Play
(ALL DISCS) (page 10)
Shuffle Play
(1␣ DISC) (page 10)
Programme Play (page 11)
To cancel Repeat Play
Press REPEAT repeatedly until “REPEAT” disappears from
the display.
Repeating the current track
You can repeat only the current track while the disc is
played in Continuous Play.
While the track you want is being played, press
REPEAT repeatedly until “REPEAT 1” appears in the
display.
·DISC 1 – 5SHUFFLE
Shuffle Play on all discs
You can play all tracks on all discs in a random order.
1 Press SHUFFLE repeatedly until “ALL DISCS”
appears in the display.
2 Press · to start ALL DISCS Shuffle Play.
The
indication appears while the player is
“shuffling” the tracks.
To cancel Shuffle Play
Press CONTINUE.
You can start Shuffle Play while playing
Press SHUFFLE, and Shuffle Play starts from the current
track.
You can specify discs during Shuffle Play (Select
Shuffle Play)
You can specify discs during ALL DISCS Shuffle Play
mode, and the tracks on the specified discs are played in
a random order.
Press DISC 1 – 5 to specify the discs after Step 1.
Semi-circles appear around the specified disc numbers in
the display. To cancel the selected discs, press DISC 1 – 5
again. The semi-circles disappear.
To return to ALL DISCS Shuffle Play, press SHUFFLE
twice.
Shuffle Play on one disc
You can play all tracks on the specific disc in a random
order.
1 Press SHUFFLE repeatedly until “1␣ DISC” appears
in the display.
2 Press DISC 1 – 5 to start 1␣ DISC Shuffle Play on
the selected disc.
The
indication appears while the player is
“shuffling” the tracks.
Playing CDsPlaying CDs
11
EN
To cancel Shuffle Play
Press CONTINUE.
You can start Shuffle Play while playing
Press SHUFFLE, and Shuffle Play starts from the current
track.
Creating Your Own Programme
(Programme Play)
You can arrange the order of the tracks on the discs
and create your own programme. The programme can
contain up to 32 tracks.
PROGRAM CHECK
DISC 1 – 5 Number buttons >10
p·
CLEAR
1 Press PROGRAM.
“PROGRAM” appears in the display.
If a programme is already stored, the last step of
the programme appears in the display. When you
want to erase the whole programme, hold down
CLEAR until “ALL CLr” appears in the display
(see page 12).
2 Press DISC 1 – 5 to select the disc.
“AL” in the display stands for “all” tracks.
When you want to programme the whole disc as
one step, skip Step 3 and go to Step 4.
3 Press the number buttons of the tracks you want to
programme in the order you want.
To programme the track numbered over 10, use
the >10 button (see page 10).
Playing orderLast programmed
track
Programmed
tracks
Total playing time
After one second
If you’ve made a mistake
Press CLEAR, then press the correct number button.
4 To programme other discs or tracks, do the
following:
To programme
Other discs
Other tracks on the same disc
Other tracks on other discs
5 Press · to start Programme Play.
To cancel Programme Play
Press CONTINUE.
You can create your programme while checking the
disc labels
While the disc tray is open, follow Steps 1 to 5 with
pressing DISC SKIP to check the disc labels. If you close
the disc tray before Step 5, the total playing time appears
in the display after a while.
Note that, if the programmed track number isn’t found
on the disc, that step is automatically erased.
The programme remains even after the Programme
Play ends
When you press ·, you can play the same programme
again.
Repeat Step(s)
2
3
2 and 3
12345
678910
1 2 3 4 5
DISC
TRACK
MIN SEC
PROGRAM
A
25
8
1 2 3 4 5
DISC
TRACK
MIN SEC
PROGRAM
A
25
8
1 2 3 4 5
DISC
TRACK
STEP
PROGRAM
A
Playing CDs
12
EN
The programme remains until you erase it or turn off
the player
If you replace discs, the programmed disc and track
numbers remain. So, the player plays only the existing
disc and track numbers. However, the disc and track
numbers that aren’t found in the player or on the disc are
deleted from the programme, and the rest of the
programme is played in the programmed order.
Note
The total playing time doesn’t appear when:
You have programmed a track whose number exceeds 20.
The total playing time of the programme exceeds 200
minutes.
Checking the track order
You can check your programme before or after you
start playing.
Press CHECK.
Each time you press this button, the display shows the
track (the disc and track numbers) or the disc (the disc
number and “AL” indication) of each step in the
programmed order. After the last step in the
programme, the display shows “End” and returns to
the original display. If you check the order after you
start playing, the display shows only the remaining
steps.
Changing the track order
You can change your programme before you start
playing.
To
Erase a track
Erase the last track in the
programme
Add tracks to the end of the
programme
Change the whole
programme completely
Press
CHECK until the track you
don’t want appears in the
display, then press CLEAR
CLEAR. Each time you press
the button, the last track will
be cleared.
DISC 1 – 5 to select the disc,
then number buttons of the
tracks to be added
CLEAR until “ALL CLr”
appears in the display.
Create a new programme
following the programming
procedure.
Recording Your Own Programme
You can record the programme you’ve created on a
tape, etc. The programme can contain up to 32 tracks.
By inserting a pause during programming, you can
divide the programme into two for recording on both
sides of a tape.
1 Create your programme (for side A when
recording on a tape) while checking the total
playing time indicated in the display.
Follow Steps 1 to 4 in “Creating Your Own
Programme” on page 11.
The
A
indication appears in the display.
2 When you record on both sides of the tape, press
P to insert a pause.
The “P” and
A B
indications appear in the display
and the playing time is reset to “0.00.”
When you record on one side of the tape, skip this
step and go to Step 4.
A pause is counted as one track
You can programme up to 31 tracks when you insert a
pause.
3 Repeat Steps 2 to 4 in “Creating Your Own
Programme” on page 11 to create the programme
for side B.
4 Start recording on the deck and then press · on
the player.
When you record on both sides of the tape, the player
pauses at the end of the programme for side A.
5 When you record on side B, reverse the tape and
press · or P on the player to resume playing.
You can check the total playing time while
programming (Programme Edit)
To select a track, press or ± and check the total
playing time. Then press PROGRAM to confirm your
selection.
To check and change your programme
See the left column of this page.
The
A
indication appears while checking the
programme for side A and
B
while checking the
programme for side B.
>10Number buttons
PROGRAM DISC 1 – 5
P·
Recording from CDs
Recording From CDs
13
EN
Recording From CDs
Recording From CDs
1 Press DISC SKIP to select the disc.
2 Press EDIT/TIME FADE repeatedly before you
start playing until “EDIT” appears and “A” in the
A
indication flashes in the display.
3 Press or ± to specify the tape length.
Each time you press these buttons, the display
changes as shown below, with the tape length of
one side following each indication.
n C-46 ˜ C-54 ˜ C-60 ˜ C-74 ˜ C-90 ˜ - -. - - N
(23.00) (27.00) (30.00) (37.00) (45.00)
4 Press EDIT/TIME FADE to have the player create
the programme.
The display shows the tracks to be recorded. “B” in
the
B
indication flashes in the display.
5 When you record on both sides of the tape, press
EDIT/TIME FADE again.
The player inserts a pause, then creates the
programme for side B. The display shows the
programmed tracks.
When you record on one side of the tape, skip this
step.
6 Start recording on the deck and then press · on
the player.
When you record on both sides of the tape, the
player pauses at the end of the programme for side
A.
EDIT/TIME FADE
/±
DISC SKIP·
Recording a CD by Specifying
Tape Length (Time Edit)
You can have the player create a programme that will
fit the length of the tape.
The player automatically creates a programme,
keeping the original order of the disc.
The programme can contain up to 32 tracks (a pause
inserted between tracks is counted as one track).
Note that tracks numbered over 20 cannot be
programmed automatically.
7 When you record on side B, reverse the tape and
press · or P on the player to resume playing.
To cancel Time Edit
Press CONTINUE.
You can programme the tracks you want in advance
Select the tracks before doing the above procedure. The
player creates a programme from the remaining tracks.
You can freely specify the tape length
Set the tape length using number buttons. To enter “0,”
use button 10.
Example: When the tape length of one side is 30 minutes
and 15 seconds
Press 3, 10, 1 and 5.
You can check and change the programme
See page 12.
Fading In or Out
You can manually fade in or out to prevent tracks from
starting or ending abruptly.
EDIT/TIME FADE
/±·
FADER
Press FADER
During pause.
FADE
lights up in
the display and the Q indication
flashes. The play fades in.
When you want to start fading out.
FADE
lights up in the display and
the q indication flashes. The play
fades out and the player pauses.
To
Start play fading in
End play fading out
Note
Fading lasts for about 5 seconds. However, when you press
FADER during Music Scan (see page 10), the play fades out
for about 2 seconds.
Recording From CDs
14
EN
Fading out at the specified time
(Time Fade)
You can have the player fade out automatically by
specifying the playing time. Once you set the Time
Fade, it works twice, that is, the play fades out at the
end of both sides of a tape.
1 Press EDIT/TIME FADE repeatedly before you
start playing until
FADE
TIME
and “A” in the
A
indication appear in the display.
2 Press or ± to specify the playing time.
Each time you press these buttons, the display
changes as shown below, with the playing time of
one side following each indication.
n C-46 ˜ C-54 ˜ C-60 ˜ C-74 ˜ C-90 ˜ - -. - - N
(23.00) (27.00) (30.00) (37.00) (45.00)
3 Press · to start playing.
At the specified time the play fades out and the
player pauses. “B” in the
B
indication appears
in the display.
4 To record on side B, reverse the tape and press ·
or P on the player to resume playing.
Again, the play fades out at the specified time.
To cancel Time Fade
Press EDIT/TIME FADE .
You can freely specify the playing time
See “You can freely specify the tape length” on page 13.
You can change discs during Time Fade
If the play ends before the specified fade-out time, (for
example, when you record CD-singles on a tape) change
the disc. The specified fade-out time is counted only
during playing.
You can fade in to resume playing in Step 4
After you reverse the tape, press FADER.
Note
If you press 0 or ) during Time Fade, Time Fade will be
cancelled.
Adjusting the Recording Level
(Peak Search)
The player locates the highest level among the tracks to
be recorded to let you adjust the recording level before
you start recording.
1 Before you start playing, press PEAK SEARCH.
“PEAK” flashes in the display and the player
repeats the portion of the highest level.
2 Adjust the recording level on the deck.
3 Press p on the player to stop Peak Search.
“PEAK” disappears from the display.
Notes
The portion with the highest level may differ every time
you try the adjustment on the same disc. The difference is,
however, so slight that you won’t find any problem in
adjusting the recording level precisely.
Peak Search does not operate while you open the disc tray
by pressing EX-CHANGE.
p
PEAK SEARCH
Additional InformationAdditional Information
15
EN
Notes on CDs
On handling CDs
To keep the disc clean, handle the disc by its edge. Do not
touch the surface.
Do not stick paper or tape on the disc.
The remote does not function.
/Remove the obstacles in the path of the remote
and the player.
/Point the remote at the remote sensor g on the
player.
/Replace all the batteries in the remote with new
ones if they are weak.
The player functions incorrectly.
/The microcomputer chips may be operating
incorrectly. Turn the power off, then turn it
back on to reset the player.
Not this way
Do not expose the disc to direct sunlight or heat sources
such as hot air ducts, nor leave it in a car parked in direct
sunlight as there can be considerable rise in temperature
inside the car.
Do not use any commercially available stabilizer. If you do,
the disc and the player may be damaged.
After playing, store the disc in its case.
On cleaning
Before playing, clean the disc with a cleaning cloth. Wipe
the disc from the centre out.
Do not use solvents such as benzine, thinner, commercially
available cleaners or anti-static spray intended for vinyl
LPs.
Specifications
Compact disc player
Laser Semiconductor laser (λ = 780 nm)
Emission duration: continuous
Laser output Max 44.6 µW*
* This output is the value measured at
a distance of 200 mm from the
objective lens surface on the Optical
Pick-up block with 7 mm aperture.
Frequency response 2 Hz to 20 kHz ± 0.5 dB
Signal-to-noise ratio More than 102 dB
Dynamic range More than 98 dB
Harmonic distortion Less than 0.0045%
Channel separation More than 100 dB
Output
Jack
type
Phono
jacks
Maximum
output
level
2 V
(at 50 kilohms)
Load
impedance
Over 10 kilohmsLINE OUT
General
Power requirements 220 V – 230 V AC, 50/60 Hz
Power consumption 14 W
Dimensions (approx.) 430 × 120 × 385 mm
(w/h/d) (17 × 4 3/4 × 15 1/4 in.) incl. projecting
parts
Mass (approx.) 5.6 kg (12 lbs 6 oz)
Supplied accessories
Audio cord (2 phono plugs – 2 phono plugs) (1)
Remote commander (remote) (1)
Sony SUM-3 (NS) batteries (2)
Design and specifications are subject to change without notice.
Troubleshooting
If you experience any of the following difficulties while
using the player, use this troubleshooting guide to help
you remedy the problem. Should any problem persist,
consult your nearest Sony dealer.
There’s no sound.
/Check that the player is connected securely.
/Make sure you operate the amplifier correctly.
/Adjust the playback level using the LINE OUT
LEVEL +/– on the remote.
The CD does not play.
/There’s no CD inside the player (“no DISC”
appears). Insert a CD.
/Place the CD with the label side up on the disc
tray correctly.
/Clean the CD (see above).
/Moisture has condensed inside the player.
Remove the disc and leave the player turned on
for about an hour (see page 2).
Additional Information
16
EN
Index
A, B
AMS 9
Automatic Music Sensor. See
AMS
C, D
Connecting 4
Continuous Play 6
E
Editing. See Recording
F, G
Fading 13
Time Fade 14
H, I, J, K
Handling CDs 15
Hookups 4
overview 4
L
Locating
by monitoring 9
by observing the display 9
by scanning 9
directly 9
using AMS 9
while checking the labels 9
M, N, O
Music Scan 9
P, Q
Peak search 14
Playback
Continuous Play 6
Programme Play 11
Repeat Play 10
Shuffle Play 10
Programme 11
changing 12
checking 12
for recording 12
Programme Edit 12
R
Recording 12
a programme 12
using Time Edit 13
Remaining time 8
Remote control 4
Repeating 10
Replacing discs while playing
a disc 8
Names of controls
Buttons
CHECK 12
CLEAR 12
CONTINUE 6
DISC 1 – 5 6
DISC CHECK 9
DISC SKIP 7
EDIT/TIME FADE 13
EX-CHANGE 8
FADER 13
LINE OUT LEVEL +/– 4
MUSIC SCAN 9
Number 9
§ OPEN/CLOSE 6
PEAK SEARCH 14
PROGRAM 11
REPEAT 10
SHUFFLE 10
TIME 8
· 7
P 7
p 7
0/) 9
/± 9
> 10 10
Switch
POWER 6
Others
Disc tray 6
Display 8
g 4
Index
S
Scanning. See Music Scan
Searching. See Locating
Select Shuffle Play 10
Shuffle Play 10
T
Time Edit 13
Time Fade 14
Total playing time 8
Troubleshooting 15
U, V, W, X, Y, Z
Unpacking 4
Index
2
PL
OSTRZEØENIE
W celu unikniÍcia
niebezpieczeÒstwa poøaru lub
poraøenia pr±dem nie naleøy
poddawaÊ urz±dzenia
dzia aniu wilgoci lub deszczu.
W celu unikniÍcia
niebezpieczeÒstwa poraøenia
pr±dem nie naleøy otwieraÊ
obudowy. Jedynie
wykwalifikowany personel jest
uprawniony do naprawy i
serwisu.
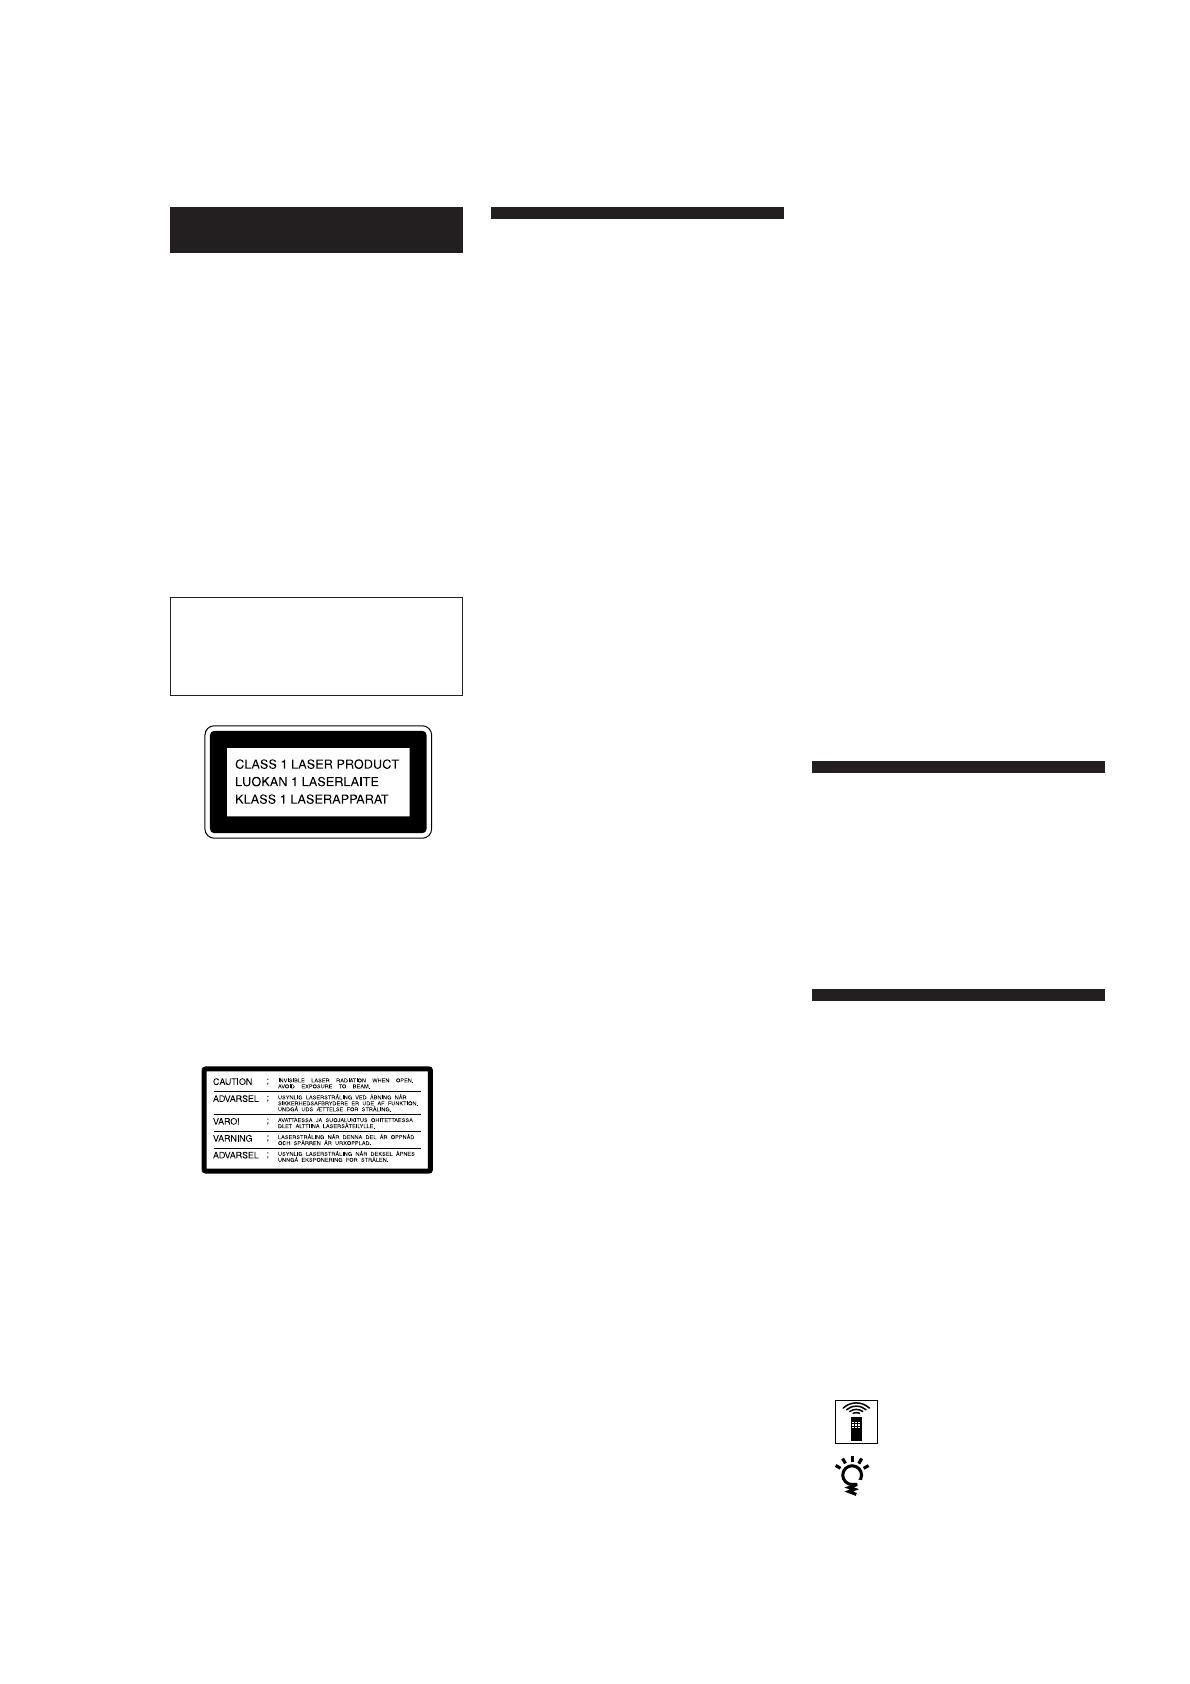
Laser bÍd±cy komponentem tego
urz±dzenia jest w stanie emitowaÊ
promienie przekraczaj±ce normy
Klasy 1.
Niniejsze urz±dzenie jest
zaklasyfikowane jako produkt z CLASS 1
LASER (z laserem klasy 1). Oznakowanie
CLASS 1 LASER PRODUCT MARKING
znajduje siÍ na zewnÍtrznej, tylnej
stronie obudowy.
Poniøsza etykieta z ostrzeøeniem
znajduje siÍ wewn±trz urz±dzenia.
Ustawianie g o no ci
ProszÍ nie zwiÍkszaÊ g o no ci podczas
s uchania fragmentu o bardzo niskim
poziomie wej ciowym lub bez sygna Ûw
audio, poniewaø moøna w ten sposÛb
uszkodziÊ g o niki, gdy odtwarzany jest
pÛºniej fragment o najwyøszym
poziomie.
Czyszczenie
Naleøy czy ciÊ obudowÍ, tabliczkÍ i
elementy sterownicze przy uøyciu
miÍkkiej, lekko wilgotnej ciereczki,
zwiløonej w roztworze agodnego rodka
czyszcz±cego. Nie naleøy uøywaÊ
ør±cych, agresywnych substancji lub
rozpuszczalnikÛw, takich jak alkohol lub
benzyna.
Je li macie PaÒstwo jakiekolwiek
pytania lub problemy zwi±zane z
odtwarzaczem, proszÍ siÍ zg osiÊ do
najbliøszego autoryzowanego
sprzedawcy firmy Sony.
¶rodki Ostroønoci
BezpieczeÒstwo
Uwaga ä Uøywanie instrumentÛw
optycznych w po ±czeniu z niniejszym
sprzÍtem podnosi ryzyko dla wzroku.
Je li cokolwiek wpadnie do obudowy
odtwarzacza lub wlana zostanie jaka
substancja p ynna, proszÍ od ±czyÊ
urz±dzenie z sieci zasilania i oddaÊ je do
serisu wyszkolonemu personelowi,
zanim bÍdzie ono ponownie uøywane.
Zasilanie
Przed uruchomieniem odtwarzacza
proszÍ siÍ upewniÊ, øe napiÍcie
odtwarzacza jest zgodne z napiÍciem
sieci zasilania w PaÒstwa kraju. NapiÍcie
pracy jest podane na plakietce z nazw±
urz±dzenia, znajduj±cej siÍ na tylnej
czÍ ci obudowy odtwarzacza.
Odtwarzacz nie jest wy ±czony z sieci,
dopÛki wtyczka znajduje siÍ w gniazdku
pr±du zmiennego, nawet je li samo
urz±dzenie zosta o wy ±czone.
Je li nie ma siÍ zamiaru uøywaÊ
odtwarzacza przez d uøszy czas naleøy
wy ±czyÊ wtyczkÍ z gniazdka. Przy
wy ±czaniu z gniazdka nigdy nie naleøy
ci±gn±Ê za sznur, tylko trzymaÊ za
wtyczkÍ.
Kabel sieciowy dla pr±du zmiennego
musi byÊ wymieniony jedynie w
specjalistycznym punkcie serwisowym.
Instalacja
Naleøy zapewniÊ odpowiedni przep yw
powietrza, by zapobiec gromadzeniu siÍ
ciep a we wnÍtrzu urz±dzenia.
Nie naleøy ustawiaÊ urz±dzenia na
miÍkkich powierzchniach takich jak
dywany, koce, ktÛre mog± zablokowaÊ
otwory wentylacyjne znajduj±ce siÍ na
spodzie.
Nie naleøy ustawiaÊ urz±dzenia w
pobliøu ºrÛde ciep a, lub w miejscach
naraøonych na bezpo rednie dzia anie
promieni s onecznych, nadmiernych
ilo ci kurzu, czy teø naraøonych na
wstrz±sy mechaniczne.
Uøytkowanie
Je li odtwarzacz zosta bezpo rednio
przeniesiony z zimnego do ciep ego
pomieszczenia, lub zosta postawiony w
szczegÛlnie wilgotnym pomieszczeniu,
wilgoÊ mog a siÍ zebraÊ na soczewkach
we wnÍtrzu urz±dzenia. Je li ma to
miejsce, odtwarzacz nie bÍdzie dzia a
poprawnie. W takim wypadku proszÍ
wyj±Ê dysk kompaktowy i pozostawiÊ
odtwarzacz w ±czony przez mniej wiÍcej
godzinÍ, by wilgoÊ wyparowa a.
Witamy !
DziÍkujemy PaÒstwu za zakup odtwarzacza
dyskÛw kompaktowych firmy Sony. Zanim
rozpoczniecie PaÒstwo uøywaÊ niniejszy
odtwarzacz, proszÍ siÍ dok adnie zapoznaÊ
z t± instrukcj± obs ugi i zachowaÊ niniejsz±
instrukcjÍ na przysz o Ê.
Informacje na Temat
tej Instrukcji
Niniejsza instrukcja obs ugi przeznaczona
jest dla modelu CDP-CE405.
Uwagi dotycz±ce oznakowania
Instrukcje obs ugi opisane w poniøszej
broszurze odnosz± siÍ do przyciskÛw
sterowniczych znajduj±cych siÍ na
odtwarzaczu.
Moøna takøe pos ugiwaÊ siÍ przyciskami
na pilocie, o ile posiadaj± one takie
same, lub zbliøone nazwy, jak przyciski
na odtwarzaczu.
NastÍpuj±ce piktogramy s± uøywane w
poniøszej instrukcji:
Oznacza, øe moøna uøyÊ pilota
do tego celu.
Oznacza wskazÛwki i rady
u atwiaj±ce osi±gniÍcie danego
celu.
Getting Started
3
PL
PL
Przygotowanie do Uøytkowania
Rozpakowanie........................................................................................4
Pod ±czenie do Systemu ....................................................................... 4
Odtwarzanie Dysku Kompaktowego CD ............................6
Odtwarzanie DyskÛw Kompaktowych CD
Uøywanie Okienka Konsoli.....................................................................8
Wymienianie dyskÛw podczas odtwarzania dysku CD .........................8
Znajdowanie okre lonego dysku ...........................................................9
Szukanie okre lonego nagrania lub pozycji w cieøce nagrania ...........9
Kilkakrotne Odtwarzanie Tego Samego Tytu u ....................................10
Odtwarzanie w Przypadkowej Kolejno ci (Shuffle Play) ......................10
Przygotowanie Indywidualnego Programu (Programme Play).............11
Przegrywanie z DyskÛw Kompaktowych CD
Przegrywanie Indywidualnego Programu ............................................12
Przegrywanie Dysku Dopasowane do D ugo ci Nagrywanej Kasety
(Time Edit).........................................................................................13
Wzmacnianie lub Wyciszanie Sygna u .................................................13
Dostrajanie Poziomu Nagrania (Peak Search) .....................................14
Informacje Dodatkowe
Uwagi Dotycz±ce DyskÛw Kompaktowych .........................................15
Usuwanie Usterek................................................................................15
Dane Techniczne .................................................................................15
Indeks
Indeks...................................................................................................16
SPIS TRE¶CI
4
PL
Przygotowanie do Uøytkowania
Rozpakowanie
ProszÍ sprawdziÊ, czy zestaw jest kompletny:
Kabel dla sygna Ûw audio (1)
Pilot (1)
Baterie Sony SUM-3 (NS) (2)
Zak adanie baterii do pilota
Moøecie PaÒstwo obs ugiwaÊ odtwarzacz przy pomocy
za ±czonego pilota.
Do pilota proszÍ w oøyÊ dwie baterie R6 (AA) zwracaj±c
uwagÍ na dopasowanie + i – na bateriach do rysunku
podanego wewn±trz obudowy. Do obs ugi odtwarzacza
proszÍ skierowaÊ pilota w stronÍ czujnika g na
odtwarzaczu.
Pod ±czenie do Systemu
Zarys
Poniøszy ustÍp opisuje sposÛb pod ±czenia odtwarzacza
dyskÛw CD do wzmacniacza. ProszÍ siÍ upewniÊ, øe
wy ±czony zosta dop yw pr±du do kaødego z
komponentÛw, zanim rozpoczniecie pod ±czenie.
Kiedy naleøy wymieniÊ baterie
Przy normalnym uøytkowaniu baterie powinny wystarczyÊ na
oko o sze Ê miesiÍcy. W chwili, gdy pilot przestaje sterowaÊ
funkcje odtwarzacza naleøy wymieniÊ baterie na nowe.
Uwagi
Nie naleøy pozostawiaÊ pilota w pobliøu miejsca o szczegÛlnie
wysokiej tempeturze lub wilgotno ci powietrza.
Nie naleøy wk adaÊ øadnych innych objektÛw do pilota,
szczegÛln± uwagÍ naleøy zwrÛciÊ przy wymianie baterii.
Nie naleøy eksponowaÊ czujnika odtwarzacza na bezpo rednie
na wietlenie przez promienie s oneczne lub przez inne
urz±dzenia wiec±ce. Moøe to spowodowaÊ nieprawid owe
funcjonowanie urz±dzenia.
Je li pilot nie bÍdzie uøywany przez d uøszy czas, naleøy wyj±Ê
baterie, by unikn±Ê uszkodzenia spowodowanego przez
ewentualny wyciek elektrolitu i korozjÍ.
Wzmacniacz
Jakie kable s± potrzebne?
Kabel dla sygna Ûw audio (dostarczony) (1)
Czerwona
wtyczka
(R)
Bia a
wtyczka
(L)
Bia a
wtyczka
(L)
Czerwona
wtyczka
(R)
Przygotowanie do Uøytkowania
Odtwarzacz dyskÛw CD
Do sieci
Do sieci
: Przep yw sygna Ûw
Gniazdo
wej ciowe audio
prawe
(R)
Gniazdo
wej ciowe
audio lewe
(L)
Gniazdo
wyj clowe
lewe (L)
Gniazdo
wyl ciowe
prawe (R)
Getting Started
5
PL
Przygotowanie do Uøytkowania
Pod ±czenia
Zak adaj±c kabel audio naleøy zwrÛciÊ uwagÍ na
dopasowanie kolorÛw kabli z odpowiednimi kolorami
gniazd na komponentach systemu: Czerowy (prawy) z
Czerwonym i Bia y (lewy) z Bia ym. ProszÍ przeprowadziÊ
pod ±czenia starannie, by unikn±Ê przydºwiÍkÛw
sieciowych i szumÛw.
INPUT
CD
L
R
LINE OUT
L
R
Odtwarzacz dyskÛw CD Wzmacniacz
Moøecie PaÒstwo ustawiÊ poziom wyj ciowy do
wzmacniacza
ProszÍ nacisn±Ê przycisk LINE OUT LEVEL +/â na pilocie.
Moøna zmniejszyÊ poziom wyj ciowy do 20dB.
Podczas zmniejszania poziomu wyj ciowego w okienku
konsoli wy wietlany jest symbol
FADE
.
Po wy ±czeniu odtwarzacza poziom wyj ciowy
automatycznie powraca do maksymalnej wysoko ci.
Uwaga
Jeøeli podczas nagrywania naci nie siÍ przyciski LINE OUT
LEVEL +/â, znajduj±ce siÍ na pilocie zdalnego sterowania, poziom
nagrywania ulegnie zmianie, jeøeli zosta on uprzednio nastawiony
na magnetofonie kasetowym itp..
Pod ±czenie do sieci zasilania
ProszÍ pod ±czyÊ odtwarzacz do sieci poprzez kabel
sieciowy.
Transport odtwarzacza
Przed transportem sprzÍtu proszÍ wykonaÊ czynno ci
opisane poniøej, po to by wewnÍtrzny mechanizm
powrÛci do swojej pierwotnej pozycji.
1 ProszÍ wyj±Ê wszyskie dyski kompaktowe z szufladki
na dyski.
2 ProszÍ nacisn±Ê przycisk § OPEN/CLOSE w celu
zamkniÍcia szufladki na dyski.
W okienku konsoli wy wietlany jest tekst Üno DISCá
(nie ma dysku).
3 ProszÍ odczekaÊ przez 10 sekund, nastÍpnie proszÍ
nacisn±Ê przycisk POWER w celu wy ±czenia
zasilania odtwarzacza.
  • Page 1 1
  • Page 2 2
  • Page 3 3
  • Page 4 4
  • Page 5 5
  • Page 6 6
  • Page 7 7
  • Page 8 8
  • Page 9 9
  • Page 10 10
  • Page 11 11
  • Page 12 12
  • Page 13 13
  • Page 14 14
  • Page 15 15
  • Page 16 16
  • Page 17 17
  • Page 18 18
  • Page 19 19
  • Page 20 20
  • Page 21 21
  • Page 22 22
  • Page 23 23
  • Page 24 24
  • Page 25 25
  • Page 26 26
  • Page 27 27
  • Page 28 28
  • Page 29 29
  • Page 30 30
  • Page 31 31
  • Page 32 32

Sony CDP-CE405 Instrukcja obsługi

Kategoria
Odtwarzacze CD
Typ
Instrukcja obsługi
Ten podręcznik jest również odpowiedni dla

w innych językach