SSS Siedle BTCV 850-02 Operating Instructions Manual
- Typ
- Operating Instructions Manual

Bedienungsanleitung
für den Endkunden
Bus-Telefon Comfort
mit Farbmonitor
Operating Instructions
for end users
Comfort bus telephone
with colour monitor
Notice d’utilisation
pour le consommateur
Poste bus confort avec
moniteur couleur
Istruzioni per l’uso
per il cliente nale
Citofono bus comfort
con monitor a colori
Gebruikershandleiding
voor de eindgebruiker
Bus-Telefoon Comfort
met kleurenmonitor
Betjeningsvejledning
til slutbrugeren
Comfort-bustelefon
med farvemonitor
Bruksanvisning
för slutkunden
Buss-telefon Comfort
med färgmonitor
Instrukcja obsługi
dla odbiorcy końcowego
Wideofon magistralowy
Comfort z kolorowym
monitorem
Инструкция по эксплуатации
для конечных клиентов
Аппарат абонента
«Комфорт» с цветным
монитором
BTCV 850-02

2
Deutsch
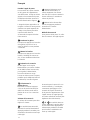
Türruf annehmen
Die Klingeltöne für Haustür und
Wohnungstür unterscheiden sich.
Wenn ein Besucher die Türklingel
drückt, klingelt das Haustelefon
und die Taste Stumm schaltung
blinkt.
Das Bild des Besuchers ist im
Moni tor zu sehen. Mit der Funktion
Zoom kann ein Ausschnitt des
Bildes vergrößert angezeigt
werden. Sie können das Gespräch
innerhalb von 45 Sekunden nach
dem letzten Klingeln annehmen.
Türöffner betätigen
Wenn Sie die Türöffnertaste drü-
cken, wird die Tür für 3 Sekunden
geöffnet, von der zuletzt geklingelt
wurde.
Licht anschalten
Wenn Sie die Licht-Taste drücken,
wird die Beleuchtung eingeschaltet,
wenn Ihr Elektroinstallateur diese
angeschlossen hat.
Klingel stumm schalten
Durch kurzes Drücken der Taste
Stummschaltung werden alle
Klingeltöne ab- und wieder
angeschaltet; als Hinweis auf die
Stummschaltung leuchtet die Taste
rot. Wenn ein Be sucher an der Tür
klingelt, solange das Haustelefon
stumm geschaltet ist, blinkt die
Taste.
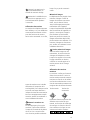
Türstation anwählen
Hörer abnehmen. Licht-Taste 2
mal drücken, um eine Sprechver-
bindung zu der Türstation aufzu-
bauen, von der zuletzt geklingelt
wurde.
Klingeltonlautstärke
Die Klingeltonlautstärke kann in 5
Stufen eingestellt werden:
Bei aufgelegtem Hörer Taste
Stum mschaltung 3 Sekunden
gedrückt halten, um die einge-
stellte Klingel tonlautstärke zu
hören.
Taste Stummschaltung kurz
drücken, Lautstärke steigt um eine
Stufe an. Nach der höchsten Stufe
springt sie wieder zur niedrigsten
Lautstärke.
Ausgewählte Lautstärke durch
3 Sekunden Drücken der Taste
Stumm schaltung abspeichern.
Klingeltonmelodie
Sie können zwischen 11 Klingel-
tonmelodien wählen. Es wird
immer der Klingel ton für die Tür
eingestellt, von der zuletzt geklin-
gelt wurde; drücken Sie also zuerst
auf die Klingel an der Haustür oder
der Woh nungstür. (Für Intern- oder
Gruppenruf ist auch eine andere
Klingeltonmelodie wählbar).
Bei aufgelegtem Hörer Tür öffner-
und Licht-Taste gleich zeitig 3
Sekunden gedrückt halten, um die
eingestellte Klingelton melodie zu
hören.
Durch Drücken der Taste
Stummschaltung wechselt die
Klingeltonmelodie.

3
Ausgewählte Klingelton-
melodie durch 3 Sekunden
Drücken der Taste Stummschaltung
abspeichern.
Tastenbelegung
Die Tasten des Telefons kön nen
z. B. zum Aufbau von Intern ge-
sprächen oder Schalt- und Steuer-
funktionen genutzt werden. Alle
Tasten sind dafür doppelt belegbar
(Ausnahme Türöffner-Taste). Jede
Taste ist mit einer Lampe unterlegt,
um Schaltzustände anzuzeigen. Für
weitere Informationen wenden
Sie sich bitte an Ihren Elektro-
installateur.
Monitor einschalten
Durch Drücken der Moni tor-Taste
wird das Kamera bild der Türstation
angezeigt, von der zuletzt ge klin-
gelt wurde. Funktion nur möglich,
wenn kein Gespräch besteht.
Bildspeicher
Das Haustelefon ist mit einem
Bild speicher ausgestattet. Alle
Besucherbilder werden mit Datum-
und Uhrzeit gespeichert. Es können
bis zu 28 Bilder im Gerät gespei-
chert werden. Ist der Speicherplatz
im Gerät erschöpft, wird immer
das älteste Bild überschrieben.
Nach einem Stromausfall sind
gespeicherte Bilder im Haustelefon
gelöscht. Wenn die Funktion des
Bildspeichers nicht gegeben ist,
wenden Sie sich an Ihren Elektro-
installateur.
Bildspeicher-Taste
Sind neue Bilder gespeichert,
leuchtet am Telefon die Bild-
speicher-Taste. Durch Tastendruck
wird das zuletzt gespeicherte Bild
angezeigt. Wird die Taste erneut
gedrückt, ist das nächste Bild zu
sehen.
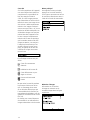
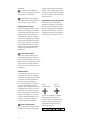
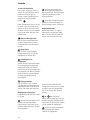
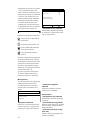
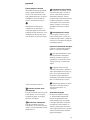
Tastenbelegung Monitor
Die Bedienung des Monitors er folgt
über eine 5-Wege Taste. Mit der
Eingabe-Taste wird der Monitor
eingeschaltet oder eine ausge-
wählte Funktion bestätigt. Mit den
Steuer-Tasten ndet die Naviga tion
innerhalb der Menü ebenen statt.
Eingabe-Taste Steuer-Tasten
Die Steuer-Tasten können je nach
Anzeige des Monitors mit unter-
schiedlichen Funktionen belegt
sein. Die Funktion der Tasten ist in
der untersten Zeile des Monitors
eingeblendet.
SD-Karte
Auf der Geräteoberseite kann
zusätzlich eine SD-Karte gesteckt
werden. Es können Karten von
32 MB bis 2 GB verwendet
werden, wobei je nach Größe der
Karte 32 bis 255 Bilder gespeichert
werden. Ein Bild benötigt ca. 1 MB
Speicher platz. Die Bilder werden
als *.tif Datei mit einer Auösung
von 640 x 480 Pixel gespeichert.
Die 28 letzten Bilder werden immer
im Gerät und auf der Karte gespei-
chert. Wenn der Speicher platz
der Karte erschöpft ist, oder die
maximale Anzahl von 255 Bildern

4
erreicht ist, wird immer das älteste
Bild überschrieben. Bei eingelegter
Karte wird in der obersten Zeile das
Symbol der SD-Karte angezeigt.
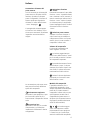
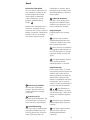
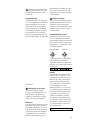
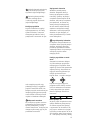
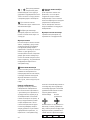
Folgende Anzeigen sind möglich:
SD-Karte korrekt erkannt
Initialisierung der SD-Karte
Karte fehlerhaft oder schreib-
geschützt
Schreib-/Lesevorgang
SD-Karte während des Schreib- und
Lesevorganges nicht entnehmen.
Die Formatierung einer SD-Karte
darf nur über die entsprechende
Funktion des Telefon erfolgen, um
das korrekte Dateiformat (FAT 16)
zu gewährleisten.
Mit einem Lesegerät für SD-Karten
können gespeicherte Bilder auf
einen Computer übertragen und
bearbeitet werden.
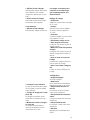
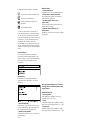
Hauptmenü
Um das Hauptmenü aufzurufen,
Eingabe-Taste drücken und in der
untersten Zeile des Monitors mit
der Steuer-Taste Menü auswählen.
Bildspeicher
Information über die Anzahl
gespeicherter und neuer Bilder in
den oberen Zeilen.
• Bildliste anzeigen
Anzeige der im Gerät gespei-
cherten Bilder. Neue Bilder sind mit
einem * Symbol markiert.
• alle Bilder löschen
Löschen aller im Gerät
gespeicherten Bilder.
Speicherkarte
• Bildliste anzeigen
Anzeige der gespeicherten Bilder.
• Speicherkarte formatieren
Eingelegte SD-Karte wird forma-
tiert, alle Bilder werden gelöscht.
• Bilder von Karte laden
(max. 28)
Gespeicherte Bilder werden in den
Geräte speicher übertragen.
• alle Bilder auf SD-Karte spei-
chern
Bilder im Speicher des Telefons
werden auf Karte gespeichert.
Gespeicherte Bilder unterliegen
dem Urheber-Gesetz. Bei der
Bearbeitung bitte beachten.

5
Bildeinstellung
• Helligkeit
in einem Bereich von 15-247 stu-
fenlos einstellbar.
• Farbe
Farbsättigung in einem Bereich von
15-247 stufenlos einstellbar.
• Kontrast
Bildkontrast in einem Bereich von
15-247 stufenlos einstellbar.
• Darstellung Livebild
- Zoom immer ein
Das Livebild zeigt immer den
Zoom-Ausschnitt.
Konguration
• Sprache/Language
Auswahl der Sprache.
• Datum/Uhrzeit
Automatisch Sommer/Winterzeit
Einstellung Datum und Uhrzeit.
• Einschaltverzögerung
Monitor schaltet zeitverzögert ein.
• Speicherverzögerung
Bild wird zeitverzögert gespeichert.
• Ausschaltverzögerung
Monitor schaltet zeitverzögert aus.
• Service
Einstellungen für den Elektroin-
stallateur.
Menü verlassen
Der Monitor schaltet sich nach der
Ausschaltverzögerung aus.
Intercom-Funktionen
Für die interne Kommunikation
im Haus bietet das Telefon zusätz-
liche Funktionen. Damit diese
Funktionen nutzbar sind, müssen
sie vom Elektroinstallateur pro-
grammiert werden.
• Rufweiterleitung
Leitet Türrufe an ein anderes
Telefon weiter.
• Interner Gruppenruf
Interner Ruf an mehrere Telefone
gleichzeitig.
• Sammeldurchsage
Durchsage an mehrere Telefone.
• Türmatik
Der Türöffner wird automatisch
nach dem Drücken der Türklingel
geöffnet.
• Rückruf
Wenn ein interner Anrufer
Sie nicht erreicht, kann er die
Rückruffunktion benutzen. An
Ihrem Telefon leuchtet dann die
entsprechende LED so lange, bis
Sie zurückrufen.
• Interner Rückruf setzen
Wenn Sie intern anrufen und
der Teilnehmer meldet sich nicht,
können Sie einen Rückruf anfor-
dern. Drücken Sie dazu 2 mal die
blinkende Taste.
- Letzte Bildposition speichern
Das Livebild zeigt immer den
zuletzt gewählten Bildausschnitt.
- Zoom auf Bildmitte setzen
Der Bildausschnitt zeigt immer die
Bildmitte.
- Datum + Zeit im Livebild
Datum und Zeit werden im Bild
eingeblendet.

6
Pegehinweise
Reinigen Sie Ihr Telefon nur mit
einem mit milder Seifenlösung
angefeuchteten, weichen Tuch.
Trockene Reinigung, aggressive
Reiniger und Scheuermittel können
die Oberäche beschädigen.
Ausführliche Pegehinweise im
Downloadbereich unter
www.siedle.de.
Service
Für die Gewährleistung gelten
die gesetzlichen Bestimmungen.
Der Austausch des Gerätes im
Servicefall erfolgt durch Ihren
Elektroinstallateur.

7
English
Accepting door calls
The ringing tones for the front
door and apartment door are dif-
ferent. When a visitor presses the
door bell, the telephone rings and
the mute button ashes.
The visitor‘s image can be seen
on the monitor. Using the zoom
function, an excerpt of the picture
can be enlarged. The call can be
accepted within 45 seconds of the
last ring tone.
Actuating the door release
When you press the door release
button, the door from which the
last call came is opened for
3 seconds.
Switching on the light
When you press the light button,
the lighting is switched on, pro-
vided this has been connected by
your electrical installer.
Muting the bell
When the mute button is
pressed briey, all the ringing tones
are switched off or on again. The
button lights up red to indicate
that the mute has been activated.
If a visitor rings the door bell while
the in-house telephone is switched
to mute, the button ashes.
Selecting a door station
Lift the receiver. Press the light
button twice to make a speech
connection to the door station
from which the last call came.
Ring tone volume
The ring tone volume can be set to
5 different levels:
Put down the receiver then
press and hold down the mute
button for 3 seconds to hear the
set ring tone volume.
Press the mute button briey
and the volume increases by one
level. After the highest level it goes
back to the lowest level.
Save the selected volume by
pressing the mute button for
3 seconds.
Ring tone melody
You can choose between 11 ring
tone melodies.
The ring tone is always set for the
door from which the last call came.
For this reason, rst ring the bell at
the front door or apartment door.
(A different ring tone melody can
also be selected for internal or
group calls).
When the handset
is on-hook: Press and hold down
the door release and light button
simultaneously for 3 seconds to
hear the set ring tone melody.
Pressing the mute button
changes the ring tone melody.

8
Save the selected ring tone
melody by pressing the mute
button for 3 seconds.
Button assignment
The telephone buttons can be
used for functions such as setting
up internal calls or for switching
and control functions. All but-
tons can be double assigned (with
the exception of the door release
button). Every button is backlit by
a lamp to indicate its switching
status. For more detailed informa-
tion, please contact your electrical
installer.
Switching on the monitor
Pressing the monitor button will
show the camera picture from the
door which placed the last door
call. This function is only possible if
there is currently no call connected.
Video memory
The bus telephone is equipped
with a video memory. All visitor
pictures are saved with a date
and time. Up to 28 pictures can
be saved in the device. Once the
memory capacity has been used
up, the oldest picture is over-
written each time a new picture is
taken. After a power cut, pictures
saved in the in-house telephone
are deleted. If the video memory
fails to work, consult your electrical
installer.
Video memory button
If new pictures have been saved,
the video memory button lights up
at the telephone. The last stored
picture is displayed by pressing a
button. Pressing the button again
accesses the next picture.
Assigning the monitor buttons
The monitor is operated using a
5-way button. The Enter key is
used to switch on the monitor or
conrm a selected function. The
control buttons are used for navi-
gation within the different menu
levels.
Enter button Control but-
tons
The control buttons can be
assigned with different functions
depending on the monitor display.
The functions of the buttons are
indicated by a display superim-
posed at the bottom edge of the
monitor.
SD card
At the top of the unit, an addi-
tional SD card can be inserted.
Cards ranging in size from 32 MB
to 2 GB can be used, with capacity
for storing between 32 and 255
pictures depending on the size.
One picture requires around 1 MB
of storage space. The pictures are
saved in *.tif format with a resolu-
tion of 640 x 480 Pixel. The 28 last
pictures are always stored in the
device and on the card. If the card’s
memory is full, or the maximum
number of 255 images has been
reached, the oldest image is always
overwritten. If the card is inserted,

9
the SD card symbol is shown in the
upper line.
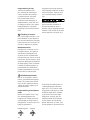
The following displays are possible:
SD card correctly detected
Initializing SD card
Card faulty or write protected
Write/Read process
Do not remove the SD card during
the write and read process.
Formatting the SD card should only
ever take place using the relevant
function of the telephone in order
to guarantee the correct le format
(FAT 16).
Using the SD card reader, saved
pictures can be transferred to a
computer and processed.
Main menu
To access the main menu, press
the Enter button and select Menu
at the bottom line of the monitor
using the control button.
Video memory
Information on the number of
saved and new pictures at the top
of the screen.
• Display picture list
Display of the pictures stored in the
device. New pictures are marked
with a * symbol.
• Delete all pictures
Deletion of all pictures stored in
the unit.
Memory card
• Display picture list
Display of the stored pictures.
• Format memory card
The inserted SD card is formatted,
all pictures will be deleted.
• Load pictures from card
(max. 28)
Saved pictures are transmitted to
the unit‘s internal memory.
• Save all pictures on the
SD card
Pictures in the telephone‘s memory
are saved to the card.
Saved pictures are subject to
the same copyright restrictions
as photographs.

10
Picture setting
• Brightness steplessly adjust-
able
within a range of 15 – 247.
• Colour
Colour saturation steplessly adjust-
able within a range of 15 – 247.
• Contrast
Picture contrast can be steplessly
adjusted within a range of
15 – 247.
• Live picture display
- Zoom always on
The live picture is permanently set
to a zoom excerpt.
- Save last picture position
The live picture always shows the
last selected picture excerpt.
- Set zoom to centre picture
The picture excerpt always shows
the centre of the picture.
- Date + time in live picture
The date and time are superim-
posed onto the picture.
Conguration
• Sprache/Language
Language selection.
• Date/time
Automatic summer time/winter
time
Date and time setting.
• ON delay
The monitor switches on with a
time delay.
• Save delay
The picture is saved with a time
delay.
• OFF delay
The monitor switches off with a
time delay.
• Servicing
Settings for the electrical installer.
Quit menu
The monitor switches off after the
set OFF delay time.
Intercom functions
For internal communication in
the house, the telephone offers
additional functions. To allow these
functions to be used, they must
be programmed by the electrical
installer.
• Call forwarding
Forwards door calls to another
telephone.
• Internal group call
Internal call to several telephones
simultaneously.
• Collective announcement
Announcement to several tel-
ephones.
• Doormatic
The door release is automatically
opened after pressing the door
bell.
• Callback
If an internal caller is unable to get
through to you, he can use the
callback function. The relevant LED
then ashes at your telephone until
you call back.
• Setting an internal callback
If you make an internal call and
the user does not pick up, you can
request a callback. To do this, press
the ashing button twice.

11
Care of your phone
Only ever clean your telephone
using a soft cloth dampened with
mild soap solution. Dry cleaning,
aggressive cleaning agents and
abrasives can damage the surface.
Detailed care instructions are
located in the download area of
www.siedle.de
Servicing
Statutory warranty conditions
apply. Exchange of the device in
case of Servicing must be per-
formed by your electrical installer.

12
Français
Prendre l‘appel de porte
Les sonneries de la porte d‘entrée
et de la porte de l‘appartement
sont diffé-rentes. Lorsqu‘un visiteur
appuie sur la sonnette de la porte,
le téléphone intérieur sonne et la
touche désacti-vation clignote.
L‘image du visiteur apparaît sur le
moniteur. La fonction zoom permet
d‘afcher une partie agrandie de
l‘image. Vous pouvez prendre la
communication dans les
45 secondes à compter de la der-
nière sonnerie.
Actionner la gâche
Lorsque vous appuyez sur la touche
de la gâche, la porte où l‘on a
sonné en dernier s‘ouvre pendant
3 secondes.
Mettre la lumière
Lorsque vous appuyez sur la touche
lumière, l‘éclairage se met en ser-
vice, si votre installateur-électricien
l‘a branché.
Désactiver la sonnerie
Un bref appui sur la touche
Désactivation a pour effet d‘arrêter
et de rétablir toutes les sonneries;
pour signaler la désactivation,
la touche s‘allume en rouge.
Lorsqu‘un visiteur sonne à la porte,
pendant que le téléphone intérieur
est désactivé, la touche clignote.
Sélectionner la
platine de rue
Décrocher le combiné. Appuyer
2 fois sur la touche lumière pour
établir une liaison vocale avec la
platine de rue où l‘on a sonné en
dernier.
Volume de la sonnerie
Le volume de la sonnerie peut être
réglé en 5 niveaux:
Le combiné étant raccroché,
maintenir la touche Désactivation
appuyée pendant 3 secondes pour
entendre le volume de sonnerie qui
a été réglé.
Appuyer brièvement sur la
touche Désactivation, le
volume augmente d‘un niveau.
Une fois que le volume a atteint le
niveau maximum, il retombe au
volume le plus bas.
Mémoriser le volume sélec-
tionné en appuyant pendant 3
secondes sur la touche
Désactivation.
Mélodie de sonnerie
Vous pouvez choisir parmi 11 mélo-
dies de sonnerie. On règle toujours
la sonnerie pour la porte où l‘on a
sonné en dernier; p. conséquent,
commencez par appuyer sur la
sonnerie de la porte d‘entrée ou
de la porte de l‘appartement. (Pour
l‘appel interne ou l‘appel groupé,
une autre mélodie de sonnerie peut
également être sélectionnée).
Le combiné étant rac-
croché: Maintenir la touche gâche
et la touche lumière appuyées en
même temps pendant 3 secondes
pour écouter la mélodie de son-
nerie qui a été réglée.

13
Lorsque l‘on appuie sur la
touche Désactivation, la
mélodie de sonnerie change.
Mémoriser la mélodie de son-
nerie choisie en appuyant sur la
touche désactivation pendant
3 secondes.
Affectation des touches
Les touches du téléphone peuvent
être utilisées p. ex. pour établir des
communications Internet ou bien
pour des fonctions de commu-
ta tion et de commande. A ces ns,
toutes les touches sont à double
affectation (à l‘exception de la
touche gâche). Sous chaque touche
se trouve une lampe destinée à
indiquer les états de commutation.
Pour tout renseignement complé-
mentaire, veuillez vous adresser à
votre installateur-électricien.
Mettre le moniteur en
marche
Le fait d‘appuyer sur la touche
moniteur a pour effet d‘afcher
l‘image de la caméra de la platine
de rue où l‘on a sonné en der-
nier. Fonction possible seulement
lorsqu‘il n‘y a pas de communi-
cation.
Mémoire d’images
Le téléphone bus est équipé d‘une
mémoire d‘images. Toutes les
images des visiteurs sont mémo-
risées, avec la date et l‘heure.
Jusqu‘à 28 images peuvent être
mémorisées dans l‘appareil.
Lorsque l‘emplacement disponible
dans la mémoire de l‘appareil est
épuisé, c‘est toujours l‘image la
plus ancienne qui est écrasée.
Après une panne de courant, les
images mémorisées dans le télé-
phone intérieur sont effacées. Si la
mémoire d‘images ne fonctionne
pas, veuillez vous adresser à votre
installateur-électricien.
Touche mémoire d‘images
Si de nouvelles images ont été
mémorisées, la touche mémoire
d‘images du téléphone s‘éclaire.
Lorsque l‘on appuie sur la touche,
l‘image mémorisée en dernier
s‘afche. Un nouvel appui sur la
touche permet de voir l‘image
suivante.
Affectation des touches
moniteur
Le moniteur s‘utilise par l‘intermé-
diaire d‘une touche à 5 voies. La
touche entrée permet de mettre le
moniteur en marche ou de valider
une fonction sélectionnée. Les tou-
ches de commande permettent de
naviguer dans les niveaux de menu.
Touche entrée Touches de
commande
Différentes fonctions peuvent être
affectées aux touches de com-
mande, en fonction de l‘afchage
du moniteur. La fonction des tou-
ches s‘afche sur la ligne se trou-
vant tout en bas du moniteur.

14
Carte SD
Sur la face supérieure de l’appareil,
une carte SD peut être insérée en
complément. Il est possible d’uti-
liser des cartes de 32 MB à
2 GB, 32 à 255 images pouvant
être mémorisées en fonction de la
taille de la carte. Une image néces-
site environ 1 MB d’emplacement
mémoire. Les images se mémori-
sent en tant que chier *.tif, à une
résolution de 640 x 480 pixels. Les
28 dernières images sont toujours
mémorisées dans l’appareil et sur
la carte. Lorsque l’emplacement
mémoire de la carte est épuisé ou
que le nombre maximum de 255
images est atteint, c’est toujours
l’image la plus ancienne qui est
écrasée. Lorsque la carte est en
place, le symbole de la carte SD
s’afche sur la ligne se trouvant
tout en haut.
Les afchages suivants sont pos-
sibles:
Carte SD correctement
détectée
Initialisation de la carte SD
Carte défectueuse ou pro-
tégée en écriture
Processus d‘écriture/de
lecture
Ne pas retirer la carte SD pendant
le processus d’écriture et de lec-
ture. Le formatage d’une carte
SD ne doit être effectué que par
l’intermédiaire de la fonction cor-
respondante du téléphone, an de
garantir le format de chier correct
(FAT 16).
Un lecteur pour cartes SD permet
de transférer à un ordinateur des
images mémorisées et de les traiter.
Menu principal
Pour appeler le menu principal,
appuyer sur la touche entrée et,
sur la ligne se trouvant tout en bas
du moniteur, sélectionner menu à
l‘aide de la touche de commande.
Mémoire d’images
Information sur le nombre
d‘images en mémoire et de
nouvelles images dans les lignes
supérieures.

15
• Afcher la liste d‘images
Afchage des images mémorisées
dans l‘appareil. Les nouvelles
images sont repérées par un sym-
bole *.
• Effacer toutes les images
Effacement de toutes les images
mémorisées dans l‘appareil.
Carte mémoire
• Afcher la liste d‘images
Afchage des images en mémoire.
• Formater la carte mémoire
La carte SD introduite dans l‘appa-
reil se formate, toutes les images
seront effacées.
• Charger les images de la carte
(max. 28)
Les images en mémoire seront
transmises à la mémoire de l‘ap-
pareil.
• Mémoriser toutes les images
sur carte SD
Les images présentes dans la
mémoire du téléphone seront
mémorisées sur la carte.
Les images en mémoire sont
soumises, de la même façon
que les photographies, aux
droits d‘auteur.
Réglage de l‘image
• Luminosité
réglable en continu dans une plage
de 15 à 247.
• Couleur
Saturation des couleurs réglable
en continu dans une plage de
15 à 247.
• Contraste
Contraste réglable en continu dans
une plage de 15 à 247.
• Présentation image en live
- Zoom toujours en marche
L‘image en live montre toujours la
section zoomée.
- Mémoriser la dernière position
d‘image.
L‘image en live montre toujours la
section d‘image sélec-tionnée en
dernier.
- Placer le zoom au centre de
l‘image.
La section de l‘image montre tou-
jours le centre de l‘image.
- Date + heure dans l‘image en
live.
La date et l‘heure s‘afchent sur
l‘image.
Conguration
• Langue/Language
Choix de la langue.
• Date/heure
Heure d‘été/d‘hiver automatique
Réglage de la date et de l‘heure.
• Temporisation de mise en
marche.
Le moniteur se met en marche
d‘une façon temporisée.
• Temporisation de la mémori-
sation.
L‘image se mémorise d‘une façon
temporisée.
• Temporisation d‘arrêt
Le moniteur s‘arrête d‘une façon
temporisée.
• Entretien
Réglages pour l‘installateur-élec-
tricien.

16
Quitter le menu
Le moniteur s‘arrête à l‘expiration
de la temporisation d‘arrêt.
Fonctions Intercom
Pour la communication interne
dans la maison, le téléphone offre
des fonctions complémentaires.
Pour que ces fonctions soient utili-
sables, elles doivent être program-
mées par l‘installateur électricien.
• Transfert d‘appel
Transfert des appels de porte à un
autre téléphone.
• Appel groupé interne
Appel interne à plusieurs télé-
phones en même temps.
• Annonce collective
Annonce à plusieurs téléphones.
• Ouverture automatique des
portes
La gâche s‘ouvre automa tiquement
après que l‘on ait appuyé sur la
sonnette de la porte.
• Rappel
Si une personne appelant en
interne ne vous joint pas, elle peut
utiliser la fonction de rappel.
Sur votre téléphone, la LED cor-
respon-dante clignote alors jusqu‘à
ce que vous rappeliez.
• Etablir le rappel interne
Si vous téléphonez en interne et
que le poste ne répond pas, vous
pouvez demander un rappel. A ces
ns, appuyez 2 fois sur la touche
qui clignote.
Conseils d‘entretien
Pour nettoyer votre téléphone,
n‘utilisez qu‘un chiffon doux humi-
dié d‘une solution savonneuse
non agressive. Un nettoyage à sec,
un détergent agressif et un produit
abrasif peuvent endommager
la surface. Conseils d‘entretien
détaillés dans la zone de téléchar-
gement, à l‘adresse www.siedle.de.
Service
Les dispositions légales s‘appli-
quent à la garantie. En cas de
réclamation, l‘échange de l‘appareil
est assuré par votre installateur-
électricien.

17
Italiano
Accettazione chiamata dal
posto esterno
I toni di suoneria per chiamate dal
posto esterno e dal piano si diffe-
renziano. Quando un visitatore
preme il campanello, il citofono di
sistema squilla per segnalare la
chiamata e il tasto della funzione
“mute” lampeggia.
L‘immagine del visitatore appare
sul monitor. Se si desidera, la fun-
zione zoom consente di visualizzare
ingrandita una sezione dell‘im-
magine.
La conversazione può essere accet-
tata entro 45 secondi dall‘ultimo
squillo del campanello.
Azionamento apriporta
Premendo il tasto apriporta, si apre
per 3 secondi la porta da cui è
stato suonato il campanello l’ultima
volta.
Accensione luce
Premendo il tasto luce, si accende
l’illuminazione, se l’elettricista
installatore ha effettuato il relativo
collegamento.
Attivazione funzione
“mute”
Premendo brevemente il tasto della
funzione “mute” è possibile disatti-
vare e riattivare i toni di suoneria; il
tasto si accende per indicare che la
funzione “mute” è attiva. Quando
un visitatore preme il cam-panello,
il tasto lampeggia nché il citofono
di sistema rimane in funzione
“mute”.
Selezione posto esterno
Sollevare il ricevitore. Premere 2
volte il tasto luce per stabilire un
collega-mento fonico con il posto
esterno, da cui è stato suonato il
campanello l’ultima volta.
Volume del campanello
Il volume del campanello può
essere regolato in 5 livelli:
A ricevitore agganciato pre-
mere il tasto della funzione “mute”
per 3 secondi per sentire il volume
del campanello impostato.
Premendo brevemente il tasto
della funzione “mute” il volume
aumenta di un livello. Dopo il mas-
simo livello, il volume torna auto-
maticamente al livello minimo.
Salvare il volume selezionato
premendo per 3 secondi il tasto
della funzione “mute”.
Melodia del campanello
È possibile selezionare fra 11
melodie del campanello. Viene
sempre impostata la melodia della
porta da cui è stato suonato il
campanello l’ultima volta; occorre
quindi premere innanzi tutto il
campanello del posto esterno o
del piano. (Per chiamate interne o
di gruppo è possibile selezionare
anche un’altra melodia).
A ricevitore aggan-
ciato: Tenere premuto contem-
poraneamente il tasto apriporta
e il tas to luce per 3 secondi per
sentire la melodia del campanello

18
impostata.
Premendo il tasto della fun-
zione “mute” è possibile cambiare
la melodia del campanello.
Memorizzare la melodia del
campanello selezionata premendo
per 3 secondi il tasto „mute“.
Assegnazione dei tasti
I tasti del citofono possono essere
utilizzati, ad esempio, per stabilire
conversazioni Internet oppure per
eseguire funzioni di comando e
commutazione. A tutti i tasti pos-
sono essere assegnate due funzioni
(ad eccezione del tasto apriporta).
Ogni tasto è provvisto di una spia
per segnalare gli stati di commu-
tazione. Per maggiori informazioni
rivolgersi al proprio elettricista
installatore.
Accensione monitor
Premendo il tasto monitor viene
visualizzata l’immagine della tele-
camera del posto esterno, da cui è
stato suonato il campanello l’ultima
volta. Questa funzio ne è abilitata
solo se non è presente alcuna con-
versazione.
Videomemoria
Il citofono bus è provvisto di una
videomemoria. Tutte le immagini
dei visitatori vengono memorizzate
con data e ora. Nell‘apparecchio
possono essere memorizzate
no a 28 im-magini. Se lo spazio
di memoria dell‘apparecchio è
esaurito, viene sempre sovrascritta
l‘immagine più vecchia. In caso di
interruzione di corrente, le imma-
gini memorizzate nel citofono bus
vengono cancellate. Se il funzio-
namento della videomemoria non
è attivo, si prega di rivolgersi al
proprio elettricista installatore.
Tasto videomemoria
Se sono state memorizzate nuove
immagini, sul citofono lampeggia
il tasto videomemoria. Premendo
il tasto, viene visualizzata l‘ultima
immagine memorizzata. Premendo
di nuovo il tasto, si passa all‘imma-
gine successiva.
Assegnazione tasti del monitor
Il monitor può essere azionato
mediante un tasto a 5 vie. Il tasto
d‘inserimento permette di accen-
dere il monitor oppure di eseguire
la funzione selezionata. I tasti di
comando consentono di navigare
all‘interno dei vari livelli di menu.
Tasto
d‘inserimento
Tasti di
comando
Ai tasti di comando è possibile
assegnare diverse funzioni a
seconda della visualizzazione del
monitor. La funzione dei tasti è
visualizzata nell‘ultima riga in
fondo del monitor.

19
Scheda SD
Sul lato superiore dell’apparecchio
è inoltre possibile inserire una
scheda SD. Si possono utilizzare
schede da 32 MB - 2 GB; a seconda
del formato della scheda è possibile
salvare da 32 a 255 immagini.
Un’immagine richiede uno spazio
di memoria di circa 1 MB. Le imma-
gini vengono salvate sotto forma
di le *.tif con una risoluzione
di 640 x 480 pixel. Le ultime 28
immagini vengono sempre salvate
nell’apparecchio e sulla scheda.
Quando lo spazio di memoria della
scheda è esaurito oppure quando è
stato raggiunto il numero massimo
di 255 immagini, viene sovrascritta
sempre l’immagine più vecchia.
A carta inserita, nella riga superiore
viene visualizzato il simbolo della
scheda SD.
Sono possibili le seguenti visualiz-
zazioni:
Scheda SD correttamente
riconosciuta
Inizializzazione della
scheda SD
Scheda difettosa o protetta da
scrittura
Processo di scrittura/lettura
Durante il processo di scrittura e
lettura non estrarre la scheda SD.
La formattazione della scheda SD
deve avvenire esclusivamente tra-
mite la corrispondente funzione del
citofono per garantire il formato di
le corretto (FAT 16).
Con l’ausilio di un lettore per
schede SD è possibile trasferire le
immagini salvate su un computer e
qui modicarle.
Menu principale
Per richiamare il menu principale,
premere il tasto d‘inserimento e
selezionare menu con il tasto di
comando nell‘ultima riga in fondo
al monitor.
Videomemoria
Informazioni sul numero di imma-
gini nuove e memorizzate nelle
righe superiori.
• Visualizzazione dell‘elenco di
immagini
Visualizzazione delle immagini
memorizzate nell‘apparecchio.
Le nuove immagini sono contrasse-
gnate dal simbolo *.
• Cancellazione di tutte le
immagini.
Cancellazione di tutte le immagini
memorizzate nell‘apparecchio.

20
Scheda di memoria
• Visualizzazione dell‘elenco di
immagini.
Visualizzazione delle immagini
memorizzate.
• Formattazione della scheda di
memoria.
La scheda SD inserita viene format-
tata e tutte le immagini vengono
cancellate.
• Scaricamento immagini dalla
scheda (max. 28).
Le immagini memorizzate vengono
trasmesse nella memoria dell‘ap-
parecchio.
• Memorizzazione di tutte le
immagini sulla scheda SD
Immagini nella memoria del cito-
fono vengono memorizzate sulla
scheda.
Le immagini memorizzate, alla
stregua di fotograe, sono sog-
gette ai diritti d‘autore.
Impostazione dell‘immagine
• Luminosità e‘
regolabile in continuo in un inter-
vallo da 15 a 247.
• Colore
La saturazione del colore è regola-
bile in continuo in un intervallo da
15 a 247.
• Contrasto
Il contrasto dell‘immagine è regola-
bile in continuo in un intervallo da
15 a 247.
• Rappresentazione immagine
live
- Zoom sempre ON.
L‘immagine live mostra sempre la
sezione zoomata.
- Memorizzazione dell‘ul-
tima posizione d‘immagine.
L‘immagine live mostra sempre la
sezione d‘immagine selezionata
per ultima.
- Impostazione dello zoom sul
centro immagine.
La sezione d‘immagine mostra
sempre il centro dell‘immagine.
- Data + ora nell‘immagine live
Data e ora vengono visualizzate
nell‘immagine.
Congurazione
• Lingua/Language
Selezione della lingua.
• Data/Ora
Automaticamente periodo estivo/
invernale
Impostazione di data e ora.
• Accensione temporizzata
Il monitor si accende in modo tem-
porizzato.
• Memorizzazione temporizzata
L‘immagine viene memorizzata in
modo temporizzato.
• Spegnimento temporizzato
Il monitor si spegne in modo tem-
porizzato.
• Assistenza. Impostazioni per
l‘elettricista installatore.
Uscita dal menu
Il monitor si spegne al termine del
periodo impostato.
Funzioni Intercom
Per la comunicazione interna
all‘edicio, il citofono offre ulteriori
funzioni. Afnché tali funzioni
siano utilizzabili, è necessario che
vengano programmate dall‘elettri-
cista installatore.
Strona się ładuje...
Strona się ładuje...
Strona się ładuje...
Strona się ładuje...
Strona się ładuje...
Strona się ładuje...
Strona się ładuje...
Strona się ładuje...
Strona się ładuje...
Strona się ładuje...
Strona się ładuje...
Strona się ładuje...
Strona się ładuje...
Strona się ładuje...
Strona się ładuje...
Strona się ładuje...
Strona się ładuje...
Strona się ładuje...
Strona się ładuje...
Strona się ładuje...
Strona się ładuje...
Strona się ładuje...
Strona się ładuje...
Strona się ładuje...
Strona się ładuje...
Strona się ładuje...
Strona się ładuje...
Strona się ładuje...
-
 1
1
-
 2
2
-
 3
3
-
 4
4
-
 5
5
-
 6
6
-
 7
7
-
 8
8
-
 9
9
-
 10
10
-
 11
11
-
 12
12
-
 13
13
-
 14
14
-
 15
15
-
 16
16
-
 17
17
-
 18
18
-
 19
19
-
 20
20
-
 21
21
-
 22
22
-
 23
23
-
 24
24
-
 25
25
-
 26
26
-
 27
27
-
 28
28
-
 29
29
-
 30
30
-
 31
31
-
 32
32
-
 33
33
-
 34
34
-
 35
35
-
 36
36
-
 37
37
-
 38
38
-
 39
39
-
 40
40
-
 41
41
-
 42
42
-
 43
43
-
 44
44
-
 45
45
-
 46
46
-
 47
47
-
 48
48


SSS Siedle BTCV 850-02 Operating Instructions Manual
- Typ
- Operating Instructions Manual
w innych językach
- italiano: SSS Siedle BTCV 850-02
- Deutsch: SSS Siedle BTCV 850-02
- français: SSS Siedle BTCV 850-02
- dansk: SSS Siedle BTCV 850-02
- Nederlands: SSS Siedle BTCV 850-02
Powiązane artykuły
Inne dokumenty
-
Siedle AHTV 870-0 Informacje o produkcie
-
Laserliner VideoControl-Master Instrukcja obsługi
-
Hama 00090915 Instrukcja obsługi
-
Blaupunkt BLA-32C124I Instrukcja obsługi
-
-
Extel Philips Welcome Instrukcja obsługi
-
 SCS Sentinel CSF0041 Instrukcja obsługi
-
Somfy V 500 PRO io instrukcja
-
HOERMANN BA B168xH238 Instrukcja obsługi
-
HOERMANN Aluminium Entrance Door Instrukcja obsługi
