MILL MAX WIFI 1500W GULVVARMER Instrukcja obsługi
- Kategoria
- Ogrzewacze pomieszczeń
- Typ
- Instrukcja obsługi

1
EE
HU
ES
Assembly and instruction manual
Series:
Please read the instructions carefully before use.
Take good care of this manual for later use.
WiFi Portable heater
This product is only suitable for well insulated space or
occasional use.
Ta izdelek je primeren samo za dobro izolirane prostore ali
občasno uporabo.
Dit product is alleen geschikt voor goed geïsoleerde ruimtes of
incidenteel gebruik.
Ce produit est seulement approprié aux espaces bien isolés ou
à l'utilisation occasionnelle.
Dieses Produkt ist nur für gut isolierte Räume oder
gelegentlichen Gebrauch geeignet.
Ovaj proizvod je namijenjen za prostorije sa dobrom izolacijom
ili za povremenu upotrebu.
See toode sobib kasutamiseks ainult hästi soojustatud
ruumides või lühiajaliseks kütmiseks.
Šis produkts ir piemērots tikai labi izolētām telpām vai
nepatstāvigai lietošanai.
Šis gaminys tinkamas tik itin sandariose vietose ar
nekasdieniam naudojimui.
Produkt jest przeznaczony wyłącznie do wykorzystania
w dobrze izolowanych przestrzeniach lub do użytku
okazjonalnego.
Questo prodotto è adatto solo per spazi ben isolati o uso
occasionale.
Tento výrobek je vhodný pouze pro dobře izolované prostory nebo
příležitostné použití.
Tento výrobok je vhodný iba pre dobre izolované priestory alebo
príležitostné použitie.
Ez a termék csak jól szigetelt helyiségekben elhelyezve vagy
alkalmi használatra alkalmas.
Este producto sólo es adecuado para espacios bien aislados o de
uso ocasional.
SL

fb.com/millnorway
@millnorway
millnorway.com
Scandinavian home comfort
Mill is a Norwegian brand that develops heating and indoor air
quality products tailored for your modern home. Inspired by
Scandinavian nature, our products are designed to sustain the
toughest of climates to ensure safe, efficient and comfortable
temperatures, as well as good air quality.
Mill products are praised for their minimalistic and elegant
features as they blend in naturally with any modern interior.
Our advanced and user-friendly technology will support a
relaxing and healthy home space with reliable temperatures
and air quality. Mill’s vision is to develop products that create
an enjoyable and harmonic household atmosphere, enhancing
both comfort and style; the ultimate Scandinavian home
comfort.
We hope you enjoy your Mill product.
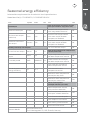
ErP energy efficiency data
Our products strictly comply with ErP relevant regulation and
directive.
You can find energy efficiency data for each model on the final
pages of this booklet.
Follow us on social media:

1
EN
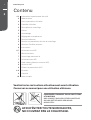
Content
24
4
4
4
4
5
5
5
5
6
6
6
6
7
7
7
8
8
8
8
9
10
Important safety information
Specifications
Before first use
First use
Description of heater
Parts
Assembly
Temperature calibration
Memory function
Resetting the heater
“Open Window” function
Instructions
Usage without WiFi connection
Child lock
Commercial lock
Usage with WiFi connection
Color codes (WiFi control light)
Activating WiFi
Delete WiFi settings
Maintenance
Warranty
Waste disposal
Please read the instructions carefully before use.
Take good care of this manual for later use.
STORE THIS INSTRUCTION MANUAL
FOR FUTURE USE!
NEVER TOUCH YOUR HEATER OR ITS
CASING WITH WET HANDS!
IN ORDER TO AVOID OVERHEATING,
DO NOT COVER THE HEATER.

2millnorway.com
EN
Important safety information
You must obey common safety guidelines when using
electrical products, especially in the presence of children.
WARNING! To avoid electric shock or damage due
to the heat, always make sure the plug is pulled out
before the heater is moved or cleaned.
READ THE INSTRUCTIONS CAREFULLY
• The product is intended for home use only.
• Make sure the heater is connected to the house's regular
mains as indicated on the heater.
• New heaters will produce a specific odor when used the
first time.This will stop after a short time and is completely
harmless.
• Check for any pieces of packing foam or cardboard that
may have fallen into the heating elements of the heater.
These pieces must be removed to avoid unpleasant odors.
• Prevent the heater from overheating — do not cover.
• Always turn off the heater and unplug it when not used for
a long period of time.
• Pay special attention if the heater is used in rooms where
children, the handicapped or elderly reside.
• The heater should not be set up directly beneath an electri-
cal socket outlet.
• The cord must not be laid under any kind of carpet. Make
sure the cord is laid in such a way that nobody can trip on it.
• The heater must not be used if either the cord or plug is
damaged.
• The heater must not be used if it has been dropped on the
floor is damaged in any other way causing it to malfunction.
• The cord must be repaired by the manufacturer or by an ex-
pert if it has been damaged, to avoid dangerous situations.
• Avoid using extension cords, which may overheat and could
possibly start a fire.

3
EN
• Never cover the air vents on the heater. Avoid potential fire
hazards by making sure the air intakes are not blocked or
covered. The heater should be used in rooms with normal
flat floors.
• The heater should not be installed in close proximity to
flammable materials of any kind because there can always
be a risk of fire.
• The heater must never be used in rooms where gasoline,
paint or other flammable liquids are stored, such as in a
garage.
• Never touch an electric heater with wet hands. The heater
should be installed so a person showering or taking a bath
cannot come into direct contact with it.
• Some parts of this product can become very hot and cause
burns. Particular attention has to be given where children
and vulnerable people are present.
• The heater must be switched off, the plug removed and the
heater must cool down before it is moved.
• Avoid overloading the mains (the circuit) where the heater
is connected. The heater may overload the electrical circuit
if other electrical devices are plugged into the same socket
outlet.
• Do not use this heater in small rooms when they are occu-
pied by persons not capable to leaving the room on their
own, unless constant supervision is provided.
• The product cannot be used by children under 8 years of
age and persons with reduced physical or mental abilities
or lack of experience and knowledge unless they have
been given supervision or instruction in the safe use of the
product and understand the hazards involved.
• Children should not play with the product. Cleaning and
maintenance should not be done by unsupervised children.
• Children under the age of 3 should be kept away from the
product, unless they are under constant supervision.
• Children aged 3 to 8 years are only permitted to turn the
product ON/OFF, assuming the heater is mounted accord-
ing to the assembly instructions and the children have

4millnorway.com
EN
received instruction or supervision in the safe use of the
product and understand the hazards involved.
• Do not use this heater in the immediate surroundings of a
bath, a shower or a swimming pool.
• Do not use if there are visible signs of damage to the heater.
• WARNING: To reduce the risk of fire, keep textiles, curtains,
or any other flammable material a minimum distance of 1 m
from the air outlet.
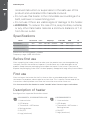
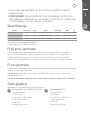
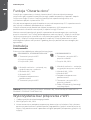
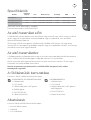
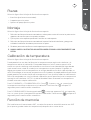
Specifications
Model Thermostat Color Amperage Power (W) WiFi IP
CO1200WIFI3 WiFi White 220-240V~, 50-60Hz 1200 802.11 b/g/n No
CO1200WIFI3BLACK WiFi Black 220-240V~, 50-60Hz 1200 802.11 b/g/n No
CO1500MAXWIFI3 WiFi White 220-240V~, 50-60Hz 1500 802.11 b/g/n IPx4
Maximum transmitting power: ≤20dBm
Frequency range: 24002483.5MHz
Before first use
After unpacking the heater, check to make sure the product was not damaged during
transport. Contact the retailer or importer if you discover any visible damages to the
product. Keep the outer packaging to transport the heater in the future. If you want to
dispose the packaging, make sure it is done properly. Keep plastic bags away from children.
First use
After turning on the heater for the first time or after an extended period without use,
the heater can produce a burnt odor for a short time. This is normal. Please read all the
instructions carefully before use. Save the instruction manual for future use.
It is also normal for the heater to make "sounds" when it warms up or cools down.
Description of heater
See figure 1 on separate illustration sheet
CO1200WIFI3, CO1200WIFI3BLACK
1. Heat emission
2. LED display
3. Thermostat + WiFi button
4. Settings button
5. ON/OFF
6. Legs (aluminum)
CO1500MAXWIFI3
1. Heat emission
2. LED display
3. Thermostat + WiFi button +
Settings button
4. ON/OFF
5. Legs (aluminum)

5
EN
Parts
See figure 2 on separate illustration sheet
• 8 screws (pre-mounted)
• 2 foot brackets
• 2 rails for the feet
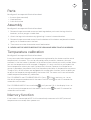
Assembly
See figure 3 on separate illustration sheet
1. Remove the pre-mounted screws on both legs before you Insert the legs into the
brackets, so that you get a stable foot.
2. Attach the legs to the brackets by tightening 2 screws into each bracket.
3. Remove the pre-mounted screws from the bottom of the heater and place the heater
gently on its head to mount the feet.
4. Two screws must be fastened on each foot bracket.
5. NEVER USE THE HEATER BEFORE THE LEGS HAVE BEEN TIGHTLY SCREWED.
Temperature calibration
See figure 4 on separate illustration sheet
It may occur deviation between the temperature registered by the heater and the actual
temperature in the room. This can be caused by several reasons, however, the most
common is that the heater is placed in a fair distance from where you usually reside. When
you set the temperature to for example 22 degrees, it is only natural that you expect the
same temperature where your sofa is placed for instance. However, the temperature
sensor is placed on the product itself, and therefore a deviation in temperature may occur.
To adjust this, all Mill heaters are equipped with a calibration function, which enables you
to adjust the temperature registered by the heater. N.B! The room must have achieved a
stable temperature before any calibration.
For CO1200WIFI3 and CO1200WIFI3BLACK: Press ○2 times and use + or - to set
the actual temperature observed in the room. Confirm with○or wait 15 seconds for
automatic confirmation.
For CO1500MAXWIFI3: Press and hold until you see CAL in the display. Use + or
- to set the actual temperature in the room. Confirm with or wait 15 seconds for
automatic confirmation.
Memory function
If the heater is connected to WiFi it will automatically reconnect with WiFi (where all
temperatures are saved) after a power cut.

6millnorway.com
EN
Resetting the heater
See figure 5 on separate illustration sheet
Turn off the heater's main switch. Turn the heater back on, within 5 seconds press and
hold ○. After 20 seconds the display will show "Fr", once you see "Fr" release ○and
the heater will reset to factory settings.
“Open window” function
The heater has an "open window" function that is activated instantly when it registers a
sudden drop in temperature with more than 5 degrees Celsius in 15 minutes. The heater
will automatically stop heating and FO will be visible in the display of the heater.
While in open window mode, it will maintain 5°C (to avoid frost damage).
The heater will automatically start heating again if temperature increase by at least 3
degrees within 15 minutes.
You can switch the heater back to normal mode by pressing the settings button 1 time.
Open window function can be disabled/enabled by pressing and holding the settings
button until "Fo" is shown on the display. You can also disable/enable open windows
function from the app if configured to WiFi.
The heater will stay in open window mode for maximum 1 hour, it then will go back to
normal heating mode.
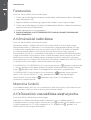
Instructions
Control panel
See figure 6 on separate illustration sheet
CO1200WIFI3, CO1200WIFI3BLACK
1. Thermostat and WiFi button
2. Settings button
3. ON/OFF button
1. Power indicator — shows whether
the heater is using power or not Wall
bracket
2. ON/OFF indicator
3. WiFi indicator
4. Desired room temperature
5. Thermostat and WiFi button
CO1500MAXWIFI3
1. Thermostat + WiFi button + set-
tings button
2. ON/OFF button
1. Power indicator — shows whether
the heater is using power or not
Wall bracket
2. ON/OFF indicator
3. WiFi indicator
4. Desired room temperature
5. Thermostat + WiFi button + set-
tings button
6. LED lights indicating how much
power the heater is using
WARNING! BE SURE THE FOOT IS FITTED CORRECTLY AND ACCORDING TO THE
INSTRUCTIONS BEFORE USING THE HEATER!

7
EN
Usage without WiFi connection
1. Plug the heater into a grounded outlet.
2. Press the ON/OFF button.
3. Turn the thermostat to the desired temperature while looking at the display. As soon as
the room temperature drops below this level, the heater will automatically start again.
When the room has reached the desired temperature again, the heater willturn itself
off.
4. The thermostat goes from 5 to 35°C.
5. If you want to change the temperature in the room, repeat step 3.
6. The heater has an overheat protection that turns the device off if any parts become
extremely off.
7. To turn off the heater, press the ON/OFF button. Should the heater be left unused for a
longer period, pull out the plug.Child lock
You can enable/disable child lock from the app. But in addition, you can also enable/
disable child lock from the heater itself. Turn off the heater using the main power switch.
Turn the heater back on, within 5 seconds press and hold ○.
After 3 seconds the display will show "CH", once you see "CH" release ○and the heater
enables/disables child lock.
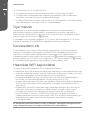
Commercial lock
You can enable and disable commercial lock from inside the app. But in addition, you
can enable/disable commercial lock from the heater itself. Turn off the heater using the
main power switch. Turn the heater back on, within 5 seconds press and hold ○. After
10 seconds the display will show "CO", once you see "CO" release ○and the heater
enables/disables commercial lock.
Usage with WiFi connection
A free app is available for downloading for iOS and Android.
By connecting your heaters with the iOS/Android device you can do the following:
• Control all your heaters situated in multiple locations . Everything is controlled with the
Mill-app (with same user)
• Set up weekly programs (or use the standard program already available in the app) by
using the 4 modes: Comfort, Sleep, Away and OFF
• Override the set programs for the whole house, a specific room or a specific heater.
There is no need to edit your program if you get home earlier than normal one day
• Enable vacation mode for saving energy while you are away. The app will automatically
increase the temperature in your house before you get back home
• Share your house with other family members, making control easy
• If internet is down the heater will follow its weekly program which is stored on the
heater. One can easily turn off the WiFi on the heaters and control them manually, so
that the heaters keep an even temperature throughout the whole day and night
• + many other things
To download the app search for “MillNorway” in Appstore or Google Play and install
the app on your device.

8millnorway.com
EN
Before use:
Be aware that the Mill app must be installed before you can connect your heaters to
your WiFi network. You can then simply follow the instructions given in the app when
connecting your heaters. The heaters will connect directly to your router via WiFi with 2,4
Ghz mode b/g/n. Bluetooth is needed for provisioning, so make sure its enabled.
Minimum OS requirement: iOS 8.0 and Android 5.0.
Go to our help desk at millnorway.com for more information or if you have any questions
regarding the Mill app, connecting to WiFi or other relating questions.
ATTENTION! The heaters will be connected directly to your WiFi router and it is
therefore important to make sure the router has sufficient capacity for the number
of active devices connected at the same time.
Color codes (WiFi control light)
The heater has not been connected to WiFi. The heater keeps an even temperature
throughout the whole day and night.
The heater is online in the Mill cloud.
When installing/connecting the Mill-app and cloud, the light will flash in various speed.
This is normal.
The heater has a problem connecting to or finding the WiFi si gnal.
Please do the following:
1. Please turn the heater OFF and ON again.
2. Please restart the WiFi router.
3. Please check the WiFi router to make sure the capacity is sufficient for the number
of active devices connected at the same time.
4. Please make sure 2,4 Ghz is activated. If the problem persists, please get in touch
with support.
The heaters are offline and have no contact with the Mill cloud.
Activating WiFi
See figure 7 on separate illustration sheet
Press «add heater» on the home screen in the Mill-app. Follow the instructions in the app.
Delete WiFi setting
See figure 8 on separate illustration sheet
For CO1200WIFI3 and CO1200WIFI3BLACK: Press and hold WiFi button for 5 seconds.
For CO1500MAXWIFI3: Press and hold until you see Sr in the display.

9
EN
Maintenance
1. For cleaning, always unplug the heater and leave it to cool.
2. Wipe the heater regularly with a damp cloth and dry the surface before turning on the
heater again.
3. The heater must be cleaned at least once a month during the heating season.
CAUTION! The heater should never be immersed in water.
Avoid using detergents to clean the heater.
Never let any water get inside the heater; this can be hazardous.
4. Dust etc. should be removed with a soft cloth.
5. The heater can be stored in a dry and clean place.
6. If the heater stops working, do not attempt to repair it yourself because it can cause a
fire hazard and/or electric shock.
Warranty
Mill offers consumers 5 years warranty for any Mill product from date of purchase by a
consumer. For business customers, a warranty period of 2 years will apply (applicable in
case the end-users are businesses).
This warranty provides the customer with a right to, at Mill's reasonable discretion, either
repair, replacement of a defected product, or alternatively a refund.
The warranty only covers defects that originates from Mill. The customer will therefore not
have a valid warranty claim if the defect is a result of circumstances such as the following:
• Negligent use, misuse, neglect, or careless operation of the product not in accordance
with the Mill user manual.
• Defects caused by transport incurred outside Mill’s responsibility.
• Normal wear and tear, including parts that might wear out over time as for example
batteries for remote controls (if applicable), filters, tubes, and lamps for outdoor heating
etc.
• Damage because of use not in accordance with the rated power and Hz.
• Damage caused by inadequate product maintenance.
• Damage from electrical outages, power surges and/or weather.
• Damage as the result of not installing or assembling the product in accordance with the
Mill user manual.
• Use of parts and accessories, i.e., filter, which are not official Mill certified components.
• Repairs or alterations carried out by parties other than Mill or its authorized agents.
• Minor deviations from the stated quality that are insignificant for the value and soundness
of the product or deviations that the customer could reasonably expect.
• Devices used with third-party software or equipment.
• Software and connectivity issues due to local restrictions in accessing our cloud services.
• Software and connectivity issues due to non-supported third-party devices.

10 millnorway.com
EN
• App or cloud/online service downtime does not fall under warranty.
Mill must provide evidence that the product’s damage has not existed when the product
was sold to the customer within the first year after the purchase.
For the avoidance of doubt, this warranty does not provide the customer or any third party
with any right to damages, compensation nor price reduction of any kind. Mill will not have
any obligation under this warranty to cover any losses incurred by the customer or any
third party.
These warranty terms are only valid for customers, who purchase products through
authorized Mill resellers.
The customer's rights and remedies pursuant to applicable mandatory law will not be
limited nor affected by this warranty.
The seller will handle the warranty claim on behalf of Mill. To make a claim under this
warranty, an end-consumer has to follow the steps described below.
Claims Process / Required Documentation
1. Contact the Mill Authorised Reseller where you purchased the product. Bring your
original receipt for the purchase, serial number of the product, and the faulty product.
2. The Mill Authorised Reseller tests the product and evaluates if the claim is covered by
the end-consumer warranty.
3. If the claim is covered by the warranty, the Mill Authorised Reseller, in accordance with
instructions from Mill and based on consumer law, decides whether to repair, replace
or refund the product.
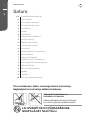
Waste disposal
The symbol indicates that this product is not to be disposed of together with household
waste. This product must be delivered to a recycling service or container for electrical
appliances and electronic equipment. This is done to avoid health risks and prevent harm
to the environment. Local businesses (or the environmental station in your neighborhood)
are required by law to accept and recycle such products, as a means of environmentally
sound disposal.
Mill International B.V.
De Giesel 5
6081 PG Haelen
The Netherlands
www.millnorway.com

1
SL
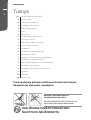
Vsebina
23
4
4
4
4
5
5
5
5
6
6
6
7
7
7
7
8
8
8
9
9
10
Pomembni varnostni podatki
Specifikacije
Pred prvo uporabo
Prva uporaba
Opis grelnika
Deli
Montaža
Umerjanje temperature
Spominska funkcija
Ponastavitev grelnika
Funkcija »odprtega okna«
Navodila za uporabo
Uporaba brez WiFi povezave
Otroška zaščita
Komercialno zaklepanje
Uporaba z WiFi povezavo
Barvne oznake (nadzorna lučka WiFi)
Aktiviranje WiFi
Pobrišite WiFi nastavitve
Vzdrževanje
Garancija
Odlaganje odpadkov
Pozorno preberite navodila za uporabo, preden pricnete z
uporabo proizvoda. Skrbno shranite ta navodila za kasnejšo
uporabo.
TA NAVODILA ZA UPORABO SHRANITE ZA
KASNEJŠEPREVERJANJE!
NIKOLI SE NE DOTIKAJTE GRELNIKA ALI
OHIŠJA Z MOKRIMI ROKAMI!
NE POKRIVAJTE GRELNIKA, DA
NE PRIDE DO PREGREVANJA.

2millnorway.com
SL
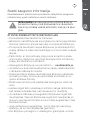
Pomembni varnostni podatki
Pri uporabi elektronskih aparatov je potrebno upoštevati
splošne varnostne smernice, še posebej v prisotnosti otrok.
OPOZORILO! Za preprečevanje električnega udara
in škode zaradi vročine, je potrebno vedno izključiti
vtič pred premikanjem ali čiščenjem grelnika.
SKRBNO PREBERITE NAVODILA
• Ta proizvod je namenjen zgolj domači uporabi.
• Grelnik priključite na hišno omrežno napajanje, kot je nave-
deno na grelniku.
• Novi grelniki ob prvi uporabi oddajajo določen vonj. To bo
po krajšem času izginilo in je povsem neškodljivo.
• Preverite, če so v grelne elemente grelnika padli koščki em-
balažne pene ali lepenke. Te koščke je potrebno odstraniti,
da ne pride do neprijetnih vonjev.
• Preprečite pregrevanje grelnika — ne pokrivajte.
• Vedno izklopite grelnik in ga iztaknite iz vtičnice, če ga dalj
časa ne uporabljate.
• Bodite še posebej pozorni, če se grelnik uporablja v pros-
torih, kjer se nahajajo otroci, invalidi ali starejši.
• Grelnik ne sme biti postavljen neposredno pod električno
vtičnico.
• Kabla ni dovoljeno polagati pod preproge. Položen mora biti
tako, da se nihče ne more spotakniti obenj.
• Če sta kabel ali vtikač poškodovana, se grelnika ne sme
uporabljati.
• Grelnika se ne sme uporabljati, če je padel na tla ali je kakor
kolipoškodovan in okvarjen.
• Poškodovani kabel mora popraviti proizvajalec ali strokovn-
jak, da ne pride do nevarnih situacij.
• Ne uporabljajte podaljškov kabla, saj se lahko pregrejejo in.

3
SL
• Nikoli ne pokrivajte prezračevalnih odprtin na grelniku.
Preprečite požarno nevarnost, tako da preprečite blokiranje
ali pokrivanje prezračevalnih odprtin. Grelnik je potrebno
uporabljati v prostorih z običajnimi ravnimi tlemi.
• Grelnika ni dovoljeno namestiti v bližini vnetljivih materialov,
saj obstaja nevarnost požara.
• Grelnika ni dovoljeno uporabljati v prostorih, kjer se hranijo
bencin, laki, barvila ali druge vnetljive snovi, npr. v garaži.
• Nikoli se ne dotikajte električnega grelnika z mokrimi
rokami. Namestite ga tako, da se ga ne more dotakniti
osebe med tuširanjem ali v kadi.
• Nekateri deli izdelka se lakho zelo segrejejo in povzročijo
opekline. Posebno pozornost je potrebno posvetiti otrokom
in ranljivim osebam.
• Pred premikanjem je grelnik potrebno izključiti, iztakniti vtič,
grelnik pa se mora ohladiti.
• Ne preobramenite električnih povezav (el. omrežja) grelnika.
Grelnik lahko preobremeni el. tokokrog, če v isto vtičnico
priključite tudi drugi električne naprave.
• Ne uporabljajte grelnika v majhnih prostorih, kjer se nehaja-
jo osebe, ki prostora ne morajo zapustiti same, razen če so
pod stalnim nadzorom.
• Proizvoda ne smejo uporabljati otroci mlajši od 8 let in
osebe z omejenimi fizičnimi ali umskimi zmožnostmi ali
neizkušene oz. nepoučene osebe, razen če so pod nadzo-
rom ali so bile poučene o varni uporabi proizvoda ter ra-
zumejo s tem povezane nevarnosti.
• Otroci se ne smejo igrati s proizvodom. Otroci brez nadzora
ne smejo čistiti ali vzdrževati proizvoda.
• Otroci mlajši od 3 let se ne smejo približevati proizvodu,
razen če so pod stalnim nadzorom.
• Otroci stari od 3 do 8 let lahko proizvod izključijo/vključijo
zgolj, če je grelnik nameščen v skladu z navodili za uporabo
in so bili otroci poučeni o varni uporabi oz. so med uporabo
pod nadzorom ter razumejo s tem povezane nevarnosti.
• Ne uporabljajte tega grelnika v neposredni bližini kadi, tuša
ali plavalnega bazena.

4millnorway.com
SL
• Ne uporabljajte, če so na grelniku vidni znaki poškodb.
• OPOZORILO: Da bi zmanjšali nevarnost požara, naj bodo
tekstil, zavese ali kateri koli drug vnetljiv material oddaljeni
najmanj 1 m od izhoda zraka.
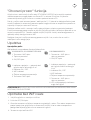
Specifikacije
Modell Termostat Barva Jakost toka Moč (W) WiFi IP
CO1200WIFI3 WiFi Beta 220-240V~, 50-60Hz 1200 802.11 b/g/n Ne
CO1200WIFI3BLACK WiFi Črna 220-240V~, 50-60Hz 1200 802.11 b/g/n Ne
CO1500MAXWIFI3 WiFi Beta 220-240V~, 50-60Hz 1500 802.11 b/g/n IPx4
Največja moč oddajanja: ≤20dBm
Frekvenčni razpon: 24002483.5MHz
Pred prvo uporabo
Po razpakiranju grelnika preverite, če je bil izdelek poškodovan med prevozom. Stopite v
stik s preprodajalcem ali uvoznikom, če odkrijete vidne poškodbe na izdelku.
Zunanjo embalažo shranite za kasnejši prevoz grelnika. Embalažo je potrebno odlagati na
primeren način. Plastične vreče shranite stran od dosega otrok.
Prva uporaba
Ob prvi vključitvi ali vključitvi po daljšem obdobju mirovanja, lahko grelnik kratek čas
oddaja vonj po ožganem. To je normalno.
Pred uporabo pozorno preberite vsa navodila. Shranite navodila za uporabo za kasnejše
preverjanje.
Normalno je tudi, da grelnik med segrevanjem in ohlajanjem proizvaja določene
»zvoke«.
Opis grelnika
Glej sliko 1 na posebnem listu z diagramom
CO1200WIFI3, CO1200WIFI3BLACK
1. Oddajanje toplote
2. LED prikaz
3. Termostat + WiFi gumb
4. Gumb za nastavitve
5. Vklop/izklop
6. Noge (aluminij)
CO1500MAXWIFI3
1. Oddajanje toplote
2. LED prikaz
3. Termostat + WiFi gumb +
gumb za nastavitve
4. Vklop/izklop
5. Noge (aluminij)

5
SL
Deli
Glej sliko 2 na posebnem listu z diagramom
• 8 vijakov (prednameščenih)
• 2 nosilca nožic
• 2 tirnici za nožice
Montaža
Glej sliko 3 na posebnem listu z diagramom
1. Odstranite prednameščene vijake z obeh nožic, preden le-te vstavite v nosilce, da
dobite stabilno oporo.
2. Pritrdite nožice v nosilce s privitjem 2 vijakov v vsakega od nosilcev.
3. Odstranite prednameščene vijake z grelnika in ga pazljivo položite na glavo, da
namestite nožice.
4. Na vsakega od nosilcev je potrebno namestiti po 2 vijaka.
5. NIKOLI NE UPORABLJAJTE GRELNIKA, DOKLER TRDNO NE PRIVIJETE NOG.
Umerjanje temperature
Glej sliko 4 na posebnem listu z diagramom
Pride lahko do odstopanja med temperaturo, ki jo zabeleži grelnik in dejansko temperaturo
v prostoru. To se lahko zgodi iz več razlogov, najpogostejši pa je, da je grelnik postavljen
v določeni razdalji od mesta, kjer se nahajate. Če na primer temperaturo nastavite na 22
stopinj, lahko pričakujete, da bo temperatura enaka kot tam, kjer se nahaja kavč. Vendar
pa je temperaturni senzor nameščen na sam proizvod, zato lahko pride do odstopanj v
temperaturi. Za odpravo tega so vsi grelniki Mill opremljeni s funkcijo umerjanja, ki vam
omogoča nastavitev temperature, ki jo zaznava grelnik.
Opomba: Temperatura v prostoru se mora ustaliti, preden pričnete z umerjanjem.
Za CO1200WIFI3 in CO1200WIFI3BLACK: Pritisnite ○2 -krat in uporabite + ali za
nastavitev dejanske temperature, ki je zaznana v prostoru. Potrdite z○ali počakajte 15
sekund za samodejno potrditev.
Za CO1500MAXWIFI3: Pritisnite in držite , dokler na zaslonu ne vidite CAL. Z + ali
- nastavite dejansko temperaturo v prostoru. Potrdite z ali počakajte 15 sekund za
samodejno potrditev.
Spominska funkcija
Če je grelnik povezan z WiFi, se bo po začasni prekinitvi električnega napajanja samodejno
ponovno povezal z WiFi (če so shranjene vse temperature).

6millnorway.com
SL
Ponastavitev grelnika
Glej sliko 5 na posebnem listu z diagramom
Izklopite glavno stikalo grelnika. Znova vklopite grelec in v 5 sekundah pritisnite
ter držite○. Po 20 sekundah se na zaslonu prikaže "Fr", ko se prikaže lahko izpustite○in
grelec se ponastavi na tovarniške nastavitve.
Funkcija »odprtega okna«
Grelnik ima funkcijo »odprtega okna«, ki se vključi takoj, ko zabeleži nenaden padec
temperature za več kot 5 stopinje Celzija v 15 minutah. Grelnik bo samodejno prenehal z
gretjem, na zaslonskem prikazu pa se bo izpisalo FO.
V načinu odprtega okna bo ohranil 5 ° C (da se izognete poškodbam zaradi zmrzali). Grelec
se bo samodejno znova zagnal, če se temperatura v 15 minutah poveča za vsaj 3 stopinje.
Grelec lahko preklopite nazaj v običajni način, tako da enkrat pritisnete gumb za nastavitve.
Funkcijo odprtega okna lahko onemogočite / omogočite s pritiskom in držanjem gumba
za dokler se na zaslonu ne prikaže "Fo". Funkcijo odprtega okna lahko tudi onemogočite /
omogočite v aplikaciji, če je nastavljena na WiFi. Grelec bo ostal v načinu odprtega okna
največ 1 uro, nato pa se bo vrnil v običajni način ogrevanja.
Navodila za uporabo
Nadzorna plošča
Glej sliko 6 na posebnem listu z diagramom
CO1200WIFI3, CO1200WIFI3BLACK
1. Termostat in WiFi gumb
2. Gumb za nastavitve
3. Gumb za vklop/izklop
1. Indikator napajanja — kaže, če grel-
nik uporablja napajanje ali ne
2. Indikator vklopa / izklopa
3. WiFi indikator
4. Želena sobna temperatura
5. Termostat in WiFi gumb
CO1500MAXWIFI3
1. Termostat + WiFi gumb + gumb
za nastavitve
2. Gumb za vklop/izklop
1. Indikator napajanja — kaže, če
grelnik uporablja napajanje ali ne
2. Indikator vklopa / izklopa
3. WiFi indikator
4. Želena sobna temperatura
5. Termostat + WiFi gumb + gumb
za nastavitve
6. LED lučke prikazujejo, koliko
energije porabi grelec
OPOZORILO! NOŽICA MORA BITI PRED PRIČETKOM UPORABE NAMEŠČENA
USTREZNO IN Z NAVODILI ZA UPORABO!

7
SL
Uporaba brez WiFi povezave
1. Vtaknite vtič v ozemljeno vtičnico.
2. Pritisnite gumb za vklop/izklop.
3. Zavrtite termostat do želene temperature ter opazujte zaslonski prikaz. Takoj, ko sobna
temperatura pade pod to raven, se bo grelnik samodejno ponovno vključil. Ko temper-
atura v prostoru ponovno doseže želeno vrednost, se bo grelnik sam izključil.
4. Termostat obsega vrednosti od 5 do 35°C.
5. Če želite spremeniti temperaturo v prostoru, ponovite korak 3.
6. Grelnik ima zaščito pred pregrevanjem, ki izključi napravo, če postanejo posamezni deli
zelo vroči.
7. Za izklop grelnika pritisnite gumb za vklop/izklop. Če se grelnik dlje časa ne uporablja,
izvlecite vtič.
Otroška zaščita
V aplikaciji lahko omogočite / onemogočite otroško zaščito. Poleg tega lahko tudi samem
grelcu omogočite / onemogočite otroško zaščito. Izklopite grelec s pomočjo glavnega
stikala za vklop. Znova vklopite grelec in v 5 sekundah pritisnite ter držite○.
Po treh sekundah se na zaslonu prikaže "CH", v tem trenutku lahko izpustite○ in grelec
bo omogočil / onemogočil otroško zaščito.
Komercialno zaklepanje
Komercialno zaklepanje lahko omogočite in onemogočite znotraj aplikacije. Poleg tega
lahko omogočite / onemogočite komercialno zaklepanje tudi na samem grelniku. Izklopite
grelec s pomočjo glavnega stikala za vklop. Znova vklopite grelec in v roku 5 sekund
pritisnite in držite○. Po 10 sekundah se na zaslonu prikaže "CO", ko ga zagledate lahko
izpustite.○in grelec omogoči / onemogoči komercialno zaklepanje.
Uporaba z WiFi povezavo
Na voljo je brezplačna aplikacija za nalaganje za iOS in Android.
Ko priključite grelnik na na napravo z iOS/Android, lahko storite naslednje:
• Nadzorujete vse vaše grelnike, ki se nahajajo na različnih lokacijah. Vse regulira
aplikacija Mill (za istega uporabnika).
• Nastavite tedenske programe (ali uporabljate standarden program, ki je že na voljo v
aplikaciji) s 4 načini: Comfort, Sleep, Away and OFF.
• Nastavite posamezne temperature za različne načine v vsakem prostoru.
• Prekličite nastavljene programe za celotno hišo, posamezne sobe ali določen
• grelnik.
Programa ni potrebno spreminjati, če se kakšen dan vrnete domov prej kot običajno.
• Omogočite počitniški način za varčevanje z energijo, ko ste odsotni. Aplikacija bo
samodejno povišala temperaturo v vaši hiši, preden se vrnete domov.
• Delite svojo hišo z drugimi družinskimi člani, kar olajša reguliranje.
• Če internet ne deluje, grelec sledi svojemu tedenskemu programu, ki je shranjen na

8millnorway.com
SL
grelniku. Lahko izključite WiFi na grelnikih in jih regulirate ročno, tako da se ohranja
enaka temperatura skozi cel dan in noč.
• + Veliko drugih stvari.
Za nalaganje aplikacije iščite “MillNorway” v Appstore ali Google Play in namestite
aplikacijo na vašo napravo.
Pred uporabo:
Preden lahko grelnik priključite na WiFi omrežje morate naložiti aplikacijo Mill. Nato med
priključitvijo grelnika zgolj sledite navodilom v aplikaciji. Grelnik se bo samodejno povezal
na vaš usmerjevalnik prek WiFi z 2,4 Ghz način b/g/n. Za nadziranje je potreben Bluetooth,
zato poskrbite, da je omogočen. Minimalna zahteve za OS: iOS 8.0 in Android 5.0.
Pojdite na naslov za spletno pomoč millnorway.com za več informacij, ali če imate
vprašanja v zvezi z aplikacijo Mill, povezovanjem z WiFi, itd.
POZOR! Grelnik bo neposredno povezan z vašim WiFi usmerjevalnikom, zato mora
le-ta imeti ustrezno zmogljivost v primeru več povezanih grelnikov ali drugih naprav.
Barvne oznake (nadzorna lučka WiFi)
Grelnik ni bil povezan z WiFi. Grelnik vzdržuje enako temperaturo skozi cel dan in noč.
Grelnik je povezan s spletom v oblaku Mill.
Med nalaganjem/povezovanjem aplikacije Mill in oblaka, bo lučka utripala z različnimi
hitrostmi. To je normalno.
Grelnik ima težave pri iskanju ali povezovanju s WiFi signalom.
Storite naslednje:
1. Izključite in nato ponovno vključite grelnik.
2. Ponovno vklopite WiFi usmerjevalnik.
3. Preverite, če je zmogljivost WiFi usmerjevalnika zadostna za istočasno povezovanje
več grelnikov ali drugih naprav.
4. 2,4 Ghz mora biti aktivirano. Če težava ni odpravljena, se obrnite na podporo.
Grelniki niso povezani s spletom in nimajo stika z oblakom Mill.
Aktiviranje WiFi
Glej sliko 7 na posebnem listu z diagramom
Pritisnite «dodaj grelnik» na začetnem zaslonskem prikazu aplikacije Mill. Sledite navodilom
v aplikaciji.
Pobrišite WiFi nastavitve
Glej sliko 8 na posebnem listu z diagramom
Za CO1200WIFI3 in CO1200WIFI3BLACK: Pritisnite in držite gumb WiFi za 5 sekunde.
Za CO1500WIFI3MAX: Pritisnite in držite dokler na zaslonu ne vidite Sr.
Strona się ładuje...
Strona się ładuje...
Strona się ładuje...
Strona się ładuje...
Strona się ładuje...
Strona się ładuje...
Strona się ładuje...
Strona się ładuje...
Strona się ładuje...
Strona się ładuje...
Strona się ładuje...
Strona się ładuje...
Strona się ładuje...
Strona się ładuje...
Strona się ładuje...
Strona się ładuje...
Strona się ładuje...
Strona się ładuje...
Strona się ładuje...
Strona się ładuje...
Strona się ładuje...
Strona się ładuje...
Strona się ładuje...
Strona się ładuje...
Strona się ładuje...
Strona się ładuje...
Strona się ładuje...
Strona się ładuje...
Strona się ładuje...
Strona się ładuje...
Strona się ładuje...
Strona się ładuje...
Strona się ładuje...
Strona się ładuje...
Strona się ładuje...
Strona się ładuje...
Strona się ładuje...
Strona się ładuje...
Strona się ładuje...
Strona się ładuje...
Strona się ładuje...
Strona się ładuje...
Strona się ładuje...
Strona się ładuje...
Strona się ładuje...
Strona się ładuje...
Strona się ładuje...
Strona się ładuje...
Strona się ładuje...
Strona się ładuje...
Strona się ładuje...
Strona się ładuje...
Strona się ładuje...
Strona się ładuje...
Strona się ładuje...
Strona się ładuje...
Strona się ładuje...
Strona się ładuje...
Strona się ładuje...
Strona się ładuje...
Strona się ładuje...
Strona się ładuje...
Strona się ładuje...
Strona się ładuje...
Strona się ładuje...
Strona się ładuje...
Strona się ładuje...
Strona się ładuje...
Strona się ładuje...
Strona się ładuje...
Strona się ładuje...
Strona się ładuje...
Strona się ładuje...
Strona się ładuje...
Strona się ładuje...
Strona się ładuje...
Strona się ładuje...
Strona się ładuje...
Strona się ładuje...
Strona się ładuje...
Strona się ładuje...
Strona się ładuje...
Strona się ładuje...
Strona się ładuje...
Strona się ładuje...
Strona się ładuje...
Strona się ładuje...
Strona się ładuje...
Strona się ładuje...
Strona się ładuje...
Strona się ładuje...
Strona się ładuje...
Strona się ładuje...
Strona się ładuje...
Strona się ładuje...
Strona się ładuje...
Strona się ładuje...
Strona się ładuje...
Strona się ładuje...
Strona się ładuje...
Strona się ładuje...
Strona się ładuje...
Strona się ładuje...
Strona się ładuje...
Strona się ładuje...
Strona się ładuje...
Strona się ładuje...
Strona się ładuje...
Strona się ładuje...
Strona się ładuje...
Strona się ładuje...
Strona się ładuje...
Strona się ładuje...
Strona się ładuje...
Strona się ładuje...
Strona się ładuje...
Strona się ładuje...
Strona się ładuje...
Strona się ładuje...
Strona się ładuje...
Strona się ładuje...
Strona się ładuje...
Strona się ładuje...
Strona się ładuje...
Strona się ładuje...
Strona się ładuje...
Strona się ładuje...
Strona się ładuje...
Strona się ładuje...
Strona się ładuje...
Strona się ładuje...
Strona się ładuje...
Strona się ładuje...
Strona się ładuje...
Strona się ładuje...
Strona się ładuje...
Strona się ładuje...
Strona się ładuje...
Strona się ładuje...
Strona się ładuje...
-
 1
1
-
 2
2
-
 3
3
-
 4
4
-
 5
5
-
 6
6
-
 7
7
-
 8
8
-
 9
9
-
 10
10
-
 11
11
-
 12
12
-
 13
13
-
 14
14
-
 15
15
-
 16
16
-
 17
17
-
 18
18
-
 19
19
-
 20
20
-
 21
21
-
 22
22
-
 23
23
-
 24
24
-
 25
25
-
 26
26
-
 27
27
-
 28
28
-
 29
29
-
 30
30
-
 31
31
-
 32
32
-
 33
33
-
 34
34
-
 35
35
-
 36
36
-
 37
37
-
 38
38
-
 39
39
-
 40
40
-
 41
41
-
 42
42
-
 43
43
-
 44
44
-
 45
45
-
 46
46
-
 47
47
-
 48
48
-
 49
49
-
 50
50
-
 51
51
-
 52
52
-
 53
53
-
 54
54
-
 55
55
-
 56
56
-
 57
57
-
 58
58
-
 59
59
-
 60
60
-
 61
61
-
 62
62
-
 63
63
-
 64
64
-
 65
65
-
 66
66
-
 67
67
-
 68
68
-
 69
69
-
 70
70
-
 71
71
-
 72
72
-
 73
73
-
 74
74
-
 75
75
-
 76
76
-
 77
77
-
 78
78
-
 79
79
-
 80
80
-
 81
81
-
 82
82
-
 83
83
-
 84
84
-
 85
85
-
 86
86
-
 87
87
-
 88
88
-
 89
89
-
 90
90
-
 91
91
-
 92
92
-
 93
93
-
 94
94
-
 95
95
-
 96
96
-
 97
97
-
 98
98
-
 99
99
-
 100
100
-
 101
101
-
 102
102
-
 103
103
-
 104
104
-
 105
105
-
 106
106
-
 107
107
-
 108
108
-
 109
109
-
 110
110
-
 111
111
-
 112
112
-
 113
113
-
 114
114
-
 115
115
-
 116
116
-
 117
117
-
 118
118
-
 119
119
-
 120
120
-
 121
121
-
 122
122
-
 123
123
-
 124
124
-
 125
125
-
 126
126
-
 127
127
-
 128
128
-
 129
129
-
 130
130
-
 131
131
-
 132
132
-
 133
133
-
 134
134
-
 135
135
-
 136
136
-
 137
137
-
 138
138
-
 139
139
-
 140
140
-
 141
141
-
 142
142
-
 143
143
-
 144
144
-
 145
145
-
 146
146
-
 147
147
-
 148
148
-
 149
149
-
 150
150
-
 151
151
-
 152
152
-
 153
153
-
 154
154
-
 155
155
-
 156
156
-
 157
157
-
 158
158
-
 159
159
-
 160
160


MILL MAX WIFI 1500W GULVVARMER Instrukcja obsługi
- Kategoria
- Ogrzewacze pomieszczeń
- Typ
- Instrukcja obsługi


