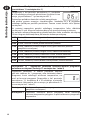
Danfoss TP5001, TP5001-RF & TP5001M Instrukcja instalacji
- Typ
- Instrukcja instalacji

TP5001 Range
Electronic 5/2 day programmable room thermostat
Mains, Battery and RF versions
User Instructions
Instrukcja Użytkownika
Vartotojo instrukcija
Посібник користувача
GB
PL
LT
Lietošanas pamācība
Kullanıcı Talimatları
Uživatelská příručka
UA
LV
TR
CZ

2
An introduction to your programmable room thermostat
Your programmable room thermostat allows you to programme
di erent temperatures at di erent time periods. You can programme
one set of times and temperatures for week days with a di erent set of
temperatures for weekend days, this is referred to as 5/2 day operation.
The thermostat can also be set up by your installer to provide one set
of times and temperatures that are repeated each day of the week. This
is referred to as 24 hour operation.
The thermostat can also be set by you to provide two di erent
programming blocks which can then be assigned to any day of the
week, this is referred to as A/B programme operation.
All thermostats can be set by your installer to provide up 2, 4 or 6 time
and temperature settings each day.
All thermostats feature useful overrides, including a programmable
frost setting.
Your thermostat has some advanced features which the installer will
set-up if they are required. There are also a number of advanced features
which can be set up by you. These advanced settings alter the way that
your thermostat operates, some also a ect the programming functions
and the user overrides. Please read the User Advanced Programming
instructions before programming the unit (see page 10).
Preset programmes
Your TP5001 comes ready programmed with a set of operating times and
temperatures which suit most people. Please remember that some of the
options available will depend on how the installer has set up the unit.
User Instructions
User Instructions
GB
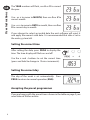
Weekdays (Mon-Fri) Weekend (Sat-Sun)
Event Time Temp. °C Event Time Temp. °C
1 06:30 20 1 07:30 20
2 08:30 15 2 09:30 20
3 11:30 20 3 11:30 20
4 13:30 15 4 13:30 20
5 16:30 21 5 16:30 21
6 22:30 15 6 22:30 15
Note: these are also times for Block
“A” programmes
Note: these are also times for Block “B”
programmes

3
Note: If set up for 4 events per day, events 3 & 4 are skipped. If set up
for 2 events per day, events 2, 3, 4 & 5 are skipped. In both cases the
events are re-numbered.
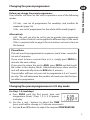
Before you start
Open the ap on the front of the programmer and
press the RESET button with a non-metallic object
until the display goes blank. This will ensure that
the factory programmes are set and that the micro-
computer in the product is operating correctly.
Customising the display
For the sake of clarity, the instructions assume that the display setting
uses a 24 hour clock, °C and that days of the week are numbered 1-7,
(where 1 is Monday). All of these settings can be personalised after the
thermostat has been programmed, see pages 8 and 9.
Setting the correct date and time
Your TP5001 incorporates a real time clock with calendar function that
automatically changes time in both Spring and Autumn. The time and
date is set in the factory for the CET time zone, and does not normally
require adjustment. If you live in another time zone refer to “Time zone
o set” on page 11. However, should it be found necessary to adjust
time or date for any other reason refer to the following instructions.
User Instructions
GB
RESET
Setting the date
Press and hold Λ and PROG for 3 seconds, to
display date in dd/mm/yy format.

4
The YEAR number will ash, use Λ or V to correct
the year.
Use - or + to move to MONTH, then use Λ or V to
correct month.
Use - or + to move to DATE in month, then use Λ or
V to correct day in month.
If you attempt to select an invalid date the unit software will reject it
and apply the nearest valid date. It is recommended that date is set in
the order, yy/mm/dd.
Setting the correct time
After setting the date, press PROG to display the
time. The time display will ash on and o .
Use the + and - buttons to set the correct time
(press and hold to change in 10 min. increments).
Setting the correct day
The day of the week is set automatically. Press
PROG to return to normal operation (RUN).
User Instructions
GB
Accepting the preset programmes
If you are happy with the preset times shown in the table on page 2 you
need take no further action.

5
User Instructions
GB
Changing the preset programmes
Before you change the preset programmes
Your installer will have set the unit to operate in one of the following
modes:
• 5/2 day - one set of programmes for weekdays and another for
weekends (page 5-6).
• 24 hr - one set of programmes for the whole of the week (page 6).
Alternatively
• A/B - The unit can also be set by you to provide two programme
blocks, either of which can be applied to di erent days of the week.
If this is required refer to page 6 for instructions on how to turn on
this feature.
Please Note
The unit must be programmed in sequence, event times cannot be
set out of sequence.
If you want to leave a preset time as it is, simply press PROG to
move to the next setting.
If you want to return the unit to RUN, press PROG and hold until
the colon in the display blinks. Alternatively leave alone and the
unit will automatically return to RUN after 2 minutes.
Your installer will have set your unit to programme 6, 4 or 2 events
per day. This will determine the number of events per day that you
are able to programme.
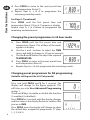
Changing the preset programmes in 5/2 day mode
For Days 1-5 (weekdays)
a) Press PROG until the rst preset time and
temperature (Event 1 Days 1, 2, 3, 4, 5) appears
in display.
b) Use the + and - buttons to adjust the TIME
(press and hold to change in 10 minute increments).
c) Use the Λ and V buttons to adjust the required TEMPERATURE.

6
User Instructions
GB
d) Press PROG to move to the next preset time
and temperature (Event 2).
e) Repeat steps b, c, & d to programme the
remaining weekday events.
For Days 6-7 (weekends)
Press PROG until the rst preset time and
temperature (Event 1 Days 6-7) appears in display.
Repeat steps b, c, & d above to programme the
remaining weekend events.
Changing the preset programmes in 24 hour mode
a) Press PROG until the rst preset time and
temperature (Event 1 for all days of the week)
appears in display.
b) Use the + and - buttons to adjust the TIME
(press and hold to change in 10 min increments).
c) Use the Λ and V buttons to adjust the required
TEMPERATURE.
d) Press PROG to move to the next preset time
and temperature (Event 2).
e) Repeat steps b, c, & d to programme the remaining events.
Changing preset programmes for AB programming
(Installer setting must be in 5/2 day mode)
Press and hold PROG and V for 3 seconds. The
display will change to the gure opposite. This
will take you into User Advanced Programming
option 1.
Use Λ and V keys to enable or disable the function
(1=enabled, 0=disabled).
Press PROG for 5 seconds until the display changes
and the colon in the display ashes to con rm that
you are in RUN.
Press PROG once, the display will change to show
the default days assigned to programme “A” (days
1, 2, 3, 4 & 5).

7
Use the + and - keys to scroll forwards or backwards
through the days of the week.
To deselect a day press V, (for example Day 2). To
select a day press Λ (for example Day 7).
Any deselected days are automatically assigned to programme “B”.
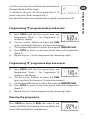
Programming “A” programme days and events
a) Press PROG until the rst preset time and
temperature (Event 1 for Programme A)
appears in display.
b) Use the + and - buttons to adjust the TIME
(press and hold to change in 10 minute increments).
c) Use the Λ and V buttons to adjust the required TEMPERATURE.
d) Press PROG to move to the next preset time and temperature
(Event 2).
e) Repeat steps b, c, & d to programme the remaining events.
Programming “B” programme days and events
a) Press PROG until the rst preset time and
temperature (Event 1 for Programme B)
appears in the display.
b) Use the + and - buttons to adjust the TIME
(press and hold to change in 10 minute increments).
c) Use the Λ and V buttons to adjust the required TEMPERATURE.
d) Press PROG to move to the next preset time and temperature
(Event 2).
e) Repeat steps b, c, & d to programme the remaining events.
Running the programme
Press PROG to return to RUN, the colon in the
display will blink. The heating will now follow the
times and temperatures programmed.
User Instructions
GB

8
User Instructions
GB
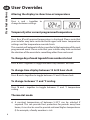
User Overrides
Altering the display to show time or temperature
Press + and - together to
change between settings.
Temporarily alter current programmed temperature
Press Λ or V until required temperature is displayed. Please note that
your installer may have restricted both upper and lower temperature
settings and the temperature override limits.
This override will automatically be cancelled at the beginning of the next
programmed event. Please note that your installer may have restricted
the duration of the override to something other than next event.
To change day of week legends from numbers to text
Press Λ and - together to toggle between day numbers and text.
To change time display between 12 & 24 hour clock
Press Λ and + together to toggle between 12 and 24 hour clock.
To change between °C and °F scaling
Press V and - together to toggle between °C and °F temperature
scaling.
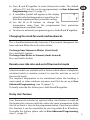
Thermostat mode
a) A constant temperature of between 5-30°C can be selected if
required. This can provide frost protection for periods away from
home, it can also be used to provide untimed higher temperatures
if, for example, a family member is sick.

9
User Instructions
GB
b) Press Λ and V together to enter thermostat mode. The default
setting is 8°C, but this can be reprogrammed, see User Advanced
Programming, step 10, (page 11).
c) A snow ake symbol will appear in the display
when the selected temperature is equal to or less
than the programmed frost protection setting.
d) Use the Λ or V buttons to change the
temperature away from the programmed frost protection
temperature to another value.
e) To return to automatic programming press both Λ and V together.
Changing the clock forwards and backwards
This is handled automatically, however, if the manual changeover has
been selected follow the instructions below.
To change from Summer to Winter (clocks back)
Press and hold - button.
To change from Winter to Summer (clocks forward)
Press and hold + button.
Remote override into and out of thermostat mode
Selected models are available with a feature which allows a telephone
activated switch or window contacts to step the unit into or out of
thermostat mode.
The required temperature to be maintained when the building is
unoccupied, or when windows are open, must rst be set up in User
Advanced Programming, step 10, (page 11).
To locally override this feature press both Λ and V together.
Delay start feature
Your thermostat includes an optional delay start feature to hold o
the heating for a time on mild days when the room temperature at the
start of an event is close to the programmed value. If you have enabled
this function it can be overridden by pressing either Λ or V buttons.
To enable this feature, please refer to User Advanced Programming,
step 11, (page 12).

10
User Instructions
GB
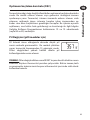
Optimum start control (OSC)
Your thermostat includes an optional optimum start control. This
feature allows you to set the time at which you require a room
temperature by. The thermostat then calculates how soon before the
event time the system must be turned up to ensure that the room is at
the temperature by the required time. A full description of this and how
to enable it and set it up is given in User Advanced Programming,
steps 12 & 13, (page 12 and 13).
Battery replacement (battery models only)
When batteries are low a battery symbol will
appear on the display. You have 15 days to replace
the batteries before the unit shuts down. When
replacing batteries ensure that only high quality
alkaline cells are use.
IMPORTANT: After replacing the batteries press and release the RESET
button to restart the unit. All date, time, programming and override
settings are maintained for the life of the product.
User Advanced Programming
Options
Important: The thermostat has been set in the factory to suit most
situations, however, there are additional optional settings which can
improve the comfort, convenience and energy e ectiveness of your
thermostat. These are set in the User Advanced Programming and
Installer Advanced Programming modes.
To access User Advanced Programming
Press and hold V and PROG for 3 seconds. This will take you into
User Advanced Programming. Use + and - keys to scroll backwards
and forwards between options then Λ and V keys to change option
settings. The ashing digit on the right hand of the display indicates
the number of the selected option.

11
User Instructions
GB
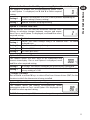
Option 1 - Enable or disable A/B programming (Option 41 set to 5+2)
This enables or disables the A/B programming option. Press
+ until Option 1 is displayed, use Λ and V to select required
setting.
Setting 0
Disabled, unit operates as 5/2 or 24 hour product depending on
installer settings (factory setting)
Setting 1 Enabled: activates A/B programming
Option 3 - Calendar clock rules
This establishes the rules that the automatic calendar clock
follows to calculate changes between summer and winter
time. Press + until Option 3 is displayed, use Λ and V to select
required setting.
Setting 0 Disabled.
Setting 1
Manual: user must change using + to advance and - to retard
displayed time.
Setting 2 European rules. (Factory Setting)
Setting 3 USA rules (2007 onwards)
Setting 4 USA rules (pre-2007)
Option 4 - Time zone o set
This feature allows the time zone to be established and
corrects time display. Press + until Option 4 is displayed, use Λ
and V to select required setting
Setting 0 UK models: this feature should be left at the factory setting of 0.
Setting 1
Central European time models: this feature should be left at the
factory setting of +1:00.
-12 Hours +14 Hours
Rest of World: use Λ and V keys to select o set from Universal time (GMT) for the
location in which the thermostat is being installed.
Option 10 - Frost/ thermostat mode setting
This feature allows the default frost/thermostat mode
temperature to be set. Press + until Option 10 is displayed, use
Λ and V to select required setting.
5-40°C - Factory setting is 8°C, but can be changed to any value between 5 -40°C.

12
User Instructions
GB
Option 11 - Start-up method
Your thermostat can start up the system in three di erent
ways. Press + until Option 11 is displayed, use Λ and V to select
required setting.
Setting 0 - Normal: Heating is turned up or down at the programmed times.
Setting 1 - Optimum start control (OSC) or Comfort Setting: This allows you to
programme the time at which you would like to be up to the required temperature.
The thermostat then calculates how soon before the required time the heating is
turned up. This will vary with weather conditions ranging from a maximum of 120
minutes to 0 minutes before the programmed event time. This setting must be used
together with option 12 to match the optimiser setting to the building in which it
is installed.
Setting 2 - Delay start or Economy Setting: This is an alternative to OSC. Set the
event times in the normal way taking into account the time that the building
takes to heat on an average day. The thermostat monitors switch on time, actual
temperature and wanted temperature and delays the start of the heating if the
actual temperature is close to the programmed temperature.
Option 12 - Optimum start control pre-heat setting (Option 11 set to 1)
Press + until Option 12 is displayed, use Λ and V to select
required setting (only active if Option 11 is set to 1).
The optimum start control must be adjusted to match the
building energy characteristics. Use the Λ and V keys to
selected the required pre-heat period. The table below suggests typical settings.
If the building fails to reach temperature on time, increase the setting by 15
minute steps each day until the correct setting is found.
If the building reaches temperature ahead of time, decrease the setting by 15
minute steps each day until the correct setting is found.
0:15 15 mins, warm air system, well insulated building
0:30 30 mins, warm air system, well insulated building.
0:45 45 mins, warm air system poorly insulated building.
1:00 60 mins, radiator system, light weight well insulated building.
(Factory Setting)
1:15 75 mins, radiator system, light weight medium insulation.
1:30 90 mins, radiator system, medium weight poorly insulation.
1:45 105 mins, radiator system, heavy weight building, well insulated.
2:00 120 mins, radiator system, heavy weight building, poorly insulated.

13
Option 13 - Optimum start control/Delayed start event setting
(Option 11 set to 1 or 2)
The Optimum start or delayed start control can be applied
to event 1 only or to each event of the day which requires
a higher temperature than the previous event. Press + until
Option 13 is displayed, use Λ and V to select required setting
(only active if Option 11 is set to 1 or 2).
Setting 0 Applies only to rst event of day. (Factory Setting)
Setting 1 Applies to each event of the day that requires a higher temperature
compared to previous event.
User Instructions
GB
Overview of installer selectable features which may a ect
the operation of your thermostat
Temperature range limitation
This allows the installer to programme both upper and lower
temperature limits. It may limit the upper and lower temperature that
you are able to set on the thermostat.
Temperature override limitation
This allows the installer to limit the number of degrees that you can
override the programmed temperature by, it also allows the installer
to set rules regarding how long a temperature override will remain in
place.
Keyboard lock
This allows the installer to limit or lock the keyboard to prevent
unauthorised changes to programme values and limits overrides.

14
User Instructions
GB
Resetting the unit
Partial reset: Press RESET (used to restart micro-computer) if display
freezes for any reason. This does not reset any programme, clock or
date. It is recommended that this is done at time of installation.
User full reset: Press RESET whilst holding down PROG button. This
resets event times and any User Advanced Programme setting, but
does not reset time or date.
Installer full reset: This is only available to the installer. In addition
to the above all of the Installer Advanced Programming settings are
returned to factory settings, however, time, date and service due date
are not reset.
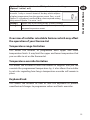
What happens to the unit when batteries fail
If batteries are not changed within 15 days of a low battery warning,
the unit shuts down. In normal circumstances the thermostat turns o
the valve or the boiler it is controlling. In extreme climates turning o
the heating is likely to result in the building freezing up. To prevent this,
the installer can set up the unit to turn ON rather than turn OFF the
heating on battery failure. This will consume more fuel but will prevent
damage occurring to the building. If appropriate please check that the
installer has set this function correctly.
Please note: If you replace the batteries and the LCD does not come
on immediately please check battery orientation. Do not leave
batteries in the product if the display is not active.
If, after changing the batteries, the screen remains blank it is
necessary to carry out a partial reset. See overleaf for details.

15
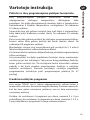
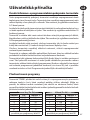
Wstępne informacje o programowalnym termostacie pokojowym
Programowalny termostat pokojowy umożliwia programowanie różnych
temperatur o różnych porach. Można zaprogramować jeden zestaw
czasów i temperatur na dni robocze oraz inny zestaw temperatur na dni
weekendowe, co jest określane mianem programowania 5/2 dni.
Termostat może być również ustawiony przez instalatora w ten sposób,
aby dany zestaw czasów i temperatur był powtarzany każdego dnia
tygodnia. Określa się to mianem programowania 24-godzinnego.
Termostat może być również ustawiony przez użytkownika w taki
sposób, aby zapewniał dwa różne bloki programowe, które można
przypisać do dowolnego dnia tygodnia, co określane jest mianem
programowania A/B.
Wszystkie termostaty mogą zostać ustawione przez instalatora w
taki sposób, aby zapewniały 2, 4 lub 6 ustawień czasu i temperatury
każdego dnia.
Wszystkie termostaty wyposażone są w wygodne funkcje sterowania
ręcznego, włącznie z zabezpieczeniem przeciwzamrożeniowym.
Termostat wyposażony jest w niektóre wysoce precyzyjne funkcje,
które w miarę potrzeby mogą być uruchomione przez instalatora.
Jest również szereg zaawansowanych funkcji, które może uruchomić
sam użytkownik. Te zaawansowane ustawienia zmieniają sposób
funkcjonowania termostatu, niektóre dotyczą również funkcji
programowania oraz sterowania ręcznego przez użytkownika.
Przed próbą zaprogramowania urządzenia (zob. str. 24) prosimy o
przeczytanie instrukcji dot. Zaawansowanego programowania przez
użytkownika.
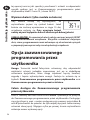
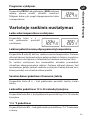
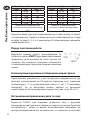
Programy ustawione fabrycznie
Termostat TP5001 został fabrycznie wyposażony w szereg programów
z ustalonymi okresami działania i temperaturami odpowiadającymi
większości użytkowników. Prosimy pamiętać, że dostępność niektórych
opcji zależeć będzie od sposobu ustawienia urządzenia przez instalatora.
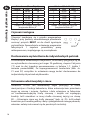
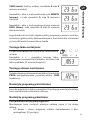
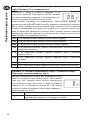
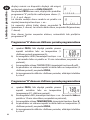
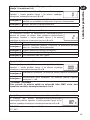
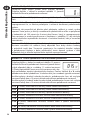
Uwaga: przy ustawieniu na 4 zmiany temperatury dziennie, zmiana 3 oraz
4 są pomijane. Przy ustawieniu na 2 zmiany temperatury dziennie, zmiany
2, 3, 4 oraz 5 są pomijane.
Instrukcja użytkownika
Instrukcja użytkownika
PL

16
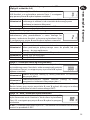
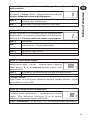
Dni robocze (Pon. - Piątek) Weekend (Sob - Niedz)
Zmiana Czas Temp. °C Zmiana Czas Temp. °C
1 06:30 20 1 07:30 20
2 08:30 15 2 09:30 20
3 11:30 20 3 11:30 20
4 13:30 15 4 13:30 20
5 16:30 21 5 16:30 21
6 22:30 15 6 22:30 15
Uwaga: są to również czasy dla
programów Bloku „A”
Uwaga: są to również czasy dla
programów Bloku „B”
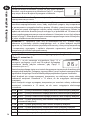
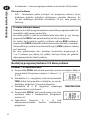
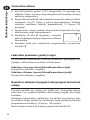
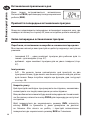
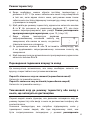
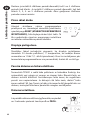
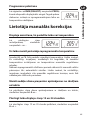
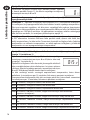
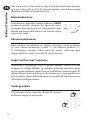
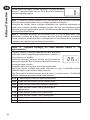
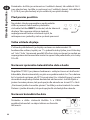
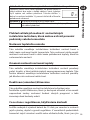
Czynności wstępne
Otworzyć znajdującą się z przodu programatora
klapkę i przy pomocy niemetalowego przedmiotu
nacisnąć przycisk RESET aż do chwili zgaśnięcia
wyświetlacza. Spowoduje to ustawienie programów
fabrycznych i zapewni prawidłową pracę
mikroprocesora, znajdującego się w urządzeniu.
Dostosowanie wyświetlacza do indywidualnych potrzeb
Dla uniknięcia ewentualnych niejasności, w instrukcji przyjmuje się, że
na wyświetlaczu stosowany jest zegar 24-godzinny, stopnie Celsjusza
(°C) oraz że dni tygodnia ponumerowane są kolejno 1-7, (gdzie 1
oznacza poniedziałek). Po zaprogramowaniu termostatu (zob. str.
21 oraz 22) wszystkie te ustawienia mogą zostać dostosowane do
indywidualnych potrzeb użytkownika.
Ustawienie właściwej daty i czasu
Termostat TP5001 ma wbudowany zegar pracujący w czasie
rzeczywistym z funkcją kalendarza, która automatycznie przestawia
zegar na wiosnę i jesienią. Godzina i data ustawiane są fabrycznie
na środkowoeuropejską strefę czasową i zwykle nie wymagają
korekty. Jeśli mieszkasz w innej stre e czasowej, zajrzyj na stronę
80 – „Ustawianie czasu wg strefy czasowej” (zob. str. 25). Jeśli jednak
konieczna jest korekta godziny i daty z jakiegokolwiek innego powodu,
wówczas należy zastosować się do poniższych instrukcji.
RESET
Instrukcja użytkownika
PL

17
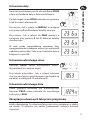
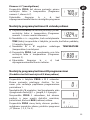
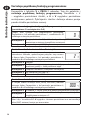
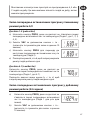
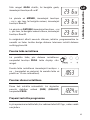
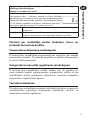
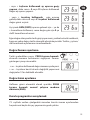
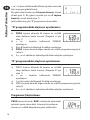
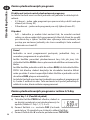
Ustawianie daty
Nacisnąć i przytrzymać przez 3 sekundy Λ oraz PROG
celem wyświetlenia daty w formacie dd/mm/rr.
Zacznie migać numer ROKU, wówczas przy pomocy
Λ lub V ustawić właściwy rok.
Przy użyciu - lub + przejść na MIESIĄC, a następnie
przy pomocy Λ lub V dokonać korekty miesiąca.
Przy użyciu - lub + przejść do DNIA miesiąca, a
następnie przy pomocy Λ lub V dokonać korekty
dnia miesiąca.
W razie próby wprowadzenia nieważnej daty,
oprogramowanie urządzenia odrzuci ją i wprowadzi
najbliższą ważną datę. Zaleca się ustawienie daty w
kolejności rr/mm/dd.
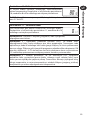
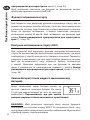
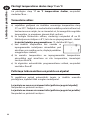
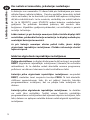
Ustawianie właściwego czasu
Nacisnąć PROG celem wyświetlenia czasu.
Wyświetlany czas zacznie migać.
Przy użyciu przycisków - lub + ustawić właściwy
czas (po naciśnięciu i przytrzymaniu czas będzie się
zmieniać w odstępach 10-minutowych).
Ustawienie właściwego dnia
Dzień tygodnia ustawiany jest automatycznie.
Nacisnąć PROG celem powrotu do normalnego
trybu pracy (RUN).
Akceptacja ustawionych fabrycznie programów
Jeżeli odpowiadają Ci ustawione fabrycznie czasy pokazane w tablicy
na stronie 16 wówczas nie należy podejmować żadnych dalszych
czynności.
Instrukcja użytkownika
PL

18
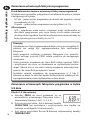
Zmienianie ustawionych fabrycznie programów
Przed dokonaniem zmian w ustawionych fabrycznie programach
Instalator musi uprzednio przygotować urządzenie do pracy w jednym
z następujących trybów:
• 5/2 dni – jeden zestaw programów na robocze dni tygodnia, a drugi
na weekendy (str. 18).
• 24 godz. – jeden zestaw programów na cały tydzień (str. 19).
Alternatywnie
• A/B – urządzenie może zostać ustawione przez użytkownika na
dwa bloki programowe, przy czym każdy z nich można stosować
do różnych dni tygodnia. Sposób uruchomienia w razie potrzeby tej
funkcji podany jest w instrukcji na str. 19.
Pamiętaj
Urządzenie musi być programowane kolejno, czasy poszczególnych
zdarzeń nie mogą być zaprogramowane bez zachowania
kolejności.
Jeżeli pragniesz zachować ustawiony fabrycznie czas wówczas
należy nacisnąć przycisk PROG celem przejścia do następnego
ustawienia.
Celem powrotu urządzenia do stanu RUN należy nacisnąć PROG
i przytrzymać do czasu, aż dwukropek na wyświetlaczu zacznie
migać. Można też nic nie robić i wtedy urządzenie automatycznie
powróci do stanu RUN po upływie 2 minut.
Instalator ustawił urządzenie do programowania 6, 4 lub 2
zdarzeń na dzień. To określać będzie liczbę zdarzeń możliwych do
zaprogramowania przez użytkownika na dany dzień.
Zmienianie ustawionych fabrycznie programów w trybie
5/2 dnia
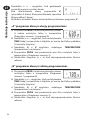
Dla dni 1-5 (dni robocze)
a) Naciskać PROG do czasu pokazania się na
wyświetlaczu ustawionego fabrycznie czasu i
temperatury (zmiana 1 dni 1, 2, 3, 4, 5).
b) Przy użyciu przycisków - lub + dokonać korekty
CZASU/TIME (po naciśnięciu i przytrzymaniu czas będzie się
zmieniać w odstępach 10-minutowych).
c) Przy użyciu przycisków Λ oraz V dokonać odpowiedniej korekty
TEMPERATURY.
Instrukcja użytkownika
PL

19
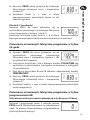
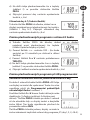
d) Nacisnąć PROG celem przejścia do kolejnego
fabrycznego ustawienia czasu i temperatury
(zmiana 2).
e) Powtórzyć kroki b, c oraz d celem
zaprogramowania pozostałych zmian na dni
robocze tygodnia.
Dla dni 6-7 (weekendy)
Naciskać PROG do czasu pokazania się na
wyświetlaczu pierwszego ustawionego fabrycznie
czasu i temperatury (zmiana 1 dni 6-7).
Powtórzyć wskazane wyżej kroki b, c, & d celem
zaprogramowania pozostałych zmian temperatury na weekend.
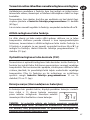
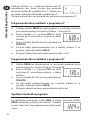
Zmienianie ustawionych fabrycznie programów w trybie
24-godz
a) Naciskać PROG do czasu pokazania się na
wyświetlaczu pierwszego ustawionego
fabrycznie czasu i temperatury (zmiana 1 dla
wszystkich dni tygodnia).
b) Przy użyciu przycisków - lub + dokonać korekty CZASU/TIME (po
naciśnięciu i przytrzymaniu czas będzie się zmieniać w odstępach
10-minutowych).
c) Przy użyciu przycisków Λ oraz V dokonać odpowiedniej korekty
TEMPERATURY.
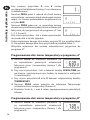
d) Nacisnąć PROG celem przejścia do kolejnego
fabrycznego ustawienia czasu i temperatury
(zmiana 2).
e) Powtórzyć kroki b, c oraz d celem zaprogramowania pozostałych
zmian temperatury.
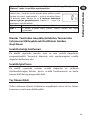
Zmienianie ustawionych fabrycznie programów w trybie
programowania AB
(Ustawienie instalacyjne musi znajdować się w trybie pracy 5/2 dnia)
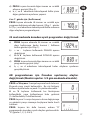
Nacisnąć i przytrzymać przez 3 sekundy łącznie
PROG oraz V. Wyświetlacz zmieni się, jak pokazano
obok. To otwiera Zaawansowane programowanie
przez użytkownika opcja 1.
Instrukcja użytkownika
PL

20
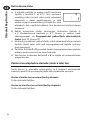
Przy pomocy przycisków Λ oraz V można
uruchamiać lub blokować funkcję (1=uruchomiona,
0=zablokowana).
Naciskać PROG przez 5 sekund do chwili zmiany
wyświetlacza i momentu, kiedy dwukropek zacznie
migać, co stanowi potwierdzenie znajdowania się
w trybie RUN.
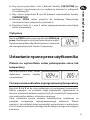
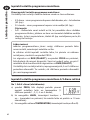
Nacisnąć PROG jeden raz, co spowoduje zmianę
obrazu na wyświetlaczu i pokazywanie ustawionych
fabrycznie dni przypisanych do programu „A” (dni
1, 2, 3, 4 oraz 5).
Przy użyciu przycisków - lub + można przechodzić
do przodu lub w tył dni tygodnia.
Celem wyłączenia danego dnia należy nacisnąć V, (na przykład dzień
2). Do wyboru danego dnia służy przycisk Λ na przykład dzień 7).
Wszystkie wyłączone dni zostaną automatycznie przypisane do
programu „B”.
Programowanie dni i zmian temperatury w programie „A”
a) Naciskać PROG do momentu pokazania się
na wyświetlaczu pierwszych ustawionych
fabrycznie czasu i temperatury (zmiana 1 dla
programu A).
b) Przy użyciu przycisków - lub + dokonać korekty CZASU/TIME (po
naciśnięciu i przytrzymaniu czas będzie się zmieniać w odstępach
10-minutowych).
c) Przy użyciu przycisków Λ oraz V dokonać odpowiedniej korekty
TEMPERATURY.
d) Nacisnąć PROG celem przejścia do kolejnego fabrycznego
ustawienia czasu i temperatury (Zmiana 2).
e) Powtórzyć kroki b, c oraz d celem zaprogramowania pozostałych
zdarzeń.
Programowanie dni i zmian temperatury w programie „B”
a) Naciskać PROG do momentu pokazania się
na wyświetlaczu pierwszych ustawionych
fabrycznie czasu i temperatury (Zmiana 1 dla
programu B).
Instrukcja użytkownika
PL
Strona się ładuje...
Strona się ładuje...
Strona się ładuje...
Strona się ładuje...
Strona się ładuje...
Strona się ładuje...
Strona się ładuje...
Strona się ładuje...
Strona się ładuje...
Strona się ładuje...
Strona się ładuje...
Strona się ładuje...
Strona się ładuje...
Strona się ładuje...
Strona się ładuje...
Strona się ładuje...
Strona się ładuje...
Strona się ładuje...
Strona się ładuje...
Strona się ładuje...
Strona się ładuje...
Strona się ładuje...
Strona się ładuje...
Strona się ładuje...
Strona się ładuje...
Strona się ładuje...
Strona się ładuje...
Strona się ładuje...
Strona się ładuje...
Strona się ładuje...
Strona się ładuje...
Strona się ładuje...
Strona się ładuje...
Strona się ładuje...
Strona się ładuje...
Strona się ładuje...
Strona się ładuje...
Strona się ładuje...
Strona się ładuje...
Strona się ładuje...
Strona się ładuje...
Strona się ładuje...
Strona się ładuje...
Strona się ładuje...
Strona się ładuje...
Strona się ładuje...
Strona się ładuje...
Strona się ładuje...
Strona się ładuje...
Strona się ładuje...
Strona się ładuje...
Strona się ładuje...
Strona się ładuje...
Strona się ładuje...
Strona się ładuje...
Strona się ładuje...
Strona się ładuje...
Strona się ładuje...
Strona się ładuje...
Strona się ładuje...
Strona się ładuje...
Strona się ładuje...
Strona się ładuje...
Strona się ładuje...
Strona się ładuje...
Strona się ładuje...
Strona się ładuje...
Strona się ładuje...
Strona się ładuje...
Strona się ładuje...
Strona się ładuje...
Strona się ładuje...
Strona się ładuje...
Strona się ładuje...
Strona się ładuje...
Strona się ładuje...
Strona się ładuje...
Strona się ładuje...
Strona się ładuje...
Strona się ładuje...
Strona się ładuje...
Strona się ładuje...
Strona się ładuje...
Strona się ładuje...
-
 1
1
-
 2
2
-
 3
3
-
 4
4
-
 5
5
-
 6
6
-
 7
7
-
 8
8
-
 9
9
-
 10
10
-
 11
11
-
 12
12
-
 13
13
-
 14
14
-
 15
15
-
 16
16
-
 17
17
-
 18
18
-
 19
19
-
 20
20
-
 21
21
-
 22
22
-
 23
23
-
 24
24
-
 25
25
-
 26
26
-
 27
27
-
 28
28
-
 29
29
-
 30
30
-
 31
31
-
 32
32
-
 33
33
-
 34
34
-
 35
35
-
 36
36
-
 37
37
-
 38
38
-
 39
39
-
 40
40
-
 41
41
-
 42
42
-
 43
43
-
 44
44
-
 45
45
-
 46
46
-
 47
47
-
 48
48
-
 49
49
-
 50
50
-
 51
51
-
 52
52
-
 53
53
-
 54
54
-
 55
55
-
 56
56
-
 57
57
-
 58
58
-
 59
59
-
 60
60
-
 61
61
-
 62
62
-
 63
63
-
 64
64
-
 65
65
-
 66
66
-
 67
67
-
 68
68
-
 69
69
-
 70
70
-
 71
71
-
 72
72
-
 73
73
-
 74
74
-
 75
75
-
 76
76
-
 77
77
-
 78
78
-
 79
79
-
 80
80
-
 81
81
-
 82
82
-
 83
83
-
 84
84
-
 85
85
-
 86
86
-
 87
87
-
 88
88
-
 89
89
-
 90
90
-
 91
91
-
 92
92
-
 93
93
-
 94
94
-
 95
95
-
 96
96
-
 97
97
-
 98
98
-
 99
99
-
 100
100
-
 101
101
-
 102
102
-
 103
103
-
 104
104


Danfoss TP5001, TP5001-RF & TP5001M Instrukcja instalacji
- Typ
- Instrukcja instalacji
w innych językach
Powiązane artykuły
-
Danfoss TP5001 & TP5001-RF Instrukcja instalacji
-
Danfoss TP9000 Installation And User Instructions Manual
-
-
-
-
-
-