Beko CHG6400W Instrukcja obsługi
- Kategoria
- Blendery
- Typ
- Instrukcja obsługi
Niniejsza instrukcja jest również odpowiednia dla

www.beko.co.uk
SMM888BX
01M-8812273200-1518-01
Soup Maker
User Manual
EN DE FR TR ES
PL RO IT AR

www.beko.co.uk
CONTENTS
ENGLISH 10-23
DEUTSCH 24-38
FRANÇAIS 39-52
TÜRKÇE 53-64
ESPAÑOL 65-80
POLSKI 81-99
ITALIANO 116-131
ىبرع 05-13

1
3
2
4
11
5
6
7
10
8
9
12
13

1
x2
1
2
1
4
5
6
2 3
9
7
8
10
11 12

35:00
00:00
1
2
2
1
1
4
5
6
2 3
9
7
8
10
11 12

1
4
5
2 3
6

2
1
1
4
5
2 3
6
7
8
9
10
11
12

&
EN
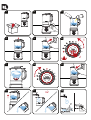
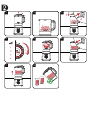
FIRST USE OPERATION / CLEANING AND CARE
DE
VORBEREITUNG BETRIEB / REINIGUNG UND PFLEGE
FR
PREMIÈRE UTILISATION FONCTIONNEMENT / NETTOYAGE ET ENTRETIEN
TR
İLK KULLANIM KULLANIM / TEMIZLEME VE BAKIM
ES
PRIMER USO FUNCIONAMIENTO / LIMPIEZA Y CUIDADOS
PL
PIERWSZE UŻYCIE OBSŁUGA / CZYSZCZENIE I PIELĘGNACJA
RO
PRIMA UTILIZARE UTILIZARE / CURĂ AREA ȘI ÎNGRIJIREA
IT
USO INIZIALE FUNZIONAMENTO / PULIZIA E CURA
AR
EN
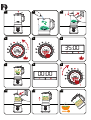
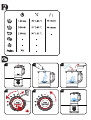
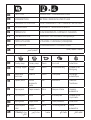
Chunky soup Creamy soup Sauce Ice crush Auto Clean
DE
Stückige Suppe Cremige
Suppe
Sauce Eiszerkleinerung Automatische
Reinigung
FR
Soupe avec
morceaux
Velouté Sauce Glace pilée Nettoyage
automatique
TR
Topaklı çorba Krema
kıvamında
çorba
Sos Buz kırma Otomatik
Temizleme
ES
Sopa espesa Sopa cremosa Salsa Romper el hielo Limpieza
automática
PL
Zupa mięsna Krem Sos Kruszony lód Automatyczne
czyszczenie
RO
Supă groasă Supă cremă Sos Gheaţă zdrobită Auto Clean
IT
Zuppa a pezzi
interi
Zuppa
cremosa
Salsa Tritatura ghiaccio Pulizia
automatica
AR

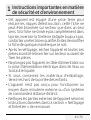
Please read this user
manual first!
Dear Customer,
Thank you for selecting a Beko
product. We hope that you get
the best results from your prod-
uct which has been manufactured
with high quality and state-of-the-
art technology. Therefore, please
read this entire user manual and
all other accompanying documents
carefully before using the product
and keep it as a reference for fu-
ture use. If you handover the prod-
uct to someone else, give the user
manual as well. Follow all warnings
and information in the user manual.
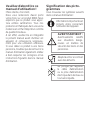
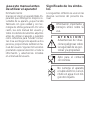
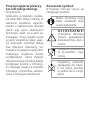
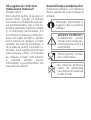
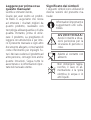
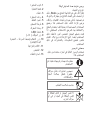
Meanings of the symbols
Following symbols are used in the
various section of this manual:
Important information
and useful hints about us-
age.
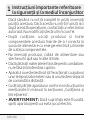
WARNING:
Warnings
for dangerous situa-
tions concerning the
safety of life and prop-
erty.
Suitable for contact with
food.
Do not immerse the ap-
pliance in water.

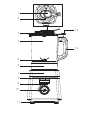
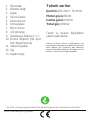
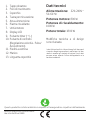
1. Measuring cap
2. Feed hole
3. Lid
4. Measuring jug
5. Blending shaft
6. Heating plate
7. Motor unit
8. LED display
9. Timer botton ( +/- )
10. Control button
(Speed adjustment - Pulse/
Start/Stop)
11. Vacuum feet
12. Handle
13. Lid tab
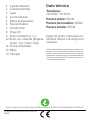
This product has been produced in environmentally-friendly, state-of-the-art facilities.
Conforms to the WEEE Directive.
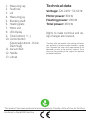
Technical data
Voltage:
220-240V~ 50-60 Hz
Motor power:
800 W
Heating power:
1000 W
Total power:
1800 W
Rights to make technical and de-
sign changes are reserved.
The values which are declared in the markings affixed on
your appliance or the other printed documents supplied
with it represent the values which were obtained in the
laboratories pursuant to the pertinent standards. These
values may vary according to the usage of the appliance
and ambient conditions.

11 / EN
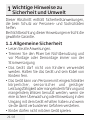
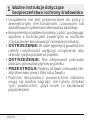
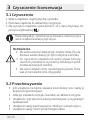
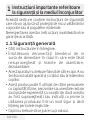
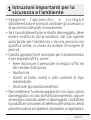
This section contains safety instructions that will
help protect from risk of personal injury or material
damage.
Failure to follow these instructions voids any grant-
ed warranty.
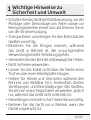
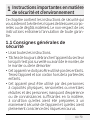
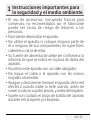
1.1 General safety
•Read all instructions.
•Always disconnect the blender from the supply
if it is left unattended and before assembling,
disassembling
•The appliance shall be not use by children. Keep the
appliance and its cord out of reach of children.
•Appliance can be use by person with reduced
physical, sensory and mental capabilities or lack
of experience and knowledge if they have been
given supervision or instruction concerning use
of appliance in a safe way and if they understand
hazards involved.
•Children shall not play with the appliance.
1
Important safety and
environmental instructions

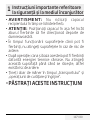
12 / EN
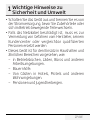
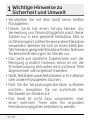
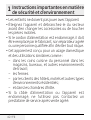
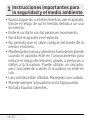
•Switch of the appliance and disconnect from supply
before changing accessories or approaching parts
that move in use.
•If the supply cord is damaged, it must be replaced
by the manufacturer, its service agent or similarly
qualified persons in order to avoid a hazard.
•This appliance is intended to be used in household
application only. It is not designed for professional
use in:
– Staff kitchen areas in shops, offices and other
working environments;
– Farm houses
– By clients in hotels, motels and other residential
type environments;
– Bed and Breakfast type environments.
•Do not operate any appliance with a damaged cord
or plug or after the appliance malfunctions, or is
dropped or damaged in any manner. Contact the
manufacturer at their customer service telephone
number for information on examination, repair, or
adjustment.
1
Important safety and
environmental instructions

13 / EN
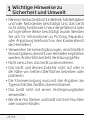
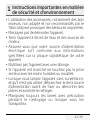
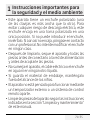
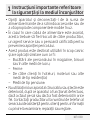
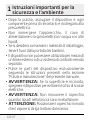
•The use of attachments, including canning jars, not
recommended by the manufacturer may cause a
risk of injury to persons.
•Do not attempt to dismantle the appliance.
•Do not operate or place any part of this appliance or
its parts on or near hot surfaces.
•Your mains power supply should comply with the
information supplied on the rating plate of the
appliance.
•Do not use the appliance with an extension cable.
•Do not touch the plug of the appliance with damp
or wet hands.
•Always switch off and disconnect from the supply if
its left unattended, when not in use, before putting
on or taking off parts, and before cleaning.
•Hold the blending shaft of the appliance carefully
during transportation and cleaning.
•Never touch blades while using the appliance.
There is the possibility of injury due to incorrect
usage.
•Avoid contacting moving parts.
1
Important safety and
environmental instructions

14 / EN
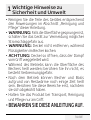
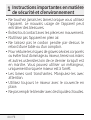
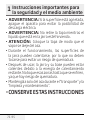
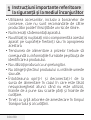
•Do not use outdoors.
•Do not let cord hang over edge of table or counter.
•Keep hands and utensils out of container while
blending to reduce the risk of severe injury to
persons or damage to the blender. A scraper may
be used but must be used only when the blender
is not running
•Blades are sharp. Handle carefully.
•Always operate blender with cover in place.
•Do not blend hot liquids.
•After cleaning, dry the appliance and all parts
before connecting it to mains supply and before
attaching the parts.
•Do not immerse the appliance, the power cable, or
the power plug in water or any other liquid.
•If you keep the packaging materials, store them out
of the reach of children.
•Appliance is not intended to be operated by means
of an external timer or seperate remote-control
system.
•Clean the parts of the appliance according to
1
Important safety and
environmental instructions

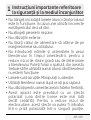
15 / EN
1
Important safety and
environmental instructions
instruction only which given “Cleaning and care
operation” part of this manual.
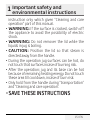
•
WARNING:
If the surface is cracked, switch off
the appliance to avoid the possibility of electric
shock.
•
WARNING:
Do not remover the lid while the
liquids in jug is boiling.
•
CAUTION:
Position the lid so that steam is
directed away from the handle.
•During the operation jug surfaces can be hot, do
not touch that surfaces incase of burning risk.
•After the operation; jug and its base can be hot
because of remaining heating energy. Do not touch
these area till cool down, incase of burn risk.
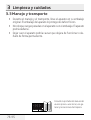
•Only hold from the handle during “transportation”
and “Cleaning and care operation”.
•SAVE THESE INSTRUCTIONS

16 / EN
1
Important safety and
environmental instructions
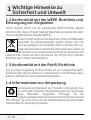
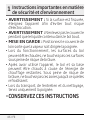
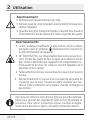
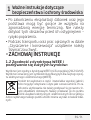
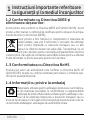
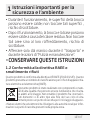
1.2 Compliance with the WEEE Directive and
Disposing of the Waste Product:
This product complies with EU WEEE Directive (2012/19/EU). This prod-
uct bears a classification symbol for waste electrical and electronic equip-
ment (WEEE).
This product has been manufactured with high quality parts
and materials which can be reused and are suitable for recy-
cling. Do not dispose of the waste product with normal domes-
tic and other wastes at the end of its service life. Take it to the
collection center for the recycling of electrical and electronic
equipment. Please consult your local authorities to learn about these col-
lection centers.
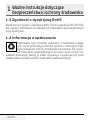
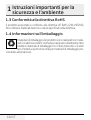
1.3 Compliance with RoHS Directive
The product you have purchased complies with EU RoHS Directive
(2011/65/EU). It does not contain harmful and prohibited materials speci-
fied in the Directive.
1.4 Package information
Packaging materials of the product are manufactured from re-
cyclable materials in accordance with our National Environment
Regulations. Do not dispose of the packaging materials togeth-
er with the domestic or other wastes. Take them to the packag-
ing material collection points designated by the local authorities.

17 / EN
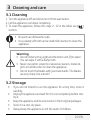
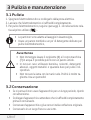
1.5 Plug Wiring
The moulded plug on this appliance incorporates a 13 A fuse. Should the
fuse need to be replaced an ASTA approved BS1362 fuse of the same rat-
ing must be used. Do not forget to refit the fuse cover. In the event of los-
ing the fuse cover, the plug must not to be used until a replacement fuse
cover has been fitted. Colour of the replacement fuse cover must be the
same colour as that visible on the pin face of the plug Fuse covers are avai-
labe from any good electrical store.
•
Fiting a different plug
• As the colours of the wires in the mains lead of this appliance may
not correspond with the coloured markings identifying the termi-
nals on your plug, proceed as follows:
• Brown cable = L (Live)
• Blue cable = N (Neutral)
• Green/yellow cable must be connected to ground (E) line
• With the alternative plugs a 13 A fuse must be fitted either in the
plug or adaptore or in the main fuse box. If in doubt contact a quali-
fied electrician.
1
Important safety and
environmental instructions

18 / EN
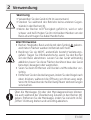
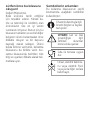
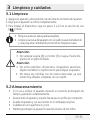
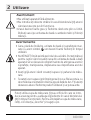
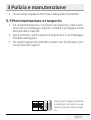
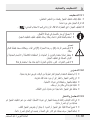
Warnings
• Do not operate the appliance when empty.
• Do not insert any foreign objects into the jug (4) when the
appliance is in use.
• When the jug is full of liquid, it becomes very heavy and hot.
Lift the jug onto the base unit with both hands and wear
gloves.
Warnings
• The jug, heating plate and base unit, and surfaces marked
with this symbol will get very hot during use.
• DO NOT TOUCH as possible injury could occur. Wear oven
gloves when removing the jug from the base unit. Allow the
appliance to cool completely before touching these surfaces,
handling, moving or storing this appliance.
• Be careful when removing the lid and the measuring cup.
• Remove the lid slowly by pushing up the lid tab, with the
opening facing away from you. Be careful as hot steam will
escape and can burn.
You can use the measuring cap (1) or the measuring cap inlet to
add ingredients into the jug (4) during the process. To remove
the measuring cap, slightly turn it to the "Open" direction and
pull gently.
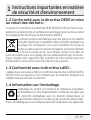
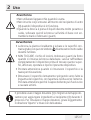
2
Use

19 / EN
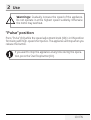
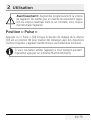
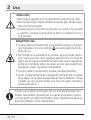
Warnings:
Gradually increase the speed of the appliance.
Do not operate it at the highest speed suddenly. Otherwise
the motor may overheat.
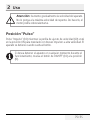
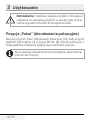
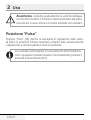
"Pulse" position
Press “Pulse” (10) while the speed adjustment knob (10) is in ON position
for mixing with high-speed short pulses. The appliance will stop when you
release the button.
If you want to stop the appliance at any time during the opera-
tion, press the Star/Stop button (10).
2
Use

20 / EN
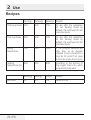
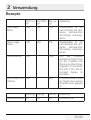
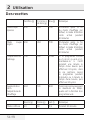
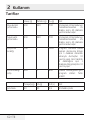
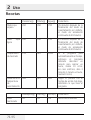
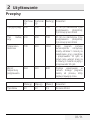
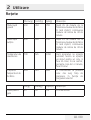
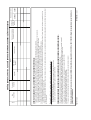
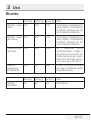
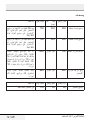
Recipes
Carrot(g) Potato(g) Water(g) Remark
Thick soup mode 350 350 700 35 min after the completion
of the heating mode by
default, the continued 40 min
insulation mode
Thin soup mode 350 350 700 25 min after the completion
of the heating mode by
default, the continued 40 min
insulation mode
Mixing
temperature
700 N/A 1050 If the program automatically
stop time, so do program
stopped to rest a minute for a
loop, do 10 cycles;If not, open
3 min 1 min a loop, do 10 cycles
Heating
temperature rise
560 N/A 840 According to the process of
the longest time to do, which
program harsh do what
Butter(g) Flour(g) Milk(L) Remark
Jam mode 50 50 0.5 Within 30 min
2
Use
Strona się ładuje...
Strona się ładuje...
Strona się ładuje...
Strona się ładuje...
Strona się ładuje...
Strona się ładuje...
Strona się ładuje...
Strona się ładuje...
Strona się ładuje...
Strona się ładuje...
Strona się ładuje...
Strona się ładuje...
Strona się ładuje...
Strona się ładuje...
Strona się ładuje...
Strona się ładuje...
Strona się ładuje...
Strona się ładuje...
Strona się ładuje...
Strona się ładuje...
Strona się ładuje...
Strona się ładuje...
Strona się ładuje...
Strona się ładuje...
Strona się ładuje...
Strona się ładuje...
Strona się ładuje...
Strona się ładuje...
Strona się ładuje...
Strona się ładuje...
Strona się ładuje...
Strona się ładuje...
Strona się ładuje...
Strona się ładuje...
Strona się ładuje...
Strona się ładuje...
Strona się ładuje...
Strona się ładuje...
Strona się ładuje...
Strona się ładuje...
Strona się ładuje...
Strona się ładuje...
Strona się ładuje...
Strona się ładuje...
Strona się ładuje...
Strona się ładuje...
Strona się ładuje...
Strona się ładuje...
Strona się ładuje...
Strona się ładuje...
Strona się ładuje...
Strona się ładuje...
Strona się ładuje...
Strona się ładuje...
Strona się ładuje...
Strona się ładuje...
Strona się ładuje...
Strona się ładuje...
Strona się ładuje...
Strona się ładuje...
Strona się ładuje...
Strona się ładuje...
Strona się ładuje...
Strona się ładuje...
Strona się ładuje...
Strona się ładuje...
Strona się ładuje...
Strona się ładuje...
Strona się ładuje...
Strona się ładuje...
Strona się ładuje...
Strona się ładuje...
Strona się ładuje...
Strona się ładuje...
Strona się ładuje...
Strona się ładuje...
Strona się ładuje...
Strona się ładuje...
Strona się ładuje...
Strona się ładuje...
Strona się ładuje...
Strona się ładuje...
Strona się ładuje...
Strona się ładuje...
Strona się ładuje...
Strona się ładuje...
Strona się ładuje...
Strona się ładuje...
Strona się ładuje...
Strona się ładuje...
Strona się ładuje...
Strona się ładuje...
Strona się ładuje...
Strona się ładuje...
Strona się ładuje...
Strona się ładuje...
Strona się ładuje...
Strona się ładuje...
Strona się ładuje...
Strona się ładuje...
Strona się ładuje...
Strona się ładuje...
Strona się ładuje...
Strona się ładuje...
Strona się ładuje...
Strona się ładuje...
Strona się ładuje...
Strona się ładuje...
Strona się ładuje...
Strona się ładuje...
Strona się ładuje...
Strona się ładuje...
Strona się ładuje...
Strona się ładuje...
Strona się ładuje...
Strona się ładuje...
Strona się ładuje...
Strona się ładuje...
Strona się ładuje...
Strona się ładuje...
Strona się ładuje...
Strona się ładuje...
Strona się ładuje...
Strona się ładuje...
Strona się ładuje...
Strona się ładuje...
Strona się ładuje...
Strona się ładuje...
-
 1
1
-
 2
2
-
 3
3
-
 4
4
-
 5
5
-
 6
6
-
 7
7
-
 8
8
-
 9
9
-
 10
10
-
 11
11
-
 12
12
-
 13
13
-
 14
14
-
 15
15
-
 16
16
-
 17
17
-
 18
18
-
 19
19
-
 20
20
-
 21
21
-
 22
22
-
 23
23
-
 24
24
-
 25
25
-
 26
26
-
 27
27
-
 28
28
-
 29
29
-
 30
30
-
 31
31
-
 32
32
-
 33
33
-
 34
34
-
 35
35
-
 36
36
-
 37
37
-
 38
38
-
 39
39
-
 40
40
-
 41
41
-
 42
42
-
 43
43
-
 44
44
-
 45
45
-
 46
46
-
 47
47
-
 48
48
-
 49
49
-
 50
50
-
 51
51
-
 52
52
-
 53
53
-
 54
54
-
 55
55
-
 56
56
-
 57
57
-
 58
58
-
 59
59
-
 60
60
-
 61
61
-
 62
62
-
 63
63
-
 64
64
-
 65
65
-
 66
66
-
 67
67
-
 68
68
-
 69
69
-
 70
70
-
 71
71
-
 72
72
-
 73
73
-
 74
74
-
 75
75
-
 76
76
-
 77
77
-
 78
78
-
 79
79
-
 80
80
-
 81
81
-
 82
82
-
 83
83
-
 84
84
-
 85
85
-
 86
86
-
 87
87
-
 88
88
-
 89
89
-
 90
90
-
 91
91
-
 92
92
-
 93
93
-
 94
94
-
 95
95
-
 96
96
-
 97
97
-
 98
98
-
 99
99
-
 100
100
-
 101
101
-
 102
102
-
 103
103
-
 104
104
-
 105
105
-
 106
106
-
 107
107
-
 108
108
-
 109
109
-
 110
110
-
 111
111
-
 112
112
-
 113
113
-
 114
114
-
 115
115
-
 116
116
-
 117
117
-
 118
118
-
 119
119
-
 120
120
-
 121
121
-
 122
122
-
 123
123
-
 124
124
-
 125
125
-
 126
126
-
 127
127
-
 128
128
-
 129
129
-
 130
130
-
 131
131
-
 132
132
-
 133
133
-
 134
134
-
 135
135
-
 136
136
-
 137
137
-
 138
138
-
 139
139
-
 140
140
-
 141
141
-
 142
142
-
 143
143
-
 144
144
-
 145
145
-
 146
146
-
 147
147
-
 148
148


Beko CHG6400W Instrukcja obsługi
- Kategoria
- Blendery
- Typ
- Instrukcja obsługi
- Niniejsza instrukcja jest również odpowiednia dla
w innych językach
- español: Beko CHG6400W El manual del propietario
- italiano: Beko CHG6400W Manuale del proprietario
- Deutsch: Beko CHG6400W Bedienungsanleitung
- français: Beko CHG6400W Le manuel du propriétaire
- Türkçe: Beko CHG6400W El kitabı
- română: Beko CHG6400W Manualul proprietarului
Powiązane artykuły
-
Beko CHP7504 Instrukcja obsługi
-
Beko TBP7354X ProVitality Inox Instrukcja obsługi
-
-
Beko CEG3190B Instrukcja obsługi
-
-
-
-
-
-
Beko MCB25433BG Instrukcja obsługi