Batavia One-Hand Chainsaw Instrukcja obsługi
- Kategoria
- Akumulatorowe piły łańcuchowe
- Typ
- Instrukcja obsługi

Model: BT–NXS006
Item-No.: 7064570
www.bataviapower.com
Nexxsaw | Compact cordless chainsaw
Kompakte Akku-Kettensäge
Tronçonneuse compacte sans fil
Compacte accu kettingzaag
Motosega compatta a batteria
Motosierra compacta de batería
Motosserra compacta sem o
Kompaktowa pila łańcuchowa akumulatorowa
Operating instructions
Bedienungsanleitung (Original)
Mode d'emploi
Gebruiksaanwijzing
Istruzioni di Funzionamento
Manual de usuario
Instruções de funcionamento
Instrukcja


A
B
3 6 74 521
8
9
2
9
13
12
12
14
11
11
10

2
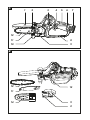
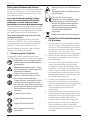
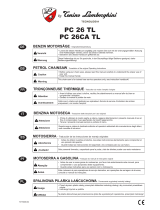
Overview
1. Protection cover
2. Head screw
3. Ventilation slots
4. Safety switch (power lock-off)
5. ON/OFF Switch
6. Handgrip
7. Battery
8. Hand guard
9. Sprocket cover
10. Base plate
11. Guide bar
12. Saw chain
13. Sprocket (see Fig. B)
14. Guide bar cover
Übersicht
1. Schutzabdeckung
2. Rändelschraube
3. Ventilationsöffnungen
4. Sicherheitsschalter (Einschaltsperre)
5. EIN/AUS-Schalter
6. Handgriff
7. Akku
8. Handschutz
9. Abdeckung
10. Anschlagsplatte
11. Schwert
12. Sägekette
13. Kettenrad (Siehe Abb. B)
14. Schwertschutz
Aperçu
1. Capot de protection
2. Vis à tête
3. Ouvertures de ventilation
4. Interrupteur de sécurité
5. Levier de commutateur marche/arrêt
principal
6. Surface de prise
7. Batterie
8. Garde de la main
9. Couvercle de pignon
10. Socle
11. Guide-chaîne
12. Chaîne
13. Pignon (voir figure B)
14. Cache de protection du guide-chaîne
Overzicht
1. Beschermkap
2. Vleugelmoer
3. Ventilatiesleuven
4. Veiligheidsschakelaar
5. Hoofd-aan/uit-schakelaar
6. Handgreep
7. Accu
8. Handbeschermer
9. Kettingwielkap
10. Grondplaat
11. Zaagblad
12. Zaagketting
13. Kettingwiel (zie Fig. B)
14. Zaagbladbeschermer
Panoramica
1. Copertura di protezione
2. Vite zigrinata
3. Prese di aerazione
4. Interruttore di sicurezza (blocco
dell’alimentazione)
5. Interruttore accensione/spegnimento
6. Impugnatura
7. Batteria
8. Copertura di sicurezza
9. Copertura dell’ingranaggio
10. Piastra di base
11. Barra guida
12. Catena della sega
13. Ingranaggio (vedere Fig. B)
14. Copertura della barra guida
Resumen
1. Cubierta de protección
2. Tornillo de cierre/apertura
3. Ranuras de ventilación
4. Interruptor de seguridad (bloqueo de la
alimentación)
5. Interruptor de encendido/apagado
6. Empuñadura
7. Batería
8. Guardamano
9. Tapa del piñón
10. Placa de base
11. Espada
12. Cadena cortante
13. Piñón (consultar la gura B)
14. Cubierta de la espada

3
Visão geral
1. Cobertura de proteção
2. Parafuso da cabeça
3. Orifícios de ventilação
4. Interruptor de segurança (bloqueio de
alimentação)
5. Interruptor de ligar/desligar
6. Punho
7. Bateria
8. Guarda de mão
9. Tampa da roda dentada
10. Chapa de base
11. Barra guia
12. Corrente da serra
13. Roda dentada (ver Fig. B)
14. Tampa da barra guia
Przegląd
1.
2.
3. Otwory wentylacyjne
4.
zasilania)
5.
6. Uchwyt
7. Akumulator
8.
9.
10.
11. Prowadnica
12.
13. rys. B)
14. Pokrywa prowadnicy

4
Contents
1. Explanation of the symbols . . . . 6
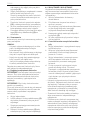
2. Additional safety instructions for
Nexxsaw . . . . . . . . . 6
3. Safety instructions for multi saws . . 7
4. Causes and operator prevention of
kickback . . . . . . . . . 8
5. . . . . . . 9
6. Contents of packing . . . . . . 9
7. Intended use . . . . . . . . 9
8. Use . . . . . . . . . . . 9
9. Maintenance, cleaning and storing. .11
10. Technical data. . . . . . . .11
11. Accessories – optionally available . .12
12. Disposal . . . . . . . . .12
13. EC-Declaration of conformity . . .12
14. UK Declaration of Conformity . . .13
Inhaltsverzeichnis
1. Erläuterung der Symbole . . . .14
2. Zusätzliche Sicherheitshinweise für
Nexxsaw . . . . . . . . .14
3. Sicherheitshinweise für Multi Sägen .15
4. Ursachen und Vermeidung eines
Rückschlags . . . . . . . .16
5. Vor der ersten Benutzung . . . .17
6. Verpackungsinhalt . . . . . .17
7. Bestimmungsgemäßer Gebrauch . .17
8. Bedienung . . . . . . . . .17
9. Wartung, Reinigung und Lagerung . .19
10. Technische Daten. . . . . . 20
11. Zubehör – optional erhältlich . . 20
12. Entsorgung . . . . . . . 20
13. EG-Konformitätserklärung . . . 21
Table des matières
1. Explication des symboles . . . 22
2. Consignes de sécurité
supplémentaires concernant la
tronçonneuse Nexxsaw . . . . 22
3. Consignes de sécurité concernant la
chaîne de tronçonneuse . . . . 23
4. Causes et prévention des risques de
rebond par l’opérateur . . . . 24
5. Avant la première utilisation. . . 25
6. Contenus de l’emballage. . . . 25
7. Utilisation prévue . . . . . . 25
8. Utilisation . . . . . . . . 25
9. Entretien, nettoyage et rangement . 27
10. Caractéristiques techniques . . 28
11. Accessoires – disponibles en option 28
12. Élimination et recyclage . . . . 28
13. CE-Déclaration de conformité . . 29
Inhoudsopgave
1. Uitleg van de symbolen . . . . 30
2. Aanvullende veiligheidsinstructies
voor de Nexxsaw . . . . . . 30
3. Veiligheidsinstructies voor
kettingzagen . . . . . . . 31
4. Oorzaken en voorkomen van
terugslag . . . . . . . . 32
5. Voor het eerste gebruik . . . . 33
6. Inhoud van de verpakking . . . 33
7. Beoogd gebruik . . . . . . 33
8. Bediening . . . . . . . . 33
9. Onderhoud, reiniging en opslag. . 35
10. Technische gegevens: . . . . 36
11. Accessoires – optioneel verkrijgbaar 36
12. Afvalverwerking en hergebruik . . 36
13. EG-Conformiteitsverklaring . . . 37

5
Contenuto
1. Spiegazione dei simboli . . . . 38
2. Ulteriori istruzioni di sicurezza per
l'uso della sega Nexxsaw . . . 38
3. Istruzioni di sicurezza per le seghe
multifunzione . . . . . . . 39
4. Cause e prevenzione dei contraccolpi
da parte dell'utente . . . . . 40
5. Operazioni preliminari al primo uso
del prodotto . . . . . . . 41
6. Contenuto della confezione . . . 41
7. Destinazione d'uso . . . . . 41
8. Uso . . . . . . . . . . 41
9. Manutenzione, pulizia e
conservazione. . . . . . . 43
10. Dati tecnici . . . . . . . . 44
11. Accessori – opzioni disponibili . . 44
12. Smaltimento . . . . . . . 44
13. Dichiarazione di conformità CE . . 45
Índice
1. Explicación de los símbolos. . . 46
2. Instrucciones de seguridad
adicionales relativas a las sierras
Nexxsaw . . . . . . . . 46
3. Instrucciones de seguridad en
materia de multisierras . . . . 47
4. Causas del rebote y su prevención
por parte del usuario . . . . . 48
5. Antes de usar por primera vez . . 49
6. Contenido del paquete . . . . 49
7. Uso previsto . . . . . . . 49
8. Uso . . . . . . . . . . 49
9. Mantenimiento, limpieza y
almacenamiento . . . . . . 52
10. Datos técnicos . . . . . . 52
11. Accesorios opcionales disponibles 53
12. Eliminación . . . . . . . 53
13. Declaración CE de conformidad . 53
Índice
1. Explicação dos símbolos . . . 54
2. Instruções de segurança adicionais
para serras Nexxsaw. . . . . 54
3. Instruções de segurança para serras
multifunções . . . . . . . 55
4. Causas e prevenção de ricochete . 56
5. Antes da primeira utilização. . . 57
6. Conteúdo da embalagem . . . 57
7. Utilização prevista . . . . . 57
8. Utilização . . . . . . . . 57
9. Manutenção, limpeza e
armazenamento . . . . . . 59
10. Dados técnicos . . . . . . 60
11. Acessórios – disponíveis a título
opcional . . . . . . . . 60
12. Eliminação . . . . . . . . 60
13. Declaração de conformidade CE . 61
Spis treści
1. . . . . . 62
2.
. 62
3.
. 63
4. Przyczyny i zapobieganie odbiciu . 65
5. . . . 65
6. . . . . 65
7. Przeznaczenie. . . . . . . 65
8. . . . . . . . 65
9. Konserwacja, czyszczenie i
przechowywanie . . . . . . 68
10. Dane techniczne . . . . . . 68
11. . 69
12. Utylizacja . . . . . . . . 69
13.
UE . . . . . . . . . . 69

English
6
Dear customer
Please familiarize yourself with the proper
usage of the device by reading and following
each chapter of this manual, in the order
presented. Keep these operating instruc-
tions for further reference.
Please read the enclosed “General safety
instructions for power tools” and all
additional safety instructions in this
operating instructions!
This manual contains important information
on operating and handling the device. Keep
these operating instructions for further
reference. Please pass it on along with the
unit if it is handed over to a third party.
Battery and charger not included!
The battery is available separately under
-
(2.4A) or 7064223 (0.4A).
These items are available online and in par-
ticipating stores.
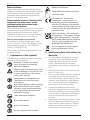
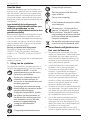
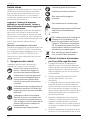
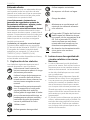
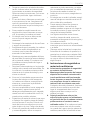
1. Explanation of the symbols
The following symbols are used in the user
manual or on the product:
Warning! To reduce the risk of
injury, the user must read the
instruction manual.
Denotes risk of personal injury, loss
of life or damage to the tool in case
of non-observance of the instruc-
tions in this manual.
Always wear hearing protection.
The effects of noise can cause
hearing loss.
Wear safety glasses. When working
with electric power tools, sparks,
splinters, chips and dust particles
may be generated and these can
cause loss of sight.
Wear protective headgear.
Wear safety gloves.
Wear sturdy shoes.
Do not expose to rain or water.
Beware of kickback.
Keep sufcient distance to electri-
cal power lines.
CE stands for “Conformité
Européenne”, which means “In
accordance with EU Regulations”.
With the CE marking, the manufac-
turer conrms that this Electric tool
complies with the applicable Euro-
pean directives.
UKCA stands for: “UK Conformity
Assessment”. This means “Compli-
ant with UK regulations”. With the
UKCA mark manufacturer conrms
that this unit complies with the
applicable UK regulations.
Do not dispose of electric power
tools with domestic refuse.
2. Additional safety instructions for
Nexxsaw
a. The Nexxsaw is designed for cutting
branches. Only use the Nexxsaw as
indicated in this manual for cutting
wood. The machine has not been
designed for continuous, professional
use.
b. Keep the Nexxsaw out of reach of chil-
dren. It is not a toy.
c. Persons with limited physical, sensorial
or mental abilities are not allowed to
use the Nexxsaw, unless they are super-
-
son or are briefed by the responsible
person how to use the machine.
d. Children and adolescents are not
allowed to use the Nexxsaw. Excluded
from this prohibition are young people
over 16 years of age under the supervi-
sion of an expert for the purpose of
training.
e. Please note the warning symbols. They
mark all those instructions which are
important for safety reasons. Observe
these instructions as failure to do so
could result in serious injury!

7
English
f. The Nexxsaw must be used only by one
person at a time. Make sure bystanders
do not stay in the vicinity of the Nexx-
saw’s work area.
g. Check the safe operating condition of
the Nexxsaw, in particular the guide bar
and the saw chain, before each
operation.
h. Always have a safe stand when working
with the saw.
i.
when switching on.
j. Make sure the guide bar and the saw
chain must be free when switched on
and must not come into contact with
the workpiece to be cut.
k. Keep your hands away from the sawing
area. Do not reach under the workpiece.
Contact with the saw chain may result
in injury.
l. Guide the Nexxsaw onto the workpiece
only when switched on. Otherwise there
is a risk of kickback if the saw chain
gets caught in the workpiece.
m. When sawing, the base plate must
always face against the workpiece. The
saw chain can become jammed and
lead to loss of control over the machine.
n. When the cut is completed, switch off
the machine and then pull the saw
chain out of the cut only after it has
come to a standstill. This way you can
avoid kickback.
o. Clamp the material to be processed
well. Do not support the workpiece with
your hand or foot. Do not touch objects
-
ger of kickback.
p. When sawing converted timber and thin
branches always use a strong support,
such as a sawing trestle. Do not stack
timber pieces.
q. Before cutting logs, secure the logs in
position.
r. When working on sloping ground, make
sure to work facing upwards.
s. Be particularly careful when cutting
splintered wood. Splinters of wood can
be torn along by the saw chain and
increase the risk of injury!
t. Foreign objects such as nails, screws,
metal parts, sand, etc. lead to increased
wear on the guide bar and saw chain.
u. A blunt saw chain can cause overheat-
ing and damage to the motor.
v. Always pull out the battery when check-
ing the chain tension, to re-tighten it, to
mount the saw chain and to eliminate
faults! Also remove the battery if you do
not use the machine temporarily.
3. Safety instructions for multi
saws
3.1 General multi saw safety warnings:
a. Keep all parts of the body away from
the saw chain when the multi saw is
operating. Before you start the multi
saw, make sure the saw chain is not
contacting anything. A moment of
inattention while operating multi saws
may cause entanglement of your cloth-
ing or body with the saw chain.
b. Hold the multi saw by insulated grip-
ping surfaces only, because the saw
chain may contact hidden wiring. Saw
chains contacting a “live” wire may
make exposed metal parts of the multi
saw “live’” and could give the operator
an electric shock.
c. Wear eye protection. Further protec-
tive equipment for hearing, head,
hands, legs and feet is recommended.
Adequate protective equipment will
debris or accidental contact with the
saw chain.
d. Always keep proper footing and oper-
ate the multi saw only when standing
on xed, secure and level surface.
Slippery or unstable surfaces may
cause a loss of balance or control of the
multi saw.
e. When cutting a limb that is under ten-
sion, be alert for spring back. When
released, the spring loaded limb may
strike the operator and/or throw the
multi saw out of control.
f. Use extreme caution when cutting
brush and saplings. The slender mate-

English
8
rial may catch the saw chain and be
whipped toward you or pull you off
balance.
g. Carry the multi saw by the handle with
the multi saw switched off and away
from your body. When transporting or
storing the multi saw, always t the
guide bar cover Proper handling of the
multi saw will reduce the likelihood of
accidental contact with the moving saw
chain.
h. Follow instructions for lubricating,
chain tensioning and changing the bar
and chain. Improperly tensioned or
lubricated chain may either break or
increase the chance for kickback.
i. Cut wood only. Do not use multi saw
for purposes not intended. For exam-
ple: do not use multi saw for cutting
metal, plastic, masonry or non-wood
building materials. Use of the multi
saw for operations different than
intended could result in a hazardous
situation.
j. This multi saw is not intended for tree
felling. Use of the multi saw for opera-
tions different than intended could
result in serious injury to the operator or
bystanders.
k. Follow all instructions when clearing
jammed material, storing or servicing
the multi saw. Make sure the switch is
off and the battery pack is removed.
Unexpected actuation of the multi saw
while clearing jammed material or ser-
vicing may result in serious personal
injury.
• Do not operate a chain saw in a tree, on a
ladder, from a rooftop, or any unstable
support. Operation of a chain saw in this
manner could result in serious personal
injury.
• Follow all instructions when clearing
jammed material, storing or servicing the
chain saw. Make sure the switch is off
and the battery pack is removed. Unex-
pected actuation of the chain saw while
clearing jammed material or servicing
may result in serious personal injury.
• Do not overreach and do not cut above
shoulder height. This helps prevent unin-
tended tip contact and enables better
control of the chain saw in unexpected
situations.
4. Causes and operator prevention
of kickback
Kickback may occur when the nose or tip of
the guide bar touches an object, or when the
wood closes in and pinches the saw chain
in the cut.
Tip contact in some cases may cause a
sudden reverse reaction, kicking the guide
bar up and back towards the operator.
Pinching the saw chain along the top of the
guide bar may push the guide bar rapidly
back towards the operator.
Either of these reactions may cause you to
lose control of the saw which could result in
serious personal injury. Do not rely exclu-
sively upon the safety devices built into your
saw. As a multi saw user, you should take
several steps to keep your cutting jobs free
from accident or injury.
Kickback is the result of multi saw misuse
and/or incorrect operating procedures or
conditions and can be avoided by taking
proper precautions as given below:
a. Maintain a rm grip, with thumb and
ngers encircling the saw handle and
position your body and arm to allow
you to resist kickback forces. Kickback
forces can be controlled by the opera-
tor, if proper precautions are taken. Do
not let go of the saw.
b. Do not overreach and do not cut above
shoulder height. This helps prevent
unintended tip contact and enables
better control of the multi saw in unex-
pected situations.
c. Only use replacement guide bars and
saw chains specied by the manufac-
turer. Incorrect replacement guide bars
and saw chains may cause chain break-
age and/or kickback.
d. Follow the manufacturer’s sharpening
and maintenance instructions for the
saw chain. Decreasing the depth gauge
height can lead to increased kickback.

9
English
5. Before the rst use
Remove the machine and all accessories
from the package. Keep the packaging
materials out of the reach of small children.
There is a danger of suffocation!
6. Contents of packing
1× Nexxsaw
1× Protection cover
1× Guide bar
1× Saw chain
1× Battery
1× Charger
1× Instruction manual
7. Intended use
• The Nexxsaw has been exclusively
designed for cutting branches. The saw
is not intended for continuous commer-
cial use.
• The intended use also includes an opera-
tion following the operating instructions.
• In conjunction with the extension handle,
the Nexxsaw can be used as a pruner for
cutting branches.
• Any use beyond these parameters (dif-
ferent media, applying force) or any
changes (reconstruction, no original
accessory) can lead to serious risks and
is regarded as use that is contrary to the
intended purpose.
8. Use
8.1 Mounting the saw chain
(See Fig. B).
Always wear gloves when handling the
saw chain.
a. Unscrew the head screw (2) coun-
ter-clockwise in order to remove the
sprocket cover (9).
b. Remove the guide bar from the machine
and run the saw chain around it.
Please note the running direction of the
saw chain. The saw chain icon is shown
on the cover.
c. Run the saw chain over the sprocket
(13) and replace the guide bar.
d. Use an oiler to oil the saw chain and the
sprocket.
e. Re-tighten the sprocket cover (9) with
the head screw (2) on the housing.
8.2 Lubrication
The saw chain must be lubricated when the
tool is in operation.
CAUTION:
• Only use commercially available, biode-
gradable chain oils.
• Do not use engine oil, waste oil or other
mineral oils.
• Never use oil including dust and particles
or volatile oil.
• If the saw makes a rattling noise, the
chain must be lubricated.
Grease the chain of the Nexxsaw regularly
with biodegradable oil.
8.3 Adjusting saw chain tension
CAUTION: Do not tighten the saw chain too
much. Excessively high tension of saw
chain may cause breakage of saw chain,
wear of the guide bar and breakage of the
sprocket.
CAUTION: A chain which is too loose can
jump off the guide bar.
The saw chain may become loose after use.
From time to time check the saw chain
tension, certainly before each use.
a. Remove the battery.
b. Loosen the head screw (2) a bit to
loosen the sprocket cover lightly.
c. The tension spring automatically tight-
ens the chain.
d. Tighten the head screw (2) to secure
the sprocket cover.
8.4 Switching ON and OFF
The use of the Nexxsaw without lubricating
the chain with chain oil will damage the saw
chain and the guide bar.
a. Insert the battery into the battery
recess.
b.
by the handgrip.
c.
the safety switch (4).
d. Then press the ON/OFF switch (5).
e. To switch off the saw, release the ON/
OFF switch.

English
10
8.5 Break-in time for new saw chains
a. Remove the battery and adjust the
chain tension.
b. Switch on the Nexxsaw and leave the
motor running idle for approx. 5
minutes.
c. Remove the battery and check the
chain tension again. If necessary,
re-tighten the chain.
d. Afterwards make only easy cuts for
approx. 30 minutes. Always ensure
Only use the Nexxsaw for heavier cuts
and greater cutting depths after the
running-in period has expired.
• Use only a sharp saw chain. A blunt saw
chain can jam more easily. Check the
chain tension more frequently when
working with a new saw chain, as the
• The service life of a saw chain depends
tension.
• During operation, the chain heats up and
re-tensioning may be necessary. Relax
the chain after work so that it is not too
tight the next time the cold machine is
used.
• Do not re-tighten saw chains that have
become too hot. After it has cooled
down, it may contract and lie too tight
against the guide bar. Wait until the saw
chain has cooled down before
re-tensioning.
• The tension of the saw chain is impor-
tant for your safety and the function of
the machine. A correctly tensioned saw
chain increases the service life of the
machine.
• Check the chain tension before each use.
• The saw chain is correctly tensioned if it
can be pulled around the sword by hand
(wear protective gloves) without sagging.
• With new saw chains, you must readjust
the chain tension again after a short
period of operation.
8.6 Work instructions
• Never reach over the protection cover (1)
or under the base plate (10). There is a
risk of injury!
• Do not start the saw if the saw chain is in
contact with the workpiece, is in the
workpiece or can hit an object. This can
lead to serious injuries.
• Clamp loose workpieces before cutting
them. Remove foreign objects such as
nails, screws, etc.
• When cutting a branch that is under
tension be alert for spring back. When
the spring-loaded limb may strike the
operator and/or throw the Nexxsaw out
of control.
• Use extreme caution when cutting brush
and saplings. The slender material may
catch the saw chain and be whipped
toward you or pull you off balance.
•
place the base plate (10) on the surface
of the workpiece and let the saw cut on
its own. Apply only light pressure to the
saw. The chain speed should not be
much slower.
8.7 Changing the saw chain
• Only handle the saw chain with gloves
• Inspect the saw chain and the guide bar
for damage or signs of wear.
• Never put a new saw chain on a worn
guide bar.
•
• When attaching the saw chain, observe
the running direction!
8.8 Kickback
• The shape of the protection cover (1)
largely eliminates the risk of kickback.
• The saw is optimally protected against
kickback by the protection cover with tip
protection. Never remove the protection
cover (1). There is a risk of injury!
8.9 Sharpen the saw chain
• The saw teeth must be sharpened if the
sawdust becomes powdery, if additional
force is required for the incision, if a
straight incision is no longer possible or
if the vibrations become stronger.
• Blunt saw chains should be
re-sharpened.

11
English
• To sharpen the chain use a chain sharp-
ener, make sure you sharpen the chain at
a 30° angle.
• Or have the chain re-sharpened profes-
sionally (advised).
• Replace the saw chain if there is consid-
erable damage that cannot be repaired
8.10 Cleaning the guide bar
• Thoroughly clean the notch of the guide
bar.
• Replace the guide bar if the guide groove
is damaged or worn and the saw chain
has too much lateral space.
9. Maintenance, cleaning and
storing
For best performance, always keep the saw
chain and the Nexxsaw in good order.
Remove the battery pack from the tool
before carrying out any adjustment, servic-
ing or maintenance.
• Clean the sprocket area with a brush or
compressed air.
• Use a cloth, a paintbrush or a brush to
remove dust and wood splinters. Always
keep the ventilation slots clean and free
from obstructions.
• We recommend that you clean your
electric power tool immediately after
each use.
• Clean the electric power tool regularly
with a damp cloth and somewhat soft
soap. Do not use any cleaning or solvent
materials; these can attack the device’s
plastic components. Make sure that no
water can get inside the electric power
tool.
• Do not let liquids of any kind enter the
Nexxsaw.
• From time to time check that all screws
• Store the Nexxsaw and the accessory
indoors in a dry place that is protected
from dust, dirt and extreme
temperatures.
• Store the Nexxsaw out of reach of chil-
dren and persons in need of supervision.
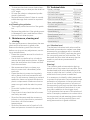
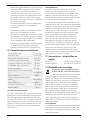
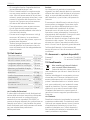
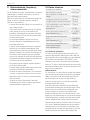
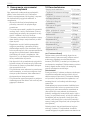
10. Technical data
Battery voltage: 12 V Li-Ion
No load speed: 4000 min-1
No load chain speed: 5.08 m/s
Total sword length: 154 mm
Effective sword length: 118 mm
Max. cutting depth: 118 mm
Product weight without
accessories: 0.97 kg
Sound pressure level LpA:81.4 dB(A)
Uncertainty KpA: 3 dB(A)
Sound power level LWA:89.4 dB(A)
Uncertainty KWA: 3 dB(A)
Hand/arm vibration: 2.792 m/s2
Uncertainty K: 1.5 m/s2
10.1 Vibration level
The declared vibration total value and the
declared noise emission values have been
measured in accordance with a standard
test method (EN 62841) and may be used
for comparing one tool with another. The
declared vibration total value may also be
used in a preliminary assessment of
exposure.
Warning!
The vibration and noise emission during
actual use of the power tool can differ from
the declared total value depending on the
ways in which the tool is used, in particular,
what kind of work piece is machined.
It is necessary to identify safety measured
to protect the operator that are based on an
estimation of exposure in the actual condi-
tions of use (taking account of all parts of
the operating cycle such as the times when
the tool is switched off and when it is run-
ning idle in addition to the trigger time).
Try to minimize the impact of vibration and
noise. Exemplary measures to reduce vibra-
tion exposure include wearing gloves while
using the tool, limiting working time, and
using accessories in good condition.

English
12
11. Accessories – optionally
available
Chain 6" . . . . . . . . . . Item-No. 7064636
Bar 6" . . . . . . . . . . . Item-No. 7064637
12. Disposal
Do not dispose of electric power
tools with domestic refuse.
The electric power tool is shipped
in packaging to reduce transport damage.
This packaging is a raw material and as
such can either be reused or can be fed
back into the raw material cycle. The elec-
tric power tool and its accessories are
made from various materials such as met-
als and plastics. Take defective compo-
nents to a special refuse collection point.
Ask about these at your specialist shop or
local council.
12.1 Batteries
Think of the environment when disposing of
batteries. Contact your local authorities to
Do not dispose of batteries with domestic
refuse. Do not dispose of by burning, risk of
explosion.
13. EC-Declaration of conformity
We, the Batavia B.V., Weth. Wassebali-
estraat 6d, NL-7951 SN Staphorst, declare
by our own responsibility that the product
Nexxsaw, Item-No 7064570, Model Nr.
BT–NXS006 is according to the basic
-
pean Directives Electromagnetic Compati-
bility 2014/30/EU (EMC), 2006/42/EC
(Machinery), RoHS: 2011/65/EU and their
amendments. For the evaluation of con-
formity, the following harmonized standards
were consulted:
EN 62841-1:2015
EN ISO 12100:2010
EN IEC 55014-1:2021
EN IEC 55014-2:2021
EN IEC 61000-3-2:2019
EN 61000-3-3:2013/A1:2019
EN 60335-1:2012/A13:2017
EN 60335-2-29:2004/A11:2018
EN 62233:2008
EN 62133-2:2017
AfPS GS 2019:01
Staphorst, 26 June 2023
Jin Min, QA Representative
Batavia B.V., Weth. Wassebaliestraat 6d,
7951 SN Staphorst, Netherlands

13
English
14. UK Declaration of Conformity
We, the Batavia B.V., Weth. Wassebali-
estraat 6d, NL-7951 SN Staphorst, Nether-
lands declare by our own responsibility that
the product Nexxsaw, Item-No 7064570,
Model Nr. BT–NXS006 is according to the
UK Regulations Supply of Machinery
(Safety) Regulations 2008, Electromag-
netic Compatibility Regulations 2016,
Restriction of the Use of Certain Hazard-
ous Substances in Electrical and Elec-
tronic Equipment Regulations 2012 and
their amendments.
Staphorst, 26 June 2023
Jin Min, QA Representative
Batavia B.V., Weth. Wassebaliestraat 6d,
7951 SN Staphorst, Netherlands
The product and the user manual may be
subject to changes. Technical data may be
changed without prior notice.

Deutsch
14
Sehr geehrte Damen und Herren
Bitte machen Sie sich in der Reihenfolge der
Kapitel mit dem Gerät vertraut und bewah-
ren Sie diese Bedienungsanleitung für spä-
tere Zwecke gut auf.
Lesen Sie bitte die beigefügten “Allge-
meine Sicherheitshinweise für Elektro-
werkzeuge” und alle weiteren Sicher-
heitshinweise in dieser Betriebsanleitung!
Diese Bedienungsanleitung enthält wichtige
Hinweise zur Inbetriebnahme und Handha-
bung. Legen Sie die Anleitung dem Produkt
bei, wenn Sie es an Dritte weitergeben.
Akku und Ladegerät sind nicht im Liefer-
umfang enthalten!
Der Akku ist separat erhältlich unter der
Artikel-Nr.: 7064221 (2Ah). Das Ladegerät
ist separat unter dem erhältlich Artikel-Nr.:
7064222 (2,4A) oder 7064223 (0,4A).
Diese Produkte sind online und in teilneh-
menden Geschäften verfügbar.
1. Erläuterung der Symbole
Folgende Symbole werden im Benutzer-
handbuch oder auf dem Produkt verwendet:
WARNUNG - Zur Verringerung des
Verletzungsrisikos Bedienungsan-
leitung lesen.
Allgemeines Warnzeichen – Seien
Sie aufmerksam und beachten Sie
allgemeine Gefahren.
Tragen Sie immer einen Gehör-
schutz. Die Einwirkung von Lärm
kann Gehörverlust bewirken.
Tragen Sie eine Schutzbrille. Wäh-
rend der Arbeit entstehende Fun-
ken oder aus dem Elektrowerkzeug
heraustretende Splitter, Späne und
Stäube können Sichtverlust
bewirken.
Tragen Sie ein Helm.
Tragen Sie Handschuhe.
Tragen Sie feste Schuhe.
Nicht Regen oder Wasser
aussetzen.
Nehmen Sie sich vor Rückschlag in
acht.
Genügen Abstand zu Elektroleitun-
gen einhalten.
CE steht für ,,Conformité
Européenne“, dies bedeutet,,Über-
einstimmung mit EU Richtlinien“.
Mit der CE Kennzeichnung bestä-
tigt der Hersteller, dass dieses
Elektrowerkzeug den geltenden
europäischen Richtlinien
entspricht.
Nicht in den Hausmüll entsorgen!
2. Zusätzliche Sicherheitshinweise
für Nexxsaw
a. Die Nexxsaw ist bestimmt zum Schnei-
den von Ästen. Verwenden Sie die Nexx-
saw nur in Übereinstimmung mit dieser
Anleitung zum Sägen von Holz im priva-
ten Bereich. Sie ist nicht für den
gewerblichen Dauereinsatz vorgesehen.
b. Halten Sie die Nexxsaw außerhalb der
Reichweite von Kindern. Das Gerät ist
kein Spielzeug.
c. Personen mit eingeschränkten physi-
schen, sensorischen oder geistigen
Fähigkeiten dürfen die Nexxsaw nicht
benutzen, es sei denn sie werden durch
eine für ihre Sicherheit zuständige Per-
son beaufsichtigt oder erhalten von der
zuständigen Person Anweisungen, wie
das Gerät zu benutzen ist.
d. Kinder und Jugendliche dürfen die
Nexxsaw nicht bedienen. Von diesem
Verbot ausgenommen sind Jugendliche
über 16 Jahre unter Aufsicht eines
Fachkundigen zum Zwecke der
Ausbildung.
e. Beachten Sie alle Hinweissymbole. Sie
kennzeichnen Anweisungen, die für die
Sicherheit wichtig sind. Befolgen Sie die
Anweisungen, andernfalls können
schwere Verletzungen die Folge sein!
f. Die Nexxsaw darf immer nur von einer
Person bedient werden. Achten Sie
darauf, dass andere Personen sich nicht
im Arbeitsbereich der Nexxsaw
aufhalten.

15
Deutsch
g. Prüfen Sie vor jeder Inbetriebnahme
den sicheren Zustand der Säge, insbe-
sondere des Schwertes und der Kette.
h. Sorgen Sie bei der Arbeit für einen
sicheren Stand.
i. Halten Sie die Maschine beim Einschal-
ten gut und sicher fest.
j. Das Schwert und die Sägekette müssen
beim Einschalten frei stehen und dürfen
keinen Kontakt zu dem zu bearbeiten-
den Werkstück haben.
k. Halten Sie die Hände vom Sägebereich
fern. Greifen Sie nicht unter das Werk-
stück. Bei Kontakt mit der Sägekette
besteht Verletzungsgefahr.
l. Führen Sie die Nexxsaw nur eingeschal-
tet auf das Werkstück. Es besteht sonst
die Gefahr eines Rückschlages, wenn
sich die Sägekette im Werkstück
verhakt.
m. Achten Sie darauf, dass die Anschlags-
platte beim Sägen immer am Werk-
stück anliegt. Die Sägekette kann sich
sonst verhaken und zum Verlust der
Kontrolle über die Nexxsaw führen.
n. Schalten Sie nach Beendigung des
Arbeitsvorgangs die Nexxsaw aus und
ziehen Sie die Sägekette erst dann aus
dem Schnitt, wenn sie zum Stillstand
gekommen ist. So vermeiden Sie einen
Rückschlag.
o. Spannen Sie das Material gut fest. Stüt-
zen Sie das Werkstück nicht mit der
Hand oder dem Fuß ab. Berühren Sie
keine Gegenstände oder den Erdboden
mit der laufenden Säge. Es besteht
Rückschlaggefahr.
p. Beim Sägen von Schnittholz und dün-
nem Gehölz verwenden Sie immer eine
Das zu schneidende Holz darf beim
Sägen nicht gestapelt werden.
q. Sichern Sie Rundhölzer bevor Sie diese
schneiden.
r. Achten Sie darauf, dass Sie immer zum
Hang hin stehen, wenn Sie auf einem
schrägen Untergrund stehen.
s. Gehen Sie beim Schneiden gesplitterten
Holzes besonders vorsichtig vor. Holz-
splitter können durch die Sägekette
mitgerissen werden und eine erhöhte
Verletzungsgefahr bedeuten!
t. Fremdkörper wie Nägel, Schrauben,
Metallteile, Sand, etc. führen zu erhöh-
tem Verschleiß an Schwert und
Sägekette.
u. Eine stumpfe Sägekette kann Überhit-
zung und Schäden am Motor
verursachen.
v. Zur Nachprüfung der Kettenspannung,
zum Nachspannen, zur Montage der
Sägekette und zur Beseitigung von
Störungen ziehen Sie immer den Akku
heraus! Entnehmen Sie den Akku eben-
falls, wenn Sie das Gerät zeitweise nicht
benutzen.
3. Sicherheitshinweise für Multi
Sägen
3.1 Allgemeine Sicherheitshinweise für
Multi Sägen
a. Halten Sie bei laufender Säge alle
Körperteile von der Sägekette fern.
Vergewissern Sie sich vor dem Starten
der Säge, dass die Sägekette nichts
berührt. Beim Arbeiten mit einer Multi
Säge kann ein Moment der Unachtsam-
keit dazu führen, dass Bekleidung oder
Körperteile von der Sägekette erfasst
werden.
b. Halten Sie die Multi Säge nur an den
isolierten Griffächen, da die Säge-
kette verborgene Stromleitungen tref-
fen kann. Der Kontakt der Sägekette
mit einer spannungsführenden Leitung
kann auch metallene Geräteteile unter
Spannung setzen und zu einem elektri-
schen Schlag führen.
c. Tragen Sie Augenschutz. Weitere
Schutzausrüstung für Gehör, Kopf,
Hände, Beine und Füße wird empfoh-
len. Passende Schutzkleidung mindert
-
gendes Spanmaterial und zufälliges
Berühren der Sägekette.
d. Achten Sie immer auf festen Stand
und benutzen Sie die Multi Säge nur,
wenn Sie auf festem, sicherem und
ebenem Grund stehen. Rutschiger
können zum Verlust des Gleichgewichts

Deutsch
16
oder zum Verlust der Kontrolle über die
Multi Säge führen.
e. Rechnen Sie beim Schneiden eines
unter Spannung stehenden Astes
damit, dass dieser zurückfedert. Wenn
die Spannung in den Holzfasern frei-
kommt, kann der gespannte Ast den
Benutzer treffen und/oder die Multi
Säge der Kontrolle entreißen.
f. Seien Sie besonders vorsichtig beim
Schneiden von Unterholz und jungen
Bäumen. Das dünne Material kann sich
in der Sägekette verfangen und auf Sie
schlagen oder Sie aus dem Gleichge-
wicht bringen.
g. Tragen Sie die Multi Säge am Griff im
ausgeschalteten Zustand, die Säge-
kette von Ihrem Körper abgewandt.
Bei Transport oder Aufbewahrung der
Multi Säge stets die Schutzabdeckung
aufziehen. Sorgfältiger Umgang mit der
Multi Säge verringert die Wahrschein-
lichkeit einer versehentlichen Berührung
mit der laufenden Sägekette.
h. Befolgen Sie Anweisungen für die
Schmierung, die Kettenspannung und
das Wechseln von Führungsschiene
und Kette. Eine unsachgemäß
gespannte oder geschmierte Kette kann
entweder reißen oder das Rückschlagri-
siko erhöhen.
i. Nur Holz sägen. Die Multi Säge nicht
für Arbeiten verwenden, für die sie
nicht bestimmt ist. Beispiel: Verwen-
den Sie die Multi Säge nicht zum
Sägen von Metall, Plastik, Mauerwerk
oder Baumaterialien, die nicht aus
Holz sind. Die Verwendung der Multi
Säge für nicht bestimmungsgemäße
Arbeiten kann zu gefährlichen Situatio-
nen führen.
j. Diese Multi Säge ist nicht geeignet
zum Fällen von Bäumen. Die Verwen-
dung der Multi Säge für nicht bestim-
mungsgemäße Arbeiten kann zu ernst-
haften Verletzungen des Benutzers
oder anderer Personen führen.
k. Befolgen Sie alle Anweisungen, wenn
Sie die Multi Säge von Materialan-
sammlungen befreien, lagern oder
Wartungsarbeiten durchführen. Verge-
wissern Sie sich, dass der Schalter
ausgeschaltet und die Einschaltsperre
sich in Sperrposition bendet. Ein
unerwarteter Betrieb der Multi Säge
beim Entfernen von Materialansamm-
lungen oder während Wartungsarbeiten
kann zu ernsthaften Verletzungen
führen.
• Arbeiten Sie mit der Kettensäge nicht
auf einem Baum, einer Leiter, von einem
Bei Betrieb in einer solchen Weise
besteht ernsthafte Verletzungsgefahr.
• Befolgen Sie alle Anweisungen, wenn
Sie die Kettensäge von Materialan-
sammlungen befreien, lagern oder War-
tungsarbeiten durchführen. Vergewis-
sern Sie sich, dass der Schalter ausge-
schaltet und die Einschaltsperre sich in
Betrieb der Kettensäge beim Entfernen
von Materialansammlungen oder wäh-
rend Wartungsarbeiten kann zu ernst-
haften Verletzungen führen.
• Vermeiden Sie eine abnormale Körper-
haltung und sägen Sie nicht über Schul-
terhöhe. Dadurch wird ein unbeabsich-
tigtes Berühren mit der Schienenspitze
vermieden und eine bessere Kontrolle
der Kettensäge in unerwarteten Situati-
onen ermöglicht.
4. Ursachen und Vermeidung eines
Rückschlags
Rückschlag kann auftreten, wenn die Spitze
der Führungsschiene einen Gegenstand
berührt oder wenn das Holz sich biegt und
die Sägekette im Schnitt festklemmt.
Eine Berührung mit der Schienenspitze kann
in manchen Fällen zu einer unerwarteten
nach hinten gerichteten Reaktion führen, bei
der die Führungsschiene nach oben und in
Richtung des Benutzers geschlagen wird.
Das Verklemmen der Sägekette an der
Oberkante der Führungsschiene kann die
Schiene rasch in Benutzerrichtung
zurückstoßen.
Jede dieser Reaktionen kann dazu führen,
dass Sie die Kontrolle über die Säge verlie-
ren und sich möglicherweise schwer verlet-
zen. Verlassen Sie sich nicht ausschließlich

17
Deutsch
auf die in der Multi Säge eingebauten
Sicherheitseinrichtungen. Als Benutzer einer
Multi Säge sollten Sie verschiedene Maß-
nahmen ergreifen, um unfall- und verlet-
zungsfrei zu arbeiten.
Ein Rückschlag ist die Folge eines falschen
oder fehlerhaften Gebrauchs der Multi Säge.
Er kann durch geeignete Vorsichtsmaßnah-
men, wie nachfolgend beschrieben, verhin-
dert werden:
a. Halten Sie die Säge mit beiden Hän-
den fest, wobei Daumen und Finger
die Griffe der Multi Säge umschließen.
Bringen Sie Ihren Körper und die Arme
in eine Stellung, in der Sie den Rück-
schlagkräften standhalten können.
Wenn geeignete Maßnahmen getroffen
werden, kann der Benutzer die Rück-
schlagkräfte beherrschen. Niemals die
Multi Säge loslassen.
b. Vermeiden Sie eine abnormale Körper-
haltung und sägen Sie nicht über
Schulterhöhe. Dadurch wird ein unbe-
absichtigtes Berühren mit der Schienen-
spitze vermieden und eine bessere
Kontrolle der Multi Säge in unerwarte-
ten Situationen ermöglicht.
c. Verwenden Sie stets vom Hersteller
vorgeschriebene Ersatzschienen und
Sägeketten. Falsche Ersatzschienen
und Sägeketten können zum Reißen der
Kette und/oder zu Rückschlag führen.
d. Halten Sie sich an die Anweisungen
des Herstellers für das Schärfen und
die Wartung der Sägekette. Zu niedrige
Tiefenbegrenzer erhöhen die Neigung
zum Rückschlag
5. Vor der ersten Benutzung
Nehmen Sie das Gerät und alle Zubehörteile
aus der Verpackung. Bewahren Sie das
Verpackungsmaterial außerhalb der Reich-
weite von Kindern auf. Es besteht
Erstickungsgefahr!
6. Verpackungsinhalt
1× Nexxsaw
1× Schutzabdeckung
1× Schwert
1× Sägekette
1× Akku
1× Ladegerät
1× Bedienungsanleitung
7. Bestimmungsgemäßer
Gebrauch
• Die Nexxsaw dient ausschließlich zum
Sägen von Materialien aus Holz, wie
Spanplatten, Ästen, Latten, Hart- und
Weichholz. Die Säge ist nicht für den
gewerblichen Dauereinsatz vorgesehen.
• Zur bestimmungsgemäßen Verwen-
dung gehört auch das Einhalten der
Anleitung.
• Jede darüber hinausgehende Verwen-
dung (andere Medien, Gewaltanwen-
dung) oder eigenmächtige Veränderung
(Umbau, kein Original-Zubehör) können
Gefahren auslösen und gelten als nicht
bestimmungsgemäß.
8. Bedienung
8.1 Einsetzen der Sägekette
(Siehe Abb. B).
Tragen Sie stets Handschuhe, wenn Sie
die Sägekette handhaben.
a. Schrauben Sie die Abdeckung (9) durch
Drehen der Rändelschraube (2) gegen
den Uhrzeigersinn ab.
b. Nehmen Sie das Schwert aus der
Maschine und führen Sie die Sägekette
um das Schwert herum.
Beachten Sie unbedingt die korrekte
Laufrichtung der Sägekette. Das Säge-
ketten-Symbol ist auf der Abdeckung
abgebildet.
c. Legen Sie die Sägekette um das Ritzel
(13) und setzen Sie das Schwert wieder
auf der Maschine.
d. Benetzen Sie mit Öl die Sägekette und
das Ritzel.
e. Schrauben Sie die Abdeckung (9) mit
der Rändelschraube (2) auf das
Gehäuse.
8.2 Schmierung
Die Sägekette muss geschmiert werden,
wenn das Werkzeug in Betrieb ist.
VORSICHT:
• Verwenden Sie nur handelsübliche,
biologisch abbaubare Kettenöle.

Deutsch
18
• Verwenden Sie kein Motoröl, Altöl oder
andere Mineralöle.
• Verwenden Sie keinesfalls Öl, das Staub
und Fremdkörper enthält, oder leicht-
• Wenn die Säge ein Rasseln macht,
muss die Kette geschmiert werden.
Schmieren Sie die Kette regelmäßig mit
biologisch abbaubarem Öl.
8.3 Einstellen der Kettenspannung
VORSICHT: Spannen Sie die Sägekette
nicht zu fest. Eine zu hohe Spannung der
Sägekette kann zum Bruch der Sägekette,
zum Verschleiß des Schwertes und zum
Bruch des Einstellrads führen.
VORSICHT: Eine zu lose Kette kann vom
Schwert rutschen.
Die Sägekette kann sich nach Betriebsstun-
den lockern. Überprüfen Sie vor jeder
Gebrauch die Kettenspannung.
a. Entfernen Sie den Akku.
b. Lösen Sie die Rändelschraube (2) ein
wenig, um die Kettenradabdeckung
leicht zu lösen.
c. Die Spannfeder spannt die Kette
automatisch.
d. Ziehen Sie die Rändelschraube (2) fest,
8.4 Ein- und Ausschalten
Eine Benutzung der Nexxsaw ohne Kettenöl
führt zur Beschädigung der Sägekette und
des Schwertes.
a. Setzen Sie den Akku in die
Akkuaufnahme.
b. Halten Sie die Nexxsaw fest und sicher
am Handgriff.
c. Zum Einschalten der Nexxsaw drücken
Sie den Sicherheitsschalter (4).
d. Drücken Sie den EIN/AUS-Schalter (5).
e. Zum Ausschalten der Säge, lassen Sie
den EIN/AUS-Schalter los.
8.5 Einlaufzeit für neue Sägeketten
a. Entfernen Sie den Akku und stellen Sie
die Kettenspannung ein.
b. Schalten Sie die Nexxsaw an und las-
sen Sie das Gerät ca. 5 Minuten im
Leerlauf laufen.
c. Entfernen Sie den Akku und kontrollie-
ren Sie die Kettenspannung erneut.
Falls erforderlich, spannen Sie die Kette
nach.
d. Führen Sie danach ca. 30 Minuten nur
leichte Schnitte durch. Sorgen Sie
immer für ausreichende Schmierung
der Sägekette! Erst nach Ablauf der
Einlaufzeit, benutzen Sie die Nexxsaw
für schwerere Schnitte und größere
Schnitttiefen.
• Verwenden Sie nur scharfe Sägeketten.
Stumpfe Sägeketten können sich leich-
ter verklemmen. Prüfen Sie beim Arbei-
Kettenspannung, da sich die Kette in
der ersten Zeit stärker dehnt.
• Die Lebensdauer einer Sägekette hängt
von einer ausreichenden Schmierung
und von der richtigen Spannung ab.
• Während des Betriebes erwärmt sich
die Kette, und es kann ein Nachspannen
notwendig werden. Entspannen Sie die
Kette nach dem Arbeiten wieder, damit
sie beim nächsten Gebrauch des kalten
Geräts nicht zu straff ist.
• Spannen Sie zu heiß gewordene Säge-
ketten nicht wieder nach. Nach dem
Abkühlen kann sie sich zusammenzie-
hen und zu straff am Schwert anliegen.
Warten Sie vor dem Nachspannen, bis
die Sägekette abgekühlt ist.
• Die Spannung der Sägekette ist wichtig
für Ihre Sicherheit und die Funktion des
Gerätes. Eine richtig gespannte Säge-
kette erhöht die Lebensdauer des
Gerätes.
• Prüfen Sie vor jeder Nutzung des Gerä-
tes die Kettenspannung.
• Die Sägekette ist richtig gespannt, wenn
sie sich ohne durchzuhängen mit der
Hand (Schutzhandschuhe tragen) um
das Schwert bewegen lässt.
• Bei neuen Sägeketten müssen Sie die
Kettenspannung nochmals nach kurzer
Betriebszeit nachstellen.
8.6 Arbeitshinweise
• Greifen Sie niemals über die Schutzab-
deckung (1) oder unter die Anschlag-
platte (10). Es besteht
Verletzungsgefahr!!
Strona się ładuje...
Strona się ładuje...
Strona się ładuje...
Strona się ładuje...
Strona się ładuje...
Strona się ładuje...
Strona się ładuje...
Strona się ładuje...
Strona się ładuje...
Strona się ładuje...
Strona się ładuje...
Strona się ładuje...
Strona się ładuje...
Strona się ładuje...
Strona się ładuje...
Strona się ładuje...
Strona się ładuje...
Strona się ładuje...
Strona się ładuje...
Strona się ładuje...
Strona się ładuje...
Strona się ładuje...
Strona się ładuje...
Strona się ładuje...
Strona się ładuje...
Strona się ładuje...
Strona się ładuje...
Strona się ładuje...
Strona się ładuje...
Strona się ładuje...
Strona się ładuje...
Strona się ładuje...
Strona się ładuje...
Strona się ładuje...
Strona się ładuje...
Strona się ładuje...
Strona się ładuje...
Strona się ładuje...
Strona się ładuje...
Strona się ładuje...
Strona się ładuje...
Strona się ładuje...
Strona się ładuje...
Strona się ładuje...
Strona się ładuje...
Strona się ładuje...
Strona się ładuje...
Strona się ładuje...
Strona się ładuje...
Strona się ładuje...
Strona się ładuje...
Strona się ładuje...
Strona się ładuje...
Strona się ładuje...
-
 1
1
-
 2
2
-
 3
3
-
 4
4
-
 5
5
-
 6
6
-
 7
7
-
 8
8
-
 9
9
-
 10
10
-
 11
11
-
 12
12
-
 13
13
-
 14
14
-
 15
15
-
 16
16
-
 17
17
-
 18
18
-
 19
19
-
 20
20
-
 21
21
-
 22
22
-
 23
23
-
 24
24
-
 25
25
-
 26
26
-
 27
27
-
 28
28
-
 29
29
-
 30
30
-
 31
31
-
 32
32
-
 33
33
-
 34
34
-
 35
35
-
 36
36
-
 37
37
-
 38
38
-
 39
39
-
 40
40
-
 41
41
-
 42
42
-
 43
43
-
 44
44
-
 45
45
-
 46
46
-
 47
47
-
 48
48
-
 49
49
-
 50
50
-
 51
51
-
 52
52
-
 53
53
-
 54
54
-
 55
55
-
 56
56
-
 57
57
-
 58
58
-
 59
59
-
 60
60
-
 61
61
-
 62
62
-
 63
63
-
 64
64
-
 65
65
-
 66
66
-
 67
67
-
 68
68
-
 69
69
-
 70
70
-
 71
71
-
 72
72
-
 73
73
-
 74
74


Batavia One-Hand Chainsaw Instrukcja obsługi
- Kategoria
- Akumulatorowe piły łańcuchowe
- Typ
- Instrukcja obsługi
w innych językach
- español: Batavia One-Hand Chainsaw Manual de usuario
- italiano: Batavia One-Hand Chainsaw Manuale utente
- Deutsch: Batavia One-Hand Chainsaw Benutzerhandbuch
- português: Batavia One-Hand Chainsaw Manual do usuário
- français: Batavia One-Hand Chainsaw Manuel utilisateur
- Nederlands: Batavia One-Hand Chainsaw Handleiding
Inne dokumenty
-
Solo 646 Original Instructions Manual
-
Makita UC3520A Instrukcja obsługi
-
Makita UC3530A Instrukcja obsługi
-
Scheppach CSE2400 Instrukcja obsługi
-
AL-KO CS 36 Li Instrukcja obsługi
-
FLORABEST FHE 710 A1 Translation Of Original Operation Manual
-
 IKRA Mogatec PC 26 TL Operating Instructions Manual
-
Worx EC-P115 Instrukcja obsługi
-
Sparky Group Professional TV 2040 Instrukcja obsługi
-
AL-KO CS 4030 Instrukcja obsługi
