Zelmer ZGK6800 Instrukcja obsługi
- Kategoria
- Trymery do brody
- Typ
- Instrukcja obsługi

ZGK6800
INSTRUKCJA UŻYTKOWANIA
Wielofunkcyjny trymer
ИНСТРУКЦИЯ ПО ЭКСПЛУАТАЦИИ
Многофункциональный триммер
NÁVOD K POUŽITÍ
Multifunkční zastřihovač
ИНСТРУКЦИИ ЗА УПОТРЕБА
Многофункционален тример
NÁVOD NA UOBSLUHU
Multifunkčný zastrihávač
ІНСТРУКЦІЯ ПО ЗАСТОСУВАННЮ
Багатофункціональний тример
USER MANUAL
Multi groomer
BENUTZERHANDBUCH
Multifunktionaler Trimmer
HASZNÁLATI UTASÍTÁS
Többfunkciós trimmer
INSTRUCȚIUNI DE UTILIZARE
Aparat de tuns multifuncțional
PL
EN
DE
CZ
SK
HU
RO
RU
UA
BG
ZGK6800
WE WOULD LIKE TO THANK YOU FOR CHOOSING ZELMER. WE WISH
THE PRODUCT PERFORMS TO YOUR SATISFACTION AND PLEASURE.
WARNING
PLEASE READ THE INSTRUCTIONS FOR USE CAREFULLY PRIOR TO
USING THE PRODUCT. STORE THESE IN A SAFE PLACE FOR FUTURE
REFERENCE
DESCRIPTION
1. T-blade
2. Blade length setting (0-1-2mm)
3. ON/OFF button
4. Trimmer guide (3-4-5-6-mm)
5. Storage pouch
6. Cleaning brush
7. Precision trimmer
8. Design trimmer
9. Mini foil shaver
10.Nose and ear trimmer
11.LED display
12.Cutting guide (3/6/9/12/15/18/21mm)
13.Oil bottle
14.USB charging cable
SAFETY INSTRUCTIONS
This device can be used by children aged 3
or over under supervision. This appliance
can be used by children aged from 8 years
and above and persons with reduced
physical, sensory or mental capabilities or
lack of experience and knowledge if they
have been given supervision or instruction
concerning use of the appliance in a safe
way and understand the hazards involved.
Children shall not play with the appliance.
Cleaning and user maintenance shall not be
made by children without supervision.
This device can only be connected with the
USB interface (5VDC, Output Max 1A).
Follow the DEVICE CHARGE instructions
in order to charge it.
Follow the device BATTERY REMOVAL
instructions for removal of the batteries from
the device.
This device is designed for use at a
maximum altitude up to 2000m above sea
level.
IMPORTANT WARNINGS
This appliance is designed for home use and should never be used for commer-
cial or industrial use under any circumstances.
Do not use the device on wet hair.
Do not use connect or disconnect the device to the mains with your hands or feet
wet. Do not use any accessories other than those supplied.
Do not use this device near to bathtubs, showers, sinks or other tanks that
contain water. The mains connection cable must not be tangled or wrapped
around the product during use. Do not pull on the cable to unplug it or use it to
carry the product.
Do not wrap the cable around the device.
Proceed according to the cleaning section of this manual for cleaning. Do not use
the product on animals.
Unplug the product immediately from the mains in the event of any breakdown
and contact an authorised Technical support service.
In order to prevent any risk of danger, do not open the device. Only qualified
technical personnel from the brand´s Official Technical support service may carry
out repairs or procedures on the device.
Any incorrect use or improper handling of the product shall render the warranty
null and void. Only an authorised technical support service centre may carry out
repairs on this product.
B&B TRENDS SL. disclaims all liability for damages that may occur to people,
animals or objects, for the non-observance of these warnings.
INSTRUCTIONS FOR USE
Always ensure the appliance is switched off before changing any attachments.
Place the desired trimming head on top of the groomer and attach the desired
cutting comb guide.
Push "ON/OFF button" (3), the trimmer is turned on and push "ON/OFF button"
again to turn it off. The display is 100% when the battery is full. The display is LO
when the battery is less than 20%.
The charging battery logo is displayed when the trimmer is charging.
You can choose between different cutting fixed comb guides
3/6/9/12/15/18/21mm (12) or 3-4-5-6mm adjustable trimmer guide (4).
HOW TO PLACE AND REMOVE
ATTACHMENTS
A detachable blade system enables you to quickly change from blade for full
grooming to detail trimming blade around a moustache, goatee, or anywhere to
define the hair line. To remove the attachments, simply pull top edge of blade
away from the body unit. To attach, align the back tab of the attachment head to
the cavity on the inner edge of trimmer unit and push down on top of blade.
T-BLADE (Fig.1)
For uniform cutting, allow the trimmer to cut its way through the hair. Do not force
it through at a faster rate.
Select the desired guide combs 3/6/9/12/15/18/18mm. Start by combing the hair
so it falls into its natural direction.
Place the largest guide comb onto your trimmer and start by trimming the sides
from the bottom upwards. Hold the trimmer lightly against the hair, with teeth of
the guide comb pointing up but flat against the head. Slowly lift the trimmer up
and outward through the hair, cutting only a small amount at a time. Repeat
around sides and back of head.
To trim your beard/moustache hold the groomer with the cutting blade facing you.
Start with edge of beard/moustache line, and with the cutting blades resting
lightly against your skin, use slow movements to create a beard/moustache line.
PRECISION TRIMMER (Fig.7)
One adjustable comb for precision trimmer
Select the desired length on the adjustable comb 3-4-5-6mm.
Hold the groomer with the cutting blade facing you.
Start with edge of beard/moustache line, and with the cutting blades resting
lightly against your skin, use slow movements to create a beard/moustache line.
DESIGN TRIMMER (Fig.8)
Use the design trimmer to create fine lines and contours around your facial style,
close to the skin.
Hold the design trimming head perpendicular to the skin and move the trimming
head upwards or downwards with gentle pressure.
MINI FOIL SHAVER (Fig.9)
Hold the groomer and allow mini foil shaver gently touches your face.
Use short, well-controlled movements to shave around your beard/moustache.
Use your free hand to stretch your skin. This encourages the hair to stand
upright, making it easier to shave.
NOSE AND EAR TRIMMER (Fig.10)
Insert the nose and ear attachment gently into the nostril or ear.
Gently move the groomer in and out of the nostril or ear and at the same time
rotate the groomer.
IMPORTANT: Avoid inserting the cutting unit more than 6mm into your nostril.
CHARGING THE DEVICE
Before using your groomer for the first time, charge for 2-3 hours, and charge 2
hours regularly. Ensure the product is switched off. The hair trimmer is complete-
ly handy to carry and can be charged anywhere with the USB cable (Fig.14). First
insert the plug on the end of the USB charging cable lead into the unit and then
connect the USB charging cable to the USB interface. This appliance is suitable
for 5V DC Max 1A charger, computer and other power interface. The LED display
(Fig.11) shows remaining battery power in percent. IMPORTANT: This product is
for cord and cordless use. Your groomer cannot be overcharged. However, if the
product is not going to be used for an extended period time (2-3 months), unplug
it from the mains and store. Fully recharge your hair clipper when you like to use
it again. To preserve the life of your batteries, let them run out every 2 months
then recharge for 2-3 hours again.
MAINTENANCE AND CLEANING
Unplug the product when you do not intend to use it for an extended period of
time to prolong its shelf-life. Allow the device to cool down prior to storage.
Separate the tool head from the body and use the cleaning brush (Fig.6) to
remove dust from the internal parts. Apply a drop of oil (Fig.13) on one of the
edges of the blades for their maintenance, and turn on the device for a few
seconds to distribute it. This should be done when you notice a certain amount of
difficulty during the trimming operation.
Ensure that the device is unplugged prior to cleaning it.
This device may only be cleaned with a damp cloth, and chemical products must
never be used for the same
PRODUCT DISPOSAL
REMOVING BATTERY
The appliance must be disconnected from
the supply mains when removing the
battery.
Ensure that the clipper is discharged of all power First remove the comb. Then
remove the blade.
Unscrew the 2 screws in the blade base of the unit. Unscrew the other screw on
the lower back housing of the clipper. Lift or pry the clipper halves apart,
exposing the battery.
Cut the metal pieces on both ends of the battery and remove it from the PCB. Pull
downward the battery set from the unit.
The battery must be removed from the
appliance before it is scrapped. The battery
is to be disposed of safety
6 7
1
8
311 12
10
4
!
!
5

DZIĘKUJEMY ZA WYBÓR MARKI ZELMER.
ŻYCZYMY SATYSFAKCJI Z UŻYTKOWANIA URZĄDZENIA.
OSTRZEŻENIE
PRZED UŻYCIEM PRODUKTU NALEŻY UWAŻNIE PRZECZYTAĆ
INSTRUKCJĘ UŻYTKOWANIA. PRZECHOWUJ JĄ W BEZPIECZNYM
MIEJSCU DO WYKORZYSTANIA W PRZYSZŁOŚCI.
OPIS
1. Ostrze T-blade
2. Regulacja długości ostrza (0-1-2mm)
3. Przycisk przełącznika ON/OFF.
4. Nasadka trymera (3-4-5-6mm)
5. Pokrowiec
6. Pędzelek do czyszczenia
7. Precyzyjny trymer
8. Trymer do modelowania
9. Golarka foliowa
10. Trymer do nosa i uszu
11. Wyświetlacz LED
12. Nasadka grzebieniowa (3/6/9/12/15/18/21mm)
13. Olej do czyszczenia ostrzy
14. Kabel USB do ładowania
INSTRUKCJE BEZPIECZEŃSTWA
Z tego urządzenia mogą korzystać dzieci w
wieku 3 lat i starsze, jeśli są one pod
nadzorem. Z tego urządzenia mogą
korzystać dzieci w wieku 8 lat i starsze oraz
osoby o ograniczonej sprawności fizycznej,
sensorycznej i umysłowej oraz osoby
nieposiadające wystarczającego
doświadczenia oraz wiedzy pod
warunkiem, że będą one nadzorowane lub
zostaną poinstruowane w zakresie
bezpiecznej obsługi urządzenia i będą
rozumiały zagrożenia związane z taką
obsługą. Dzieci nie mogą bawić się
urządzeniem. Czyszczenie i konserwacja
urządzenia nie mogą być dokonywane
przez dzieci bez nadzoru.
Urządzenie można podłączać tylko do portu
USB (5VDC, wyjście maks. 1A).
Ładuj urządzenie zgodnie z instrukcjami
dotyczącymi ŁADOWANIA URZĄDZENIA.
Baterie wyjmować z urządzenia zgodnie z
instrukcjami dotyczącymi WYJMOWANIA
BATERII.
Urządzenie jest przeznaczone do użytku na
maksymalnej wysokości do 2000m n.p.m..
WAŻNE OSTRZEŻENIA
To urządzenie jest przeznaczone do użytku domowego i nigdy w żadnym wypadku
nie powinno być wykorzystywane do użytku komercyjnego lub przemysłowego.
Nie używać urządzenia na mokrych włosach.
Nie używać, nie podłączać ani nie odłączać urządzenia od sieci, mając mokre dłonie
lub stopy.
Nie używać akcesoriów innych niż dostarczone.
Urządzenie nie może być nigdy używane w pobliżu wanien, pryszniców, zlewów lub
innych zbiorników z wodą.
W trakcie użytkowania przewód zasilający nie może być splątany ani owinięty wokół
produktu.
Nie ciągnąć za kabel przyłączeniowy w celu odłączenia go i nie używać go do
przenoszenia urządzenia.
Nie owijać kabla wokół urządzenia.
Urządzenie należy czyścić według wskazówek znajdujących się w sekcji dotyczącej
czyszczenia.
Nie używać produktu na zwierzętach.
Natychmiast odłączyć produkt od sieci w przypadku awarii i skontaktować się z
oficjalnym działem wsparcia technicznego.
Aby zapobiec ryzyku niebezpieczeństwa, nie należy otwierać urządzenia. Naprawy
lub procedury dotyczące urządzenia może wykonywać tylko wykwalifikowany
personel z oficjalnego działu wsparcia technicznego marki.
Nieprawidłowe użycie lub niewłaściwe obchodzenie się z produktem spowoduje
unieważnienie gwarancji. Tylko oficjalne serwisowe centrum wsparcia technicznego
może dokonywać napraw produktu.
Eurogama Sp. z o.o. nie ponosi odpowiedzialności za jakiekolwiek szkody, które
mogą wystąpić na osobach, zwierzętach lub przedmiotach z powodu nieprzestrze-
gania tych ostrzeżeń.
INSTRUKCJA UŻYTKOWANIA
Przed wymianą akcesoriów należy zawsze upewnić się, że urządzenie jest wyłączone.
Umieść wybraną głowicę trymera na maszynce i przymocuj wybraną tnącą nakładkę
grzebieniową.
Naciśnij przycisk przełącznika ON/OFF (3) aby włączyć trymer. Ponowne jego
naciśnięcie spowoduje wyłączenie urządzenia. 100% na wyświetlaczu oznacza w pełni
naładowaną baterię. LO, pojawia się gdy poziom naładowania baterii jest mniejszy niż
20%. W trakcie ładowania urządzenia wyświetla się logo ładowania akumulatora.
Można wybierać między różnymi stałymi nasadkami grzebieniowym
3/6/9/12/15/18/21mm (Rys. 12) lub 3-4-5-6mm regulowaną nasadką trymera (Rys. 4).
JAK ZAKŁADAĆ I ZDEJMOWAĆ AKCESORIA
Odłączany system ostrzy umożliwia szybką zmianę z ostrza do pełnej pielęgnacji na
ostrze do precyzyjnego przycinania w okolicy wąsów, bródki lub w dowolnym innym
miejscu, gdzie chcemy wyznaczyć linię włosów. Aby usunąć osprzęt, wystarczy
odciągnąć górną krawędź ostrza od korpusu. Aby założyć wybrany element, ustaw
tylną zakładkę głowicy danego elementu w linii z zagłębieniem na wewnętrznej
krawędzi trymera i naciśnij na górną część ostrza.
OSTRZE T-BLADE (Rys. 1)
Dla równomiernego cięcia, pozwól aby trymer wycinał włosy swoim tempem. Nie
przesuwaj go na siłę przez włosy próbując przyspieszyć cięcie.
Wybierz wymaganą głowicę z grzebieniem 3/6/9/12/15/18/21mm. Zacznij od
przeczesywania włosów w taki sposób, aby układały się w ich naturalnym kierunku.
Umieść największy grzebień na trymerze i zacznij od przycinania włosów od dołu do
góry. Dociskaj trymer lekko do włosów, z zębami grzebienia skierowanymi w
górę, ale płasko przylegającymi do głowy. Powoli podnieść trymer w górę i na zewnątrz
przez włosy, przycinając na raz tylko ich niewielką ilość. Powtórz tę czynność na
bokach i z tyłu głowy.
Aby przyciąć brodę / wąsy trzymaj maszynkę z ostrzem tnącym skierowanym w twoją
stronę.
Zacznij od linii krawędzi brody / wąsów, z ostrzem tnącym spoczywającym lekko na
skórze. Wykonuj wolne ruchy, aby wykreować linię brody / wąsów
PL
WE WOULD LIKE TO THANK YOU FOR CHOOSING ZELMER. WE WISH
THE PRODUCT PERFORMS TO YOUR SATISFACTION AND PLEASURE.
WARNING
PLEASE READ THE INSTRUCTIONS FOR USE CAREFULLY PRIOR TO
USING THE PRODUCT. STORE THESE IN A SAFE PLACE FOR FUTURE
REFERENCE
DESCRIPTION
1. T-blade
2. Blade length setting (0-1-2mm)
3. ON/OFF button
4. Trimmer guide (3-4-5-6-mm)
5. Storage pouch
6. Cleaning brush
7. Precision trimmer
8. Design trimmer
9. Mini foil shaver
10.Nose and ear trimmer
11.LED display
12.Cutting guide (3/6/9/12/15/18/21mm)
13.Oil bottle
14.USB charging cable
SAFETY INSTRUCTIONS
This device can be used by children aged 3
or over under supervision. This appliance
can be used by children aged from 8 years
and above and persons with reduced
physical, sensory or mental capabilities or
lack of experience and knowledge if they
have been given supervision or instruction
concerning use of the appliance in a safe
way and understand the hazards involved.
Children shall not play with the appliance.
Cleaning and user maintenance shall not be
made by children without supervision.
This device can only be connected with the
USB interface (5VDC, Output Max 1A).
Follow the DEVICE CHARGE instructions
in order to charge it.
Follow the device BATTERY REMOVAL
instructions for removal of the batteries from
the device.
This device is designed for use at a
maximum altitude up to 2000m above sea
level.
IMPORTANT WARNINGS
This appliance is designed for home use and should never be used for commer-
cial or industrial use under any circumstances.
Do not use the device on wet hair.
Do not use connect or disconnect the device to the mains with your hands or feet
wet. Do not use any accessories other than those supplied.
Do not use this device near to bathtubs, showers, sinks or other tanks that
contain water. The mains connection cable must not be tangled or wrapped
around the product during use. Do not pull on the cable to unplug it or use it to
carry the product.
Do not wrap the cable around the device.
Proceed according to the cleaning section of this manual for cleaning. Do not use
the product on animals.
Unplug the product immediately from the mains in the event of any breakdown
and contact an authorised Technical support service.
In order to prevent any risk of danger, do not open the device. Only qualified
technical personnel from the brand´s Official Technical support service may carry
out repairs or procedures on the device.
Any incorrect use or improper handling of the product shall render the warranty
null and void. Only an authorised technical support service centre may carry out
repairs on this product.
B&B TRENDS SL. disclaims all liability for damages that may occur to people,
animals or objects, for the non-observance of these warnings.
INSTRUCTIONS FOR USE
Always ensure the appliance is switched off before changing any attachments.
Place the desired trimming head on top of the groomer and attach the desired
cutting comb guide.
Push "ON/OFF button" (3), the trimmer is turned on and push "ON/OFF button"
again to turn it off. The display is 100% when the battery is full. The display is LO
when the battery is less than 20%.
The charging battery logo is displayed when the trimmer is charging.
You can choose between different cutting fixed comb guides
3/6/9/12/15/18/21mm (12) or 3-4-5-6mm adjustable trimmer guide (4).
PRECYZYJNY TRYMER (Rys.7)
Jedna regulowana nasadka do precyzyjnej stylizacji. Wybierz wymaganą długość na
regulowanej nasadce 3-4-5-6mm. Trzymaj golarkę ostrzem skierowanym do siebie.
Zacznij od krawędzi brody/wąsów i trzymając ostrza tnące lekko przylegające do skóry,
powolnymi ruchami utwórz linię brody/wąsów.
PRECYZYJNY TRYMER (Rys. 8)
Użyj precyzyjnego trymera, aby tworzyć delikatne linie i kontury wokół swojej twarzy,
blisko skóry.
Przytrzymaj głowicę trymera prostopadle do skóry i przesuwaj w górę lub w dół
delikatnie dociskając.
GOLARKA FOLIOWA (Rys. 9)
Przytrzymaj maszynkę i pozwól, aby mini golarka foliowa delikatnie dotykała twojej
twarzy.
Używaj krótkich, pewnych ruchów, aby golić się wokół brody / wąsów. Za pomocą
wolnej ręki naciągaj skórę. Powoduje to, że włosy podnoszą się, co ułatwia golenie.
TRYMER DO NOSA I USZU (Rys. 10)
Delikatnie wprowadź nasadkę do przycinania włosów w nosie i uszu do otworu
nosowego lub ucha.
Delikatnie poruszaj maszynką w kierunku do wewnątrz i na zewnątrz otworu nosowego
lub ucha jednocześnie obracając maszynką. WAŻNE: Nie wkładaj trymera do nosa
głębiej niż na 6mm.
ŁADOWANIE URZĄDZENIA
Przed użyciem maszynki po raz pierwszy ładuj ją przez 2-3 godziny. Później ładuj ją
regularnie przez 2 godziny. Upewnij się, że produkt jest wyłączony.
Trymer do włosów jest poręczy i może być ładowany w dowolnym miejscu za pomocą
kabla USB (Rys.14). Najpierw włóż wtyczkę na końcu kabla USB do urządzenia, a
następnie podłącz kabel USB do portu USB. To urządzenie może był ładowane
ładowarką 5V DC maks. 1A, z komputera i innych źródeł zasilania. Wyświetlacz LED
(rys.11) pokazuje stan naładowania baterii w procentach.
WAŻNE: Produkt może być wykorzystywany z przewodem lub bez przewodu. Trymer
nie może być nadmiernie naładowany. Jeśli jednak produkt nie będzie używany przez
dłuższy czas (2-3 miesiące), odłącz go od sieci i schowaj. Naładuj baterię do pełna gdy
zechcesz użyć go ponownie. Aby zachować żywotność baterii, należy rozładować je co
2 miesiące, a następnie ponownie ładować przez 2-3 godziny
KONSERWACJA i CZYSZCZENIE
Odłączyć urządzenie od zasilania, jeśli ma być nieużywane przez dłuższy okres czasu,
tak aby wydłużyć jego żywotność. Przed schowaniem urządzenia poczekać aż wystyg-
nie. Odłączyć nasadkę od korpusu i za pomocą pędzelka do czyszczenia (Rys. 6)
usunąć zabrudzenia z części wewnętrznych. W celu przeprowadzenia konserwacji
ostrzy nanieść kroplę oleju (Rys. 13) na jedną z ich krawędzi i włączyć urządzenie na
kilka sekund w celu jej rozprowadzenia. Konserwację należy przeprowadzić, gdy
zaobserwujemy trudność w pracy urządzenia w czasie przycinania włosów.
Przed czyszczeniem urządzenia upewnij się, że jest odłączone od zasilania. Urządze-
nie można czyścić tylko z użyciem wilgotnej ściereczki. Do czyszczenia nigdy nie
używaj środków chemicznych.
EKOLOGICZNA UTYLIZACJA
WYJMOWANIE BATERII
W czasie wyjmowania baterii urządzenie
musi być odłączone od sieci zasilającej.
Upewnij się, że trymer jest całkowicie rozładowany. Najpierw zdejmij nakładkę.
Następnie zdejmij ostrze.
Odkręcić 2 śruby w podstawie ostrza urządzenia. Odkręcić śrubę na dolnej tylnej
obudowie maszynki. Podnieś lub podważ połówki maszynki, odsłaniając baterię.
Odłącz przewody na obu końcach baterii i wyjmij ją z komory baterii. Wyciągnij z
urządzenia zestaw baterii ciągnąc w dół.
Przed wyrzuceniem urządzenia należy wyjąc
z niego baterię. Baterię należy usunąć w
bezpieczny sposób.
Mamy nadziejE¡l, ze produkt przyniesie Pañstwu wiele satysfakcji. .
HOW TO PLACE AND REMOVE
ATTACHMENTS
A detachable blade system enables you to quickly change from blade for full
grooming to detail trimming blade around a moustache, goatee, or anywhere to
define the hair line. To remove the attachments, simply pull top edge of blade
away from the body unit. To attach, align the back tab of the attachment head to
the cavity on the inner edge of trimmer unit and push down on top of blade.
T-BLADE (Fig.1)
For uniform cutting, allow the trimmer to cut its way through the hair. Do not force
it through at a faster rate.
Select the desired guide combs 3/6/9/12/15/18/18mm. Start by combing the hair
so it falls into its natural direction.
Place the largest guide comb onto your trimmer and start by trimming the sides
from the bottom upwards. Hold the trimmer lightly against the hair, with teeth of
the guide comb pointing up but flat against the head. Slowly lift the trimmer up
and outward through the hair, cutting only a small amount at a time. Repeat
around sides and back of head.
To trim your beard/moustache hold the groomer with the cutting blade facing you.
Start with edge of beard/moustache line, and with the cutting blades resting
lightly against your skin, use slow movements to create a beard/moustache line.
PRECISION TRIMMER (Fig.7)
One adjustable comb for precision trimmer
Select the desired length on the adjustable comb 3-4-5-6mm.
Hold the groomer with the cutting blade facing you.
Start with edge of beard/moustache line, and with the cutting blades resting
lightly against your skin, use slow movements to create a beard/moustache line.
DESIGN TRIMMER (Fig.8)
Use the design trimmer to create fine lines and contours around your facial style,
close to the skin.
Hold the design trimming head perpendicular to the skin and move the trimming
head upwards or downwards with gentle pressure.
MINI FOIL SHAVER (Fig.9)
Hold the groomer and allow mini foil shaver gently touches your face.
Use short, well-controlled movements to shave around your beard/moustache.
Use your free hand to stretch your skin. This encourages the hair to stand
upright, making it easier to shave.
NOSE AND EAR TRIMMER (Fig.10)
Insert the nose and ear attachment gently into the nostril or ear.
Gently move the groomer in and out of the nostril or ear and at the same time
rotate the groomer.
IMPORTANT: Avoid inserting the cutting unit more than 6mm into your nostril.
CHARGING THE DEVICE
Before using your groomer for the first time, charge for 2-3 hours, and charge 2
hours regularly. Ensure the product is switched off. The hair trimmer is complete-
ly handy to carry and can be charged anywhere with the USB cable (Fig.14). First
insert the plug on the end of the USB charging cable lead into the unit and then
connect the USB charging cable to the USB interface. This appliance is suitable
for 5V DC Max 1A charger, computer and other power interface. The LED display
(Fig.11) shows remaining battery power in percent. IMPORTANT: This product is
for cord and cordless use. Your groomer cannot be overcharged. However, if the
product is not going to be used for an extended period time (2-3 months), unplug
it from the mains and store. Fully recharge your hair clipper when you like to use
it again. To preserve the life of your batteries, let them run out every 2 months
then recharge for 2-3 hours again.
MAINTENANCE AND CLEANING
Unplug the product when you do not intend to use it for an extended period of
time to prolong its shelf-life. Allow the device to cool down prior to storage.
Separate the tool head from the body and use the cleaning brush (Fig.6) to
remove dust from the internal parts. Apply a drop of oil (Fig.13) on one of the
edges of the blades for their maintenance, and turn on the device for a few
seconds to distribute it. This should be done when you notice a certain amount of
difficulty during the trimming operation.
Ensure that the device is unplugged prior to cleaning it.
This device may only be cleaned with a damp cloth, and chemical products must
never be used for the same
PRODUCT DISPOSAL
REMOVING BATTERY
The appliance must be disconnected from
the supply mains when removing the
battery.
Ensure that the clipper is discharged of all power First remove the comb. Then
remove the blade.
Unscrew the 2 screws in the blade base of the unit. Unscrew the other screw on
the lower back housing of the clipper. Lift or pry the clipper halves apart,
exposing the battery.
Cut the metal pieces on both ends of the battery and remove it from the PCB. Pull
downward the battery set from the unit.
The battery must be removed from the
appliance before it is scrapped. The battery
is to be disposed of safety
To urzqdzenie jest oznaczone zgodnie z Dyrektywq Europejskq
2012/19/UE oraz polskq Ustawa z dnia 11 wrzesnia 2015 r. ,,O zuzytym
sprzE¡)cie elektrycznym i elektronicznym" (Dz.U. z dn. 23.10.2015 paz.
11688) symbolem przekreslonego kontenera na odpady.
Takie oznakowanie informuje, ze sprzE¡lt ten, po okresie jego
uzytkowania nie moze byé umieszczany lqcznie z innymi odpadami
pochodzqcymi z gospodarstwa domowego.
Uzytkownik jest zobowiqzany do oddania go prowadzqcym zbieranie
zuzytego sprzE¡ltu elektrycznego i elektronicznego. Prowadzqcy
zbieranie, w tym lokalne punkty zbiórki, sklepy oraz gminne jednostki,
tworzq odpowiedni system umozliwiajqcy oddanie tego sprzE¡)tu.
Wlasciwe postE¡)powanie ze zuzytym sprzE¡)tem elektrycznym i
elektronicznym przyczynia siE¡l do unikniE¡lcia szkodliwych dla zdrowia
ludzi i srodowiska naturalnego konsekwencji, wynikajqcych z obecnosci
sk/adników niebezpiecznych oraz niew/asciwego sk/adowania i
przetwarzania takiego sprzE¡ltu.

DZIĘKUJEMY ZA WYBÓR MARKI ZELMER.
ŻYCZYMY SATYSFAKCJI Z UŻYTKOWANIA URZĄDZENIA.
OSTRZEŻENIE
PRZED UŻYCIEM PRODUKTU NALEŻY UWAŻNIE PRZECZYTAĆ
INSTRUKCJĘ UŻYTKOWANIA. PRZECHOWUJ JĄ W BEZPIECZNYM
MIEJSCU DO WYKORZYSTANIA W PRZYSZŁOŚCI.
OPIS
1. Ostrze T-blade
2. Regulacja długości ostrza (0-1-2mm)
3. Przycisk przełącznika ON/OFF.
4. Nasadka trymera (3-4-5-6mm)
5. Pokrowiec
6. Pędzelek do czyszczenia
7. Precyzyjny trymer
8. Trymer do modelowania
9. Golarka foliowa
10. Trymer do nosa i uszu
11. Wyświetlacz LED
12. Nasadka grzebieniowa (3/6/9/12/15/18/21mm)
13. Olej do czyszczenia ostrzy
14. Kabel USB do ładowania
INSTRUKCJE BEZPIECZEŃSTWA
Z tego urządzenia mogą korzystać dzieci w
wieku 3 lat i starsze, jeśli są one pod
nadzorem. Z tego urządzenia mogą
korzystać dzieci w wieku 8 lat i starsze oraz
osoby o ograniczonej sprawności fizycznej,
sensorycznej i umysłowej oraz osoby
nieposiadające wystarczającego
doświadczenia oraz wiedzy pod
warunkiem, że będą one nadzorowane lub
zostaną poinstruowane w zakresie
bezpiecznej obsługi urządzenia i będą
rozumiały zagrożenia związane z taką
obsługą. Dzieci nie mogą bawić się
urządzeniem. Czyszczenie i konserwacja
urządzenia nie mogą być dokonywane
przez dzieci bez nadzoru.
Urządzenie można podłączać tylko do portu
USB (5VDC, wyjście maks. 1A).
Ładuj urządzenie zgodnie z instrukcjami
dotyczącymi ŁADOWANIA URZĄDZENIA.
Baterie wyjmować z urządzenia zgodnie z
instrukcjami dotyczącymi WYJMOWANIA
BATERII.
Urządzenie jest przeznaczone do użytku na
maksymalnej wysokości do 2000m n.p.m..
WAŻNE OSTRZEŻENIA
To urządzenie jest przeznaczone do użytku domowego i nigdy w żadnym wypadku
nie powinno być wykorzystywane do użytku komercyjnego lub przemysłowego.
Nie używać urządzenia na mokrych włosach.
Nie używać, nie podłączać ani nie odłączać urządzenia od sieci, mając mokre dłonie
lub stopy.
Nie używać akcesoriów innych niż dostarczone.
Urządzenie nie może być nigdy używane w pobliżu wanien, pryszniców, zlewów lub
innych zbiorników z wodą.
W trakcie użytkowania przewód zasilający nie może być splątany ani owinięty wokół
produktu.
Nie ciągnąć za kabel przyłączeniowy w celu odłączenia go i nie używać go do
przenoszenia urządzenia.
Nie owijać kabla wokół urządzenia.
Urządzenie należy czyścić według wskazówek znajdujących się w sekcji dotyczącej
czyszczenia.
Nie używać produktu na zwierzętach.
Natychmiast odłączyć produkt od sieci w przypadku awarii i skontaktować się z
oficjalnym działem wsparcia technicznego.
Aby zapobiec ryzyku niebezpieczeństwa, nie należy otwierać urządzenia. Naprawy
lub procedury dotyczące urządzenia może wykonywać tylko wykwalifikowany
personel z oficjalnego działu wsparcia technicznego marki.
Nieprawidłowe użycie lub niewłaściwe obchodzenie się z produktem spowoduje
unieważnienie gwarancji. Tylko oficjalne serwisowe centrum wsparcia technicznego
może dokonywać napraw produktu.
Eurogama Sp. z o.o. nie ponosi odpowiedzialności za jakiekolwiek szkody, które
mogą wystąpić na osobach, zwierzętach lub przedmiotach z powodu nieprzestrze-
gania tych ostrzeżeń.
INSTRUKCJA UŻYTKOWANIA
Przed wymianą akcesoriów należy zawsze upewnić się, że urządzenie jest wyłączone.
Umieść wybraną głowicę trymera na maszynce i przymocuj wybraną tnącą nakładkę
grzebieniową.
Naciśnij przycisk przełącznika ON/OFF (3) aby włączyć trymer. Ponowne jego
naciśnięcie spowoduje wyłączenie urządzenia. 100% na wyświetlaczu oznacza w pełni
naładowaną baterię. LO, pojawia się gdy poziom naładowania baterii jest mniejszy niż
20%. W trakcie ładowania urządzenia wyświetla się logo ładowania akumulatora.
Można wybierać między różnymi stałymi nasadkami grzebieniowym
3/6/9/12/15/18/21mm (Rys. 12) lub 3-4-5-6mm regulowaną nasadką trymera (Rys. 4).
JAK ZAKŁADAĆ I ZDEJMOWAĆ AKCESORIA
Odłączany system ostrzy umożliwia szybką zmianę z ostrza do pełnej pielęgnacji na
ostrze do precyzyjnego przycinania w okolicy wąsów, bródki lub w dowolnym innym
miejscu, gdzie chcemy wyznaczyć linię włosów. Aby usunąć osprzęt, wystarczy
odciągnąć górną krawędź ostrza od korpusu. Aby założyć wybrany element, ustaw
tylną zakładkę głowicy danego elementu w linii z zagłębieniem na wewnętrznej
krawędzi trymera i naciśnij na górną część ostrza.
OSTRZE T-BLADE (Rys. 1)
Dla równomiernego cięcia, pozwól aby trymer wycinał włosy swoim tempem. Nie
przesuwaj go na siłę przez włosy próbując przyspieszyć cięcie.
Wybierz wymaganą głowicę z grzebieniem 3/6/9/12/15/18/21mm. Zacznij od
przeczesywania włosów w taki sposób, aby układały się w ich naturalnym kierunku.
Umieść największy grzebień na trymerze i zacznij od przycinania włosów od dołu do
góry. Dociskaj trymer lekko do włosów, z zębami grzebienia skierowanymi w
górę, ale płasko przylegającymi do głowy. Powoli podnieść trymer w górę i na zewnątrz
przez włosy, przycinając na raz tylko ich niewielką ilość. Powtórz tę czynność na
bokach i z tyłu głowy.
Aby przyciąć brodę / wąsy trzymaj maszynkę z ostrzem tnącym skierowanym w twoją
stronę.
Zacznij od linii krawędzi brody / wąsów, z ostrzem tnącym spoczywającym lekko na
skórze. Wykonuj wolne ruchy, aby wykreować linię brody / wąsów
PL
WE WOULD LIKE TO THANK YOU FOR CHOOSING ZELMER. WE WISH
THE PRODUCT PERFORMS TO YOUR SATISFACTION AND PLEASURE.
WARNING
PLEASE READ THE INSTRUCTIONS FOR USE CAREFULLY PRIOR TO
USING THE PRODUCT. STORE THESE IN A SAFE PLACE FOR FUTURE
REFERENCE
DESCRIPTION
1. T-blade
2. Blade length setting (0-1-2mm)
3. ON/OFF button
4. Trimmer guide (3-4-5-6-mm)
5. Storage pouch
6. Cleaning brush
7. Precision trimmer
8. Design trimmer
9. Mini foil shaver
10.Nose and ear trimmer
11.LED display
12.Cutting guide (3/6/9/12/15/18/21mm)
13.Oil bottle
14.USB charging cable
SAFETY INSTRUCTIONS
This device can be used by children aged 3
or over under supervision. This appliance
can be used by children aged from 8 years
and above and persons with reduced
physical, sensory or mental capabilities or
lack of experience and knowledge if they
have been given supervision or instruction
concerning use of the appliance in a safe
way and understand the hazards involved.
Children shall not play with the appliance.
Cleaning and user maintenance shall not be
made by children without supervision.
This device can only be connected with the
USB interface (5VDC, Output Max 1A).
Follow the DEVICE CHARGE instructions
in order to charge it.
Follow the device BATTERY REMOVAL
instructions for removal of the batteries from
the device.
This device is designed for use at a
maximum altitude up to 2000m above sea
level.
IMPORTANT WARNINGS
This appliance is designed for home use and should never be used for commer-
cial or industrial use under any circumstances.
Do not use the device on wet hair.
Do not use connect or disconnect the device to the mains with your hands or feet
wet. Do not use any accessories other than those supplied.
Do not use this device near to bathtubs, showers, sinks or other tanks that
contain water. The mains connection cable must not be tangled or wrapped
around the product during use. Do not pull on the cable to unplug it or use it to
carry the product.
Do not wrap the cable around the device.
Proceed according to the cleaning section of this manual for cleaning. Do not use
the product on animals.
Unplug the product immediately from the mains in the event of any breakdown
and contact an authorised Technical support service.
In order to prevent any risk of danger, do not open the device. Only qualified
technical personnel from the brand´s Official Technical support service may carry
out repairs or procedures on the device.
Any incorrect use or improper handling of the product shall render the warranty
null and void. Only an authorised technical support service centre may carry out
repairs on this product.
B&B TRENDS SL. disclaims all liability for damages that may occur to people,
animals or objects, for the non-observance of these warnings.
INSTRUCTIONS FOR USE
Always ensure the appliance is switched off before changing any attachments.
Place the desired trimming head on top of the groomer and attach the desired
cutting comb guide.
Push "ON/OFF button" (3), the trimmer is turned on and push "ON/OFF button"
again to turn it off. The display is 100% when the battery is full. The display is LO
when the battery is less than 20%.
The charging battery logo is displayed when the trimmer is charging.
You can choose between different cutting fixed comb guides
3/6/9/12/15/18/21mm (12) or 3-4-5-6mm adjustable trimmer guide (4).
PRECYZYJNY TRYMER (Rys.7)
Jedna regulowana nasadka do precyzyjnej stylizacji. Wybierz wymaganą długość na
regulowanej nasadce 3-4-5-6mm. Trzymaj golarkę ostrzem skierowanym do siebie.
Zacznij od krawędzi brody/wąsów i trzymając ostrza tnące lekko przylegające do skóry,
powolnymi ruchami utwórz linię brody/wąsów.
PRECYZYJNY TRYMER (Rys. 8)
Użyj precyzyjnego trymera, aby tworzyć delikatne linie i kontury wokół swojej twarzy,
blisko skóry.
Przytrzymaj głowicę trymera prostopadle do skóry i przesuwaj w górę lub w dół
delikatnie dociskając.
GOLARKA FOLIOWA (Rys. 9)
Przytrzymaj maszynkę i pozwól, aby mini golarka foliowa delikatnie dotykała twojej
twarzy.
Używaj krótkich, pewnych ruchów, aby golić się wokół brody / wąsów. Za pomocą
wolnej ręki naciągaj skórę. Powoduje to, że włosy podnoszą się, co ułatwia golenie.
TRYMER DO NOSA I USZU (Rys. 10)
Delikatnie wprowadź nasadkę do przycinania włosów w nosie i uszu do otworu
nosowego lub ucha.
Delikatnie poruszaj maszynką w kierunku do wewnątrz i na zewnątrz otworu nosowego
lub ucha jednocześnie obracając maszynką. WAŻNE: Nie wkładaj trymera do nosa
głębiej niż na 6mm.
ŁADOWANIE URZĄDZENIA
Przed użyciem maszynki po raz pierwszy ładuj ją przez 2-3 godziny. Później ładuj ją
regularnie przez 2 godziny. Upewnij się, że produkt jest wyłączony.
Trymer do włosów jest poręczy i może być ładowany w dowolnym miejscu za pomocą
kabla USB (Rys.14). Najpierw włóż wtyczkę na końcu kabla USB do urządzenia, a
następnie podłącz kabel USB do portu USB. To urządzenie może był ładowane
ładowarką 5V DC maks. 1A, z komputera i innych źródeł zasilania. Wyświetlacz LED
(rys.11) pokazuje stan naładowania baterii w procentach.
WAŻNE: Produkt może być wykorzystywany z przewodem lub bez przewodu. Trymer
nie może być nadmiernie naładowany. Jeśli jednak produkt nie będzie używany przez
dłuższy czas (2-3 miesiące), odłącz go od sieci i schowaj. Naładuj baterię do pełna gdy
zechcesz użyć go ponownie. Aby zachować żywotność baterii, należy rozładować je co
2 miesiące, a następnie ponownie ładować przez 2-3 godziny
KONSERWACJA i CZYSZCZENIE
Odłączyć urządzenie od zasilania, jeśli ma być nieużywane przez dłuższy okres czasu,
tak aby wydłużyć jego żywotność. Przed schowaniem urządzenia poczekać aż wystyg-
nie. Odłączyć nasadkę od korpusu i za pomocą pędzelka do czyszczenia (Rys. 6)
usunąć zabrudzenia z części wewnętrznych. W celu przeprowadzenia konserwacji
ostrzy nanieść kroplę oleju (Rys. 13) na jedną z ich krawędzi i włączyć urządzenie na
kilka sekund w celu jej rozprowadzenia. Konserwację należy przeprowadzić, gdy
zaobserwujemy trudność w pracy urządzenia w czasie przycinania włosów.
Przed czyszczeniem urządzenia upewnij się, że jest odłączone od zasilania. Urządze-
nie można czyścić tylko z użyciem wilgotnej ściereczki. Do czyszczenia nigdy nie
używaj środków chemicznych.
EKOLOGICZNA UTYLIZACJA
WYJMOWANIE BATERII
W czasie wyjmowania baterii urządzenie
musi być odłączone od sieci zasilającej.
Upewnij się, że trymer jest całkowicie rozładowany. Najpierw zdejmij nakładkę.
Następnie zdejmij ostrze.
Odkręcić 2 śruby w podstawie ostrza urządzenia. Odkręcić śrubę na dolnej tylnej
obudowie maszynki. Podnieś lub podważ połówki maszynki, odsłaniając baterię.
Odłącz przewody na obu końcach baterii i wyjmij ją z komory baterii. Wyciągnij z
urządzenia zestaw baterii ciągnąc w dół.
Przed wyrzuceniem urządzenia należy wyjąc
z niego baterię. Baterię należy usunąć w
bezpieczny sposób.
Mamy nadziejE¡l, ze produkt przyniesie Pañstwu wiele satysfakcji. .
HOW TO PLACE AND REMOVE
ATTACHMENTS
A detachable blade system enables you to quickly change from blade for full
grooming to detail trimming blade around a moustache, goatee, or anywhere to
define the hair line. To remove the attachments, simply pull top edge of blade
away from the body unit. To attach, align the back tab of the attachment head to
the cavity on the inner edge of trimmer unit and push down on top of blade.
T-BLADE (Fig.1)
For uniform cutting, allow the trimmer to cut its way through the hair. Do not force
it through at a faster rate.
Select the desired guide combs 3/6/9/12/15/18/18mm. Start by combing the hair
so it falls into its natural direction.
Place the largest guide comb onto your trimmer and start by trimming the sides
from the bottom upwards. Hold the trimmer lightly against the hair, with teeth of
the guide comb pointing up but flat against the head. Slowly lift the trimmer up
and outward through the hair, cutting only a small amount at a time. Repeat
around sides and back of head.
To trim your beard/moustache hold the groomer with the cutting blade facing you.
Start with edge of beard/moustache line, and with the cutting blades resting
lightly against your skin, use slow movements to create a beard/moustache line.
PRECISION TRIMMER (Fig.7)
One adjustable comb for precision trimmer
Select the desired length on the adjustable comb 3-4-5-6mm.
Hold the groomer with the cutting blade facing you.
Start with edge of beard/moustache line, and with the cutting blades resting
lightly against your skin, use slow movements to create a beard/moustache line.
DESIGN TRIMMER (Fig.8)
Use the design trimmer to create fine lines and contours around your facial style,
close to the skin.
Hold the design trimming head perpendicular to the skin and move the trimming
head upwards or downwards with gentle pressure.
MINI FOIL SHAVER (Fig.9)
Hold the groomer and allow mini foil shaver gently touches your face.
Use short, well-controlled movements to shave around your beard/moustache.
Use your free hand to stretch your skin. This encourages the hair to stand
upright, making it easier to shave.
NOSE AND EAR TRIMMER (Fig.10)
Insert the nose and ear attachment gently into the nostril or ear.
Gently move the groomer in and out of the nostril or ear and at the same time
rotate the groomer.
IMPORTANT: Avoid inserting the cutting unit more than 6mm into your nostril.
CHARGING THE DEVICE
Before using your groomer for the first time, charge for 2-3 hours, and charge 2
hours regularly. Ensure the product is switched off. The hair trimmer is complete-
ly handy to carry and can be charged anywhere with the USB cable (Fig.14). First
insert the plug on the end of the USB charging cable lead into the unit and then
connect the USB charging cable to the USB interface. This appliance is suitable
for 5V DC Max 1A charger, computer and other power interface. The LED display
(Fig.11) shows remaining battery power in percent. IMPORTANT: This product is
for cord and cordless use. Your groomer cannot be overcharged. However, if the
product is not going to be used for an extended period time (2-3 months), unplug
it from the mains and store. Fully recharge your hair clipper when you like to use
it again. To preserve the life of your batteries, let them run out every 2 months
then recharge for 2-3 hours again.
MAINTENANCE AND CLEANING
Unplug the product when you do not intend to use it for an extended period of
time to prolong its shelf-life. Allow the device to cool down prior to storage.
Separate the tool head from the body and use the cleaning brush (Fig.6) to
remove dust from the internal parts. Apply a drop of oil (Fig.13) on one of the
edges of the blades for their maintenance, and turn on the device for a few
seconds to distribute it. This should be done when you notice a certain amount of
difficulty during the trimming operation.
Ensure that the device is unplugged prior to cleaning it.
This device may only be cleaned with a damp cloth, and chemical products must
never be used for the same
PRODUCT DISPOSAL
REMOVING BATTERY
The appliance must be disconnected from
the supply mains when removing the
battery.
Ensure that the clipper is discharged of all power First remove the comb. Then
remove the blade.
Unscrew the 2 screws in the blade base of the unit. Unscrew the other screw on
the lower back housing of the clipper. Lift or pry the clipper halves apart,
exposing the battery.
Cut the metal pieces on both ends of the battery and remove it from the PCB. Pull
downward the battery set from the unit.
The battery must be removed from the
appliance before it is scrapped. The battery
is to be disposed of safety
Produkt może zawierać baterie. Przed usunięciem produktu wyjąć
baterie i wyrzucić je do specjalnego pojemnika przeznaczonego do
zbiórki baterii.

WE WOULD LIKE TO THANK YOU FOR CHOOSING ZELMER. WE WISH
THE PRODUCT PERFORMS TO YOUR SATISFACTION AND PLEASURE.
WARNING
PLEASE READ THE INSTRUCTIONS FOR USE CAREFULLY PRIOR TO
USING THE PRODUCT. STORE THESE IN A SAFE PLACE FOR FUTURE
REFERENCE
DESCRIPTION
1. T-blade
2. Blade length setting (0-1-2mm)
3. ON/OFF button
4. Trimmer guide (3-4-5-6-mm)
5. Storage pouch
6. Cleaning brush
7. Precision trimmer
8. Design trimmer
9. Mini foil shaver
10.Nose and ear trimmer
11.LED display
12.Cutting guide (3/6/9/12/15/18/21mm)
13.Oil bottle
14.USB charging cable
SAFETY INSTRUCTIONS
This device can be used by children aged 3
or over under supervision. This appliance
can be used by children aged from 8 years
and above and persons with reduced
physical, sensory or mental capabilities or
lack of experience and knowledge if they
have been given supervision or instruction
concerning use of the appliance in a safe
way and understand the hazards involved.
Children shall not play with the appliance.
Cleaning and user maintenance shall not be
made by children without supervision.
This device can only be connected with the
USB interface (5VDC, Output Max 1A).
Follow the DEVICE CHARGE instructions
in order to charge it.
Follow the device BATTERY REMOVAL
instructions for removal of the batteries from
the device.
This device is designed for use at a
maximum altitude up to 2000m above sea
level.
IMPORTANT WARNINGS
This appliance is designed for home use and should never be used for commer-
cial or industrial use under any circumstances.
Do not use the device on wet hair.
Do not use connect or disconnect the device to the mains with your hands or feet
wet. Do not use any accessories other than those supplied.
Do not use this device near to bathtubs, showers, sinks or other tanks that
contain water. The mains connection cable must not be tangled or wrapped
around the product during use. Do not pull on the cable to unplug it or use it to
carry the product.
Do not wrap the cable around the device.
Proceed according to the cleaning section of this manual for cleaning. Do not use
the product on animals.
Unplug the product immediately from the mains in the event of any breakdown
and contact an authorised Technical support service.
In order to prevent any risk of danger, do not open the device. Only qualified
technical personnel from the brand´s Official Technical support service may carry
out repairs or procedures on the device.
Any incorrect use or improper handling of the product shall render the warranty
null and void. Only an authorised technical support service centre may carry out
repairs on this product.
B&B TRENDS SL. disclaims all liability for damages that may occur to people,
animals or objects, for the non-observance of these warnings.
INSTRUCTIONS FOR USE
Always ensure the appliance is switched off before changing any attachments.
Place the desired trimming head on top of the groomer and attach the desired
cutting comb guide.
Push "ON/OFF button" (3), the trimmer is turned on and push "ON/OFF button"
again to turn it off. The display is 100% when the battery is full. The display is LO
when the battery is less than 20%.
The charging battery logo is displayed when the trimmer is charging.
You can choose between different cutting fixed comb guides
3/6/9/12/15/18/21mm (12) or 3-4-5-6mm adjustable trimmer guide (4).
EN
HOW TO PLACE AND REMOVE
ATTACHMENTS
A detachable blade system enables you to quickly change from blade for full
grooming to detail trimming blade around a moustache, goatee, or anywhere to
define the hair line. To remove the attachments, simply pull top edge of blade
away from the body unit. To attach, align the back tab of the attachment head to
the cavity on the inner edge of trimmer unit and push down on top of blade.
T-BLADE (Fig.1)
For uniform cutting, allow the trimmer to cut its way through the hair. Do not force
it through at a faster rate.
Select the desired guide combs 3/6/9/12/15/18/18mm. Start by combing the hair
so it falls into its natural direction.
Place the largest guide comb onto your trimmer and start by trimming the sides
from the bottom upwards. Hold the trimmer lightly against the hair, with teeth of
the guide comb pointing up but flat against the head. Slowly lift the trimmer up
and outward through the hair, cutting only a small amount at a time. Repeat
around sides and back of head.
To trim your beard/moustache hold the groomer with the cutting blade facing you.
Start with edge of beard/moustache line, and with the cutting blades resting
lightly against your skin, use slow movements to create a beard/moustache line.
PRECISION TRIMMER (Fig.7)
One adjustable comb for precision trimmer
Select the desired length on the adjustable comb 3-4-5-6mm.
Hold the groomer with the cutting blade facing you.
Start with edge of beard/moustache line, and with the cutting blades resting
lightly against your skin, use slow movements to create a beard/moustache line.
DESIGN TRIMMER (Fig.8)
Use the design trimmer to create fine lines and contours around your facial style,
close to the skin.
Hold the design trimming head perpendicular to the skin and move the trimming
head upwards or downwards with gentle pressure.
MINI FOIL SHAVER (Fig.9)
Hold the groomer and allow mini foil shaver gently touches your face.
Use short, well-controlled movements to shave around your beard/moustache.
Use your free hand to stretch your skin. This encourages the hair to stand
upright, making it easier to shave.
NOSE AND EAR TRIMMER (Fig.10)
Insert the nose and ear attachment gently into the nostril or ear.
Gently move the groomer in and out of the nostril or ear and at the same time
rotate the groomer.
IMPORTANT: Avoid inserting the cutting unit more than 6mm into your nostril.
CHARGING THE DEVICE
Before using your groomer for the first time, charge for 2-3 hours, and charge 2
hours regularly. Ensure the product is switched off. The hair trimmer is complete-
ly handy to carry and can be charged anywhere with the USB cable (Fig.14). First
insert the plug on the end of the USB charging cable lead into the unit and then
connect the USB charging cable to the USB interface. This appliance is suitable
for 5V DC Max 1A charger, computer and other power interface. The LED display
(Fig.11) shows remaining battery power in percent. IMPORTANT: This product is
for cord and cordless use. Your groomer cannot be overcharged. However, if the
product is not going to be used for an extended period time (2-3 months), unplug
it from the mains and store. Fully recharge your hair clipper when you like to use
it again. To preserve the life of your batteries, let them run out every 2 months
then recharge for 2-3 hours again.
MAINTENANCE AND CLEANING
Unplug the product when you do not intend to use it for an extended period of
time to prolong its shelf-life. Allow the device to cool down prior to storage.
Separate the tool head from the body and use the cleaning brush (Fig.6) to
remove dust from the internal parts. Apply a drop of oil (Fig.13) on one of the
edges of the blades for their maintenance, and turn on the device for a few
seconds to distribute it. This should be done when you notice a certain amount of
difficulty during the trimming operation.
Ensure that the device is unplugged prior to cleaning it.
This device may only be cleaned with a damp cloth, and chemical products must
never be used for the same
PRODUCT DISPOSAL
REMOVING BATTERY
The appliance must be disconnected from
the supply mains when removing the
battery.
Ensure that the clipper is discharged of all power First remove the comb. Then
remove the blade.
Unscrew the 2 screws in the blade base of the unit. Unscrew the other screw on
the lower back housing of the clipper. Lift or pry the clipper halves apart,
exposing the battery.
Cut the metal pieces on both ends of the battery and remove it from the PCB. Pull
downward the battery set from the unit.
The battery must be removed from the
appliance before it is scrapped. The battery
is to be disposed of safety

WE WOULD LIKE TO THANK YOU FOR CHOOSING ZELMER. WE WISH
THE PRODUCT PERFORMS TO YOUR SATISFACTION AND PLEASURE.
WARNING
PLEASE READ THE INSTRUCTIONS FOR USE CAREFULLY PRIOR TO
USING THE PRODUCT. STORE THESE IN A SAFE PLACE FOR FUTURE
REFERENCE
DESCRIPTION
1. T-blade
2. Blade length setting (0-1-2mm)
3. ON/OFF button
4. Trimmer guide (3-4-5-6-mm)
5. Storage pouch
6. Cleaning brush
7. Precision trimmer
8. Design trimmer
9. Mini foil shaver
10.Nose and ear trimmer
11.LED display
12.Cutting guide (3/6/9/12/15/18/21mm)
13.Oil bottle
14.USB charging cable
SAFETY INSTRUCTIONS
This device can be used by children aged 3
or over under supervision. This appliance
can be used by children aged from 8 years
and above and persons with reduced
physical, sensory or mental capabilities or
lack of experience and knowledge if they
have been given supervision or instruction
concerning use of the appliance in a safe
way and understand the hazards involved.
Children shall not play with the appliance.
Cleaning and user maintenance shall not be
made by children without supervision.
This device can only be connected with the
USB interface (5VDC, Output Max 1A).
Follow the DEVICE CHARGE instructions
in order to charge it.
Follow the device BATTERY REMOVAL
instructions for removal of the batteries from
the device.
This device is designed for use at a
maximum altitude up to 2000m above sea
level.
IMPORTANT WARNINGS
This appliance is designed for home use and should never be used for commer-
cial or industrial use under any circumstances.
Do not use the device on wet hair.
Do not use connect or disconnect the device to the mains with your hands or feet
wet. Do not use any accessories other than those supplied.
Do not use this device near to bathtubs, showers, sinks or other tanks that
contain water. The mains connection cable must not be tangled or wrapped
around the product during use. Do not pull on the cable to unplug it or use it to
carry the product.
Do not wrap the cable around the device.
Proceed according to the cleaning section of this manual for cleaning. Do not use
the product on animals.
Unplug the product immediately from the mains in the event of any breakdown
and contact an authorised Technical support service.
In order to prevent any risk of danger, do not open the device. Only qualified
technical personnel from the brand´s Official Technical support service may carry
out repairs or procedures on the device.
Any incorrect use or improper handling of the product shall render the warranty
null and void. Only an authorised technical support service centre may carry out
repairs on this product.
B&B TRENDS SL. disclaims all liability for damages that may occur to people,
animals or objects, for the non-observance of these warnings.
INSTRUCTIONS FOR USE
Always ensure the appliance is switched off before changing any attachments.
Place the desired trimming head on top of the groomer and attach the desired
cutting comb guide.
Push "ON/OFF button" (3), the trimmer is turned on and push "ON/OFF button"
again to turn it off. The display is 100% when the battery is full. The display is LO
when the battery is less than 20%.
The charging battery logo is displayed when the trimmer is charging.
You can choose between different cutting fixed comb guides
3/6/9/12/15/18/21mm (12) or 3-4-5-6mm adjustable trimmer guide (4).
EN
WIR MÖCHTEN UNS BEI IHNEN BEDANKEN, DASS SIE SICH FÜR ZELMER
ENTSCHIEDEN HABEN. WIR HOFFEN, DASS DAS PRODUKT ZU IHRER
ZUFRIEDENHEIT FUNKTIONIERT.
WARNUNG
LESEN SIE DIE GEBRAUCHSANWEISUNG SORGFÄLTIG DURCH, BEVOR
SIE DAS PRODUKT VERWENDEN. BEWAHREN SIE ES AN EINEM
SICHEREN ORT FÜR DEN ZUKÜNFTIGEN GEBRAUCH AUF
BESCHREIBUNG
1. T-blade-Klinge
2. Einstellung der Klingenlänge (0-1-2mm)
3. Ein-/Ausschalter [ON/OFF].
4. Trimmeraufsatz (3-4-5-6mm)
5. Schutzhülle
6. Reinigungspinsel
7. Präzisionstrimmer
8. Haarformungsaufsatz
9. Rasierfolie
10. Nasen-und Ohrentrimmeraufsatz
11. LED-Anzeigeleuchte
12. Kammaufsatz (3/6/9/12/15/18/21mm)
13. Schmieröl
14. USB-Ladekabel
SICHERHEITSHINWEISE
Dieses Gerät darf von Kindern ab 3 Jahren
benutzt werden, wenn sie beaufsichtigt
werden.
Dieses Gerät kann von Kindern ab 8 Jahren
und darüber und von Personen mit
reduzierten physischen, sensorischen oder
mentalen Fähigkeiten oder Mangel an
Erfahrung und/oder Wissen benutzt werden,
wenn sie beaufsichtigt oder bezüglich des
sicheren Gebrauchs des Gerätes
unterwiesen wurden und die daraus
resultierenden Gefahren verstanden haben.
Kinder dürfen nicht mit dem Gerät spielen.
Die Reinigung und Wartung des Gerätes darf
nicht von Kindern ohne Aufsicht durchgeführt
werden.
Das Gerät darf nur an einen USB-Port
angeschlossen werden (5VDC, max.
Ausgangsstrom 1A).
Laden Sie das Gerät gemäß den
Anweisungen im Abschnitt LADEN DES
GERÄTS auf.
Entfernen Sie die Batterien aus dem Gerät
gemäß den Anweisungen im Abschnitt
ENTFERNEN DER BATTERIEN.
Das Gerät ist nur für den Hausgebrauch bis
zu einer Höhe von 2000 m ü.d.M. bestimmt.
WICHTIGE WARNUNGEN
Dieses Gerät ist für den Hausgebrauch bestimmt und sollte unter keinen
Umständen für kommerzielle oder industrielle Zwecke verwendet werden.
Verwenden Sie das Gerät nicht auf nassem Haar.
Verwenden, verbinden oder trennen Sie das Gerät nicht mit nassen Händen oder
Füßen.
Verwenden Sie kein anderes als das mitgelieferte Zubehör.
Das Gerät darf niemals in der Nähe von Badewannen, Duschen, Waschbecken
oder anderen Gefäßen verwendet werden.
Das Netzkabel darf während des Gebrauchs nicht verwickelt oder um das
Produkt gewickelt werden.
Ziehen Sie nicht am Anschlusskabel, um es von der Steckdose zu trennen oder
es als Tragegriff zu verwenden.
Wickeln Sie das Kabel nicht um das Gerät.
Reinigen Sie das Gerät gemäß den Anweisungen im Abschnitt „Reinigung".
Verwenden Sie das Produkt nicht an Tieren.
Trennen Sie das Produkt im Falle einer Störung sofort vom Netz und kontak-
tie-ren Sie den offiziellen Kundendienst.
Um jegliches Gefahrenrisiko zu vermeiden, darf das Gerät nicht geöffnet werden.
Nur qualifiziertes technisches Personal des offiziellen technischen Kunden-
diens-tes darf Reparaturen oder Verfahren an dem Gerät durchführen.
Bei unsachgemäßem Gebrauch oder unsachgemäßer Handhabung erlischt die
Garantie. Nur ein offizielles technisches Kundendienstzentrum kann das Produkt
reparieren
B&B TRENDS SL. lehnt jede Haftung für Schäden an Personen, Tieren oder
Gegenständen ab, die aufgrund der Nichtbeachtung dieser Warnungen entste-
hen können.
GEBRAUCHSANLEITUNG
Vergewissern Sie sich immer, dass das Gerät ausgeschaltet ist, bevor Sie Zubehör-
teile wechseln.
Setzen Sie den ausgewählten Trimmkopf auf den Haarschneider und bringen Sie
den ausgewählten Kammaufsatz an. Drücken Sie den ON/OFF-Schalter (3), um den
Trimmer einzuschalten. Durch erneutes Drücken der Taste wird das Gerät ausges-
chaltet. 100 % auf dem Display zeigt an, dass der Akku vollständig aufgeladen ist.
LO, erscheint, wenn der Akkustand weniger als 20 % beträgt. Während des Ladevor-
gangs wird das Ladesymbol angezeigt. Sie können zwischen festen
3/6/9/12/15/18/21mm Kammaufsätzen
(Abb. 12) oder einem verstellbaren 3-4-5-6mm Trimmeraufsatz (Abb. 4) wählen
ZUBEHÖRTEILE AUFSETZEN UND
ABNEHMEN
Das abnehmbare Klingensystem ermöglicht Ihnen den schnellen Wechsel von
einer Vollpflegeklinge zu einer Präzisionstrimmklinge für das Trimmen um den
Schnurrbart, das Kinn oder überall dort, wo Sie den Haaransatz bestimmen
möchten. Um die Zubehörteile abzunehmen, ziehen Sie einfach an der
Oberkante der Klinge. Um das gewünschte Zubehörteil zu befestigen, richten
Sie die hintere Lasche des Zubehörkopfes mit der Aussparung an der
Innenkan-te des Trimmers aus und drücken Sie auf die Oberseite der Klinge.
T-BLADE-Klinge (Abb. 1)
Für einen gleichmäßigen Schnitt lassen Sie den Trimmer das Haar in seinem
eigenen Tempo schneiden. Bewegen Sie ihn nicht gewaltsam durch das Haar,
um den Haarschnitt zu beschleunigen.
Wählen Sie den gewünschten 3/6/9/12/15/18/21mm-Kammaufsatz. Vorerst
kämmen Sie das Haar durch, so dass es in ihre natürliche Richtung fällt.
Setzen Sie den größten Kammaufsatz auf den Haarschneider und beginnen Sie
mit dem Haarschneiden von unten nach oben. Drücken Sie den Haarschneider
leicht gegen das Haar, wobei die Zähne des Kammaufsatzes nach oben zeigen,
aber flach an dem Kopf anliegen. Schieben Sie den Haarschneider langsam
durch das Haar nach oben und nach außen und schneiden Sie jeweils nur eine
kleine Haarpartie. Wiederholen Sie diesen Vorgang an den Seiten und am
Hinterkopf.
Zum Trimmen des Bartes bzw. Schnurbartes halten Sie den Haarschneider
mitDEder Klinge zu sich gerichtet.
Beginnen Sie am Rand des Bartes/Schnurrbartes, wobei die Schneidklinge
leicht auf der Haut aufliegt. Führen Sie langsame Bewegungen aus, um die
Bart-/Schnurrbartlinie zu erstellen.
HOW TO PLACE AND REMOVE
ATTACHMENTS
A detachable blade system enables you to quickly change from blade for full
grooming to detail trimming blade around a moustache, goatee, or anywhere to
define the hair line. To remove the attachments, simply pull top edge of blade
away from the body unit. To attach, align the back tab of the attachment head to
the cavity on the inner edge of trimmer unit and push down on top of blade.
T-BLADE (Fig.1)
For uniform cutting, allow the trimmer to cut its way through the hair. Do not force
it through at a faster rate.
Select the desired guide combs 3/6/9/12/15/18/18mm. Start by combing the hair
so it falls into its natural direction.
Place the largest guide comb onto your trimmer and start by trimming the sides
from the bottom upwards. Hold the trimmer lightly against the hair, with teeth of
the guide comb pointing up but flat against the head. Slowly lift the trimmer up
and outward through the hair, cutting only a small amount at a time. Repeat
around sides and back of head.
To trim your beard/moustache hold the groomer with the cutting blade facing you.
Start with edge of beard/moustache line, and with the cutting blades resting
lightly against your skin, use slow movements to create a beard/moustache line.
PRECISION TRIMMER (Fig.7)
One adjustable comb for precision trimmer
Select the desired length on the adjustable comb 3-4-5-6mm.
Hold the groomer with the cutting blade facing you.
Start with edge of beard/moustache line, and with the cutting blades resting
lightly against your skin, use slow movements to create a beard/moustache line.
DESIGN TRIMMER (Fig.8)
Use the design trimmer to create fine lines and contours around your facial style,
close to the skin.
Hold the design trimming head perpendicular to the skin and move the trimming
head upwards or downwards with gentle pressure.
MINI FOIL SHAVER (Fig.9)
Hold the groomer and allow mini foil shaver gently touches your face.
Use short, well-controlled movements to shave around your beard/moustache.
Use your free hand to stretch your skin. This encourages the hair to stand
upright, making it easier to shave.
NOSE AND EAR TRIMMER (Fig.10)
Insert the nose and ear attachment gently into the nostril or ear.
Gently move the groomer in and out of the nostril or ear and at the same time
rotate the groomer.
IMPORTANT: Avoid inserting the cutting unit more than 6mm into your nostril.
CHARGING THE DEVICE
Before using your groomer for the first time, charge for 2-3 hours, and charge 2
hours regularly. Ensure the product is switched off. The hair trimmer is complete-
ly handy to carry and can be charged anywhere with the USB cable (Fig.14). First
insert the plug on the end of the USB charging cable lead into the unit and then
connect the USB charging cable to the USB interface. This appliance is suitable
for 5V DC Max 1A charger, computer and other power interface. The LED display
(Fig.11) shows remaining battery power in percent. IMPORTANT: This product is
for cord and cordless use. Your groomer cannot be overcharged. However, if the
product is not going to be used for an extended period time (2-3 months), unplug
it from the mains and store. Fully recharge your hair clipper when you like to use
it again. To preserve the life of your batteries, let them run out every 2 months
then recharge for 2-3 hours again.
MAINTENANCE AND CLEANING
Unplug the product when you do not intend to use it for an extended period of
time to prolong its shelf-life. Allow the device to cool down prior to storage.
Separate the tool head from the body and use the cleaning brush (Fig.6) to
remove dust from the internal parts. Apply a drop of oil (Fig.13) on one of the
edges of the blades for their maintenance, and turn on the device for a few
seconds to distribute it. This should be done when you notice a certain amount of
difficulty during the trimming operation.
Ensure that the device is unplugged prior to cleaning it.
This device may only be cleaned with a damp cloth, and chemical products must
never be used for the same
PRODUCT DISPOSAL
REMOVING BATTERY
The appliance must be disconnected from
the supply mains when removing the
battery.
Ensure that the clipper is discharged of all power First remove the comb. Then
remove the blade.
Unscrew the 2 screws in the blade base of the unit. Unscrew the other screw on
the lower back housing of the clipper. Lift or pry the clipper halves apart,
exposing the battery.
Cut the metal pieces on both ends of the battery and remove it from the PCB. Pull
downward the battery set from the unit.
The battery must be removed from the
appliance before it is scrapped. The battery
is to be disposed of safety
PRÄZISIONSTRIMMER (Rys.7)
Ein verstellbarer Trimmaufsatz für präzises Styling. Wählen Sie die gewünschte
Länge an dem verstellbaren 3-4-5-6mm-Trimmaufsatz. Halten Sie den Haarsch-
neider so, dass die Klinge zu Ihnen zeigt. Beginnen Sie am Rand Ihres
Bartes/Schnurrbartes und ziehen Sie mit langsamen Bewegungen eine Bart-/S-
chnurrbartlinie, wobei Sie die Klingen leicht angedrückt auf der Haut halten.
PRÄZISIONSTRIMMER (Abb. 8)
Verwenden Sie den Präzisionstrimmer, um feine Linien und Konturen im
Gesicht zu stylen.
Halten Sie den Trimmerkopf senkrecht zum Haut und bewegen Sie ihn durch
leichten Druck nach oben oder unten.
FOLIENRASIERER (Abb. 9)
Halten Sie den Rasierer und lassen Sie den Mini-Folienrasierer sanft Ihr Gesicht
berühren.
Rasieren Sie mit kurzen, sicheren Bewegungen um den Bart/Schnurrbart
herum. Strafen Sie mit der freien Hand die Haut. Dadurch werden die Haare
angehoben und lassen sich leichter rasieren.
NASEN- UND OHRENHAARSCHNEIDER (Abb. 10)
Führen Sie den Nasen- und Ohrentrimmer sanft in das Nasenloch oder die
Ohröffnung hinein und wieder heraus und dabei den Trimmer drehen.
WICHTIG: Führen Sie den Nasentrimmer nicht tiefer als 6 mm ein.
LADEN DES GERÄTS
Laden Sie den Haarschneider vor dem ersten Gebrauch 2-3 Stunden lang auf.
Laden Sie ihn dann regelmäßig für 2 Stunden. Stellen Sie sicher, dass das
Produkt ausgeschaltet ist.
Der Haartrimmer ist handlich und kann mit dem USB-Kabel (Abb.14) überall
aufgeladen werden. Stecken Sie zuerst den Stecker am Ende des USB-Kabels
in das Gerät und verbinden Sie dann das USB-Kabel mit einem USB-Anschluss.
Das Gerät kann mit einem 5V DC Ladegerät max. 1A, von einem Computer und
anderen Stromquellen geladen werden. Die LED-Anzeige (Abb.11) zeigt den
Ladezustand des Akkus in Prozent an.
WICHTIG: Dieses Produkt kann mit oder ohne Kabel verwendet werden. Der
Trimmer darf nicht überladen werden. Wenn das Produkt jedoch über einen
längeren Zeitraum (2-3 Monate) nicht verwendet wird, ziehen Sie den
Netzstec-ker und verstauen Sie das Gerät. Laden Sie den Akku vollständig auf,
wenn Sie das Gerät wieder verwenden wollen. Um die Lebensdauer des Akkus
zu erhalten, entladen Sie ihn alle 2 Monate und laden Sie ihn anschließend für
2-3 Stunden wieder auf.
WARTUNG UND REINIGUNG
Trennen Sie das Gerät von der Stromversorgung, wenn es über einen längeren
Zeitraum nicht benutzt wird, um seine Lebensdauer zu verlängern. Lassen Sie
das Gerät abkühlen, bevor Sie es einlagern. Trennen Sie den Aufsatz vom
Gerät und verwenden Sie die Reinigungsbürste (Abb. 6), um Schmutz von den
inneren Teilen zu entfernen. Zur Wartung der Klingen geben Sie einen Tropfen
Öl (Abb. 13) auf eine der Kanten der Klingen und schalten Sie das Gerät für
einige Sekunden ein, damit sich das Öl verteilt. Die Wartung sollte durchgeführt
werden, wenn Sie Schwierigkeiten bei der Bedienung des Geräts beim
Haarschneiden feststellen.
Stellen Sie sicher, dass das Gerät vor der Reinigung vom Stromnetz getrennt
ist.
Reinigen Sie das Gerät nur mit einem feuchten Tuch. Verwenden Sie niemals
Chemikalien zur.
PRODUKTENTSORGUNG
ENTNEHMEN DER BATTERIE
Beim Entfernen der Batterie muss das
Gerät vom Netz getrennt werden.
Stellen Sie sicher, dass der Haarschneider vollständig entladen ist. Entfernen
Sie zuerst den Batteriedeckel. Nehmen Sie dann die Klinge ab.
Entfernen Sie die 2 Schrauben im Sockel des Messers. Entfernen Sie die
Schraube am unteren hinteren Gehäuse des Haarschneiders. Heben Sie die
Gerätehälften ab, so dass die Batterie freigelegt wird.
Trennen Sie die Drähte an beiden Enden der Batterie und nehmen Sie sie aus
dem Batteriefach. Ziehen Sie die Batterieeinheit aus dem Gerät, indem Sie ihn
nach unten ziehen.
Entfernen Sie die Batterie, bevor Sie das
Gerät entsorgen. Entsorgen Sie die Batterie
auf sichere Art und Weise.
6 7
1
8
311 12
10
4
!
!
5

WE WOULD LIKE TO THANK YOU FOR CHOOSING ZELMER. WE WISH
THE PRODUCT PERFORMS TO YOUR SATISFACTION AND PLEASURE.
WARNING
PLEASE READ THE INSTRUCTIONS FOR USE CAREFULLY PRIOR TO
USING THE PRODUCT. STORE THESE IN A SAFE PLACE FOR FUTURE
REFERENCE
DESCRIPTION
1. T-blade
2. Blade length setting (0-1-2mm)
3. ON/OFF button
4. Trimmer guide (3-4-5-6-mm)
5. Storage pouch
6. Cleaning brush
7. Precision trimmer
8. Design trimmer
9. Mini foil shaver
10.Nose and ear trimmer
11.LED display
12.Cutting guide (3/6/9/12/15/18/21mm)
13.Oil bottle
14.USB charging cable
SAFETY INSTRUCTIONS
This device can be used by children aged 3
or over under supervision. This appliance
can be used by children aged from 8 years
and above and persons with reduced
physical, sensory or mental capabilities or
lack of experience and knowledge if they
have been given supervision or instruction
concerning use of the appliance in a safe
way and understand the hazards involved.
Children shall not play with the appliance.
Cleaning and user maintenance shall not be
made by children without supervision.
This device can only be connected with the
USB interface (5VDC, Output Max 1A).
Follow the DEVICE CHARGE instructions
in order to charge it.
Follow the device BATTERY REMOVAL
instructions for removal of the batteries from
the device.
This device is designed for use at a
maximum altitude up to 2000m above sea
level.
IMPORTANT WARNINGS
This appliance is designed for home use and should never be used for commer-
cial or industrial use under any circumstances.
Do not use the device on wet hair.
Do not use connect or disconnect the device to the mains with your hands or feet
wet. Do not use any accessories other than those supplied.
Do not use this device near to bathtubs, showers, sinks or other tanks that
contain water. The mains connection cable must not be tangled or wrapped
around the product during use. Do not pull on the cable to unplug it or use it to
carry the product.
Do not wrap the cable around the device.
Proceed according to the cleaning section of this manual for cleaning. Do not use
the product on animals.
Unplug the product immediately from the mains in the event of any breakdown
and contact an authorised Technical support service.
In order to prevent any risk of danger, do not open the device. Only qualified
technical personnel from the brand´s Official Technical support service may carry
out repairs or procedures on the device.
Any incorrect use or improper handling of the product shall render the warranty
null and void. Only an authorised technical support service centre may carry out
repairs on this product.
B&B TRENDS SL. disclaims all liability for damages that may occur to people,
animals or objects, for the non-observance of these warnings.
INSTRUCTIONS FOR USE
Always ensure the appliance is switched off before changing any attachments.
Place the desired trimming head on top of the groomer and attach the desired
cutting comb guide.
Push "ON/OFF button" (3), the trimmer is turned on and push "ON/OFF button"
again to turn it off. The display is 100% when the battery is full. The display is LO
when the battery is less than 20%.
The charging battery logo is displayed when the trimmer is charging.
You can choose between different cutting fixed comb guides
3/6/9/12/15/18/21mm (12) or 3-4-5-6mm adjustable trimmer guide (4).
EN
WIR MÖCHTEN UNS BEI IHNEN BEDANKEN, DASS SIE SICH FÜR ZELMER
ENTSCHIEDEN HABEN. WIR HOFFEN, DASS DAS PRODUKT ZU IHRER
ZUFRIEDENHEIT FUNKTIONIERT.
WARNUNG
LESEN SIE DIE GEBRAUCHSANWEISUNG SORGFÄLTIG DURCH, BEVOR
SIE DAS PRODUKT VERWENDEN. BEWAHREN SIE ES AN EINEM
SICHEREN ORT FÜR DEN ZUKÜNFTIGEN GEBRAUCH AUF
BESCHREIBUNG
1. T-blade-Klinge
2. Einstellung der Klingenlänge (0-1-2mm)
3. Ein-/Ausschalter [ON/OFF].
4. Trimmeraufsatz (3-4-5-6mm)
5. Schutzhülle
6. Reinigungspinsel
7. Präzisionstrimmer
8. Haarformungsaufsatz
9. Rasierfolie
10. Nasen-und Ohrentrimmeraufsatz
11. LED-Anzeigeleuchte
12. Kammaufsatz (3/6/9/12/15/18/21mm)
13. Schmieröl
14. USB-Ladekabel
SICHERHEITSHINWEISE
Dieses Gerät darf von Kindern ab 3 Jahren
benutzt werden, wenn sie beaufsichtigt
werden.
Dieses Gerät kann von Kindern ab 8 Jahren
und darüber und von Personen mit
reduzierten physischen, sensorischen oder
mentalen Fähigkeiten oder Mangel an
Erfahrung und/oder Wissen benutzt werden,
wenn sie beaufsichtigt oder bezüglich des
sicheren Gebrauchs des Gerätes
unterwiesen wurden und die daraus
resultierenden Gefahren verstanden haben.
Kinder dürfen nicht mit dem Gerät spielen.
Die Reinigung und Wartung des Gerätes darf
nicht von Kindern ohne Aufsicht durchgeführt
werden.
Das Gerät darf nur an einen USB-Port
angeschlossen werden (5VDC, max.
Ausgangsstrom 1A).
Laden Sie das Gerät gemäß den
Anweisungen im Abschnitt LADEN DES
GERÄTS auf.
Entfernen Sie die Batterien aus dem Gerät
gemäß den Anweisungen im Abschnitt
ENTFERNEN DER BATTERIEN.
Das Gerät ist nur für den Hausgebrauch bis
zu einer Höhe von 2000 m ü.d.M. bestimmt.
WICHTIGE WARNUNGEN
Dieses Gerät ist für den Hausgebrauch bestimmt und sollte unter keinen
Umständen für kommerzielle oder industrielle Zwecke verwendet werden.
Verwenden Sie das Gerät nicht auf nassem Haar.
Verwenden, verbinden oder trennen Sie das Gerät nicht mit nassen Händen oder
Füßen.
Verwenden Sie kein anderes als das mitgelieferte Zubehör.
Das Gerät darf niemals in der Nähe von Badewannen, Duschen, Waschbecken
oder anderen Gefäßen verwendet werden.
Das Netzkabel darf während des Gebrauchs nicht verwickelt oder um das
Produkt gewickelt werden.
Ziehen Sie nicht am Anschlusskabel, um es von der Steckdose zu trennen oder
es als Tragegriff zu verwenden.
Wickeln Sie das Kabel nicht um das Gerät.
Reinigen Sie das Gerät gemäß den Anweisungen im Abschnitt „Reinigung".
Verwenden Sie das Produkt nicht an Tieren.
Trennen Sie das Produkt im Falle einer Störung sofort vom Netz und kontak-
tie-ren Sie den offiziellen Kundendienst.
Um jegliches Gefahrenrisiko zu vermeiden, darf das Gerät nicht geöffnet werden.
Nur qualifiziertes technisches Personal des offiziellen technischen Kunden-
diens-tes darf Reparaturen oder Verfahren an dem Gerät durchführen.
Bei unsachgemäßem Gebrauch oder unsachgemäßer Handhabung erlischt die
Garantie. Nur ein offizielles technisches Kundendienstzentrum kann das Produkt
reparieren
B&B TRENDS SL. lehnt jede Haftung für Schäden an Personen, Tieren oder
Gegenständen ab, die aufgrund der Nichtbeachtung dieser Warnungen entste-
hen können.
GEBRAUCHSANLEITUNG
Vergewissern Sie sich immer, dass das Gerät ausgeschaltet ist, bevor Sie Zubehör-
teile wechseln.
Setzen Sie den ausgewählten Trimmkopf auf den Haarschneider und bringen Sie
den ausgewählten Kammaufsatz an. Drücken Sie den ON/OFF-Schalter (3), um den
Trimmer einzuschalten. Durch erneutes Drücken der Taste wird das Gerät ausges-
chaltet. 100 % auf dem Display zeigt an, dass der Akku vollständig aufgeladen ist.
LO, erscheint, wenn der Akkustand weniger als 20 % beträgt. Während des Ladevor-
gangs wird das Ladesymbol angezeigt. Sie können zwischen festen
3/6/9/12/15/18/21mm Kammaufsätzen
(Abb. 12) oder einem verstellbaren 3-4-5-6mm Trimmeraufsatz (Abb. 4) wählen
ZUBEHÖRTEILE AUFSETZEN UND
ABNEHMEN
Das abnehmbare Klingensystem ermöglicht Ihnen den schnellen Wechsel von
einer Vollpflegeklinge zu einer Präzisionstrimmklinge für das Trimmen um den
Schnurrbart, das Kinn oder überall dort, wo Sie den Haaransatz bestimmen
möchten. Um die Zubehörteile abzunehmen, ziehen Sie einfach an der
Oberkante der Klinge. Um das gewünschte Zubehörteil zu befestigen, richten
Sie die hintere Lasche des Zubehörkopfes mit der Aussparung an der
Innenkan-te des Trimmers aus und drücken Sie auf die Oberseite der Klinge.
T-BLADE-Klinge (Abb. 1)
Für einen gleichmäßigen Schnitt lassen Sie den Trimmer das Haar in seinem
eigenen Tempo schneiden. Bewegen Sie ihn nicht gewaltsam durch das Haar,
um den Haarschnitt zu beschleunigen.
Wählen Sie den gewünschten 3/6/9/12/15/18/21mm-Kammaufsatz. Vorerst
kämmen Sie das Haar durch, so dass es in ihre natürliche Richtung fällt.
Setzen Sie den größten Kammaufsatz auf den Haarschneider und beginnen Sie
mit dem Haarschneiden von unten nach oben. Drücken Sie den Haarschneider
leicht gegen das Haar, wobei die Zähne des Kammaufsatzes nach oben zeigen,
aber flach an dem Kopf anliegen. Schieben Sie den Haarschneider langsam
durch das Haar nach oben und nach außen und schneiden Sie jeweils nur eine
kleine Haarpartie. Wiederholen Sie diesen Vorgang an den Seiten und am
Hinterkopf.
Zum Trimmen des Bartes bzw. Schnurbartes halten Sie den Haarschneider
mitDEder Klinge zu sich gerichtet.
Beginnen Sie am Rand des Bartes/Schnurrbartes, wobei die Schneidklinge
leicht auf der Haut aufliegt. Führen Sie langsame Bewegungen aus, um die
Bart-/Schnurrbartlinie zu erstellen.
HOW TO PLACE AND REMOVE
ATTACHMENTS
A detachable blade system enables you to quickly change from blade for full
grooming to detail trimming blade around a moustache, goatee, or anywhere to
define the hair line. To remove the attachments, simply pull top edge of blade
away from the body unit. To attach, align the back tab of the attachment head to
the cavity on the inner edge of trimmer unit and push down on top of blade.
T-BLADE (Fig.1)
For uniform cutting, allow the trimmer to cut its way through the hair. Do not force
it through at a faster rate.
Select the desired guide combs 3/6/9/12/15/18/18mm. Start by combing the hair
so it falls into its natural direction.
Place the largest guide comb onto your trimmer and start by trimming the sides
from the bottom upwards. Hold the trimmer lightly against the hair, with teeth of
the guide comb pointing up but flat against the head. Slowly lift the trimmer up
and outward through the hair, cutting only a small amount at a time. Repeat
around sides and back of head.
To trim your beard/moustache hold the groomer with the cutting blade facing you.
Start with edge of beard/moustache line, and with the cutting blades resting
lightly against your skin, use slow movements to create a beard/moustache line.
PRECISION TRIMMER (Fig.7)
One adjustable comb for precision trimmer
Select the desired length on the adjustable comb 3-4-5-6mm.
Hold the groomer with the cutting blade facing you.
Start with edge of beard/moustache line, and with the cutting blades resting
lightly against your skin, use slow movements to create a beard/moustache line.
DESIGN TRIMMER (Fig.8)
Use the design trimmer to create fine lines and contours around your facial style,
close to the skin.
Hold the design trimming head perpendicular to the skin and move the trimming
head upwards or downwards with gentle pressure.
MINI FOIL SHAVER (Fig.9)
Hold the groomer and allow mini foil shaver gently touches your face.
Use short, well-controlled movements to shave around your beard/moustache.
Use your free hand to stretch your skin. This encourages the hair to stand
upright, making it easier to shave.
NOSE AND EAR TRIMMER (Fig.10)
Insert the nose and ear attachment gently into the nostril or ear.
Gently move the groomer in and out of the nostril or ear and at the same time
rotate the groomer.
IMPORTANT: Avoid inserting the cutting unit more than 6mm into your nostril.
CHARGING THE DEVICE
Before using your groomer for the first time, charge for 2-3 hours, and charge 2
hours regularly. Ensure the product is switched off. The hair trimmer is complete-
ly handy to carry and can be charged anywhere with the USB cable (Fig.14). First
insert the plug on the end of the USB charging cable lead into the unit and then
connect the USB charging cable to the USB interface. This appliance is suitable
for 5V DC Max 1A charger, computer and other power interface. The LED display
(Fig.11) shows remaining battery power in percent. IMPORTANT: This product is
for cord and cordless use. Your groomer cannot be overcharged. However, if the
product is not going to be used for an extended period time (2-3 months), unplug
it from the mains and store. Fully recharge your hair clipper when you like to use
it again. To preserve the life of your batteries, let them run out every 2 months
then recharge for 2-3 hours again.
MAINTENANCE AND CLEANING
Unplug the product when you do not intend to use it for an extended period of
time to prolong its shelf-life. Allow the device to cool down prior to storage.
Separate the tool head from the body and use the cleaning brush (Fig.6) to
remove dust from the internal parts. Apply a drop of oil (Fig.13) on one of the
edges of the blades for their maintenance, and turn on the device for a few
seconds to distribute it. This should be done when you notice a certain amount of
difficulty during the trimming operation.
Ensure that the device is unplugged prior to cleaning it.
This device may only be cleaned with a damp cloth, and chemical products must
never be used for the same
PRODUCT DISPOSAL
REMOVING BATTERY
The appliance must be disconnected from
the supply mains when removing the
battery.
Ensure that the clipper is discharged of all power First remove the comb. Then
remove the blade.
Unscrew the 2 screws in the blade base of the unit. Unscrew the other screw on
the lower back housing of the clipper. Lift or pry the clipper halves apart,
exposing the battery.
Cut the metal pieces on both ends of the battery and remove it from the PCB. Pull
downward the battery set from the unit.
The battery must be removed from the
appliance before it is scrapped. The battery
is to be disposed of safety
PRÄZISIONSTRIMMER (Rys.7)
Ein verstellbarer Trimmaufsatz für präzises Styling. Wählen Sie die gewünschte
Länge an dem verstellbaren 3-4-5-6mm-Trimmaufsatz. Halten Sie den Haarsch-
neider so, dass die Klinge zu Ihnen zeigt. Beginnen Sie am Rand Ihres
Bartes/Schnurrbartes und ziehen Sie mit langsamen Bewegungen eine Bart-/S-
chnurrbartlinie, wobei Sie die Klingen leicht angedrückt auf der Haut halten.
PRÄZISIONSTRIMMER (Abb. 8)
Verwenden Sie den Präzisionstrimmer, um feine Linien und Konturen im
Gesicht zu stylen.
Halten Sie den Trimmerkopf senkrecht zum Haut und bewegen Sie ihn durch
leichten Druck nach oben oder unten.
FOLIENRASIERER (Abb. 9)
Halten Sie den Rasierer und lassen Sie den Mini-Folienrasierer sanft Ihr Gesicht
berühren.
Rasieren Sie mit kurzen, sicheren Bewegungen um den Bart/Schnurrbart
herum. Strafen Sie mit der freien Hand die Haut. Dadurch werden die Haare
angehoben und lassen sich leichter rasieren.
NASEN- UND OHRENHAARSCHNEIDER (Abb. 10)
Führen Sie den Nasen- und Ohrentrimmer sanft in das Nasenloch oder die
Ohröffnung hinein und wieder heraus und dabei den Trimmer drehen.
WICHTIG: Führen Sie den Nasentrimmer nicht tiefer als 6 mm ein.
LADEN DES GERÄTS
Laden Sie den Haarschneider vor dem ersten Gebrauch 2-3 Stunden lang auf.
Laden Sie ihn dann regelmäßig für 2 Stunden. Stellen Sie sicher, dass das
Produkt ausgeschaltet ist.
Der Haartrimmer ist handlich und kann mit dem USB-Kabel (Abb.14) überall
aufgeladen werden. Stecken Sie zuerst den Stecker am Ende des USB-Kabels
in das Gerät und verbinden Sie dann das USB-Kabel mit einem USB-Anschluss.
Das Gerät kann mit einem 5V DC Ladegerät max. 1A, von einem Computer und
anderen Stromquellen geladen werden. Die LED-Anzeige (Abb.11) zeigt den
Ladezustand des Akkus in Prozent an.
WICHTIG: Dieses Produkt kann mit oder ohne Kabel verwendet werden. Der
Trimmer darf nicht überladen werden. Wenn das Produkt jedoch über einen
längeren Zeitraum (2-3 Monate) nicht verwendet wird, ziehen Sie den
Netzstec-ker und verstauen Sie das Gerät. Laden Sie den Akku vollständig auf,
wenn Sie das Gerät wieder verwenden wollen. Um die Lebensdauer des Akkus
zu erhalten, entladen Sie ihn alle 2 Monate und laden Sie ihn anschließend für
2-3 Stunden wieder auf.
WARTUNG UND REINIGUNG
Trennen Sie das Gerät von der Stromversorgung, wenn es über einen längeren
Zeitraum nicht benutzt wird, um seine Lebensdauer zu verlängern. Lassen Sie
das Gerät abkühlen, bevor Sie es einlagern. Trennen Sie den Aufsatz vom
Gerät und verwenden Sie die Reinigungsbürste (Abb. 6), um Schmutz von den
inneren Teilen zu entfernen. Zur Wartung der Klingen geben Sie einen Tropfen
Öl (Abb. 13) auf eine der Kanten der Klingen und schalten Sie das Gerät für
einige Sekunden ein, damit sich das Öl verteilt. Die Wartung sollte durchgeführt
werden, wenn Sie Schwierigkeiten bei der Bedienung des Geräts beim
Haarschneiden feststellen.
Stellen Sie sicher, dass das Gerät vor der Reinigung vom Stromnetz getrennt
ist.
Reinigen Sie das Gerät nur mit einem feuchten Tuch. Verwenden Sie niemals
Chemikalien zur.
PRODUKTENTSORGUNG
ENTNEHMEN DER BATTERIE
Beim Entfernen der Batterie muss das
Gerät vom Netz getrennt werden.
Stellen Sie sicher, dass der Haarschneider vollständig entladen ist. Entfernen
Sie zuerst den Batteriedeckel. Nehmen Sie dann die Klinge ab.
Entfernen Sie die 2 Schrauben im Sockel des Messers. Entfernen Sie die
Schraube am unteren hinteren Gehäuse des Haarschneiders. Heben Sie die
Gerätehälften ab, so dass die Batterie freigelegt wird.
Trennen Sie die Drähte an beiden Enden der Batterie und nehmen Sie sie aus
dem Batteriefach. Ziehen Sie die Batterieeinheit aus dem Gerät, indem Sie ihn
nach unten ziehen.
Entfernen Sie die Batterie, bevor Sie das
Gerät entsorgen. Entsorgen Sie die Batterie
auf sichere Art und Weise.

WE WOULD LIKE TO THANK YOU FOR CHOOSING ZELMER. WE WISH
THE PRODUCT PERFORMS TO YOUR SATISFACTION AND PLEASURE.
WARNING
PLEASE READ THE INSTRUCTIONS FOR USE CAREFULLY PRIOR TO
USING THE PRODUCT. STORE THESE IN A SAFE PLACE FOR FUTURE
REFERENCE
DESCRIPTION
1. T-blade
2. Blade length setting (0-1-2mm)
3. ON/OFF button
4. Trimmer guide (3-4-5-6-mm)
5. Storage pouch
6. Cleaning brush
7. Precision trimmer
8. Design trimmer
9. Mini foil shaver
10.Nose and ear trimmer
11.LED display
12.Cutting guide (3/6/9/12/15/18/21mm)
13.Oil bottle
14.USB charging cable
SAFETY INSTRUCTIONS
This device can be used by children aged 3
or over under supervision. This appliance
can be used by children aged from 8 years
and above and persons with reduced
physical, sensory or mental capabilities or
lack of experience and knowledge if they
have been given supervision or instruction
concerning use of the appliance in a safe
way and understand the hazards involved.
Children shall not play with the appliance.
Cleaning and user maintenance shall not be
made by children without supervision.
This device can only be connected with the
USB interface (5VDC, Output Max 1A).
Follow the DEVICE CHARGE instructions
in order to charge it.
Follow the device BATTERY REMOVAL
instructions for removal of the batteries from
the device.
This device is designed for use at a
maximum altitude up to 2000m above sea
level.
IMPORTANT WARNINGS
This appliance is designed for home use and should never be used for commer-
cial or industrial use under any circumstances.
Do not use the device on wet hair.
Do not use connect or disconnect the device to the mains with your hands or feet
wet. Do not use any accessories other than those supplied.
Do not use this device near to bathtubs, showers, sinks or other tanks that
contain water. The mains connection cable must not be tangled or wrapped
around the product during use. Do not pull on the cable to unplug it or use it to
carry the product.
Do not wrap the cable around the device.
Proceed according to the cleaning section of this manual for cleaning. Do not use
the product on animals.
Unplug the product immediately from the mains in the event of any breakdown
and contact an authorised Technical support service.
In order to prevent any risk of danger, do not open the device. Only qualified
technical personnel from the brand´s Official Technical support service may carry
out repairs or procedures on the device.
Any incorrect use or improper handling of the product shall render the warranty
null and void. Only an authorised technical support service centre may carry out
repairs on this product.
B&B TRENDS SL. disclaims all liability for damages that may occur to people,
animals or objects, for the non-observance of these warnings.
INSTRUCTIONS FOR USE
Always ensure the appliance is switched off before changing any attachments.
Place the desired trimming head on top of the groomer and attach the desired
cutting comb guide.
Push "ON/OFF button" (3), the trimmer is turned on and push "ON/OFF button"
again to turn it off. The display is 100% when the battery is full. The display is LO
when the battery is less than 20%.
The charging battery logo is displayed when the trimmer is charging.
You can choose between different cutting fixed comb guides
3/6/9/12/15/18/21mm (12) or 3-4-5-6mm adjustable trimmer guide (4).
This product complies with European Directive 2012/19/EU on
electrical and electronic devices, known as WEEE (Waste Electrical
and Electronic Equipment), provides the legal framework applicable
in the European Union for the disposal and reuse of waste
electronic and electrical devices. Do not dispose of this product in
the bin, instead going to the electrical and electronic waste
collection center closest to your home.
The product may contain batteries. Remove them before disposing
of the product and dispose in special containers approved for this
purpose.
EN
WIR MÖCHTEN UNS BEI IHNEN BEDANKEN, DASS SIE SICH FÜR ZELMER
ENTSCHIEDEN HABEN. WIR HOFFEN, DASS DAS PRODUKT ZU IHRER
ZUFRIEDENHEIT FUNKTIONIERT.
WARNUNG
LESEN SIE DIE GEBRAUCHSANWEISUNG SORGFÄLTIG DURCH, BEVOR
SIE DAS PRODUKT VERWENDEN. BEWAHREN SIE ES AN EINEM
SICHEREN ORT FÜR DEN ZUKÜNFTIGEN GEBRAUCH AUF
BESCHREIBUNG
1. T-blade-Klinge
2. Einstellung der Klingenlänge (0-1-2mm)
3. Ein-/Ausschalter [ON/OFF].
4. Trimmeraufsatz (3-4-5-6mm)
5. Schutzhülle
6. Reinigungspinsel
7. Präzisionstrimmer
8. Haarformungsaufsatz
9. Rasierfolie
10. Nasen-und Ohrentrimmeraufsatz
11. LED-Anzeigeleuchte
12. Kammaufsatz (3/6/9/12/15/18/21mm)
13. Schmieröl
14. USB-Ladekabel
SICHERHEITSHINWEISE
Dieses Gerät darf von Kindern ab 3 Jahren
benutzt werden, wenn sie beaufsichtigt
werden.
Dieses Gerät kann von Kindern ab 8 Jahren
und darüber und von Personen mit
reduzierten physischen, sensorischen oder
mentalen Fähigkeiten oder Mangel an
Erfahrung und/oder Wissen benutzt werden,
wenn sie beaufsichtigt oder bezüglich des
sicheren Gebrauchs des Gerätes
unterwiesen wurden und die daraus
resultierenden Gefahren verstanden haben.
Kinder dürfen nicht mit dem Gerät spielen.
Die Reinigung und Wartung des Gerätes darf
nicht von Kindern ohne Aufsicht durchgeführt
werden.
Das Gerät darf nur an einen USB-Port
angeschlossen werden (5VDC, max.
Ausgangsstrom 1A).
Laden Sie das Gerät gemäß den
Anweisungen im Abschnitt LADEN DES
GERÄTS auf.
Entfernen Sie die Batterien aus dem Gerät
gemäß den Anweisungen im Abschnitt
ENTFERNEN DER BATTERIEN.
Das Gerät ist nur für den Hausgebrauch bis
zu einer Höhe von 2000 m ü.d.M. bestimmt.
WICHTIGE WARNUNGEN
Dieses Gerät ist für den Hausgebrauch bestimmt und sollte unter keinen
Umständen für kommerzielle oder industrielle Zwecke verwendet werden.
Verwenden Sie das Gerät nicht auf nassem Haar.
Verwenden, verbinden oder trennen Sie das Gerät nicht mit nassen Händen oder
Füßen.
Verwenden Sie kein anderes als das mitgelieferte Zubehör.
Das Gerät darf niemals in der Nähe von Badewannen, Duschen, Waschbecken
oder anderen Gefäßen verwendet werden.
Das Netzkabel darf während des Gebrauchs nicht verwickelt oder um das
Produkt gewickelt werden.
Ziehen Sie nicht am Anschlusskabel, um es von der Steckdose zu trennen oder
es als Tragegriff zu verwenden.
Wickeln Sie das Kabel nicht um das Gerät.
Reinigen Sie das Gerät gemäß den Anweisungen im Abschnitt „Reinigung".
Verwenden Sie das Produkt nicht an Tieren.
Trennen Sie das Produkt im Falle einer Störung sofort vom Netz und kontak-
tie-ren Sie den offiziellen Kundendienst.
Um jegliches Gefahrenrisiko zu vermeiden, darf das Gerät nicht geöffnet werden.
Nur qualifiziertes technisches Personal des offiziellen technischen Kunden-
diens-tes darf Reparaturen oder Verfahren an dem Gerät durchführen.
Bei unsachgemäßem Gebrauch oder unsachgemäßer Handhabung erlischt die
Garantie. Nur ein offizielles technisches Kundendienstzentrum kann das Produkt
reparieren
B&B TRENDS SL. lehnt jede Haftung für Schäden an Personen, Tieren oder
Gegenständen ab, die aufgrund der Nichtbeachtung dieser Warnungen entste-
hen können.
GEBRAUCHSANLEITUNG
Vergewissern Sie sich immer, dass das Gerät ausgeschaltet ist, bevor Sie Zubehör-
teile wechseln.
Setzen Sie den ausgewählten Trimmkopf auf den Haarschneider und bringen Sie
den ausgewählten Kammaufsatz an. Drücken Sie den ON/OFF-Schalter (3), um den
Trimmer einzuschalten. Durch erneutes Drücken der Taste wird das Gerät ausges-
chaltet. 100 % auf dem Display zeigt an, dass der Akku vollständig aufgeladen ist.
LO, erscheint, wenn der Akkustand weniger als 20 % beträgt. Während des Ladevor-
gangs wird das Ladesymbol angezeigt. Sie können zwischen festen
3/6/9/12/15/18/21mm Kammaufsätzen
(Abb. 12) oder einem verstellbaren 3-4-5-6mm Trimmeraufsatz (Abb. 4) wählen
ZUBEHÖRTEILE AUFSETZEN UND
ABNEHMEN
Das abnehmbare Klingensystem ermöglicht Ihnen den schnellen Wechsel von
einer Vollpflegeklinge zu einer Präzisionstrimmklinge für das Trimmen um den
Schnurrbart, das Kinn oder überall dort, wo Sie den Haaransatz bestimmen
möchten. Um die Zubehörteile abzunehmen, ziehen Sie einfach an der
Oberkante der Klinge. Um das gewünschte Zubehörteil zu befestigen, richten
Sie die hintere Lasche des Zubehörkopfes mit der Aussparung an der
Innenkan-te des Trimmers aus und drücken Sie auf die Oberseite der Klinge.
T-BLADE-Klinge (Abb. 1)
Für einen gleichmäßigen Schnitt lassen Sie den Trimmer das Haar in seinem
eigenen Tempo schneiden. Bewegen Sie ihn nicht gewaltsam durch das Haar,
um den Haarschnitt zu beschleunigen.
Wählen Sie den gewünschten 3/6/9/12/15/18/21mm-Kammaufsatz. Vorerst
kämmen Sie das Haar durch, so dass es in ihre natürliche Richtung fällt.
Setzen Sie den größten Kammaufsatz auf den Haarschneider und beginnen Sie
mit dem Haarschneiden von unten nach oben. Drücken Sie den Haarschneider
leicht gegen das Haar, wobei die Zähne des Kammaufsatzes nach oben zeigen,
aber flach an dem Kopf anliegen. Schieben Sie den Haarschneider langsam
durch das Haar nach oben und nach außen und schneiden Sie jeweils nur eine
kleine Haarpartie. Wiederholen Sie diesen Vorgang an den Seiten und am
Hinterkopf.
Zum Trimmen des Bartes bzw. Schnurbartes halten Sie den Haarschneider
mitDEder Klinge zu sich gerichtet.
Beginnen Sie am Rand des Bartes/Schnurrbartes, wobei die Schneidklinge
leicht auf der Haut aufliegt. Führen Sie langsame Bewegungen aus, um die
Bart-/Schnurrbartlinie zu erstellen.
HOW TO PLACE AND REMOVE
ATTACHMENTS
A detachable blade system enables you to quickly change from blade for full
grooming to detail trimming blade around a moustache, goatee, or anywhere to
define the hair line. To remove the attachments, simply pull top edge of blade
away from the body unit. To attach, align the back tab of the attachment head to
the cavity on the inner edge of trimmer unit and push down on top of blade.
T-BLADE (Fig.1)
For uniform cutting, allow the trimmer to cut its way through the hair. Do not force
it through at a faster rate.
Select the desired guide combs 3/6/9/12/15/18/18mm. Start by combing the hair
so it falls into its natural direction.
Place the largest guide comb onto your trimmer and start by trimming the sides
from the bottom upwards. Hold the trimmer lightly against the hair, with teeth of
the guide comb pointing up but flat against the head. Slowly lift the trimmer up
and outward through the hair, cutting only a small amount at a time. Repeat
around sides and back of head.
To trim your beard/moustache hold the groomer with the cutting blade facing you.
Start with edge of beard/moustache line, and with the cutting blades resting
lightly against your skin, use slow movements to create a beard/moustache line.
PRECISION TRIMMER (Fig.7)
One adjustable comb for precision trimmer
Select the desired length on the adjustable comb 3-4-5-6mm.
Hold the groomer with the cutting blade facing you.
Start with edge of beard/moustache line, and with the cutting blades resting
lightly against your skin, use slow movements to create a beard/moustache line.
DESIGN TRIMMER (Fig.8)
Use the design trimmer to create fine lines and contours around your facial style,
close to the skin.
Hold the design trimming head perpendicular to the skin and move the trimming
head upwards or downwards with gentle pressure.
MINI FOIL SHAVER (Fig.9)
Hold the groomer and allow mini foil shaver gently touches your face.
Use short, well-controlled movements to shave around your beard/moustache.
Use your free hand to stretch your skin. This encourages the hair to stand
upright, making it easier to shave.
NOSE AND EAR TRIMMER (Fig.10)
Insert the nose and ear attachment gently into the nostril or ear.
Gently move the groomer in and out of the nostril or ear and at the same time
rotate the groomer.
IMPORTANT: Avoid inserting the cutting unit more than 6mm into your nostril.
CHARGING THE DEVICE
Before using your groomer for the first time, charge for 2-3 hours, and charge 2
hours regularly. Ensure the product is switched off. The hair trimmer is complete-
ly handy to carry and can be charged anywhere with the USB cable (Fig.14). First
insert the plug on the end of the USB charging cable lead into the unit and then
connect the USB charging cable to the USB interface. This appliance is suitable
for 5V DC Max 1A charger, computer and other power interface. The LED display
(Fig.11) shows remaining battery power in percent. IMPORTANT: This product is
for cord and cordless use. Your groomer cannot be overcharged. However, if the
product is not going to be used for an extended period time (2-3 months), unplug
it from the mains and store. Fully recharge your hair clipper when you like to use
it again. To preserve the life of your batteries, let them run out every 2 months
then recharge for 2-3 hours again.
MAINTENANCE AND CLEANING
Unplug the product when you do not intend to use it for an extended period of
time to prolong its shelf-life. Allow the device to cool down prior to storage.
Separate the tool head from the body and use the cleaning brush (Fig.6) to
remove dust from the internal parts. Apply a drop of oil (Fig.13) on one of the
edges of the blades for their maintenance, and turn on the device for a few
seconds to distribute it. This should be done when you notice a certain amount of
difficulty during the trimming operation.
Ensure that the device is unplugged prior to cleaning it.
This device may only be cleaned with a damp cloth, and chemical products must
never be used for the same
PRODUCT DISPOSAL
REMOVING BATTERY
The appliance must be disconnected from
the supply mains when removing the
battery.
Ensure that the clipper is discharged of all power First remove the comb. Then
remove the blade.
Unscrew the 2 screws in the blade base of the unit. Unscrew the other screw on
the lower back housing of the clipper. Lift or pry the clipper halves apart,
exposing the battery.
Cut the metal pieces on both ends of the battery and remove it from the PCB. Pull
downward the battery set from the unit.
The battery must be removed from the
appliance before it is scrapped. The battery
is to be disposed of safety
PRÄZISIONSTRIMMER (Rys.7)
Ein verstellbarer Trimmaufsatz für präzises Styling. Wählen Sie die gewünschte
Länge an dem verstellbaren 3-4-5-6mm-Trimmaufsatz. Halten Sie den Haarsch-
neider so, dass die Klinge zu Ihnen zeigt. Beginnen Sie am Rand Ihres
Bartes/Schnurrbartes und ziehen Sie mit langsamen Bewegungen eine Bart-/S-
chnurrbartlinie, wobei Sie die Klingen leicht angedrückt auf der Haut halten.
PRÄZISIONSTRIMMER (Abb. 8)
Verwenden Sie den Präzisionstrimmer, um feine Linien und Konturen im
Gesicht zu stylen.
Halten Sie den Trimmerkopf senkrecht zum Haut und bewegen Sie ihn durch
leichten Druck nach oben oder unten.
FOLIENRASIERER (Abb. 9)
Halten Sie den Rasierer und lassen Sie den Mini-Folienrasierer sanft Ihr Gesicht
berühren.
Rasieren Sie mit kurzen, sicheren Bewegungen um den Bart/Schnurrbart
herum. Strafen Sie mit der freien Hand die Haut. Dadurch werden die Haare
angehoben und lassen sich leichter rasieren.
NASEN- UND OHRENHAARSCHNEIDER (Abb. 10)
Führen Sie den Nasen- und Ohrentrimmer sanft in das Nasenloch oder die
Ohröffnung hinein und wieder heraus und dabei den Trimmer drehen.
WICHTIG: Führen Sie den Nasentrimmer nicht tiefer als 6 mm ein.
LADEN DES GERÄTS
Laden Sie den Haarschneider vor dem ersten Gebrauch 2-3 Stunden lang auf.
Laden Sie ihn dann regelmäßig für 2 Stunden. Stellen Sie sicher, dass das
Produkt ausgeschaltet ist.
Der Haartrimmer ist handlich und kann mit dem USB-Kabel (Abb.14) überall
aufgeladen werden. Stecken Sie zuerst den Stecker am Ende des USB-Kabels
in das Gerät und verbinden Sie dann das USB-Kabel mit einem USB-Anschluss.
Das Gerät kann mit einem 5V DC Ladegerät max. 1A, von einem Computer und
anderen Stromquellen geladen werden. Die LED-Anzeige (Abb.11) zeigt den
Ladezustand des Akkus in Prozent an.
WICHTIG: Dieses Produkt kann mit oder ohne Kabel verwendet werden. Der
Trimmer darf nicht überladen werden. Wenn das Produkt jedoch über einen
längeren Zeitraum (2-3 Monate) nicht verwendet wird, ziehen Sie den
Netzstec-ker und verstauen Sie das Gerät. Laden Sie den Akku vollständig auf,
wenn Sie das Gerät wieder verwenden wollen. Um die Lebensdauer des Akkus
zu erhalten, entladen Sie ihn alle 2 Monate und laden Sie ihn anschließend für
2-3 Stunden wieder auf.
WARTUNG UND REINIGUNG
Trennen Sie das Gerät von der Stromversorgung, wenn es über einen längeren
Zeitraum nicht benutzt wird, um seine Lebensdauer zu verlängern. Lassen Sie
das Gerät abkühlen, bevor Sie es einlagern. Trennen Sie den Aufsatz vom
Gerät und verwenden Sie die Reinigungsbürste (Abb. 6), um Schmutz von den
inneren Teilen zu entfernen. Zur Wartung der Klingen geben Sie einen Tropfen
Öl (Abb. 13) auf eine der Kanten der Klingen und schalten Sie das Gerät für
einige Sekunden ein, damit sich das Öl verteilt. Die Wartung sollte durchgeführt
werden, wenn Sie Schwierigkeiten bei der Bedienung des Geräts beim
Haarschneiden feststellen.
Stellen Sie sicher, dass das Gerät vor der Reinigung vom Stromnetz getrennt
ist.
Reinigen Sie das Gerät nur mit einem feuchten Tuch. Verwenden Sie niemals
Chemikalien zur.
PRODUKTENTSORGUNG
ENTNEHMEN DER BATTERIE
Beim Entfernen der Batterie muss das
Gerät vom Netz getrennt werden.
Stellen Sie sicher, dass der Haarschneider vollständig entladen ist. Entfernen
Sie zuerst den Batteriedeckel. Nehmen Sie dann die Klinge ab.
Entfernen Sie die 2 Schrauben im Sockel des Messers. Entfernen Sie die
Schraube am unteren hinteren Gehäuse des Haarschneiders. Heben Sie die
Gerätehälften ab, so dass die Batterie freigelegt wird.
Trennen Sie die Drähte an beiden Enden der Batterie und nehmen Sie sie aus
dem Batteriefach. Ziehen Sie die Batterieeinheit aus dem Gerät, indem Sie ihn
nach unten ziehen.
Entfernen Sie die Batterie, bevor Sie das
Gerät entsorgen. Entsorgen Sie die Batterie
auf sichere Art und Weise.

WE WOULD LIKE TO THANK YOU FOR CHOOSING ZELMER. WE WISH
THE PRODUCT PERFORMS TO YOUR SATISFACTION AND PLEASURE.
WARNING
PLEASE READ THE INSTRUCTIONS FOR USE CAREFULLY PRIOR TO
USING THE PRODUCT. STORE THESE IN A SAFE PLACE FOR FUTURE
REFERENCE
DESCRIPTION
1. T-blade
2. Blade length setting (0-1-2mm)
3. ON/OFF button
4. Trimmer guide (3-4-5-6-mm)
5. Storage pouch
6. Cleaning brush
7. Precision trimmer
8. Design trimmer
9. Mini foil shaver
10.Nose and ear trimmer
11.LED display
12.Cutting guide (3/6/9/12/15/18/21mm)
13.Oil bottle
14.USB charging cable
SAFETY INSTRUCTIONS
This device can be used by children aged 3
or over under supervision. This appliance
can be used by children aged from 8 years
and above and persons with reduced
physical, sensory or mental capabilities or
lack of experience and knowledge if they
have been given supervision or instruction
concerning use of the appliance in a safe
way and understand the hazards involved.
Children shall not play with the appliance.
Cleaning and user maintenance shall not be
made by children without supervision.
This device can only be connected with the
USB interface (5VDC, Output Max 1A).
Follow the DEVICE CHARGE instructions
in order to charge it.
Follow the device BATTERY REMOVAL
instructions for removal of the batteries from
the device.
This device is designed for use at a
maximum altitude up to 2000m above sea
level.
IMPORTANT WARNINGS
This appliance is designed for home use and should never be used for commer-
cial or industrial use under any circumstances.
Do not use the device on wet hair.
Do not use connect or disconnect the device to the mains with your hands or feet
wet. Do not use any accessories other than those supplied.
Do not use this device near to bathtubs, showers, sinks or other tanks that
contain water. The mains connection cable must not be tangled or wrapped
around the product during use. Do not pull on the cable to unplug it or use it to
carry the product.
Do not wrap the cable around the device.
Proceed according to the cleaning section of this manual for cleaning. Do not use
the product on animals.
Unplug the product immediately from the mains in the event of any breakdown
and contact an authorised Technical support service.
In order to prevent any risk of danger, do not open the device. Only qualified
technical personnel from the brand´s Official Technical support service may carry
out repairs or procedures on the device.
Any incorrect use or improper handling of the product shall render the warranty
null and void. Only an authorised technical support service centre may carry out
repairs on this product.
B&B TRENDS SL. disclaims all liability for damages that may occur to people,
animals or objects, for the non-observance of these warnings.
INSTRUCTIONS FOR USE
Always ensure the appliance is switched off before changing any attachments.
Place the desired trimming head on top of the groomer and attach the desired
cutting comb guide.
Push "ON/OFF button" (3), the trimmer is turned on and push "ON/OFF button"
again to turn it off. The display is 100% when the battery is full. The display is LO
when the battery is less than 20%.
The charging battery logo is displayed when the trimmer is charging.
You can choose between different cutting fixed comb guides
3/6/9/12/15/18/21mm (12) or 3-4-5-6mm adjustable trimmer guide (4).
WIR MÖCHTEN UNS BEI IHNEN BEDANKEN, DASS SIE SICH FÜR ZELMER
ENTSCHIEDEN HABEN. WIR HOFFEN, DASS DAS PRODUKT ZU IHRER
ZUFRIEDENHEIT FUNKTIONIERT.
WARNUNG
LESEN SIE DIE GEBRAUCHSANWEISUNG SORGFÄLTIG DURCH, BEVOR
SIE DAS PRODUKT VERWENDEN. BEWAHREN SIE ES AN EINEM
SICHEREN ORT FÜR DEN ZUKÜNFTIGEN GEBRAUCH AUF
BESCHREIBUNG
1. T-blade-Klinge
2. Einstellung der Klingenlänge (0-1-2mm)
3. Ein-/Ausschalter [ON/OFF].
4. Trimmeraufsatz (3-4-5-6mm)
5. Schutzhülle
6. Reinigungspinsel
7. Präzisionstrimmer
8. Haarformungsaufsatz
9. Rasierfolie
10. Nasen-und Ohrentrimmeraufsatz
11. LED-Anzeigeleuchte
12. Kammaufsatz (3/6/9/12/15/18/21mm)
13. Schmieröl
14. USB-Ladekabel
SICHERHEITSHINWEISE
Dieses Gerät darf von Kindern ab 3 Jahren
benutzt werden, wenn sie beaufsichtigt
werden.
Dieses Gerät kann von Kindern ab 8 Jahren
und darüber und von Personen mit
reduzierten physischen, sensorischen oder
mentalen Fähigkeiten oder Mangel an
Erfahrung und/oder Wissen benutzt werden,
wenn sie beaufsichtigt oder bezüglich des
sicheren Gebrauchs des Gerätes
unterwiesen wurden und die daraus
resultierenden Gefahren verstanden haben.
Kinder dürfen nicht mit dem Gerät spielen.
Die Reinigung und Wartung des Gerätes darf
nicht von Kindern ohne Aufsicht durchgeführt
werden.
Das Gerät darf nur an einen USB-Port
angeschlossen werden (5VDC, max.
Ausgangsstrom 1A).
Laden Sie das Gerät gemäß den
Anweisungen im Abschnitt LADEN DES
GERÄTS auf.
Entfernen Sie die Batterien aus dem Gerät
gemäß den Anweisungen im Abschnitt
ENTFERNEN DER BATTERIEN.
Das Gerät ist nur für den Hausgebrauch bis
zu einer Höhe von 2000 m ü.d.M. bestimmt.
WICHTIGE WARNUNGEN
Dieses Gerät ist für den Hausgebrauch bestimmt und sollte unter keinen
Umständen für kommerzielle oder industrielle Zwecke verwendet werden.
Verwenden Sie das Gerät nicht auf nassem Haar.
Verwenden, verbinden oder trennen Sie das Gerät nicht mit nassen Händen oder
Füßen.
Verwenden Sie kein anderes als das mitgelieferte Zubehör.
Das Gerät darf niemals in der Nähe von Badewannen, Duschen, Waschbecken
oder anderen Gefäßen verwendet werden.
Das Netzkabel darf während des Gebrauchs nicht verwickelt oder um das
Produkt gewickelt werden.
Ziehen Sie nicht am Anschlusskabel, um es von der Steckdose zu trennen oder
es als Tragegriff zu verwenden.
Wickeln Sie das Kabel nicht um das Gerät.
Reinigen Sie das Gerät gemäß den Anweisungen im Abschnitt „Reinigung".
Verwenden Sie das Produkt nicht an Tieren.
Trennen Sie das Produkt im Falle einer Störung sofort vom Netz und kontak-
tie-ren Sie den offiziellen Kundendienst.
Um jegliches Gefahrenrisiko zu vermeiden, darf das Gerät nicht geöffnet werden.
Nur qualifiziertes technisches Personal des offiziellen technischen Kunden-
diens-tes darf Reparaturen oder Verfahren an dem Gerät durchführen.
Bei unsachgemäßem Gebrauch oder unsachgemäßer Handhabung erlischt die
Garantie. Nur ein offizielles technisches Kundendienstzentrum kann das Produkt
reparieren
B&B TRENDS SL. lehnt jede Haftung für Schäden an Personen, Tieren oder
Gegenständen ab, die aufgrund der Nichtbeachtung dieser Warnungen entste-
hen können.
GEBRAUCHSANLEITUNG
Vergewissern Sie sich immer, dass das Gerät ausgeschaltet ist, bevor Sie Zubehör-
teile wechseln.
Setzen Sie den ausgewählten Trimmkopf auf den Haarschneider und bringen Sie
den ausgewählten Kammaufsatz an. Drücken Sie den ON/OFF-Schalter (3), um den
Trimmer einzuschalten. Durch erneutes Drücken der Taste wird das Gerät ausges-
chaltet. 100 % auf dem Display zeigt an, dass der Akku vollständig aufgeladen ist.
LO, erscheint, wenn der Akkustand weniger als 20 % beträgt. Während des Ladevor-
gangs wird das Ladesymbol angezeigt. Sie können zwischen festen
3/6/9/12/15/18/21mm Kammaufsätzen
(Abb. 12) oder einem verstellbaren 3-4-5-6mm Trimmeraufsatz (Abb. 4) wählen
ZUBEHÖRTEILE AUFSETZEN UND
ABNEHMEN
Das abnehmbare Klingensystem ermöglicht Ihnen den schnellen Wechsel von
einer Vollpflegeklinge zu einer Präzisionstrimmklinge für das Trimmen um den
Schnurrbart, das Kinn oder überall dort, wo Sie den Haaransatz bestimmen
möchten. Um die Zubehörteile abzunehmen, ziehen Sie einfach an der
Oberkante der Klinge. Um das gewünschte Zubehörteil zu befestigen, richten
Sie die hintere Lasche des Zubehörkopfes mit der Aussparung an der
Innenkan-te des Trimmers aus und drücken Sie auf die Oberseite der Klinge.
T-BLADE-Klinge (Abb. 1)
Für einen gleichmäßigen Schnitt lassen Sie den Trimmer das Haar in seinem
eigenen Tempo schneiden. Bewegen Sie ihn nicht gewaltsam durch das Haar,
um den Haarschnitt zu beschleunigen.
Wählen Sie den gewünschten 3/6/9/12/15/18/21mm-Kammaufsatz. Vorerst
kämmen Sie das Haar durch, so dass es in ihre natürliche Richtung fällt.
Setzen Sie den größten Kammaufsatz auf den Haarschneider und beginnen Sie
mit dem Haarschneiden von unten nach oben. Drücken Sie den Haarschneider
leicht gegen das Haar, wobei die Zähne des Kammaufsatzes nach oben zeigen,
aber flach an dem Kopf anliegen. Schieben Sie den Haarschneider langsam
durch das Haar nach oben und nach außen und schneiden Sie jeweils nur eine
kleine Haarpartie. Wiederholen Sie diesen Vorgang an den Seiten und am
Hinterkopf.
Zum Trimmen des Bartes bzw. Schnurbartes halten Sie den Haarschneider
mitDEder Klinge zu sich gerichtet.
Beginnen Sie am Rand des Bartes/Schnurrbartes, wobei die Schneidklinge
leicht auf der Haut aufliegt. Führen Sie langsame Bewegungen aus, um die
Bart-/Schnurrbartlinie zu erstellen.
DE
HOW TO PLACE AND REMOVE
ATTACHMENTS
A detachable blade system enables you to quickly change from blade for full
grooming to detail trimming blade around a moustache, goatee, or anywhere to
define the hair line. To remove the attachments, simply pull top edge of blade
away from the body unit. To attach, align the back tab of the attachment head to
the cavity on the inner edge of trimmer unit and push down on top of blade.
T-BLADE (Fig.1)
For uniform cutting, allow the trimmer to cut its way through the hair. Do not force
it through at a faster rate.
Select the desired guide combs 3/6/9/12/15/18/18mm. Start by combing the hair
so it falls into its natural direction.
Place the largest guide comb onto your trimmer and start by trimming the sides
from the bottom upwards. Hold the trimmer lightly against the hair, with teeth of
the guide comb pointing up but flat against the head. Slowly lift the trimmer up
and outward through the hair, cutting only a small amount at a time. Repeat
around sides and back of head.
To trim your beard/moustache hold the groomer with the cutting blade facing you.
Start with edge of beard/moustache line, and with the cutting blades resting
lightly against your skin, use slow movements to create a beard/moustache line.
PRECISION TRIMMER (Fig.7)
One adjustable comb for precision trimmer
Select the desired length on the adjustable comb 3-4-5-6mm.
Hold the groomer with the cutting blade facing you.
Start with edge of beard/moustache line, and with the cutting blades resting
lightly against your skin, use slow movements to create a beard/moustache line.
DESIGN TRIMMER (Fig.8)
Use the design trimmer to create fine lines and contours around your facial style,
close to the skin.
Hold the design trimming head perpendicular to the skin and move the trimming
head upwards or downwards with gentle pressure.
MINI FOIL SHAVER (Fig.9)
Hold the groomer and allow mini foil shaver gently touches your face.
Use short, well-controlled movements to shave around your beard/moustache.
Use your free hand to stretch your skin. This encourages the hair to stand
upright, making it easier to shave.
NOSE AND EAR TRIMMER (Fig.10)
Insert the nose and ear attachment gently into the nostril or ear.
Gently move the groomer in and out of the nostril or ear and at the same time
rotate the groomer.
IMPORTANT: Avoid inserting the cutting unit more than 6mm into your nostril.
CHARGING THE DEVICE
Before using your groomer for the first time, charge for 2-3 hours, and charge 2
hours regularly. Ensure the product is switched off. The hair trimmer is complete-
ly handy to carry and can be charged anywhere with the USB cable (Fig.14). First
insert the plug on the end of the USB charging cable lead into the unit and then
connect the USB charging cable to the USB interface. This appliance is suitable
for 5V DC Max 1A charger, computer and other power interface. The LED display
(Fig.11) shows remaining battery power in percent. IMPORTANT: This product is
for cord and cordless use. Your groomer cannot be overcharged. However, if the
product is not going to be used for an extended period time (2-3 months), unplug
it from the mains and store. Fully recharge your hair clipper when you like to use
it again. To preserve the life of your batteries, let them run out every 2 months
then recharge for 2-3 hours again.
MAINTENANCE AND CLEANING
Unplug the product when you do not intend to use it for an extended period of
time to prolong its shelf-life. Allow the device to cool down prior to storage.
Separate the tool head from the body and use the cleaning brush (Fig.6) to
remove dust from the internal parts. Apply a drop of oil (Fig.13) on one of the
edges of the blades for their maintenance, and turn on the device for a few
seconds to distribute it. This should be done when you notice a certain amount of
difficulty during the trimming operation.
Ensure that the device is unplugged prior to cleaning it.
This device may only be cleaned with a damp cloth, and chemical products must
never be used for the same
PRODUCT DISPOSAL
REMOVING BATTERY
The appliance must be disconnected from
the supply mains when removing the
battery.
Ensure that the clipper is discharged of all power First remove the comb. Then
remove the blade.
Unscrew the 2 screws in the blade base of the unit. Unscrew the other screw on
the lower back housing of the clipper. Lift or pry the clipper halves apart,
exposing the battery.
Cut the metal pieces on both ends of the battery and remove it from the PCB. Pull
downward the battery set from the unit.
The battery must be removed from the
appliance before it is scrapped. The battery
is to be disposed of safety
PRÄZISIONSTRIMMER (Rys.7)
Ein verstellbarer Trimmaufsatz für präzises Styling. Wählen Sie die gewünschte
Länge an dem verstellbaren 3-4-5-6mm-Trimmaufsatz. Halten Sie den Haarsch-
neider so, dass die Klinge zu Ihnen zeigt. Beginnen Sie am Rand Ihres
Bartes/Schnurrbartes und ziehen Sie mit langsamen Bewegungen eine Bart-/S-
chnurrbartlinie, wobei Sie die Klingen leicht angedrückt auf der Haut halten.
PRÄZISIONSTRIMMER (Abb. 8)
Verwenden Sie den Präzisionstrimmer, um feine Linien und Konturen im
Gesicht zu stylen.
Halten Sie den Trimmerkopf senkrecht zum Haut und bewegen Sie ihn durch
leichten Druck nach oben oder unten.
FOLIENRASIERER (Abb. 9)
Halten Sie den Rasierer und lassen Sie den Mini-Folienrasierer sanft Ihr Gesicht
berühren.
Rasieren Sie mit kurzen, sicheren Bewegungen um den Bart/Schnurrbart
herum. Strafen Sie mit der freien Hand die Haut. Dadurch werden die Haare
angehoben und lassen sich leichter rasieren.
NASEN- UND OHRENHAARSCHNEIDER (Abb. 10)
Führen Sie den Nasen- und Ohrentrimmer sanft in das Nasenloch oder die
Ohröffnung hinein und wieder heraus und dabei den Trimmer drehen.
WICHTIG: Führen Sie den Nasentrimmer nicht tiefer als 6 mm ein.
LADEN DES GERÄTS
Laden Sie den Haarschneider vor dem ersten Gebrauch 2-3 Stunden lang auf.
Laden Sie ihn dann regelmäßig für 2 Stunden. Stellen Sie sicher, dass das
Produkt ausgeschaltet ist.
Der Haartrimmer ist handlich und kann mit dem USB-Kabel (Abb.14) überall
aufgeladen werden. Stecken Sie zuerst den Stecker am Ende des USB-Kabels
in das Gerät und verbinden Sie dann das USB-Kabel mit einem USB-Anschluss.
Das Gerät kann mit einem 5V DC Ladegerät max. 1A, von einem Computer und
anderen Stromquellen geladen werden. Die LED-Anzeige (Abb.11) zeigt den
Ladezustand des Akkus in Prozent an.
WICHTIG: Dieses Produkt kann mit oder ohne Kabel verwendet werden. Der
Trimmer darf nicht überladen werden. Wenn das Produkt jedoch über einen
längeren Zeitraum (2-3 Monate) nicht verwendet wird, ziehen Sie den
Netzstec-ker und verstauen Sie das Gerät. Laden Sie den Akku vollständig auf,
wenn Sie das Gerät wieder verwenden wollen. Um die Lebensdauer des Akkus
zu erhalten, entladen Sie ihn alle 2 Monate und laden Sie ihn anschließend für
2-3 Stunden wieder auf.
WARTUNG UND REINIGUNG
Trennen Sie das Gerät von der Stromversorgung, wenn es über einen längeren
Zeitraum nicht benutzt wird, um seine Lebensdauer zu verlängern. Lassen Sie
das Gerät abkühlen, bevor Sie es einlagern. Trennen Sie den Aufsatz vom
Gerät und verwenden Sie die Reinigungsbürste (Abb. 6), um Schmutz von den
inneren Teilen zu entfernen. Zur Wartung der Klingen geben Sie einen Tropfen
Öl (Abb. 13) auf eine der Kanten der Klingen und schalten Sie das Gerät für
einige Sekunden ein, damit sich das Öl verteilt. Die Wartung sollte durchgeführt
werden, wenn Sie Schwierigkeiten bei der Bedienung des Geräts beim
Haarschneiden feststellen.
Stellen Sie sicher, dass das Gerät vor der Reinigung vom Stromnetz getrennt
ist.
Reinigen Sie das Gerät nur mit einem feuchten Tuch. Verwenden Sie niemals
Chemikalien zur.
PRODUKTENTSORGUNG
ENTNEHMEN DER BATTERIE
Beim Entfernen der Batterie muss das
Gerät vom Netz getrennt werden.
Stellen Sie sicher, dass der Haarschneider vollständig entladen ist. Entfernen
Sie zuerst den Batteriedeckel. Nehmen Sie dann die Klinge ab.
Entfernen Sie die 2 Schrauben im Sockel des Messers. Entfernen Sie die
Schraube am unteren hinteren Gehäuse des Haarschneiders. Heben Sie die
Gerätehälften ab, so dass die Batterie freigelegt wird.
Trennen Sie die Drähte an beiden Enden der Batterie und nehmen Sie sie aus
dem Batteriefach. Ziehen Sie die Batterieeinheit aus dem Gerät, indem Sie ihn
nach unten ziehen.
Entfernen Sie die Batterie, bevor Sie das
Gerät entsorgen. Entsorgen Sie die Batterie
auf sichere Art und Weise.
Strona się ładuje...
Strona się ładuje...
Strona się ładuje...
Strona się ładuje...
Strona się ładuje...
Strona się ładuje...
Strona się ładuje...
Strona się ładuje...
Strona się ładuje...
Strona się ładuje...
Strona się ładuje...
Strona się ładuje...
Strona się ładuje...
Strona się ładuje...
Strona się ładuje...
Strona się ładuje...
Strona się ładuje...
Strona się ładuje...
Strona się ładuje...
Strona się ładuje...
Strona się ładuje...
Strona się ładuje...
Strona się ładuje...
Strona się ładuje...
Strona się ładuje...
Strona się ładuje...
Strona się ładuje...
Strona się ładuje...
Strona się ładuje...
Strona się ładuje...
Strona się ładuje...
Strona się ładuje...
Strona się ładuje...
Strona się ładuje...
Strona się ładuje...
Strona się ładuje...
Strona się ładuje...
Strona się ładuje...
Strona się ładuje...
Strona się ładuje...
Strona się ładuje...
Strona się ładuje...
Strona się ładuje...
Strona się ładuje...
Strona się ładuje...
Strona się ładuje...
Strona się ładuje...
Strona się ładuje...
Strona się ładuje...
Strona się ładuje...
Strona się ładuje...
Strona się ładuje...
Strona się ładuje...
Strona się ładuje...
Strona się ładuje...
Strona się ładuje...
Strona się ładuje...
Strona się ładuje...
Strona się ładuje...
Strona się ładuje...
-
 1
1
-
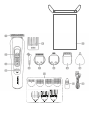 2
2
-
 3
3
-
 4
4
-
 5
5
-
 6
6
-
 7
7
-
 8
8
-
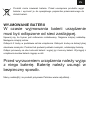 9
9
-
 10
10
-
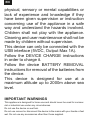 11
11
-
 12
12
-
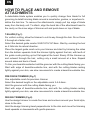 13
13
-
 14
14
-
 15
15
-
 16
16
-
 17
17
-
 18
18
-
 19
19
-
 20
20
-
 21
21
-
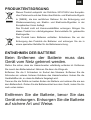 22
22
-
 23
23
-
 24
24
-
 25
25
-
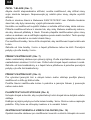 26
26
-
 27
27
-
 28
28
-
 29
29
-
 30
30
-
 31
31
-
 32
32
-
 33
33
-
 34
34
-
 35
35
-
 36
36
-
 37
37
-
 38
38
-
 39
39
-
 40
40
-
 41
41
-
 42
42
-
 43
43
-
 44
44
-
 45
45
-
 46
46
-
 47
47
-
 48
48
-
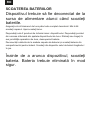 49
49
-
 50
50
-
 51
51
-
 52
52
-
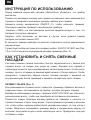 53
53
-
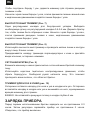 54
54
-
 55
55
-
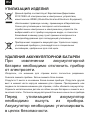 56
56
-
 57
57
-
 58
58
-
 59
59
-
 60
60
-
 61
61
-
 62
62
-
 63
63
-
 64
64
-
 65
65
-
 66
66
-
 67
67
-
 68
68
-
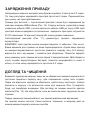 69
69
-
 70
70
-
 71
71
-
 72
72
-
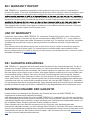 73
73
-
 74
74
-
 75
75
-
 76
76
-
 77
77
-
 78
78
-
 79
79
-
 80
80


Zelmer ZGK6800 Instrukcja obsługi
- Kategoria
- Trymery do brody
- Typ
- Instrukcja obsługi
w innych językach
- slovenčina: Zelmer ZGK6800 Používateľská príručka
- română: Zelmer ZGK6800 Manual de utilizare
Inne dokumenty
-
Remington PG6060 Instrukcja obsługi
-
Remington PG6050 Instrukcja obsługi
-
Remington PG6045 Instrukcja obsługi
-
Remington PG6030 Instrukcja obsługi
-
BaByliss MT860E Instrukcja obsługi
-
Remington MB4555 Instrukcja obsługi
-
Remington MB4550 Instrukcja obsługi
-
Tristar TR-2553 Instrukcja obsługi
-
 Profi Care PC BHT3015 Instrukcja obsługi
-
ELDOM GDS8 Instrukcja obsługi
