G21 GRILL Instrukcja obsługi

Kategoria
Grille
Typ
Instrukcja obsługi
HU PL
SK
DE
EN
CZ
Arizona
HR
SLO
ASSEMBLY AND OPERATION INSTRUCTIONS
Model: Arizona BBQ
USE ONLY THE HOSE AND HOSE CONNECTOR PROVIDED! IF A REPLACEMENT IS
NECESSARY, PLEASE CONTACT EITHER OUR CUSTOMER SERVICE DEPARTMENT OR
YOUR LOCAL DEALER. THE USE OF UNAUTHORISED PARTS CAN BE DANGEROUS.
0359/17
FOR OUTDOOR USE ONLY
PLEASE READ INSTRUCTIONS CAREFULLY BEFORE ASSEMBLY
RETAIN THIS MANUAL FOR FUTURE REFERENCE
EN
WARNING
Hazardous fire or explosion may result if instructions are not followed.
It is the consumer’s responsibility to see that the barbecue is properly assembled, installed, and
taken care of. Failure to follow instructions in this manual could result in bodily injury and/or
property damage.
For your safety if you smell gas:
1. Turn off gas supply at bottle.
2. Extinguish all naked flames; do not operate any electrical appliances.
3. Ventilate the area.
4. Check for leaks as detailed in this manual.
5. If odour persists, contact your dealer or gas supplier immediately.
Safety precautions:
1. Perform impermeability check after each tank refill.
2. Never perform impermeability check with a match or open flame.
3. Do not store gasoline or other flammable vapours and liquids in the vicinity of this or any other
appliance.
4. Any LP cylinder not connected for use shall not be stored in the vicinity of this or any other
appliance.
Assembly:
WARNING: Whilst every effort has made in manufacture of your barbecue to remove any sharp
edge, you should handle all components with care to avoid accidental injury.
Tools required: Either a crosshead screwdriver or flat-bladed screwdriver and either a spanner
(we have supplied a multifunction spanner) or a pair pliers.
Assembly:
Please read all instructions thoroughly before proceeding. Find a large, clean area to assemble
your barbecue. Please refer to the parts list and assembly diagram as necessary. Assembly of the
barbecue involves many large components, it is advisable to have two people to assemble the unit.
NOTICE: Rip off all the plastic protection before assembling!
WARNING: Do not move the appliance during use.
Turn off gas supply at the gas cylinder when appliance is not in use.
Do not modify the appliance.
Minimum distance from sides and back of unit to combustible construction is 3 m
from side and 3 m from back.
The English version of the manual is an exact translation of the original manufacturer‘s instructions.
Images used in this manual are for illustrational purposes only and may differ from the actual product.
Technical Information:
BRAND: G21
APPLIANCE CODE: Arizona BBQ - grill Arizona BBQ - hotplate
THERMAL POWER 16 kW (1142 g/h) The grill burner is
dimensioned to 4 kW and the side
grill burner is dimensioned to 4 kW.
The appliance is also fitted with a rear
burner rated at 4,0 kW (286g/h). This
burner must not be used at the same
time as the grill burners.
4 kW (286 g/h) The grill
burner is dimensioned to
4 kW
GAS CATEGORY: I3+(28-30/37) I3B/P(30)
GAS TYPES: Butane Propane Butane/Propane mixture
GAS PRESSURE: 28 - 30 mbar 37 mbar 30 mbar
INJECTION JET SIZE: Grill: 0.95 mm
Side: 0.95 mm 0359/17
IDENTIFICATION CODE: 0359BT887
ONLY FOR USE OUTDOORS AND IN WELL VENTILATED AREAS.
WARNING: ACCESIBLE PARTS OF THE GRILL CAN BE VERY HOT. KEEP OUT OF REACH
OF CHILDREN.
DO NOT MOVE THE APPLIANCE DURING USE.
TURN OFF THE GAS SUPPLY AT THE GAS CYLINDER AFTER USE.
DO NOT MODIFY THE APPLIANCE.
THIS APPLIANCE MUST BE KEPT AWAY FROM FLAMMABLE MATERIALS DURING USE.
READ THE INSTRUCTION MANUAL BEFORE USING THE APPLIANCE.
IN ADDITION A LOGO OR WARNING SHALL BE USED TO FORBID GAS CYLINDERS IN
PLACES OF THE APPLIANCE NOT INTENDED TO RECEIVE GAS CYLINDERS IF ANY.
Note:
Diameter dimension of pan used for side burner, must be between 140-240 mm.
Digits on the injector indicates its size, For example, ”0.85”on the injector means injector size is ”0.85mm”.
WARNING INFORMATION
Important:
Read the following instructions carefully and be sure your barbecue is properly installed,
assembled and cared for. Not following these instructions may result in serious injury and/or
property damage.
If you have any questions concerning assembly or operation, contact your dealer or LPG Gas
Company.
• Prior to use please make sure the appliance and cylinder are placed on a flat level ground.
• Never light the GRILL OR REAR BURNERS with the HOOD in the closed position.
• Never light the SIDE BURNER with the lid in the closed position.
• Your barbecue can be used with gas cylinders with maximal weight 15 kg.
24 CM 24 CM
NOTE FOR CONSUMER: Retain for future Reference
Connecting the gas cylinder to the grill
This appliance is only suitable for use with low-pressure butane or propane gas or LPG mixtures,
fitted with the appropriate low-pressure regulator via a flexible hose. The hose should be secured
to the regulator and the appliance with hose clips. For barbecue which is set to I3B/P(30), I3+(28-
30/37) use a regulator which operates butane gas at 30 mbar and propane gas at 37 mbar. For
I3B/P(50), a regulator operates the butane, propane gas mixture at 50mbar. Ensure the regulator
was certified by standard EN16129. Never store gas cylinder inside the grill.
Regulator and Hose
Use only regulators and hose approved for LP Gas at the above pressures. The life expectancy of
the regulator is estimated as 2 years. It is recommended that regulator is changed within 2 years of
the date of manufacture. The use of the wrong regulator or hose is unsafe; always check that you
have the correct items before operating the barbecue. The hose used must conform to the relevant
standard for the country of use. The length of the hose must be 1.5 metres (maximum). Worn or
damaged hose must be replaced. Ensure that the hose is not obstructed, kinked, or in contact
with any part of the barbecue other than at its connection.
Storage of Appliance
Storage of an appliance indoors is only permissible if the cylinder is disconnected and removed
from the appliance. When the appliance is not to be used for a period of time it should be stored
in its original packaging and stored in a dry dust free area.
Gas Cylinder
The gas cylinder should not be dropped or handled roughly! Always keep the cylinder in upright
position. during operation. Make sure the cylinder is from any source of flame before you change
the cylinder. If the appliance is not in use, the cylinder must be disconnected. Replace the
protective cap on the cylinder after disconnecting the cylinder from the appliance. The gas cylinder
must be sited outside the body of the appliance.
Cylinders must be stored outdoors in an upright position and out of the reach of children. The
cylinder must never be stored where temperatures can reach over 50°C. Do not store the cylinder
near flames, pilot lights or other sources of ignition. DO NOT SMOKE.
This barbecue is designed for use outdoors, away from any flammable materials. It is important that
there are no overhead obstructions and that there is a minimum distance of 3 m from the side or
rear of the appliance. It is important that the ventilation openings of the appliance are not obstructed.
The barbecue must be used on a level, stable surface. The appliance should be protected from direct
draughts and shall be positioned or protected against direct penetration by any trickling water (e.g. rain).
Parts sealed by the manufacturer or his agent must not be altered by the user. No modifications
should be made to any part of this barbecue and repairs and maintenance should only be carried
out by a registered service engineer.
Since this barbecue has no restriction in the Emission of unburned gas, this barbecue must be
installed and/or used outdoors or in an amply ventilated area.
To check for leaks
Make 2-3 fluid ounces of leak detecting solution by mixing one part washing up liquid with 3
parts water.
• Ensure the control valve is “OFF”.
Connect the regulator to the cylinder and ON/OFF valve to the burner, ensure the connections
are secured then turn ON the gas.
Brush the soapy solution onto the hose and all joints. If bubbles appear you have a leak, which
must be rectified before use.
• Retest after fixing the fault.
• Turn OFF the gas at the cylinder after testing.
If leakage is detected and cannot be rectified. Do not attempt to cure leakage but contact your
gas dealer.
Appliance connection
Before connection, ensure that there is no debris caught in the head of the gas cylinder, regulator,
burner and burner ports. Spiders and insects can nest within and clog the burner/venturi tube at
the orifice. A clogged burner can lead to a fire beneath the appliance.
Fit the hose to the appliance using a spanner to tighten it onto the connection thread. If the hose is
replaced it must be secured to the appliance and regulator connections with hose clips. Disco-
nnect the
regulator from the cylinder (according to the directions supplied with the regulator) when the bar-
becue is not in use.
The Barbecue must be used in a well ventilated area. Do not obstruct the flow of combustion air
to the burner when the barbecue is in use. GRILL CAN ONLY BE USED OUTDOOR.
BEFORE USE CHECK FOR LEAKS.
NEVER CHECK FOR LEAKS WITH A NAKED FLAME, ALWAYS USE A SOAPY WATER
SOLUTION.
Lighting Instructions
1. Open the hood of the barbecue before attempting to light the burners.
2. Turn all the control knobs clockwise to “OFF” position.
3. Connect the regulator to the gas bottle. Turn the gas supply “ON” at the regulator. Check with
the use of soapy water for any gas leakage between the bottle and the regulator.
4. Push down the front left control knob and keep pressing whilst turning anti-clockwise to the
“HIGH” position (a clicking sound is heard), this will light the left hand burner. Observe if the burner
has lit. If not repeat this process.
5. If the burner has not lit after retrying wait 5 minutes and repeat step 4.
6. Adjust the heat by turning the knob to the High/Low position.
7. If the burner does not light. Light the appliance with a match using the lighting hole in the side
of the appliance. Consult your gas dealer to rectify the ignition.
8. To light the remaining burners in sequence from left to right, repeat step 4 above. The
crosslighting channel between the burners will light the burner adjacent to it. Never attempt to light
other burners except left hand burner first.
9. To turn the barbecue ‘OFF’ turn the cylinder valve or regulator switch to the ‘OFF’ position and
then turn the control knob on the appliance clockwise to the ‘OFF’ position.
Lighting Instructions (Side burner)
1. Open the lid of the side burner.
2. Push down the side burner control knob and keep pressing whilst turning anti-clockwise to the
“HIGH” position (a clicking sound is heard), this will light the side burner. Observe if the burner has
lit. If not, repeat this process.
3. If the burner has not lit after retrying wait 5 minutes and repeat step 2.
4. Adjust the heat by turning the knob to the High/Low position.
5. If the burner does not light. Light the appliance with a match using a long match or taper.
Consult your gas dealer to rectify the ignition.
6. To turn the side burner ‘OFF’, turn the control knob clockwise to the ‘OFF’ position. If you
wish to turn the complete barbecue ‘OFF’ turn the cylinder valve or regulator switch to the ‘OFF’
position and then turn the control knob on the appliance clockwise to the ‘OFF’ position.
Lighting instructions (Rear burner)
1. Open the hood of the barbecue.
2. Push down the rear burner control knob and turn it anti-clockwise to the ‘‘Ful rate‘‘ position, this
will light the rear burner. Observe if the burner has lit. If not repeat this process.
3. If the burner has not lit after retrying wait 5 minutes and repeat step 2.
4. Adjust the heat by turning the knob to the „high‘‘ / „low‘‘ position.
5. If the burner does not light, light the appliance with a match using a long match or taper. Consult
your gas dealer to rectify the ignition.
6. To turn the rear burner ‘‘OFF‘‘ turn the control knob clockwise to the ‘‘OFF‘‘ position. If you wish
to turn the complete barbecue ‘‘OFF‘‘ turn the gas supply or regulator switch to the ‘‘OFF‘‘ position
and then turn the control knob on the appliance clockwise to the ‘‘OFF‘‘ position.
IMPORTANT WARNING:
Do not use rotisserie burner when main burners are in use.
WARNING: If the burner fails to ignite, turn the control knob off (clockwise) and also turn the
cylinder valve off. Wait five minutes before attempting to relight with ignition sequence.
Before cooking for the first time, operate the barbecue for about 15 minutes with the lid
closed and the gas turned on LOW. This will “heat clean” the internal parts and dissipate odour
from the painted finish.
Clean your barbecue after each USE. DO NOT use abrasive or flammable cleaners, as it will
damage the parts of the product and may start a fire. Clean in warm soapy water.
WARNING: Accessible parts may be very hot. Keep young children away from the hot appliance
at all times (even while cooling down!). It is recommended to use protective gloves (eg oven
gloves) when handling particularly hot components.
Cleaning and maintenance
CAUTION: All cleaning and maintenance should be carried out when the barbecue is cold and with
the fuel supply turned OFF at the gas cylinder.
Cleaning
“Burning off” the barbecue after every use (for approx 15 minutes) will keep excessive food residue
to a minimum.
Outer surface
Use mild detergent or baking soda and hot water solution. Non-abrasive scouring powder can be
used on stubborn stains, then rinse with water.
Interior of barbecue bottom
Remove residue using brush, scraper and/or cleaning pad then wash with a soapy water solution.
Rinse with water and allow to dry.
Wooden surface
Wash with a soft cloth and hot soapy water solution. Rinse with water. Do not use abrasive
cleaners, degreasers or a concentrated barbecue cleaner on wooden parts.
Cooking grid
Use a mild soapy water solution. Non-abrasive scouring powder can be used on stubborn stains
then rinse with water.
Burner cleaning
Turn the gas OFF at the control knob and disconnect the cylinder.
Remove grate.
Clean the burner with a soft brush or blow clean with compressed air and wipe with a cloth.
Clean any clogged ports with a pipe cleaner or stiff wire (such as an opened paper clip).
Inspect burner for any damage (cracks or holes). If damage is found, replace with a new burner.
Reinstall the burner, check to ensure that the Gas valve orifices are correctly positioned and se-
cured inside the burner inlet (venturi).
Troubleshooting
PROBLEM POSSIBLE CAUSE SOLUTION
The burner does
not ignite using
the ignition
system
1.LP gas cylinder is empty
2.Faulty regulator
3.Obstructions in burner
4.Obstructions in gas jets or gas hose
5. Electrode wire loose or disconnec-
ted on electrode or ignition unit
6.Electrode or wire is damaged faulty
pushbutton igniter
1.Replace with full cylinder
2.have regulator checked or
replace
3.Clean burner
4.Clean jets and gas hose
5.Reconnect wire
6.Change electrode and wire
change igniter
The burner can-
not be ignited
even with the
use of matches
1.LG gas cylinder is empty
2.Faulty regulator
3.Obstructions in burner
4.Obstructions in gas jets or gas hose
1.Replace with full cylinder
2.Have regulator checked or
replace
3.Clean burner
4.Clean jets and gas hose
Low flame or
flashback (fire
in burner tube-a
hissing or roaring
noise may be
heard)
1.LP gas cylinder is too small
2.Obstructions in burner
3.Obstructions in gas jets or gas hose
4.Windy conditions
1.Use larger cylinder
2.Clean burner
3.Clean jets and gas hose
4.Use BBQ in a more sheltered
place
Service
Your gas barbecue should be serviced annually by a competent registered person.
CARE AND PROTECTION OF STAINLESS STEEL SURFACES
Your BBQ features Stainless Steel components, using moderate grade Stainless Steels. All Stain-
less Steel grades require a level of care and protection to retain their appearance. Stainless Steels
are not immune to corrosion and neither are they maintenance-free, contrary to popular
public perception. Even the highest marine grades of Stainless Steel require frequent cleaning
with fresh water to avoid oxidation and other corrosive issues.
After assembly, we recommend that owners apply a thin layer of Olive Oil with a clean rag,
to all exposed Stainless Steel areas. This should then be polished in and buffed off with another
clean rag to a non-oily finish. This process will aid protection against dirt and other corrosive con-
taminants, by providing a temporary food-safe shield. The Olive Oil layer also makes later polishing
and removal of fingerprints easier. This process should be repeated frequently when cleaning your
grill.
You may have bought a protective cover for your BBQ. It is recommended that a BBQ cover
should be used at all times when the BBQ is not in use to protect your investment. However it is
vital to understand that unless the BBQ is cool, clean and dry when the cover is fitted, use of
a cover can in fact be detrimental. A cover placed on a warm, wet or unclean BBQ (or any mix
of these factors) can in fact be a very effective corrosion breeder!
For this reason, the BBQ should always be cool, cleaned of any surface contaminants or dirt
and be thoroughly dry before a protective cover is fitted. This is especially important before a
BBQ is stored for any length of time i.e. if the BBQ doesn’t get frequent use, or when the BBQ is
stored away over winter months.
In order to maintain the quality of the finish of your Stainless Steel BBQ, the owner must be vigilant
with care and maintenance according to this advice.
Look after your investment carefully and it will serve you well for many years to come.
MONTAGE- UND BETRIEBSANWEISUNGEN
Modell: Arizona BBQ
VERWENDEN SIE NUR DEN BEIGELEGTEN SCHLAUCH UND SCHLAUCHANSCHLUSS!
WENN EIN ERSATZ ERFORDERLICH SEIN SOLLTE, WENDEN SIE SICH AN UNSEREN
KUNDENDIENST ODER IHREN LOKALEN HÄNDLER.
DIE VERWENDUNG VON NICHT FREIGEGEBENEN TEILEN KANN ZU UNSICHEREN
BETRIEBSBEDINGUNGEN FÜHREN UND DIE UMWELT GEFÄHRDEN.
0359/17
NUR ZUR VERWENDUNG IM FREIEN
BITTE LESEN SIE DIESE ANWEISUNGEN SORGFÄLTIG VOR DER MONTAGE DURCH
BEWAHREN SIE DIESES HANDBUCH ZUM SPÄTEREN NACHSCHLAGEN AUF
DE
WARNUNG
Das Ignorieren dieser Anweisungen kann zu gefährlichen Bränden
oder Explosion führen
Es obliegt der Verantwortung des Verbrauchers, dass der Grill richtig montiert, installiert und
gewartet wird. Die Nichtbeachtung der Anweisungen in diesem Handbuch kann zu Verletzungen
und / oder Sachschäden führen.
Sicherheitsanweisungen für den fall, dass sie gasgeruch wahrnehmen:
1. Schließen Sie die Gasversorgung an der Flasche.
2. Löschen Sie alle offenen Flammen; betreiben Sie keine elektrischen Geräte.
3. Lüften Sie den Bereich.
4. Überprüfen Sie die Dichtheit, wie in diesem Handbuch beschrieben.
5. Wenn der Gasgeruch weiterhin bestehen, wenden Sie sich sofort an Ihren Händler oder
Gaslieferanten.
Vorsichtsmassnahmen:
1. Überprüfen Sie die Dichtheit aller Verbindungen nach jedem Befüllen der Gasflasche.
2. Suchen Sie NIE nach Lecks mit einem Streichholz oder offenem Feuer.
3. Lagern Sie keine Benzin oder andere entflammbare Dämpfe und Flüssigkeiten in der Nähe
dieses oder anderer ähnlicher Geräte.
4. Jede LPG Flasche, die nicht mit dem Grill verbunden ist, darf nicht in der Nähe dieses oder eines
anderen ähnlichen Geräts gelagert werden.
Zusammenbau:
WARNHINWEIS: Trotz aller Bemühungen bei der Herstellung sämtliche scharfen Kanten an Ihrem
Grill zu entfernen, sollten Sie alle Teile vorsichtig handhaben, um versehentliche Verletzungen zu
vermeiden.
Benötigtes Werkzeug: Entweder ein Kreuzschlitz- oder Schlitzschraubendreher und einen
Schlüssel (haben wir ein Multifunktionsschlüssel im Lieferumfang enthalten) oder ein Paar Zangen.
ZUSAMMENBAU:
Bitte lesen Sie alle Anweisungen gründlich durch, bevor Sie fortfahren. Suchen Sie einen großen,
sauberen Bereich, in dem Sie Ihren Grillwagen zusammenbauen. Bei Bedarf verweisen wir auf die
Stückliste und den Montageplan. Die Montage des Grills beinhaltet viele große Bauteile, daher ist
es ratsam, den Zusammenbau zu zweit durchzuführen.
HINWEIS: Stellen Sie sicher, dass alle Kunststoffschutzfolien vor der Montage entfernt werden!
ACHTUNG: Bewegen Sie das Gerät während des Betriebs nicht.
Schließen Sie die Gaszufuhr an der Gasflasche, wenn das Gerät nicht in Gebrauch ist
Ändern Sie nichts am Gerät.
Mindestabstand an den Seiten und der Rückseite des Gerätes zu brennbaren
Konstruktionen jeweils 3 m.
Die deutsche Version der Anleitung ist eine genaue Übersetzung der Anleitung des Herstellers.
Die in diesem Handbuch verwendeten Bilder dienen nur zur Illustration und können nicht genau
das Produkt entsprechen.
Technische Informationen:
GERÄT HERGESTELLT VON: G21
GERÄTECODE: Arizona BBQ - Grill Arizona BBQ - Platte
GESAMMT WÄRMEEINTRAG:
( ALLE KATEGORIEN)
16 kW (1142 g/h) Jeder Brenner wird
für 4,0 kW, inkl. hinterer Brenner
ausgelegt. Der hintere Brenner
darf nicht in derselben Zeit benutzt
werden, wie die Grillbrenner.
4kW (286 g/h) Der
Grillbrenner ist mit
4 kW
GERÄTE KATEGORIE: I3+(28-30/37) I3B/P(30)
GASARTEN: Butan Propan
Butan, Propan oder
deren Mischung
GASDRUCK: 28 - 30 mbar 37 mbar 30 mbar
INJECTOR GRÖSSE: Grill: 0.95 mm
Seite: 0.95 mm 0359/17
KENNNUMMER: 0359BT887
ES IST FÜR AUSSENBEREICHE SOWIE FÜR DEN GEBRAUCH IN GUT GELÜFTETEN
RÄUMEN BESTIMMT.
HINWEIS: DIE TEILE DES GRILLS KÖNNEN WÄHREND DES GRILLENS SEHR HEISS SEIN
(CA. 1 STUNDE). KINDER DÜRFEN DEN GRILL NICHT BENUTZEN. HALTEN SIE KINDER IM
AUSREICHENDEN ABSTAND, DAMIT VERBRENNUNGEN VERHINDERT WERDEN.
ES IST VERBOTEN, BEIM BETRIEB DEN GRILL ZU VERLEGEN.
NACH DER BENUTZUNG DES GRILLS IST DIE GASZUFÜHRUNG AUF DER GASFLASCHE
ZU SCHLIESSEN.
AM GERÄT DÜRFEN KEINE VERÄNDERUNGEN DURCHGEFÜHRT WERDEN.
DIESES GERÄT DARF BEI DESSEN BENUTZUNG IN DER ANWESENHEIT VON
BRENNBAREN STOFFEN NICHT BENUTZT WERDEN.
VOR DER BENUTZUNG DES GERÄTS IST DIE GEBRAUCHSANWEISUNG DURCHZULESEN.
DAS WARNSCHILD WEIST DARAUF HIN, DASS DIE GASFLASCHE BEIM GEBRAUCH
AUSSERHALB DES GRILLS UND NICHT IM GRILL SEIN SOLL.
BEMERKUNG:
Der Durchmesser für den Seitenbrenner muss 140-240 mm betragen.
Die Ziffern auf dem Injektor zeigen seine Größe, beispielsweise „0,85“ auf dem Injektor bedeutet die Injektor
Größe ist „0,85 mm“.
WARNHINWEISE
WICHTIG:
Lesen Sie die folgenden Anweisungen sorgfältig durch und stellen Sie sicher, dass Ihr Grill
richtig installiert, zusammengebaut und gewartet ist. Die Nichtbeachtung dieser Anweisungen
kann zu schweren Verletzungen und / oder Sachschäden führen.
Wenn Sie Fragen zur Montage oder Betrieb haben, wenden Sie sich an Ihren Händler oder LPG
bzw. Gas Lieferanten.
Wenn Sie den Grill aufstellen, stellen Sie das Gerät und die Gasflasche stets auf einen ebenen
Boden.
Zünden Sie den Grill oder den hinteren Brenner nie an, wenn sich der Deckel in der geschlossenen
Position befindet.
Zünden Sie den Seitenbrenner nie an, wenn sich die Abdeckungen der geschlossenen Position
befinden.
• Ihr Grill kann mit Gasflaschen mit einem Maximalgewicht von 15 kg betrieben werden.
24 CM 24 CM
HINWEIS FÜR VERBRAUCHER: bewahren Sie die Anweisungen für
späteren Gebrauch auf
ANSCHLUSS DER GASFLASCHE AN DAS GERÄT
Dieses Gerät ist nur für die Verwendung mit Niederdruck-Butan; Propan oder LPG Gasgemischen
geeignet und die Gasflasche muss mit einem entsprechenden Niederdruckregler verfügen über
muss einen flexiblen Schlauch angeschlossen werden. Der Schlauch sollte am Regler und am
Gerät mit Schlauchschellen gesichert werden. Bei Geräten der Kategorie I3B / P (30), I3 + (28-
30 / 37) sollte ein Regler verwendet werden, der bei Butangas bei 30 mbar und bei Propangas
bei 37 mbar arbeitet. Bei I3B / P (50) sollte der Regler bei Butan, Propan Gasgemisch bei 50
mbar arbeiten. Achten Sie darauf, dass der Regler nach dem Standard EN16129 zertifiziert wurde.
Lagern Sie die Gasflaschen niemals im Innern des Grills.
Regler und Schlauch
Verwenden Sie nur Regler und Schlauch für Flüssiggas, die für die weiter oben genannten Drücke
freigegeben wurden. Die Lebenserwartung des Reglers wird auf 2 Jahre geschätzt. Es wird
empfohlen, den Regler innerhalb von 2 Jahren nach dem Herstellungsdatum auszutauschen.
Die Verwendung eines falschen Reglers oder Schlauches ist nicht sicher; überprüfen Sie immer,
dass Sie die richtigen Teile verwenden, bevor Sie mit dem Grillen beginnen.
Der verwendete Schlauch, muss den entsprechenden Normen des Einsatzlandes entsprechen. Die
Länge des Schlauches darf max. 1,5 m sein. Ein abgenutzter oder beschädigter Schlauch muss
ersetzt werden. Stellen Sie sicher, dass der Schlauch nicht verstopft, geknickt oder in Kontakt mit
einem Teil des Grills, ausser dessen Anschluss, ist.
Lagerung des Geräts
Die Lagerung eines Gerätes in Innenräumen ist nur zulässig, wenn die Gasflasche getrennt und
aus dem Gerät entfernt wurde. Wenn das Gerät für einen bestimmten Zeitraum nicht verwendet
wird, sollte es in der Originalverpackung und an einem trockenen staubfreien Ort gelagert werden.
Gasflasche
Die Gasflasche darf nicht fallengelassen oder grob behandelt werden! Halten Sie die Flasche
während des Gebrauchs in aufrechter Position. Stellen Sie sicher, dass die Gasflasche fern von
jeglicher Feuerquelle ist, bevor sie Sie austauschen. Wenn das Gerät nicht in Gebrauch ist, muss
die Gasflasche vom Grill getrennt werden. Setzen Sie nach dem Trennen die Schutzkappe auf die
Gasflasche, um das Verschlussventil zu schützen. Die Gasflasche muss außerhalb des Gehäuses
des Grills abgestellt werden.
Gasflaschen müssen im Freien in einer aufrechten Position und außerhalb der Reichweite von
Kindern aufbewahrt werden. Die Gasflasche darf nicht in Bereichen gelagert werden, wo
Temperaturen über 50°C erreicht werden können. Lagern Sie die Gasflasche nicht in der Nähe von
Feuer, Zündflammen oder anderen Zündquellen. BEIM UMGANG NICHT RAUCHEN.
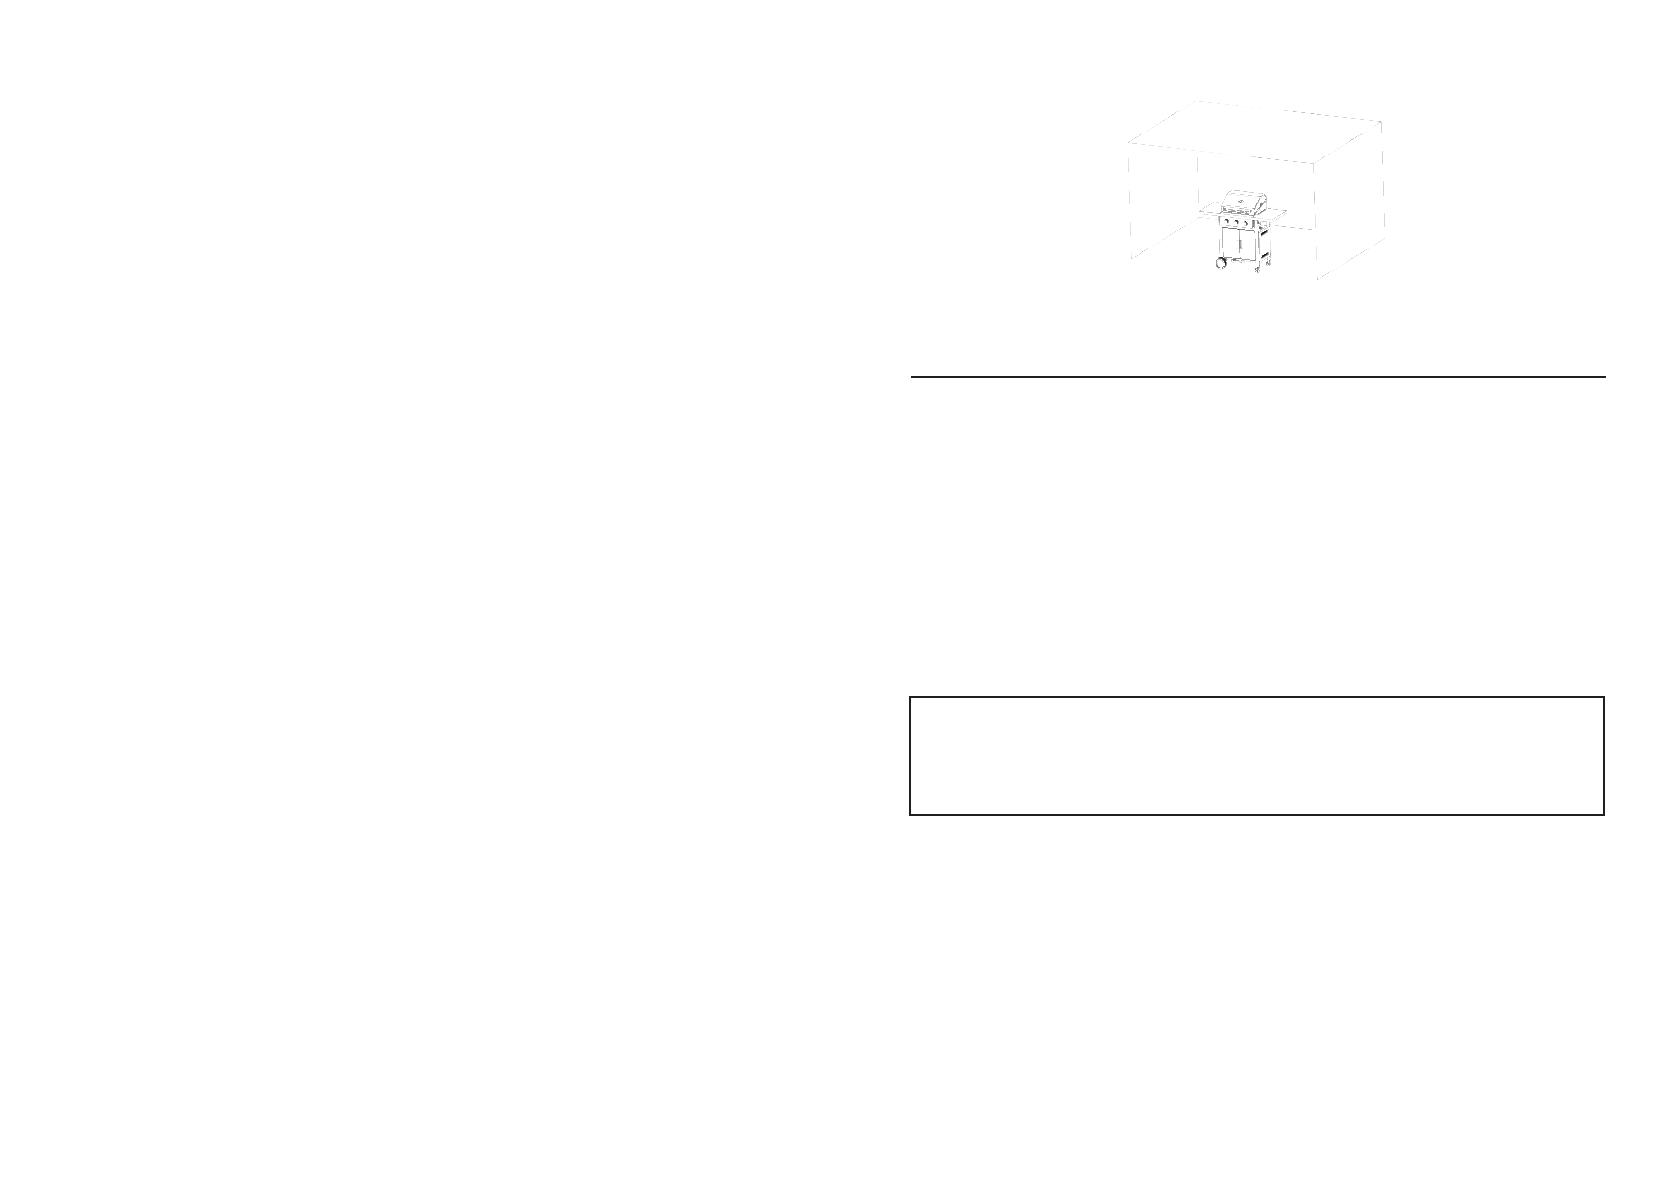
Dieser Grill ist für den Einsatz im Außenbereich konzipiert, außer Reichweite von entflammbaren
Materialien. Es ist wichtig, dass während des Betriebs keine Hindernisse über dem Grill geben
und dass ein Mindestabstand von 3 m von der Seite oder Rückseite des Geräts eingehalten wird.
Es ist wichtig, dass die Belüftungsöffnungen des Geräts nicht blockiert sind. Der Grill muss auf
einer ebenen, stabilen Unterlage aufgestellt werden. Das Gerät sollte vor direkter Zugluft geschützt
werden und so aufgestellt sein, dass es vor dem Eindringen von Wasser (z.B. regen) geschützt ist.
Teile, die vom Hersteller oder von seinem Beauftragten versiegelt wurden, dürfen vom
Anwender nicht verändert werden. Es dürfen keine Änderungen an keinem der Teile dieses
Grills gemacht werden und Reparatur und Wartung sollte nur von einem entsprechend
zertifiziertem Servicetechniker durchgeführt werden.
Da dieser Grill keine Beschränkung bei der Emission von unverbranntem Gas hat, darf er nur im
GASLECKSUCHE:
Bereiten Sie etwa 100ml Leckerkennungslösung durch Mischen von einem Teil Spülmittel mit
3 Teilen Wasser.
• Stellen Sie sicher, dass das Hauptventil ZU ist.
Schließen Sie den Druckregler an die Gasflasche an und das EIN/AUS-Ventil an den Brenner und
stellen Sie sicher, dass die Anschlüsse fest angeschlossen sind, dann öffnen Sie das Gasventil.
Bürsten Sie die Seifenlauge auf den Schlauch und alle Verbindungsstellen. Wenn Blasen
erscheinen, haben Sie ein Leck entdeckt, das vor der Inbetriebnahme behoben werden muss.
• Testen Sie die Verbindungsstellen nach der Reparatur erneut.
• Verschließen Sie das Gasventil nach dem Testen.
Wenn Sie ein Leck festgestellt haben, dass nicht verschlossen werden kann. Versuchen Sie
nicht, dieses Leck selber zu verschließen, sondern fragen Sie Ihren Gashändler.
Verbindung zum Grill
Vor dem Anschluss ist sicherzustellen, dass sich keine Fremdkörper im Auslass des Gaszylinders,
im Regler, Brenner und in den Brenneröffnungen befinden. Spinnen und Insekten nisten gerne
in kleinen Öffnungen und können die Brenner / Venturi-Rohr an der Öffnung verstopfen. Ein
verstopfter Brenner kann einen Brand unterhalb des Gerätes verursachen.
Stecken Sie den Schlauch an das Gerät und ziehen es mit einem Schraubenschlüssel am
Anschlussgewinde fest. Wurde der Schlauch ersetzt, muss er an beiden Enden, einmal am Gerät
und zweitens am Regleranschluss, mit Schlauchschellen gesichert werden. Entfernen Sie der
Druckregler von der Flasche (nach zum Regler gehörenden Anweisungen), wenn der Grill nicht in
Gebrauch ist.
Der Grill muss in gut belüfteten Bereichen verwendet werden. Behindern Sie die Zufuhr der
Verbrennungsluft zum Brenner nicht, wenn der Grill in Gebrauch ist. VERWENDEN SIE DEN GRILL
NUR IM FREIEN.
VOR DER VERWENDUNG AUF GASLECKS PRÜFEN.
SUCHEN SIE NIE NACH LECKS MIT OFFENER FLAMME, BENUTZEN SIE DAZU
STATTDESSEN SEIFENWASSER.
Freien oder in gut belüfteten Räumen aufgestellt und/oder betrieben werde.
Anweisungen zum Anzünden des Grills
1. Öffnen Sie die Haube des Grills, bevor Sie die Brenner anzünden.
2. Schalten Sie alle Bedienknöpfe im Uhrzeigersinn, auf „OFF/AUS“.
3. Schließen Sie den Druckregler an die Gasflasche. Drehen Sie das Gas am Druckregler auf.
Überprüfen Sie mit Seifenwasser die Verbindung zwischen Flasche und Regler auf Gaslecks.
4. Drücken Sie den vorderen linken Drehknopf und drehen Sie ihn gleichzeitig gegen den
Uhrzeigersinn auf die „HIGH/HOCH“ Position (ein Klicken ist zu hören), dies zündet den linken
Brenner. Sehen Sie nach, ob der Brenner gezündet hat Falls nicht, wiederholen Sie diesen Vorgang.
5. Wenn der Brenner nach erneutem Versuch nicht gezündet hat, warten Sie 5 Minuten und
wiederholen Sie Schritt 4.
6. Stellen Sie die gewünschte Hitze durch Drehen des Knopfes zwischen der High/Low Position
ein.
7. Wenn der Brenner nicht gezündet hat. Zünden Sie das Gerät mit einem Zündholz durch das
Zündöffnung an der Seite des Gerätes an. Wenden Sie sich an Ihren Händler, um die automatische
Zündung zu reparieren.
8. Um die übrigen Brenner nacheinander von links nach rechts anzuzünden, wiederholen Schritt 4.
Über den Zündkanal zwischen den Brennern wird jeweils der angrenzende Brenner angezündet.
Versuchen Sie niemals, andere Brenner, außer den linken Brenner, zuerst anzuzünden.
9. Um den Grill auszuschalten, drehen Sie das Flaschenventil bzw. Druckregler in die Position
„OFF/AUS“ und schalten Sie dann den Drehknopf am Gerät im Uhrzeigersinn ebenfalls in die
Position „OFF/AUS“.
Anweisung zum Anzünden des Seitenbrenners
1. Öffnen Sie den Deckel des Seitenbrenners.
2. Drücken Sie Drehknopf des Seitenbrenners und drehen ihn gleichzeitig gegen den Uhrzeigersinn
auf die Position „HIGH/HOCH“ Position (ein Klicken ist zu hören), dies zündet den Seitenbrenner.
Sehen Sie nach, ob der Brenner gezündet hat Falls nicht, wiederholen Sie diesen Vorgang.
3. Wenn der Brenner nach erneutem Versuch nicht gezündet hat, warten Sie 5 Minuten und
wiederholen Sie Schritt 2.
4. Stellen Sie die gewünschte Hitze durch Drehen des Knopfes zwischen der High/Low Position
ein.
5. Wenn der Brenner nicht gezündet hat. Zünden Sie das Gerät mit einem langen Streichholz oder
einem langen Gasanzünder. Wenden Sie sich an Ihren Händler, um die automatische Zündung zu
reparieren.
6. Um den Seitenbrenner auszuschalten, drehen Sie den Drehknopf im Uhrzeigersinn in die
Position „OFF/AUS“. Wenn Sie den kompletten Grill ausschalten möchten, dann drehen Sie
das Flaschenventil bzw. den Druckregler in die Position „OFF/AUS“ und schalten Sie dann den
Drehknopf am Gerät im Uhrzeigersinn in die Position „OFF/AUS“.
Anweisungen zum Grillen (hinterer Brenner)
1. Öffnen Sie den Deckel des Brenners.
2. Drücken sie die Bedienungstaste und drehen Sie damit gegen den Uhrzeigersinn in die „HI‘‘
Stellung, hiermit wird der Brenner angezündet. Stellen Sie fest, ob der Brenner wirklich brennt.
Falls nicht, wiederholen Sie den beschriebenen Vorgang noch einmal.
3. Zündet der Brenner auch bei den nächsten Versuchen nicht an, warten Sie 5 Minuten und wie-
derholen Sie den Schritt 2 noch einmal.
4. Die Temperatur ist mit dem Drehen des Drehknopfes in die „high‘‘ / „low‘‘-Stellung einzustellen.
5. Wenn der Brenner auch nach wiederholten Versuchen nicht anzündet, zünden Sie den Brenner
mit Zündholz oder mit dem langen Anzünder. Für die Reparatur der Zündung ist mit Ihrem Liefe-
ranten Kontakt aufzunehmen.
6. Wenn Sie den hinteren Brenner abschalten möchten, drehen Sie den Drehknopf im Uhrzeiger-
sinn in die „OFF‘‘-Stellung. Wenn Sie den Grill ganz ausschalten möchten, ist die Gaszuführung zu
schließen und alle Drehknöpfe in die „OFF‘‘-Stellung zu drehen.
WICHTIGER HINWEIS
Wenn der Hauptbrenner benutzt wird, darf der Brenner für Motor-Drehspieß nicht benutzt
werden.
WARNUNG: Wenn der Brenner nicht zündet, drehen Sie den Drehknopf (im Uhrzeigersinn) und
machen Sie das Flaschenventil zu. Warten Sie fünf Minuten, bevor Sie die Zündfolge wiederholen.
Vor der ersten Benutzung sollten Sie den Grill auf der Stufe LOW/NIEDRIG für etwa 15 Minuten mit
geschlossenem Deckel aufheizen lassen. Damit werden die inneren Teile mit „Hitze gereinigt“ und
unangenehme Gerüche von den lackierten Oberflächen entfernt.
Reinigen Sie den Grill nach jeder Verwendung. Verwenden Sie dazu keine scheuernden oder
entflammbaren Reinigungsmittel, da sie die Teile des Produkts angreifen und sich entfachen
können. Reinigen Sie den Grill mit warmem Seifenwasser.
WARNUNG: Zugängliche Teile können sehr heiß sein. Halten Sie kleine Kinder weg von den heißen
Geräteteilen (auch während der Abkühlungsphase!). Es wird empfohlen, Schutzhandschuhe (z.B.
Ofenhandschuhe) beim Umgang mit besonders heißen Komponenten zu verwenden.
REINIGUNG UND PFLEGE
ACHTUNG: Alle Reinigungs- und Wartungsarbeiten sollten durchgeführt werden wenn der Grill
kalt ist und die Gasversorgung an der Gasflasche abgedreht ist.
Reinigung
Lassen Sie den Grill nach jedem Gebrauch eine Zeit lang (ca. 15 Minuten) brennen, damit werden
Nahrungsmittelreste auf ein Minimum reduziert.
Außenseite
Benutzen Sie zur Reinigung mildes Spülmittel oder Backpulver und warmes Wasser. Hartnäckige
Flecken können mit feinem Scheuerpulver entfernt werden, dann mit Wasser abspülen.
Innenraum Des Grills Unten
Entfernen Sie zunächst mit einem Pinsel, Spachtel und / oder Schwamm die groben Rückstände
und spülen dann mit einer Seifenlauge den restlichen Schmutz ab. Mit Wasser abspülen und
trocknen lassen.
Holzoberflächen
Benutzen Sie zum Waschen ein weiches Tuch und warmes Seifenwasser. Mit Wasser abspülen.
Verwenden Sie keine Scheuermittel, Entfetter oder konzentrierte Grillreiniger für die Holzteile.
Grillrost
Verwenden Sie eine milde Seifenlauge. Hartnäckige Flecken können mit feinem Scheuerpulver
entfernt werden, dann mit Wasser abspülen.
Reinigung Der Brennereinheit
• Drehen Sie das Gas mit dem Drehknopf ab und trennen Sie die Gasflasche vom Grill.
• Entfernen Sie den Kühlrost.
Reinigen Sie den Brenner mit einer weichen Bürste oder blasen mit Druckluft die Düsen frei und
wischen ihn anschließend mit einem Tuch ab.
Reinigen Sie verstopfte Düsen mit einem Pfeifenreiniger oder steifen Draht (z.B. einer
aufgebogene Büroklammer).
Kontrollieren Sie den Brenner auf Schäden (Risse oder Löcher). Wenn Schäden festgestellt werden,
ersetzen Sie ihn durch einen neuen Brenner. Bauen Sie den Brenner wieder ein und überprüfen
ihn, um sicherzustellen, dass die Gasöffnungen richtig positioniert sind und er im Inneren des
Brennereinlasses (Venturi) gesichert ist.
FEHERBEHEBUNG
PROBLEM MÖGLICHE URSACHE LÖSUNG
Brenner zündet nicht
mit dem Zündsystem
1. Gasflasche ist leer
2. Regler ist defekt
3. Brenner ist verstopft
4. Gasdüsen oder -schlauch ver-
stopft
5. Elektrodendraht lose oder von
Elektrode oder Zündeinheit ge-
trennt
6. Elektrode oder Draht beschädi-
gt, Zündmechanismus des Drehre-
glers ist defekt
1. Gasflasche gegen volle
tauschen
2. Regler überprüfen oder
ersetzen
3. Brenner reinigen
4. Düsen und Gasschlauch
reinigen
5. Draht verbinden
6. Elektrode, Draht und/oder
Zündmechanismus tauschen
Brenner lässt sich
nicht mit einem Strei-
chholz anzünden
1. Gasflasche ist leer
2. Regler ist defekt
3. Brenner ist verstopft
4. Gasdüsen oder -schlauch
verstopft
1. Gasflasche gegen volle
tauschen
2. Regler überprüfen oder
ersetzen
3. Brenner reinigen
4. Düsen und Gasschlauch
reinigen
Kleiner Flamme oder
Flammenrückschlag
(Feuer im Brenne-
rrohr, vernehmbares
zischendes oder fau-
chendes Geräusch)
1. Gasflasche zu klein
2. Brenner ist verstopft
3. Gasdüsen oder -schlauch
verstopft
4. Windige Bedingungen
1. Größere Gasflasche verwen-
den
2. Brenner reinigen
3. Düsen und Gasschlauch
reinigen
4. Stellen Sie den Grill in einem
geschützten Bereich auf.
WARTUNG
Ihr Gasgrill sollte jährlich von einer zuständigen fachkundigen Person gewartet werden.
PFLEGE UND SCHUTZ VON EDELSTAHLOBERFLÄCHEN
Ihr Grill verfügt über Edelstahl-Komponenten aus rostfreiem Stahl mittlerer Güte. Jede Edelstahl-
Güte erfordern ein entsprechendes Maß an Pflege und Schutz, um dessen Aussehen zu
konservieren. Nichtrostende Stähle sind nicht immun gegen Korrosion und sie sind auch nicht
pflege frei, im Gegensatz zur allgemeinen öffentlichen Meinung. Selbst Sorten mit der höchsten
Güte von Edelstahl erfordern häufige Reinigung mit frischem Wasser, um Oxidation und andere
korrosive Probleme zu vermeiden.
Nach der Montage empfehlen wir, dass die Eigentümer eine dünne Schicht von Olivenöl mit einem
sauberen Lappen, auf alle freiliegenden Edelstahlflächen auftragen. Danach sollten die Flächen
mit einem anderen sauberen Lappen poliert werden, so dass eine nicht-ölige Oberfläche entsteht.
Dieser Prozess hilft beim Schutz gegen Schmutz und andere korrosive Verunreinigungen, indem
es eine temporäre lebensmittelechte Schutzschicht aufbaut. Die Olivenöl-Schicht erleichtert auch
das späte Polieren und Entfernen von Fingerabdrücken. Dieser Prozess sollte bei der Reinigung
Ihres Grills häufig wiederholt werden.
Sie können eine schützende Abdeckung für Ihren Grill kaufen. Es wird empfohlen, eine Abdeckung
immer dann zu verwenden, wenn der Grill nicht in Gebrauch ist, um Ihre Investition zu schützen.
Allerdings ist es wichtig zu verstehen, die Abdeckung erst dann zu verwenden, wenn der Grill kalt,
sauber und trocken ist. Eine vorzeitige Abdeckung des Grills kann sich in der Tat negativ auswirken.
Wenn Sie einen warmen, feuchten oder unreinen (oder einen mit einer beliebigen Mischung dieser
Faktoren) Grill abdecken, kann dies die Korrosion sogar noch effektiv unterstützen!
Aus diesem Grund sollte der Grill immer kalt sein, von jeglichen Verunreinigungen oder Schmutz
gereinigt und gründlich trocken sein, bevor eine Schutzabdeckung angebracht wird. Dies ist
besonders wichtig, bevor Sie den Grill für längere Zeit abstellen, resp. wenn der Grill nicht häufig
gebraucht wird oder wenn der Grill über die Wintermonate gelagert werden soll.
Um die Qualität der Oberfläche Ihres Edelstahl-Grills zu bewahren, muss der Besitzer die Pflege
und Wartung sorgfältig gemäß dieser Anweisung durchführen.
Kümmern Sie sich um Ihren Grill sorgfältig und er wird Ihnen für viele Jahre Freude bereiten.
VOD NA MONTÁŽ PLYNOVÉHO GRILU
Model: Arizona BBQ
PŘI MONTÁŽI GRILU POUŽÍVEJTE POUZE ORIGINÁLNÍ PŘÍSLUŠENSTVÍ, KTERÉ JE
SOUČÁSTÍ BALENÍ. POKUD JE NUTNÁ JAKÁKOLIV NÁHRADA, KONTAKTUJTE BUĎ NÁŠ
ZÁKAZNICKÝ SERVIS, NEBO SVÉHO MÍSTNÍHO PRODEJCE.
POUŽITÍM NEAUTORIZOVANÝCH DÍLŮ SE VYSTAVUJETE RIZIKU OHROŽENÍ ZDRAVÍ,
PŘÍPADNĚ MŮŽE DOJÍT K POŠKOZENÍ VAŠEHO GRILU.
CZ
0359/17
GRIL JE URČEN VÝHRADNĚ PRO VENKOVNÍ POUŽITÍ.
PŘED MONTÁŽÍ GRILU SI DŮKLADNĚ PŘEČTĚTE CELÝ NÁVOD NA SESTAVENÍ.
NÁVOD SI PEČLIVĚ USCHOVEJTE PRO PŘÍPADNÉ BUDOUCÍ POUŽITÍ.
VAROVÁNÍ
Při ignorování a nedodržení instrukcí, které jsou uvedeny v návodu,
může dojít k nebezpečí požáru nebo výbuchu.
Povinností spotřebitele je, ujistit se, že gril je správně sestaven a že je správně používán. Při
ignorování a nedodržení instrukcí v tomto manuálu může dojít ke zranění osob, případně škodám
na majetku.
Co dělat, pokud při používání grilu ucítíte plyn:
1. Vypněte přívod plynu na plynové láhvi.
2. Uhaste veškeré zdroje ohně, které jsou ve vašem okolí, nepoužívejte žádné elektrické přístroje.
3. Větrejte prostory, zajistěte cirkulaci vzduchu.
4. Přečtěte si část JAK ZKONTROLOVAT TĚSNOST v tomto manuálu.
5. Pokud zápach přetrvává, obraťte se ihned na odborníka, nebo na dodavatele či výrobce plyno-
vých láhví.
Bezpečnostní opatření:
1. Vyzkoušejte těsnost všech spojů při každém připojení tlakové lahve ke grilu.
2. Nikdy nekontrolujte těsnost spojů v blízkosti otevřeného ohně.
3. Gril, ani tlakové lahve neskladujte v blízkosti benzínu nebo jiných hořlavých látek.
4. Neskladujte v blízkosti jakéhokoliv jiného zařízení na tlakové bomby, nebo zařízení, u kterého
může dojít k úniku hořlavých látek.
Montáž:
VAROVÁNÍ: I přes to, že při výrobě grilu byly dodržovány veškeré postupy a bylo dbáno na co
nejkvalitnější zpracování, je možné, že některé hrany mohou být ostré, proto doporučujeme při
sestavování grilu dbát zvýšené opatrnosti, aby nedošlo k pořezání či jinému zranění.
Doporučené nářadí: plochý a křížový šroubovák, kleště, sada klíčů
Postup montáže:
Před montáží si pečlivě přečtěte všechny pokyny.
Gril sestavujte na takovém místě, abyste měli dostatek prostoru pro manipulaci s veškerými díly.
V návodu jsou vyobrazeny jednotlivé kroky, jak postupovat při sestavování grilu, společně se
seznamem dílů, které jsou součástí balení (jednotlivé součástky si před montáží překontrolujte,
zda žádná nechybí). Pro montáž grilu jsou zapotřebí minimálně 2 osoby.
UPOZORNĚNÍ: Ujistěte se, že jste při montáži odstranili všechny obaly a ochranné prvky, které
sloužily pouze k přepravě.
VAROVÁNÍ: Během grilování gril nepřemisťujte, ani s ním nijak nemanipulujte.
Pokud gril nepoužíváte, vždy dbejte na to, aby byl přívod plynu z tlakové láhve vypnut.
Gril samovolně neupravujte, ani nevylepšujte.
Minimální vzdálenost od stěn či jiných překážek a grilu je 3m, gril nedoporučujeme
používat v těsné blízkosti domů a jiných obytných prostor.
Česká verze návodu je přesným překladem originálního návodu výrobce.
Fotografie použité v manuálu jsou pouze ilustrační a nemusí se přesně shodovat s výrobkem.
Technické informace:
Značka spotřebiče: G21
Označení přístroje: Arizona BBQ - gril Arizona BBQ - plotýnka
Celková tepelná hřejivost:
(všechny kategorie plynů)
16 kW (1142 g/h) Každý hořák
je dimenzován na 4,0 kW,
včetně zadního hořáku. Zadní
hořák nesmí být používán
ve stejnou dobu jako hořáky
grilu.
4 kW (286 g/h), hořáky jsou
dimenzovány na 4 kW
Kategorie plynu: I3+(28-30/37) I3B/P(30)
Druhy plynu: Butan Propan Mix plynu propanu abutanu (LPG)
Tlaky plynu: 28 - 30 mbar 37 mbar 30 mbar
Velikost trysek: Gril: 0.95 mm
Postranní tryska: 0.95 mm 0359/17
Identifikační kód: 0359BT887
URČENO PRO VENKOVNÍ POUŽITÍ A PRO POUŽITÍ V DOBŘE VĚTRANÝCH PROSTORECH.
UPOZORNĚNÍ: ČÁSTI GRILU MOHOU BÝT BĚHEM GRILOVÁNÍ A ZEJMÉNA PO GRILOVÁNÍ
(CCA 1HOD) VELMI HORKÉ. NENECHÁVEJTE DĚTI POUŽÍVAT GRIL A DRŽTE JE V
DOSTATEČNÉ VZDÁLENOSTI, ABY NEDOŠLO K JEJICH POPÁLENÍ.
KDYŽ JE GRIL V PROVOZU TAK JEJ NEPŘEMISŤUJTE.
PO POUŽITÍ GRILU VYPNĚTE PŘÍVOD PLYNU NA PLYNOVÉ BOMBĚ.
PŘÍSTROJ NIJAK NEUPRAVUJTE.
TENTO PŘÍSTROJ NESMÍ BÝT BĚHEM PROVOZU POUŽÍVÁN V PŘÍTOMNOSTI HOŘLAVÝCH
MATERIÁLŮ.
PŘED POUŽÍVÁNÍM PŘÍSTROJE SI PŘEČTĚTE NÁVOD K POUŽÍVÁNÍ.
VAROVACÍ ŠTÍTEK POUKAZUJE NA TO, ŽE PLYNOVÁ BOMBA MÁ BÝT PŘI POUŽÍVÁNÍ
VENKU, NEMÁ BÝT UVNITŘ GRILU.
Poznámka:
Průměr pánve pro postranní hořák musí být 140-240 mm.
Číslice na trysce označují její rozměr, například „0,85“ na trysce znamená, že rozměr trysky je „0,85 mm“.
Pozor:
Důležité:
Přečtěte si pozorně následující instrukce a ujistěte se, že Váš gril je správně sestaven. Nedodržení
postupu stavby grilu může vést ke zranění osob či k poškození grilu.
Pokud budete mít při stavbě nebo používání grilu jakékoliv dotazy, obraťte se na svého prodejce
či přímo výrobce.
Před grilováním se ujistěte, že gril i tlaková láhev jsou umístěny na rovném povrchu a nemůže
tak dojít k převrácení grilu vlivem nerovností povrchu, na kterém gril stojí.
Nikdy se nepokoušejte zapálit hořáky se zavřeným vrchním krytem. Toto varování platí i pro
postranní hořák.
• Gril je možné používat s tlakovými lahvemi o hmotnosti maximálně 15 kg.
24 CM 24 CM
Poznámka pro spotřebitele: uchovejte pro pozdější použití
Připojení tlakové láhve ke grilu
Používání grilu je vhodné pouze pro použití s tlakovými láhvemi s nízkým tlakem butanu, propanu
či jejich směsi. Tlakové láhve musí být vybaveny příslušným regulátorem nízkého tlaku. Regulátor
tlaku používejte výhradně certifikovaný, dle platné normy EN16129. Hadice by měla být pevně
připevněna k regulátoru a přístroji. Pro gril, který je konstruován na I3B/P(30), I3+(28-30/37) použijte
regulátor, který je určen pro použití butanu s tlakem 30 mbar a propanu 37 mbar. Pro získání
podrobnějších informací týkající se výběru vhodného regulátoru kontaktujte svého prodejce plynu,
či tlakových láhví. Plynovou láhev skladujte mimo gril.
Regulátor a hadice
Používejte výhradně regulátory a hadice, které splňují výše uvedené parametry (tlak, plyn) a jsou
schválené příslušnou normou. Životnost regulátoru je odhadována na 2 roky, poté je doporučována
výměna.Použití nesprávného regulátoru nebo hadice je nebezpečné. Vždy důkladně zkontrolujte
veškeré spoje, zda jsou správně zapojené. Délka hadice musí být maximálně 1,5 m. Opotřebované
nebo poškozené hadice musí být neprodleně vyměněny. Vždy se ujistěte, že hadice není ucpaná,
zlámaná, nebo zda není v přímém kontaktu s žádnou částí grilu.
Skladování grilu a tlakové láhve
Tlaková láhev musí být vždy odpojena a vyjmuta z grilovacího zařízení. Gril doporučujeme
uskladňovat do originálního obalu, nebo ho minimálně přikrývat plachtou, jelikož je nutné gril
skladovat v bezprašném a suchém prostředí.
Tlaková láhev
Do láhve s plynem je zakázáno kopat, dále je zakázáno s ní cloumat či házet, nebo s ní bouchat o
zem. Pokud gril není používán, musí být láhev bezpodmínečně odpojena a uskladněna mimo gril.
Plynové láhve musí být skladovány venku ve vzpřímené poloze (nikdy ne naležato!) a mimo dosah dětí.
Tlakové láhve nesmí být nikdy uskladňovány v místech, kde teploty mohou dosáhnout více, než 50°C.
Neskladujte tlakové láhve v blízkosti ohně, či v místnosti společně s věčným plamínkem, nebo poblíž
jiných zdrojů ohně, kde by mohlo dojít ke vznícení. V blízkosti tlakových lahví je zakázáno kouřit.
Gril je určen pro použití venku, v dostatečné vzdálenosti od hořlavých materiálů.
Důležité! Větrací otvory grilu nesmí být ničím zakrývány, používání grilu je dovoleno minimálně 3
m od zdi domu či jiné stavby (překážky) tak, aby mohl vzduch cirkulovat.
Gril musí stát při používání na rovném podkladu tak, aby byl stabilní. Grilování je zakázáno ve
velkém průvanu, vichru a dešti.
Části zapečetěné výrobcem nebo distributorem nesmí být poškozeny uživatelem. Uživatelé nesmí
provádět na grilu žádné úpravy či změny. Případné opravy či údržba musí být prováděna pouze
registrovaným servisním technikem.
Vzhledem k tomu, že tento gril nemá žádné omezení emisí nespáleného paliva, musí být sestavován
a používán venku popřípadě na dostatečně větraném místě.
Jak zkontrolovat těsnost:
• Připravte si vodu s pár kapkami jaru.
• Ujistěte se, že je regulační ventil vypnut „OFF“.
Připojte regulátor k lahvi a ON/OFF regulační ventil k hořáku, ujistěte se, že je vše správně
připevněno, poté pusťte plyn ON.
Jarovou vodu jemně nalijte na hadici a všechny spáry. Pokud se objeví bubliny, dochází k úniku,
což musíte před použitím opravit.
• Po utěsnění znovu použijte jarovou vodu.
• Po skončení testování vypněte přívod plynu.
• Pokud se vám nepodaří odstranit únik, kontaktujte svého prodejce.
Připojení spotřebiče
Před připojením se ujistěte, že veškeré hadice a trubky, které vedou k plynové lahvi, regulátoru a
hořáku, neobsahují žádné nežádoucí částečky či úlomky nebo např. mrtvý hmyz. Zanesený hořák
může vést k požáru.
Nasaďte hadici a pomocí klíče utáhněte na připojovacím závitu. Pokud gril nebude delší dobu
používán, odpojte regulátor od láhve (podle pokynů dodávaných s regulátorem).
Gril musí být používán v dobře větraném prostoru tak, aby docházelo k proudění vzduchu. Gril je
určen pouze pro grilování venku, ve velmi dobře větrané pergole nebo altánu.
PŘED POUŽITÍM ZKONTROLUJTE TĚSNOST.
NIKDY NEKONTROLUJTE TĚSNOST V BLÍZKOSTI OTEVŘENÉHO OHNĚ, KE KONTROLE
VŽDY POUŽIJTE JAROVOU VODU.
Pokyny ke grilování
1. Než se pokusíte zapálit hořáky, otevřete kryt roštu grilu.
2. Nejprve otočte všechny ovládací knoflíky ve směru hodinových ručiček do polohy „OFF“.
3. Po zkontrolování těsnosti připojte regulátor k plynové láhvi. Zapněte přívod plynu „ON“ na
regulátoru a použijte jarovou vodu pro zkontrolování, zda nedochází k úniku plynu.
4. Stlačte přední levý ovládací knoflík a držte stisknutý. Dále pak otáčejte knoflík proti směru
hodinových ručiček do polohy „HIGH“ (uslyšíte cvaknutí) a tím by mělo dojít k zapálení hořáku.
Zjistěte, zda se hořák zapálil, pokud ne, celý tento proces zopakujte.
5. Pokud se hořák nezapálí ani po dalších pokusech, počkejte 5 minut a znovu opakujte krok č. 4.
6. Nastavte teplotu otočením knoflíku na „high“ / „low“ polohu.
7. Pokud nedojde k zapálení hořáku ani po několika opakovaných pokusech, zkontrolujte, zda
máte správně připojenou tlakovou láhev a zda jste správně zapnuli přívod plynu.
8. Chcete-li zapálit zbývající hořáky v pořadí zleva doprava, opakujte krok č. 4. Nikdy se
nepokoušejte zapálit ostatní hořáky, pokud nebude zapálený první hořák nalevo, který se zapaluje
vždy jako první.
9. Chcete-li manipulovat s grilem, případně chcete-li gril uskladnit, otočte všechny knoflíky do
polohy „OFF“ jak na ventilu tlakové lahve, regulátoru, tak i na samotném grilu.
Pokyny ke grilování (boční hořák)
1. Otevřete kryt bočního hořáku.
2. Stlačte boční ovládací knoflík a držte stisknutý. Dále pak otáčejte knoflík proti směru hodinových
ručiček do polohy „HIGH“ (uslyšíte cvaknutí) a tím by mělo dojít k zapálení hořáku. Zjistěte, zda se
hořák zapálil, pokud ne, celý tento proces zopakujte.
3. Pokud se hořák nezapálí ani po dalších pokusech, počkejte 5 minut a znovu opakujte krok č. 2.
4. Nastavte teplotu otočením knoflíku na požadovanou polohu.
5. Pokud nedojde k zapálení hořáku, ani po několika opakovaných pokusech, zkontrolujte, zda
máte správně připojenou tlakovou láhev a zda jste správně zapnuli přívod plynu.
6. Pokud chcete vypnout boční hořák, otočte ovládacím knoflíkem do pozice OFF. Pokud chcete
vypnout celý gril, otočte ventilem na plynové lahvi nebo regulátorem do pozice OFF a poté otočte
ovládacím knoflíkem na přístroji po směru hodinových ručiček do pozice OFF.
Pokyny ke grilování (zadní hořák)
1. Otevřete víko grilu.
2. Stlačte zadní ovládací knoflík a otočte s ním proti směru hodinových ručiček do pozice „HIGH‘‘,
takto dojde k zapálení hořáku. Zjistěte, zda byl hořák zapálen. Pokud ne, proces opakujte.
3. Pokud se hořák nezapálí ani po dalších pokusech, počkejte 5 minut a znovu opakujte krok č. 2.
4. Nastavte teplotu otočením knoflíku na požadovanou polohu.
5. Pokud nedojde k zapálení hořáku ani po několika opakovaných pokusech, zapalte hořák sirkami
nebo dlouhým zapalovačem. Zkonzultujte opravu zapalování se svým dodavatelem.
6. Pokud chcete zadní hořák vypnout, otočte ovládacím knoflíkem po směru hodinových ručiček
do pozice „OFF‘‘. Pokud chcete gril úplně vypnout, odpojte přívod plynu a otočte všechny ovládací
knoflíky do pozice „OFF‘‘.
DŮLEŽITÉ UPOZORNĚNÍ:
Hořák na grilovací jehlu s motorkem nepoužívejte, pokud je používán hlavní hořák.
VAROVÁNÍ: pokud se vám nepodaří zapálit hořák, otočte ovládacím knoflíkem do pozice OFF
(po směru hodinových ručiček) a také otočte ventilem na plynové lahvi do pozice OFF. Počkejte 5
minut a poté se pokuste hořák zapálit znovu.
Před prvním grilováním otevřete kryt grilovacího roštu, gril zapalte a nechte 15 minut hořet hořáky
s plynem v pozici LOW, dojde tak k ohřátí a „opálení“ povrchové úpravy grilovacího roštu.
Gril čistěte po každém použití, nedojde tak ke znečištění grilovacího roštu připečenými kousky
masa nebo omastkem a Vaše maso bude vždy skvěle opečené. Nepoužívejte agresivní nebo
hořlavé čisticí prostředky, protože může dojít k poškození částí výrobku a může začít hořet. Čistěte
pouze teplou vodou s jarem.
VAROVÁNÍ: Některé části grilu mohou být velmi horké. Držte mimo dosah dětí v dostatečné
vzdálenosti a nenechte děti používat gril (části grilu mohou být horké ještě hodinu po grilování!).
Při grilování a čistění grilu doporučujeme používat ochranné rukavice, které jsou odolné při vyšších
teplotách a nemůže tak dojít k popálení.
Čištění a údržba
UPOZORNĚNÍ: Veškeré čištění a údržba grilu by měla být prováděna, až když je gril vychladlý
a je odpojený od tlakové láhve.
Čištění
„Vypálení“ grilu po každém použití (přibližně 15 minut) zredukuje zbytky jídla na minimum.
Vnější povrch
Používejte jar nebo jedlou sodu a teplou vodu. Čisticí prostředky lze použít pouze na ochranné
části grilu (kryty, atd.). Nepoužívejte abrazivní prostředky, houbičky, nebo drátěnku na mytí. Po
použití čisticího prostředku opláchněte důkladně čistou vodou.
Spodní část grilu
Zbytky odstraňte za použití kartáče, škrabky nebo čistící podložky, poté opláchněte jarovou vodou.
Opláchněte čistou vodou a nechejte uschnout.
Dřevěné části
Omyjte jemným hadříkem a teplou mýdlovou vodou, poté opláchněte čistou vodou. Nepoužívejte
čisticí prostředky, odmašťovadla ani jiné silné agresivní čističe na gril, ani jeho dřevěné části.
Grilovací rošt
Použijte pouze vodu s jarem. Zbytky jídla poté seškrábejte jemnou škrabkou nebo kartáčkem
a setřete houbičkou či hadříkem.
Plynový hořák
• Vypněte plyn, do polohy OFF, na ovládacím knoflíku a odpojte tlakovou láhev.
• Odstraňte rošt. Vyčistěte hořák měkkým kartáčem a otřete hadříkem.
Ucpaná a zanesená místa opatrně vyčistěte pomocí drátu (např. otevřené sponky na papíry)
nebo profoukněte vzduchem.
Pohledem zkontrolujte, zda na sobě nemá hořák nějaké drobné trhlinky či jiná poškození. Pokud
ano, neprodleně jej vyměňte za nový. Poškozené hořáky rozhodně nepoužívejte.
Pokud měníte starý hořák za nový, ujistěte se, že jste jej instalovali správně a zda je správně
připevněn na vnitřní straně přívodu hořáku a umístěn na plynovém ventilu.
Řešení potíží
Problém Možná příčina Řešení
Hořák se nezapálí
pomocí systému
zapalování, který je
popsaný v návodě
1. Prázdná plynová láhev
2. Vadný regulátor
3. Zanesený, nevyčištěný hořák
4. Zanesená nebo nevyčištěná
plynová tryska nebo hadice
5. Uvolněné nebo odpojené
dráty od elektřiny, které vedou k
zapalování
6. Poškozený knoflík zapalování
1. Doplnit láhev
2. Zkontrolovat regulátor,
případně vyměnit
3. Vyčistit hořák
4. Vyčistit trysky nebo hadice
5. Zkontrolovat, připojit uvolněné
dráty
6. Vyměnit knoflík zapalování
Hořák se nezapálí ani
pomocí zápalky
1. Prázdná plynová láhev
2. Vadný regulátor
3. Zanesený, nevyčištěný hořák
4. Zanesená nebo nevyčištěná
plynová tryska nebo hadice
1. Doplnit láhev
2. Zkontrolovat regulátor,
případně vyměnit
3. Vyčistit hořák
4. Vyčistit trysky nebo hadice
Nízký plamen, plamen
mimo hořák, zvuk
syčení
1. Plynová lahev je příliš malá
2. Zanesený, nevyčištěný hořák
3. Zanesená nebo nevyčištěná
plynová tryska nebo hadice
4. Špatné větrné podmínky,
grilování v průvanu
1. Použijte větší, doporučenou
plynovou lahev
2. Vyčistit hořák
3. Vyčistit trysky nebo hadice
4. Použijte gril na jiném,
větraném, lépe chráněném místě
Servis
Plynový gril by měl být každoročně zkontrolován příslušnou oprávněnou osobou, autorizovaným
servisem.
Důležité informace
Péče a ochrana o plochu z ušlechtilé oceli
Tento model plynového grilu nabízí řadu přídavných komponentů z kvalitní nerezové oceli.
Nerezová ocel není bezúdržbová tak, jak si většina lidí myslí. Komponenty z nerezu vyžadují zvláštní
péči, aby zachovaly svůj vzhled. Komponenty z nerezové oceli vyžadují časté oplachování vodou.
Nerezové komponenty se doporučuje ošetřit olivovým olejem. Olivový olej by měl být nanesen
v tenké vrstvě a rozetřen suchým hadrem až úplně do sucha. Tento proces by měl minimalizovat
znečištění komponentů.
Na gril je možné dokoupení ochranné plachty, která je doporučována používat pokaždé, když není
gril používán. Tuto plachtu dávejte pouze na vychladlý, vyčištěný a suchý gril.
V zájmu zachování kvality grilovaní a vaření doporučujeme gril udržovat čistý a pečlivě jej
uskladňovat, zejména v zimních měsících, když se gril nepoužívá.
Pokud budete o gril dostatečně pečovat, bude Vám sloužit mnoho let.
VOD NA MONTÁŽ PLYNOVÉHO GRILU
Model: Arizona BBQ
PRI MONTÁŽI GRILU POUŽÍVAJTE IBA ORIGINÁLNE PRÍSLUŠENSTVO, KTORÉ JE
SÚČASŤOU BALENIA. AK JE NUTNÁ AKÁKOĽVEK NÁHRADA, KONTAKTUJTE BUĎ NÁŠ
ZÁKAZNÍCKY SERVIS, ALEBO SVOJHO MIESTNEHO PREDAJCU.
POUŽITÍM NEAUTORIZOVANÝCH DIELOV SA VYSTAVUJETE RIZIKU OHROZENIA ZDRAVIA,
ALEBO POŠKODENIU VÁŠHO GRILU.
0359/17
GRIL JE URČENÝ VÝHRADNE PRE VONKAJŠIE POUŽITIE.
PRED MONTÁŽOU GRILU SI DÔKLADNE PREČÍTAJTE CELÝ NÁVOD NA ZOSTAVENIE.
NÁVOD SI STAROSTLIVO USCHOVAJTE PRE PRÍPADNÉ BUDÚCE POUŽITIE.
SK
VAROVANIE
V prípade ignorovania alebo nedodržania inštrukcií, ktoré sú uvedené
v návode, hrozí nebezpečenstvo požiaru alebo výbuchu.
Povinnosťou spotrebiteľa je uistiť sa, že gril je správne zostavený a je správne používaný. V prípade
ignorovania alebo nedodržania inštrukcií v tomto manuáli môže dôjsť k zraneniu osôb, prípadne
škodám na majetku.
Čo spraviť, ak pri používaní grilu zacítite plyn:
1. Vypnite prívod plynu na plynovej fľaši.
2. Uhaste všetky zdroje ohňa, ktoré sú vo vašom okolí - nepoužívajte žiadne elektrické prístroje.
3. Vyvetrajte priestory a zaistite cirkuláciu vzduchu.
4. Prečítajte si časť AKO SKONTROLOVAŤ TESNOSŤ v tomto manuáli.
5. Ak zápach pretrváva, obráťte sa ihneď na odborníka alebo na dodávateľa/výrobcu plynových
fliaš.
Bezpečnostné opatrenia:
1. Vyskúšajte tesnosť všetkých spojov pri každom pripojení tlakovej fľaše ku grilu.
2. Nikdy nekontrolujte tesnosť spojov v blízkosti otvoreného ohňa.
3. Gril, ani tlakovú nádobu, neskladujte v blízkosti benzínu alebo iných horľavých látok.
4. Neskladujte v blízkosti akéhokoľvek iného zariadenia na tlakové bomby, alebo zariadenia, u
ktorého môže dôjsť k úniku horľavých látok.
Montáž:
VAROVANIE: Napriek tomu, že pri výrobe grilu boli dodržiavané všetky postupy a dbalo sa na čím
kvalitnejšie spracovanie, niektoré hrany môžu byť ostré, preto odporúčame pri zostavovaní grilu
dbať na zvýšenú opatrnosť, aby nedošlo k porezaniu alebo inému zraneniu.
Odporúčané náradie: plochý a krížový skrutkovač, kliešte, sada kľúčov.
Postup montáže:
Pred montážou si pozorne prečítajte všetky pokyny.
Gril zostavujte na mieste, kde máte dostatok priestoru na manipuláciu so všetkými dielmi.
V návode sú zobrazené jednotlivé kroky, ako postupovať pri zostavovaní grilu, spoločne so zozna-
mom dielov, ktoré sú súčasťou balenia (jednotlivé súčiastky si pred montážou skontrolujte, či ne-
chýba niektorá).
Pre montáž grilu sú potrebné minimálne 2 osoby.
UPOZORNENIE: Uistite sa, že ste pred montážou odstránili všetky obaly a ochranné prvky, ktoré
slúžili iba na prepravu.
VAROVANIE: Počas grilovania gril nepremiestňujte, ani s ním nijako nemanipulujte.
Ak gril nepoužívate, vždy dbajte na to, aby bol prívod plynu z tlakovej fľaše vypnutý.
Gril samovoľne neupravujte, ani nevylepšujte.
Minimálna vzdialenosť od stien či iných prekážok a grilu je 3m, gril neodporúčame
používať v tesnej blízkosti domov a iných obytných priestorov.
Slovenská verzia návodu je presným prekladom originálneho návodu výrobcu.
Fotografie použité v návode sú len ilustračné a nemusia sa presne zhodovat s výrobkom.
Technické informácie:
Značka spotrebiča: G21
Označenie prístroja: Arizona BBQ - gril Arizona BBQ - platnička
Celková tepelná hrejivosť:
(všetky kategórie plynov)
16 kW (1142 g/h) každý horák
je dimenzovaný na 4,0 kW,
vrátane zadného horáka.
Zadný horák nesmie byť
používaný v rovnakom čase
ako horáky grilu.
4 kW (286 g/h), horáky sú
dimenzované na 4 kW.
Kategórie plynu: I3+(28-30/37) I3B/P(30)
Druhy plynu: Bután Propán Mix plynu propánu a butánu (LPG)
Tlaky plynu: 28 - 30 mbar 37 mbar 30 mbar
Veľkosť trysiek: Gril: 0.95 mm
Postranná tryska: 0.95 mm 0359/17
Identifikačný kód: 0359TB887
Určené pre vonkajšie použitie a pre použitie v dobre vetraných priestoroch.
UPOZORNENIE: Časti grilu môžu byť počas grilovania a najmä po grilovaní (cca 1hod) veľmi
horúce. Nenechávajte deti používať gril a držte ich v dostatočnej vzdialenosti, aby nedošlo k
ich popáleniu.
Keď je gril v prevádzke tak ho nepremiestňujte.
Po použití grilu vypnite prívod plynu na plynovej bombe.
Prístroj nijako neupravujte.
Tento prístroj nesmie byť počas používania používaný v prítomnosti horľavých materiálov.
Pred používaním prístroja si prečítajte návod na používanie.
Alarmujúci štítok poukazuje na to, že plynová bomba má byť pri používaní vonku, nemá byť
vnútri grilu.
Poznámka:
Priemer panvice pre postranné horák musí byť 140-240 mm.
Číslice na tryske označujú jej rozmer, napríklad „0,85“ na tryske znamená, že rozmer trysky je „0,85 mm“.
Pozor:
Dôležité:
Prečítajte si pozorne nasledujúce inštrukcie a uistite sa, že váš gril je správne zostavený.
Nedodržanie postupu stavby grilu môže viesť k zraneniu osôb či k poškodeniu grilu.
Ak budete mať pri stavaní alebo používaní grilu akékoľvek otázky, obráťte sa na svojho predajcu
či priamo výrobcu.
Pred grilovaním sa uistite, že gril a tlaková fľaša sú umiestnené na rovnom povrchu a nemôže
dôjsť k prevráteniu grilu vplyvom nerovností povrchu, na ktorom gril stojí.
Nikdy sa nepokúšajte zapáliť horáky so zatvoreným vrchným krytom. Toto varovanie platí aj pre
postranný horák.
• Gril je možné používať s tlakovými fľašami s hmotnosťou maximálne 15 kg.
24 CM 24 CM
  • Page 1 1
  • Page 2 2
  • Page 3 3
  • Page 4 4
  • Page 5 5
  • Page 6 6
  • Page 7 7
  • Page 8 8
  • Page 9 9
  • Page 10 10
  • Page 11 11
  • Page 12 12
  • Page 13 13
  • Page 14 14
  • Page 15 15
  • Page 16 16
  • Page 17 17
  • Page 18 18
  • Page 19 19
  • Page 20 20
  • Page 21 21
  • Page 22 22
  • Page 23 23
  • Page 24 24
  • Page 25 25
  • Page 26 26
  • Page 27 27
  • Page 28 28
  • Page 29 29
  • Page 30 30
  • Page 31 31
  • Page 32 32
  • Page 33 33
  • Page 34 34
  • Page 35 35
  • Page 36 36
  • Page 37 37
  • Page 38 38
  • Page 39 39
  • Page 40 40
  • Page 41 41
  • Page 42 42
  • Page 43 43
  • Page 44 44
  • Page 45 45
  • Page 46 46
  • Page 47 47
  • Page 48 48
  • Page 49 49
  • Page 50 50
  • Page 51 51
  • Page 52 52
  • Page 53 53
  • Page 54 54
  • Page 55 55
  • Page 56 56
  • Page 57 57
  • Page 58 58
  • Page 59 59

G21 GRILL Instrukcja obsługi

Kategoria
Grille
Typ
Instrukcja obsługi

w innych językach