
IAN 364186_2010
UNIVERSAL DOWEL JIG / UNIVERSAL-DÜBELHILFE/
GABARIT DE PERÇAGE UNIVERSEL PUD 30 A1
GABARIT DE PERÇAGE
UNIVERSEL
Mode d’emploi
UNIVERSAL DOWEL JIG
Operating instructions
UNIVERSEEL DEUVELHULPSTUK
Gebruiksaanwijzing
UNIVERZÁLNÍ POMŮCKA
PRO HMOŽDINKY
Návod k obsluze
UNIVERSEL DYVELHJÆLP
Betjeningsvejledning
UNIVERZÁLNA POMÔCKA
NA KOLÍKY
Návod na obsluhu
UNIVERSAL-DÜBELHILFE
Bedienungsanleitung
UNIWERSALNY PRZYRZĄD
DO POŁĄCZEŃ KOŁKOWYCH
Instrukcja obsługi
MAESTRO ESPIGADOR
UNIVERSAL
Instrucciones de uso
CV_364186_PUD30A1_LB8.indd 1-3 11.03.2021 16:32:08

GB / IE Operating instructions Page 1
DE / AT / CH Bedienungsanleitung Seite 11
FR / BE Mode d’emploi Page 21
NL / BE Gebruiksaanwijzing Pagina 31
CZ Návod k obsluze Strana 41
PL Instrukcja obsługi Strona 51
SK Návod na obsluhu Strana 61
ES Instrucciones de uso Página 71
DK Betjeningsvejledning Side 81
CV_364186_PUD30A1_LB8.indd 1-3 11.03.2021 16:32:08

1
6 mm
10 mm
8 mm
1
12
2
12
10 6
8
10 mm
max.
30 mm
1
22
11
2
1
06
8
max.
18 mm
8 mm
1
06
8
6 mm
max.
14 mm
F
A
C
D E
B
G H
CV_364186_PUD30A1_LB1.indd 4-6 15.03.2021 08:49:25

PUD 30 A1 GB│IE │ 1 ■
Contents
Introduction ...................................2
Information about these operating instructions .................2
Proper use ............................................2
Safety .......................................3
Package contents ..............................4
Use ..........................................4
Make preparations ......................................4
Processing wooden workpiece 1 ...........................5
Corner joints ...........................................6
Face joints ............................................7
T-joints ................................................8
Maintenance and storage .......................8
Disposal ......................................9
Service ......................................10
Importer ....................................10
IB_364186_PUD30A1_LB8.indb 1 12.03.2021 10:09:35

PUD 30 A1
■ 2 │ GB│IE
Introduction
Information about these operating instructions
Congratulations!
You have purchased a high-quality product. Familiarise
yourself with the product before using it for the first time. To
do this, read the following operating instructions thoroughly. Use the
product only as described and for the range of applications specified.
Keep these operating instructions in a safe place. Please also pass
these operating instructions on to any future owner(s).
Proper use
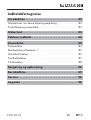
This product is used exclusively for making dowel connections.
Three drill bushes in sizes 6, 8 and 10 mm are provided for this
purpose. You can use the product to create corner, T and face joints.
The product is suitable for wooden workpieces from 12 to 30 mm.
Commercial or industrial use is not permitted. No liability will be
assumed in cases of improper use. No liability will be assumed for
damage caused by misuse or improper handling, the use of force or
unauthorised modification. The risk is borne solely by the user.
IB_364186_PUD30A1_LB8.indb 2 12.03.2021 10:09:37

PUD 30 A1 GB│IE │ 3 ■
Safety
■ Check the product before every use to make sure it is in perfect
condition. Do not use the product if it is damaged in any way.
■ Do not allow children to use the product unless they are being
supervised. Children are not always able to correctly recognise
potential dangers. This product is not a toy.
■ This product is not intended for use by individuals (including
children) with reduced physical, sensory, or mental capabilities. It
may also not be used by individuals who lack experience and/or
knowledge unless they are supervised by a person responsible for
their safety or have received instructions on how to use the product
from such a person.
■ Please observe the operating instructions for the drill/
cordless screwdriver when using the product.
■ Unplug the appliance before fitting or changing parts.
■ All parts must be properly fitted before use, otherwise there is
a risk of serious injury!
■ Never remove the fitted protective devices.
■ Firmly clamp the wooden workpiece you are working on.
■ Ensure that you are standing firmly and the wooden workpiece is
stable.
IB_364186_PUD30A1_LB8.indb 3 12.03.2021 10:09:37

PUD 30 A1
■ 4 │ GB│IE
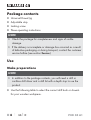
Package contents
▯ Universal Dowel Jig
▯ Adjustable stop
▯ Locking screw
▯ These operating instructions
NOTE
► Check the package for completeness and signs of visible
damage.
► If the delivery is incomplete or damage has occurred as a result
of defective packaging or during transport, contact the customer
service hotline (see section Service).
Use
Make preparations
NOTE
► In addition to the package contents, you will need a drill or
cordless drill driver and a drill bit with a depth stop to use the
product.
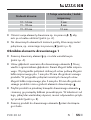
♦ Use the following table to select the correct drill bush or dowels
for your wooden workpiece.
IB_364186_PUD30A1_LB8.indb 4 12.03.2021 10:09:37

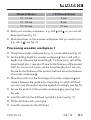
PUD 30 A1 GB│IE │ 5 ■
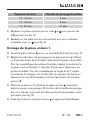
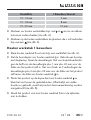
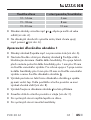
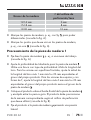
Wood thickness ∅ Drill bush/dowel
12–14 mm 6 mm
15–18 mm 8 mm
19–30 mm 10 mm
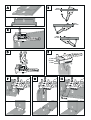
♦ Mark your wooden workpieces, e.g. with and , so you can tell
them apart (see Fig. A).
♦ Mark the places on the wooden workpieces that you want to join,
e.g. with a (see Fig. A).
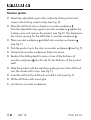
Processing wooden workpiece 1
♦ Clamp the wooden workpiece , e.g. to a work table (see Fig. A).
♦ Set the drilling depth for wooden workpiece . Use a drill with a
depth stop. Measure the dowel length. For face joints, set half the
dowel length plus 1 mm plus 26 mm for the thickness of the product
itself. For corner and T-joints, set the dowel length plus 6 mm plus
26 mm for the thickness of the product itself and minus the thickness
of wooden workpiece .
♦ Place the product on the front edge of wooden workpiece and
clamp it between the guide bolts. Depending on which drill bush
you are using, the product must be applied accordingly (see Fig. B).
♦ Secure the product to the wooden workpiece by pressing from
the side.
♦ Insert the drill into the drill bush and drill a hole (see Fig. C).
♦ Fill the drill holes with wood glue.
♦ Insert the dowels into the drill holes.
IB_364186_PUD30A1_LB8.indb 5 12.03.2021 10:09:37

PUD 30 A1
■ 6 │ GB│IE
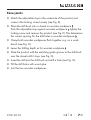
Corner joints
♦ Attach the adjustable stop to the underside of the product and
screw in the locking screw loosely (see Fig. D).
♦ Place the drill bush onto a dowel on wooden workpiece .
Push the adjustable stop against wooden workpiece , tighten the
locking screw and remove the product (see Fig. E). This determines
the correct spacing for the drill holes in wooden workpiece .
♦ Place wooden workpiece parallel onto wooden workpiece
(see Fig. F).
♦ Push the product up to the stop on wooden workpiece (see Fig. F).
♦ Clamp both wooden workpieces firmly into place.
♦ Readjust the drilling depth to minus 6 mm of the thickness of
wooden workpiece plus 26 mm for the thickness of the product
itself.
♦ Slide the product with the matching guide groove to the drill bush
over the dowel until it stops (see Fig. F).
♦ Insert the drill into the drill bush and drill a hole (see Fig. F).
♦ Fill the drill holes with wood glue.
♦ Join the two wooden workpieces.
IB_364186_PUD30A1_LB8.indb 6 12.03.2021 10:09:37

PUD 30 A1 GB│IE │ 7 ■
Face joints
♦ Attach the adjustable stop to the underside of the product and
screw in the locking screw loosely (see Fig. D).
♦ Place the drill bush onto a dowel on wooden workpiece .
Push the adjustable stop against wooden workpiece , tighten the
locking screw and remove the product (see Fig. E). This determines
the correct spacing for the drill holes in wooden workpiece .
♦ Clamp both wooden workpieces flush together, e.g. on a work-
bench (see Fig. G).
♦ Leave the drilling depth as for wooden workpiece .
♦ Slide the product with the matching guide groove to the drill bush
over the dowel until it stops (see Fig. G).
♦ Insert the drill into the drill bush and drill a hole (see Fig. G).
♦ Fill the drill holes with wood glue.
♦ Join the two wooden workpieces.
IB_364186_PUD30A1_LB8.indb 7 12.03.2021 10:09:37

PUD 30 A1
■ 8 │ GB│IE
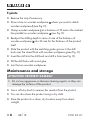
T-joints
♦ Remove the stop if necessary.
♦ Draw a line on wooden workpiece where you want to attach
wooden workpiece (see Fig. H).
♦ Clamp wooden workpiece at a distance of 35 mm to the marked
line parallel on wooden workpiece (see Fig. H).
♦ Readjust the drilling depth to minus 6 mm of the thickness of
wooden workpiece plus 26 mm for the thickness of the product
itself.
♦ Slide the product with the matching guide groove to the drill
bush over the dowel flush with wooden workpiece (see Fig. H).
♦ Insert the drill into the drill bush and drill a hole (see Fig. H).
♦ Fill the drill holes with wood glue.
♦ Join the two wooden workpieces.
Maintenance and storage
ATTENTION! PROPERTY DAMAGE!
► Do not use aggressive or abrasive cleaning agents, as they can
damage the surfaces of the product.
♦ Use a soft dry brush to remove the sawdust from the product.
♦ You can also clean the product using a dry cloth.
♦ Store the product in a clean, dry location away from direct
sunlight.
IB_364186_PUD30A1_LB8.indb 8 12.03.2021 10:09:37

PUD 30 A1 GB│IE │ 9 ■
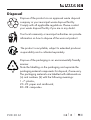
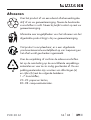
Disposal
Dispose of the product via an approved waste disposal
company or your municipal waste disposal facility.
Comply with all applicable regulations. Please contact
your waste disposal facility if you are in any doubt.
Your local community or municipal authorities can provide
information on how to dispose of the worn-out product.
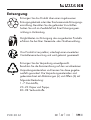
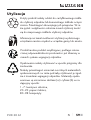
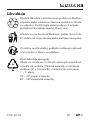
The product is recyclable, subject to extended producer
responsibility and is collected separately.
Dispose of the packaging in an environmentally friendly
manner.
Note the labelling on the packaging and separate the
packaging material components for disposal, if necessary.
The packaging materials are labelled with abbreviations
(a) and numbers (b) with the following meanings:
1–7: plastics,
20–22: paper and cardboard,
80–98: composites.
IB_364186_PUD30A1_LB8.indb 9 12.03.2021 10:09:42

PUD 30 A1
■ 10 │ GB│IE
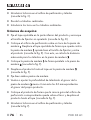
Service
Service Great Britain
Tel.: 0800 404 7657
E-Mail: [email protected]
Service Ireland
Tel.: 1890 930 034
(0,08EUR / Min.,(peak))
(0,06EUR / Min.,(off peak))
E-Mail: [email protected]
IAN 364186_2010
Importer
Please note that the following address is not the service address.
Please use the service address provided in the operating instructions.
KOMPERNASS HANDELS GMBH
BURGSTRASSE 21
44867 BOCHUM
GERMANY
www.kompernass.com
IB_364186_PUD30A1_LB8.indb 10 12.03.2021 10:09:43

PUD 30 A1 DE│AT│CH │ 11 ■
Inhaltsverzeichnis
Einführung ...................................12
Informationen zu dieser Bedienungsanleitung ................12
Bestimmungsgemäße Verwendung ........................12
Sicherheit ....................................13
Lieferumfang .................................14
Verwendung .................................14
Vorbereitungen tätigen ..................................14
Holzwerkstück 1 bearbeiten ..............................15
Eckverbindungen ......................................16
Stirnflächenverbindungen ................................17
T-Verbindungen .......................................18
Reinigung und Aufbewahrung ..................18
Entsorgung ..................................19
Service ......................................20
Importeur ...................................20
IB_364186_PUD30A1_LB8.indb 11 12.03.2021 10:09:43

PUD 30 A1
■ 12 │ DE│AT│CH
Einführung
Informationen zu dieser Bedienungsanleitung
Herzlichen Glückwunsch!
Mit Ihrem Kauf haben Sie sich für ein hochwertiges Produkt
entschieden. Machen Sie sich vor der ersten Inbetriebnahme
mit dem Produkt vertraut. Lesen Sie hierzu aufmerksam die nachfolgende
Bedienungsanleitung. Benutzen Sie das Produkt nur wie beschrieben
und für die angegebenen Einsatzbereiche. Bewahren Sie diese
Bedienungsanleitung gut auf. Händigen Sie alle Unterlagen bei
Weitergabe des Produkts an Dritte ebenfalls mit aus.
Bestimmungsgemäße Verwendung
Das Produkt dient ausschließlich dem Herstellen von Dübelverbindungen.
Dazu stehen drei Bohrbuchsen in den Größen 6-, 8- und 10mm
zur Verfügung. Sie können mit dem Produkt Eck-, T- und Stirnflächen-
verbindungen herstellen. Das Produkt ist für Holzwerkstücke von
12 bis 30mm geeignet.
Die gewerbliche oder industrielle Verwendung ist nicht zulässig.
Für nicht bestimmungsgemäße Verwendung wird nicht gehaftet.
Für Schäden, die von missbräuchlicher oder unsachgemäßer Behand-
lung, von Gewaltanwendung oder unautorisierter Modifikation
herrühren, wird ebenfalls keine Haftung übernommen. Das Risiko
trägt allein der Benutzer.
IB_364186_PUD30A1_LB8.indb 12 12.03.2021 10:09:44

PUD 30 A1 DE│AT│CH │ 13 ■
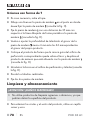
Sicherheit
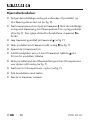
■ Kontrollieren Sie das Produkt vor jedem Gebrauch auf einwand-
freien Zustand. Sollten Schäden festgestellt werden, darf das
Produkt nicht mehr verwendet werden.
■ Gestatten Sie Kindern die Benutzung des Produktes nur unter
Aufsicht. Kinder können mögliche Gefahren nicht immer richtig
erkennen. Das Produkt ist kein Spielzeug.
■ Dieses Produkt ist nicht dafür bestimmt, durch Personen (einschließ-
lich Kinder) mit eingeschränkten physischen, sensorischen oder
geistigen Fähigkeiten oder an einem Mangel an Erfahrung und/
oder Wissen benutzt zu werden, es sei denn, sie werden durch
eine für ihre Sicherheit zuständige Person beaufsichtigt oder erhiel-
ten von ihr Anweisungen, wie das Produkt zu benutzen ist.
■ Beachten Sie beim Umgang mit dem Produkt auch die
Bedienungsanleitung der Bohrmaschine bzw. des Akku-
Bohrschraubers.
■ Ziehen Sie den Netzstecker, bevor Sie Teile montieren oder
wechseln.
■ Alle Teile müssen sachgerecht vor der Verwendung montiert sein,
ansonsten besteht Verletzungsgefahr!
■ Entfernen Sie niemals vorhandene Schutzvorrichtungen.
■ Spannen Sie das zu bearbeitende Holzwerkstück fest.
■ Achten Sie darauf, dass Sie selbst und das zu bearbeitende Holz-
werkstück einen sicheren Stand haben.
IB_364186_PUD30A1_LB8.indb 13 12.03.2021 10:09:44

PUD 30 A1
■ 14 │ DE│AT│CH
Lieferumfang
▯ Universal-Dübelhilfe
▯ Verstellbarer Anschlag
▯ Feststellschraube
▯ Diese Bedienungsanleitung
HINWEIS
► Prüfen Sie die Lieferung auf Vollständigkeit und auf sichtbare
Schäden.
► Bei einer unvollständigen Lieferung oder Schäden infolge
mangel hafter Verpackung oder durch Transport wenden Sie
sich an die Service-Hotline (siehe Kapitel Service).
Verwendung
Vorbereitungen tätigen
HINWEIS
► Sie benötigen zusätzlich zum Lieferumfang eine Bohrmaschine
bzw. einen Akku-Bohrschrauber und einen Bohrer mit Tiefenstop,
um das Produkt zu verwenden.
♦ Wählen Sie anhand der folgenden Tabelle die richtige Bohrbuchse
bzw. die richtigen Dübel für Ihr Holzwerkstück aus.
IB_364186_PUD30A1_LB8.indb 14 12.03.2021 10:09:44

PUD 30 A1 DE│AT│CH │ 15 ■
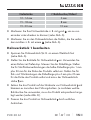
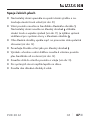
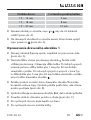
Holzstärke ∅ Bohrbuchse/Dübel
12–14 mm 6 mm
15–18 mm 8 mm
19–30 mm 10 mm
♦ Markieren Sie Ihre Holzwerkstücke z.B. mit und , um sie von-
einander unterscheiden zu können (siehe Abb. A).
♦ Markieren Sie an den Holzwerkstücken die Stellen, die Sie verbin-
den möchten z.B. mit einem (siehe Abb. A).
Holzwerkstück 1 bearbeiten
♦ Spannen Sie Holzwerkstück z.B. an einem Werktisch fest
(siehe Abb. A).
♦ Stellen Sie die Bohrtiefe für Holzwerkstück ein. Verwenden Sie
einen Bohrer mit Tiefenstop. Messen Sie die Dübellänge. Stellen
Sie für Stirnflächenverbindungen die halbe Dübellänge plus 1mm
plus 26mm für die Dicke des Produkts selbst ein. Stellen Sie für
Eck- und T-Verbindungen die Dübellänge plus 6mm plus 26mm
für die Dicke des Produkts selbst und minus der Holzwerkstück-
stärke ein.
♦ Setzen Sie das Produkt auf die Stirnkante von Holzwerkstück und
klemmen es zwischen den Führungsbolzen. Je nachdem welche
Bohrbuchse Sie verwenden, muss das Produkt entsprechend ange-
legt werden (siehe Abb. B).
♦ Fixieren Sie das Produkt an Holzwerkstück durch seitliches
Andrücken.
IB_364186_PUD30A1_LB8.indb 15 12.03.2021 10:09:44

PUD 30 A1
■ 16 │ DE│AT│CH
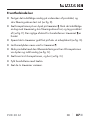
♦ Führen Sie den Bohrer in die Bohrbuchse ein und bohren (siehe
Abb. C).
♦ Füllen Sie Holzleim in die Bohrlöcher.
♦ Stecken Sie die Dübel in die Bohrlöcher.
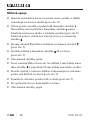
Eckverbindungen
♦ Befestigen Sie den verstellbaren Anschlag auf der Unterseite
des Produkts und schrauben Sie die Feststellschraube lose ein
(siehe Abb. D).
♦ Stecken Sie die Bohrbuchse auf einen Dübel von Holzwerkstück .
Schieben Sie den verstellbaren Anschlag gegen das Holzwerk-
stück , drehen die Feststellschraube fest und nehmen das Produkt
ab (siehe Abb. E). Der richtige Abstand für die Bohrlöcher in
Holzwerkstück ist ermittelt.
♦ Legen Sie Holzwerkstück parallel auf Holzwerkstück
(siehe Abb. F).
♦ Schieben Sie das Produkt bis zum Anschlag an Holzwerkstück
(siehe Abb. F).
♦ Spannen Sie beide Holzwerkstücke fest.
♦ Stellen Sie die Bohrtiefe minus 6mm der Holzwerkstückstärke
plus 26mm für die Dicke des Produkts selbst neu ein.
♦ Schieben Sie das Produkt mit der passenden Führungsnut zur
Bohrbuchse über den Dübel bis zum Anschlag (siehe Abb. F).
♦ Führen Sie den Bohrer in die Bohrbuchse ein und bohren
(siehe Abb. F).
IB_364186_PUD30A1_LB8.indb 16 12.03.2021 10:09:44

PUD 30 A1 DE│AT│CH │ 17 ■
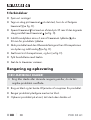
♦ Füllen Sie Holzleim in die Bohrlöcher.
♦ Stecken Sie die beiden Holzwerkstücke zusammen.
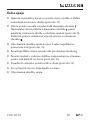
Stirnflächenverbindungen
♦ Befestigen Sie den verstellbaren Anschlag auf der Unterseite
des Produkts und schrauben Sie die Feststellschraube lose ein
(siehe Abb. D).
♦ Stecken Sie die Bohrbuchse auf einen Dübel von Holzwerkstück .
Schieben Sie den verstellbaren Anschlag gegen das Holzwerk-
stück , drehen die Feststellschraube fest und nehmen das Produkt
ab (siehe Abb. E). Der richtige Abstand für die Bohrlöcher in
Holzwerkstück ist ermittelt.
♦ Spannen Sie beide Holzwerkstücke z.B. an einem Werktisch
bündig zusammen (siehe Abb. G).
♦ Belassen Sie die Bohrtiefe wie für Holzwerkstück .
♦ Schieben Sie das Produkt mit der passenden Führungsnut zur
Bohrbuchse über den Dübel bis zum Anschlag (siehe Abb. G).
♦ Führen Sie den Bohrer in die Bohrbuchse ein und bohren
(siehe Abb. G).
♦ Füllen Sie Holzleim in die Bohrlöcher.
♦ Stecken Sie die beiden Holzwerkstücke zusammen.
IB_364186_PUD30A1_LB8.indb 17 12.03.2021 10:09:44
Strona się ładuje...
Strona się ładuje...
Strona się ładuje...
Strona się ładuje...
Strona się ładuje...
Strona się ładuje...
Strona się ładuje...
Strona się ładuje...
Strona się ładuje...
Strona się ładuje...
Strona się ładuje...
Strona się ładuje...
Strona się ładuje...
Strona się ładuje...
Strona się ładuje...
Strona się ładuje...
Strona się ładuje...
Strona się ładuje...
Strona się ładuje...
Strona się ładuje...
Strona się ładuje...
Strona się ładuje...
Strona się ładuje...
Strona się ładuje...
Strona się ładuje...
Strona się ładuje...
Strona się ładuje...
Strona się ładuje...
Strona się ładuje...
Strona się ładuje...
Strona się ładuje...
Strona się ładuje...
Strona się ładuje...
Strona się ładuje...
Strona się ładuje...
Strona się ładuje...
Strona się ładuje...
Strona się ładuje...
Strona się ładuje...
Strona się ładuje...
Strona się ładuje...
Strona się ładuje...
Strona się ładuje...
Strona się ładuje...
Strona się ładuje...
Strona się ładuje...
Strona się ładuje...
Strona się ładuje...
Strona się ładuje...
Strona się ładuje...
Strona się ładuje...
Strona się ładuje...
Strona się ładuje...
Strona się ładuje...
Strona się ładuje...
Strona się ładuje...
Strona się ładuje...
Strona się ładuje...
Strona się ładuje...
Strona się ładuje...
Strona się ładuje...
Strona się ładuje...
Strona się ładuje...
Strona się ładuje...
Strona się ładuje...
Strona się ładuje...
Strona się ładuje...
Strona się ładuje...
Strona się ładuje...
Strona się ładuje...
Strona się ładuje...
Strona się ładuje...
Strona się ładuje...
Strona się ładuje...
-
 1
1
-
 2
2
-
 3
3
-
 4
4
-
 5
5
-
 6
6
-
 7
7
-
 8
8
-
 9
9
-
 10
10
-
 11
11
-
 12
12
-
 13
13
-
 14
14
-
 15
15
-
 16
16
-
 17
17
-
 18
18
-
 19
19
-
 20
20
-
 21
21
-
 22
22
-
 23
23
-
 24
24
-
 25
25
-
 26
26
-
 27
27
-
 28
28
-
 29
29
-
 30
30
-
 31
31
-
 32
32
-
 33
33
-
 34
34
-
 35
35
-
 36
36
-
 37
37
-
 38
38
-
 39
39
-
 40
40
-
 41
41
-
 42
42
-
 43
43
-
 44
44
-
 45
45
-
 46
46
-
 47
47
-
 48
48
-
 49
49
-
 50
50
-
 51
51
-
 52
52
-
 53
53
-
 54
54
-
 55
55
-
 56
56
-
 57
57
-
 58
58
-
 59
59
-
 60
60
-
 61
61
-
 62
62
-
 63
63
-
 64
64
-
 65
65
-
 66
66
-
 67
67
-
 68
68
-
 69
69
-
 70
70
-
 71
71
-
 72
72
-
 73
73
-
 74
74
-
 75
75
-
 76
76
-
 77
77
-
 78
78
-
 79
79
-
 80
80
-
 81
81
-
 82
82
-
 83
83
-
 84
84
-
 85
85
-
 86
86
-
 87
87
-
 88
88
-
 89
89
-
 90
90
-
 91
91
-
 92
92
-
 93
93
-
 94
94


w innych językach
- español: Parkside PUD 30 A1 Manual de usuario
- Deutsch: Parkside PUD 30 A1 Benutzerhandbuch
- slovenčina: Parkside PUD 30 A1 Používateľská príručka
- français: Parkside PUD 30 A1 Manuel utilisateur
- dansk: Parkside PUD 30 A1 Brugermanual
- Nederlands: Parkside PUD 30 A1 Handleiding
Powiązane artykuły
Inne dokumenty
-
Triton TDJ 600 Instrukcja obsługi
-
Festool Domino DF 500 Q Instrukcja obsługi
-
Festool 574432 Instrukcja instalacji
-
Festool DOMINO XL DF 700 EQ Instrukcja obsługi
-
-
Scheppach 5906808901 Translation Of Original Operating Manual
-
Einhell Blue BT-BD 401 Instrukcja obsługi
-
EINHELL SB 701-1 Instrukcja obsługi
-
Kreg K4-INT Instrukcja obsługi