Dantherm AC 70 Instrukcja obsługi

Typ
Instrukcja obsługi

Ten podręcznik jest również odpowiedni dla

ACD 137 - AC 22 - AC 70
IT
ITITITITDK
NL
FR
ES
DE
GB
EE
LV
LT
HR
SE
BG
SK
SI
HU
CZ
RU
NO
FI
RO
PL
USER AND MAINTENANCE BOOK
en
LIBRETTO USO E MANUTENZIONE
it
BEDIENUNGS- UND WARTUNGSANLEITUNG
de
MANUAL DE INSTRUCCIONES PARA EL USO Y MANTENIMIENTO
es
MANUEL D’UTILISATION ET DE MAINTENANCE
fr
VEJLEDNING OM BRUG OG VEDLIGEHOLDELSE
da
INSTRUKCJA OBSŁUGI I KONSERWACJI
pl
(28°C / 55% RH)
7,1 kW-кВт
24.000 Btu/h-БТЕ/ч
(30°C / 80% RH)
130 l-л / 24 h-ч
35 ÷ 98 %
10 ÷ 42 °C
1.020 / 800 m³/h-м³/ч
R1234yf / 950 g-г
GWP-Потенциал глобального потепления 4
~220-240 V
50 Hz-Гц
1.980 W-Вт / 10 A
dB
(A)
55 dB-дБ
20 l-л
98 kg-кг
PS 41,5 - 32,8 bar-бар
TS 63 - 53 °C
LRA 57,0 A
CO
2
Eq
3,8
GWP
4
IMPORTANT: In order to have a correct function you must use an electrical generator in class G3 or more (frequency variation
±1%, tension variation ±2%). The maximum power of electrical generator must be three time the nominal power of device that you
must connect.
TECHNICAL DATA TABLE - TABELLA DATI TECNICI - TECHNISCHE
DATENTABELLE - TABLA DE DATOS TÉCNICOS - TABLEAU DES DONNÉES
TECHNIQUES - TABEL TECHNISCHE GEGEVENS - TABELA DE DADOS
TÉCNICOS - TEKNISK DATATABEL - TEKNISTEN TIETOJEN TAULUKKO - TABELL
FOR TEKNISKE DATA - TABELL MED TEKNISKA EGENSKAPER - TABELA
DANYCH TECHNICZNYCH - ТАБЛИЦЕ ТЕХНИЧЕСКИХ ДАННЫХ - TABULKA
TECHNICKÝCH ÚDAJŮ - MŰSZAKI ADATOK TÁBLÁZATA - TEHNIČNI PODATKI -
TEKNİK VERİLER TABLOSUNDA - TABLICI S TEHNIČKIM PODACIMA - TECHNINIŲ
DUOMENŲ LENTELĖJE - TEHNISKO DATU TABULA - TEHNILISTE ANDMETE
TABEL - TABELUL CU DATE TEHNICE - TABUĽKA TECHNICKÝCH ÚDAJOV -
ТАБЛИЦА ТЕХНИЧЕСКИ ДАННИ - ТАБЛИЦІ ТЕХНІЧНИХ ДАНИХ - TABELI
SA TEHNIČKIM PODACIMA - ΠΙΝΑΚΙΔΑ ΤΩΝ ΤΕΧΝΙΚΩΝ ΣΤΟΙΧΕΙΩΝ - 技术参数 -
ТЕХНИКАЛЫҚ КӨРСЕТКІШТЕР КЕСТЕСІ
NOTE:________________________________________________________________________
_______________________________________________________________________________
_______________________________________________________________________________
_______________________________________________________________________________
_______________________________________________________________________________
_______________________________________________________________________________
_______________________________________________________________________________
_______________________________________________________________________________
_______________________________________________________________________________
_______________________________________________________________________________
_______________________________________________________________________________
_______________________________________________________________________________
_______________________________________________________________________________
_______________________________________________________________________________
_______________________________________________________________________________
_______________________________________________________________________________
_______________________________________________________________________________
_______________________________________________________________________________
______________________________________________________________________________
_______________________________________________________________________________
_______________________________________________________________________________
_______________________________________________________________________________
_______________________________________________________________________________
_______________________________________________________________________________
_______________________________________________________________________________
_______________________________________________________________________________
_______________________________________________________________________________
_______________________________________________________________________________
_______________________________________________________________________________
_______________________________________________________________________________
_______________________________________________________________________________
_______________________________________________________________________________
_______________________________________________________________________________
_______________________________________________________________________________
_______________________________________________________________________________
_______________________________________________________________________________
_______________________________________________________________________________
______________________________________________________________________________
_______________________________________________________________________________
_______________________________________________________________________________
_______________________________________________________________________________
_______________________________________________________________________________
_______________________________________________________________________________
_______________________________________________________________________________
_______________________________________________________________________________
_______________________________________________________________________________
_______________________________________________________________________________
PICTURES - FIGURE - ABBILDUNGEN - FIGURAS - FIGURES - FIGUREN - FIGU-
RAS - FIGURER - KUVAT - FIGURER - FIGURER - ILUSTRACJE - ИЛЛЮСТРАЦИИ
- OBRÁZKY - ÁBRÁK - SLIKE - ŞEKİLLER - SLIKE - ILIUSTRACIJOS - ATTĒLI -
JOONISED - IMAGINI - OBRÁZKY - СХЕМИ - МАЛЮНКИ - SLIKE - ΕΙΚΟΝΕΣ - 图示 图示
- СУРЕТТЕМЕЛЕР
4
3
5
6
7
8 10
9
1
HOT
AIR
COLD
AIR
AMBIENT
AIR
AMBIENT
AIR
2
A
B
C
D
8888
ALARM
FAN SPEED
FAN SPEED
LOW HIGH
MODE
FAN
SET
DRYERCOOL
MODE /TAC
HOT AIR
COLD AIR
HOT
AIR
C
OLD AIR
DRY AIR
Ø 300 mm
Ø 400 mm
5”
HOT
AIR
C
OLD AIR
* If ready
* If ready
PICTURES - FIGURE - ABBILDUNGEN - FIGURAS - FIGURES - FIGUREN - FIGU-
RAS - FIGURER - KUVAT - FIGURER - FIGURER - ILUSTRACJE - ИЛЛЮСТРАЦИИ
- OBRÁZKY - ÁBRÁK - SLIKE - ŞEKİLLER - SLIKE - ILIUSTRACIJOS - ATTĒLI -
JOONISED - IMAGINI - OBRÁZKY - СХЕМИ - МАЛЮНКИ - SLIKE - ΕΙΚΟΝΕΣ - 图示图示
- СУРЕТТЕМЕЛЕР
4
3
5
6
7
8 10
9
1
HOT
AIR
COLD
AIR
AMBIENT
AIR
AMBIENT
AIR
2
A
B
C
D
8888
ALARM
FAN SPEED
FAN SPEED
LOW HIGH
MODE
FAN
SET
DRYERCOOL
MODE /TAC
HOT AIR
COLD AIR
HOT
AIR
C
OLD AIR
DRY AIR
Ø 300 mm
Ø 400 mm
5”
HOT
AIR
C
OLD AIR
* If ready
* If ready
PICTURES - FIGURE - ABBILDUNGEN - FIGURAS - FIGURES - FIGUREN - FIGU-
RAS - FIGURER - KUVAT - FIGURER - FIGURER - ILUSTRACJE - ИЛЛЮСТРАЦИИ
- OBRÁZKY - ÁBRÁK - SLIKE - ŞEKİLLER - SLIKE - ILIUSTRACIJOS - ATTĒLI -
JOONISED - IMAGINI - OBRÁZKY - СХЕМИ - МАЛЮНКИ - SLIKE - ΕΙΚΟΝΕΣ - 图示 图示
- СУРЕТТЕМЕЛЕР
4
3
5
6
7
8 10
9
1
HOT
AIR
COLD
AIR
AMBIENT
AIR
AMBIENT
AIR
2
A
B
C
D
8888
ALARM
FAN SPEED
FAN SPEED
LOW HIGH
MODE
FAN
SET
DRYERCOOL
MODE /TAC
HOT AIR
COLD AIR
HOT
AIR
COLD AIR
DRY AIR
Ø 300 mm
Ø 400 mm
5”
HOT
AIR
COLD AIR
* If ready
* If ready
PICTURES - FIGURE - ABBILDUNGEN - FIGURAS - FIGURES - FIGUREN - FIGU-
RAS - FIGURER - KUVAT - FIGURER - FIGURER - ILUSTRACJE - ИЛЛЮСТРАЦИИ
- OBRÁZKY - ÁBRÁK - SLIKE - ŞEKİLLER - SLIKE - ILIUSTRACIJOS - ATTĒLI -
JOONISED - IMAGINI - OBRÁZKY - СХЕМИ - МАЛЮНКИ - SLIKE - ΕΙΚΟΝΕΣ - 图示图示
- СУРЕТТЕМЕЛЕР
4
3
5
6
7
8
10
9
1
HOT
AIR
COLD
AIR
AMBIENT
AIR
AMBIENT
AIR
2
A
B
C
D
8888
ALARM
FAN SPEED
FAN SPEED
LOW HIGH
MODE
FAN
SET
DRYERCOOL
MODE /TAC
HOT AIR
COLD AIR
HOT
AIR
C
OLD AIR
DRY AIR
Ø 300 mm
Ø 400 mm
5”
HOT
AIR
C
OLD AIR
* If ready
* If ready
PICTURES - FIGURE - ABBILDUNGEN - FIGURAS - FIGURES - FIGUREN - FIGU-
RAS - FIGURER - KUVAT - FIGURER - FIGURER - ILUSTRACJE - ИЛЛЮСТРАЦИИ
- OBRÁZKY - ÁBRÁK - SLIKE - ŞEKİLLER - SLIKE - ILIUSTRACIJOS - ATTĒLI -
JOONISED - IMAGINI - OBRÁZKY - СХЕМИ - МАЛЮНКИ - SLIKE - ΕΙΚΟΝΕΣ - 图示 图示
- СУРЕТТЕМЕЛЕР
4
3
5
6
7
8
10
9
1
HOT
AIR
COLD
AIR
AMBIENT
AIR
AMBIENT
AIR
2
A
B
C
D
8888
ALARM
FAN SPEED
FAN SPEED
LOW HIGH
MODE
FAN
SET
DRYERCOOL
MODE /TAC
HOT AIR
COLD AIR
HOT
AIR
C
OLD AIR
DRY AIR
Ø 300 mm
Ø 400 mm
5”
HOT
AIR
C
OLD AIR
* If ready
* If ready
NOTE:________________________________________________________________________
_______________________________________________________________________________
_______________________________________________________________________________
_______________________________________________________________________________
_______________________________________________________________________________
_______________________________________________________________________________
_______________________________________________________________________________
_______________________________________________________________________________
_______________________________________________________________________________
_______________________________________________________________________________
_______________________________________________________________________________
_______________________________________________________________________________
_______________________________________________________________________________
_______________________________________________________________________________
_______________________________________________________________________________
_______________________________________________________________________________
_______________________________________________________________________________
_______________________________________________________________________________
______________________________________________________________________________
_______________________________________________________________________________
_______________________________________________________________________________
_______________________________________________________________________________
_______________________________________________________________________________
_______________________________________________________________________________
_______________________________________________________________________________
_______________________________________________________________________________
_______________________________________________________________________________
_______________________________________________________________________________
_______________________________________________________________________________
_______________________________________________________________________________
_______________________________________________________________________________
_______________________________________________________________________________
_______________________________________________________________________________
_______________________________________________________________________________
_______________________________________________________________________________
_______________________________________________________________________________
_______________________________________________________________________________
______________________________________________________________________________
_______________________________________________________________________________
_______________________________________________________________________________
_______________________________________________________________________________
_______________________________________________________________________________
_______________________________________________________________________________
_______________________________________________________________________________
_______________________________________________________________________________
_______________________________________________________________________________
_______________________________________________________________________________
en
it
de
es
fr
nl
pt
da
no
sv
pl
ru
cs
hu
sl
tr
hr
lt
lv
et
ro
sk
bg
uk
bs
el
zh
INDEXINDEX
1... INTRODUCTION
2... GENERAL DESCRIPTION OF THE UNIT
3... PRELIMINARY OPERATIONS
4... START-UP
5... MAINTENANCE
6... ALARM LIST
►►►1. INTRODUCTION
►►1.1. INTRODUCTION
The manual is intended for the end user only
in regard to operations that can be performed
with closed panels. The operations that require
to open doors or panels with tools must only be
performed by expert personnel. Each appliance
must be connected to the power supply via a ca-
ble with a power plug supplied with the unit. For
maintenance operations, the power plug must
always be disconnected to allow the operator to
intervene in safe conditions.
If assistance or spare parts are required, read

to identify the appliance (model and serial num-
ber).
►►1.2. GENERAL SAFETY RULES
The purpose of the manual and of the entire
documentation supplied is to allow both the
installer and operator to correctly perform the
installation, start-up and maintenance of the
equipment, without causing damage to the per-
sonnel in charge and to the unit.
Each appliance is subject to a risk assessment
carried out in compliance with current legisla-
      
implements the protective measures required to
achieve the risk reduction objectives.
All activities regarding the operation and main-
tenance of the unit must be performed:
Only by properly trained people, who must im-
plement safe working practices and use the
personal protective equipment appropriate to
      

Only by properly trained people who have
read and fully understood the manuals, tech-
nical documents and safety documents.
Use of the appliance must not be allowed to
anyone who is not adequately trained and
skilled.
This manual, the technical documents and any
security documents attached must be read and
stored for the entire lifespan of the appliance:
CAUTION: This appliance is designed for
use in an indoor environment.
CAUTION: The unit must be connected to
an electrical system that complies with local
electrical safety regulations.
CAUTION: The unit must be placed by fol-
lowing the dimensions and spaces required,
including the minimum spaces allowed by
adjacent structures.
CAUTION: This equipment must always
be connected to earth. We decline any liabil-
ity for any danger or damage caused if this
requirement is not complied with.
CAUTION: Sharp tools (screwdrivers,
needles or the like) must not be inserted into
the grids or inside any other panel opening,
especially when the unit is open to remove
the lter.
CAUTION: All maintenance and cleaning
operations on the unit must be performed
with the power supply disconnected. Never
remove the front grids or open any part of
the unit without rst disconnecting the plug
from the socket.
CAUTION: Do not use water to clean the
unit. Use a wet cloth to clean the unit. Nev-
er spray water on the unit and its electrical
components.
The equipment must always be kept in a vertical
position in order to prevent accidental spillage
 -
tainer. It is strictly forbidden to move the equip-
en
it
de
es
fr
nl
pt
da
no
sv
pl
ru
cs
hu
sl
tr
hr
lt
lv
et
ro
sk
bg
uk
bs
el
zh
ment while connected to the power outlet, as the
resulting vibrations and movements may cause
-

The unit can only be moved after emptying
the condensate tank, and in any case, it is
ALWAYS REQUIRED to remove the plug
from the socket before moving the appli-
ance. Should water be accidentally spilled
on the appliance, the unit must be immedi-
ately turned o and disconnected from the
power supply and may only be turned on af-
ter eight HOURS/TAC have elapsed.
CAUTION: The equipment contains
R1234yf refrigerant: this gas is ammable.
The amount of charge is indicated in the data
table of this user manual.
Warning, the refrigerant is odourless.
Do not use any means to accelerate the de-
frosting process or for cleaning other than
those recommended by the manufacturer.
The appliance must be placed in a room that
does not have ignition sources continuously
in operation (e.g. open ames, a gas appli-
ance while running or an electric heater run-
ning).
Do not drill holes into or burn the appliance.
►►1.3. PERSONAL PROTECTIVE
EQUIPMENT
Use the following personal protective equipment
during unit use and maintenance operations:
CLOTHING: Those who carry out mainte-
nance or work on the unit in environments with

non-slip soles.
GLOVES: Appropriate gloves must be worn
during cleaning and maintenance operations.
-
propriate gloves is mandatory in order to pre-
vent the risk of freezing.
MASK AND GOGGLES: Masks to protect
the respiratory tract and safety goggles to pro-
tect the eyes must be worn during cleaning and
maintenance operations.
►►1.4. GENERAL SAFETY RULES
The following safety signs, which must be re-

Read the user manual.
Read the technical manual.
Electric shock hazard.
Flammable material hazard.
CAUTION: It is strictly forbidden to remove
the safety signs on the units.
►►►2. GENERAL DESCRIPTION OF
THE UNIT
(PIC. 1)
(PIC. 2)
A. Ambient air inlet.
B. Ambient air inlet.
C. Hot air outlet.
D. Cold air outlet.
This appliance allows you to control the ambient
temperature and relative humidity. The available
-
tilation.
For correct ambient climate control, it is nec-
essary to adapt the appliance and select the
correct desired operating mode via the control
panel, considering that the lower grids (front and
rear) draw in the ambient air, whereas the upper
grids release air into the environment [the upper/
front grid (D PIC. 2) releases cold air, whereas
the upper grid (C PIC. 2) releases hot air].
en
it
de
es
fr
nl
pt
da
no
sv
pl
ru
cs
hu
sl
tr
hr
lt
lv
et
ro
sk
bg
uk
bs
el
zh
Refer to the “CONTROL PANEL” paragraph for
the operating modes.
►►2.1. REFRIGERANT CIRCUIT
The refrigerant gas used in these units is
R1234yf. The refrigerant circuit is built in com-
pliance with current standards.
Flammable material hazard.
This unit is hermetically sealed and contains

►►►3. PRELIMINARY OPERATIONS
►►3.1. REMOVAL OF THE PACKAG-
ING AND ASSEMBLY
(PIC. 3)
Remove the packaging taking care not to dam-
age the unit. Dispose of the packaging products
(wood, plastic, cardboard), taking them to the
specialised collection or recycling centres (fol-
low the local regulations in force).
CAUTION: Assemble the appliance, with the
adequate air outlet (1 or 2-way outlet, depend-
ing on the model), handles, wheels, cord reel
and all the relevant nuts and bolts, before oper-
ating it.
NOTE: Correct operation requires the appropri-
ate air outlet to be installed, according to the ac-
tual requirements (depending on the model).
►►3.2. INSPECTION
All units are factory assembled and wired
(except for certain components). Upon receiving
the unit, it must be immediately and thoroughly
inspected, checking that it has not been dam-
aged during transport or that no parts are miss-
ing.

on the external metal panels, including those in
the tank compartment. Also check that the ca-
ble, plug and relevant insulation are intact. Oth-
erwise, it is FORBIDDEN to connect and start
the unit, which must be sent to an authorised
service centre.
►►3.3. OPERATING PRINCIPLES
CAUTION: To ensure correct operation of
the appliance, it is recommended to operate
the unit within the limits shown on the tech-
nical data table.
►►3.4. POSITIONING
Set up the appliance to ensure an adequate air

CAUTION: Make sure that the appliance is
placed in such a way so as to prevent contact
with water.
►►3.5. SERVICE AREA
The hot air expelled by the fan must not be ob-
structed. Avoid recirculation phenomena of the
air expelled and drawn by the appliance so as
to prevent compromising the performance of the
unit or even interrupting normal operation.
CAUTION: The equipment must not be
placed in cramped environments, which do not
allow adequate distribution of the air from the
dedicated inlets and outlets in the room.
CAUTION: Do not place or hang objects on
the front panel, it may cause damage to the unit.
►►3.6. GENERAL INFORMATION
CAUTION: Disconnect the power plug from
the socket before carrying out any maintenance
operation on the electrical part.
CAUTION: Check that the supply voltage
corresponds to the unit's operating data (volt-
age and frequency) shown on the data plate on

power cable for correct operation.
CAUTION: The earthing connection is man-
datory.
en
it
de
es
fr
nl
pt
da
no
sv
pl
ru
cs
hu
sl
tr
hr
lt
lv
et
ro
sk
bg
uk
bs
el
zh
►►►4. START-UP
►►4.1. PRELIMINARY CHECKS
CAUTION: Check that the power cord is
properly connected.
CAUTION: Check that all the cover pan-
els are in the correct position and are locked via

►►4.2. CONTROL PANEL
(PIC. 4)
The unit is equipped with a luminous control pan-
el, which indicates the operating status of the ap-
pliance.
A brief description is provided below:
CONTROL PANEL:

shows [ - - ] when the unit is connected to the
mains and electrically powered.
LED:

ventilation speed (LOW > Low speed / HIGH >
High speed).

alarm. The display will show the error message.

operating mode:
-COOL LED: This LED indicates that the appli-
ance is operating in “COOLING” mode.
-
perature set point is reached.
 This LED indicates that the ap-
pliance is operating in “DEHUMIDIFICATION”
mode.
-
midity set point is reached.
-LED FAN: This LED indicates that the appli-
ance is operating in “VENTILATION” mode.
BUTTONS:

on.
Press the “ON/OFF” button to turn the appliance

]).
       
then on immediately, the compressor does not
start immediately. After a few minutes, the appli-
ance restarts automatically.
      
to select the desired ventilation speed (LOW >
Low Speed / HIGH > High Speed).


desired set point value. The display will start


and the new set point has been detected by the
electronics.
It is possible to operate the appliance regard-
less of the degree of temperature or humidity in
the environment; in fact, the appliance will work

“CONT” appears on the display.

desired operating mode:
[COOL MODE]: Se-
lect the “COOL” cooling mode on the control
panel.

[COOL MODE]:

2) to outside the room.
        
control panel.

MODE]    
mode on the control panel.
  
to view the working HOURS/TAC of the appli-
ance.
►►4.3. DISCHARGE PIPE CONNEC-
TION (Set-up)
A discharge pipe can be connected to the appli-


►►4.4. CONNECTING AIR DUCTING
PIPES
Air ducting pipes can be connected to the ap-
pliance. It is recommended to use only pipes of
adequate section and to avoid bends or narrow-
ing of the duct sections.
It is forbidden to move the appliance when it is
ON and when it is connected to ducting pipes.
en
it
de
es
fr
nl
pt
da
no
sv
pl
ru
cs
hu
sl
tr
hr
lt
lv
et
ro
sk
bg
uk
bs
el
zh
►►4.5. CONNECTION AND ACTIVATION
OF THE REMOTE TEMPERATURE CON-
TROL (optional)
(Valid for cooling only)
(PIC. 10)
NOTE: Use only original accessories.
Depending on the model, it is possible to connect
a remote temperature control to the appliance
in order to obtain the desired temperature in the
room, even remotely (only compatible with the
cooling feature).
With the appliance in stand-by mode (i.e. product
 
the remote temperature control (PIC. 10), press
-
trol panel and set the desired temperature on the
remote temperature control. The control panel
display will show “RC” and the room temperature.

the temperature set point is reached.
►►►5. MAINTENANCE
►►5.1. CHECKS TO BE PERFORMED
BY THE USER
The only maintenance to be carried out by the

be performed at least once a month.
The cleaning frequency can be increased due to
the dustiness of the working environment of the
appliance.
         -


CAUTION: REMOVE THE FILTER FROM THE
APPLIANCE TO PERFORM CLEANING. IT IS
FORBIDDEN TO PERFORM CLEANING WITH
THE FILTER INSTALLED.
►►5.2. SPARE PARTS
Should it be required to replace one or more
parts during maintenance by specialised opera-
tors, this must be done by using original spare
parts only.
If required, request the “spare parts list” from
your vendor, specifying the model and serial
number of the unit.
►►5.3. DISMANTLING THE UNIT
The unit has been designed and built to ensure
continuous operation. The lifespan of some
components such as the fan and the compres-
sor depends on their maintenance.
CAUTION: The unit contains substanc-
es and components dangerous for the environ-
ment (electronic components, refrigerant gas
and oils). At the end of its useful life, in the event
of dismantling the unit, the operation must be
carried out by specialised refrigerating person-
nel.
       
centres for the collection and disposal of equip-
ment containing dangerous substances. The re-
      
in the circuit must be recovered, in accordance
with the regulations in force in your country.
en
it
de
es
fr
nl
pt
da
no
sv
pl
ru
cs
hu
sl
tr
hr
lt
lv
et
ro
sk
bg
uk
bs
el
zh
►►►6. ALARM LIST
ALARM POSSIBLE CAUSE POSSIBLE SOLUTION
FULL + “FULL“ Full or missing tank The alarm is automatically reset by empty-
ing or inserting the tank
ALARM + “Lo t“ Room temperature too
low
Room temperature conditions not suitable
for operation
ALARM + “Prob“ Malfunction of the humid-
ity probe. In any case, the
unit continues to operate
Contact the authorised service centre
ALARM + “Pro2“ Malfunction of the ambi-
ent temperature probe
Contact the authorised service centre
ALARM + “dEFr“
ALARM + “Lotd”
Defrosting thermostat
malfunction
Contact the authorised service centre
ALARM + “HiPS“ High pressure alarm in
the refrigerant circuit

Disconnect the unit from the power supply.
Open the electrical panel and reset the
high pressure switch.
If the alarm persist contact the authorised
service centre
ALARM + “LoPS“ Low pressure alarm in the
refrigerant circuit

Disconnect the unit from the power supply
and riconnect.
If the alarm persist contact the authorised
service centre
INDICEINDICE
1... INTRODUZIONE
2... DESCRIZIONE GENERALE DELL’UNITÀ
3... OPERAZIONI PRELIMINARI
4... AVVIAMENTO
5... MANUTENZIONE
6... LISTA ALLARMI
en
it
de
es
fr
nl
pt
da
no
sv
pl
ru
cs
hu
sl
tr
hr
lt
lv
et
ro
sk
bg
uk
bs
el
zh
►►►1. INTRODUZIONE
►►1.1. INTRODUZIONE
        
operazioni eseguibili con pannelli chiusi. Le ope-
razioni che necessitano dell’apertura di porte o
pannelli con attrezzi devono essere eseguite solo
da personale esperto. Ogni apparecchio deve es-
sere collegato all’alimentazione elettrica tramite
cavo con spina di alimentazione in dotazione con
l’unità. Per le operazioni di manutenzione, la spina
di alimentazione deve essere sempre scollegata,
consentendo all’operatore di intervenire in condi-
zioni di sicurezza.

di serie), in caso di richiesta di assistenza o di ri-

esternamente all’unità.
►►1.2. NORME GENERALI DI SICUREZ-
ZA
Lo scopo del manuale e di tutta la documentazio-
ne fornita, è quello di mettere in condizione, sia
l’installatore che l’operatore, di eseguire corretta-
mente l’installazione, l’avviamento e la manuten-
zione dell’apparecchiatura, senza provocare dan-
ni al personale addetto e all’unità.
Ogni apparecchio è soggetto a una valutazione
      
-
plementa le misure protettive necessarie, per rag-
giungere gli obiettivi di riduzione del rischio.
Tutte le attività relative al funzionamento e alla
manutenzione dell’unità devono essere eseguite:
Solo da persone adeguatamente istruite, che
devono adottare pratiche di lavoro sicure e uti-
lizzare i dispositivi di protezione individuale ap-
     

Solo da persone adeguatamente istruite, che
hanno letto e compreso completamente i ma-
nuali, i documenti tecnici e i documenti di sicu-
rezza.
L’uso dell’apparecchio deve essere negato a
chiunque non sia adeguatamente addestrato e
competente.
Il presente manuale, i documenti tecnici e i docu-
menti di sicurezza eventualmente allegati, devono
essere letti e conservati per l’intera vita dell’appa-
recchio:
ATTENZIONE: Questo apparecchio è pro-
gettato per l’utilizzo in un ambiente interno.
ATTENZIONE: L’unità deve essere collega-
ta a un impianto elettrico conforme alle norme
di sicurezza elettrica locali.
ATTENZIONE: L’unità deve essere posizio-
nata rispettando le dimensioni e gli spazi ne-
cessari, inclusi gli spazi minimi permessi dalle
strutture adiacenti.
ATTENZIONE: Questa apparecchiatura
deve essere sempre connessa a prese di colle-
gamento a terra; si declina ogni responsabilità
per qualsiasi pericolo o danno arrecato qua-
lora questa prescrizione non fosse rispettata.
ATTENZIONE: Strumenti appuntiti (caccia-
viti, aghi o simili) non devono essere inseriti
nelle griglie o in qualsiasi altra aperture dei
pannelli, specialmente quando l’unità è aperta
per rimuovere il ltro.
ATTENZIONE: Ogni intervento di manuten-
zione e pulizia sull’unità deve essere fatto con
l’alimentazione elettrica scollegata. Mai rimuo-
vere la griglia frontale o aprire qualsiasi parte
dell’unità senza prima aver scollegato la spina
dalla presa.
ATTENZIONE: L’unità non deve essere pu-
lita usando acqua. Per pulire l’unità usare uno
straccio umido. Mai spruzzare acqua sull’unità
e sui suoi componenti elettrici.
L’apparecchiatura deve essere sempre tenuta in
-
ta accidentale di condensa (acqua), dall’apposi-
to contenitore. È assolutamente vietato muovere
l’apparecchiatura quando è connessa alla presa
di corrente, in quanto le conseguenti vibrazioni e
movimenti, potrebbero determinare la fuoriuscita
della condensa dall’apposito contenitore, con in-
teressamento delle parti elettriche.
L’unità può essere movimentata solo dopo
aver svuotato la tanica della condensa, e in
ogni caso, è SEMPRE NECESSARIO rimuove-
re la spina dalla presa prima di spostare l’ap-
parecchio. Se dell’acqua dovesse essere acci-
dentalmente versata sull’apparecchio, l’unità
deve essere immediatamente spenta e scolle-
gata dalla rete elettrica, e potrà essere accesa
non prima che siano trascorse otto ore.
ATTENZIONE: L’apparecchiatura contiene
refrigerante R1234yf: tale gas è inammabile.
La quantità di carica è indicata nella tabella
dati di questo manuale d’uso.
Prestare attenzione, il refrigerante è inodore.
Non servirsi di mezzi per accelerare il proces-
so di sbrinamento o per la pulizia, che non sia-
no quelli raccomandati dal produttore.
L’apparecchio deve essere posto in una stan-
za che non abbia sorgenti di accensione con-
tinuamente in funzione (per esempio, amme
libere, un’apparecchio a gas in funzione o un
riscaldatore elettrico in funzione).
Non forare o bruciare l’apparecchio.
►►1.3. DISPOSITIVI DI PROTEZIONE
INDIVIDUALE
Per le operazioni di utilizzo e manutenzione delle
unità, usare i seguenti mezzi di protezione indivi-
duale:

opera sull’unità, deve indossare scarpe antinfor-
tunistiche, con suola antiscivolo in ambienti con
pavimentazione scivolosa.
GUANTI: Durante le pulizie e le operazioni di
manutenzione, è necessario l’uso di guanti ap-
propriati. In caso di ricarica del gas refrigerante, è

evitare il rischio di congelamento.
MASCHERINA E OCCHIALI: Durante le ope-
razioni di pulizia e manutenzione, devono essere
usate maschere per la protezione delle vie respi-
ratorie ed occhiali di protezione per la protezione
degli occhi.
►►1.4. NORME GENERALI DI SICUREZ-
ZA
L’unità riporta i seguenti segnali di sicurezza, che
devono essere rispettati:
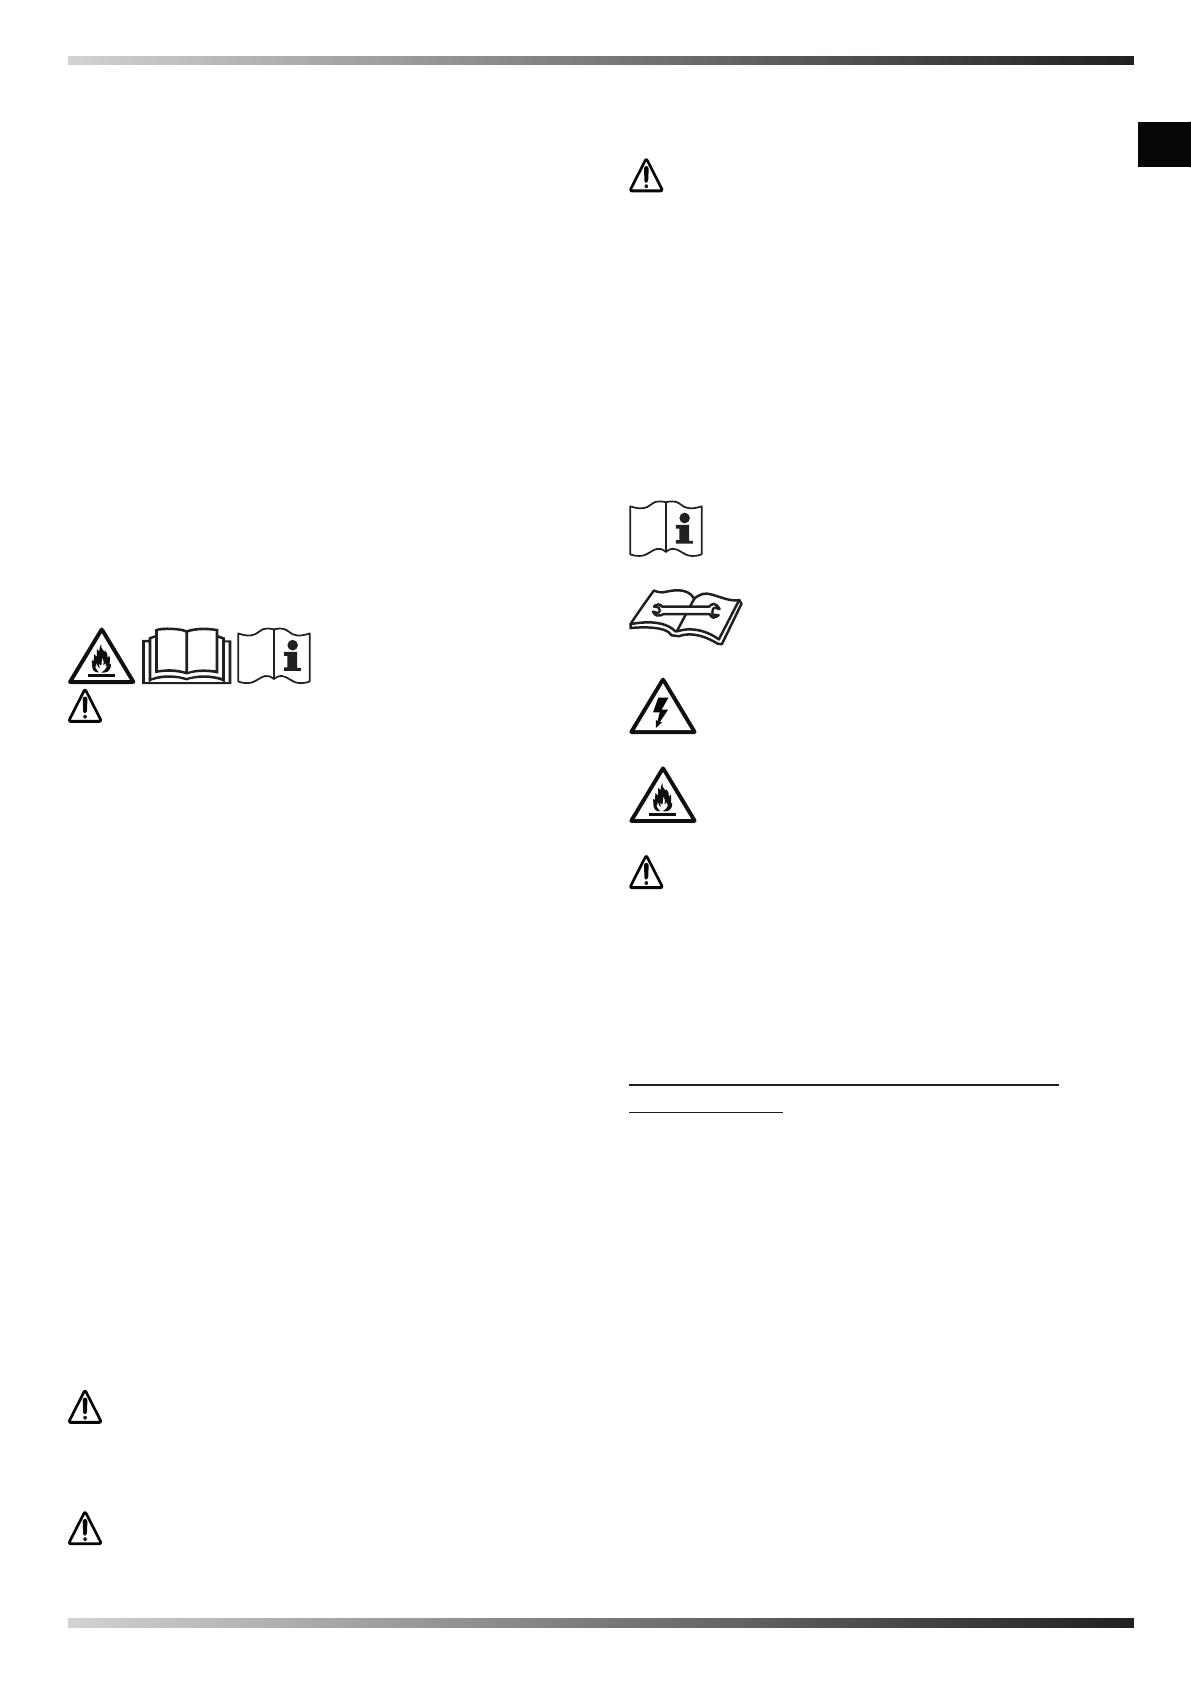
Leggere il manuale utente.
Leggere il manuale tecnico.
Pericolo di shock elettrico.

ATTENZIONE: È severamente vietato rimuo-
vere la segnaletica di sicurezza presente nelle
unità.
►►►2. DESCRIZIONE GENERALE
DELL’UNITÀ
(FIG. 1)
(FIG. 2)
A. Ingresso aria ambiente.
B. Ingresso aria ambiente.
C. Uscita aria calda.
D. Uscita aria fredda.
Questo apparecchio permette di controllare la
temperatura e l’umidità relativa in ambiente. Le
-

Per il corretto controllo del clima in ambiente, è
necessario adeguare l’apparecchio e selezionare
la corretta modalità di funzionamento desiderata
tramite il pannello comandi, tenendo in considera-
zione che le griglie inferiori (frontale e posteriore)
en
it
de
es
fr
nl
pt
da
no
sv
pl
ru
cs
hu
sl
tr
hr
lt
lv
et
ro
sk
bg
uk
bs
el
zh
aspirano l’aria ambiente, mentre le griglie superio-
ri rilasciano aria in ambiente [la griglia superiore /
frontale (D FIG. 2) rilascia aria fredda, mentre la
griglia superiore (C FIG. 2) rilascia aria calda].
Per le modalità di funzionamento fare riferimento
al paragrafo “PANNELLO DI CONTROLLO“.
►►2.1. CIRCUITO FRIGORIFERO
Il gas refrigerante utilizzato in queste unità è
R1234yf. Il circuito frigorifero è realizzato in con-
formità alle norme vigenti.
Pericolo materiale inammabile.
Questa unità è ermeticamente sigillata e contiene

►►►3. OPERAZIONI PRELIMINARI
►►3.1. RIMOZIONE DELL’IMBALLO E
ASSEMBLAGGIO
(FIG. 3)
Rimuovere l’imballo facendo attenzione a non
danneggiare l’unità. Smaltire i prodotti di imballo
     
centri di raccolta o di riciclaggio specializzati (atte-
nersi alle norme locali in vigore).
ATTENZIONE: Assemblare l’apparecchio,
con l’uscita dell’aria adeguata (uscita ad 1 o a 2
vie, a seconda del modello), maniglie, ruote, av-
volgi cavo e tutta la relativa bulloneria, prima della
messa in funzione.
NOTA-
cessario installare l’uscita dell’aria adeguata alle
proprie esigenze (a seconda del modello).
►►3.2. ISPEZIONE
Tutte le unità sono assemblate e cablate in
fabbrica (ad eccezione di alcuni componenti). Al
ricevimento dell’unità occorre ispezionarla subi-
    
riportato danni durante il trasporto o che non ci
siano parti mancanti.

siano presenti ammaccature sui pannelli metallici
      
inoltre che il cavo, la spina e i relativi isolamenti
siano integri. In caso contrario È VIETATO col-
legare e avviare l’unità, che deve essere inviata
presso un centro di assistenza autorizzato.
►►3.3. LIMITI DI FUNZIONAMENTO
ATTENZIONE: Per garantire un corretto
funzionamento dell’apparecchio, si raccoman-
da di far operare l’unità entro i limiti riportati
sulla tabella dati tecnici.
►►3.4. POSIZIONAMENTO
-

ATTENZIONE: Assicurarsi che l’apparecchio
sia posizionata in modo tale da evitare il contatto
con l’acqua.
►►3.5. AREA DI SERVIZIO
L’aria calda espulsa dal ventilatore, non deve tro-
vare ostacoli. Evitare fenomeni di ricircolo dell’aria
espulsa ed aspirata dall’apparecchio, pena il de-
cadimento delle prestazioni dell’unità o addirittura
l’interruzione del normale funzionamento.
ATTENZIONE: L’apparecchiatura non deve
essere posta in ambienti angusti, che non permet-

proveniente dagli ingressi e dalle uscite dedicate.
ATTENZIONE: Non appoggiare o appende-
re oggetti al pannello frontale, può causare danni
all’unità.
►►3.6. GENERALITÀ
ATTENZIONE: Prima di ogni intervento di ma-
nutenzione sulla parte elettrica, scollegare la spi-
na di alimentazione dalla presa.
     
alimentazione corrisponda ai dati di funzionamen-
to dell’unità (tensione e frequenza), riportati sulla
-
recchio è dotato di un cavo di alimentazione per il
corretto funzionamento.
ATTENZIONE: Il collegamento a terra è ob-
bligatorio.
en
it
de
es
fr
nl
pt
da
no
sv
pl
ru
cs
hu
sl
tr
hr
lt
lv
et
ro
sk
bg
uk
bs
el
zh
  • Page 1 1
  • Page 2 2
  • Page 3 3
  • Page 4 4
  • Page 5 5
  • Page 6 6
  • Page 7 7
  • Page 8 8
  • Page 9 9
  • Page 10 10
  • Page 11 11
  • Page 12 12
  • Page 13 13
  • Page 14 14
  • Page 15 15
  • Page 16 16
  • Page 17 17
  • Page 18 18
  • Page 19 19
  • Page 20 20
  • Page 21 21
  • Page 22 22
  • Page 23 23
  • Page 24 24
  • Page 25 25
  • Page 26 26
  • Page 27 27
  • Page 28 28
  • Page 29 29
  • Page 30 30
  • Page 31 31
  • Page 32 32
  • Page 33 33
  • Page 34 34
  • Page 35 35
  • Page 36 36
  • Page 37 37
  • Page 38 38
  • Page 39 39
  • Page 40 40
  • Page 41 41
  • Page 42 42
  • Page 43 43
  • Page 44 44
  • Page 45 45
  • Page 46 46
  • Page 47 47
  • Page 48 48
  • Page 49 49
  • Page 50 50
  • Page 51 51
  • Page 52 52
  • Page 53 53
  • Page 54 54
  • Page 55 55
  • Page 56 56
  • Page 57 57
  • Page 58 58
  • Page 59 59
  • Page 60 60

Dantherm AC 70 Instrukcja obsługi

Typ
Instrukcja obsługi
Ten podręcznik jest również odpowiedni dla