
LED CEILING LIGHT
LED-DECKENLEUCHTE
Montage-, Bedienungs- und Sicherheitshinweise
LED CEILING LIGHT
Assembly, operating and safety instructions
LAMPA SUFITOWA LED
Wskazówki montażu, obsługi i bezpieczeństwa
IAN 303302

GB Assembly, operating and safety instructions Page 5
PL Wskazówki montażu, obsługi i bezpieczeństwa Strona 11
DE / AT / CH Montage-, Bedienungs- und Sicherheitshinweise Seite 17
Before reading, unfold the page containing the illustrations and familiarise yourself with all functions of the
device.
Przed przeczytaniem proszę rozłożyć stronę z ilustracjami, a następnie proszę zapoznać się z wszystkimi
funkcjami urządzenia.
Klappen Sie vor dem Lesen die Seite mit den Abbildungen aus und machen Sie sich anschließend mit allen
Funktionen des Gerätes vertraut.

N
L
AC in
5
10
14115602L
1
4
2
3
6 7
9
8
N
L
AC in
1
3
5
4
6107
14115402L
9
8
2


5 GB
List of pictograms used ........................................................................................................ Page 6
Introduction ................................................................................................................................... Page 6
Intended use ........................................................................................................................................ Page 6
Scope of delivery ................................................................................................................................Page 6
Parts description ..................................................................................................................................Page 7
Technical data ..................................................................................................................................... Page 7
Safety .................................................................................................................................................Page 7
Safety notices ......................................................................................................................................Page 7
Preparation ...................................................................................................................................Page 8
Required tools and material ...............................................................................................................Page 8
Prior to installation .................................................................................................................Page 8
Start-up .............................................................................................................................................Page 8
Mounting the light ............................................................................................................................... Page 8
Maintenance and cleaning ............................................................................................... Page 9
Disposal ............................................................................................................................................Page 9
Warranty and service ...........................................................................................................Page 9
Warranty .............................................................................................................................................Page 9
Service address ................................................................................................................................... Page 9
Declaration of conformity ...................................................................................................................Page 10
Manufacturer .......................................................................................................................................Page 10
Table of contents

6 GB
Introduction
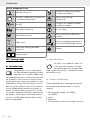
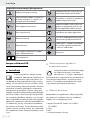
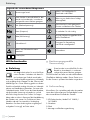
List of pictograms used
Read the instructions! Danger to life and risk of accident
for infants and children!
This light is suitable only for interior use,
in dry and enclosed spaces. Electric shock warning!
Danger to life!
Volt (AC) This light is not suitable for dimmer
or electronic switches.
Hertz (mains frequency) For your safety
Watt (effective power) Caution! Risk of burns due to hot
surfaces!
Safety class II
b
a
Dispose of packaging and device in
an environmentally-friendly manner!
Observe the warning and safety
instructions! Lifespan
ON OFF Switching cycles
LED Ceiling Light
Introduction
Congratulations on your new product.
You have selected a high quality product.
Please be sure to carefully read the com-
plete operating instructions. Fold out the page with
the illustrations. These instructions are part of the
product and contain important information on setup
and handling. Always follow all safety instructions.
Before using this product for the first time verify the
correct voltage and that all parts are properly in-
stalled. Should you have any questions or you are
unsure about operating the product, please contact
the dealer or service centre. Please keep these in-
structions in a safe place and pass them on third
parties as applicable.
Intended use
This light is only suitable for indoor use
in dry and enclosed spaces. The light
can be fastened to any normally inflam-
mable surface. This product is intended for private
household use only.
Scope of delivery
Check immediately after unpacking that the parts
are complete and that the product is in proper
condition.
1 LED ceiling light, Model 14115402L /
14115602L
2 Screws
2 Wall plugs
1 Set of assembly instructions and usage instructions

7 GB
Introduction / Safety
Parts description
1 Wall plugs
2 Mounting bracket
3 Locating screws (connection housing)
4 Screws (mounting bracket)
5 Connection housing
6 Junction box
7 Protective tube
8 Mains connection cable (external)
9 Terminal block
10 Lamp arms
Technical data
Item no.: 14115402L or 14115602L
Operating voltage: 230–240 V∼ 50 Hz
Rated lamp power: LED 24 W (14115402L)
LED 18 W (14115602L)
Protection class: II /
Safety
Safety notices
Damage due to failure to comply with these operat-
ing instructions will invalidate the guarantee! We
assume no liability for consequential damage! We
assume no liability for material damage or personal
injury due to improper handling or failure to comply
with the safety instructions!
RISK OF FAT
AL
INJURY AND ACCIDENT HAZ-
ARD FOR TODDLERS AND
SMALL CHILDREN!
Never leave children unsupervised with the
packaging materials. The packaging material
poses a suffocation hazard. Children frequently
underestimate the dangers. Please always keep
the product out of the reach of children.
This device may be used by children aged
8 years and up, as well as by persons with re-
duced physical, sensory or mental capacities,
or lacking experience and / or knowledge, so
long as they are supervised or instructed in
the safe use of the device and understand the
associated risks. Do not allow children to play
with the device. Cleaning and user maintenance
must not be performed by children without
supervision.
Avoid the risk of fatal injury
from electric shock
Ensure that a qualified electrician, or a person
trained to carry out electrical installations,
performs the electrical installation.
Always check the light, power supply, and
mains cable for damage before plugging it in.
Never use the light if it shows any signs of
damage.
A damaged mains cable indicates a life-threat-
ening danger due to electric shock. In the event
of damage, repairs or other problems with the
light please contact the service centre or a
qualified electrician.
Prior to installation, remove the fuse or switch
off the circuit breaker (0 setting) in the fuse box.
Prior to installation verify the mains voltage on
site corresponds with the operating voltage
required for the light (see “Technical data“).
Ensure that the light does not come into contact
with water or other liquids under any circum-
stances.
Never open any of the components of the elec-
trical equipment or insert any objects into the
same components. This will pose a risk of fatal
injury from electric shock.
Do not install the light on a wet or conductive
substrate!
Prevent fire and
injury hazards
RISK OF INJURY!
Check each lamp and lamp glass for damage
immediately after unpacking.
Do not mount the light with defective lamps
and / or lamp lenses. In this case contact the
service centre for a replacement.

8 GB
Safety / Preparation / Prior to installation / Start-up
Do not look directly into the light source (light
bulb, LED etc.).
Do not use optical instruments to look at the light.
The illuminant in this light is not replaceable; if
the illuminant has reached the end of its life,
replace the entire light.
This light is not suitable for dimmer
or electronic switches.
Safe working
Mount the light so that it is protected from
moisture and dirt.
Carefully prepare for assembly and allow your-
self adequate time. Organise all parts and any
necessary additional tools or materials before
starting so they are easy to reach.
Always be attentive! Always pay attention to
what you are doing and use common sense.
Never install the light if you are having difficulty
concentrating or do not feel well.
Preparation
Required tools and material
The tools and materials specified are not included.
This information and these values are non-binding
and are only provided as a reference.
The nature of the material is determined by the
individual local conditions.
- Pencil / making tool
- Voltage tester
- Screwdriver
- Electric drill
- Bit (ø approx. 0.8 cm)
- Side cutting pliers
- Ladder
Prior to installation
Important: The electrical connection must be
established by a qualified electrician or a person
trained to perform electrical installations. This per-
son must be familiar with the properties of the light
and the connection regulations.
Familiarise yourself with all the instructions and
diagrams in this manual, as well as with the light
itself, before you install it.
Before installation ensure that the circuit, to which
the light will be connected, is not energised. To
do so, remove the fuse or switch off the circuit
breaker in the fuse box (0 position).
Use the voltage tester to verify the de-energised
status.
Start-up
Mounting the light
Remove the screws 3 visible at the side of
the connection housing 5 and remove the
mounting angle 2 from the back.
Use the slotted holes in the mounting bracket 2
intended for the screws to mark the bores.
Now drill the fixing holes (approx. 8 mm,
depth approx. 40 mm). Be careful not to
damage the supply line.
Insert the dowels 1 into the bores.
Fasten the mounting bracket 2 with the
provided screws 4.
Open the junction box 6.
Feed the power cord (external) 8 through the
cable guides 7.
Now connect the connection cable of the light
to the mains connection cable (external) 8
using the terminal block 9.
Note: Be sure to correctly connect each of the
individual wires of the mains connection cable
(external): black or brown live wire = L symbol,
blue neutral wire = N symbol, protection class
II / . This light is specially insulated and must
not be connected to a protective conductor.
Ensure that the protective hose 7 is properly
attached to the terminal box 6.

9 GB
Start-up / Maintenance and cleaning / Disposal / Warranty and service
Close the junction box 6.
Now use the screws 3 to screw the light to
the mounting bracket 2.
Move the lamp arm 10 in the desired direction.
Maintenance and cleaning
RISK OF ELECTRIC SHOCK!
Disconnect the light from the mains circuit before
cleaning. To do so, remove the fuse or switch off
the circuit breaker in the fuse box (0 position).
RISK OF ELECTRIC SHOCK!
For electrical safety, never clean the light with
water or other liquids, or immerse it in water.
CAUTION! DANGER OF BURNS DUE
TO HOT SURFACES!
Allow the light to cool completely.
Do not use solvents, benzene or similar
substances. They could damage the light.
Only use a dry, lint-free cloth for cleaning.
Disposal
The packaging is made entirely of recyclable mate-
rials, which you may dispose of at local recycling
facilities.
b
a
Observe the marking of the packaging
materials for waste separation, which
are marked with abbreviations (a) and
numbers (b) with following meaning:
1–7: plastics / 20–22: paper and fibre-
board / 80–98: composite materials.
The product and packaging materials
are recyclable, dispose of it separately
for better waste treatment. The Triman
logo is valid in France only.
Contact your local refuse disposal
authority for more details of how to
dispose of your worn-out product.
To help protect the environment, please
dispose of the product properly when it
has reached the end of its useful life and
not in the household waste. Information
on collection points and their opening
hours can be obtained from your local
authority.
Warranty and service
Warranty
You receive a 36 month warranty on this product,
valid from the date of purchase. The appliance has
been carefully produced under strict quality control.
Within the warranty period we shall rectify without
charge all material and manufacturing defects. In th
e
event of a defect during the warranty period, please
send the appliance to the listed Service Centre
address, referencing the following item number:
14115402L / 14115602L.
Wear parts (such as bulbs) and damage caused by
improper handling, non-observance of the operating
instructions or unauthorised interference are excluded
from the warranty. The performance of services un-
der the warranty does not extend or renew the
warranty period.
Service address
Briloner Leuchten GmbH & Co. KG
Im Kissen 2
DE-59929 Brilon
GERMANY
Tel.: +49 (0) 29 61 / 97 12–800
Fax: +49 (0) 29 61 / 97 12–199
E-mail: [email protected]
www.briloner.de
IAN 303302
Please have your receipt and the article number
(e.g. IAN 12345) ready as your proof of purchase
when enquiring about your product.

10 GB
Spis zawartościWarranty and service
Declaration of conformity
This product fulfils the requirements of the applicable
European and national directives. Conformity has
been demonstrated. The relevant declarations and
documents are held by the manufacturer.
Manufacturer
Briloner Leuchten GmbH & Co. KG
Im Kissen 2
DE-59929 Brilon
GERMANY

11 PL
Spis zawartości
Legenda zastosowanych piktogramów ...........................................................Strona 12
Instrukcja ......................................................................................................................................Strona 12
Zastosowanie zgodne z przeznaczeniem .....................................................................................Strona 12
Zakres dostawy ................................................................................................................................Strona 12
Opis części ....................................................................................................................................... Strona 13
Dane techniczne ..............................................................................................................................Strona 13
Bezpieczeństwo ......................................................................................................................Strona 13
Wskazówki bezpieczeństwa...........................................................................................................Strona 13
Przygotowanie .......................................................................................................................Strona 14
Potrzebne narzędzia imateriały .....................................................................................................Strona 14
Przed instalacją ......................................................................................................................Strona 14
Uruchomienie............................................................................................................................Strona 14
Montaż lampy ..................................................................................................................................Strona 14
Konserwacja i czyszczenie............................................................................................Strona 15
Utylizacja .....................................................................................................................................Strona 15
Gwarancja i serwis ..............................................................................................................Strona 16
Gwarancja .......................................................................................................................................Strona 16
Adres serwisu ...................................................................................................................................Strona 16
Deklaracja zgodności ......................................................................................................................Strona 16
Producent ..........................................................................................................................................Strona 16
Warranty and service

12 PL
Instrukcja
Legenda zastosowanych piktogramów
Należy przeczytać instrukcję! Niebezpieczeństwo utraty życia lub
odniesienia obrażeń przez dzieci!
Niniejsza lampa nadaje się wyłącznie
do pracy wewnątrz, w suchych i za-
mkniętych pomieszczeniach.
Ostrzeżenie o możliwości porażenia
prądem! Zagrożenie życia!
Wolt (napięcie przemienne) Lampa nie nadaje się do użycia w po-
łączeniu z regulatorami jasności świa-
tła lub wyłącznikami elektronicznymi.
Herc (częstotliwość) Prawidłowy sposób postępowania
Wat (moc czynna) Ostrożnie! Niebezpieczeństwo popa-
rzenia przez gorące powierzchnie!
Klasa ochrony II
b
a
Opakowanie i urządzenie przekazać
do utylizacji zgodnie zprzepisami
oochronie środowiska!
Przestrzegać wskazówek ostrzegaw-
czych i bezpieczeństwa! Żywotność
ON OFF Cykle włączania
Lampa sufitowa LED
Instrukcja
Gratulujemy Państwu zakupu nowego
urządzenia. Zdecydowali się Państwo na
zakup produktu najwyższej jakości. Pro-
szę dokładnie przeczytać całą niniejszą instrukcję
obsługi. Proszę rozłożyć stronę z rysunkami. Niniej-
sza instrukcja obsługi należy do produktu. Zawiera
ona ważne wskazówki dotyczące uruchamiania i
posługiwania się produktem. Zawsze należy prze-
strzegać wszystkich wskazówek dotyczących bezpie-
czeństwa. Przed uruchomieniem proszę sprawdzić,
czy występuje prawidłowe napięcie, i czy wszystkie
części są prawidłowo zamontowane. W przypadku
zapytań lub niepewności odnośnie obchodzenia się
z urządzeniem, prosimy o kontakt ze sprzedawcą
lub punktem serwisowym. Proszę starannie przecho-
wywać niniejszą instrukcję obsługi, a w razie odda-
nia urządzenia osobom trzecim przekazać ją wraz
z nim.
Zastosowanie zgodne z
przeznaczeniem
Niniejsza oprawa oświetleniowa nadaje
się wyłącznie do pracy w obszarze
wewnętrznym, w suchych i zamkniętych
pomieszczeniach. Lampa może być mocowana na
wszystkich powierzchniach onormalnym stopniu
palności. To urządzenie przewidziano do użytku
w prywatnym gospodarstwie domowym.
Zakres dostawy
Bezpośrednio po wypakowaniu należy sprawdzić,
czy zestaw jest kompletny oraz czy urządzenie
znajduje się w nienagannym stanie.
1 lampa sufitowa LED, model 14115402L /
14115602L
2 śruby
2 kołki
1 instrukcja montażu i obsługi
Instrukcja / Bezpieczeństwo

13 PL
Instrukcja Instrukcja / Bezpieczeństwo
Opis części
1 Kołki
2 Kątownik montażowy
3 Śruby mocujące (obudowa połączeniowa)
4 Śruby (kątownik montażowy)
5 Obudowa połączeniowa
6 Skrzynka przyłączeniowa
7 Wężyk ochronny
8 Przewód zasilający (zewnętrzny)
9 Zacisk
10 Ramiona lampy
Dane techniczne
Nr artykułu: 14115402L lub
14115602L
Napięcie robocze: 230–240 V∼ 50 Hz
Moc znamionowa
lampy: LED 24 W (14115402L)
LED 18 W (14115602L)
Klasa ochrony: II /
Bezpieczeństwo
Wskazówki
bezpieczeństwa
W przypadku szkód spowodowanych nieprzestrze-
ganiem niniejszej instrukcji obsługi prawo do gwa-
rancji wygasa! Za szkody pośrednie producent nie
ponosi odpowiedzialności! W przypadku szkód ma-
terialnych lub osobowych, które powstały wskutek
niewłaściwego obchodzenia się z urządzeniem lub
nieprzestrzegania wskazówek dotyczących bezpie-
czeństwa, nie ponosimy żadnej odpowiedzialności!
ZAGROŻE-
NIE ŻYCIA I NIEBEZPIECZEŃ-
STWO WYPADKU U DZIECI!
W żadnym wypadku nie pozostawiać dzieci
bez nadzoru w pobliżu opakowania. Istnieje
niebezpieczeństwo uduszenia się materiałem
opakowaniowym. Dzieci często nie dostrzegają
niebezpieczeństwa. Dzieci nie powinny mieć
dostępu do produktu.
Niniejsze urządzenie może być używane przez
dzieci od lat 8 oraz przez osoby z obniżonymi
zdolnościami fizycznymi, sensorycznymi lub
mentalnymi lub brakiem doświadczenia i / lub
wiedzy, jeśli pozostają pod nadzorem lub zo-
stały pouczone w kwestii bezpiecznego użycia
urządzenia i rozumieją wynikające z niego za-
grożenia. Dzieci nie mogą bawić się urządzen
iem.
Czyszczenie i konserwacja nie mogą być prze-
prowadzane przez dzieci bez nadzoru.
Porażenie prądem
elektrycznym grozi śmiercią
Wykonanie instalacji elektrycznej należy zlecić
wykwalifikowanemu elektrykowi lub osobie
przeszkolonej w zakresie wykonywania instala-
cji elektrycznych.
Przed każdym podłączeniem do sieci elektrycz-
nej należy dokonać kontroli lampy oraz prze-
wodu sieciowego pod względem uszkodzeń.
Nigdy nie używać lampy w razie stwierdzenia
jakichkolwiek uszkodzeń.
Uszkodzone przewody sieciowe stwarzają nie-
bezpieczeństwo utraty życia wskutek porażenia
prądem elektrycznym. W razie uszkodzeń, na-
praw lub innych problemów z lampą należy zwró-
cić się do punktu serwisowego lub do elektryka.
Przed rozpoczęciem montażu wyjąć bezpiecz-
nik lub wyłączyć wyłącznik nadmiarowoprądowy
w skrzynce bezpiecznikowej (położenie 0).
Przed montażem należy upewnić się, że istnie-
jące napięcie sieci jest zgodne z wymaganym
napięciem roboczym oprawy oświetleniowej
(patrz „Dane techniczne“).
Bezwzględnie unikać kontaktu lampy z wodą
lub innymi cieczami.
Nigdy nie otwierać elementów elektrycznych i
nie wkładać do nich jakichkolwiek przedmiot
ów.
Tego rodzaju ingerencje oznaczają zagrożenie
życia wskutek porażenia prądem elektrycznym.
Lampy nie należy instalować na podłożu
wilgotnym lub przewodzącym prąd!

14 PL
Bezpieczeństwo / Przygotowanie / Przed instalacją / Uruchomienie
Jak uniknąć zagrożenia
pożarowego i obrażeń ciała
NIEBEZPIECZEŃSTWO OBRAŻEŃ CIAŁA!
Bezpośrednio po wypakowaniu należy skontro-
lować każde źródło światła i klosz pod wzglę-
dem uszkodzeń.
Proszę nie montować oprawy oświetleniowej z
uszkodzonymi źródłami światła i / lub kloszami.
W takim przypadku w celu otrzymania części
zamiennej należy skontaktować się z punktem
serwisowym.
Nie należy bezpośrednio wpatrywać się w
źródło światła (elementy świetlne, LED, itp).
Nie patrzeć w źródło światła przez instrumenty
optyczne.
Źródło światła tej lampy nie podlega wymianie;
jeśli źródło światła zakończy swoje działanie,
należy wymienić całą lampę.
Lampa nie nadaje się do użycia w
połączeniu z regulatorami jasności
światła lub wyłącznikami elektro-
nicznymi.
Prawidłowy sposób
postępowania
Lampę zamontować w taki sposób, aby była
zabezpieczona przed wilgocią, wiatrem i
zanieczyszczeniami.
Starannie przygotować montaż izarezerwować
sobie wystarczającą ilość czasu. Wszystkie po-
jedyncze części oraz dodatkowo potrzebne
narzędzia należy uprzednio rozłożyć w przej-
rzysty sposób i w zasięgu ręki.
Zachować ostrożność! Zawsze zwracać uwagę
na wykonywane czynności i kierować się roz-
sądkiem. Nie należy wykonywać montażu
lampy w przypadku braku koncentracji lub
złego samopoczucia.
Przygotowanie
Potrzebne narzędzia
imateriały
Wymienione narzędzia i materiały nie są częścią
zestawu. Są to jedynie niewiążące informacje i
wartości orientacyjne. Właściwości materiału za-
leżą od warunków w pomieszczeniu.
- ołόwek / narzędzie do oznaczania
- detektor napięcia
- śrubokręt
- wiertarka
- wiertło (ok. ø 8 mm)
- szczypce do cięcia drutu
- drabina
Przed instalacją
Ważne: Wykonanie podłączenia elektrycznego
należy zlecić wyszkolonemu elektrykowi lub osobie
wdrożonej do wykonywania instalacji elektrycznych.
Osoba ta musi posiadać wiedzę na temat właści-
wości lampy iprzepisów dotyczących podłączania.
Przed instalacją należy zapoznać się ze
wszystkimi instrukcjami i rysunkami zawartymi
w niniejszej instrukcji oraz z samą lampą.
Przed instalacją należy upewnić się, że prze-
wód, do którego ma być podłączona lampa,
nie znajduje się pod napięciem. Wtym celu
należy wyjąć bezpiecznik lub wyłączyć wy-
łącznik nadmiarowoprądowy wskrzynce bez-
piecznikowej (pozycja 0).
Brak napięcia należy stwierdzić za pomocą
wskaźnika napięcia.
Uruchomienie
Montaż lampy
Usunąć widoczne śruby 3 po bokach obu-
dowy połączeniowej 5 i zdjąć kątownik
montażowy 2 na odwrotnej stronie.
Uruchomienie / Konserwacja i czyszczenie / Utylizacja

15 PL
Bezpieczeństwo / Przygotowanie / Przed instalacją / Uruchomienie Uruchomienie / Konserwacja i czyszczenie / Utylizacja
Zaznaczyć otwory do wiercenia za pomocą
otworów wzdłużnych w kątowniku montażo-
wych 2 przeznaczonych na śruby.
Nawiercić otwory mocujące (ok. 8 mm, głębo-
kość ok. 40 mm). Uważać, aby nie uszkodzić
przewodu doprowadzającego.
Wprowadzić kołki 1 w otwory.
Zamocować kątownik montażowy 2 za
pomocą dołączonych śrub 4.
Otworzyć skrzynkę przyłączeniową lampy 6.
Przeprowadzić przewód zasilający (zewnętrzny)
8 przez wężyki ochronne 7.
Za pomocą zacisku 9 połączyć kabel instala-
c
yjny lampy zprzewodem zasilającym (zew
nętrz-
nym) 8.
Wskazówka: Należy zwracać uwagę, aby
prawidłowo podłączyć poszczególne przewody
kabla zasilającego (zewnętrznego): przewód
przewodzący prąd, czarny lub brązowy = sym-
bolL, przewód zerowy, niebieski = symbolN,
klasa ochrony II/ . Ta lampa jest specjalnie
izolowana i nie może być podłączona do
przewodu ochronnego.
Należy uważać na to, aby wężyk ochronny 7
był poprawnie włożony do skrzynki przyłącze-
niowej 6.
Zamknąć skrzynkę przyłączeniową 6.
Przykręcić lampę za pomocą śrub 3 do
kątownika montażowego 2.
Proszę wygiąć ramiona lampy 10 w wymaga-
nym kierunku.
Konserwacja i czyszczenie
NIEBEZPIECZEŃSTWO
PORAŻENIA PRĄDEM ELEKTRYCZNYM!
Przed rozpoczęciem czyszczenia lampę odłączyć
od sieci elektrycznej. Wtym celu należy wyjąć
bezpiecznik lub wyłączyć wyłącznik nadmiarowo-
prądowy wskrzynce bezpiecznikowej (pozycja 0).
NIEBEZPIECZEŃSTWO
PORAŻENIA PRĄDEM ELEKTRYCZNYM!
Ze względu na zachowanie bezpieczeństwa w za-
kresie elektryczności nie wolno czyścić lampy za
pomocą wody lub innych płynόw, ani też zanurzać
w wodzie.
OSTROŻNIE! NIEBEZPIECZEŃSTWO
POPARZENIA WSKUTEK GORĄCYCH
POWIERZCHNI!
Odczekać, aż lampa całkowicie ostygnie.
Nie używać rozpuszczalników, benzyny i
podobnych substancji. W przeciwnym razie
lampa może zostać uszkodzona.
Do czyszczenia należy używać wyłącznie
suchej, niestrzępiącej się szmatki.
Utylizacja
Opakowanie wykonane jest z materiałów przyjazny
ch
dla środowiska, które można przekazać do utyliza-
cji w lokalnym punkcie przetwarzania surowców
wtórnych.
b
a
Przy segregowaniu odpadów prosimy
zwrócić uwagę na oznakowanie mate-
riałów opakowaniowych, oznaczone
są one skrótami (a) i numerami (b) o na-
stępującym znaczeniu: 1-7: Tworzywa
sztuczne / 20-22: Papier i tektura /
80-98: Materiały kompozytowe.
Produkt i materiał opakowania nadają
się do ponownego przetworzenia, należy
je zutylizować osobno w celu lepszego
przetworzenia odpadów. Logo Triman
jest ważne tylko dla Francji.
Informacji na temat możliwości utylizacji
wyeksploatowanego produktu udziela
urząd gminy lub miasta.
Z uwagi na ochronę środowiska nie
wyrzucać urządzenia po zakończeniu
eksploatacji do odpadów domowych,
lecz prawidłowo zutylizować. Informacji
o punktach zbiorczych i ich godzinach
otwarcia udziela odpowiedni urząd.

16 PL
Gwarancja i serwis
Gwarancja i serwis
Gwarancja
W momencie zakupu otrzymują Państwo na to
urządzenie 36 miesięcy gwarancji. Urządzenie
wyprodukowano starannie i poddano dokładnej
kontroli jakości. Wokresie gwarancji usuwamy
bezpłatnie wszystkie wady materiałowe ifabryczne.
Jeśli mimo to w okresie gwarancji pojawią się usterki,
urządzenie należy przesłać na podany adres serwi-
sowy, podając następujący numer artykułu:
14115402L / 14115602L.
Gwarancji nie podlegają uszkodzenia spowodow
ane
przez nieprawidłowe użytkowanie, nieprzestrzega-
nie instrukcji obsługi lub ingerencję nieautoryzowa-
nych osób, a także części szybkozużywające się
(jak np. elementy świetlne). Usługa gwarancyjna
nie przedłuża ani nie odnawia okresu gwarancji.
Adres serwisu
Briloner Leuchten GmbH & Co. KG
Im Kissen 2
DE-59929 Brilon
NIEMCY
Tel.: +49 (0) 29 61 / 97 12–800
Faks: +49 (0) 29 61 / 97 12–199
E-mail: [email protected]
www.briloner.de
IAN 303302
Przed skontaktowaniem się z działem serwisowym
należy przygotować paragon i numer artykułu
(np. IAN 12345) jako dowód zakupu.
Deklaracja zgodności
Niniejszy produkt spełnia wymagania obowiązują-
cych dyrektyw europejskich i krajowych. Zgodność
została wykazana. Odpowiednie objaśnienia i
podkładki dokumentacyjne są zdeponowane u
producenta.
Producent
Briloner Leuchten GmbH & Co. KG
Im Kissen 2
DE-59929 Brilon
NIEMCY
Inhaltsverzeichnis

17 DE/AT/CH
Gwarancja i serwis Inhaltsverzeichnis
Legende der verwendeten Piktogramme ........................................................... Seite 18
Einleitung ......................................................................................................................................... Seite 18
Bestimmungsgemäße Verwendung ....................................................................................................Seite 18
Lieferumfang ........................................................................................................................................ Seite 18
Teilebeschreibung ...............................................................................................................................Seite 19
Technische Daten ................................................................................................................................Seite 19
Sicherheit ......................................................................................................................................... Seite 19
Sicherheitshinweise .............................................................................................................................Seite 19
Vorbereitung ................................................................................................................................Seite 20
Benötigtes Werkzeug und Material ...................................................................................................Seite 20
Vor der Installation .................................................................................................................Seite 20
Inbetriebnahme ......................................................................................................................... Seite 20
Leuchte montieren ...............................................................................................................................Seite 20
Wartung und Reinigung .....................................................................................................Seite 21
Entsorgung .....................................................................................................................................Seite 21
Garantie und Service ............................................................................................................Seite 21
Garantie ..............................................................................................................................................Seite 21
Serviceadresse ....................................................................................................................................Seite 22
Konformitätserklärung .........................................................................................................................Seite 22
Hersteller ..............................................................................................................................................Seite 22

18 DE/AT/CH
Einleitung / SicherheitEinleitung
Legende der verwendeten Piktogramme
Anweisungen lesen! Lebens- und Unfallgefahr für
Kleinkinder und Kinder!
Diese Leuchte ist ausschließlich für den
Betrieb im Innenbereich, in trockenen
und geschlossenen Räumen geeignet.
Warnung vor elektrischem Schlag!
Lebensgefahr!
Volt (Wechselspannung) Diese Leuchte ist nicht geeignet für
Dimmer und elektronische Schalter.
Hertz (Frequenz) So verhalten Sie sich richtig
Watt (Wirkleistung) Vorsicht! Verbrennungsgefahr durch
heiße Oberflächen!
Schutzklasse II
b
a
Entsorgen Sie Verpackung
und Gerät umweltgerecht!
Warn- und Sicherheitshinweise
beachten! Lebensdauer
ON OFF Schaltzyklen
LED-Deckenleuchte
Einleitung
Wir beglückwünschen Sie zum Kauf Ihres
neuen Gerätes. Sie haben sich damit für
ein hochwertiges Produkt entschieden.
Bitte lesen Sie diese Bedienungsanleitung vollständig
und sorgfältig durch. Klappen Sie die Seite mit den
Abbildungen aus. Diese Anleitung gehört zu diesem
Produkt und enthält wichtige Hinweise zur Inbetrieb-
nahme und Handhabung. Beachten Sie immer alle
Sicherheitshinweise. Prüfen Sie vor der Inbetriebnahme,
ob die korrekte Spannung vorhanden ist und ob
alle Teile richtig montiert sind. Sollten Sie Fragen
haben oder unsicher in Bezug auf die Handhabung
des Gerätes sein, setzen Sie sich bitte mit Ihrem
Händler oder der Servicestelle in Verbindung.
Bewahren Sie diese Anleitung bitte sorgfältig auf
und geben Sie sie ggf. an Dritte weiter.
Bestimmungsgemäße
Verwendung
Diese Leuchte ist ausschließlich für den
Betrieb im Innenbereich, in trockenen
und geschlossenen Räumen geeignet.
Die Leuchte kann auf allen normal entflammbaren
Oberflächen befestigt werden. Dieses Gerät ist nur
für den Einsatz in privaten Haushalten vorgesehen.
Lieferumfang
Kontrollieren Sie unmittelbar nach dem Auspacken
immer den Lieferumfang auf Vollständigkeit sowie
den einwandfreien Zustand des Gerätes.
1 LED-Deckenleuchte, Modell 14115402L /
14115602L
2 Schrauben
2 Dübel
1 Montage- und Bedienungsanleitung

19 DE/AT/CH
Einleitung / Sicherheit
Teilebeschreibung
1 Dübel
2 Montagewinkel
3 Fixierschrauben (Anschlussgehäuse)
4 Schrauben (Montagewinkel)
5 Anschlussgehäuse
6 Anschlusskasten
7 Schutzschlauch
8 Netzanschlusskabel (extern)
9 Lüsterklemme
10 Lampenarme
Technische Daten
Artikelnr.: 14115402L bzw. 14115602L
Betriebsspannung: 230–240 V∼ 50 Hz
Nennleistung
Leuchte: LED 24 W (14115402)
LED 18 W (14115602L)
Schutzklasse: II /
Sicherheit
Sicherheitshinweise
Bei Schäden, die durch Nichtbeachtung dieser
Bedienungsanleitung verursacht werden, erlischt der
Garantieanspruch! Für Folgeschäden wird keine
Haftung übernommen! Bei Sach- oder Personen-
schäden, die durch unsachgemäße Handhabung
oder Nichtbeachtung der Sicherheitshinweise verur-
sacht werden, wird keine Haftung übernommen!
LEBENS-
UND UNFALLGEFAHR FÜR
KLEINKINDER UND KINDER!
Lassen Sie Kinder niemals unbeaufsichtigt
mit dem Verpackungsmaterial. Es besteht
Erstickungsgefahr durch Verpackungsmaterial.
Kinder unterschätzen häufig die Gefahren.
Halten Sie Kinder stets vom Produkt fern.
Dieses Gerät kann von Kindern ab 8 Jahren
und darüber, sowie von Personen mit verringer-
ten physischen, sensorischen oder mentalen
Fähigkeiten oder Mangel an Erfahrung und
Wissen benutzt werden, wenn sie beaufsichtigt
oder bezüglich des sicheren Gebrauchs des
Gerätes unterwiesen wurden und die daraus
resultierenden Gefahren verstehen. Kinder dür-
fen nicht mit dem Gerät spielen. Reinigung und
Benutzerwartung dürfen nicht von Kindern ohne
Beaufsichtigung durchgeführt werden.
Vermeiden Sie Lebensgefahr
durch elektrischen Schlag
Lassen Sie die Elektroinstallation durch einen
ausgebildeten Elektriker oder eine für Elektro-
installationen eingewiesene Person durchführen.
Überprüfen Sie vor jedem Netzanschluss die
Leuchte und das Netzanschlusskabel auf etwaige
Beschädigungen. Benutzen Sie Ihre Leuchte
niemals, wenn Sie irgendwelche Beschädigungen
feststellen.
Beschädigte Netzkabel bedeuten Lebensgefahr
durch elektrischen Schlag. Wenden Sie sich bei
Beschädigungen, Reparaturen oder anderen
Problemen an der Leuchte an die Servicestelle
oder eine Elektrofachkraft.
Entfernen Sie vor der Montage die Sicherung
oder schalten Sie den Leitungsschutzschalter im
Sicherungskasten aus (0-Stellung).
Vergewissern Sie sich vor der Montage, dass
die vorhandene Netzspannung mit der benötigten
Betriebsspannung der Leuchte übereinstimmt
(siehe „Technische Daten“).
Vermeiden Sie unbedingt die Berührung der
Leuchte mit Wasser oder anderen Flüssigkeiten.
Öffnen Sie niemals eines der elektrischen Betriebs-
mittel oder stecken irgendwelche Gegenstände
in dieselben. Derartige Eingriffe bedeuten Lebens-
gefahr durch elektrischen Schlag.
Die Leuchte nicht auf feuchtem oder leitendem
Untergrund installieren!
Einleitung

20 DE/AT/CH
Inbetriebnahme / Wartung und Reinigung / Entsorgung / Garantie und ServiceSicherheit / Vorbereitung / Vor der Installation / Inbetriebnahme
Vermeiden Sie Brand-
und Verletzungsgefahr
VERLETZUNGSGEFAHR!
Überprüfen Sie unmittelbar nach dem Auspac
ken
jedes Leuchtmittel und Lampenglas auf Beschä-
digungen.
Montieren Sie die Leuchte nicht mit defekten
Leuchtmitteln und / oder Lampenglas. Setzen
Sie sich in diesem Fall für Ersatz mit der Service-
stelle in Verbindung.
Nicht direkt in die Lichtquelle (Leuchtmittel, LED
etc.) hineinschauen.
Nicht mit optischen Instrumenten in die Licht-
quelle schauen.
Die Lichtquelle dieser Leuchte ist nicht ersetz-
bar; wenn die Lichtquelle ihr Lebensdauerende
erreicht hat, ist die gesamte Leuchte zu ersetzen.
Diese Leuchte ist nicht geeignet für
Dimmer und elektronische Schalter.
So verhalten Sie sich richtig
Montieren Sie die Leuchte so, dass sie vor
Feuchtigkeit und Verschmutzung geschützt ist.
Bereiten Sie die Montage sorgfältig vor und
nehmen Sie sich ausreichend Zeit. Legen Sie
alle Einzelteile und zusätzlich benötigtes Werk-
zeug oder Material vorher übersichtlich und
griffbereit zurecht.
Seien Sie stets aufmerksam! Achten Sie immer
darauf was Sie tun und gehen Sie stets mit Ver-
nunft vor. Montieren Sie die Leuchte in keinem
Fall, wenn Sie unkonzentriert sind oder sich
unwohl fühlen.
Vorbereitung
Benötigtes Werkzeug
und Material
Die genannten Werkzeuge und Materialien sind
nicht im Lieferumfang enthalten. Es handelt sich
hierbei um unverbindliche Angaben und Werte zur
Orientierung. Die Beschaffenheit des Materials
richtet sich nach den individuellen Gegebenheiten
vor Ort.
- Bleistift / Markierwerkzeug
- Spannungsprüfer
- Schraubendreher
- Bohrmaschine
- Bohrer (ca. ø 8 mm)
- Seitenschneider
- Leiter
Vor der Installation
Wichtig: Der elektrische Anschluss muss durch
einen ausgebildeten Elektriker oder eine für Elektro-
installationen eingewiesene Person erfolgen. Diese
muss Kenntnis über die Eigenschaften der Leuchte
und Anschlussbestimmungen haben.
Machen Sie sich vor der Installation mit allen
Anweisungen und Abbildungen in dieser Anlei-
tung sowie mit der Leuchte selbst vertraut.
Stellen Sie vor der Installation sicher, dass an
der Leitung, an der die Leuchte angeschlossen
werden soll, keine Spannung vorliegt. Entfernen
Sie hierfür die Sicherung oder schalten Sie den
Leitungsschutzschalter im Sicherungskasten aus
(0-Stellung).
Überprüfen Sie die Spannungsfreiheit mittels
Spannungsprüfer.
Inbetriebnahme
Leuchte montieren
Entfernen Sie die seitlich am Anschlussgehäuse
5 sichtbaren Schrauben 3 und nehmen Sie
den Montagewinkel 2 auf der Rückseite ab.
Markieren Sie die Bohrlöcher mit Hilfe der im
Montagewinkel 2 für die Schrauben vorgese-
henen Langlöcher.
B
ohren Sie nun die Befestigungslöcher (ca. 8 m
m,
Tiefe ca. 40 mm). Stellen Sie sicher, dass Sie die
Zuleitung nicht beschädigen.
Strona się ładuje...
Strona się ładuje...
Strona się ładuje...
-
 1
1
-
 2
2
-
 3
3
-
 4
4
-
 5
5
-
 6
6
-
 7
7
-
 8
8
-
 9
9
-
 10
10
-
 11
11
-
 12
12
-
 13
13
-
 14
14
-
 15
15
-
 16
16
-
 17
17
-
 18
18
-
 19
19
-
 20
20
-
 21
21
-
 22
22
-
 23
23


w innych językach
- Deutsch: LIVARNO 303302 Bedienungsanleitung
- English: LIVARNO 303302 Owner's manual
Powiązane artykuły
-
LIVARNO 279114 Instrukcja obsługi
-
-
-
-
-
-
-
-
-