
LED-DECKENLEUCHTE
/ LED CEILING LIGHT /
PLAFONNIER À LED
IAN 316904
LED-DECKENLEUCHTE
Montage-, Bedienungs- und Sicherheitshinweise
LED CEILING LIGHT
Assembly, operating and safety instructions
PLAFONNIER À LED
Instructions de montage, d‘utilisation et consignes de sécurité
LED-PLAFONDLAMP
Montage-, bedienings- en veiligheidsinstructies
STROPNÍ LED SVÍTIDLO
Pokyny k montáži, obsluze a bezpečnostní pokyny
LAMPA SUFITOWA LED
Wskazówki montażu, obsługi i bezpieczeństwa
STROPNÁ LED LAMPA
Pokyny pre montáž, obsluhu a bezpečnostné pokyny

DE / AT / CH Montage-, Bedienungs- und Sicherheitshinweise Seite 5
GB / IE Assembly, operating and safety instructions Page 11
FR / BE Instructions de montage, d‘utilisation et consignes de sécurité Page 17
NL / BE Montage-, bedienings- en veiligheidsinstructies Pagina 23
PL Wskazówki montażu, obsługi i bezpieczeństwa Strona 29
CZ Pokyny k montáži, obsluze a bezpečnostní pokyny Strana 35
SK Pokyny pre montáž, obsluhu a bezpečnostné pokyny Strana 41
Klappen Sie vor dem Lesen die Seite mit den Abbildungen aus und machen Sie sich anschließend mit allen
Funktionen des Gerätes vertraut.
Before reading, unfold the page containing the illustrations and familiarise yourself with all functions of the
device.
Avant de lire le mode d‘emploi, ouvrez la page contenant les illustrations et familiarisez-vous ensuite avec
toutes les fonctions de l‘appareil.
Vouw vóór het lezen de pagina met de afbeeldingen open en maak u vertrouwd met alle functies van het
apparaat.
Przed przeczytaniem proszę rozłożyć stronę z ilustracjami, a następnie proszę zapoznać się z wszystkimi
funkcjami urządzenia.
Před čtením si otevřete stranu s obrázky a potom se seznamte se všemi funkcemi přístroje.
Pred čítaním si odklopte stranu s obrázkami a potom sa oboznámte so všetkými funkciami prístroja.

LL
NN
LL
NN
14137606L / 14137604L
14137706L / 14137704L
1
2
3
4
5
678
1
2
3
4
5
678


5 DE/AT/CH
Inhaltsverzeichnis
Legende der verwendeten Piktogramme ........................................................... Seite 6
Einleitung ......................................................................................................................................... Seite 6
Bestimmungsgemäße Verwendung ....................................................................................................Seite 6
Lieferumfang ........................................................................................................................................ Seite 6
Teilebeschreibung ...............................................................................................................................Seite 7
Technische Daten ................................................................................................................................Seite 7
Sicherheit ......................................................................................................................................... Seite 7
Sicherheitshinweise .............................................................................................................................Seite 7
Vorbereitung ................................................................................................................................Seite 8
Benötigtes Werkzeug und Material ...................................................................................................Seite 8
Vor der Installation .................................................................................................................Seite 8
Inbetriebnahme ......................................................................................................................... Seite 8
Leuchte montieren ...............................................................................................................................Seite 8
Wartung und Reinigung .....................................................................................................Seite 9
Entsorgung .....................................................................................................................................Seite 9
Garantie und Service ............................................................................................................Seite 9
Garantie ..............................................................................................................................................Seite 9
Serviceadresse ....................................................................................................................................Seite 10
Konformitätserklärung .........................................................................................................................Seite 10
Hersteller ..............................................................................................................................................Seite 10

6 DE/AT/CH
Einleitung / SicherheitEinleitung
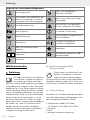
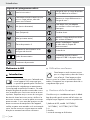
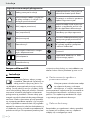
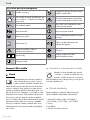
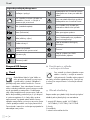
Legende der verwendeten Piktogramme
Anweisungen lesen! Lebens- und Unfallgefahr für
Kleinkinder und Kinder!
Diese Leuchte ist ausschließlich für den
Betrieb im Innenbereich, in trockenen
und geschlossenen Räumen geeignet.
Warnung vor elektrischem Schlag!
Lebensgefahr!
Volt (Wechselspannung) Diese Leuchte ist nicht geeignet für
Dimmer und elektronische Schalter.
Hertz (Frequenz) So verhalten Sie sich richtig
Watt (Wirkleistung) Vorsicht! Verbrennungsgefahr durch
heiße Oberflächen!
Schutzklasse II b
a
Entsorgen Sie Verpackung
und Gerät umweltgerecht!
Warn- und Sicherheitshinweise
beachten! Lebensdauer
ON OFF Schaltzyklen Die Verpackung besteht aus 100 %
recyceltem Papier.
Schutzleiter
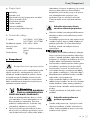
LED-Deckenleuchte
Einleitung
Wir beglückwünschen Sie zum Kauf Ihres
neuen Gerätes. Sie haben sich damit für
ein hochwertiges Produkt entschieden.
Bitte lesen Sie diese Bedienungsanleitung vollständig
und sorgfältig durch. Klappen Sie die Seite mit den
Abbildungen aus. Diese Anleitung gehört zu diesem
Produkt und enthält wichtige Hinweise zur Inbetrieb-
nahme und Handhabung. Beachten Sie immer alle
Sicherheitshinweise. Prüfen Sie vor der Inbetriebnahme,
ob die korrekte Spannung vorhanden ist und ob
alle Teile richtig montiert sind. Sollten Sie Fragen
haben oder unsicher in Bezug auf die Handhabung
des Gerätes sein, setzen Sie sich bitte mit Ihrem
Händler oder der Servicestelle in Verbindung.
Bewahren Sie diese Anleitung bitte sorgfältig auf
und geben Sie sie ggf. an Dritte weiter.
Bestimmungsgemäße
Verwendung
Diese Leuchte ist ausschließlich für den
Betrieb im Innenbereich, in trockenen
und geschlossenen Räumen geeignet.
Die Leuchte kann auf allen normal entflammbaren
Oberflächen befestigt werden. Dieses Gerät ist nur
für den Einsatz in privaten Haushalten vorgesehen.
Lieferumfang
Kontrollieren Sie unmittelbar nach dem Auspacken
immer den Lieferumfang auf Vollständigkeit sowie
den einwandfreien Zustand des Gerätes.
1 Deckenleuchte, Modell 14137606L /
14137604L / 14137706L / 14137704L
2 Schrauben
2 Dübel
1 Montage- und Bedienungsanleitung

7 DE/AT/CH
Einleitung / Sicherheit
Teilebeschreibung
1 Dübel
2 Montagewinkel
3 Fixierschrauben (Anschlussgehäuse)
4 Schrauben (Montagewinkel)
5 Anschlussgehäuse
6 Lüsterklemme
7 Schutzschlauch
8 Netzanschlusskabel (extern)
Technische Daten
Artikelnr.: 14137606L / 14137604L /
14137706L / 14137704L
Betriebsspannung: 230‒240 V∼ 50 Hz
Nennleistung
Leuchte: LED 11,5 W nicht austauschbar
Schutzklasse: II /
Sicherheit
Sicherheitshinweise
Bei Schäden, die durch Nichtbeachtung dieser
Bedienungsanleitung verursacht werden, erlischt der
Garantieanspruch! Für Folgeschäden wird keine
Haftung übernommen! Bei Sach- oder Personen-
schäden, die durch unsachgemäße Handhabung
oder Nichtbeachtung der Sicherheitshinweise verur-
sacht werden, wird keine Haftung übernommen!
LEBENS-
UND UNFALLGEFAHR FÜR
KLEINKINDER UND KINDER!
Lassen Sie Kinder niemals unbeaufsichtigt
mit dem Verpackungsmaterial. Es besteht
Erstickungsgefahr durch Verpackungsmaterial.
Kinder unterschätzen häufig die Gefahren.
Halten Sie Kinder stets vom Produkt fern.
Dieses Gerät kann von Kindern ab 8 Jahren
und darüber, sowie von Personen mit verringer-
ten physischen, sensorischen oder mentalen
Fähigkeiten oder Mangel an Erfahrung und
Wissen benutzt werden, wenn sie beaufsichtigt
oder bezüglich des sicheren Gebrauchs des
Gerätes unterwiesen wurden und die daraus
resultierenden Gefahren verstehen. Kinder dür-
fen nicht mit dem Gerät spielen. Reinigung und
Benutzerwartung dürfen nicht von Kindern ohne
Beaufsichtigung durchgeführt werden.
Vermeiden Sie Lebensgefahr
durch elektrischen Schlag
Lassen Sie die Elektroinstallation durch einen
ausgebildeten Elektriker oder eine für Elektro-
installationen eingewiesene Person durchführen.
Überprüfen Sie vor jedem Netzanschluss die
Leuchte und das Netzanschlusskabel auf etwaige
Beschädigungen. Benutzen Sie Ihre Leuchte
niemals, wenn Sie irgendwelche Beschädigungen
feststellen.
Beschädigte Netzkabel bedeuten Lebensgefahr
durch elektrischen Schlag. Wenden Sie sich bei
Beschädigungen, Reparaturen oder anderen
Problemen an der Leuchte an die Servicestelle
oder eine Elektrofachkraft.
Entfernen Sie vor der Montage die Sicherung
oder schalten Sie den Leitungsschutzschalter im
Sicherungskasten aus (0-Stellung).
Vergewissern Sie sich vor der Montage, dass
die vorhandene Netzspannung mit der benötigten
Betriebsspannung der Leuchte übereinstimmt
(siehe „Technische Daten“).
Vermeiden Sie unbedingt die Berührung der
Leuchte mit Wasser oder anderen Flüssigkeiten.
Öffnen Sie niemals eines der elektrischen Betriebs-
mittel oder stecken irgendwelche Gegenstände
in dieselben. Derartige Eingriffe bedeuten Lebens-
gefahr durch elektrischen Schlag.
Die Leuchte nicht auf feuchtem oder leitendem
Untergrund installieren!
Einleitung

8 DE/AT/CH
Inbetriebnahme / Wartung und Reinigung / Entsorgung / Garantie und ServiceSicherheit / Vorbereitung / Vor der Installation / Inbetriebnahme
Vermeiden Sie Brand-
und Verletzungsgefahr
Montieren Sie die Leuchte nicht mit defekten
Leuchtmitteln und / oder Lampenglas. Setzen
Sie sich in diesem Fall für Ersatz mit der Service-
stelle in Verbindung.
Nicht direkt in die Lichtquelle (Leuchtmittel, LED
etc.) hineinschauen.
Nicht mit optischen Instrumenten in die Licht-
quelle schauen.
Die Lichtquelle dieser Leuchte ist nicht ersetzbar;
wenn die Lichtquelle das Ende ihrer Lebensdauer
erreicht hat, ist die gesamte Leuchte zu ersetzen.
Diese Leuchte ist nicht geeignet für
Dimmer und elektronische Schalter.
So verhalten Sie sich richtig
Montieren Sie die Leuchte so, dass sie vor
Feuchtigkeit und Verschmutzung geschützt ist.
Bereiten Sie die Montage sorgfältig vor und
nehmen Sie sich ausreichend Zeit. Legen Sie
alle Einzelteile und zusätzlich benötigtes Werk-
zeug oder Material vorher übersichtlich und
griffbereit zurecht.
Seien Sie stets aufmerksam! Achten Sie immer
darauf, was Sie tun und gehen Sie stets mit Ver-
nunft vor. Montieren Sie die Leuchte in keinem
Fall, wenn Sie unkonzentriert sind oder sich
unwohl fühlen.
Vorbereitung
Benötigtes Werkzeug
und Material
Die genannten Werkzeuge und Materialien sind
nicht im Lieferumfang enthalten. Es handelt sich
hierbei um unverbindliche Angaben und Werte zur
Orientierung. Die Beschaffenheit des Materials
richtet sich nach den individuellen Gegebenheiten
vor Ort.
- Bleistift / Markierwerkzeug
- Spannungsprüfer
- Schraubendreher
- Bohrmaschine
- Bohrer (ca. ø 8 mm)
- Seitenschneider
- Leiter
Vor der Installation
Wichtig: Der elektrische Anschluss muss durch
einen ausgebildeten Elektriker oder eine für Elekt-
roinstallationen eingewiesene Person erfolgen.
Diese muss Kenntnis über die Eigenschaften der
Leuchte und Anschlussbestimmungen haben.
Machen Sie sich vor der Installation mit allen
Anweisungen und Abbildungen in dieser Anlei-
tung sowie mit der Leuchte selbst vertraut.
Stellen Sie vor der Installation sicher, dass an
der Leitung, an der die Leuchte angeschlossen
werden soll, keine Spannung vorliegt. Entfernen
Sie hierfür die Sicherung oder schalten Sie den
Leitungsschutzschalter im Sicherungskasten aus
(0-Stellung).
Überprüfen Sie die Spannungsfreiheit mittels
Spannungsprüfer.
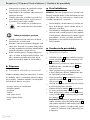
Inbetriebnahme
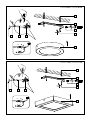
Leuchte montieren
Entfernen Sie die seitlich am Anschlussgehäuse
5 sichtbaren Schrauben 3 und nehmen Sie
den Montagewinkel 2 auf der Rückseite ab.
Markieren Sie die Bohrlöcher mit Hilfe der im
Montagewinkel 2 für die Schrauben vorgese-
henen Langlöcher.
Bohren Sie nun die Befestigungslöcher (ca.
ø 8 mm, Tiefe ca. 40 mm). Stellen Sie sicher,
dass Sie die Zuleitung nicht beschädigen.
Führen Sie die Dübel 1 in die Bohrlöcher ein.
Befestigen Sie den Montagewinkel 2 mit den
mitgelieferten Schrauben 4.

9 DE/AT/CH
Inbetriebnahme / Wartung und Reinigung / Entsorgung / Garantie und Service
Lösen Sie die Schrauben gegen den Uhrzeiger-
sinn und öffnen Sie den Anschlusskasten.
Entnehmen Sie den Schutzschlauch 7 und
führen Sie das Netzanschlusskabel (extern) 8
hindurch.
Verbinden Sie nun das Anschlusskabel der
Leuchte mittels Lüsterklemme 6 mit dem Net-
zanschlusskabel (extern) 8.
Hinweis: Achten Sie darauf, dass Sie die ein-
zelnen Leiter des Netzanschlusskabels (extern)
8 jeweils richtig anschließen: stromführender
Leiter, schwarz oder braun = Symbol L, Neut-
ralleiter, blau = Symbol N. Der Schutzleiter
(grün- gelb) wird nicht angeschlossen.
Schutzklasse II. Diese Leuchte ist besonders iso-
liert und darf nicht an einen Schutzleiter ange-
schlossen werden.
Setzen Sie den Schutzschlauch 7 wieder in
den Anschlusskasten ein.
Schließen Sie den Anschlusskasten und drehen
Sie die Schrauben im Uhrzeigersinn fest.
Verschrauben Sie nun die Leuchte mittels der
Schrauben 3 mit dem Montagewinkel 2.
Setzen Sie die Sicherung wieder ein oder
schalten Sie den Leitungsschutzschalter am
Sicherungskasten ein (I-Stellung).
Ihre Leuchte ist nun betriebsbereit.
Wartung und Reinigung
STROMSCHLAGGEFAHR!
Trennen Sie zur Reinigung die Leuchte zuerst vom
Stromnetz. Entfernen Sie hierfür die Sicherung oder
schalten Sie den Leitungsschutzschalter im Sicherungs-
kasten aus (0-Stellung).
STROMSCHLAGGEFAHR!
Aus Gründen der elektrischen Sicherheit darf die
Leuchte niemals mit Wasser oder anderen Flüssig-
keiten gereinigt oder gar in Wasser getaucht werden.
VORSICHT! VERBRENNUNGSGEFAHR
DURCH HEISSE OBERFLÄCHEN!
Lassen Sie die Leuchte vollständig abkühlen.
Benutzen Sie keine Lösungsmittel, Benzin o. ä.
Die Leuchte würde hierbei Schaden nehmen.
Verwenden Sie zur Reinigung nur ein trockenes,
fusselfreies Tuch.
Setzen Sie die Sicherung wieder ein oder
schalten Sie den Leitungsschutzschalter am
Sicherungskasten ein (I-Stellung).
Entsorgung
Die Verpackung besteht aus umweltfreundlichen
Materialien, die Sie über die örtlichen Recy-
clingstellen entsorgen können.
b
a
Beachten Sie die Kennzeichnung der
Verpackungsmaterialien bei der Abfallt-
rennung, diese sind gekennzeichnet mit
Abkürzungen (a) und Nummern (b) mit
folgender Bedeutung: 1–7: Kunststoffe /
20–22: Papier und Pappe / 80–98:
Verbundstoffe.
Werfen Sie Ihr Produkt, wenn es ausge-
dient hat, im Interesse des Umweltschut
zes
nicht in den Hausmüll, sondern führen
Sie es einer fachgerechten Entsorgung
zu. Über Sammelstellen und deren Öff-
nungszeiten können Sie sich bei Ihrer
zuständigen Verwaltung informieren.
Garantie und Service
Garantie
Sie erhalten zum Zeitpunkt des Kaufs auf dieses Gerät
36 Monate Garantie. Das Gerät wurde sorgfältig
produziert und einer genauen Qualitätskontrolle
unterzogen. Innerhalb der Garantiezeit beheben wir
kostenlos alle Material- oder Herstellerfehler. Sollten
sich dennoch während der Garantiezeit Mängel
herausstellen, senden Sie das Gerät bitte an die
aufgeführte Service-Adresse unter Angabe folgender
Artikel-Nummer: 14137606L / 14137604L /
14137706L / 14137704L.
Von der Garantie ausgeschlossen sind Schäden
durch nicht sachgemäße Handhabung, Nichtbe-
achtung der Bedienungsanleitung oder Eingriff durch
Sicherheit / Vorbereitung / Vor der Installation / Inbetriebnahme

10 DE/AT/CH
Garantie und Service
nicht autorisierte Personen sowie Verschleißteile (wie
z. B. Leuchtmittel). Durch die Garantieleistung wird
die Garantiezeit weder verlängert noch erneuert.
Serviceadresse
Briloner Leuchten GmbH & Co. KG
Im Kissen 2
DE-59929 Brilon
DEUTSCHLAND
Tel.: +49 (0) 29 61 / 97 12–800
Fax: +49 (0) 29 61 / 97 12–199
E-Mail: [email protected]
www.briloner.de
IAN 316904
Bitte halten Sie für alle Anfragen den Kassenbon
und die Artikelnummer (z. B. IAN 12345) als
Nachweis für den Kauf bereit.
Konformitätserklärung
Dieses Produkt erfüllt die Anforderungen der gelten-
den europäischen und nationalen Richtlinien. Die
Konformität wurde nachgewiesen. Entsprechende
Erklärungen und Unterlagen sind beim Hersteller
hinterlegt.
Hersteller
Briloner Leuchten GmbH & Co. KG
Im Kissen 2
DE-59929 Brilon
DEUTSCHLAND
Table of contents

11 GB/IE
Garantie und Service Table of contents
List of pictograms used ........................................................................................................ Page 12
Introduction ................................................................................................................................... Page 12
Intended use ........................................................................................................................................ Page 12
Scope of delivery ................................................................................................................................Page 12
Parts description ..................................................................................................................................Page 13
Technical data ..................................................................................................................................... Page 13
Safety .................................................................................................................................................Page 13
Safety notices ......................................................................................................................................Page 13
Preparation ...................................................................................................................................Page 14
Required tools and material ...............................................................................................................Page 14
Prior to installation .................................................................................................................Page 14
Start-up .............................................................................................................................................Page 14
Mounting the light ............................................................................................................................... Page 14
Maintenance and cleaning ............................................................................................... Page 15
Disposal ............................................................................................................................................Page 15
Warranty and service ...........................................................................................................Page 15
Warranty .............................................................................................................................................Page 15
Service address ................................................................................................................................... Page 15
Declaration of conformity ...................................................................................................................Page 16
Manufacturer .......................................................................................................................................Page 16

12 GB/IE
Introduction
List of pictograms used
Read the instructions! Danger to life and risk of accident
for infants and children!
This light is suitable only for interior use,
in dry and enclosed spaces. Electric shock warning!
Danger to life!
Volt (AC) This light is not suitable for dimmer
or electronic switches.
Hertz (mains frequency) For your safety
Watt (effective power) Caution! Risk of burns due to hot
surfaces!
Protection class II b
a
Dispose of packaging and device in
an environmentally-friendly manner!
Observe the warning and safety
instructions! Lifespan
ON OFF Switching cycles The packaging is made from 100%
recycled paper.
Protective conductor
LED Ceiling Light
Introduction
Congratulations on your new product.
You have selected a high quality product.
Please be sure to carefully read the com-
plete operating instructions. Fold out the page with
the illustrations. These instructions are part of the
product and contain important information on setup
and handling. Always follow all safety instructions.
Before using this product for the first time verify the
correct voltage and that all parts are properly in-
stalled. Should you have any questions or you are
unsure about operating the product, please contact
the dealer or service centre. Please keep these in-
structions in a safe place and pass them on third
parties as applicable.
Intended use
This light is only suitable for indoor use
in dry and enclosed spaces. The light
can be fastened to any normally inflam-
mable surface. This product is intended for private
household use only.
Scope of delivery
Check immediately after unpacking that the parts
are complete and that the product is in proper
condition.
1 LED Ceiling Light, model 14137606L /
14137604L / 14137706L / 14137704L
2 Screws
2 Wall plugs
1 Set of assembly instructions and usage instructions

13 GB/IE
Introduction / Safety
Parts description
1 Wall plugs
2 Mounting bracket
3 Locating screws (connection housing)
4 Screws (mounting bracket)
5 Connection housing
6 Terminal block
7 Protective tube
8 Mains connection cable (external)
Technical data
Item no.: 14137606L / 14137604L /
14137706L / 14137704L
Operating voltage: 230‒240 V∼ 50 Hz
Rated lamp power: LED 11.5 W non-replaceable
Protection class: II /
Safety
Safety notices
Damage due to failure to comply with these operat-
ing instructions will invalidate the guarantee! We
assume no liability for consequential damage! We
assume no liability for material damage or personal
injury due to improper handling or failure to comply
with the safety instructions!
RISK OF FAT
AL
INJURY AND ACCIDENT HAZ-
ARD FOR TODDLERS AND
SMALL CHILDREN!
Never leave children unsupervised with the
packaging materials. The packaging material
poses a suffocation hazard. Children frequently
underestimate the dangers. Please always keep
the product out of the reach of children.
This device may be used by children aged
8 years and up, as well as by persons with re-
duced physical, sensory or mental capacities,
or lacking experience and / or knowledge, so
long as they are supervised or instructed in
the safe use of the device and understand the
associated risks. Do not allow children to play
with the device. Cleaning and user maintenance
must not be performed by children without
supervision.
Avoid the risk of fatal injury
from electric shock
Ensure that a qualified electrician, or a person
trained to carry out electrical installations,
performs the electrical installation.
Always check the light, power supply, and
mains cable for damage before plugging it in.
Never use the light if it shows any signs of
damage.
A damaged mains cable indicates a life-threat-
ening danger due to electric shock. In the event
of damage, repairs or other problems with the
light please contact the service centre or a
qualified electrician.
Prior to installation, remove the fuse or switch
off the circuit breaker (0 setting) in the fuse box.
Prior to installation verify the mains voltage on
site corresponds with the operating voltage
required for the light (see “Technical data“).
Ensure that the light does not come into contact
with water or other liquids under any circum-
stances.
Never open any of the components of the elec-
trical equipment or insert any objects into the
same components. This will pose a risk of fatal
injury from electric shock.
Do not install the light on a wet or conductive
substrate!
Prevent fire and
injury hazards
Do not mount the light with defective lamps
and / or lamp lenses. In this case contact the
service centre for a replacement.
Do not look directly into the light source (light
bulb, LED etc.).
Do not use optical instruments to look at the light.

14 GB/IE
Safety / Preparation / Prior to installation / Start-up
The lamp’s illuminant is not replaceable. The
entire lamp needs to be replaced if the illumi-
nant reaches the end of its service life.
This light is not suitable for dimmer
or electronic switches.
Safe working
Mount the light so that it is protected from
moisture and dirt.
Carefully prepare for assembly and allow your-
self adequate time. Organise all parts and any
necessary additional tools or materials before
starting so they are easy to reach.
Always be attentive! Always pay attention to
what you are doing and use common sense.
Never install the light if you are having difficulty
concentrating or do not feel well.
Preparation
Required tools and material
The tools and materials specified are not included.
This information and these values are non-binding
and are only provided as a reference.
The nature of the material is determined by the
individual local conditions.
- Pencil / making tool
- Voltage tester
- Screwdriver
- Electric drill
- Bit (ø approx. 0.8 cm)
- Side cutting pliers
- Ladder
Prior to installation
Important: The electrical connection must be
established by a qualified electrician or a person
trained to perform electrical installations. This per-
son must be familiar with the properties of the light
and the connection regulations.
Familiarise yourself with all the instructions and
diagrams in this manual, as well as with the light
itself, before you install it.
Before installation ensure that the circuit, to which
the light will be connected, is not energised. To
do so, remove the fuse or switch off the circuit
breaker in the fuse box (0 position).
Use the voltage tester to verify the de-energised
status.
Start-up
Mounting the light
Remove the screws 3 visible at the side of
the connection housing 5 and remove the
mounting angle 2 from the back.
Use the slotted holes in the mounting bracket 2
intended for the screws to mark the bores.
Now drill the fixing holes (approx. ø 8 mm,
depth approx. 40 mm). Be careful not to
damage the supply line.
Insert the dowels 1 into the bores.
Fasten the mounting bracket 2 with the
provided screws 4.
Loosen the screws counter-clockwise and open
the junction box.
Remove the protective tube 7 and guide the
mains connection cable (external) 8 through it.
Now use the lustre terminal 6 to connect the
connection cable for the light to the mains con-
nection cable (external) 8.
Note: Make sure to correctly connect the
individual conductors of the mains connection
cable (external) 8: live wire, black or brown =
symbol L, neutral wire, blue = symbol N. The
earth wire (green-yellow) is not connected.

15 GB/IE
Start-up / Maintenance and cleaning / Disposal / Warranty and service
Protection class II. This light is specially insulated
and must not be connected to a protective con-
ductor.
Replace the protective tube 7 in the junction
box.
Close the junction box and turn the screws
clockwise.
Now use the screws 3 to screw the light to
the mounting bracket 2.
Replace the fuse or switch on the circuit breaker
(I setting) inside the fuse box.
Your light is now ready to use.
Maintenance and cleaning
RISK OF ELECTRIC SHOCK!
Disconnect the light from the mains circuit before
cleaning. To do so, remove the fuse or switch off
the circuit breaker in the fuse box (0 position).
RISK OF ELECTRIC SHOCK!
For electrical safety, never clean the light with
water or other liquids, or immerse it in water.
CAUTION! DANGER OF BURNS DUE
TO HOT SURFACES!
Allow the light to cool completely.
Do not use solvents, benzene or similar sub-
stances. They could damage the light.
Only use a dry, lint-free cloth for cleaning.
Replace the fuse or switch on the circuit breaker
(I setting) inside the fuse box.
Disposal
The packaging is made entirely of recyclable
materials, which you may dispose of at local
recycling facilities.
b
a
Observe the marking of the packaging
materials for waste separation, which
are marked with abbreviations (a) and
numbers (b) with following meaning:
1–7: plastics / 20–22: paper and fibre-
board / 80–98: composite materials.
To help protect the environment, please
dispose of the product properly when it
has reached the end of its useful life and
not in the household waste. Information
on collection points and their opening
hours can be obtained from your local
authority.
Warranty and service
Warranty
You receive a 36 month warranty on this product,
valid from the date of purchase. The appliance has
been carefully produced under strict quality control.
Within the warranty period we shall rectify without
charge all material and manufacturing defects. In th
e
event of a defect during the warranty period, please
send the appliance to the listed Service Centre
address, referencing the following item number:
14137606L / 14137604L / 14137706L /
14137704L.
Wear parts (such as bulbs) and damage caused by
improper handling, non-observance of the operating
instructions or unauthorised interference are excluded
from the warranty. The performance of services un-
der the warranty does not extend or renew the
warranty period.
Service address
Briloner Leuchten GmbH & Co. KG
Im Kissen 2
DE-59929 Brilon
GERMANY
Tel.: +49 (0) 29 61 / 97 12–800
Fax: +49 (0) 29 61 / 97 12–199
E-mail: [email protected]
www.briloner.de
IAN 316904
Please have your receipt and the article number
(e.g. IAN 12345) ready as your proof of purchase
when enquiring about your product.

16 GB/IE
Warranty and service
Declaration of conformity
This product fulfils the requirements of the applicable
European and national directives. Conformity has
been demonstrated. The relevant declarations and
documents are held by the manufacturer.
Manufacturer
Briloner Leuchten GmbH & Co. KG
Im Kissen 2
DE-59929 Brilon
GERMANY
Table des matières

17 FR/BE
Warranty and service Table des matières
Légende des pictogrammes utilisés .......................................................................... Page 18
Introduction ................................................................................................................................... Page 18
Utilisation conforme ............................................................................................................................Page 18
Contenu de la livraison .......................................................................................................................Page 18
Descriptif des pièces ...........................................................................................................................Page 19
Caractéristiques techniques ................................................................................................................Page 19
Sécurité .............................................................................................................................................Page 19
Indications de sécurité ........................................................................................................................Page 19
Préparation ...................................................................................................................................Page 20
Outils et matériel nécessaires ............................................................................................................. Page 20
Avant l‘installation ..................................................................................................................Page 20
Mise en marche .......................................................................................................................... Page 20
Montage de la lampe .........................................................................................................................Page 20
Entretien et nettoyage..........................................................................................................Page 21
Mise au rebut ............................................................................................................................... Page 21
Garantie et service après-vente ..................................................................................Page 21
Garantie ..............................................................................................................................................Page 21
Adresse du service après-vente .......................................................................................................... Page 22
Déclaration de conformité .................................................................................................................. Page 22
Fabricant ..............................................................................................................................................Page 22

18 FR/BE
Introduction
Légende des pictogrammes utilisés
Lisez les instructions! Danger de mort et risques d'accident
pour les bébés et les enfants !
Cette lampe est exclusivement conçue
pour un usage intérieur, dans des
locaux secs et fermés.
Attention au risque d’électrocution !
Danger de mort !
Volt (tension alternative) Cette lampe n'est pas adaptée
aux variateurs et aux interrupteurs
électriques.
Hertz (fréquence) Conduite à tenir
Watt (puissance active) Attention ! Risque de brûlures du fait
des surfaces brûlantes !
Classe de protection II b
a
Mettez l’emballage et l’appareil
au rebut dans le respect de
l'environnement !
Respectez les avertissements et les
consignes de sécurité ! Durée de vie
ON OFF Cycles de commutation L'emballage est exclusivement
composé à 100% de papier recyclé.
Conducteur de protection
Plafonnier à LED
Introduction
Nous vous félicitons pour l‘achat de votre
nouvel appareil. Vous avez opté pour
un produit de grande qualité. Veuillez lire
ce mode d‘emploi intégralement et attentivement.
Ouvrez la page contenant les illustrations. Ce mode
d‘emploi fait partie du produit et contient des instruc-
tions essentielles pour sa mise en service et sa ma-
nipulation. Respectez toujours toutes les consignes
de sécurité. Avant la mise en service, vérifiez si la
tension est correcte et si toutes les pièces sont correc-
tement montées. Si vous avez des questions ou des
doutes concernant la manipulation de l‘appareil,
veuillez contacter votre revendeur ou le service après-
vente. Veuillez conserver soigneusement ce mode
d‘emploi et remettez-le aux autres utilisateurs.
Utilisation conforme
Cette lampe est exclusivement conçue
pour un usage intérieur, dans des locaux
secs et fermés. Cette lampe peut être
fixée sur toutes les surfaces normalement inflam-
mables. Cet appareil est uniquement destiné à un
usage domestique privé.
Contenu de la livraison
Contrôlez toujours immédiatement après le débal-
lage du produit que le contenu de la livraison est
complet et que l’appareil se trouve en parfait état.
1 plafonnier à LED, modèle 14137606L /
14137604L / 14137706L /14137704L
2 vis
2 chevilles
1 notice de montage et d’utilisation
Introduction / Sécurité

19 FR/BE
Introduction Introduction / Sécurité
Descriptif des pièces
1 Cheville
2 Équerre de montage
3 Vis de fixation (boîtier de raccordement)
4 Vis (équerre de montage)
5 Boîtier de raccordement
6 Domino
7 Gaine de protection
8 Câble d’alimentation électrique (externe)
Caractéristiques techniques
Réf. : 14137606L / 14137604L /
14137706L / 14137704L
Tension de service: 230‒240 V∼ 50 Hz
Puissance nominale
de la lampe : LED 11,5 W non remplaçable
Classe de protection: II /
Sécurité
Indications de sécurité
Les droits de recours en garantie sont annulés en
cas de dommages résultant du non-respect du
présent mode d’emploi ! Le fabricant décline toute
responsabilité pour les dommages consécutifs !
Toute responsabilité est déclinée pour les dommages
matériels ou corporels causés par une manipulation
incorrecte ou par le non-respect des consignes de
sécurité !
DAN-
GER DE MORT ET RISQUE
D‘ACCIDENT POUR LES EN-
FANTS EN BAS ÂGE ET LES ENFANTS !
Ne jamais laisser les enfants sans surveillance
avec le matériel d’emballage. L‘emballage
présente un risque d‘étouffement. Les enfants
sous-estiment souvent le danger. Toujours tenir
le produit à l‘écart des enfants.
Ce produit peut être utilisé par des enfants âgés
de 8 ans et plus ainsi que par des personnes
ayant des capacités physiques, sensorielles ou
mentales réduites ou manquant d‘expérience
ou de connaissances, s‘ils sont surveillés ou s‘ils
ont été informés de l‘utilisation sûre du produit
et comprennent les risques liés à son utilisation.
Les enfants ne doivent pas jouer avec ce prod
uit.
Le nettoyage et l‘entretien du produit ne doivent
pas être effectués par des enfants laissés sans
surveillance.
Prévention de risques mortels
par électrocution
L‘installation électrique doit être effectuée par
un électricien ou par une personne dûment
formée à cet effet.
A
vant chaque raccordement au secteur, con
trôlez
le bon état de la lampe et du câble d‘alimenta-
tion. N‘utilisez jamais la lampe si vous constatez
le moindre dommage.
Des câbles d‘alimentation endommagés im-
pliquent un danger de mort par électrocution.
En cas de détériorations, de réparations ou
d’autres problèmes, veuillez contacter le SAV
ou un électricien.
Avant le montage, retirez le fusible ou coupez
le disjoncteur de la boîte à fusibles (position 0).
Avant le montage, vérifiez que la tension
secteur corresponde à la tension de service
requise de la lampe (voir «Caractéristiques
techniques»).
Évitez impérativement tout contact de la lampe
avec de l‘eau ou d‘autres liquides.
N‘ouvrez jamais les composants électriques,
et n‘insérez jamais d‘objets quelconques dans
ceux-ci. De telles interventions impliquent un
danger de mort par électrocution.
N‘installez jamais la lampe sur un support
humide ou conducteur de courant!
Prévention de risque d‘incendies
et de blessures
Ne montez pas la lampe avec des ampoules
et / ou des verres de lampe défectueux(-ses).
Veuillez dans ce cas contacter le service après-
vente pour procéder au remplacement de la
pièce défectueuse.

20 FR/BE
Sécurité / Préparation / Avant l‘installation / Mise en marche
Ne jamais regarder directement dans la source
lumineuse (ampoule, LED, etc.).
Ne pas regarder dans la source de lumière
avec des instruments optiques.
La source lumineuse de cette lampe n’est pas
remplaçable. Lorsque la source lumineuse ar-
rive en fin de vie, l’ensemble de la lampe doit
être remplacé.
Cette lampe n‘est pas compatible
avec les variateurs ou les interrup-
teurs électroniques.
Conduite à tenir
Montez la lampe de telle sorte qu‘elle soit
protégée de l‘humidité et des salissures.
Soigneusement préparer le montage du pro-
duit et l‘effectuer sans précipitation. Préparez
toutes les pièces détachées et l‘outillage ou le
matériel requis et posez-les à portée de main.
Soyez toujours vigilant ! Faites toujours attention
à ce que vous faites et agissez raisonnablement.
N‘effectuez jamais le montage de la lampe si
vous n‘êtes pas concentré ou si vous vous sen-
tez mal.
Préparation
Outils et matériel nécessaires
Les outils et matériels indiqués ne sont pas inclus
dans le contenu de la livraison. Il s‘agit là de don-
nées et de valeurs indicatives vous permettant de
vous orienter. Les caractéristiques du matériel dé-
pendent des conditions spécifiques sur place.
- Crayon / outil marqueur
- Détecteur de tension
- Tournevis
- Perceuse
- Foret (env. ø8 mm)
- Pince coupante diagonale
- Escabeau
Avant l‘installation
Important : Le raccordement électrique doit être
réalisé par un électricien professionnel ou par une
personne instruite pour exécuter une installation
électrique. Celle-ci doit connaître les caractéristiques
des lampes et des conditions de raccordement.
Avant l‘installation, familiarisez-vous avec l‘en-
semble des instructions et des illustrations du
présent mode d‘emploi et avec la lampe elle-
même.
Assurez-vous avant l‘installation que le câble
sur lequel la lampe doit être branchée n‘est
pas sous tension. Retirez à cet effet le fusible
ou coupez le disjoncteur de la boîte à fusible
(position 0).
Vérifiez l‘absence de tension à l‘aide d‘un
détecteur de tension.
Mise en marche
Montage de la lampe
Sur le boîtier de raccordement 5, ôtez les vis
3 visibles latéralement, et détachez l‘équerre
de montage 2 de la face arrière.
Marquez les trous de perçage à l‘aide des
trous oblongs prévus pour les vis se trouvant
dans l‘équerre de montage 2.
Maintenant, percez les trous d‘attache (env.
ø 8 mm, profondeur env. 40 mm). Assurez-vous
de ne pas endommager l‘alimentation.
Insérer les chevilles
1
dans les trous de per
çage.
Fixez l‘équerre de montage 2 avec les vis
fournies 4.
Desserrez les vis dans le sens anti-horaire et
ouvrez le boîtier de raccordement.
Retirez la gaine de protection 7 et passez le
câble d‘alimentation (externe) 8 au travers.
Reliez maintenant le câble d‘alimentation de la
lampe au câble d‘alimentation (externe) 8 à
l‘aide du domino 6.
Remarque: Veillez à ce que les fils du câble
d‘alimentation électrique (externe) 8 aient
leur raccord respectif: fil conducteur, noir ou
brun = symbole L, fil neutre, bleu = symbole N.
… / Entretien et nettoyage / Mise au rebut / Garantie et service après-vente
Strona się ładuje...
Strona się ładuje...
Strona się ładuje...
Strona się ładuje...
Strona się ładuje...
Strona się ładuje...
Strona się ładuje...
Strona się ładuje...
Strona się ładuje...
Strona się ładuje...
Strona się ładuje...
Strona się ładuje...
Strona się ładuje...
Strona się ładuje...
Strona się ładuje...
Strona się ładuje...
Strona się ładuje...
Strona się ładuje...
Strona się ładuje...
Strona się ładuje...
Strona się ładuje...
Strona się ładuje...
Strona się ładuje...
Strona się ładuje...
Strona się ładuje...
Strona się ładuje...
Strona się ładuje...
Strona się ładuje...
Strona się ładuje...
-
 1
1
-
 2
2
-
 3
3
-
 4
4
-
 5
5
-
 6
6
-
 7
7
-
 8
8
-
 9
9
-
 10
10
-
 11
11
-
 12
12
-
 13
13
-
 14
14
-
 15
15
-
 16
16
-
 17
17
-
 18
18
-
 19
19
-
 20
20
-
 21
21
-
 22
22
-
 23
23
-
 24
24
-
 25
25
-
 26
26
-
 27
27
-
 28
28
-
 29
29
-
 30
30
-
 31
31
-
 32
32
-
 33
33
-
 34
34
-
 35
35
-
 36
36
-
 37
37
-
 38
38
-
 39
39
-
 40
40
-
 41
41
-
 42
42
-
 43
43
-
 44
44
-
 45
45
-
 46
46
-
 47
47
-
 48
48
-
 49
49


w innych językach
- Deutsch: LIVARNO 316904 Bedienungsanleitung
- slovenčina: LIVARNO 316904 Návod na obsluhu
- français: LIVARNO 316904 Le manuel du propriétaire
- Nederlands: LIVARNO 316904 de handleiding
Powiązane artykuły
-
LIVARNO 303302 Instrukcja obsługi
-
-
-
-
-
-
-
-
-