
EN
DE
ES
FR
IT
NL
PT
PL
SE
Smart Smoke Alarm
Quick Start Guide
V1.0.0

3 M
3 M
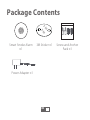
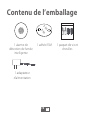
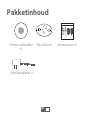
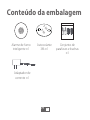
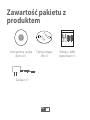
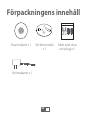
Package Contents
Screw and Anchor
Pack ×1
Smart Smoke Alarm
×1
3M Sticker ×1
Power Adapter ×1
EN 1

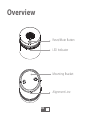
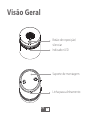
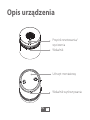
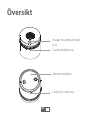
Overview
Reset/Mute Button
LED Indicator
Mounting Bracket
Alignment Line
EN 2

1
2
3
1 2
3
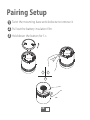
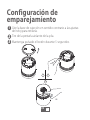
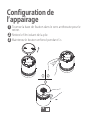
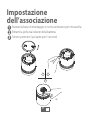
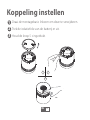
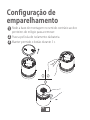
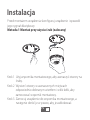
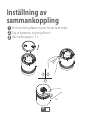
Pairing Setup
Twist the mounting base anticlockwise to remove it.
Pull out the battery insulation film.
Hold down the button for 5 s.
EN 3

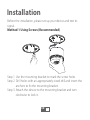
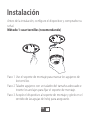
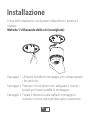
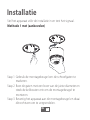
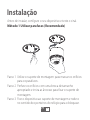
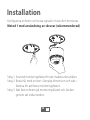
Installation
Before the installation, please set up your device and test its
signal.
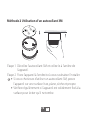
Method 1 Using Screws (Recommended)
Step 1 Use the mounting bracket to mark the screw holes.
Step 2 Drill holes with an appropriately-sized drill and insert the
anchors to fix the mounting bracket.
Step 3 Attach the device to the mounting bracket and turn
clockwise to lock it.
EN 4

3 M
3 M
i
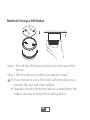
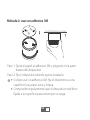
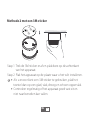
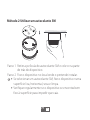
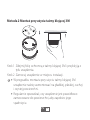
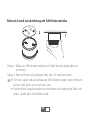
Method 2 Using a 3M Sticker
Step 1 Peel off the 3M sticker and stick it to the rear of the
device.
Step 2 Affix the device to where you want to install.
• If you choose to use a 3M sticker, affix the device to a
smooth, flat, dry, and clean surface.
• Regularly check whether the device is attached to the
surface securely to keep it from falling down.
EN 5

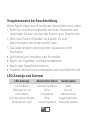
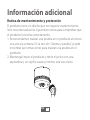
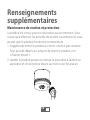
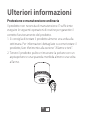
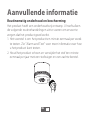
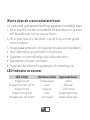
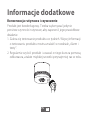
Additional Information
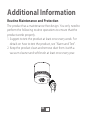
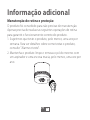
Routine Maintenance and Protection
The product has a maintenance-free design. You only need to
perform the following routine operations to ensure that the
product works properly.
1. Suggest to test the product at least once every week. For
details on how to test the product, see "Alarm and Test".
2. Keep the product clean and remove dust from it with a
vacuum cleaner and soft brush at least once every year.
EN 6

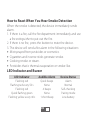
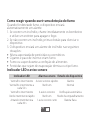
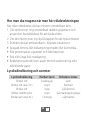
LED Indicator Audible Alarm Device Status
Flashing red
Flashing red every 50 s
Flashing red
Quick flashing green
Flashing yellow every 40 s
Quick beeps
None
4 beeps
None
1 short beep
Alarm
Normal
Self-checking
Pairing mode
Low battery
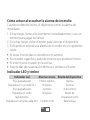
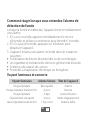
How to React When You Hear Smoke Detection
When the smoke is detected, the device immediately sends
alarm.
1. If there is a fire, call the fire department immediately and use
a fire extinguisher to put out the fire.
2. If there is no fire, press the button to mute the device.
3. The device will send a fire alarm in the following situations:
• Mist sprayed from pesticides or cosmetics.
• Cigarettes and incense sticks generate smoke.
• Cooking smoke or steam.
• Pesticides that is thermal evaporation or smoke-like.
LED Indicator and Buzzer
EN 7

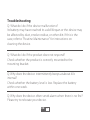
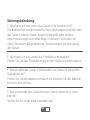
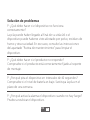
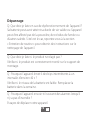
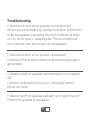
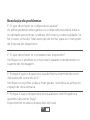
Troubleshooting
QWhat do I do if the device malfunctions?
Its battery may have reached its valid lifespan or the device may
be affected by dust, smoke residue, or other dirt. If this is the
case, refer to "Routine Maintenance" for instructions on
cleaning the device.
QWhat do I do If the product does not respond?
Check whether the product is correctly mounted to the
mounting bracket.
Q: Why does the device intermittently beeps at about 40s
interval?
Check whether the battery level is low. Replace the battery
within one week.
Q: Why does the device often sends alarm when there is no fire?
Please try to relocate your device.
EN 8

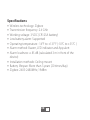
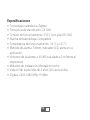
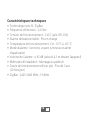
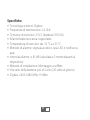
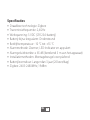
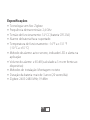
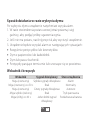
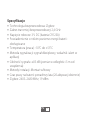
Specifications
• Wireless technology: Zigbee
• Transmission frequency: 2.4 GHz
• Working voltage: 3 VDC (CR123A battery)
• Low battery alarm: Supported
• Operating temperature: -14°F to +131°F (-10°C to +55°C )
• Alarm method: Buzzer, LED indicator and App alert
• Alarm loudness: ≥ 85 dB (calculated 3 m in front of the
device)
• Installation methods: Ceiling mount
• Battery lifespan: More than 3 years (20 times/day)
• Zigbee: 2405-2480MHz; 19dBm
EN 9

DE
Intelligenter Rauchmelder
Kurzanleitung
V1.0.0

3 M
3 M
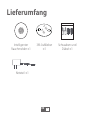
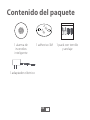
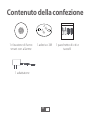
Lieferumfang
Schrauben und
Dübel ×1
Intelligenter
Rauchmelder ×1
3M Aufkleber
×1
Netzteil ×1
DE 10

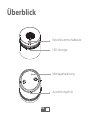
Überblick
Reset/Stummschalttaste
LED-Anzeige
Montagehalterung
Ausrichtungslinie
DE 11

1
2
3
1 2
3
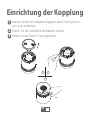
Einrichtung der Kopplung
Drehen Sie die Grundplatte entgegen dem Uhrzeigersinn,
um sie zu entfernen.
Ziehen Sie die Isolierfolie der Batterie heraus.
Halten Sie die Taste 5 s lang gedrückt.
DE 12

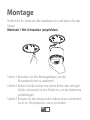
Montage
Richten Sie Ihr Gerät vor der Installation ein und testen Sie das
Signal.
Methode 1 Mit Schrauben (empfohlen)
Schritt 1 Benutzen Sie den Montagebügel, um die
Schraubenlöcher zu markieren.
Schritt 2 Bohren Sie die Löcher mit einem Bohrer der richtigen
Größe und setzen Sie die Dübel ein, um die Halterung
zu befestigen.
Schritt 3 Bringen Sie das Gerät an der Halterung an und drehen
Sie es im Uhrzeigersinn, um es zu fixieren.
DE 13

3 M
3 M
i
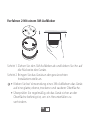
Verfahren 2 Mit einem 3M-Aufkleber
Schritt 1 Ziehen Sie den 3M-Aufkleber ab und kleben Sie ihn auf
die Rückseite des Geräts.
Schritt 2 Bringen Sie das Gerät an der gewünschten
Installationsstelle an.
• Kleben Sie bei Verwendung eines 3M-Aufklebers das Gerät
auf eine glatte, ebene, trockene und saubere Oberfläche.
• Überprüfen Sie regelmäßig, ob das Gerät sicher an der
Oberfläche befestigt ist, um ein Herunterfallen zu
verhindern.
DE 14

Zusätzliche Informationen
Routinewartung und Schutz
Das Produkt verfügt über ein wartungsfreies Design. Sie müssen
nur die folgenden Routinearbeiten durchführen, um
sicherzustellen, dass das Produkt ordnungsgemäß funktioniert.
1. Wir empfehlen, das Produkt mindestens einmal pro Woche
zu testen. Einzelheiten zum Testen des Produkts finden Sie
unter „Alarm und Test“.
2. Halten Sie das Produkt sauber und entfernen Sie den Staub
mindestens einmal im Jahr mit einem Staubsauger und einer
weichen Bürste.
DE 15

LED-Anzeige Akustischer Alarm Gerätestatus
Rot blinkend
Blinkt alle 50 s rot
Rot blinkend
Schnelles grünes Blinken
Blinkt alle 40 s gelb
Schnelle Signaltöne
Ohne
4 Signaltöne
Ohne
1 kurzer Signalton
Alarm
Normal
Selbstkontrolle
Kopplungsmodus
Schwache Batterie
Vorgehensweise bei Rauchmeldung
Wenn Rauch erkannt wird, sendet das Gerät sofort einen Alarm.
1. Rufen Sie im Falle eines Brandes sofort die Feuerwehr und
verwenden Sie zum Löschen des Feuers einen Feuerlöscher.
2. Wenn kein Feuer vorhanden ist, drücken Sie zum
Stummschalten des Geräts auf die Taste.
3. Das Gerät sendet in den folgenden Situationen einen
Feueralarm:
• Sprühnebel von Pestiziden oder Kosmetika.
• Rauch von Zigaretten und Räucherstäbchen.
• Rauch oder Dampf beim Kochen.
• Pestizide, die thermisch verdampfen oder rauchähnlich sind.
LED-Anzeige und Summer
DE 16

Störungsbehebung
FWas kann ich tun, wenn das Gerät nicht funktioniert?
Die Batterie hat möglicherweise ihre Lebensdauer erreicht oder
das Gerät ist durch Staub, Rauchrückstände oder andere
Verschmutzungen beeinträchtigt. In diesem Fall finden Sie
unter „Routinemäßige Wartung“ Anweisungen zur Reinigung
des Geräts.
FWas kann ich tun, wenn das Produkt nicht reagiert?
Prüfen Sie, ob das Produkt richtig an der Halterung befestigt ist.
F: Warum gibt das Gerät in Abständen von etwa 40 Sekunden
Signaltöne ab?
Prüfen Sie, ob die Batterie schwach ist. Ersetzen Sie die Batterie
binnen einer Woche.
F: Warum sendet das Gerät oft einen Alarm, obwohl es nicht
brennt?
Stellen Sie Ihr Gerät bitte woanders auf.
DE 17

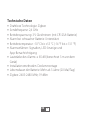
Technische Daten
• Drahtlose Technologie: Zigbee
• Sendefrequenz: 2,4 GHz
• Betriebsspannung: 3 V Gleichstrom (mit CR123A-Batterie)
• Alarm bei schwacher Batterie: Unterstützt
• Betriebstemperatur: -10 °C bis +55 °C (-14 °F bis +131 °F)
• Alarmverfahren: Signalton, LED-Anzeige und
App-Benachrichtigung
• Lautstärke des Alarms: ≥ 85 dB (berechnet 3 m vor dem
Gerät)
• Installationsmethoden: Deckenmontage
• Lebensdauer der Batterie: Mehr als 3 Jahre (20 Mal/Tag)
• Zigbee: 2405-2480 MHz; 19 dBm
DE 18
Strona się ładuje...
Strona się ładuje...
Strona się ładuje...
Strona się ładuje...
Strona się ładuje...
Strona się ładuje...
Strona się ładuje...
Strona się ładuje...
Strona się ładuje...
Strona się ładuje...
Strona się ładuje...
Strona się ładuje...
Strona się ładuje...
Strona się ładuje...
Strona się ładuje...
Strona się ładuje...
Strona się ładuje...
Strona się ładuje...
Strona się ładuje...
Strona się ładuje...
Strona się ładuje...
Strona się ładuje...
Strona się ładuje...
Strona się ładuje...
Strona się ładuje...
Strona się ładuje...
Strona się ładuje...
Strona się ładuje...
Strona się ładuje...
Strona się ładuje...
Strona się ładuje...
Strona się ładuje...
Strona się ładuje...
Strona się ładuje...
Strona się ładuje...
Strona się ładuje...
Strona się ładuje...
Strona się ładuje...
Strona się ładuje...
Strona się ładuje...
Strona się ładuje...
Strona się ładuje...
Strona się ładuje...
Strona się ładuje...
Strona się ładuje...
Strona się ładuje...
Strona się ładuje...
Strona się ładuje...
Strona się ładuje...
Strona się ładuje...
Strona się ładuje...
Strona się ładuje...
Strona się ładuje...
Strona się ładuje...
Strona się ładuje...
Strona się ładuje...
Strona się ładuje...
Strona się ładuje...
Strona się ładuje...
Strona się ładuje...
Strona się ładuje...
Strona się ładuje...
Strona się ładuje...
Strona się ładuje...
Strona się ładuje...
Strona się ładuje...
Strona się ładuje...
Strona się ładuje...
Strona się ładuje...
Strona się ładuje...
-
 1
1
-
 2
2
-
 3
3
-
 4
4
-
 5
5
-
 6
6
-
 7
7
-
 8
8
-
 9
9
-
 10
10
-
 11
11
-
 12
12
-
 13
13
-
 14
14
-
 15
15
-
 16
16
-
 17
17
-
 18
18
-
 19
19
-
 20
20
-
 21
21
-
 22
22
-
 23
23
-
 24
24
-
 25
25
-
 26
26
-
 27
27
-
 28
28
-
 29
29
-
 30
30
-
 31
31
-
 32
32
-
 33
33
-
 34
34
-
 35
35
-
 36
36
-
 37
37
-
 38
38
-
 39
39
-
 40
40
-
 41
41
-
 42
42
-
 43
43
-
 44
44
-
 45
45
-
 46
46
-
 47
47
-
 48
48
-
 49
49
-
 50
50
-
 51
51
-
 52
52
-
 53
53
-
 54
54
-
 55
55
-
 56
56
-
 57
57
-
 58
58
-
 59
59
-
 60
60
-
 61
61
-
 62
62
-
 63
63
-
 64
64
-
 65
65
-
 66
66
-
 67
67
-
 68
68
-
 69
69
-
 70
70
-
 71
71
-
 72
72
-
 73
73
-
 74
74
-
 75
75
-
 76
76
-
 77
77
-
 78
78
-
 79
79
-
 80
80
-
 81
81
-
 82
82
-
 83
83
-
 84
84
-
 85
85
-
 86
86
-
 87
87
-
 88
88
-
 89
89
-
 90
90


w innych językach
- español: imou ZS2 Guía del usuario
- italiano: imou ZS2 Guida utente
- Deutsch: imou ZS2 Benutzerhandbuch
- português: imou ZS2 Guia de usuario
- français: imou ZS2 Mode d'emploi
- Nederlands: imou ZS2 Gebruikershandleiding
Powiązane artykuły
Inne dokumenty
-
Otio 520045 Instrukcja obsługi
-
Smartwares RM175RF Instrukcja obsługi
-
Tesla 047-1406 Instrukcja obsługi
-
Abus FURM50000 Instrukcja obsługi
-
Smartwares PD-8826 Instrukcja obsługi
-
Somfy Home Alarm Essential instrukcja
-
Smartwares FGA-13051 Instrukcja obsługi
-
Smartwares FGA-1304 Instrukcja obsługi
-
Smartwares FGA-1304 Battery Standalone Carbon Monoxide Alarm Instrukcja obsługi