
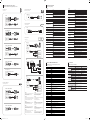
Quick setup guide
Guide d’installation rapide
Warranty card
(Not available in some locations)
Carte de garantie
(Non disponible dans certains pays)
Regulatory guide
Guide réglementaire
Power cord
Cordon d’alimentation
Batteries
(Not available in some locations)
Batteries
(Non disponible dans certains pays)
Remote Control
Télécommande
DP cable
Câble DP
Touch Pen (1EA)
(QM85D-BR Model Only)
Stylet tactile (1EA)
(pour les modèles QM85D-BR uniquement)
BN68-07440C-00
[English]
- Contact the vendor where you purchased the product if any
components are missing.
- The warranty will be void in the event of a breakdown due to
exceeding the maximum recommended hours of use per day
of 16 hours.
[Français]
- S’il manque le moindre composant, contactez le revendeur auprès
duquel vous avez acheté le produit.
- La garantie s’annule en cas de panne due à une durée d’utilisation
supérieure à celle recommandée par jour (16 heures).
[Deutsch]
- Wenn Komponenten fehlen, wenden Sie sich an den Anbieter, bei dem
Sie das Gerät gekauft haben.
- Wenn das Gerät defekt wird, weil es länger als die empfohlene
maximale Nutzungsdauer von 16 Stunden pro Tag in Betrieb war,
erlischt möglicherweise die Garantie.
[Italiano]
- Se alcuni componenti risultassero mancanti, rivolgersi al punto vendita
presso il quale è stato acquistato il prodotto.
-
La garanzia non sarà considerata valida in caso di guasto dovuto al
superamento del numero massimo consigliato di 16 ore di utilizzo giornaliero.
[Español]
- Póngase en contacto con el distribuidor donde adquirió el producto si
falta alguno de los componentes.
-
La garantía quedará anulada en caso de que se produzca una avería
causada por sobrepasar el número máximo de horas de uso diario
(16 horas).
[Svenska]
- Kontrakta leverantören där du köpte produkten om några delar
saknas.
- Garantin gäller inte vid ett haveri som beror på att det maximala
rekommenderade antalet om 16 användningstimmar per dag har
överskridits.
[Magyar]
- Ha bármelyik alkatrész hiányzik, forduljon a forgalmazóhoz.
- A napi ajánlott 16 óra üzemidő túllépése miatti meghibásodás esetén
a jótállás érvényét veszti.
[Polski]
- Jeżeli brakuje jakichkolwiek elementów, skontaktuj się ze
sprzedawcą produktu.
- W przypadku awarii spowodowanej przekroczeniem
maksymalnego zalecanego czasu używania produktu (16 godzin
dziennie) gwarancja straci ważność.
[Português]
- Contacte o vendedor onde adquiriu o produto caso haja
componentes em falta.
- A garantia será anulada caso ocorra uma avaria por se
ultrapassar o número máximo de horas de utilização
recomendado de 16 horas por dia.
[Türkçe]
- Herhangi bir parça eksikse, ürünü satın aldığınız satıcıyla temas kurun.
- Günde 16 saat olan maksimum önerilen sürenin aşılmasına bağlı
arıza durumunda garanti geçersiz olur.
QM85D QM85D-BR
Quick Setup Guide
Guide d’installation rapide
Checking the Components
Verification des composants
Control Panel
Panneau de configuration
The terms HDMI and HDMI High-Denition Multimedia
Interface, and the HDMI Logo are trademarks or
registered trademarks of HDMI Licensing LLC in the
United States and other countries.
[Español]
1
Encender el producto.
Si pulsa el botón mientras el producto está encendido, se mostrará el menú de control.
- Para salir del menú OSD, mantenga pulsada la tecla del panel durante al menos un segundo.
2
Moverse al menú superior o inferior. También puede ajustar el valor de una opción.
3
Moverse al menú izquierdo o derecho.
4
Pulse un botón del mando a distancia apuntando al sensor ubicado en la parte delantera del producto para utilizar la
función correspondiente a dicho botón.
[Svenska]
1
Slå på produkten.
Om du trycker på knappen när produkten är påslagen visas kontrollmenyn.
- Du stänger skärmmenyn genom att trycka och hålla in panelknappen under minst en sekund.
2
Gå till den övre eller lägre menyn. Du kan också ändra värdet för ett alternativ.
3
Gå till vänster eller höger meny.
4
Tryck på en knapp på fjärrkontrollen och rikta den mot sensorn på produktens framsida när du vill utföra motsvarande
funktion.
[Magyar]
1
Kapcsolja be a készüléket.
Ha megnyomja a gombot a készülék bekapcsolt állapotában, akkor megjelenik a vezérlő menü.
- A képernyő menüből való kilépéshez nyomja meg és tartsa lenyomva a panel gombot legalább egy másodpercig.
2
Lépjen a felső vagy az alsó menüre. Módosíthatja az egyes opciók értékét is.
3
Lépjen a jobb vagy a bal oldali menüre.
4
Nyomjon meg egy gombot a távirányítón, miközben a készülék előlapján levő érzékelőre mutat, a megfelelő funkció
elvégzéséhez.
[Polski]
1
Włączenie urządzenia.
Naciśnięcie przycisku , gdy urządzenie jest włączone spowoduje wyświetlenie menu sterowania.
- Aby wyjść z menu ekranowego, należy nacisnąć przycisk panelu i przytrzymać go przez przynajmniej jedną sekundę.
2
Wybór wyższej lub niższej opcji menu. Te przyciski umożliwiają również zmianę wartości opcji.
3
Wybór opcji menu po lewej lub prawej stronie.
4
Aby skorzystać z wybranej funkcji, nacisnąć odpowiedni przycisk na pilocie sterowania skierowanym na czujnik
umieszczony z przodu urządzenia.
[Português]
1
Para ligar o produto.
Se premir o botão quando o produto está ligado, o menu de controlo será apresentado.
- Para sair do menu OSD, prima e mantenha premida a tecla do painel durante, pelo menos, um segundo.
2
Para deslocar para o menu superior ou inferior. Pode também ajustar o valor de uma opção.
3
Para deslocar para o menu esquerdo ou direito.
4
Prima um botão do telecomando apontando para o sensor localizado na parte frontal do produto para executar a função
correspondente.
[Türkçe]
1
Ürünü açar.
Ürün açıkken düğmesine bastığınızda kontrol menüsü görüntülenir.
- OSD menüsünden çıkmak için panel düğmesini en az bir saniye basılı tutun.
2
Bir üst veya alt menüye gider. Bir seçeneğin değerini ayarlamak için de kullanabilirsiniz.
3
Soldaki veya sağdaki menüye gider.
4
İlgili işlevi gerçekleştirmek için uzaktan kumandayı ürünün ön tarafındaki sensöre doğrultarak bir düğmeye basın.
Reverse Side
Face arrière
[English]
1
Power on the product.
If you press the button when the product is turned on, the control menu will be displayed.
- To exit the OSD menu, press and hold the panel key for at least one second.
2
Move to the upper or lower menu. You can also adjust the value of an option.
3
Move to the left or right menu.
4
Press a button on the remote control pointing at the sensor on the front of the product to perform the corresponding
function.
[Français]
1
Met l'appareil sous tension.
Si vous appuyez sur le bouton alors que l'appareil est allumé, le menu de commande s'afche.
- Pour quitter le menu OSD, appuyez sur le bouton du panneau et maintenez-le enfoncé pendant au moins une seconde.
2
Passez au menu supérieur ou au menu inférieur. Vous pouvez aussi ajuster la valeur d'une option.
3
Passez au menu de gauche ou au menu de droite.
4
Appuyez sur un bouton de la télécommande tout en pointant cette dernière vers le capteur situé à l'avant du produit pour
exécuter la fonction correspondante.
[Deutsch]
1
Einschalten des Geräts.
Wenn Sie die Taste drücken, während das Gerät eingeschaltet ist, wird das Steuerungsmenü geöffnet.
- Drücken Sie zum Schließen des OSD-Menüs die Steuerungstaste mindestens 1 Sekunde.
2
Geht zum oberen oder unteren Menü. Sie können damit auch den Wert einer Option ändern.
3
Geht zum linken oder rechten Menü.
4
Drücken Sie auf eine Taste auf der Fernbedienung, während Sie auf den Sensor an der Vorderseite des Geräts zielen, um
die entsprechende Funktion auszuführen.
[Italiano]
1
Consente di accendere il prodotto.
Se si preme il tasto mentre il prodotto è acceso, verrà visualizzato il menu di controllo.
- Per uscire dal menu OSD, tenere premuto il tasto del pannello per almeno un secondo.
2
Consente di spostarsi al menu superiore o inferiore nonché di regolare il valore di un'opzione.
3
Consente di spostarsi al menu di sinistra o destra.
4
Per eseguire una funzione, premere il pulsante corrispondente sul telecomando puntando quest'ultimo in direzione del
sensore sulla parte frontale del prodotto.
DVI IN /
MAGICINFO IN
RGB / DVI /
HDMI /
AUDIO IN
RJ45
IR /AMBIENT
SENSOR IN
HDMI IN 3
HDMI IN 2
HDMI IN 1
USB
DP IN 3
(UHD 30Hz)
DP IN 2
(UHD 60Hz)
DP IN 1
(UHD 60Hz)
RGB IN
IR OUT
AUDIO OUT
RS232C OUT RS232C IN
2
1
9
3
4
5
6
7
8
! @0
[English]
1
Supplies power to the external sensor board or receives the light sensor signal.
2
Connects to a source device using a HDMI cable or HDMI-DVI cable.
3
Connects to a PC using a DP cable.
- Obtain sharp picture quality when viewing UHD content at 30 Hz.
- The recommended resolution for the DP IN 3 (UHD 30Hz) port is 1920 x 1080 @ 60 Hz.
The resolution can be changed to the optimal resolution of 3840 x 2160 @ 30 Hz, if required.
4
Connects to a PC using a DP cable.
- Obtain sharp picture quality when viewing UHD content at 60 Hz.
5
DVI IN: Connects to a source device using a DVI cable or HDMI-DVI cable.
MAGICINFO IN: To use MagicInfo, make sure to connect the DP-DVI cable.
6
Connects to MDC using a LAN cable.
7
Receives the remote control signal via the external sensor board and outputs the signal via LOOP OUT.
8
Connects to MDC using an RS232C adapter.
9
Connects to a USB device when upgrading software.
0
Connects to a source device using a D-SUB cable.
!
Connects to the audio of a source device.
@
Receives sound from a PC via an audio cable.
[Français]
1
Permet d'alimenter la carte de capteur externe ou de recevoir le signal de capteur lumineux.
2
Connexion à un périphérique source à l'aide d'un câble HDMI ou HDMI-DVI.
3
Permet de se connecter à un ordinateur via un câble DP.
- Permet d'obtenir une qualité d'image nette lors de la lecture de contenu UHD à 30 Hz.
- La résolution recommandée pour le port DP IN 3 (UHD 30Hz) est de 1920 x 1080 à 60 Hz.
Si nécessaire, la résolution peut être réglée sur une valeur optimale de 3840 x 2160 à 30 Hz.
4
Permet de se connecter à un ordinateur via un câble DP.
- Permet d'obtenir une qualité d'image nette lors de la lecture de contenu UHD à 60 Hz.
5
DVI IN: Connexion à un périphérique source à l'aide d'un câble DVI ou HDMI-DVI.
MAGICINFO IN: Pour utiliser MagicInfo, veillez à brancher le câble DP-DVI.
6
Permet de se connecter à MDC via un câble LAN.
7
Permet de recevoir le signal de la télécommande via la carte de capteur externe et d'émettre le signal via LOOP OUT.
8
Connexion au MDC grâce à un adaptateur RS232C.
9
Ce port doit être connecté à un périphérique USB lors de la mise à niveau du logiciel.
0
Permet de se connecter à un périphérique source via un câble D-SUB.
!
Connexion au signal audio d'un périphérique source.
@
Permet de recevoir le son d'un ordinateur via un câble audio.
[Deutsch]
1
Versorgt die externe Sensoreinheit mit Strom oder empfängt das Beleuchtungssensorsignal.
2
Anschließen an ein externes Gerät mit Hilfe eines HDMI- oder HDMI-DVI-Kabels.
3
Zum Anschluss eines PCs über ein DP-Kabel.
- Sorgt für schärfere Bilder, wenn UHD-Inhalt bei 30 Hz angezeigt wird.
- Die empfohlene Auösung für den Anschluss DP IN 3 (UHD 30Hz) ist 1920 x 1080 bei 60 Hz.
Die Auösung kann in die optimale Auösung von 3840 x 2160 bei 30 Hz geändert werden.
4
Zum Anschluss eines PCs über ein DP-Kabel.
- Sorgt für schärfere Bilder, wenn UHD-Inhalt bei 60 Hz angezeigt wird.
5
DVI IN: Anschließen an ein externes Gerät mit Hilfe eines DVI- oder HDMI-DVI-Kabels.
MAGICINFO IN: Zur Verwendung von MagicInfo muss das DP-DVI-Kabel angeschlossen sein.
6
Zum Anschluss eines PCs über ein LAN-Kabel.
7
Empfängt das Signal der Fernbedienung über die externe Sensoreinheit und gibt das Signal über LOOP OUT aus.
8
Zur Verbindung mit MDC über einen RS232C-Adapter.
9
Zum Anschluss eines USB-Geräts beim Aktualisieren der Software.
0
Zum Anschluss eines Quellgeräts über ein D-SUB-Kabel.
!
Anschließen an den Audioausgang eines externen Gerätes.
@
Nimmt Ton von einem PC über ein Audiokabel auf.
[Italiano]
1
Alimenta il sensore esterno o riceve il segnale del sensore luce.
2
Collega a un dispositivo sorgente mediante cavo HDMI o HDMI-DVI.
3
Consente il collegamento a un PC mediante un cavo DP.
- Consente di ottenere una qualità dell'immagine nitida quando si visualizzano contenuti UHD a 30 Hz.
- La risoluzione consigliata per la porta DP IN 3 (UHD 30Hz) è 1920 x 1080 a 60 Hz.
Se necessario, è possibile passare alla risoluzione ottimale di 3840 x 2160 a 30 Hz.
4
Consente il collegamento a un PC mediante un cavo DP.
- Consente di ottenere una qualità dell'immagine nitida quando si visualizzano contenuti UHD a 60 Hz.
5
DVI IN: Collega a un dispositivo sorgente mediante cavo DVI o HDMI-DVI.
MAGICINFO IN: Per utilizzare MagicInfo, assicurarsi di connettere il cavo DP-DVI.
6
Consente il collegamento a MDC mediante un cavo LAN.
7
Consente di ricevere il segnale del telecomando attraverso il sensore esterno e inviare in uscita il segnale attraverso LOOP OUT.
8
Consente il collegamento a MDC mediante un adattatore RS232C.
9
Consente il collegamento a un dispositivo USB quando si aggiorna il software.
0
Consente il collegamento a un dispositivo sorgente mediante un cavo D-SUB.
!
Collega alla porta audio di un dispositivo sorgente.
@
Riceve l’audio da un PC attraverso il cavo audio.
[Español]
1
Suministra alimentación a la placa de sensores externa o recibe la señal del sensor de luz.
2
Conecta a un dispositivo de origen mediante un cable HDMI o un cable HDMI-DVI.
3
Conecta con un PC mediante un cable DP.
- Permite obtener una calidad de imagen nítida al ver contenido UHD a 30 Hz.
- La resolución recomendada para el puerto DP IN 3 (UHD 30Hz) es 1920 x 1080 a 60 Hz.
La resolución se puede cambiar a la resolución óptima de 3840 x 2160 a 30 Hz, si fuera necesario.
4
Conecta con un PC mediante un cable DP.
- Permite obtener una calidad de imagen nítida al ver contenido UHD a 60 Hz.
5
DVI IN: Conecta a un dispositivo de origen mediante un cable DVI o un cable HDMI-DVI.
MAGICINFO IN: Para utilizar MagicInfo, asegúrese de conectar el cable DP-DVI.
6
Conecta con MDC mediante un cable LAN.
7
Recibe la señal del mando a distancia a través de la placa del sensor externa y envía la señal a través de LOOP OUT.
8
Conecta a MDC mediante un adaptador RS232C.
9
Conecta con un dispositivo USB cuando se actualiza el software.
0
Conecta con un dispositivo que actúa como fuente mediante un cable D-SUB.
!
Conexión del audio de un dispositivo de origen.
@
Recibe el sonido de un PC a través de un cable de audio.
[Svenska]
1
Ger ström åt den externa sensorns kretskort eller tar emot ljussensorsignalen.
2
Ansluter till en källenhet med HDMI-kabel eller HDMI-DVI-kabel.
3
För anslutning av en dator via en DP-kabel.
- Få skarp bildkvalitet när du visar UHD-innehåll i 30 Hz.
- Rekommenderad upplösning för porten DP IN 3 (UHD 30Hz) är 1920 x 1080 vid 60 Hz.
Upplösningen kan vid behov ändras till den optimala upplösningen 3840 × 2160 vid 30 Hz.
4
För anslutning av en dator via en DP-kabel.
- Få skarp bildkvalitet när du visar UHD-innehåll i 60 Hz.
5
DVI IN: Ansluter till en källenhet med DVI-kabel eller HDMI-DVI-kabel.
MAGICINFO IN: Glöm inte att ansluta DP-DVI-kabeln när du ska använda MagicInfo.
6
För anslutning till MDC via en LAN-kabel.
7
Tar emot fjärrkontrollens signaler via den externa sensorns kretskort och sänder signalen via LOOP OUT.
8
Ansluter till en MDC med en RS232C-adapter.
9
Ansluts till en USB-enhet vid uppgradering av programvaran.
0
För anslutning av en källenhet via en D-SUB-kabel.
!
Ansluter ljudet för källenheten.
@
Tar emot ljud från en dator via en ljudkabel.
[Magyar]
1
A külső érzékelőtábla tápellátása, illetve a fényérzékelő jelének fogadása.
2
Csatlakoztatás forráseszközhöz HDMI-kábel vagy HDMI–DVI kábellel.
3
Csatlakoztatás számítógéphez DP-kábellel.
- Éles képminőség elérése, amikor UHD tartalmat néz 30 Hz-en.
- A DP IN 3 (UHD 30Hz) port ajánlott felbontása 1920 x 1080 @ 60 Hz.
Szükség esetén a felbontás az optimális 3840 x 2160 @ 30 Hz felbontásra is módosítható.
4
Csatlakoztatás számítógéphez DP-kábellel.
- Éles képminőség elérése, amikor UHD tartalmat néz 60 Hz-en.
5
DVI IN: Csatlakoztatás forráseszközhöz DVI-kábel vagy HDMI–DVI kábellel.
MAGICINFO IN: A MagicInfo használatához csatlakoztassa a DP-DVI kábelt.
6
Csatlakozás MDC-hez LAN kábellel.
7
A távirányító jelének fogadása a külső érzékelőpanelen keresztül, és a jel LOOP OUT csatlakozón keresztül történő
továbbítása.
8
Csatlakoztatás MDC-hez RS232C adapterrel.
9
Csatlakoztatás USB-eszközhöz, szoftverfrissítés esetén.
0
Csatlakozás jelforrás készülékhez D-SUB kábellel.
!
Csatlakoztatás forráseszköz audiocsatlakozójához.
@
Hang fogadása PC-ről, audiokábelen keresztül.
[Polski]
1
Do zasilania zewnętrznej płyty czujnika lub odbioru sygnału czujnika światła.
2
Do podłączania urządzenia źródłowego za pomocą kabla HDMI lub kabla HDMI/DVI.
3
Do podłączenia do komputera poprzez kabel DP.
- Pozwala uzyskać wysoką ostrość obrazu w trakcie wyświetlania materiałów w jakości UHD przy częstotliwości
odświeżania ekranu wynoszącej 30 Hz.
- Dla gniazda DP IN 3 (UHD 30Hz) zalecana rozdzielczość wynosi 1920 x 1080 przy 60 Hz.
W razie konieczności rozdzielczość można zmienić na rozdzielczość optymalną 3840 x 2160 przy 30 Hz.
4
Do podłączenia do komputera poprzez kabel DP.
- Pozwala uzyskać wysoką ostrość obrazu w trakcie wyświetlania materiałów w jakości UHD przy częstotliwości odświeżania
ekranu wynoszącej 60 Hz.
5
DVI IN: Do podłączania urządzenia źródłowego za pomocą kabla DVI lub kabla HDMI/DVI.
MAGICINFO IN: Aby móc używać funkcji MagicInfo, należy podłączyć kabel DP-DVI.
6
Do podłączenia do MDC za pomocą kabla LAN.
7
Do odbioru sygnału zdalnego sterowania przez zewnętrzną płytę czujnika i wysyłania sygnału przez gniazdo LOOP OUT.
8
Gniazdo dla funkcji MDC (adapter RS232C).
9
Do podłączenia do urządzenia USB podczas aktualizacji oprogramowania.
0
Do podłączenia do urządzenia źródłowego za pomocą kabla D-SUB.
!
Do łączenia monitora z wyjściem audio urządzenia źródłowego.
@
Do odbioru dźwięku z komputera przez przewód audio.
[Português]
1
Fornece alimentação ao quadro do sensor externo ou recebe o sinal do sensor de luz.
2
Liga-se a um dispositivo de entrada utilizando um cabo HDMI ou HDMI-DVI.
3
Liga-se a um PC através de um cabo DP.
- Obtenha uma imagem nítida ao visualizar conteúdos UHD a 30 Hz.
- A resolução recomendada para a porta DP IN 3 (UHD 30Hz) é de 1920 x 1080 @ 60 Hz.
É possível alterá-la para a melhor resolução, de 3840 x 2160 @ 30 Hz, se necessário.
4
Liga-se a um PC através de um cabo DP.
- Obtenha uma imagem nítida ao visualizar conteúdos UHD a 60 Hz.
5
DVI IN: Liga-se a um dispositivo de entrada utilizando um cabo DVI ou HDMI-DVI.
MAGICINFO IN: Para usar o MagicInfo, certique-se de que liga o cabo DP-DVI.
6
Liga-se ao MDC através de um cabo LAN.
7
Recebe o sinal do telecomando através do quadro do sensor externo e transmite o sinal através da porta LOOP OUT.
8
Liga-se a um MDC utilizando um adaptador RS232C.
9
Liga-se a um dispositivo USB durante a atualização do software.
0
Liga-se a um dispositivo de entrada através de um cabo D-SUB.
!
Liga-se ao áudio de um dispositivo de entrada.
@
Recebe o som de um PC através de um cabo de áudio.
[Türkçe]
1
Harici sensör kartına güç sağlar veya ışık sensör sinyalini alır.
2
Bir HDMI kablosu ya da HDMI-DVI kablosu kullanan bir kaynak cihaza bağlanır.
3
DP kablosuyla bir PC'ye bağlar.
- UHD çözünürlüğe sahip içeriği 30 Hz'de izlerken net görüntü kalitesi elde edin.
- DP IN 3 (UHD 30Hz) bağlantı noktası için önerilen çözünürlük 60 Hz'de 1920 x 1080'dir.
Gerekirse çözünürlük optimal çözünürlük olan 30 Hz'de 3840 x 2160 olarak değiştirilebilir.
4
DP kablosuyla bir PC'ye bağlar.
- UHD çözünürlüğe sahip içeriği 60 Hz'de izlerken net görüntü kalitesi elde edin.
5
DVI IN: Bir DVI kablosu ya da HDMI-DVI kablosu kullanan bir kaynak cihaza bağlanır.
MAGICINFO IN: MagicInfo'yu kullanmak için DP-DVI kablosunu bağladığınızdan emin olun.
6
LAN kablosuyla MDC'ye bağlanır.
7
Uzaktan kumanda sinyalini harici sensör kartından alır ve LOOP OUT aracılığıyla sinyal çıkışı verir.
8
RS232C adaptörü kullanarak bir MDC'ye bağlar.
9
Yazılım yükseltirken bir USB cihaza bağlanır.
0
D-SUB kablosuyla bir kaynak cihaza bağlanır.
!
Bir kaynak cihazın ses kısmına bağlanır.
@
PC'den sesi bir ses kablosu ile alır.
213
4
Speaker / Haut-parleur
See the User’s Manual for further instructions for installation and adjustment.
Reportez-vous au manuel de l’utilisateur pour obtenir des instructions supplémentaires sur l’installation et le réglage.
- The colour and the appearance may differ depending on the product, and the specifications are subject to change without
prior notice to improve the performance.
- Download the user manual from the website for further details.
http://www.samsung.com/displaysolutions
- La couleur et l’aspect du produit peuvent varier en fonction du modèle, et ses spécications peuvent être modiées sans préavis
pour des raisons d’amélioration des performances.
- Téléchargez le manuel utilisateur du site Web pour obtenir plus de détails.
[QM85D-BR-QSG-EU]BN68-07440C-00.indd 1 2015-04-23 9:14:36

[English]
For details on how to use the MDC programme, refer to Help
after installing the programme.
The MDC programme is available on the website.
[Français]
Pour obtenir des détails sur la manière d'utiliser le programme
MDC, reportez-vous à l'Aide après avoir installé le programme.
Le programme MDC est disponible sur le site Web.
[Deutsch]
Informationen zur Verwendung des Programms MDC nden
Sie nach der Installation in der Hilfe.
Das Programm MDC ist auf der Website erhältlich.
[Italiano]
Per ulteriori dettagli su come utilizzare il programma MDC,
selezionare la guida dopo l'installazione del programma. Il
programma MDC è disponibile sul sito Web.
[Español]
Para obtener información sobre cómo usar el programa MDC,
consulte la Ayuda tras instalar el programa.
El programa MDC está disponible en el sitio web.
[Svenska]
Information om hur du använder programmet hittar du i
hjälpen när du har installerat programmet.
MDC-programmet är tillgängligt på webbplatsen.
[Magyar]
Az MDC program használatának részleteit a Súgóban találja, a
program telepítését követően.
Az MDC program a honlapon érhető el.
[Polski]
Szczegółowe informacje na temat korzystania z programu
MDC można znaleźć w pomocy dostępnej po zainstalowaniu
programu. Program MDC jest dostępny na stronie
internetowej.
[Português]
Para obter mais detalhes sobre como usar o programa MDC,
consulte a Ajuda depois de instalar o programa.
O programa MDC está disponível no site.
[Türkçe]
MDC programını nasıl kullanacağınızla ilgili ayrıntılar için,
programı yükledikten sonra Yardım bölümüne bakın.
MDC programına web sitesinden ulaşılabilir.
Troubleshooting Guide
Guide de depannage
[English]
Issues Solutions
The screen keeps switching on and off.
Check the cable connection between the product and PC, and ensure the connection is secure.
No Signal is displayed
on the screen.
Check that the product is connected correctly with a cable.
Check that the device connected to the product is powered on.
Not Optimum Mode is displayed.
This message is displayed when a signal from the graphics card exceeds the product’s
maximum resolution and frequency.
Refer to the Standard Signal Mode Table and set the maximum resolution and frequency
according to the product specications.
[Français]
Problèmes Solutions
L’écran s’allume et s’éteint continuellement.
Vériez que le câble est connecté correctement entre l’appareil et l’ordinateur.
Aucun signal s’afche à l’écran.
Vériez que l’appareil est connecté correctement à l’aide d’un câble.
Assurez-vous que le périphérique connecté à l’appareil est sous tension.
Mode non optimal est afché.
Ce message s’afche lorsqu’un signal émis par la carte graphique est supérieur à la
fréquence et la résolution maximales de l’appareil.
Consultez le tableau des modes de signal standard et réglez la fréquence et la résolution
maximales conformément aux spécications de l’appareil.
[Deutsch]
Problem Lösungen
Der Bildschirm wird ständig ein- und
ausgeschaltet.
Überprüfen Sie die Kabelverbindung zwischen dem Gerät und dem PC.
Die Meldung
Kein Signal
wird auf dem
Bildschirm angezeigt.
Überprüfen Sie, ob das Gerät korrekt über ein Kabel angeschlossen ist.
Überprüfen Sie, ob das angeschlossene Gerät eingeschaltet ist.
Die Meldung ungeeign. Modus wird
angezeigt.
Diese Meldung wird angezeigt, wenn ein Signal von der Grakkarte die
maximale Aulösung und Frequenz des Geräts überschreitet.
Schlagen Sie in der Tabelle der Standardsignalmodi nach und stellen Sie die maximale
Auösung und Frequenz gemäß den technischen Daten des Geräts ein.
[Italiano]
Problemi Soluzioni
Lo schermo si accende e si spegne.
Controllare la connessione del cavo tra il prodotto e il PC e vericare che il collegamento
sia sicuro.
Sullo schermo viene visualizzato il
messaggio Assenza di segnale.
Vericare che il prodotto sia collegato correttamente mediante cavo.
Vericare che il dispositivo collegato al prodotto sia acceso.
Mod non ottimale viene visualizzato a
schermo.
Questo messaggio viene visualizzato quando il segnale proveniente dalla scheda graca
supera la risoluzione e la frequenza massima del prodotto.
Vedere la Tabella delle modalità standard del segnale e impostare la frequenza e la
risoluzione massima in base alle speciche del prodotto.
[Español]
Problemas Soluciones
La pantalla se enciende y se apaga
continuamente.
Compruebe la conexión del cable entre el producto y el PC, asegúrese de que la conexión
sea rme.
Sin señal se muestra en la pantalla.
Compruebe que el producto esté conectado correctamente con un cable.
Compruebe que el dispositivo conectado al producto esté encendido.
Se muestra Modo no óptimo.
Este mensaje se muestra cuando una señal de la tarjeta gráca supera la frecuencia y la
resolución máxima del producto.
Consulte la Tabla de los modos de señal estándar y congure la frecuencia y la resolución
máximas en función de las especicaciones del producto.
[Svenska]
Problem Lösningar
Skärmen håller på att slås på och av.
Kontrollera kabelanslutningen mellan produkten och datorn och se till att anslutningen är säker.
Ingen signal visas på skärmen.
Kontrollera att produkten är korrekt ansluten med en kabel.
Kontrollera att enheten som är ansluten till produkten som är påslagen.
Ej optimalt läge visas.
Meddelandet visas när en signal från grakkortet överskrider produktens maximala
upplösning och frekvens.
Se tabellen för standardsignalläge och ställ in maximal frekvens enligt
produktspecikationerna.
[Magyar]
Problémák Megoldások
A képernyo felváltva be- és kikapcsol.
Ellenorizze a készülék és a számítógép közötti kábeles kapcsolatot, és gyozodjön meg
arról, hogy a csatlakoztatás stabil.
A kepernyőn a No Signal uzenet lathato.
Gyozodjön meg arról, hogy a készülék megfeleloen van csatlakoztatva a kábellel.
Ellenorizze, hogy be van-e kapcsolva a kijelzohöz csatlakoztatott eszköz.
Megjelenik a Not Optimum Mode
uzenet.
Ez az üzenet akkor jelenik meg, ha a videokártyától érkezo jel felbontása és frekvenciája
meghaladja a készülék maximális felbontását vagy frekvenciáját.
A Szabványos jelmód táblázat alapján állítsa be a készülék muszaki jellemzoinek
megfeleloen a maximális felbontást és frekvenciát.
[Polski]
Problem Rozwiązanie
Ekran naprzemiennie włacza sie i wyłacza.
Sprawdz połaczenie miedzy urzadzeniem a komputerem i upewnij sie, ze zostało wykonane
poprawnie.
Na ekranie pojawia sie komunikat
Brak sygnału.
Upewnij sie, ze urzadzenie jest prawidłowo podłaczone kablem.
Sprawdz, czy urzadzenie podłaczone do monitora jest właczone.
Wyświetlany jest komunikat
Niewłaściwy tryb
.
Komunikat ten pojawia sie, gdy sygnał z karty gracznej przekroczy maksymalna
rozdzielczosc i czestotliwosc urzadzenia.
Patrz Tabela trybu standardowego i ustaw maksymalna rozdzielczosc i czestotliwosc zgodnie
ze specykacja urzadzenia.
[Português]
Problemas Soluções
O ecrã está continuamente a ligar e a
desligar.
Verique a ligação do cabo entre o produto e o PC, e certique-se de que a ligação está bem
efectuada.
mensagem Sem Sinal e exibida no ecra
Verique se o produto está ligado correctamente com um cabo.
Verique se o dispositivo ligado ao produto está ligado.
A mensagem Modo inadequado e
exibida.
Esta mensagem é apresentada quando um sinal da placa gráca ultrapassa a resolução e a
frequência máximas do produto.
Consulte a Tabela do modo de sinal padrão e dena a resolução e a frequência máximas de
acordo com as especicações do produto.
[Türkçe]
Sorunlar Çözümler
Ekran açılıp kapanmaya devam ediyor.
Ürün ve PC arasındaki kablo baglantısını kontrol edin ve baglantının saglam oldugundan
emin olun.
Ekranda Sinyal Yok görüntüleniyor.
Ürünün bir kabloyla dogru sekilde baglandıgını kontrol edin.
Cihazın baglı oldugu ürünün açık oldugunu kontrol edin.
Uygun Olmayan Mod görüntüleniyor.
Bu mesaj, grak kartından gelen bir sinyal ürünün maksimum çözünürlügünü ve frekansını
astıgında görüntülenir.
Standart Sinyal Modu Tablosu’na bakın ve ürünün teknik özelliklerine uygun olarak
maksimum çözünürlügü ve frekansı ayarlayın.
Connecting and Using a Source Device
Connexion et utilisation d’un peripherique source
Connecting to a PC
Connexion à un PC
Connecting to a Video Device
Connexion à un appareil vidéo
RS232C IN
RS232C OUT
RS232C IN
RS232C OUT
RS232C IN
RS232C OUT
RJ45
RS232C OUT
RS232C IN
RS232C OUT
RS232C IN
RS232C OUT
RJ45
HUB
Connecting to MDC
Connexion à MDC
RGB IN
RGB / DVI / HDMI / AUDIO IN
DVI IN / MAGICINFO IN
RGB / DVI / HDMI / AUDIO IN
HDMI IN 1, HDMI IN 2, HDMI IN 3
RGB / DVI / HDMI / AUDIO IN
HDMI IN 1, HDMI IN 2, HDMI IN 3
HDMI IN 1, HDMI IN 2, HDMI IN 3
RGB / DVI / HDMI / AUDIO IN
Specifications
Caractéristiques techniques
Contact SAMSUNG WORLD WIDE
Comment contacter Samsung dans le monde
Model Name QM85D QM85D-BR
Panel
Size 85 CLASS (84.5 inches / 214 cm)
Display area 1872.0 mm (H) x 1053.0 mm (V)
Dimensions (W x H x D) 1903.4 x 1090.5 x 105.1 mm 1949 x 1130 x 128.8 mm
Weight (Without stand) 55.5 kg 81.2 kg
Synchronization
Horizontal Frequency 30 - 81 kHz, 30 - 134 kHz (DisplayPort), 30 - 90 kHz (HDMI)
Vertical Frequency 48 - 75 Hz, 56 - 75 Hz (DisplayPort), 24 - 75 Hz (HDMI)
Resolution
RGB Analog, DVI (Digital Visual Interface) Compliant Digital RGB
Optimum resolution
1920 x 1080 @ 60 Hz, 3840 x 2160 @ 60 Hz (DisplayPort1, DisplayPort2)
Maximum resolution
1920 x 1080 @ 60 Hz, 3840 x 2160 @ 30 Hz (HDMI1, HDMI2, HDMI3, Display
P
ort3)
Maximum Pixel Clock 148.5 MHz (Analog, Digital), 533 MHz (DisplayPort), 297 MHz (HDMI)
Power Supply
AC 100 to 240 VAC (+/- 10%), 60 / 50 Hz ± 3 Hz
Refer to the label at the back of the product as the standard voltage can vary in
different countries.
Environmental
considerations
Operating
Temperature : 32 °F - 104 °F (0 °C - 40 °C)
Humidity : 10% – 80%, non-condensing
Storage
Temperature : -4 °F - 113 °F (-20 °C - 45 °C)
Humidity : 5% – 95%, non-condensing
Connecting to an Audio System
Branchement à un système audio
AUDIO OUT
DP IN 1 (UHD 60Hz),
DP IN 2 (UHD 60Hz), DP IN 3 (UHD 30Hz)
HDMI IN 1, HDMI IN 2, HDMI IN 3
Connecting the LAN Cable
Connexion du câble LAN
RJ45
- This device is a Class A digital apparatus.
Web site: http://www.samsung.com
Country Customer Care Centre
AUSTRIA 0800-SAMSUNG (0800-7267864)
BELGIUM 02-201-24-18
BOSNIA 055 233 999
BULGARIA 800 111 31, Безплатна телефонна линия
CROATIA 072 726 786
CYPRUS 8009 4000 only from landline, toll free
CZECH 800 - SAMSUNG (800-726786)
DENMARK 70 70 19 70
EIRE 0818 717100
ESTONIA 800-7267
FINLAND 030-6227 515
FRANCE 01 48 63 00 00
GERMANY
0180 6 SAMSUNG bzw.
0180 6 7267864*
(*0,20 €/Anruf aus dem dt. Festnetz, aus dem Mobilfunk max. 0,60 €/Anruf)
GREECE
80111-SAMSUNG (80111 726 7864) only from land line
(+30) 210 6897691 from mobile and land line
HUNGARY
0680SAMSUNG (0680-726-786)
0680PREMIUM (0680-773-648)
ITALIA 800-SAMSUNG (800.7267864)
LATVIA 8000-7267
LITHUANIA 8-800-77777
LUXEMBURG 261 03 710
MONTENEGRO 020 405 888
NETHERLANDS 0900-SAMSUNG (0900-7267864) (€ 0,10/Min)
NORWAY 815 56480
POLAND
801-172-678* lub +48 22 607-93-33 *
* (koszt połączenia według taryfy operatora)
PORTUGAL 808 20 7267
ROMANIA 08008 726 78 64 (08008 SAMSUNG) Apel GRATUIT
SERBIA 011 321 6899
SLOVAKIA
0800 - SAMSUNG
(0800-726 786)
SLOVENIA
080 697 267 (brezplačna številka)
090 726 786 (0,39 EUR/min)
klicni center vam je na voljo od ponedeljka do petka od 9. do 18. ure.
SPAIN 0034902172678
SWEDEN 0771 726 7864 (0771-SAMSUNG)
SWITZERLAND 0800 726 78 64 (0800-SAMSUNG)
UK 0330 SAMSUNG (7267864)
[QM85D-BR-QSG-EU]BN68-07440C-00.indd 2 2015-04-23 9:14:38
-
 1
1
-
 2
2


Samsung QM85D-BR Skrócona instrukcja obsługi
- Typ
- Skrócona instrukcja obsługi
- Niniejsza instrukcja jest również odpowiednia dla
w innych językach
- español: Samsung QM85D-BR Guía de inicio rápido
- italiano: Samsung QM85D-BR Guida Rapida
- Deutsch: Samsung QM85D-BR Schnellstartanleitung
- svenska: Samsung QM85D-BR Snabbstartsguide
- português: Samsung QM85D-BR Guia rápido
- français: Samsung QM85D-BR Guide de démarrage rapide
- Türkçe: Samsung QM85D-BR Hızlı başlangıç Kılavuzu
- English: Samsung QM85D-BR Quick start guide
Powiązane artykuły
-
Samsung QM85D Skrócona instrukcja obsługi
-
Samsung UE55D Skrócona instrukcja obsługi
-
Samsung DB40D Skrócona instrukcja obsługi
-
Samsung QM105D Skrócona instrukcja obsługi
-
Samsung DM82E-BM Skrócona instrukcja obsługi
-
Samsung DM65E-BR Skrócona instrukcja obsługi
-
Samsung UD46E-C Skrócona instrukcja obsługi
-
-
-
Samsung DM82D Skrócona instrukcja obsługi