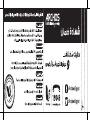
Archos 50d Neon Instrukcja obsługi
- Kategoria
- Telefony komórkowe
- Typ
- Instrukcja obsługi

1
English
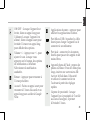
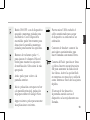
Congratulations for the purchase of an ARCHOS device!
This quick start guide helps you to start using your device properly.
If you have more questions concerning the use of your device,
• You can consult the frequently asked questions on our website:
go to http://faq.archos.com/
• You can send us a message on Facebook:
go to www.facebook.com/ARCHOS
• You can contact our After-sales department:
go to www.archos.com, click Support > After-sales support >
• You can consult the declaration of conformity:
go to www.archos.com, click Support > Downloads >
As we are often updating and improving our products, your device’s software may have
a slightly different appearance or modified functionality than presented in this Quick
Start Guide.
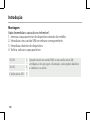
Welcome

2
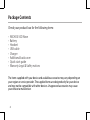
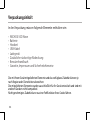
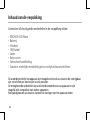
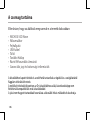
Package Contents
Check your product box for the following items:
- ARCHOS 50D Neon
- Battery
- Headset
- USB cable
- Charger
- Additional back cover
- Quick start guide
- Warranty Legal & Safety notices
The items supplied with your device and available accessories may vary depending on
your region or service provider. The supplied items are designed only for your device
and may not be compatible with other devices. Unapproved accessories may cause
your device to malfunction.

3
3
4
1 2
86
7
5
English
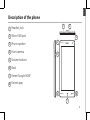
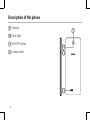
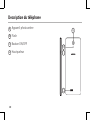
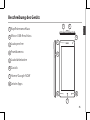
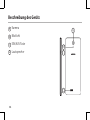
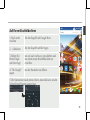
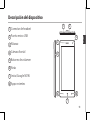
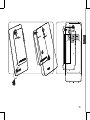
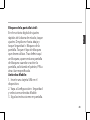
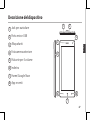
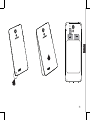
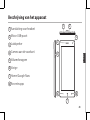
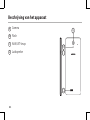
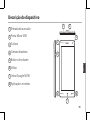
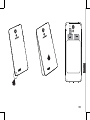
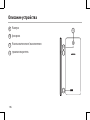
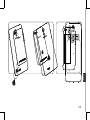
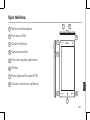
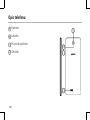
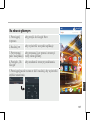
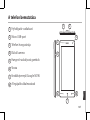
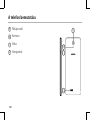
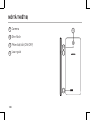
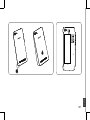
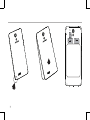
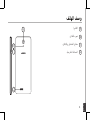
Description of the phone
1
Headset jack
Micro-USB port
Phone speaker
Front camera
Volume buttons
Back
Home/Google NOW
Recent apps
2
3
4
5
6
7
8

4
9
12
11
10
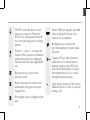
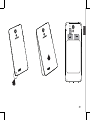
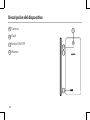
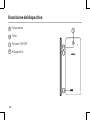
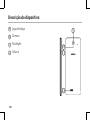
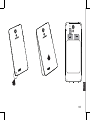
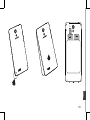
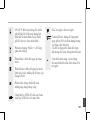
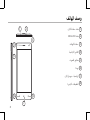
Description of the phone
11
10
9
12
Camera
Flash light
ON/OFF button
Loudspeaker

5
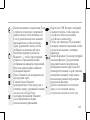
English
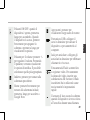
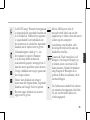
ON/OFF: when the device is off,
long press to turn on. When the
device is on, short press to turn off
the screen and long press to display
options.
Volume +/-: press +/- to adjust the
volume. When you press the button,
notication options are displayed.
You can select the most appropriate
one.
Back: press to go back to the
previous screen.
Home: short press to return to the
homescreen, long press to access
Google Now.
Recent apps: press to display recent
apps.
Micro-USB port: plug the provided
cable to charge the device or to
connect it to a computer.
Headphone jack: connect the
provided earphones to make hand-
free calls.
Camera & Flash: take pictures or
make movies. To extend movies
duration, insert a micro-SD card.
Activate the ash option in a dark
environment and use it as a torch
through the quick settings.
Light sensor: it turns off the screen
when the device is close to your ear
during a call.

6
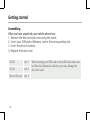
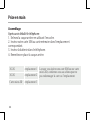
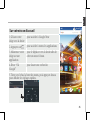
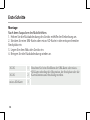
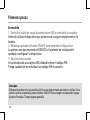
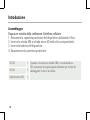
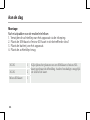
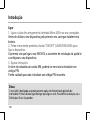
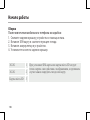
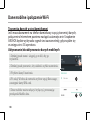
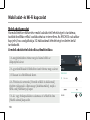
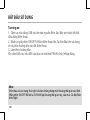
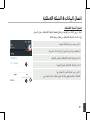
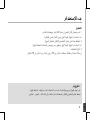
Assembling
After you have unpacked your mobile phone box:
1. Remove the device’s back cover using the notch.
2. Insert your SIM card or Memory card in the corresponding slot.
3. Insert the device’s battery.
4. Replace the back cover.
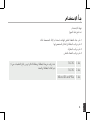
Getting started
3G/2G slot 1 When inserting your SIM card or micro-SD card, make sure
to follow the illustration, otherwise you may damage the
slot or the card.
3G/2G slot 2
Micro-SD card slot 3

7
12
3
English

8
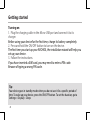
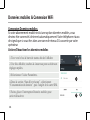
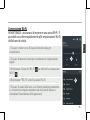
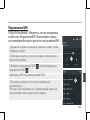
Turning on
1. Plug the charging cable in the Micro-USB port and connect it to its
charger.
Before using your device for the rst time, charge its battery completely.
2. Press and hold the ON/OFF button to turn on the device.
The rst time you start up your ARCHOS, the installation wizard will help you
set up your device.
3. Follow the instructions.
If you have inserted a SIM card, you may need to enter a PIN code.
Beware of typing a wrong PIN code.
Tip:
Your device goes in standby mode when you do not use it for a specific period of
time. To wake up your device, press the ON/OFF button. To set the duration, go to
Settings > Display > Sleep.
Getting started

5
4
1
2
3
9
English
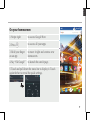
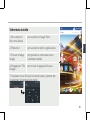
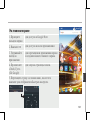
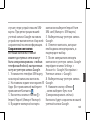
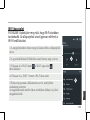
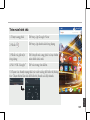
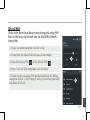
On your homescreen
1. Swipe right to access Google Now
2. Press
to access all your apps
3. Hold your nger
on an app
to move it right and create a new
homescreen.
4. Say “Ok Google” to launch the search page.
5. Touch and pull down the status bar to display it. Touch
again the bar to reveal the quick settings.

10
5
4
3
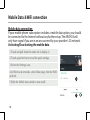
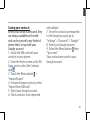
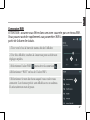
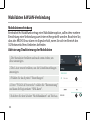
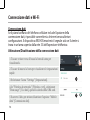
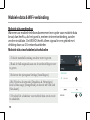
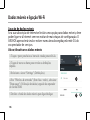
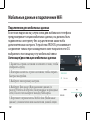
Mobile data connection
If your mobile phone subscription includes a mobile data option, you should
be connected to the Internet without any further setup. The ARCHOS will
only have signal if you are in an area covered by your provider’s 3G network.
Activating/Deactivating the mobile data
Mobile Data & WiFi connection
1. Touch and pull down the status bar to display it.
2. Touch again the bar to reveal the quick settings.
3. Select the Settings icon.
4. In Wireless & networks, select Data usage, then the SIM
card tab.
5. Slide the Mobile data switch to turn on/off.

11
3
5
English
1. Touch and pull down the status bar to display it.
2. Touch again the bar to reveal the quick settings.
3. Select the Settings icon.
4. In Wireless & networks, select Data usage, then the SIM
card tab.
5. Slide the Mobile data switch to turn on/off.
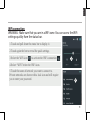
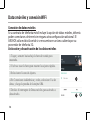
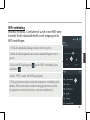
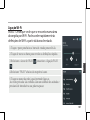
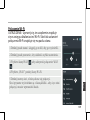
WiFi connection
WARNING: Make sure that you are in a WiFi zone. You can access the WiFi
settings quickly from the status bar.
1. Touch and pull down the status bar to display it.
2. Touch again the bar to reveal the quick settings.
3. Select the WiFi icon
to activate the WiFi connection .
4. Select “WiFi” below the WiFi icon.
5. Touch the name of network you want to connect to.
Private networks are shown with a lock icon and will require
you to enter your password.

12
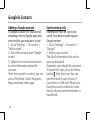
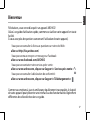
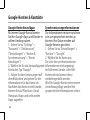
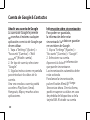
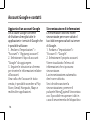
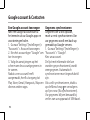
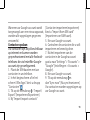
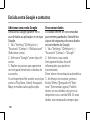
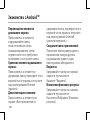
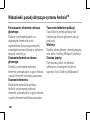
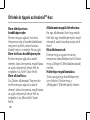
Adding a Google account
A Google account lets you take full
advantage of any Google apps and
services that you may want to use.
1. Go to “Settings” > “Accounts” >
“Add account”.
2. Select the account type “Google”
to add.
3. Follow the onscreen instructions
to enter information about the
account.
Once the account is created, you can
access Play Store, Gmail, Hangouts,
Maps and many other apps.
Synchronizing info
Information must be sync to be
saved. Your data is backed up on
Google servers.
1. Go to “Settings” > “Accounts” >
“Google”.
2. Select your account.
The list of information that can be
sync are displayed.
Automatic sync should be activated.
To launch the sync, press the Menu
button , then Sync now. You can
get them back in case of loss of
your device or SIM card. When your
Google account is added to a new
device, all your saved information is
transferred.
Google & Contacts

13
English
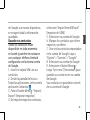
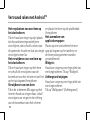
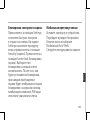
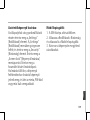
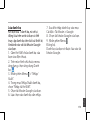
Saving your contacts
When your contacts are saved, they
are always available on the web
and can be synced to any Android
phone that’s set up with your
Google account.
1. Install the SIM card with your
contacts in your phone.
2. From the Home screen or the All
Apps screen, select the Contacts
app .
3. Touch the Menu button >
“Import/Export”.
4. In Import/export contacts, select
“Import from SIM card”.
5. Select your Google account.
6. Check contacts to be imported
and validate.
7. Once the contacts are imported
in the Google account, go to
“Settings” > “Accounts” > “Google”.
8. Select you Google account.
9. Select the Menu button , then
“Sync now”.
Your contacts are saved to your
Google account.

14
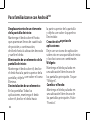
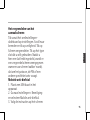
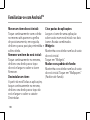
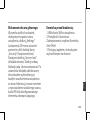
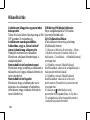
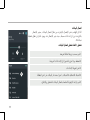
Moving a home screen item:
Touch and hold your nger onto it,
then slide it to the desired location,
and release your nger.
Removing a home screen item:
Touch and hold it, slide your nger
towards the top of the screen and
drop it over the "Remove" icon.
Uninstalling an item:
From the "All apps" screens, touch
and hold it, slide your nger towards
the top of the screen and drop it
over "Uninstall" bin.
Creating application folders:
Drop one app icon over another on
a home screen and the two icons
will be combined.
Widgets:
Hold your nger on a homescreen at
an empty location. Touch “Widgets”.
Changing your wallpaper:
Hold your nger on a home screen
at an empty location.
Touch “Wallpapers”.
Hints & tips for Android
TM

15
English
Locking the touchscreen:
Select the “Settings” app, then scroll
down and touch “Security”. Touch
“Screen lock”. Touch the type of lock
you would like to use. After you set
a lock, a lock screen is displayed
whenever your screen wakes up,
requesting the pattern, pin or other
specied key.
Mobile anti-theft:
1. Insert a SIM card in the device.
2. Go to Settings > Security and
select Mobile anti-theft.
3. Follow the onscreen instructions.

16
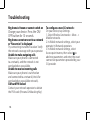
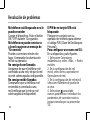
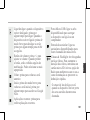
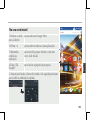
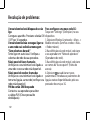
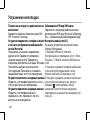
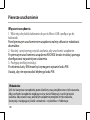
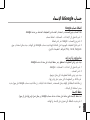
Troubleshooting
My phone is frozen or cannot switch on
Charge your device. Press the ON/
OFF button for 10 seconds.
My phone cannot connect to a network
or “No service” is displayed
Try connecting in another location. Verify
the network coverage with your operator.
Unable to make outgoing calls
Make sure your phone is connected
to a network, and the network is not
overloaded or unavailable.
Unable to receive incoming calls
Make sure your phone is switched on
and connected to a network (check for
overloaded or unavailable network).
SIM card PIN locked
Contact your network operator to obtain
the PUK code (Personal Unblocking Key).
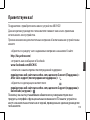
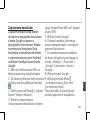
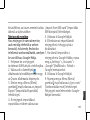
To configure a new 3G network:
On your device, tap Settings.
1. Select Wireless & networks > More... >
Mobile networks.
2. In Mobile network settings, select your
operator in Network operators.
3. In Mobile network settings, select
Access point names, then select to
add new parameters and enter the exact
connection parameters provided by your
3G provider.

17
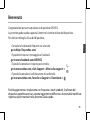
Français
Félicitations, vous venez d’acquérir un appareil ARCHOS!
Grâce à ce guide d’utilisation rapide, commencez à utiliser votre appareil en toute
facilité.
Si vous avez plus de questions concernant l’utilisation de votre appareil,
• Vous pouvez consulter la foire aux questions sur notre site Web :
allez sur http://faq.archos.com/
• Vous pouvez nous envoyer un message sur Facebook :
allez sur www.facebook.com/ARCHOS
• Vous pouvez contacter notre service après-vente :
allez sur www.archos.com, cliquez sur Support > Service après-vente >
• Vous pouvez consulter la déclaration de conformité :
allez sur www.archos.com, cliquez sur Support > Téléchargements >
Comme nous mettons à jour et améliorons régulièrement nos produits, le logiciel
de votre appareil peut présenter une interface ou des fonctionnalités légèrement
différentes de celles décrites dans ce guide.
Bienvenue

18
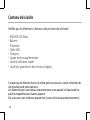
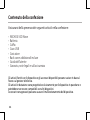
Contenu de la boîte
Vériez que les éléments ci-dessous sont présents dans la boîte :
- ARCHOS 50D Neon
- Batterie
- Kit piéton
- Câble USB
- Chargeur
- Coque arrière supplémentaire
- Guide d’utilisation rapide
- Guide des garanties et des mentions légales
Il se peut que les éléments fournis, de même que les accessoires, varient en fonction de
votre localité ou de votre opérateur.
Les éléments fournis sont conçus uniquement pour votre appareil et ils pourraient ne
pas être compatibles avec d’autres appareils.
Des accessoires non conformes peuvent être la source d’un mauvais fonctionnement.

19
3
4
1 2
86
7
5
Français
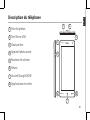
Description du téléphone
1
2
3
4
Prise kit piéton
Port Micro-USB
Haut-parleur
Appareil photo avant
Boutons de volume
Retour
Accueil/Google NOW
Applications récentes
5
6
7
8

20
9
12
11
10
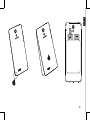
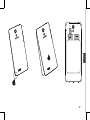
Description du téléphone
9
11
10
12
Appareil photo arrière
Flash
Bouton ON/OFF
Haut-parleur
Strona się ładuje...
Strona się ładuje...
Strona się ładuje...
Strona się ładuje...
Strona się ładuje...
Strona się ładuje...
Strona się ładuje...
Strona się ładuje...
Strona się ładuje...
Strona się ładuje...
Strona się ładuje...
Strona się ładuje...
Strona się ładuje...
Strona się ładuje...
Strona się ładuje...
Strona się ładuje...
Strona się ładuje...
Strona się ładuje...
Strona się ładuje...
Strona się ładuje...
Strona się ładuje...
Strona się ładuje...
Strona się ładuje...
Strona się ładuje...
Strona się ładuje...
Strona się ładuje...
Strona się ładuje...
Strona się ładuje...
Strona się ładuje...
Strona się ładuje...
Strona się ładuje...
Strona się ładuje...
Strona się ładuje...
Strona się ładuje...
Strona się ładuje...
Strona się ładuje...
Strona się ładuje...
Strona się ładuje...
Strona się ładuje...
Strona się ładuje...
Strona się ładuje...
Strona się ładuje...
Strona się ładuje...
Strona się ładuje...
Strona się ładuje...
Strona się ładuje...
Strona się ładuje...
Strona się ładuje...
Strona się ładuje...
Strona się ładuje...
Strona się ładuje...
Strona się ładuje...
Strona się ładuje...
Strona się ładuje...
Strona się ładuje...
Strona się ładuje...
Strona się ładuje...
Strona się ładuje...
Strona się ładuje...
Strona się ładuje...
Strona się ładuje...
Strona się ładuje...
Strona się ładuje...
Strona się ładuje...
Strona się ładuje...
Strona się ładuje...
Strona się ładuje...
Strona się ładuje...
Strona się ładuje...
Strona się ładuje...
Strona się ładuje...
Strona się ładuje...
Strona się ładuje...
Strona się ładuje...
Strona się ładuje...
Strona się ładuje...
Strona się ładuje...
Strona się ładuje...
Strona się ładuje...
Strona się ładuje...
Strona się ładuje...
Strona się ładuje...
Strona się ładuje...
Strona się ładuje...
Strona się ładuje...
Strona się ładuje...
Strona się ładuje...
Strona się ładuje...
Strona się ładuje...
Strona się ładuje...
Strona się ładuje...
Strona się ładuje...
Strona się ładuje...
Strona się ładuje...
Strona się ładuje...
Strona się ładuje...
Strona się ładuje...
Strona się ładuje...
Strona się ładuje...
Strona się ładuje...
Strona się ładuje...
Strona się ładuje...
Strona się ładuje...
Strona się ładuje...
Strona się ładuje...
Strona się ładuje...
Strona się ładuje...
Strona się ładuje...
Strona się ładuje...
Strona się ładuje...
Strona się ładuje...
Strona się ładuje...
Strona się ładuje...
Strona się ładuje...
Strona się ładuje...
Strona się ładuje...
Strona się ładuje...
Strona się ładuje...
Strona się ładuje...
Strona się ładuje...
Strona się ładuje...
Strona się ładuje...
Strona się ładuje...
Strona się ładuje...
Strona się ładuje...
Strona się ładuje...
Strona się ładuje...
Strona się ładuje...
Strona się ładuje...
Strona się ładuje...
Strona się ładuje...
Strona się ładuje...
Strona się ładuje...
Strona się ładuje...
Strona się ładuje...
Strona się ładuje...
Strona się ładuje...
Strona się ładuje...
Strona się ładuje...
Strona się ładuje...
Strona się ładuje...
Strona się ładuje...
Strona się ładuje...
Strona się ładuje...
Strona się ładuje...
Strona się ładuje...
Strona się ładuje...
Strona się ładuje...
Strona się ładuje...
Strona się ładuje...
Strona się ładuje...
Strona się ładuje...
Strona się ładuje...
Strona się ładuje...
Strona się ładuje...
Strona się ładuje...
Strona się ładuje...
Strona się ładuje...
Strona się ładuje...
Strona się ładuje...
Strona się ładuje...
Strona się ładuje...
Strona się ładuje...
Strona się ładuje...
Strona się ładuje...
Strona się ładuje...
Strona się ładuje...
Strona się ładuje...
Strona się ładuje...
Strona się ładuje...
Strona się ładuje...
Strona się ładuje...
Strona się ładuje...
Strona się ładuje...
Strona się ładuje...
Strona się ładuje...
Strona się ładuje...
-
 1
1
-
 2
2
-
 3
3
-
 4
4
-
 5
5
-
 6
6
-
 7
7
-
 8
8
-
 9
9
-
 10
10
-
 11
11
-
 12
12
-
 13
13
-
 14
14
-
 15
15
-
 16
16
-
 17
17
-
 18
18
-
 19
19
-
 20
20
-
 21
21
-
 22
22
-
 23
23
-
 24
24
-
 25
25
-
 26
26
-
 27
27
-
 28
28
-
 29
29
-
 30
30
-
 31
31
-
 32
32
-
 33
33
-
 34
34
-
 35
35
-
 36
36
-
 37
37
-
 38
38
-
 39
39
-
 40
40
-
 41
41
-
 42
42
-
 43
43
-
 44
44
-
 45
45
-
 46
46
-
 47
47
-
 48
48
-
 49
49
-
 50
50
-
 51
51
-
 52
52
-
 53
53
-
 54
54
-
 55
55
-
 56
56
-
 57
57
-
 58
58
-
 59
59
-
 60
60
-
 61
61
-
 62
62
-
 63
63
-
 64
64
-
 65
65
-
 66
66
-
 67
67
-
 68
68
-
 69
69
-
 70
70
-
 71
71
-
 72
72
-
 73
73
-
 74
74
-
 75
75
-
 76
76
-
 77
77
-
 78
78
-
 79
79
-
 80
80
-
 81
81
-
 82
82
-
 83
83
-
 84
84
-
 85
85
-
 86
86
-
 87
87
-
 88
88
-
 89
89
-
 90
90
-
 91
91
-
 92
92
-
 93
93
-
 94
94
-
 95
95
-
 96
96
-
 97
97
-
 98
98
-
 99
99
-
 100
100
-
 101
101
-
 102
102
-
 103
103
-
 104
104
-
 105
105
-
 106
106
-
 107
107
-
 108
108
-
 109
109
-
 110
110
-
 111
111
-
 112
112
-
 113
113
-
 114
114
-
 115
115
-
 116
116
-
 117
117
-
 118
118
-
 119
119
-
 120
120
-
 121
121
-
 122
122
-
 123
123
-
 124
124
-
 125
125
-
 126
126
-
 127
127
-
 128
128
-
 129
129
-
 130
130
-
 131
131
-
 132
132
-
 133
133
-
 134
134
-
 135
135
-
 136
136
-
 137
137
-
 138
138
-
 139
139
-
 140
140
-
 141
141
-
 142
142
-
 143
143
-
 144
144
-
 145
145
-
 146
146
-
 147
147
-
 148
148
-
 149
149
-
 150
150
-
 151
151
-
 152
152
-
 153
153
-
 154
154
-
 155
155
-
 156
156
-
 157
157
-
 158
158
-
 159
159
-
 160
160
-
 161
161
-
 162
162
-
 163
163
-
 164
164
-
 165
165
-
 166
166
-
 167
167
-
 168
168
-
 169
169
-
 170
170
-
 171
171
-
 172
172
-
 173
173
-
 174
174
-
 175
175
-
 176
176
-
 177
177
-
 178
178
-
 179
179
-
 180
180
-
 181
181
-
 182
182
-
 183
183
-
 184
184
-
 185
185
-
 186
186
-
 187
187
-
 188
188
-
 189
189
-
 190
190
-
 191
191
-
 192
192
-
 193
193
-
 194
194
-
 195
195
-
 196
196
-
 197
197


Archos 50d Neon Instrukcja obsługi
- Kategoria
- Telefony komórkowe
- Typ
- Instrukcja obsługi
w innych językach
- español: Archos 50d Neon Manual de usuario
- italiano: Archos 50d Neon Manuale utente
- português: Archos 50d Neon Manual do usuário
- français: Archos 50d Neon Manuel utilisateur