17
RQTX1024
Getting StartedPlaying DiscsOther OperationsReference
ENGLISH
DivX information
ABOUT DIVX VIDEO-ON-DEMAND:
This DivX
®
Certified device must be registered in order to play DivX
Video-on-Demand (VOD) content.
First generate the DivX VOD registration code for your device and submit
it during the registration process. [Important: DivX VOD content is
protected by a DivX DRM (Digital Rights Management) system that
restricts playback to registered DivX Certified devices. If you try to play
DivX VOD content not authorized for your device, the message
“AUTHORIZATION ERROR” will be displayed and your content will not
play.]
Learn more at www.divx.com/vod.
Display the unit’s registration code
(B 16, “REGISTRATION” in OTHERS menu)
≥ We recommend that you make a note of this code for future reference.
≥ After playing DivX VOD content for the first time, another registration
code is then displayed in “REGISTRATION (DIVX)”. Do not use this
registration code to purchase DivX VOD content. If you use this code to
purchase DivX VOD content, and then play the content on this unit, you
will no longer be able to play any content that you purchased using the
previous code.
Regarding DivX content that can only be played a set
number of times
Some DivX VOD content can only be played a set number of times. When
you play this content, the remaining number of plays is displayed.
You cannot play this content when the number of remaining plays is zero.
(“RENTAL EXPIRED” is displayed.)
When playing this content
≥ The number of remaining plays is reduced by one if
– you press [Í]1 or [SETUP];.
– you press [∫ STOP]5.
– you press [:, 9 SKIP]5 or [6, 5 SEARCH]5 etc. and
arrive at another content.
Resume function (B 10, Stop: [∫ STOP]5) does not work.
You can display subtitles text recorded onto the DivX video disc on this unit.
Depending on the methods used to create the file, the following functions
may not work, or the subtitles may not be displayed correctly.
1 During play, select “SUBTITLE” in Menu 1 (B 12).
2 Press [3, 4]9 to select “TEXT ON” and press [OK]9.
≥DivX video files that do not display “TEXT ON” do not contain
subtitles text. Subtitles text cannot be displayed.
≥If the subtitles text are not displayed correctly, try changing the
language settings (B below).
Subtitles text language settings
[Only when “LANGUAGE” in DISPLAY menu is set to “ENGLISH” (B 16).]
1 During play, press [SETUP];.
2 Press [3, 4]9 to select “DISC” and press [OK]9.
3 Press [3, 4]9 to select “SUBTITLE TEXT” and press [OK]9.
4 Press [3, 4]9 to select “LATIN1”, “LATIN2” (factory setting),
“CYRILLIC” or “TURKISH” and press [OK]9.
≥To exit the screen, press [SETUP];.
Types of subtitles text file that can be displayed
Subtitles text that satisfy the following conditions can be displayed on this
unit.
≥ File format: MicroDVD, SubRip, or TMPlayer
≥ File extension: “.SRT”, “.srt”, “.SUB”, “.sub”, “.TXT”, or “.txt”
≥ File name: No more than 44 characters excluding the file extension
≥ The DivX video file and subtitles text file are inside the same folder, and
the file names are the same except for the file extensions.
≥ If there are more than one subtitles text files inside the same folder, they
are displayed in the following order of priority: “.srt”, “.sub”, “.txt”.
[Note]
≥ If the file name of the DivX video file is not displayed correctly on the
menu screen (the file name is displayed as “¢”), or the file size exceeds
256 KB, the subtitles text may not be displayed correctly.
≥ The subtitles text cannot be displayed during menu display or when
operations such as search are being performed.
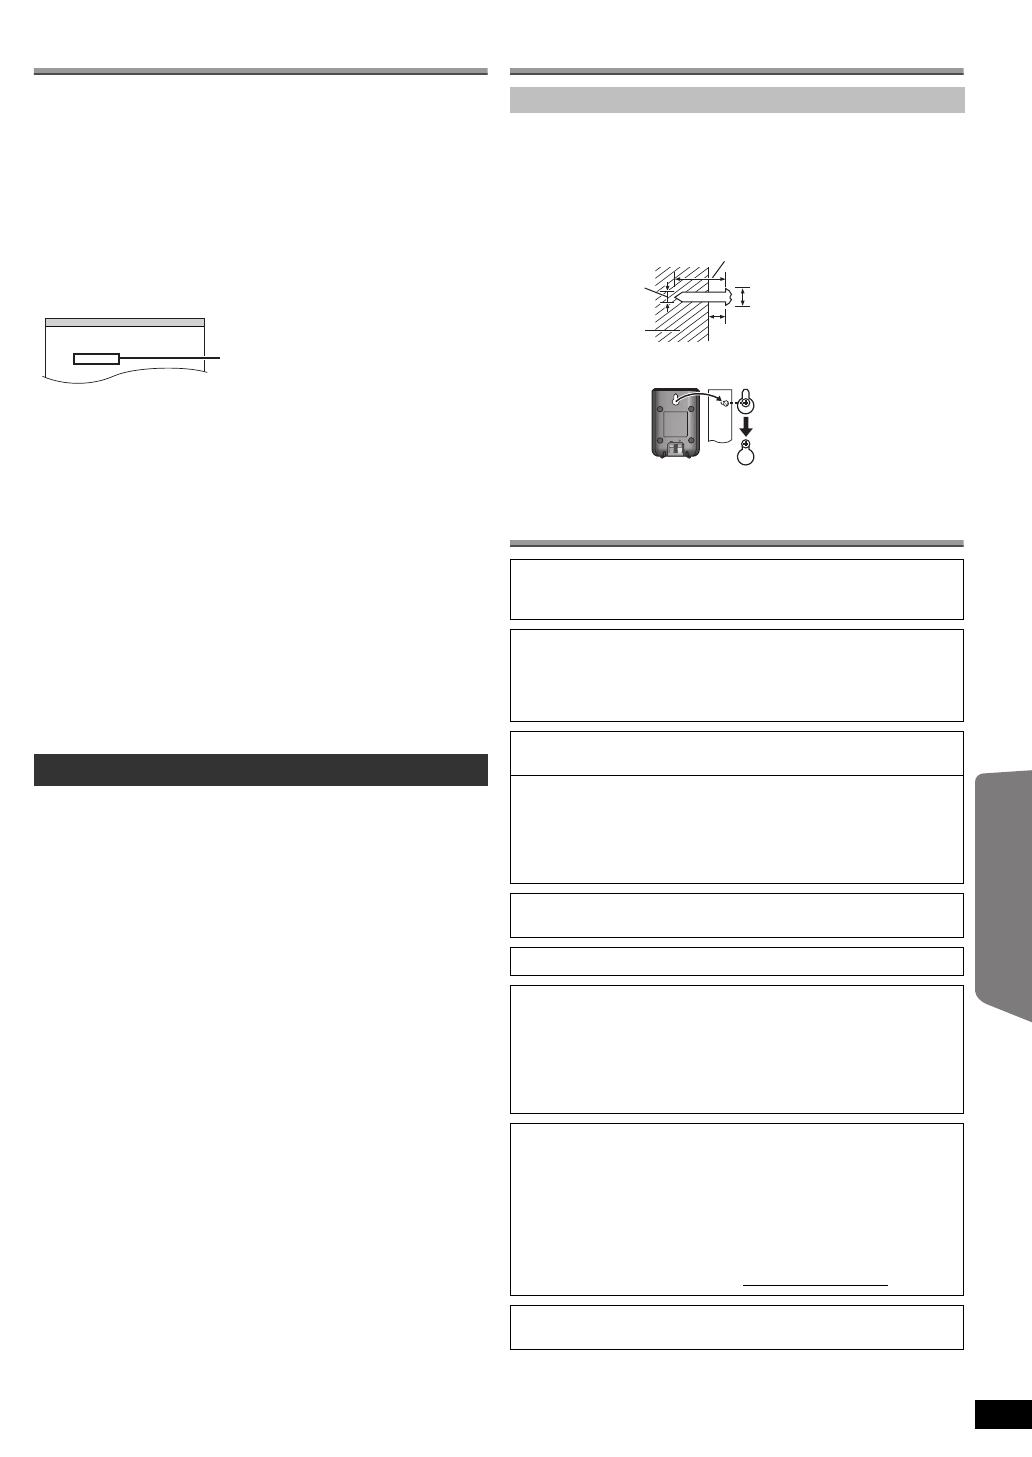
Speaker installation option
You can attach all of the speakers (except subwoofer) to a wall.
≥ The wall or pillar on which the speakers are to be attached should be
capable of supporting 10 kg per screw. Consult a qualified building
contractor when attaching the speakers to a wall. Improper attachment
may result in damage to the wall and speakers.
Licenses
Displaying DivX subtitles text
SET
OTHERS−REGISTRATION (DIVX)
DIVX (R) VIDEO ON DEMAND
YOUR REGISTRATION CODE IS
XXXXXXXX
TO LEARN MORE VISIT
www.divx.com/vod
8 alphanumeric characters
Attaching to a wall
1 Drive a screw (not included) into the wall.
2 Fit the speaker securely onto the screw(s) with the hole(s).
Manufactured under license from Dolby Laboratories.
Dolby, Pro Logic, and the double-D symbol are trademarks of Dolby
Laboratories.
Manufactured under license under U.S. Patent #’s: 5,451,942;
5,956,674; 5,974,380; 5,978,762; 6,487,535 & other U.S. and
worldwide patents issued & pending. DTS and DTS Digital Surround
are registered trademarks and the DTS logos and Symbol are
trademarks of DTS, Inc. c 1996-2008 DTS, Inc. All Rights Reserved.
U.S. Patent Nos. 6,836,549; 6,381,747; 7,050,698; 6,516,132; and
5,583,936.
This product incorporates copyright protection technology that is
protected by U.S. patents and other intellectual property rights. Use of
this copyright protection technology must be authorized by
Macrovision, and is intended for home and other limited viewing uses
only unless otherwise authorized by Macrovision. Reverse
engineering or disassembly is prohibited.
HDMI, the HDMI logo and High-Definition Multimedia Interface are
trademarks or registered trademarks of HDMI Licensing LLC.
HDAVI Control
TM
is a trademark of Panasonic Corporation.
Windows Media and the Windows logo are trademarks or registered
trademarks of Microsoft Corporation in the United States and/or other
countries.
This product is protected by certain intellectual property rights of
Microsoft Corporation and third parties. Use or distribution of such
technology outside of this product is prohibited without a license from
Microsoft or an authorized Microsoft subsidiary and third parties.
This product is licensed under the MPEG-4 Visual patent portfolio
license for the personal and non-commercial use of a consumer for (i)
encoding video in compliance with the MPEG-4 Visual Standard
(“MPEG-4 Video”) and/or (ii) decoding MPEG-4 Video that was
encoded by a consumer engaged in a personal and non-commercial
activity and/or was obtained from a video provider licensed by MPEG
LA to provide MPEG-4 Video. No license is granted or shall be implied
for any other use. Additional information including that relating to
promotional, internal and commercial uses and licensing may be
obtained from MPEG LA, LLC. See http://www.mpegla.com
.
Plays DivX
®
video
DivX
®
is a registered trademark of DivX, Inc., and is used under license.
At least 30 mm
Wall or pillar
4.0 mm
7.0 mm to 9.0 mm
3 mm to 5 mm
17
SC-PT70EP-RQTX1024-Z_eng.book Page 17 Thursday, August 20, 2009 10:19 AM


