HQ Power HQPE11001 Instrukcja obsługi
- Kategoria
- Budziki
- Typ
- Instrukcja obsługi
Niniejsza instrukcja jest również odpowiednia dla


HQWS10001
V. 01 – 27/03/2020 2 ©Velleman nv

HQWS10001
V. 01 – 27/03/2020 3 ©Velleman nv
USER MANUAL
1. Introduction
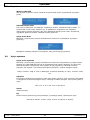
To all residents of the European Union
Important environmental information about this product
This symbol on the device or the package indicates that disposal of the device after its
lifecycle could harm the environment. Do not dispose of the unit (or batteries) as
unsorted municipal waste; it should be taken to a specialized company for recycling.
This device should be returned to your distributor or to a local recycling service. Respect
the local environmental rules.
If in doubt, contact your local waste disposal authorities.
Thank you for choosing HQPower™! Please read the manual thoroughly before bringing
this device into service. If the device was damaged in transit, do not install or use it and
contact your dealer.
2. Safety Instructions
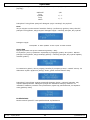
Read and understand this manual and all safety signs before using this appliance.
Indoor use only.
Power supply polarisation.
• This device can be used by children aged from 8 years and above, and persons with
reduced physical, sensory or mental capabilities or lack of experience and
knowledge if they have been given supervision or instruction concerning the use of
the device in a safe way and understand the hazards involved. Children shall not
play with the device. Cleaning and user maintenance shall not be made by children
without supervision.
• Do not expose this appliance to dripping or splashing liquids. Do not place objects
filled with liquid, such as a vase, on top of the appliance.
• Do not block any ventilation openings. Install in accordance with the manufacturer’s
instructions.
• Do not install near any heat sources such as radiators, heat registers, stoves or
other devices (including amplifiers) that produce heat.
• Only use attachments and accessories specified by the manufacturer.
• Unplug this appliance during lightning storms or when not in use for long periods of
time.
• Protect the power cord from being walked on or pinched, particularly at the prongs,
convenience receptacles, the point where they exit from the appliance.
• If the external flexible cable or cord of this device is damaged, it shall be exclusively
replaced by the manufacturer or his service agent or a similar qualified person in
order to avoid a hazard.
• Where the mains plug or an appliance coupler is used as the disconnect device, the
disconnect device shall remain readily operable.
• This appliance may require the use of a different line cord, attachment plug, or
both, depending on the available power source at installation. Connect this
appliance only to the power source indicated on the appliance’s rear panel. To
reduce the risk of fire or electric shock, refer servicing to qualified service personnel
or equivalent.

HQWS10001
V. 01 – 27/03/2020 4 ©Velleman nv
3. General Guidelines
• Refer to the Velleman
®
Service and Quality Warranty on the last pages of this
manual.
• All modifications of the device are forbidden for safety reasons. Damage caused by
user modifications to the device is not covered by the warranty.
• Only use the device for its intended purpose. Using the device in an unauthorised
way will void the warranty.
• Damage caused by disregard of certain guidelines in this manual is not covered by
the warranty and the dealer will not accept responsibility for any ensuing defects or
problems.
• Nor Velleman nv nor its dealers can be held responsible for any damage
(extraordinary, incidental or indirect) – of any nature (financial, physical…) arising
from the possession, use or failure of this product.
• Keep this manual for future reference.
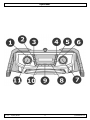
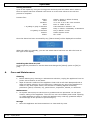
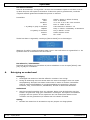
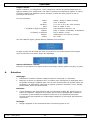
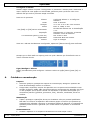
4. Overview
Refer to the illustrations on page 2 of this manual.
1
preset/3/8
7
snooze/tuning/enter
2
preset/2/7
8
rewind/scan
3
preset/1/6
9
info/menu
4
preset/4/9
10
mode
5
preset/5/10
11
on-off/vol +/-
6
shift/pause
5. Operation
5.1 Setup
First-Time Use
Connect the appliance to a suitable power supply source, or insert four C-type batteries
in the battery compartment. It is recommended to power this appliance with batteries
only for short portable use.
Next, fully extend the antenna.
Switching On
Connect the appliance to a suitable power supply source. Press the on-off button to
switch on the appliance.
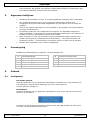
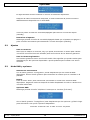
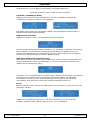
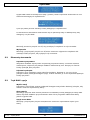
Date and time will automatically be set by the DAB signal. The radio will scan for
available frequencies.

HQWS10001
V. 01 – 27/03/2020 5 ©Velleman nv
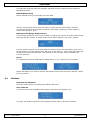
The digit on the right indicates the amount of available frequencies.
Once the scan completed, the radio will tune itself to the first alphabetically listed
station available in DAB mode.
Press the on-off button again to put the appliance in standby mode.
Switching Off
Press and hold the on-off button until the appliance switches off, or just press the
button briefly to cancel the standby mode.
5.2 Controls
Using the Buttons
All button actions are a brief press unless otherwise stated in the required action. This
includes the button function of the dials.
Using the Dial
The dials on this appliance are dual action. This means you can use them to scroll
through the available options and press them for the required button actions.
5.3 DAB Mode and Options
Selecting a Station
Use the tuning/enter dial to cycle through the available DAB stations. Press the dial to
tune the radio into the displayed station.
Scanning
Retune or refresh the amount of available DAB stations by pressing the scan button. It
is recommended you do this when the radio has been moved or if you are getting a poor
DAB signal.
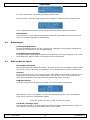
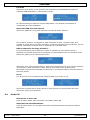
DAB Menu Options
Press and hold the info/menu button until [Full Scan] is displayed.
Turn the tuning/enter dial to cycle through the options and press the same dial to
select. Available options:
Full Scan → Manual Tune → DRC → Prune → System
Full Scan
Select [Full Scan] in the menu options to fully erase and retune all the available DAB
stations.

HQWS10001
V. 01 – 27/03/2020 6 ©Velleman nv
The radio will scan through the available channels. All the channels will be shown in
alphabetical order.
Manual DAB Tuning
Select [Manual Tune] to manually tune the radio.
Use the tuning/enter dial to tune the radio in and press the same dial to keep the
current tuning. Save as a preset if required. This helps in getting a clearer signal in
areas where signal is poor.
DRC (Dynamic Range Compression)
This function enables to even out the audio by raising the volume of quieter audio levels
and lowering the volume of louder audio levels. Select [DRC] in the menu options.
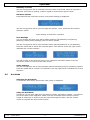
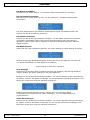
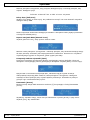
The low option will give you a small amount of DRC, where the high option gives you a
strong amount. Use the tuning/enter dial to tune the radio in. Then, press the same dial
to select the required preference. The asterisk in the top right corner indicates the
current selection.
Prune
It is possible to remove DAB stations listed with a [?] by using the prune function.
Select the station you wish to remove and select [Prune] from the menu options. Select
[Yes] to confirm.
5.4 FM Mode
Selecting the FM Mode
Press the mode button to change from DAB to FM radio.
Auto Tune FM
To autotune the next available radio station, press the scan button once.
The scan will always stop at the next signal received. Save a preset if required.

HQWS10001
V. 01 – 27/03/2020 7 ©Velleman nv
Manually Tune FM
Use the tuning/enter dial to manually tune the radio in FM mode. Save as a preset if
required. This helps in getting a clearer signal in areas where signal is poor.
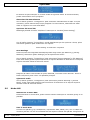
FM Menu Options
Press and hold the info/menu button until [Scan Setting] is displayed.
Use the tuning/enter dial to cycle through the options. Then, press the same dial to
select an option:
Scan Setting → Audio Set → System
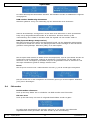
Scan Settings
You can change the auto tune search ability between [All Stations] and [Strong
Stations]. Select [Scan Settings] from the menu options.
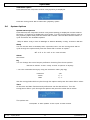
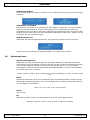
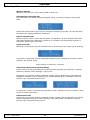
Use the tuning/enter dial to cycle between either [Strong Stations] or [All Stations].
Press the same dial to select the required option. The asterisk in the top right corner
indicates the current selection.
You will be sent to the previous menu once a selection has been made. Press the
info/menu button to return to the main screen.
Audio Settings
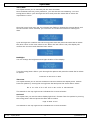
Use the tuning/enter dial to cycle between [Stereo Allowed] and [Forced Mono] options.
Press the same dial to confirm. The asterisk in the top right corner indicates the current
selection.
5.5 Aux Mode
Selecting the AUX Mode
To select the AUX mode, press mode until [AUX] is displayed.
Using the AUX Mode
Connect a 3.5 mm jack cable from the device (mobile, MP3 player, tablet…) to the AUX
port at the back of the appliance. Make sure the connected device has the volume
output at maximum in order to play the sound through the radio. Use the volume
control to regulate the end volume output.

HQWS10001
V. 01 – 27/03/2020 8 ©Velleman nv
AUX Menu Option
Press and hold the info/menu button until [System] is displayed.
Press the tuning/enter dial to select the [System] option.
5.6 System Options
System Menu Options
Press and hold the info/menu button until [Scan Setting] is displayed in either DAB or
FM mode, or [System] is displayed in AUX mode. Turn the tuning/enter dial to cycle to
the [System] option and press the same dial to select. Use the same dial as before to
cycle and select the available options:
Sleep → Alarm → EQ → Time → Backlight → Inactive Standby → Lang. → Reset → SW Ver.
Sleep
You can set the radio to standby after a period of time. Use the tuning/enter dial to
cycle through the options and press the same dial to select an option:
Off → 15 → 30 → 45 → 60 → 90 minutes
Alarm
See below.
EQ
You can change the sound output preference choosing from these options:
Normal → Classic → Jazz → Pop → Rock → Speech → My EQ*
* You can customise the EQ by using the submenu under [My EQ]:
Loudness
Y/N
Treble
+/- 7
Bass
+/- 7
Use the tuning/select dial to cycle through the options and press the same dial to select.
Time
All the time and date functions and preferences can be altered here. Turn the
tuning/enter dial to cycle through the options and press the same dial to select.
The options are:
Time/Date → Auto Update → Set 12/24 → Date Format

HQWS10001
V. 01 – 27/03/2020 9 ©Velleman nv
Time/Date
This option allows you to manually set the time and date.
Once selected from the [Time] submenu, you will see the hours flashing. Turn the
tuning/enter dial to cycle through the hours and press the same dial to select the
required hour value.
Once the hours have been set, the minutes are flashing. Repeat the process above and
set the minutes. Once selected, you will move on to the next screen for setting the
date.
Cycle through the numbers with the tuning/enter dial and press the same dial to select
the value. Move to the next value to set. When the last value is set, the display will
confirm the new time and date has been saved.
Backlight
You can change the brightness and light duration of the display.
Turn the tuning/enter dial to cycle through the options and press the same dial to select
an option:
Time Out → On Level → Dim
Time Out
This option allows you to set the duration of the time before the display dims. Choose
from the options by turning the tuning/enter dial and press the same dial to select:
On → 10 → 20 → 30 → 45 → 60 → 90 → 120 → 180 seconds
The asterisk in the top right corner indicates the current selection.
On Level
This option lets you set the active display light level. Choose from the options by turning
the tuning/enter dial and press the same dial to select:
High → Med → Low
The asterisk in the top right corner indicates the current selection.

HQWS10001
V. 01 – 27/03/2020 10 ©Velleman nv
Dim
This option lets you set the inactive display light level. Choose from the options by
turning the tuning/enter dial and press the same dial to select:
High → Med → Low
The asterisk in the top right corner indicates the current selection.
Inactive Standby (Step)
You can set the auto standby time with this feature. Choose from the options by turning
the tuning/enter dial and press the same dial to select:
Off → 2 → 4 → 5 → 6 hours
Each value is a period of minutes. The radio will continue to play for the selected
duration until you select [Off]. The asterisk in the top right corner indicates the current
selection.
Language
With this option you can choose your language. Choose from the options by turning the
tuning/enter dial and press the same dial to select:
English → Français → Deutsch → Italiano → Español
The asterisk in the top right corner indicates the current selection.
Reset
Selecting this option will reset the radio and clear any saved presets. Use this option if
the DAB signal is still poor after re-scanning for stations or any other possible default.
SW Ver.
This will display the current software version in use.
5.7 DAB/FM Preset
The radio has 10 preset slots for both DAB and FM selections.
Storing Preset 1-5
Tune a station in on either DAB or FM and make sure it is currently playing. Press and
hold on of the presets marked 1/6, 2/7, 3/8, 4/9 or 5/10. This relates to the first
number shown. If done successfully, you will see a stored message on the display.
Storing Preset 1-6
Tune a station in on either DAB or FM and make sure it is currently playing. Press the
shift button, and press and hold on of the presets marked 1/6, 2/7, 3/8, 4/9 or 5/10.
This relates to the second number shown. If done successfully, you will see a stored
message on the display.
Recalling a Preset
To recall a preset on 1-5, press one of the preset numbers to recall a saved station. To
recall a preset on 6-10, press the shift button followed by one of the preset numbers to
recall a saved station. Note that all presets will be lost as soon as the radio is
disconnected from the mains or if the batteries are removed.

HQWS10001
V. 01 – 27/03/2020 11 ©Velleman nv
5.8 DAB/FM Information
Information Details
When listening in DAB or FM mode, press the info button to cycle through the available
information from the broadcasting service and the radio.
The information cycle:
DAB → FM → AUX
DAB
• Now Playing
• Signal Strength
• Music Genre
• National/Local Designation
• MHz Frequency
• Signal Errors
• Kbps Data Transfer Rate
• Power Type
• Time Date
FM
• Now Playing
• Station Name
• Music Genre
• Mono/Stereo
• Power Type
• Time
• Date
AUX
• Power Type
• Time
• Date
5.9 Alarm
Disabling the Alarm/Snooze
Press the on/off button to turn off the alarm, or press the snooze button to start a 5
minute countdown before the alarm sounds again.
Setting the Alarm
Press and hold the info/menu button until the display changes. Use the tuning/enter dial
to cycle to the [System] menu and press the same dial to select it. Use the tuning/enter
dial to cycle to the [Alarm] menu and press the same dial to select it. Note that you can
only set the alarm when the radio is active and not in standby mode.

HQWS10001
V. 01 – 27/03/2020 12 ©Velleman nv
Setting the Alarm
Cycle to the option by using the tuning/enter dial and press the same dial to select it.
Once an option has been selected it will move on to the next value to set until the
process is complete.
Process flow:
Alarm
Alarm 1 Setup → Alarm 2 Setup
Time
Hour → Minutes
Duration
15 → 30 → 45 → 60 → 90 minutes
Alert
Buzz → *DAB → *FM
* If [DAB] or [FM] is selected
Last Listened → Preset 1-10
Repeat
Daily → *Once → Weekday → Weekend
* If [Once] is selected
Day → Month → Year
Volume
Select Volume Level
Alarm
On → Off
Once the alarm has been successfully set, [Alarm Saved] will be displayed to confirm.
When the radio is in standby, you can see which alarm has been set with the icons on
the right of the display.
Switching the Alarm On/Off
Go through the procedure to set the alarm and change the [Alarm] option to [On] or
[Off].
6. Care and Maintenance
Cleaning
• Before starting any cleaning or maintenance activities, unplug the appliance from its
power source and let it cool down.
• Wipe all exterior surfaces of the appliance clean with a soft cloth dampened with a
soap and water solution. Do not immerse or submerge any part of the appliance in
water or any other liquid. Never use solvents or cleaning agents containing
petroleum (petrol, kerosene, oil), paint thinner, turpentine, alcohol, or ammonia.
Maintenance
• All repairs should only be carried out by qualified service personnel. Do not open
exterior casing of the appliance. There are no user-serviceable parts inside. Opening
or visible attempts to open or repair the appliance may void any guarantee and/or
cause damage to the product or personal injury.
Storage
• Store the appliance and its accessories in a clean and dry area.

HQWS10001
V. 01 – 27/03/2020 13 ©Velleman nv
7. Technical Specifications
power supply
adapter ............................................................................................. 5 VDC, 1 A
batteries ....................................................................... 4 x 1.5 V C cell (not incl.)
speaker output ........................................................................................ 2 x 2.5 W
IP rate ...........................................................................................................IPX3
frequency
FM ............................................................................................... 87.5-108 MHz
DAB .............................................................................................. 174-240 MHz
dimensions .............................................................................. 322 x 110 x 136 mm
weight ........................................................................................................ 1.4 kg
Use this device with original accessories only. Velleman nv cannot be held
responsible in the event of damage or injury resulting from (incorrect) use of
this device. For more info concerning this product and the latest version of this
manual, please visit our website www.velleman.eu. The information in this
manual is subject to change without prior notice.
© COPYRIGHT NOTICE
The copyright to this manual is owned by Velleman nv. All worldwide rights
reserved. No part of this manual may be copied, reproduced, translated or reduced to
any electronic medium or otherwise without the prior written consent of the copyright
holder.

HQWS10001
V. 01 – 27/03/2020 14 ©Velleman nv
HANDLEIDING
1. Inleiding
Aan alle ingezetenen van de Europese Unie
Belangrijke milieu-informatie betreffende dit product
Dit symbool op het toestel of de verpakking geeft aan dat, als het na zijn levenscyclus
wordt weggeworpen, dit toestel schade kan toebrengen aan het milieu. Gooi dit toestel
(en eventuele batterijen) niet bij het gewone huishoudelijke afval; het moet bij een
gespecialiseerd bedrijf terechtkomen voor recyclage. U moet dit toestel naar uw
verdeler of naar een lokaal recyclagepunt brengen. Respecteer de plaatselijke
milieuwetgeving.
Hebt u vragen, contacteer dan de plaatselijke autoriteiten betreffende de
verwijdering.
Dank u voor uw aankoop! Lees deze handleiding grondig door voor u het toestel in
gebruik neemt. Werd het toestel beschadigd tijdens het transport, installeer het dan
niet en raadpleeg uw dealer.
2. Veiligheidsvoorschriften
Lees en begrijp deze handleiding en de veiligheidsinstructies vóór ingebruikname.
Uitsluitend voor gebruik binnenshuis.
Poolaanduiding voedingsstekker.
• Dit toestel is geschikt voor gebruik door kinderen vanaf 8 jaar, door personen met
fysieke, zintuiglijke of verstandelijke beperkingen, of door personen met gebrek aan
ervaring en kennis, op voorwaarde dat dit onder toezicht gebeurt van een persoon
die verantwoordelijk is voor hun veiligheid of hun aanwijzingen heeft gegeven, hoe
zij het toestel moeten gebruiken en zich bewust zijn van de risico's die het gebruik
van het toestel met zich meebrengt. Kinderen mogen niet met het toestel spelen.
De reiniging en het onderhoud van het toestel mogen niet worden uitgevoerd door
kinderen, tenzij ze onder toezicht staan.
• Stel dit toestel niet bloot aan druipende of spattende vloeistoffen. Plaats geen
voorwerpen gevuld met vloeistoffen, zoals vazen, op het toestel.
• Zorg ervoor dat de ventilatieopeningen niet geblokkeerd worden. Installeer het
toestel volgens de voorschriften van de fabrikant.
• Installeer het toestel niet in de nabijheid van warmtebronnen (zoals radiatoren,
verwarmingselementen, kachels of andere toestellen) die warmte produceren.
• Gebruik uitsluitend de door de fabrikant gespecificeerde hulpstukken/accessoires.
• Trek de stekker uit het stopcontact bij onweer en wanneer het toestel gedurende
een langere periode niet wordt gebruikt.
• Zorg ervoor dat niemand op de kabel kan stappen of erover kan struikelen, bij de
stekker, het stopcontact en het punt waar de kabel uit het toestel gaat.
• Indien de externe, flexibele kabel beschadigd is, dan moet deze door de fabrikant,
diens servicedienst, of een gelijkwaardig bekwaam persoon vervangen worden.
• Als u de stekker of de aansluiting op het toestel gebruikt om het toestel uit te
schakelen, dient u ervoor te zorgen dat deze goed toegankelijk zijn.
• Het gebruik van een ander netsnoer, een andere montagestekker of beide kan nodig
zijn, afhankelijk van de beschikbare voedingsbron op de plaats van gebruik. Sluit

HQWS10001
V. 01 – 27/03/2020 15 ©Velleman nv
het toestel alleen aan op een voedingsbron die wordt aangegeven op de achterkant
van het toestel. Om gevaar voor brand en elektrische schokken te voorkomen, laat
het onderhoud steeds uitvoeren door een vakman.
3. Algemene richtlijnen
• Raadpleeg de Velleman
®
service- en kwaliteitsgarantie achteraan deze handleiding.
• Om veiligheidsredenen mag u geen wijzigingen aanbrengen. Schade door
wijzigingen die de gebruiker heeft aangebracht aan het toestel valt niet onder de
garantie.
• Gebruik het toestel enkel waarvoor het gemaakt is. De garantie vervalt automatisch
bij ongeoorloofd gebruik.
• De garantie geldt niet voor schade door het negeren van bepaalde richtlijnen in
deze handleiding en uw dealer zal de verantwoordelijkheid afwijzen voor defecten of
problemen die hier rechtstreeks verband mee houden.
• Noch Velleman nv noch zijn verdelers kunnen aansprakelijk gesteld worden voor
schade (buitengewoon, incidenteel of onrechtstreeks) – van welke aard dan ook
(financieel, fysisch…) voortvloeiend uit het bezit, gebruik of falen van dit product.
• Bewaar deze handleiding voor verdere raadpleging.
4. Omschrijving
Raadpleeg de afbeeldingen op pagina 2 van deze handleiding.
1
voorinstelling/3/8
7
sluimeren/tuning/enter
2
voorinstelling/2/7
8
terug/scannen
3
voorinstelling/1/6
9
info/menu
4
voorinstelling/4/9
10
modus
5
voorinstelling/5/10
11
aan-uit/vol +/-
6
shift/pauze
5. Gebruik
5.1 Configuratie
Het eerste gebruik
Sluit het toestel aan op een geschikte voedingsbron of plaats vier C-type batterijen in
het batterijvak. Gebruik alleen batterijen voor kort mobiel gebruik.
Trek de antenne volledig uit.
Inschakelen
Sluit het toestel aan op een geschikte voedingsbron. Druk op de aan/uit-knop om het
toestel in te schakelen.
De datum en tijd worden automatisch ingesteld door het DAB-signaal. De radio voert
een scan uit op beschikbare frequenties.

HQWS10001
V. 01 – 27/03/2020 16 ©Velleman nv
De teller rechts geeft het aantal gevonden zenders weer.
Na het scannen geeft de radio de gevonden zenders in alfanumerieke volgorde weer.
Druk nogmaals op de aan/uit-knop om het toestel in stand-bymodus te zetten.
Uitschakelen
Houd de aan/uit-knop ingedrukt totdat het toestel is uitgeschakeld of druk kort op de
knop om de stand-bymodus te deactiveren.
5.2 Bedieningen
De knoppen gebruiken
In deze handleiding wordt van een “korte druk” uitgegaan, tenzij anders aangegeven.
Dit omvat de knopfunctie van de draaiknoppen.
De draaiknoppen gebruiken
De draaiknoppen op dit toestel hebben een knopfunctie. Met deze knoppen kunt u door
de beschikbare opties scrollen en de gewenste actie selecteren.
5.3 DAB-modus en opties
Een zender selecteren
Gebruik de draaiknop 'Afstemmen/Enter' om door de lijst met beschikbare DAB-zenders
te scrollen. Druk op de knop 'Tuning/Enter' om de weergegeven zender te selecteren.
Scannen
Druk op de knop 'Scan' om de radio opnieuw naar DAB-zenders te laten scannen en de
zenderlijst te vernieuwen. Het is aanbevolen om een scan uit te voeren wanneer de
radio werd verplaatst of als het ontvangen signaal niet sterk genoeg is.
DAB-menuopties
Houd de info/menu-knop ingedrukt totdat [Full Scan] wordt weergegeven.
Draai aan de knop 'Tuning/Enter' om door de opties te scrollen en druk op dezelfde
knop om te selecteren. Beschikbare opties:
Full Scan → Manual Tune → DRC → Prune → System
Full Scan (Volledige scan)
Selecteer [Full Scan] in de menuopties om alle beschikbare DAB-zenders te wissen en
een volledige scan naar nieuwe DAB-zenders uit te voeren.

HQWS10001
V. 01 – 27/03/2020 17 ©Velleman nv
De radio doorloopt de beschikbare kanalen. Alle kanalen worden in alfabetische volgorde
weergegeven.
DAB-zenders handmatig afstemmen
Selecteer [Manual Tune] om handmatig op een radiozender af te stemmen.
Gebruik de draaiknop 'Tuning/Enter' om de radio af te stemmen en druk op dezelfde
knop om op de geselecteerde zender af te stemmen. Sla deze zender op als
voorinstelling. Dit is ideaal in situaties waar het signaal van een zender zwak is.
DRC (Dynamic Range Compression)
Met deze functie kunnen radio's het dynamisch bereik van de uitgaande audiosignalen
comprimeren zodat het volume van zachte geluiden wordt verhoogd en dat van harde
geluiden wordt gedempt. Selecteer [DRC] in de menuopties.
Met de optie LOW worden de harde tonen licht afgezwakt, met de optie HIGH worden de
harde tonen sterk afgezwakt. Gebruik de draaiknop 'Tuning/Enter' om de radio af te
stemmen. Druk vervolgens op dezelfde knop om de gewenste keuze te selecteren. Het
sterretje rechtsboven geeft de huidige selectie weer.
Prune
Met de prune-functie kunt u DAB-zenders met een [?] uit de zenderlijst verwijderen
Kies de zender die u wilt verwijderen en selecteer [Prune] in de menuopties. Selecteer
[Yes] om te bevestigen.
5.4 FM-modus
De FM-modus selecteren
Druk op de knop 'Mode' om te schakelen van DAB-modus naar FM-modus.
FM auto-tune
Druk op de scan-knop om naar de volgende beschikbare zender te gaan.
De radio stopt automatisch met scannen wanneer er een zender met voldoende
signaalsterkte wordt gevonden. Sla deze zender op als voorinstelling.

HQWS10001
V. 01 – 27/03/2020 18 ©Velleman nv
Handmatig afstemmen op FM-radiozenders
Gebruik de draaiknop 'Tuning/Enter' om de radio handmatig af te stemmen in FM-
modus. Sla deze zender op als voorinstelling. Dit is ideaal in situaties waar het signaal
van een zender zwak is.
FM-menuopties
Houd de knop 'Info/Menu' ingedrukt totdat [Scan Setting] wordt weergegeven.
Gebruik de draaiknop 'Tuning/Enter' om door de opties te scrollen. Druk op dezelfde
knop om een optie te selecteren:
Scan Setting → Audio Set → System
Scan Settings (Scaninstellingen)
Bij de automatische scanfunctie kunt u kiezen tussen [All Stations] en [Strong
Stations]. Selecteer [Scan Settings] in de menuopties.
Gebruik de draaiknop 'Tuning/Enter' om te scrollen tussen [Strong stations] of [All
stations]. Druk op de knop 'Tuning/Enter' om de gewenste optie te selecteren. Het
sterretje rechtsboven geeft de huidige selectie weer.
Zodra een keuze is gemaakt, wordt het vorige menu weergegeven. Druk op de knop
'Info/Menu' om naar het hoofdscherm terug te keren .
Audio Settings (audio-instellingen)
Gebruik de draaiknop 'Tuning/Enter' om te scrollen tussen de opties [Stereo Allowed] en
[Forced Mono]. Druk nogmaals om te bevestigen. Het sterretje rechtsboven geeft de
huidige selectie weer.
5.5 AUX-modus
De AUX-modus selecteren
Om de AUX-modus te selecteren, houd de mode-knop ingedrukt totdat [AUX] wordt
weergeven.
De AUX-modus gebruiken
Sluit een 3.5 mm-kabel van het toestel (mobiele telefoon, MP3-speler, tablet, ...) aan
op de AUX-ingang (achterkant). Zorg ervoor dat het volume van het aangesloten toestel
ingesteld is op het maximumniveau om het geluid via de radio af te spelen. Gebruik de
volumeknoppen om het gewenste volume in te stellen.

HQWS10001
V. 01 – 27/03/2020 19 ©Velleman nv
AUX-menuoptie
Houd de knop 'Info/Menu' ingedrukt totdat [System] wordt weergeven.
Druk op de knop 'Tuning/Enter' om de optie [System] te selecteren.
5.6 Systeemopties
Systeemmenu-opties
Houd de info/menu-knop ingedrukt totdat [Scan Setting] wordt weergeven in DAB- of
FM-modus of [System] in AUX-modus. Draai aan de knop 'Tuning/Enter' om door de
opties te scrollen en druk op dezelfde knop om te selecteren. Gebruik dezelfde knop om
door de opties te scrollen en om de gewenste optie te selecteren.
Sleep → Alarm → EQ → Time → Backlight → Inactive Standby → Lang. → Reset → SW
Ver.
Sleep (slaaptimer)
De radio kan worden ingesteld om naar de stand-bymodus te schakelen wanneer een
vooraf ingestelde tijd is verstreken. Gebruik de draaiknop 'Tuning/Enter' om door te
opties te scrollen en druk op dezelfde knop om een optie te selecteren.
Off → 15 → 30 → 45 → 60 → 90 minutes
Alarm (alarm)
Zie hierna.
EQ (equalizer)
Het geluid kan worden naar wens worden aangepast met de EQ-instellingen:
Normal → Classic → Jazz → Pop → Rock → Speech → My EQ*
* U kunt de equalizer naar wens instellen via het submenu onder [EQ]:
Loudness
Y/N
Treble
+/- 7
Bass
+/- 7
Gebruik de draaiknop 'Tuning/Enter' om door de opties te scrollen en druk op dezelfde
knop om een optie te selecteren.
Time (tijd)
Alle datum- en tijdfuncties kunnen hier gewijzigd worden. Draai aan de knop
'Tuning/Enter' om door de opties te scrollen en druk op dezelfde knop om te selecteren.
De opties zijn:
Time/Date → Auto Update → Set 12/24 → Date Format

HQWS10001
V. 01 – 27/03/2020 20 ©Velleman nv
Time/Date (tijd/datum)
Met deze optie kunt u de datum en tijd handmatig instellen.
Selecteer Time/Date in het submenu [Time]. De uurweergave begint te knipperen. Draai
aan de knop 'Tuning/Enter' om door de uren te scrollen en druk op dezelfde knop om de
gewenste waarde te selecteren.
Na het instellen van de uren, knippert de minutenweergave. Herhaal de bovenstaande
stappen en stel de minuten in. Ga naar het volgende scherm om de datum in te stellen.
Gebruik de draaiknop 'Tuning/Enter' om door de beschikbare nummers te scrollen en
druk op de knop om de gewenste waarde te selecteren. Ga naar de volgende waarde-
instelling. Wanneer de laatste waarde is ingesteld, verschijnt een bevestiging op het
display dat de nieuwe tijd en datum zijn opgeslagen.
Achtergrondverlichting
U kunt de helderheid en de achtergrondverlichting van het scherm wijzigen.
Draai aan de knop 'Tuning/Enter' om door de beschikbare opties te scrollen en druk op
dezelfde knop om een optie te selecteren:
Time Out → On Level → Dim
Time Out
Met deze optie kunt u de tijd instellen voordat het display uitgaat. Draai aan de knop
'Tuning/Enter' om door de opties te scrollen en druk op dezelfde knop om een optie te
selecteren:
On → 10 → 20 → 30 → 45 → 60 → 90 → 120 → 180 seconds
Het sterretje rechtsboven geeft de huidige selectie weer.
On Level
Met deze optie kunt u het niveau van de achtergrondverlichting van het actieve display
instellen. Draai aan de knop 'Tuning/Enter' om door de opties te scrollen en druk op
dezelfde knop om een optie te selecteren:
High → Med → Low
Het sterretje rechtsboven geeft de huidige selectie weer.
Strona się ładuje...
Strona się ładuje...
Strona się ładuje...
Strona się ładuje...
Strona się ładuje...
Strona się ładuje...
Strona się ładuje...
Strona się ładuje...
Strona się ładuje...
Strona się ładuje...
Strona się ładuje...
Strona się ładuje...
Strona się ładuje...
Strona się ładuje...
Strona się ładuje...
Strona się ładuje...
Strona się ładuje...
Strona się ładuje...
Strona się ładuje...
Strona się ładuje...
Strona się ładuje...
Strona się ładuje...
Strona się ładuje...
Strona się ładuje...
Strona się ładuje...
Strona się ładuje...
Strona się ładuje...
Strona się ładuje...
Strona się ładuje...
Strona się ładuje...
Strona się ładuje...
Strona się ładuje...
Strona się ładuje...
Strona się ładuje...
Strona się ładuje...
Strona się ładuje...
Strona się ładuje...
Strona się ładuje...
Strona się ładuje...
Strona się ładuje...
Strona się ładuje...
Strona się ładuje...
Strona się ładuje...
Strona się ładuje...
Strona się ładuje...
Strona się ładuje...
Strona się ładuje...
Strona się ładuje...
Strona się ładuje...
Strona się ładuje...
Strona się ładuje...
Strona się ładuje...
Strona się ładuje...
Strona się ładuje...
Strona się ładuje...
Strona się ładuje...
Strona się ładuje...
Strona się ładuje...
Strona się ładuje...
Strona się ładuje...
Strona się ładuje...
Strona się ładuje...
-
 1
1
-
 2
2
-
 3
3
-
 4
4
-
 5
5
-
 6
6
-
 7
7
-
 8
8
-
 9
9
-
 10
10
-
 11
11
-
 12
12
-
 13
13
-
 14
14
-
 15
15
-
 16
16
-
 17
17
-
 18
18
-
 19
19
-
 20
20
-
 21
21
-
 22
22
-
 23
23
-
 24
24
-
 25
25
-
 26
26
-
 27
27
-
 28
28
-
 29
29
-
 30
30
-
 31
31
-
 32
32
-
 33
33
-
 34
34
-
 35
35
-
 36
36
-
 37
37
-
 38
38
-
 39
39
-
 40
40
-
 41
41
-
 42
42
-
 43
43
-
 44
44
-
 45
45
-
 46
46
-
 47
47
-
 48
48
-
 49
49
-
 50
50
-
 51
51
-
 52
52
-
 53
53
-
 54
54
-
 55
55
-
 56
56
-
 57
57
-
 58
58
-
 59
59
-
 60
60
-
 61
61
-
 62
62
-
 63
63
-
 64
64
-
 65
65
-
 66
66
-
 67
67
-
 68
68
-
 69
69
-
 70
70
-
 71
71
-
 72
72
-
 73
73
-
 74
74
-
 75
75
-
 76
76
-
 77
77
-
 78
78
-
 79
79
-
 80
80
-
 81
81
-
 82
82


HQ Power HQPE11001 Instrukcja obsługi
- Kategoria
- Budziki
- Typ
- Instrukcja obsługi
- Niniejsza instrukcja jest również odpowiednia dla
w innych językach
- español: HQ Power HQPE11001 Manual de usuario
- Deutsch: HQ Power HQPE11001 Benutzerhandbuch
- português: HQ Power HQPE11001 Manual do usuário
- français: HQ Power HQPE11001 Manuel utilisateur
- English: HQ Power HQPE11001 User manual
- Nederlands: HQ Power HQPE11001 Handleiding
Powiązane artykuły
Inne dokumenty
-
Sharp DR-450(BK) Instrukcja obsługi
-
Sharp DR-S460 Instrukcja obsługi
-
audizio Padova DAB+ Radio Wood Instrukcja obsługi
-
HQ-Power HQDA10002 Instrukcja obsługi
-
OK ORD 110 Instrukcja obsługi
-
Perel WC220 Instrukcja obsługi
-
Perel WC217 Instrukcja obsługi
-
-
Perel WC206 Instrukcja obsługi
-
Perel WC207 Instrukcja obsługi