Tyco Electronics 1928L Instrukcja obsługi
- Kategoria
- Telewizory
- Typ
- Instrukcja obsługi

Touchmonitor OSD Guide
With Multi-Language Support
1928L 19” LCD Desktop Touchmonitor

Elo TouchSystems
1928L 19-inch LCD Touchmonitor
OSD Guide with Multi-Language Support
Revision A
P/N E229394

Languages
English…………………………………1
Deutsch.................................................. 5
Español………………………………...9
本人〔日本語〕……………………….13
Italiano………………………………....17
中國人 …………………………………21
Polski ………………………………….25
Svenska………………………………...29

1232/11/2009148211
2
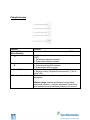
Table of Contents
Operation
About Touchmonitor Adjustments…………………………………………………......1
Side Panel Controls……………………………………………………..2
Controls and Adjustment………………………………………………………..3
OSD Menu Functions……………………………………………………3
OSD Locking and Unlocking Feature………………………………….3
OSD Control Options……………………………………………………4

1232/11/2009148311
3
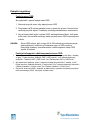
OPERATION
About Touchmonitor Adjustments
Your touchmonitor will unlikely require adjustment. Variations in video output and application may require
adjustments to your touchmonitor to optimize the quality of the display. For best performance, your touchmonitor
should be operating in native resolution that is 1280 X 1024 at 60–75 Hz. Use the display control panel in Windows to
choose 1280 X 1024 resolution. Operating in other resolutions degrades video performance.
All adjustments you make to the controls are automatically memorized. This feature saves you from having to reset
your choices every time you unplug or power your touchmonitor off and on. If there is a power failure, your
touchmonitor settings will not default to the factory specifications. To restore factory set up, choose it from the OSD,
Recall Defaults.

1232/11/2009148411
4
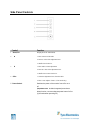
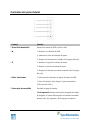
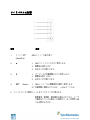
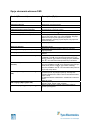
Side Panel Controls
Control Function
1 Menu/Exit Dislplay/Exits the OSD Menus.
2 ▲ 1. Enter contrast of the OSD.
2. Increase value of the adjustment item.
3. Shuffle item clockwise.
3 ▼ 1. Enter audio volume adjustment.
2. Decrease value of the adjustment item.
3. Shuffle item counter-clockwise.
4 Select 1. Select the adjustment items from the OSD.
2. Enter “Auto Adjust” feature. (VGA mode only)
5 Power Switch Switches the power of the monitor from off to on to
off.
(Important note: Includes integrated power down
delay function, user must depress power button for five
(5) seconds when powering off.)

1232/11/2009148511
5
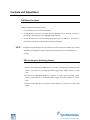
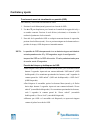
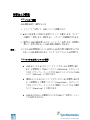
Controls and Adjustment
OSD Menu Functions
To display and Select the OSD Functions:
1 Press the Menu key to activate the OSD menu.
2 Use ▲or▼ to move clockwise or counterclockwise through the menu. Press the select key on
the monitor. The parameter will be highlighted when selected.
3 To quit the OSD screen at any time during the operation, press the Menu key. If no keys are
pressed for a short time period, the OSD automatically disappears.
NOTE: The OSD screen will disappear if no input activities are detected from 45 seconds to 255 seconds,
depending on the OSD time setting on the OSD of the monitor. The monitor default is 45
seconds.
OSD Locking and Unlocking Feature
To Lock OSD, hold Menu and ▲ button for 2 seconds. A window pops up showing “OSD
Unlock” as you hold every 2 seconds the window toggeles from “OSD is Unlock” to “OSD
Lock.”
To Lock Power, hold Menu and ▼ for 2 seconds. A window pops up showing “Power
Unlock” as you hold every 2 seconds the window toggles from “Power Unlock” to “Power
Lock.”
While the OSD and/or Power is locked, when the OSD keys are pushed, no window shall
appear.

1232/11/2009148611
6
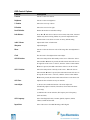
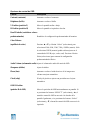
OSD Control Options
Control Descripción
Contrast Increase or decrease contrast.
Brightness Increase or decrease brightness.
V-Position Moves the screen up or down.
H-Position Moves the screen left or right.
Recall Defaults Returns the monitor to its default settings.
Color Balance Press ▲ or ▼ and “Select” button to select 9300, 6500, 5500, 7500 and
USER. Only when selecting USER, can you make adjustments to the
R/G/B content. Press Select to restore to factory default setting.
Audio Volume Adjust audio vlume of OSD menu.
Sharpness Adjust Sharpness.
Phase Increase or decrease the snow noise of the image after auto adjustment is
made.
Clock The dot clock is fine-adjusted after Auto Adjust.
OSD H-Position Moves the OSD position horizontally on the screen. When the “Select”
button and the ▲ button are pressed, the OSD control menu will move to
the right side of the screen. Likewise, when the “Select” button and the
▼button is pressed, the OSD control menu will move to the left side.
OSD V-Position Moves the OSD position vertically on the screen. When the “Select”
button and the ▲ button is pressed, the OSD control menu will move to
the top side of the screen. Likewise, when the “Select” button and the
▼button are pressed, the OSD control menu will move to the lower side.
OSD Time Adjusts the time of OSD icon stays on monitor.
Auto-Adjust (1) Press Auto to enable this function. The Auto-Adjust will
automatically adjust V-Position, H-Position, Clock and Clock-Phase.
(VGA only)
(2) Indicates the current resolution, H-Frequency and V-Frequency.
(DVI and VGA.)
OSD Language Select from English, French, German, Spanish, Japanese, Italian,
Chinese, Polish and Swedish.
Input Select Select video source from DSUB analog to DVI digital.

1232/11/2009148711
7
Índice de contenido
FUNCIONAMIENTO
Acerca de los ajustes del monitor táctil………………………………………………………6
Controles del panel lateral…………………………………………………… 7
Controles y ajuste………………………………………………………………………8
Funciones de menú de visualización en pantalla (OSD)………………… 8
Función de bloqueo y desbloqueo de OSD…………………………………8
Opciones de control de OSD………………………………………………9-10

1232/11/2009148811
8
FUNCIONAMIENTO
ACERCA DE LOS AJUSTES DEL MONITOR TÁCTIL
Su monitor táctil probablemente no requiera ajustes. Las variaciones en las salidas de vídeo y
las aplicaciones podrían requerir ajustes en su monitor táctil para optimizar la calidad de
visualización. Para un rendimiento óptimo, el monitor táctil debe funcionar a resolución nativa,
es decir, 1280 X 1024 píxeles a 60-75 Hz. Use el panel de control de pantalla de Windows para
seleccionar una resolución de 1280 X 1024 píxeles. El funcionamiento a otras resoluciones
degrada el rendimiento del vídeo.
Todos los ajustes que realice en los controles se memorizarán automáticamente. Esta función
le ahorra el tener que reconfigurar sus elecciones cada vez que desenchufe o que apague o
encienda el monitor táctil. Si se produce un corte de corriente, la configuración del monitor
táctil no volverá por defecto a las especificaciones de fábrica. Para restaurar la configuración
de fábrica, selecciónela en la visualización en pantalla (OSD).

1232/11/2009148911
9
Controles del panel lateral
Control Función
1 Menu/Exit (menú/salir) Muestra los menús de OSD o sale de ellos.
2 ▲ 1. Introduce el contraste de OSD.
2. Aumenta el valor del elemento de ajuste.
3. Desplaza el elemento en el sentido de las agujas del reloj.
3 ▼ 1. Introduce el ajuste de volumen de audio.
2. Reduce el valor del elemento de ajuste.
3. Desplaza el elemento en sentido contrario al de las agujas
del reloj.
4 Select (seleccionar) 1. Selecciona los elementos de ajuste del menú de OSD.
2. Pasa a la función “Auto Adjust” (ajuste automático).
(Sólo en modo VGA.)
5 Interruptor de encendido Enciende o apaga el monitor.
(Nota importante: Incluye una función integrada de retardo
de apagado, el usuario deberá pulsar el botón de encendido
durante cinco [5] segundos a fin de apagar el monitor.)

1232/11/20091481011
10
Controles y ajuste
Funciones de menú de visualización en pantalla (OSD)
Para mostrar y seleccionar las funciones de OSD:
1. Presione la tecla Menu (menú) para activar el menú de OSD.
2. Use ▲ o ▼ para desplazarse por el menú en el sentido de las agujas del reloj o
en sentido contrario. Presione la tecla Select (seleccionar) en el monitor. Se
resaltará el parámetro al seleccionarlo.
3. Para salir de la pantalla de OSD en cualquier momento durante la operación,
presione la tecla Menu (menú). Si no se presiona ninguna tecla durante un breve
periodo de tiempo, OSD desaparecerá automáticamente.
NOTA: La pantalla de OSD desaparecerá si no se detecta ninguna actividad de
entrada pasados entre 45 y 255 segundos, según la configuración
temporal de OSD en la OSD del monitor. El valor predeterminado para
el monitor es de 45 segundos.
Función de bloqueo y desbloqueo de OSD
Para bloquear OSD, apriete los botones Menu (menú) y de flecha hacia arriba
durante 2 segundos. Aparecerá una ventana indicando “OSD unlock” (OSD
desbloqueada). Si se mantienen presionados los botones, cada 2 segundos la
ventana pasará de “OSD unlock” (OSD está desbloqueada) a “OSD Lock”
(OSD bloqueada).
Para bloquear el encendido, apriete los botones Menu (menú) y de flecha
hacia abajo durante 2 segundos. Aparecerá una ventana indicando “Power
unlock” (encendido desbloqueado). Si se mantienen presionados los botones,
cada 2 segundos la ventana pasará de “Power unlock” (encendido
desbloqueado) a “Power Lock” (encendido bloqueado).
Mientras que OSD o el encendido esté bloqueado, no aparecerá ninguna
ventana al pulsar las teclas de OSD.

1232/11/20091481111
11
Opciones de control de OSD
Control Descripción
Contrast (contraste) Aumenta o reduce el contraste.
Brightness (brillo) Aumenta o reduce el brillo.
V-Position (posición V) Mueve la pantalla arriba o abajo.
H-Position (posición H) Mueve la pantalla a izquierda o derecha.
Recall Defaults (restablecer valores
predeterminados) Restablece la configuración predeterminada del monitor.
Color Balance
(equilibrio de color) Presione ▲ o ▼ y el botón “Select” (seleccionar) para
seleccionar 9300, 6500, 5500, 7500 y USER (usuario). Sólo
si selecciona USER (usuario) podrá realizar ajustes en el
contenido de R/G/B (rojo, verde, azul). Presione el botón
Select (seleccionar) para restaurar la configuración
predeterminada de fábrica.
Audio Volume (volumen de audio) Ajusta el volumen de audio del menú de OSD.
Sharpness (nitidez) Ajusta la nitidez.
Phase (fase) Aumenta o reduce el ruido de nieve de la imagen tras
efectuar un ajuste automático.
Clock (reloj) El reloj de píxeles se ajusta con precisión tras el ajuste
automático.
OSD H-Position
(posición H de OSD) Mueve la posición de OSD horizontalmente en pantalla. Si
se presionan los botones “SELECT” (seleccionar) y ▲, el
menú de control de OSD se moverá a la derecha de la
pantalla. Igualmente, si se presionan los botones “Select”
(seleccionar) y ▼, el menú de control de OSD se moverá a la
izquierda.

1232/11/20091481211
12
OSD V-Position
(posición V de OSD) Mueve la posición de OSD verticalmente en pantalla. Si se
presionan los botones “SELECT” (seleccionar) y ▲, el
menú de control de OSD se moverá a la parte superior de la
pantalla. Igualmente, si se presionan los botones “Select”
(seleccionar) y ▼, el menú de control de OSD se moverá a la
parte inferior.
OSD Time (tiempo de OSD) Ajusta el tiempo que el icono de OSD permanece en el monitor.
Auto-Adjust (ajuste automático) (1) Presione Auto (automático) para activar esta función. La
opción Auto-Adjust (ajuste automático) ajustará de forma
automática los parámetros V-Position (posición V),
H-Position (posición H), Clock (reloj) y Clock-Phase
(reloj-fase). (Sólo VGA.)
(2) Indica la resolución, la frecuencia horizontal y la
frecuencia vertical actuales. (DVI y VGA.)
OSD Language (idioma de OSD) Selecciona inglés, francés, alemán, español, japonés,
italiano, chino, polaco o sueco.
Input Select (selección de entrada) Selecciona la fuente de vídeo entre DSUB (analógica) y DVI
(digital).

1232/11/20091481311
13
もくじ
操作
タッチモニタの調整について………………………………………………………………12
サイドパネルの制御………………………………………………………………..13
制御/調整…………………………………………………………………………………14
OSD(オンスクリーンディスプレイ)メニュー機能………………………….14
OSD ロック/アンロック機能………………………………………………………14
OSD 制御オプション……………………………………………………………15-16

1232/11/20091481411
14
操作
タッチモニタの調整について
お持ちのモニターの調整が必要になることはありませんが、タッチモニタのビデオ出力
およびアプリケーションの変化を調整して、表示品質を最適化する必要がある場合もあ
ります。
タッチモニタの最高の性能をお楽しみいただくためには、60~75Hz で 1280x1024 の
ネイティブ解像度をご利用ください。ウィンドウの表示制御パネルを使って 1280x
1024 解像度を選択してください。他の解像度でご利用されるとビデオ性能を低下させて
しまいます。制御の調整内容は自動的に保存されますので、タッチモニタのプラグを抜
いたり、スイッチを入れたり切ったりするたびにリセットする必要はありません。電源
障害が起きても、タッチモニタの設定はデフォルトの工場出荷時の仕様になることはあ
りません。工場の設定を回復するには、OSD から選択してください。

1232/11/20091481511
15
サイドパネルの制御
制御 機能
1. メニュー/終了 OSD メニューの表示/終了。
(Menu/Exit)
2. ▲ 1. OSD コントラストの入力に使用します。
2. 調整値を増加します。
3. 右回りに切り替わります。
3. ▼ 1. オーディオの音量調整の入力に使用します。
2. 調整値を減少します。
3. 左回りに切り替わります。
4. 選択 (Select) 1. OSD メニューから調整事項の選択に使用します。
2.「自動調整」機能を入力します。(VGA モードのみ)
5. スイッチ モニタの電源スイッチをオンやオフに切り替えます。
重要事項:電源断・遅延機能が統合されており、ユーザ
は電源をオフにする場合には電源ボタンを5秒間押し続
ける必要があります。)

1232/11/20091481611
16
制御および調整
OSD メニュー機能
OSD 機能を表示・選択するには
1. メニューキーを押して、OSD メニューを起動します。
2. ▲または▼を使って右回りか左回りにメニューを動かします。モニター
の選択キーを押します。選択すると、パラメターが強調表示されます。
3. 操作中に OSD 画面を閉じるには、メニューキーを押します。短時間の
間にキーを何も押さないと OSD 画面は自動的に消えます。
注記: モニタの OSD 時間設定によって 45 秒から 255 秒の間に活動が何も入力さ
れないと OSD 画面は消えます。モニターのデフォルトは 45 秒間です。
OSD ロックおよびアンロック機能
OSD をロックするにはメニューとアップボタンを 2 秒間押し続け
ます。2 秒間押すと「OSD アンロック(OSD Unlock)」のウィンド
ウがポップアップし、ウィンドウが「OSD アンロック」から「OSD
ロック(OSD Lock)」に変わります。
電源をロックするにはメニューとダウンボタンを 2 秒間押し続けま
す。2 秒間押すと「電源アンロック(Power Unlock)」のウィンド
ウがポップアップし、ウィンドウが「電源アンロック」から「電源
ロック(Power Lock)」に変わります。
OSD および/あるいは電源がロックされ OSD キーを押すと、ウィン
ドウは表示されません。

1232/11/20091481711
17
OSD 制御オプション_____________________________________________________
制御 詳細
コントラスト Contrast) コントラストを増減する。
輝度(Brightness) 輝度を増減する。
垂直位置(V-Position) 画面を上下に移動する。
水平位置(H-Position) 画面を左右に移動する。
デフォルト設定のリコ
ール(Recall Defaults)
モニターがデフォルト設定に戻る。
色のバランス
(Color Balance)
▲または▼と「選択」ボタンを押して、9300、6500、5500、
7500、USER(ユーザ)の中から選択します。USER を選択
した場合のみ、R/G/B コンテンツを調整することができま
す。選択を押すと、工場出荷時のデフォルト設定が回復され
ます。
音量(Audio Volume) OSD メニューの音量を調整する。
鮮明度(Sharpness) 鮮明度を調整する。
位相(Phase) 自動調整が行われた後、スノーノイズの画像を増減する。
クロック(Clock) 自動調整の後、ドットクロックを微調整する。
OSD 水平位置
(OSD H-Position)
画面の OSD 位置を水平に移動する。「選択」ボタンおよび▲
ボタンを押すと、OSD 制御メニューは画面の右側に移動す
る。同様に「選択」ボタンおよび▼ボタンを押すと、OSD 制
御メニューは画面の左側に移動する。

1232/11/20091481811
18
OSD 垂直位置
(OSD V-Position)
画面の OSD 位置を垂直に移動する。「選択」ボタンおよび▲
ボタンを押すと、OSD 制御メニューは画面の上側に移動す
る。同様に「選択」ボタンおよび▼ボタンを押すと、OSD 制
御メニューは画面の下側に移動する。
OSD 時間(OSD Time) モニターの OSD アイコンの時間を調整する。
自動調整(Auto-Adjust) (1)「自動」を押してこの機能を起動する。自動調整によっ
て垂直位置や水平位置、クロック、クロック位相(VGA のみ)
を自動的に調整する。
(2)現在の解像度や水平周波数、垂直周波数を示す(DVI お
よび VGA)。
OSD 言語
(OSD Language)
英語、フランス語、ドイツ語、スペイン語、日本語、イタリ
ア語、中国語、ポーランド語、スウェーデン語から選択する。
入力選択
(Input Select)
DSUB アナログから DVI デジタルへビデオ源を選択する。
Strona się ładuje...
Strona się ładuje...
Strona się ładuje...
Strona się ładuje...
Strona się ładuje...
Strona się ładuje...
Strona się ładuje...
Strona się ładuje...
Strona się ładuje...
Strona się ładuje...
Strona się ładuje...
Strona się ładuje...
Strona się ładuje...
Strona się ładuje...
Strona się ładuje...
Strona się ładuje...
Strona się ładuje...
Strona się ładuje...
Strona się ładuje...
Strona się ładuje...
Strona się ładuje...
Strona się ładuje...
Strona się ładuje...
Strona się ładuje...
Strona się ładuje...
Strona się ładuje...
Strona się ładuje...
Strona się ładuje...
-
 1
1
-
 2
2
-
 3
3
-
 4
4
-
 5
5
-
 6
6
-
 7
7
-
 8
8
-
 9
9
-
 10
10
-
 11
11
-
 12
12
-
 13
13
-
 14
14
-
 15
15
-
 16
16
-
 17
17
-
 18
18
-
 19
19
-
 20
20
-
 21
21
-
 22
22
-
 23
23
-
 24
24
-
 25
25
-
 26
26
-
 27
27
-
 28
28
-
 29
29
-
 30
30
-
 31
31
-
 32
32
-
 33
33
-
 34
34
-
 35
35
-
 36
36
-
 37
37
-
 38
38
-
 39
39
-
 40
40
-
 41
41
-
 42
42
-
 43
43
-
 44
44
-
 45
45
-
 46
46
-
 47
47
-
 48
48


Tyco Electronics 1928L Instrukcja obsługi
- Kategoria
- Telewizory
- Typ
- Instrukcja obsługi
w innych językach
- español: Tyco Electronics 1928L Manual de usuario
- italiano: Tyco Electronics 1928L Manuale utente
- Deutsch: Tyco Electronics 1928L Benutzerhandbuch
- svenska: Tyco Electronics 1928L Användarmanual
- 日本語: Tyco Electronics 1928L ユーザーマニュアル
- English: Tyco Electronics 1928L User manual
Inne dokumenty
-
Samsung SMT-1921N Instrukcja obsługi
-
Asus VE208 Skrócona instrukcja obsługi
-
Dell 17FP Instrukcja obsługi
-
Dell 17FP Instrukcja obsługi
-
Asus MT276H Skrócona instrukcja obsługi
-
Samsung SYNCMASTER NC220 Instrukcja obsługi
-
-
Samsung SYNCMASTER NC220P Instrukcja obsługi
-
Samsung TC191W Skrócona instrukcja obsługi
-
NEC MultiSync® LCD1700V Instrukcja obsługi