Philips AC4012/10 Instrukcja obsługi
- Kategoria
- Oczyszczacze powietrza
- Typ
- Instrukcja obsługi

AC4012
4241 210 83811
E
F
B
D
A
Warranty
User manual
C
1
EN User manual 1
CS Příručka pro uživatele 15
HU Felhasználói kézikönyv 29
PL Instrukcja obsługi 45
RO Manual de utilizare 61
SK Príručka užívateľa 77
Register your product and get support at
www.philips.com/welcome
Always there to help you
Question?
Contact
Philips
Specifications are subject to change without notice
© 2015 Koninklijke Philips N.V.
All rights reserved.

1
2
2
6
1
2
7
3 4
5
8
9
11
10
13
12
14 15 16
17 19
18
20 21 22

1
EN
English
10 Guarantee and service 13
Order parts or accessories 13
11 Notices 13
Electromagnetic elds (EMF) 13
Compliance with EMF 13
Recycling 14
Contents
1 Important
Safety 2
2 Your air purier 4
What’s in the box 4
3 Get started 5
Install lters 5
4 Use the air purier 6
Understand the air quality light 6
Understand the healthy air
protect alert 6
Switch on 6
Set the sensitivity of the air
quality sensor 6
Change the fan speed 7
Manual 7
Set the timer 7
5 Clean your air purier 8
Clean the air purier 8
Clean the air quality sensor 8
6 Clean the pre-lter 9
7 Replace the lters 10
Replace the NanoProtect
Activated Carbon lter and the
NanoProtect lter 10
8 Reset the lter lifetime
counter 11
9 Troubleshooting 12
English

2
EN
• Do not use the appliance
if the plug, the power cord,
or the appliance itself is
damaged.
• This appliance can be
used by children aged
from 8 years and above
and persons with reduced
physical, sensory or
mental capabilities or
lack of experience and
knowledge if they have
been given supervision or
instruction concerning use
of the appliance in a safe
way and understand the
hazards involved. Children
shall not play with the
appliance. Cleaning and
maintenance shall not be
made by children without
supervision.
• Do not block the air inlet
and outlet, e.g. by placing
items on the air outlet or in
front of the air inlet.
Caution
• This appliance is not
a substitute for proper
ventilation, regular vacuum
cleaning, or use of an
extractor hood or fan while
cooking.
• If the power socket used to
power the appliance has
poor connections, the plug
1 Important
Safety
Read this user manual carefully before
you use the appliance, and save it for
future reference.
Danger
• Do not let water or any
other liquid or ammable
detergent enter the
appliance to avoid electric
shock and/or a re hazard.
• Do not clean the appliance
with water, any other liquid,
or a (ammable) detergent
to avoid electric shock
and/or a re hazard.
Warning
• Check if the voltage
indicated on the bottom
or indicated at the rear of
the appliance corresponds
to the local power voltage
before you connect the
appliance.
• If the power cord is
damaged, you must have
it replaced by Philips, a
service center authorized
by Philips, or similarly
qualied persons in order
to avoid a hazard.

3
EN
English
• Always lift or move the
appliance by the handle at
the back of the appliance.
• Do not insert your ngers
or objects into the air
outlet.
• Do not use this appliance
when you have used
indoor smoke-type insect
repellents or in places
with oily residues, burning
incense, or chemical fumes.
• Do not use the appliance
near gas appliances,
heating devices or
replaces.
• Always unplug the
appliance after use and
before you clean it.
• Do not use the appliance
in a room with major
temperature changes,
as this may cause
condensation inside the
appliance.
• To prevent interference,
place the appliance at least
2m away from electrical
appliances that use
airborne radio waves such
as TVs, radios, and radio-
controlled clocks.
• The appliance is only
intended for household use
under normal operating
conditions.
of the appliance becomes
hot. Make sure that you
plug the appliance into a
properly connected power
socket.
• Always place and use
the appliance on a dry,
stable, level, and horizontal
surface.
• Leave at least 20cm free
space behind and on both
sides of the appliance and
leave at least 30cm free
space above the appliance.
• Do not place anything on
top of the appliance and
do not sit on the appliance.
• Do not place the
appliance directly below
an air conditioner to
prevent condensation
from dripping onto the
appliance.
• Make sure all lters
are properly installed
before you switch on the
appliance.
• Only use the original
Philips lters specially
intended for this appliance.
Do not use any other lters.
• Avoid knocking against the
appliance (the air inlet and
outlet in particular) with
hard objects.
English

4
EN
2 Your air
purifier
Congratulations on your purchase, and
welcome to Philips!
To fully benet from the support that
Philips oers, register your product at
www.philips.com/welcome.
Read this user manual carefully before
you install and use the unit. Save it for
future reference.
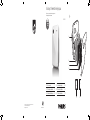
What’s in the box
Check and identify the contents of your
package (g a):
A Air quality sensor
B Filter 4: NanoProtect lter (AC4124)
C Filter 3: NanoProtect Activated
Carbon lter (AC4123)
D Filter 1: Pre-lter
E User manual
F Warranty
• Do not use the appliance
in wet surroundings or in
surroundings with high
ambient temperatures,
such as the bathroom,
toilet, or kitchen.
• The appliance does not
remove carbon monoxide
(CO) or radon (Rn). It cannot
be used a a safety device
in case of accidents with
combustion processes and
hazardous chemicals.

5
EN
English
Note
• Make sure that the side with the two
projections is pointing towards you,
and that all hooks of the pre-lter are
properly attached to the purier.
7 To reattach the front panel, insert
the top hooks into the top of the
purier rst (1). Then, push the
panel against the body of the
purier (2) (g g).
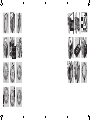
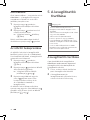
3 Get started
Install lters
The air purier comes with all lters
tted inside, but you have to remove the
packaging of the lters before you can
use it. Remove all lters, unpack them,
and place them back into the air purier
as described below.
Note
• Insert the lters in the correct position.
• Make sure you place the lters in the
order of NanoProtect lter, NanoProtect
Activated Carbon lter, and nally the
pre-lter.
• Make sure that the side with the tag is
pointing towards you.
1 Place your ngers in the recesses of
the side panels and gently pull the
top part of the front panel towards
you.
2 Gently pull the bottom of the panel
out (1), then lift the top part of the
front panel towards you (2) (g b).
3 Remove all the lters from the
purier (g c).
4 Remove all packaging material
from the lters (g d).
5 Put the lters back into the purier
(g e).
6 Place the pre-ler in the purier
(g f).
English

6
EN
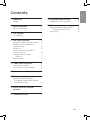
Switch on
1
Put the plug of the air purier into
the power outlet.
» All lights go on twice and you
hear a beep. Then, the lights go
out again.
2 Press the
button to switch on the
purier (g i).
» The air quality light shows the
current air quality.
» The fan speed
light goes on
(g j).
3 Press the
button to switch o the
purier.
Set the sensitivity of the
air quality sensor
People with certain health problems
(for example: allergies or asthma) have
a greater need for healthy air. For this
reason, the purier allows you to adjust
the sensitivity of the air quality sensor. If
you set it to higher sensitivity level, the
purier starts cleaning the air at lower
pollution level.
There are 3 sensitivity levels:
• Extra sensitive (default setting)
• Sensitive
• Standard
You can adjust the sensitivity of the air
quality sensor in the following way.
Note
• When it is set to a higher sensitivity,
the purier starts cleaning the air at
lower pollution levels to make the air
even cleaner. Plug the purier before
adjusting the sensitivity of the air
quality sensor.
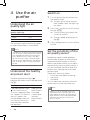
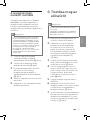
4 Use the air
purifier
Understand the air
quality light
Color of the air
quality light ring
Air quality level
Blue Good
Purple Fair
Red Bad
The air quality light automatically goes
on when the purier is switched on.
Note
• The built-in air quality sensor measures
the air quality and automatically selects
the appropriate color of the air quality
light. When the air is clean, the color
of the air quality light is in blue. When
the air quality deteriorates, the color of
the air quality light changes to purple
or red.
Understand the healthy
air protect alert
The lter replacement light ( )
indicates the lters have to be replaced
(g h).
Healthy air protect alert Follow this
Filter replacement light
is on continuously.
This lasts approximately
for 2 weeks. On the last
day of 2 weeks, the
purier beeps every 30
minutes to inform you
that the lters need to
be replaced.
Replace the
NanoProtect
Activated
Carbon lter
and the
NanoProtect
lter.

7
EN
English
Tip
• If the air quality light is in blue color, this
means the air quality is good, and you
can select a lower fan speed.
Sleep mode
In sleep mode, the air lter operates
very quietly while all lights are dimmed
for your undisturbed sleep.
1 Press the
button to switch on the
purier (g i).
2 Press the button to select sleep
mode.
» The
light goes on (g m).
To change to another fan speed, press
the
button.
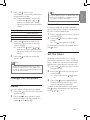
Set the timer
With the timer function, you can let
the purier operate for a set number of
hours. When the set time has elapsed,
the purier automatically switches o.
1 Press the
button to switch on the
purier (g i).
2 Press the
button to activate the
timer (g k).
» The timer light (
, , or ) goes
on.
3 Press the
button repeatedly to
choose the number of hours you
want the purier to operate.
To deactivate the timer function, press
the
button repeatedly until the timer
light (
, , or ) is out.
1 Press the
button and
simultaneously put the power plug
in the power socket.
» The purier beeps twice and
one of the
lights ( , , or )
goes on to show the current
sensitivity level of the air quality
sensor.
Timer light Sensitivity level
Extra sensitive
Sensitive
Standard
2 Press the
button to adjust the
sensitivity level of the air quality
sensor (g k).
» One of the
lights ( , , or )
goes on to show the preferred
sensitivity level of the air quality
sensor.
3 Press the
button to switch o
the purier.
Note
• When you change the sensitivity, the
purier automatically starts operating
at the set sensitivity level whenever you
switch on the purier.
Change the fan speed
Manual
You can select the desired fan speed.
1 Press the
button to switch on the
purier (g i).
2 Press the button once or more
times to select the fan speed you
need:
, , or (g l).
English

8
EN
Note
• When the humidity level in the
room is very high, it is possible that
condensation develops on the air
quality sensor. As a result, the air
quality light may indicate that the air
quality is bad even though it is good.
In this case you have to clean the air
quality sensor or use one of the manual
speed settings.
1 Clean the air quality sensor inlet
and the air quality sensor outlet
with a soft brush (g n).
2 Remove the air quality sensor
cover (g o).
3 Clean the air quality sensor, the
dust inlet and the dust outlet with
a lightly moistened cotton swab
(g p).
4 Dry them with a dry cotton swab.
5 Reattach the air quality sensor
cover.
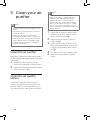
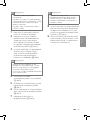
5 Clean your air
purifier
Note
• Always unplug the purier before you
clean it.
• Never immerse the purier in water or
any other liquid.
• Never use abrasive, aggressive, or
ammable cleaners such as bleach or
alcohol to clean any part of the purier.
• Only the pre-lter is washable. Other
air purier lters are not washable or
vacuum cleanable.
Clean the air purier
Regularly clean the inside and outside
of the purier body to prevent dust from
collecting.
1 Wipe away dust with a soft dry
cloth from the body of the purier.
2 Clean the air inlet and the air outlet
with a soft dry cloth.
Clean the air quality
sensor
Clean the air quality sensor every 2
months for optimal functioning of the
purier. Clean it more frequently if you
use the purier in a dusty environment.

9
EN
English
Note
• Alternatively, you can clean the pre-
lter by removing the dust with a
vacuum cleaner.
• Make sure that the pre-lter is
completely dry. If it is still wet, bacteria
may multiply in it and shorten the
lifetime of the pre-lter.
• Make sure that the side with the two
projections is pointing towards you,
and that all hooks of the pre-lter are
properly attached to the purier.
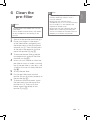
6 Clean the
pre-filter
Note
• The pre-lter is washable and vacuum
cleanable.
• Clean the pre-lter for every two weeks
to ensure optimal functioning of the
purier.
1 Switch o the purier and unplug it.
2 Place your ngers in the recess
of the side panels and gently pull
the bottom part of the front panel
towards you (1). Then lift the hooks
at the top of the panel out of the
top of the purier (2) (g b).
3 To remove the pre-lter, grab the
two projections and pull the lter
towards you (g q).
4 Use a vacuum cleaner to clean the
pre-lter or wash it under a running
tap. If the pre-lter is very dirty, use
a soft brush to brush away the dust
(g r).
5 Air dry the pre-lter.
6 Put the pre-lter back into the
purier. Attach all hooks properly to
the purier (g f).
7 To reattach the front panel, insert
the top hooks into the top of the
purier rst (1). Then, push the
panel against the body of the
purier (2) (g g).
English

10
EN
7 Replace the
filters
The lter replacement light ( )
indicates the lters have to be replaced.
Note
• If you remove the front panel for lter
changing while the purier is switched
on, all lights on the control panel will
be o.
• Once the front panel is placed back to
the purier, all lights ash twice. Then,
the purier is o. Press the
button to
switch on the purier again.
Replace the NanoProtect
Activated Carbon lter
and the NanoProtect
lter
Note
• The NanoProtect Activated Carbon
lter and the NanoProtect lter are not
washable or vacuum cleanable.
Replace both the NanoProtect
Activated Carbon lter and NanoProtect
lter when the
light goes on. This light
will be on for approximately 2 weeks.
On the last day of the 2 weeks, the
purier beeps every 30 minutes to
inform you that the lter needs to be
replaced.
Note
• Insert the lters in the correct position.
• Make sure you place the lters in the
order of NanoProtect lter, NanoProtect
Activated Carbon lter, and nally the
pre-lter.
• Make sure that the side with the tag is
pointing towards you.
1 Switch o the purier and unplug it.
2 Place your ngers in the recesses
of the side panels and gently pull
the bottom part of the front panel
towards you. Lift the panel out of
the hooks at the top of the purier
(g b).
3 Remove the lters using the tag on
the lter. Take the lters by both
sides and gently deposit them into
the house hold trash bin (g s).
Note
• Do not touch the pleated lter surface,
or smell the lter as it has collected
pollutants from the air.
• Wash your hands after disposing of the
used lters.
4 Remove all packaging material
from the new lters (g d).
5 Place the new NanoProtect lter in
the purier rst (g t).
6 Then, place the new NanoProtect
Activated Carbon lter in the
purier (g u).
7 Place the pre-ler in the purier
(g f).
Note
• Make sure that the side with the two
projections is pointing towards you,
and that all hooks of the pre-lter are
properly attached to the purier.
8 To reattach the front panel, insert
the top hooks into the top of the
purier rst (1). Then, push the
panel against the body of the
purier (2) (g g).
9 Reset the NanoProtect Activated
Carbon lter and the NanoProtect
lter lifetime (see ‘Reset the lter
lifetime counter’).

11
EN
English
8 Reset the
filter lifetime
counter
When you replace the lters, it is
important that you also reset the lter
lifetime counter afterwards. This allows
the purier to be in sync with the lter
lifetime.
After you have replaced the lters, reset
the lter time:
1 Switch o the purier and unplug it.
2 Replace the air purier lters (see
‘Replace the lters’).
3 Put the plug in the power socket
and switch on the purier again.
4 Press and hold the button for 2
seconds (g v).
Note
• Reset the purier when it is plugged in
and switched on.
• Only replace the lters when you see
the light goes on.
English

12
EN
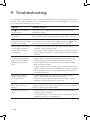
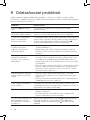
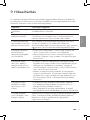
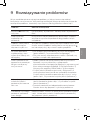
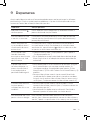
9 Troubleshooting
This chapter summarizes the most common problems you could encounter with the
purier. If you are unable to solve the problem with the information below, contact the
Consumer Care Center in your country.
Problem Possible solution
The
light has been on
continuously.
The lter is full. Replace the lter and reset the lter
lifetime counter.
No air comes out of the
air outlet.
The purier is not connected to the power supply. Put the
plug of the purier into the power outlet and switch on.
The fan speed does not
change when the sleep
mode is activated.
In sleep mode, the fan speed is set to a very low level.
If you want to change the fan speed, press the
button
one or more times to set the desired fan speed.
The airow that comes
out of the air outlet is
signicantly weaker
than before.
• The pre-lter is dirty. Clean the pre-lter (see the
chapter “Clean the pre-lter”).
• You have not removed all packaging material from the
lters. Make sure that you have removed all packaging
material.
The air quality does not
improve, even though
the purier has been
operating for a long
time.
• One of the lters has not been placed in the purier.
Make sure that all lters are properly installed in the
following order, starting with the innermost lter: 1)
NanoProtect lter, 2) NanoProtect Activated Carbon
lter, and 3) pre-lter.
• The air quality sensor is wet. The humidity level in your
room is high and causes condensation. Make sure that
the air quality sensor is clean and dry (see ‘Clean the
air quality sensor’).
The color of the air
quality light always
stays the same.
• The air quality sensor is dirty. Clean the air quality
sensor (see ‘Clean the air quality sensor’).
• There is not enough ventilation in the room. Open a
window, to improve the air circulation.
I need cleaner air
because I have an
allergy.
You can change the air quality sensor sensitivity (see
‘Set the sensitivity of the air quality sensor’) to make the
purier clean the air even better.
The purier is extra
loud.
• Please check if you have removed all the packaging
material from the lters.
• If the appliance is still too loud, you can change the fan
speed to a lower fan speed level.

13
EN
English
11 Notices
Electromagnetic elds
(EMF)
This Philips appliance complies with all
applicable standards and regulations
regarding exposure to electromagnetic
elds.
Compliance with EMF
Koninklijke Philips N.V. manufactures
and sells many products targeted at
consumers, which, like any electronic
apparatus, in general have the ability
to emit and receive electromagnetic
signals.
One of Philips’ leading Business
Principles is to take all necessary
health and safety measures for our
products, to comply with all applicable
legal requirements and to stay well
within the EMF standards applicable at
the time of producing the products.
Philips is committed to develop,
produce and market products that
cause no adverse health eects. Philips
conrms that if its products are handled
properly for their intended use, they
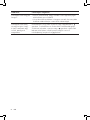
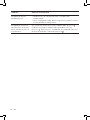
Problem Possible solution
The purier still
indicates that I need
to replace a lter, but I
already did.
Perhaps you did not press the
button properly. Put the
plug of the appliance in the power outlet, press the
button to switch on the appliance, and press and hold
the
button for 2 seconds.
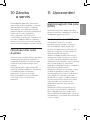
10 Guarantee
and service
If you need information or if you have a
problem, please visit the Philips website
at www.philips.com or contact the
Philips Consumer Care Center in your
country (you nd its phone number in
the worldwide guarantee leaet). If there
is no Consumer Care Centre in your
country, go to your local Philips dealer.
Order parts or
accessories
If you have to replace a part or want to
purchase an additional part, go to your
Philips dealer or visit www.philips.com/
support.
If you have problems obtaining the
parts, please contact the Philips
Consumer Care Center in your country
(you nd its phone number in the
worldwide guarantee leaet).
English

14
EN
are safe to use according to scientic
evidence available today.
Philips plays an active role in the
development of international EMF
and safety standards, enabling Philips
to anticipate further developments in
standardization for early integration in
its products.
Any changes or modications made
to this device that are not expressly
approved by Philips Consumer Lifestyle
may void the user’s authority to operate
the equipment.
Recycling
This symbol means that this product
shall not be disposed of with normal
household waste (2012/19/EU).
Follow your country’s rules for the
separate collection of electrical and
electronic products. Correct disposal
helps prevent negative consequences for
the environment and human health.

15
CS
Čeština
10 Záruka a servis 27
Objednání dílů nebo doplňků 27
11 Upozornění 27
Elektromagneti=cká pole (EMP) 27
Soulad se standardy EMP 27
Recyklace 28
Obsah
1 Důležité
Bezpečnost 16
2 Vaše čistička vzduchu 18
Co je v balení 18
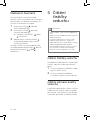
3 Začínáme 19
Instalace ltrů 19
4 Použití čističky vzduchu 20
Jak funguje kontrolka kvality
vzduchu 20
Jak funguje upozornění na
ochranu zdravého vzduchu 20
Zapnutí 20
Nastavení citlivosti snímače
kvality vzduchu 20
Změna rychlosti ventilátoru. 21
Manuální 21
Nastavení časovače 22
5 Čištění čističky vzduchu 22
Čištění čističky vzduchu 22
Čištění snímače kvality vzduchu 22
6 Čištění předltru 23
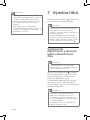
7 Výměna ltrů 24
Výměna Filtr NanoProtect s
aktivním uhlím a NanoProtect
ltru 24
8 Resetování počítadla
životnosti ltrů 25
9 Odstraňování problémů 26

16
CS
obdobně kvalikovaní
pracovníci, aby se předešlo
možnému nebezpečí.
• Pokud byste zjistili závadu
na zástrčce, na napájecím
kabelu nebo přímo na
přístroji, přístroj dále
nepoužívejte.
• Děti od 8 let věku a osoby
s omezenými fyzickými,
smyslovými nebo
duševními schopnostmi
nebo nedostatkem
zkušeností a znalostí
mohou tento přístroj
používat v případě, že jsou
pod dohledem nebo byly
poučeny o bezpečném
používání přístroje a
chápou rizika, která mohou
hrozit. Děti si s přístrojem
nesmí hrát. Čištění a údržbu
nesmí provádět děti bez
dozoru.
• Vyvarujte se zablokování
vstupu a výstupu vzduchu,
např. umístěním předmětů
na výstup vzduchu nebo
před vstup vzduchu.
Upozornění
• Tento přístroj nenahrazuje
řádné větrání, pravidelné
vysávání prachu nebo
použití digestoře či
ventilátoru během vaření.
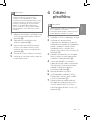
1 Důležité
Bezpečnost
Před použitím přístroje si pozorně
přečtěte tuto uživatelskou příručku a
uschovejte ji pro budoucí použití.
Nebezpečí
• Zamezte proniknutí
vody, jiné kapaliny nebo
hořlavého čisticího
prostředku do přístroje.
Předejdete tak úrazu
elektrickým proudem a/
nebo požáru.
• Přístroj nečistěte vodou,
jakoukoli jinou tekutinou
ani (hořlavým) čisticím
prostředkem. Předejdete
tak úrazu elektrickým
proudem a/nebo požáru.
Varování
• Před zapojením přístroje
zkontrolujte, zda napětí
uvedené na spodní
nebo zadní části přístroje
odpovídá napětí místní
rozvodné sítě.
• Pokud by byl poškozen
napájecí kabel, musí jeho
výměnu provést společnost
Philips, autorizovaný servis
společnosti Philips nebo

17
CS
Čeština
• Přístroj vždy zvedejte nebo
s ním pohybujte pomocí
rukojeti na zadní straně.
• Nezasouvejte prsty nebo
předměty do výstupu
vzduchu.
• Nepoužívejte tento přístroj,
pokud jste použili repelent
proti hmyzu kouřového
typu pro vnitřní prostory
nebo na místech se zbytky
oleje, hořící vonnou
tyčinkou nebo chemickými
výpary.
• Nepoužívejte přístroj
v blízkosti plynových
zařízení, topných zařízení
nebo krbů.
• Po použití a před čištěním
zařízení vždy odpojte.
• Nepoužívejte zařízení
v místnosti s velkými
změnami teploty, protože
by tím mohlo dojít ke
kondenzaci uvnitř přístroje.
• Aby nedocházelo k rušení,
umístěte přístroj nejméně
2 m od elektrických zařízení
využívajících vzdušných
rádiových vln, např.
televizorů, rádií a rádiem
řízených hodin.
• Přístroj je určen pouze pro
domácí použití za běžných
provozních podmínek.
• Nepoužívejte přístroj ve
vlhkém prostředí nebo
• Pokud je v zásuvce použité
k napájení přístroje špatný
kontakt, začne se zástrčka
přístroje přehřívat. Dbejte
na to, abyste přístroj zapojili
do řádně instalované síťové
zásuvky.
• Přístroj vždy pokládejte
a používejte na suchém,
stabilním, vyrovnaném a
vodorovném povrchu.
• Za přístrojem a po obou
jeho stranách ponechejte
alespoň 20 cm volného
prostoru a zároveň
ponechejte alespoň 30 cm
volného prostoru nad
přístrojem.
• Na přístroj nic nepokládejte
a nesedejte si na něj.
• Neumisťujte přístroj přímo
pod klimatizaci, zabráníte
tak tomu, aby na něj kapala
kondenzovaná voda.
• Před zapnutím přístroje se
ujistěte, že všechny ltry
jsou správně nainstalovány.
• Používejte pouze originální
ltry značky Philips
určené přímo pro tento
přístroj. Žádné jiné ltry
nepoužívejte.
• Dbejte na to, abyste
do přístroje (zejména
do vstupu a výstupu
vzduchu) nenarazili tvrdým
předmětem.

18
CS
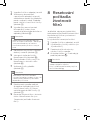
2 Vaše čistička
vzduchu
Gratulujeme k nákupu a vítáme vás
mezi uživateli výrobků společnosti
Philips!
Chcete-li plně využívat výhod, které
nabízí společnost Philips, zaregistrujte
svůj výrobek na webových stránkách
www.philips.com/welcome.
Před použitím výrobku si pozorně
přečtěte tuto uživatelskou příručku.
Uschovejte ji pro budoucí použití.
Co je v balení
Zkontrolujte a identikujte obsah balení
(obrázek a):
A Snímač kvality vzduchu
B Filtr 4: NanoProtect ltr (AC4124)
C Filtr 3: Filtr NanoProtect s aktivním
uhlím (AC4123)
D Filtr 1: Předltr
E Uživatelská příručka
F Záruka
v prostředí s vysokými
okolními teplotami,
například v koupelně, na
záchodě nebo v kuchyni.
• Přístroj neodstraňuje
oxid uhelnatý (CO) ani
radon (Rn). Není možné jej
použít jako bezpečnostní
zařízení v případě
nehod se spalovacími
procesy a nebezpečnými
chemikáliemi.
Strona się ładuje...
Strona się ładuje...
Strona się ładuje...
Strona się ładuje...
Strona się ładuje...
Strona się ładuje...
Strona się ładuje...
Strona się ładuje...
Strona się ładuje...
Strona się ładuje...
Strona się ładuje...
Strona się ładuje...
Strona się ładuje...
Strona się ładuje...
Strona się ładuje...
Strona się ładuje...
Strona się ładuje...
Strona się ładuje...
Strona się ładuje...
Strona się ładuje...
Strona się ładuje...
Strona się ładuje...
Strona się ładuje...
Strona się ładuje...
Strona się ładuje...
Strona się ładuje...
Strona się ładuje...
Strona się ładuje...
Strona się ładuje...
Strona się ładuje...
Strona się ładuje...
Strona się ładuje...
Strona się ładuje...
Strona się ładuje...
Strona się ładuje...
Strona się ładuje...
Strona się ładuje...
Strona się ładuje...
Strona się ładuje...
Strona się ładuje...
Strona się ładuje...
Strona się ładuje...
Strona się ładuje...
Strona się ładuje...
Strona się ładuje...
Strona się ładuje...
Strona się ładuje...
Strona się ładuje...
Strona się ładuje...
Strona się ładuje...
Strona się ładuje...
Strona się ładuje...
Strona się ładuje...
Strona się ładuje...
Strona się ładuje...
Strona się ładuje...
Strona się ładuje...
Strona się ładuje...
Strona się ładuje...
Strona się ładuje...
Strona się ładuje...
Strona się ładuje...
Strona się ładuje...
Strona się ładuje...
Strona się ładuje...
Strona się ładuje...
Strona się ładuje...
Strona się ładuje...
Strona się ładuje...
Strona się ładuje...
Strona się ładuje...
Strona się ładuje...
Strona się ładuje...
Strona się ładuje...
-
 1
1
-
 2
2
-
 3
3
-
 4
4
-
 5
5
-
 6
6
-
 7
7
-
 8
8
-
 9
9
-
 10
10
-
 11
11
-
 12
12
-
 13
13
-
 14
14
-
 15
15
-
 16
16
-
 17
17
-
 18
18
-
 19
19
-
 20
20
-
 21
21
-
 22
22
-
 23
23
-
 24
24
-
 25
25
-
 26
26
-
 27
27
-
 28
28
-
 29
29
-
 30
30
-
 31
31
-
 32
32
-
 33
33
-
 34
34
-
 35
35
-
 36
36
-
 37
37
-
 38
38
-
 39
39
-
 40
40
-
 41
41
-
 42
42
-
 43
43
-
 44
44
-
 45
45
-
 46
46
-
 47
47
-
 48
48
-
 49
49
-
 50
50
-
 51
51
-
 52
52
-
 53
53
-
 54
54
-
 55
55
-
 56
56
-
 57
57
-
 58
58
-
 59
59
-
 60
60
-
 61
61
-
 62
62
-
 63
63
-
 64
64
-
 65
65
-
 66
66
-
 67
67
-
 68
68
-
 69
69
-
 70
70
-
 71
71
-
 72
72
-
 73
73
-
 74
74
-
 75
75
-
 76
76
-
 77
77
-
 78
78
-
 79
79
-
 80
80
-
 81
81
-
 82
82
-
 83
83
-
 84
84
-
 85
85
-
 86
86
-
 87
87
-
 88
88
-
 89
89
-
 90
90
-
 91
91
-
 92
92
-
 93
93
-
 94
94


Philips AC4012/10 Instrukcja obsługi
- Kategoria
- Oczyszczacze powietrza
- Typ
- Instrukcja obsługi
w innych językach
- slovenčina: Philips AC4012/10 Používateľská príručka
- română: Philips AC4012/10 Manual de utilizare
Powiązane artykuły
-
Philips AC5659/10 Instrukcja obsługi
-
-
-
-
-
-
Philips AC1215/50 Instrukcja obsługi
-
Philips AC2889/10R1 Instrukcja obsługi
-
-