
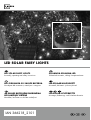
LED SOLAR FAIRY LIGHTS
LED SOLAR FAIRY LIGHTS
Assembly, operating and safety instructions
GIRLANDA SOLARNA LED
Wskazówki montażu, obsługi i bezpieczeństwa
IAN 366218_2101
LED GIRLIANDA SU SAULĖS BATERIJA
Nurodymai dėl montavimo, naudojimo ir saugumo
LED-SOLAAR-V ALGUSKETT
Montaaži-, käsitsemis- ja ohutusjuhised
LED-SOLAR-LICHTERKETTE
Montage-, Bedienungs- und Sicherheitshinweise
AR SAULES BATERIJĀM DARBINĀMA
LED LAMPIŅU VIRTENE
Montāžas, lietošanas un drošības norādījumi

LED SOLAR FAIRY LIGHTS
GB Assembly, operating and safety instructions Page 5
PL Wskazówki montażu, obsługi i bezpieczeństwa Strona 19
LT Nurodymai dėl montavimo, naudojimo ir saugumo Puslapis 34
EE Montaaži-, käsitsemis- ja ohutusjuhised Lehekülg 48
LV Montāžas, lietošanas un drošības norādījumi Lpp. 62
DE / AT / CH Montage-, Bedienungs- und Sicherheitshinweise Seite 76

MODEON/OFF
6
7
8
9
5421 3


5 GB
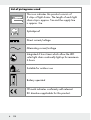
List of pictograms used ................................................ Page 6
Introduction ........................................................................... Page 7
Proper use .................................................................................... Page 7
Description of parts and features ............................................... Page 7
Scope of delivery ......................................................................... Page 7
Technical data ............................................................................. Page 8
Safety instructions ........................................................... Page 8
Product-specific safety instructions .............................................. Page 9
Safety instructions for batteries/rechargeable batteries ........... Page 9
Functioning ............................................................................. Page 11
Installation .............................................................................. Page 11
Operation ................................................................................ Page 12
Setting up the product ................................................................. Page 12
Timer function ............................................................................... Page 13
Maintenance and care ................................................. Page 14
Troubleshooting................................................................. Page 14
Disposal ..................................................................................... Page 15
Warranty ................................................................................. Page 17
Warranty claim procedure ......................................................... Page 17
Service .......................................................................................... Page 18

6 GB
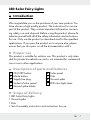
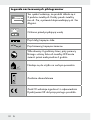
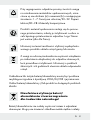
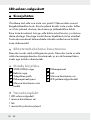
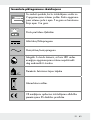
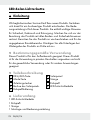
List of pictograms used
This icon indicates this product consists of
2 strips of light chains. The length of each light
chain strip is approx. 5 m and the supply line
is approx. 3 m.
Splashproof
Direct current/voltage
Alternating current/voltage
Integrated 6 hour timer which allow the LED
solar light chain continually light up for maximum
6 hours
Suitable for outdoor use
Battery operated
CE mark indicates conformity with relevant
EU directives applicable for this product.

7 GB
LED Solar Fairy Lights
Introduction
We congratulate you on the purchase of your new product. You
have chosen a high quality product. The instructions for use are
part of the product. They contain important information concern-
ing safety, use and disposal. Before using the product, please fa-
miliarise yourself with all of the safety information and instructions
for use. Only use the product as described and for the specified
applications. If you pass the product on to anyone else, please
ensure that you also pass on all the documentation with it.
Proper use
This product is suitable for outdoor use. This product is only inten-
ded for private household use, and is not intended for commercial
use or use in other applications.
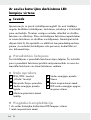
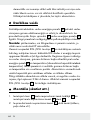
Description of parts and features
1 ON/OFF button
2 Mode button
3 Supply line plug
4 Socket of solar panel
5 Ground spike holder
6 Solar panel
7 Pole
8 Ground spike
9 LED solar light chain
Scope of delivery
1 LED Solar Fairy Lights
1 Ground spike
1 Pole
1 Set of assembly instructions and instructions for use

8 GB
Technical data
Operating voltage: 3.7 V
Rechargeable battery: 1 x 3.7 V not replaceable/recharge-
able Lithium ion battery with 1300 mAh
LED: HG05422A:
100 LEDs x 1.2 mW (max.) (warm white)
HG05422B:
100 LEDs x 1.2 mW (max.) (cold white)
HG05422C:
100 LEDs x 1.2 mW (max.) (colourful
(red, green, orange and blue))
Protection type: IP44 (splash proof)
Solar panel: approx. 11.5 x 11.5 cm
Lighting time
(with full charge): approx. 8 hours
Safety instructions
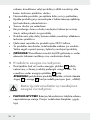
PLEASE READ THE INSTRUCTIONS FOR USE PRIOR TO USE!
PLEASE KEEP THE INSTRUCTIONS IN A SAFE PLACE! IF PASS-
ING THIS PRODUCT ON TO A THIRD PARTY ALSO INCLUDE
ALL DOCUMENTS.
This product can be used by children aged from 8 years and
above and persons with reduced physical, sensory or mental
capabilities or lack of experience and knowledge if they have
been given supervision or instruction concerning use of the
product in a safe way and understand the hazards involved.
Children shall not play with the product. Cleaning and user
maintenance shall not be made by children without supervision.

9 GB
Do not use the product if you detect any kind of damage.
Always switch off the product, when storing it in a dark envi-
ronment, in order not to discharge the rechargeable battery.
The LEDs are not replaceable.
If the LEDs fail at the end of their lives, the entire product must
be replaced.
The product does not contain any parts that can be serviced
by the user.
Never plug in the product directly into a 230 V ~ supply.
The product is not a toy and should not be played with by
children. Children are not able to understand the dangers that
can occur when handling the product.
WARNING! This LED solar light chain must not be used with-
out all gaskets being in place.
Product-specific safety instructions
Make sure that the solar panel 6 is free of dirt and free of
snow and ice in winter. Otherwise the performance of the
solar panel 6 will diminish.
CAUTION: When removing the product, make sure to also
remove the pole 7 and ground spike 8 so it cannot pose
any risk (e. g. tripping).
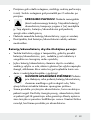
Safety instructions for batteries/
rechargeable batteries
DANGER TO LIFE! Keep batteries/rechargeable batteries
out of reach of children. If accidentally swallowed seek
immediate medical attention.
Swallowing may lead to burns, perforation of soft tissue, and
death. Severe burns can occur within 2 hours of ingestion.

10 GB
DANGER OF EXPLOSION! Never recharge
non-rechargeable batteries. Do not short-circuit
batteries/rechargeable batteries and/or open
them. Overheating, fire or bursting can be the result.
Never throw batteries/rechargeable batteries into fire or
water.
Do not exert mechanical loads to batteries/rechargeable
batteries.
Risk of leakage of batteries/rechargeable batteries
Avoid extreme environmental conditions and temperatures,
which could affect batteries/rechargeable batteries, e.g.
radiators/direct sunlight.
If batteries/rechargeable batteries have leaked, avoid contact
with skin, eyes and mucous membranes with the chemicals!
Flush immediately the affected areas with fresh water and
seek medical attention!
WEAR PROTECTIVE GLOVES! Leaked or dam-
aged batteries/rechargeable batteries can cause
burns on contact with the skin. Wear suitable pro-
tective gloves at all times if such an event occurs.
This product has a built-in rechargeable battery which cannot
be replaced by the user. The removal or replacement of the
rechargeable battery may only be carried out by the manu-
facturer or his customer service or by a similarly qualified per-
son in order to avoid hazards. When disposing of the product,
it should be noted that this product contains a rechargeable
battery.

11 GB
Functioning
The solar panel 6 installed in the product converts sunlight into
electrical energy and stores it in the rechargeable battery.
Insert the supply line plug 3 into the socket of the solar panel 4.
Turn clockwise tighten the union nut.
Note: Make sure the sealing ring is seated correctly, otherwise
the IP protection cannot be guaranteed.
Press ON/OFF button 1 for 1 time, the product will automatically
light on as it begins to get dark. The LEDs are a very long-life and
energy-saving light source. The light duration depends on the amount
of sunlight, the angle of light on the solar panel 6 and the temper-
ature (the rechargeable battery capacity is temperature-dependent).
A vertical angle of light at temperatures above the freezing point is
ideal. The rechargeable battery does not achieve maximum capac-
ity until after several charge and discharge cycles.
In summer a completely drained rechargeable battery takes about
2 to 4 days to fully recharge in constant sunlight. To switch the
product off, press the ON/OFF button 1 for 1 time again.
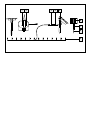
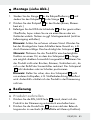
Installation (see Fig)
1. Insert the pole 7 into the ground spike holder 5 and insert
the ground spike 8 into the pole 7.
2. Push the ground spike 8 into the ground (lawn, flower bed,
etc.).
3. You can fix the LED solar light chain 9 on the desired sur-
face, twist on the tree or railing by using the mounting material
such as cable tie (mounting material is not included).
Note: Ensure the product is stable. Do not use force when
assembling or setting up the prod uct e.g. hammer blows.

12 GB
This will damage the solar panel 6.
Note: For the best results, put the product in a place where
the solar panel 6 is exposed to di rect sunlight for as long as
possible. Do not put the product under bushes, trees, canopies
etc. as this reduces the incidence of incoming sun light. Position
the product in such a way that the solar panel 6 is not cov-
ered or in the shade.
Note: Make sure the solar panel 6 is not impacted by other
light sources, e.g. yard- or street light ing, or the product will
not switch on at twilight.
Operation
Setting up the product
1. Press the ON/OFF button 1 once so that the product can
switch on automatically at dusk.
2. Press the mode button 2 to switch to the next lighting mode
(8 lighting effects with memory function). When you reach
lighting mode 8, the next press of the mode button 2
switches the product back into lighting mode 1.
The lighting modes are listed as below:
Mode 1: combination (combination of all lighting modes)
Mode 2:
in wave (HG05422A: warm white only; HG05422B:
cold white only; HG05422C: Red-orange LEDs and
blue-green LEDs light alternately and in different fre-
quencies.)
Mode 3: sequential (HG05422A: warm white only;
HG05422B: cold white only; HG05422C: Red-or-
ange LEDs and blue-green LEDs flash alternately in
different frequencies
.)

13 GB
Mode 4: Slo-Glo (HG05422A: warm white only; HG05422B:
cold white only; HG05422C: Red-orange LEDs and
blue-green LEDs slowly light up alternating
.
)
Mode 5: chasing/flash (HG05422A: warm white only;
HG05422B: cold white only; HG05422C: Red-or-
ange LEDs and blue-green LEDs flash at the same
time
.
)
Mode 6: slow fade (LEDs light up and fade out slowly
.
)
Mode 7: twinkle/flash (HG05422A: warm white only;
HG05422B: cold white only; HG05422C:
Red-orange LEDs and blue-green LEDs light up
alternating like twinkle
.
)
Mode 8: steady on (All LEDs are on.)
3. Press the ON/OFF button 1 to disable the product and
charging process.
Note: If you no longer use the product, please unplug the
supply line plug 3 from the socket of solar panel 4.
Note: The charging time of the rechargeable battery when
the solar panel 6 is used depends on the intensity of the sun-
light and the angle of incidence of the light on the solar panel
6. Place the solar panel 6 as perpendicular as possible to
the angle of incidence of the light. In this way you will receive
the highest light levels.
Timer function
1. To switch on the timer function, connect the product to the
socket of solar panel 4, then pressing the mode button 2
for 3 second. The mode button 2 lights up green when the
timer function is activated.
2. The product will automatically light on as it begins to get dark.
Once get bright light or light up for 6 hours, the product will

14 GB
turn off. Afterwards, the product will light up 6 hours again
when get dark and then turn off again.
3. To switch off the timer function, press and hold 3 second the
mode button 2 again and the light of the mode button 2
will be turned off.
Note: The timer function can only be switched on or off in
dark. (The green light goes out in daylight, but switches on
again in dark.)
Note: If no longer use, please unplug the supply line plug 3
from the socket of solar panel 4.
Maintenance and care
The LEDs cannot be replaced. The product requires no maintenance.
Clean the product regularly with a dry, lint-free cloth. Use a
slightly dampened cloth to remove more stubborn dirt.
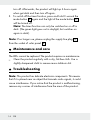
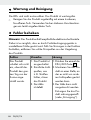
Troubleshooting
Note: This product has delicate electronic components. This means
that if it is placed near an object that transmits radio signals, it could
cause interference. If you notice that the product is malfunctioning,
remove any sources of interference from the area of the product.

15 GB
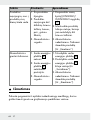
Error Cause Solution
The product
will not switch
on even though
the sun shone
on the product
all day.
1. The product is
turned off.
2. Artificial
sources of light,
e.g. street light-
ing, are inter-
fering with the
product.
3. The recharge-
able battery is
defective.
1. Press ON/OFF button
1 for 1 time.
2. Mount the product in a
place where it cannot
be disturbed by other
sources of light.
3.
The rechargeable battery
cannot be replaced.
Dispose of the product
properly (see “Disposal”).
Battery quickly
loses its
charge.
1. The solar panel
6 is dirty.
2. Solar panel 6
is positioned
incorrectly.
3. The recharge-
able battery is
defective.
1.
Clean the solar panel
6
.
2. Reposition the solar
panel 6 (refer to
“Installation”).
3. The rechargeable battery
cannot be replaced.
Dispose of the product
properly (see “Disposal”).
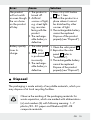
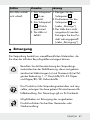
Disposal
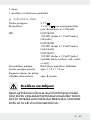
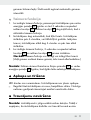
The packaging is made entirely of recyclable materials, which you
may dispose of at local recycling facilities.
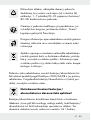
b
a
Observe the marking of the packaging materials for
waste separation, which are marked with abbreviations
(a) and numbers (b) with following meaning: 1–7:
plastics/20–22: paper and fibreboard/80–98:
composite materials.

16 GB
The product and packaging materials are recyclable,
dispose of it separately for better waste treatment. The
Triman logo is valid in France only.
Contact your local refuse disposal authority for more
details of how to dispose of your worn-out product.
To help protect the environment, please dispose of the
product properly when it has reached the end of its
useful life and not in the household waste. Information
on collection points and their opening hours can be
obtained from your local authority.
Faulty or used batteries/rechargeable batteries must be recycled
in accordance with Directive 2006/66/EC and its amendments.
Please return the batteries/rechargeable batteries and/or the
product to the available collection points.
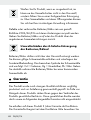
Environmental damage through incorrect
disposal of the batteries/rechargeable
batteries!
Batteries/rechargeable batteries may not be disposed of with the
usual domestic waste. They may contain toxic heavy metals and are
subject to hazardous waste treatment rules and regulations. The
chemical symbols for heavy metals are as follows: Cd = cadmium,
Hg = mercury, Pb = lead. That is why you should dispose of used
batteries/rechargeable batteries at a local collection point.

17 GB
Warranty
The product has been manufactured to strict quality guidelines and
meticulously examined before delivery. In the event of product de-
fects you have legal rights against the retailer of this product. Your
legal rights are not limited in any way by our warranty detailed
below.
The warranty for this product is 3 years from the d
ate of purchase. The
warranty period begins on the date of purchase. Please keep the
original sales receipt in a safe location. This document is required
as your proof of purchase.
Should this product show any fault in materials or manufacture within
3 years from the date of purchase, we will repair or replace it – at
our choice – free of charge to you. This warranty becomes void if
the product has been damaged, or used or maintained improperly.
The warranty applies to defects in material or manufacture. This
warranty does not cover product parts subject to normal wear, thus
possibly considered consumables (e.g. batteries) or for damage to
fragile parts, e.g. switches, rechargeable batteries or glass parts.
Warranty claim procedure
To ensure quick processing of your case, please observe the fol-
lowing instructions:
Please have the till receipt and the item number (e.g. IAN
123456_7890) available as proof of purchase.

18 GB
You will find the item number on the rating plate, an engraving on
the front page of the instructions for use (bottom left), or as a
sticker on the rear or bottom of the product.
If functional or other defects occur, please contact the service de-
partment listed either by telephone or by e-mail.
You can return a defective product to us free of charge to the ser-
vice address that will be provided to you. Ensure that you enclose
the proof of purchase (till receipt) and information about what the
defect is and when it occurred.
Service
Service Great Britain
Tel.: 08000569216
E-Mail: [email protected]

19 PL
Legenda zastosowanych piktogramów .. Strona 20
Wstęp ....................................................................................... Strona 21
Zastosowanie zgodne z przeznaczeniem ..............................Strona 21
Opis części................................................................................Strona 21
Zawartość .................................................................................Strona 21
Dane techniczne .......................................................................Strona 22
Wskazówki bezpieczeństwa .............................Strona 22
Wskazówki dotyczące bezpieczeństwa
charakterystyczne dla produktu ..............................................Strona 23
Wskazówki bezpieczeństwa dla
baterii/akumulatorów ..............................................................Strona 24
Sposób działania ..........................................................Strona 25
Montaż ....................................................................................Strona 26
Obsługa ................................................................................. Strona 27
Ustawianie produktu ................................................................Strona 27
Funkcja Timer ............................................................................ Strona 28
Konserwacja i czyszczenie ................................... Strona 29
Usuwanie usterek .........................................................Strona 29
Utylizacja ..............................................................................Strona 30
Gwarancja ...........................................................................Strona 32
Sposób postępowania w przypadku
naprawy gwarancyjnej ............................................................ Strona 33
Serwis ........................................................................................Strona 33

20 PL
Legenda zastosowanych piktogramów
Ten symbol wskazuje, ze produkt składa się z
2 pasków świetlnych. Każdy pasek świetlny
ma ok. 5 m, a przewód doprowadzający ok. 3 m
długości.
Ochrona przed pryskającą wodą
Prąd stały/napięcie stałe
Prąd zmienny/napięcie zmienne
Wbudowany 6-godzinny timer, przy pomocy
którego solarny łańcuch świetlny LED może
świecić przez maksymalnie 6 godzin
Nadaje się do użytku na wolnym powietrzu
Zasilanie akumulatorem
Znak CE wskazuje zgodność z odpowiednimi
Dyrektywami UE dotyczącymi tego produktu.
Strona się ładuje...
Strona się ładuje...
Strona się ładuje...
Strona się ładuje...
Strona się ładuje...
Strona się ładuje...
Strona się ładuje...
Strona się ładuje...
Strona się ładuje...
Strona się ładuje...
Strona się ładuje...
Strona się ładuje...
Strona się ładuje...
Strona się ładuje...
Strona się ładuje...
Strona się ładuje...
Strona się ładuje...
Strona się ładuje...
Strona się ładuje...
Strona się ładuje...
Strona się ładuje...
Strona się ładuje...
Strona się ładuje...
Strona się ładuje...
Strona się ładuje...
Strona się ładuje...
Strona się ładuje...
Strona się ładuje...
Strona się ładuje...
Strona się ładuje...
Strona się ładuje...
Strona się ładuje...
Strona się ładuje...
Strona się ładuje...
Strona się ładuje...
Strona się ładuje...
Strona się ładuje...
Strona się ładuje...
Strona się ładuje...
Strona się ładuje...
Strona się ładuje...
Strona się ładuje...
Strona się ładuje...
Strona się ładuje...
Strona się ładuje...
Strona się ładuje...
Strona się ładuje...
Strona się ładuje...
Strona się ładuje...
Strona się ładuje...
Strona się ładuje...
Strona się ładuje...
Strona się ładuje...
Strona się ładuje...
Strona się ładuje...
Strona się ładuje...
Strona się ładuje...
Strona się ładuje...
Strona się ładuje...
Strona się ładuje...
Strona się ładuje...
Strona się ładuje...
Strona się ładuje...
Strona się ładuje...
Strona się ładuje...
Strona się ładuje...
Strona się ładuje...
Strona się ładuje...
Strona się ładuje...
Strona się ładuje...
Strona się ładuje...
-
 1
1
-
 2
2
-
 3
3
-
 4
4
-
 5
5
-
 6
6
-
 7
7
-
 8
8
-
 9
9
-
 10
10
-
 11
11
-
 12
12
-
 13
13
-
 14
14
-
 15
15
-
 16
16
-
 17
17
-
 18
18
-
 19
19
-
 20
20
-
 21
21
-
 22
22
-
 23
23
-
 24
24
-
 25
25
-
 26
26
-
 27
27
-
 28
28
-
 29
29
-
 30
30
-
 31
31
-
 32
32
-
 33
33
-
 34
34
-
 35
35
-
 36
36
-
 37
37
-
 38
38
-
 39
39
-
 40
40
-
 41
41
-
 42
42
-
 43
43
-
 44
44
-
 45
45
-
 46
46
-
 47
47
-
 48
48
-
 49
49
-
 50
50
-
 51
51
-
 52
52
-
 53
53
-
 54
54
-
 55
55
-
 56
56
-
 57
57
-
 58
58
-
 59
59
-
 60
60
-
 61
61
-
 62
62
-
 63
63
-
 64
64
-
 65
65
-
 66
66
-
 67
67
-
 68
68
-
 69
69
-
 70
70
-
 71
71
-
 72
72
-
 73
73
-
 74
74
-
 75
75
-
 76
76
-
 77
77
-
 78
78
-
 79
79
-
 80
80
-
 81
81
-
 82
82
-
 83
83
-
 84
84
-
 85
85
-
 86
86
-
 87
87
-
 88
88
-
 89
89
-
 90
90
-
 91
91


w innych językach
- Deutsch: LIVARNO 366218 Bedienungsanleitung
- eesti: LIVARNO 366218 Omaniku manuaal
- English: LIVARNO 366218 Owner's manual
Powiązane artykuły
-
LIVARNO 384304 Instrukcja obsługi
-
-
-
-
-
-
-
-
-