
www.rossmax.com
Model: AM30
INUAM30000000XXXX
OBM_IB_AM30_
V9_SW_ver2123
Warranty Card
This instrument is covered by a 1 year guarantee from the date of purchase, mattress and accessories are not included.
For products sold within the European Union, rossmax acknowledges all consumer rights granted under the EU Directive
2019/771 and the respective national laws within the EU. The guarantee is valid only on presentation of the warranty card
completed or stamped by the seller/dealer confirming date of purchase or the receipt. Opening or altering the instrument
invalidates the guarantee. The guarantee does not cover damage, accidents or non-compliance with the instruction manual.
Please contact your local seller/dealer or buying source or www.rossmax.com.
Customer Name: ______________________________________________________________________
Address: _____________________________________________________________________________
Telephone: ___________________________________________________________________________
E-mail address: ________________________________________________________________________
Product Information
Date of purchase: _____________________________________________________________________
Store where purchased:
______________________________________________________________________________________
Matelas à bulles
Materac przeciwodleżynowy bąbelkowy
Air Mattress Bubble Type
Пузырчатый противопролежневый матрас
Colchón de burbujas
Bubble-Typ Matratze
Rossmax Swiss GmbH,
Widnauerstrasse 1, CH-9435
Heerbrugg, Switzerland
2
13
45
Русский Язык
Введение
Благодарим Вас за покупку пузырчатого противопролежневого матраса Rossmax. При надлежа-
щем уходе и использовании, Ваш надувной матрас обеспечит Вам надежное лечение на протя-
жении многих лет. Мы рекомендуем внимательно прочитать данное руководство пользователя,
чтобы узнать о настройке и особенностях Вашего надувного матраса. Матрас уменьшает давле-
ние благодаря последовательному надуванию и спусканию чередующихся воздушных ячеек, с 6
минутными интервалами. Он предназначен для сокращения числа случаев пролежней благода-
ря улучшению комфорта пациентов, а также для долгосрочного ухода за пациентами, страдаю-
щими от пролежней.
Внимание: Ознакомьтесь с сопутствующей документацией. Перед использованием тщатель-
но прочтите это руководство. Сохраните данное руководство для использования в будущем.
Предостережения при пользовании изделием
1. Не курите вблизи насоса
2. Держите насос вдали от нагретых поверхностей.
3. Существует опасность взрыва при использовании в присутствии воспламеняющихся анесте-
тиков.
4. Никогда не используйте этот продукт, если у него поврежден шнур или штепсель. Если продукт
не работает должным образом, обратитесь в службу поддержки Rossmax.
5. Замените предохранитель, как отмечено: Т1а 250В.
6. Не используйте с пациентами, которые имеют повреждения спинного мозга.
7. Необходим тщательный контроль, если этот продукт используется вблизи детей.
8. Используйте этот продукт только по его прямому назначению, как описано в данном руковод-
стве. Не используйте другие матрас, не рекомендованные производителем.
9. Не изменяйте этот продукт без разрешения производителя.
10. Если вы подозреваете, что у Вас, возможно, возникла аллергическая реакция, пожалуйста,
обратитесь к врачу.
11. Не обслуживайте и не собирайте устройство во время использования.
Правила использования
1. Поместите матрас на раму кровати с концом шланга на нижней секции рамы кровати. Прочно
закрепите матрас, фиксируя флажки к кровати, если таковые имеются.
2. Использую встроенные кронштейны, надежно подвесьте насос на край кровати в нижней сек-
ции или расположите на гладкой ровной поверхности.
3. Подсоедините воздушные шланги от матраса к насосу.
Примечание: Проверьте и убедитесь, что воздушные шланги не перекручены и не заправлены
под матрас.
4. Подключите насос к сетевой электрической розетке. Убедитесь, что кабель питания находится
на безопасном расстоянии от возможных опасностей.
Примечание: после установки, кабель питания должен быть аккуратно расположен, чтобы
избежать каких-либо отключений или несчастных случаев.
5. Включите выключатель питания на панели управления насосом. Насос начнет надувать матрас.
Примечание: Насос должен быть использован только с матрасом, рекомендованным произ-
водителем. Не используйте его для других целей.
6. При надувании, отрегулируйте настройки давления, основываясь на уровне комфорта пациен-
та, поворачивая ручку регулировки давления по часовой стрелке, чтобы увеличить упругость.
Примечание: Каждый раз, при настройке матраса для использования, рекомендуется, чтобы
сначала давление было установлено на максимальное значение, и только затем настроить же-
лаемый уровень давления в надувном матрасе.
Очистка и дезинфекция
1. Протрите насосный агрегат влажной тряпкой и мягким моющим содержать. Если используется
другой моющее средство, выбрать то, которое не будет иметь никаких химических воздейст-
вий на поверхности пластикового корпуса насосного агрегата
2. Протрите матрас теплой водой, содержащей мягкое моющее средство и тщательно высушите
на воздухе перед использованием.
Примечание:
• Не используйте очищающее средство на основе фенольных веществ.
• После очистки, высушите матрас, избегая попадание прямого солнечного света.
Устранение неисправностей
Признаки Контрольная точка / Коррекция
Питание не подключено • Убедитесь, что штекер подключен к сети
• Проверьте, не перегорел ли предохранитель
Пациент касается нижней
точки • Настройки давления могут быть недостаточными для
пациента, отрегулируйте более высокое давление
и подождите несколько минут для достижения
максимального комфорта.
Матрас свободно движется Убедитесь, что матрас крепится к раме кровати флажками
Воздух не поступает из
некоторых выпускных
отверстий воздушной трубки
Это нормально в переменном режиме, так как выпускные
отверстия меняются при производстве воздуха во время их
циклов
Примечание: Если уровень давления находится на устойчиво низком уровне, убедитесь в от-
сутствии утечек в воздушных шлангах и трубках. При необходимости, заменить поврежденную
трубу или шланг или обратиться в службу поддержки Rossmax.
Технические характеристики
Насос
Размеры (Д х Ш х В) 26.5 x 13.5 x 10 cm
Вес 3 lbs (1.4kg)
Источник питания переменного тока AC 230В/50Гц или AC 220В/60Гц или AC 110В/60Гц
Продолжительность цикла 6 минут
Матрас
Размеры (Д х Ш х В) 79” х 35” х 3” (200 × 90 × 7 см)
Удлинительные флажки 20”(50 см) с обеих сторон
Вес 5 фунтов (2,3 кг)
Максимальный вес 220 фунтов (100 кг)
Условия эксплуатации От 10°С до 40°C (От 50°F до 104°F), От 10% до 75%
относительной влажности; 700~1060hPa
Условия хранения и транспортировки От -18°С до + 43°С (От 0°F до 110°F), От 10% до 95%
относительной влажности
Применяемые части типа BF
IP Классификация IP21: Защита от вредных попаданий воды и
пылевидных частиц
Nazwa/Funkcja części
1. Panel sterowania
2. Przełącznik on/o
3. Pokrętło regulacji ciśnienia
4. Hak
5. Wejście przewodu powietrza
Название / Функция
каждого части
1. Пульт управления
2. Выключатель
3. Ручка регулировки давления
4. Кронштейн
5. Шланг для подачи воздуха
Język Polski
Wstęp
Dziękujemy za zakup bąbelkowego materaca przeciwodleżynowego Rossmax. Przy właściwej pie-
lęgnacji i użytkowaniu, Twój materac zapewni Ci wieloletnie i niezawodne leczenie. Należy przeczy-
tać instrukcję, aby zaznajomić się z właściwościami materaca. Materac łagodzi nacisk przez cykliczne
spuszczanie i pompowanie powietrza naprzemiennie w komorach, w określonych odstępach czasu
co 6 minut. Jest on przeznaczony do zapobiegania i zmniejszania częstotliwości występowania od-
leżyn oraz poprawy komfortu pacjenta. Umożliwia długoterminową opiekę nad pacjentami z odle-
żynami.
Uwaga: Należy zapoznać się z dokumentacją towarzyszącą. Przed rozpoczęciem użytkowania
produktu należy dokładnie przeczytać niniejszą instrukcję. Należy zachować instrukcje do wglą-
du.
Ostrzeżenia dotyczące produktu
1. Nie należy palić w pobliżu pompy.
2. Trzymaj pompę z dala od gorących powierzchni.
3. Ryzyko wybuchu w przypadku stosowania łatwopalnych środków znieczulających.
4. Nigdy nie używaj tego produktu, jeśli ma uszkodzony przewód lub wtyczkę. Jeśli urządzenie nie
działa prawidłowo, należy skontaktować się z serwisem.
5. Wymień bezpiecznik: T1A 250V .
6. Nie należy stosować u pacjentów, którzy mają uraz rdzenia kręgowego.
7. Zachować szczególną ostrożność, gdy produkt używany jest w obecności dzieci.
8. Produkt ten można stosować tylko zgodnie z jego przeznaczeniem, opisanym w niniejszej instruk-
cji. Nie należy używać innego materaca, który nie posiada rekomendacji producenta.
9. Nie należy modykować urządzenia bez zezwolenia producenta.
10. Jeśli podejrzewasz, że może miałeś lub masz reakcję alergiczną, należy natychmiast skonsultować
się z lekarzem.
11. Nie naprawiaj ani demontuj urządzenia w trakcie korzystania z niego.
Jak korzystać z urządzenia
1. Umieść materac na ramie łóżka z końcem przewodu po stronie nóg. Materac mocno zabezpiecz
poprzez zamocowanie do uchwytów ramy łózka jeśli są dostępne.
2. Używając wbudowanych wieszaków, ostrożnie powieś pompę na końcu łóżka lub połóż na gład-
kiej, płaskiej powierzchni.
3. Podłącz przewody powietrza z materaca do pompy.
Uwaga: Należy sprawdzić i upewnić się że przewody powietrzne nie są załamane lub schowane
pod materacem.
4. Podłącz pompę do ściennego gniazdka elektrycznego. Upewnij się, że przewód zasilający jest bez-
piecznie oddalony od potencjalnych zagrożeń.
Uwaga: Po instalacji, dodatkowa długość przewodu zasilającego, powinna zostać starannie zwi-
nięta, aby uniknąć wypadku.
5. Włącz przełącznik zasilania na panelu sterowania Pompa zacznie nadmuchiwać materac.
Uwaga: Pompa powinna być używana tylko z zalecanym przez producenta materacem. Nie należy
używać jej do innych celów.
6. Podczas napełniania, należy dostosować poziom ciśnienia w oparciu o komfort pacjenta, obracając
pokrętło regulacji ciśnienia w prawo, aby je zwiększyć.
Uwaga: Za każdym razem gdy materac jest przygotowywany do użycia zaleca się najpierw ustawić
ciśnienie na max, a następnie dopasować do uzyskania pożądanej miękkości.
Czyszczenie i dezynfekcja
1. Przetrzyj pompkę wilgotną ściereczką z łagodnym detergentem. Jeśli stosuje się inne detergenty
to należy wybrać takie, które nie będą miały wpływu chemicznego na powierzchnię z tworzywa
sztucznego obudowy pompy.
2. Przetrzyj materac ciepłą wodą zawierającą łagodny detergent i dokładnie wysusz przed ponow-
nym użyciem.
Uwaga:
• Nie należy używać produktu na bazie fenolu.
• Po oczyszczeniu osuszyć materac unikając bezpośredniego nasłonecznienia.
Rozwiązywanie problemów
Problemy Sprawdzenie / Rozwiązanie
Zasilanie nie jest włączone • Sprawdzić, czy wtyczka jest podłączona do zasilania.
• Sprawdź czy bezpiecznik nie jest przepalony.
Pacjent dotyka materaca -
poziom ciśnienia jest za niski. • Ustawiony poziom ciśnienia może nie być odpowiedni dla
pacjenta. Należy ustawić wyższe ciśnienie i odczekać kilka
minut dla uzyskania większego komfortu.
Materac jest luźny. Sprawdź, czy materac jest przymocowany do ramy łóżka.
Powietrze nie jest dmuchane
do wszystkich przewodów
powietrznych.
To jest normalne. Materac jest w trybie cyklu.
Uwaga: Jeśli poziom ciśnienia jest stale na niskim poziomie, sprawdź czy rury i przewody powietrza
są szczelne. Jeśli nie, to konieczne wymień uszkodzony element lub w razie potrzeby skontaktuj się
z obsługą Rossmax.
Specykacje
Pompa
Wymiary (dł x szer x wys) 26.5 x 13.5 x 10 cm
Waga 3 funty (1.4kg)
Źródło zasilania AC 230 V/50 Hz lub AC 220 V/60 Hz lub AC 110 V/60 Hz
Czas cyklu 6 min
Materac
Wymiary (dł x szer x wys) 79" × 35" × 3" (200 × 90 ×7 cm)
Zakres rozszerzeń 20” (50 cm) z obu stron
Waga 5 funtów (2,3 kg)
Waga,Pojemność 220 lbs (100 kg)
Środowisko pracy 10°C do 40°C (50°F do 104°F), 10% do 75% RH; 700~1060hPa
Transport i przechowywanie -18°C do + 43°C (0°F do 110°F), 10% do 95% RH
Części typu BF
Klasykacja IP IP21: Rodzaj ochrony przed wodą i pyłami
lbs
lbs lbs
~
BF
~
BF

Française
Introduction
Merci d’avoir acheté le matelas à bulles d’air Rossmax. Avec un entretien et une utilisation corrects,
votre matelas d’air vous apportera de nombreuses années de soins ables. Nous vous encourageons
à lire attentivement ce livret guide pour apprendre à installer votre matelas d’air et à en connaître
les caractéristiques. Le matelas soulage la pression par un gonage et un dégonage séquentiel des
cellules d’air en alternance sur environ des intervalles de temps d’environ 6 minutes. Il est destiné
à aider à réduire l’apparition des ulcères de pression tout en optimisant le confort du patient et les
soins à long terme des patients sourant d’ulcères de pression.
Attention: Consultez les documents d’accompagnement. Veuillez lire ce manuel attentivement
avant l’emploi. Veillez à conserver ce manuel.
Mises en garde sur le produit
1. Ne pas fumer sur ni à proximité de la pompe.
2. Maintenir la pompe loin des surfaces chauées.
3. Il y a un risque d’explosion en cas d’utilisation en présence d’anesthésiques inammables.
4. Ne jamais utiliser ce produit si le cordon ou la che sont endommagés ; en cas de dysfonctionne-
ment, merci de contacter le service Rossmax si nécessaire.
5. Remplacer le fusible comme indiqué : T 1 A 250 V.
6. Ne pas utiliser avec des patients qui présentent une lésion de la moelle épinière.
7. Une surveillance étroite est nécessaire lorsque ce produit est utilisé sur ou près d’enfants.
8. Utiliser ce produit uniquement pour son usage prévu, comme décrit dans le présent manuel. Ne
pas utiliser d’autres matelas non recommandés par le fabricant.
9. Ne pas modier ce produit sans autorisation du fabricant.
10. En cas de soupçon de réaction allergique, merci de consulter immédiatement votre médecin.
11. Ne pas entretenir l’appareil pendant son utilisation.
Utilisation
1. Placer le matelas sur le cadre de lit avec l’extrémité du tuyau au niveau des pieds du cadre de lit.
Fixer le matelas fermement en xant les sangles au cadre de lit le cas échéant.
2. En utilisant les crochets intégrés, accrocher fermement la pompe à l’extrémité du lit côté pieds ou
la placer sur une surface plane et lisse.
3. Raccorder les tuyaux d’air du matelas à la pompe.
Remarque: Contrôler et vérier que les tuyaux d’air ne sont pas pliés ou coincés sous le matelas.
4. Brancher la pompe sur une prise secteur. S’assurer que le cordon d’alimentation est en lieu sûr,
loin des dangers possibles.
Remarque : après installation, la longueur supplémentaire de cordon d’alimentation, le cas
échéant, doit être rangée soigneusement pour éviter tout déclenchement accidentel.
5. Allumer l’interrupteur d’alimentation sur le panneau de commande de la pompe. La pompe com-
mence à goner le matelas.
Remarque: la pompe ne doit être utilisée qu’avec le matelas recommandé par le fabricant. Ne
pas l’utiliser à d’autres ns.
6. Pendant le gonage, ajuster le réglage de la pression en fonction du niveau de confort du patient
en tournant le bouton de réglage de la pression dans le sens horaire pour augmenter la fermeté.
Remarque: Chaque fois que le matelas est mis en place pour une utilisation, il est recommandé
de régler la pression initiale sur le maxi., puis d’ajuster le niveau de résistance du matelas d’air à la
douceur souhaitée une fois la mise en place est terminée.
Nettoyage et désinfection
1. Essuyez la pompe avec un chion humide et un détergent doux. Si un autre détergent est utilisé,
choisissez celui qui ne aura pas d’eets chimiques sur la surface du boîtier en plastique de l’unité
de pompe.
2. Essuyez le matelas avec de l’eau chaude contenant un détergent doux et séché à l’air avant de
l’utiliser.
Remarque:
• Ne pas utiliser le produit à base phénolique pour le nettoyage.
• Après le nettoyage, sécher le matelas sans exposition directe au soleil.
Dépannage
Symptômes Point de contrôle / Correction
L’alimentation n’est pas sur ON • Vérier que la che est reliée au secteur
• Vérier que le fusible n’est pas grillé
Le patient s’enfonce • Le réglage de la pression est peut-être insusant pour
le patient ; ajuster à une pression plus élevée et attendre
quelques minutes pour un meilleur confort
La forme du matelas est lâche Vérier que le matelas est xé au cadre de lit par les sangles
Absence d’air de certaines
sorties du raccord du tube d’air Cela est normal car il est en mode alternatif, les sorties d’air se
relaient pour produire de l’air pendant leur temps de cycle
Remarque: Si le niveau de pression reste toujours faible, vérier la présence de fuites (tubes ou
tuyaux d’air). Si nécessaire, remplacer tout tube ou tuyau endommagé ou contacter le service Ross-
max si nécessaire.
Specication
Pompe
Dimensions (L x P x H) 26.5 x 13.5 x 10 cm
Poids 3 lbs (1.4 kg)
Source secteur AC 230V/50Hz un AC 220V/60Hz un AC 110V/60Hz
Temps de cycle 6 mins
Matelas
Dimensions (L x P x H) 79" × 35" × 3" (200 × 90 × 7 cm)
Sangles d’extension 20"(50 cm) of both sides
Poids 5 liv (2,3 kg)
Capacité de poids 220 liv (100 kg)
État de fonctionnement 10 °C à 40 °C (50 °F à 104 °F), 10 % à 75 % d’humidité relative;
700~1060hPa
État de stockage et de transport -18 °C à +43 °C (0 °F à 110 °F), 10 % à 95 % d’humidité relative
Pièces appliquées de type BF
Classication IP IP21: Protection contre la pénétration nuisible de l’eau et les
matières particulaires
Español
Introducción
Gracias por comprar el colchón de aire de burbujas Rossmax. Con el cuidado y uso adecuados, su colchón
de aire debería proporcionarle muchos años de tratamiento adecuado. Le animamos a leer cuidadosamente
este manual de usuario para aprender las opciones y conguración de este colchón de aire. El colchón mini-
miza la presión mediante el hinchado y deshinchado secuencial de las celdillas a intervalos aproximados de
6 minutos. Su objetivo es la disminución de la incidencia de las ulceras de presión al tiempo que optimiza el
confort del paciente de larga duración que sufren ulceras de presión.
Atención: Consulte los documentos anexos. Por favor, lea este manual cuidadosamente antes del uso.
Por favor, conserve este manual.
Precauciones referentes al producto
1. No fume encima o cerca de la bomba
2. Mantenga la bomba alejada de supercies calientes
3. Riesgo de explosión si se utiliza en presencia de anestésicos inamables
4. Nunca utilice este producto si presenta desperfectos en el cable o en el enchufe, si no funciona correcta-
mente, contacte con el servicio técnico de Rossmax si es necesario.
5. Reemplace con un fusible según especicaciones T 1A. 250 V.
6. No utilizar con pacientes con daños en la medula espinal.
7. Su uso debe ser supervisado cuando se utiliza cerca o con niños.
8. Este producto está previsto para su uso exclusivamente como se describe en el manual. No utilice otros
colchones no recomendados por el fabricante.
9. No modique este producto sin la autorización del fabricante.
10. Si sospecha que puede tener o de que tiene alguna reacción alérgica, por favor consulte con su médico
inmediatamente.
11 No haga ningún mantenimiento del dispositivo mientras aun esté en funcionamiento.
Como usar
1. Coloque el colchón de aire sobre el somier con el conector de la manguera de aire a los pies. Si es posible
asegure el colchón al somier mediante los anclajes disponibles
2. Usando los colgadores suministrados, cuelgue de modo seguro la bomba a los pies de la cama o deposítela
en una supercie plana
3. Conecte las mangueras de aire del colchón a la bomba
NOTA: Compruebe y asegúrese de que las mangueras no estén retorcidas o pasen por debajo del colchón
4. Conecte la bomba a la corriente eléctrica. Manténgase a distancia de posibles riesgos.
NOTA: Después de la instalación, cualquier exceso de cable eléctrico debería ser colocado de modo que
se evite cualquier riesgo de tropezar.
5. Actúe sobre el interruptor de puesta en marcha en el panel de control de la bomba. El hinchado del col-
chón empezara inmediatamente
NOTA: La bomba debe ser usada solo con el colchón recomendado por su fabricante. No la use para
ningún otro uso.
6. Durante el hinchado, ajuste los niveles de presión buscando el confort del paciente girando el botón de
control en el sentido de las agujas del reloj para incrementar la rmeza del colchón
NOTA: Cada vez que el colchón sea puesto en funcionamiento se recomienda empezar ajustando la pre-
sión al máximo, y ajuste después los niveles para obtener la dureza necesaria una vez el hinchado inicial se
ha completado.
Limpieza y desinfección
1. Limpie la unidad de la bomba con un paño húmedo y detergente suave. No utilice detergentes que pudie-
ran ser abrasivos o reaccionar con las supercies de la unidad de la bomba.
2. WLimpiar el colchón con agua caliente que contenga un detergente suave y secado al aire antes de usar.
NOTA:
• No utilice productos con base fenólica para la limpieza.
• Después de limpiar, secar el colchón al aire sin exponer al sol directamente.
Localización de fallas
Síntomas Comprobación / corrección
No está encendido • Compruebe si esta correctamente conectado a la corriente.
• Verique que no haya un fusible fundido
EL paciente está tocando fondo • El ajuste de la presión puede no ser el adecuado para el
paciente, ajuste una presión superior y espere unos minutos
para comprobar la mejora en el confort
El colchón se ha deformado Compruebe si el colchón esta correctamente jado al somier
No sale aire de alguno de los
conectores del tubo de aire Esto es normal ya que en el modo alternativo, las salidas de aire
lo hacen de forma alternativa durante sus tiempos de ciclo
NOTA: Si los niveles de presión son consistentemente bajos, compruebe que no haya alguna perdida de aire
en los tubos o mangueras. Si es necesario reemplace cualquier tubo o manguera que presente desperfectos
o póngase en contacto con el servicio técnico Rossmax
Especicaciones
Unidad Bomba
Dimensiones (Largo x Ancho x Alto) 26.5 x 13.5 x 10 cm
Peso 3 lbs (1.4 kg)
Voltaje alterna AC 230V/50Hz o AC 220V/60Hz o AC110V/60Hz
Tiempo de ciclo 6 mins
Colchón
Dimensiones (Largo x Ancho x Alto) 79" × 35" × 3" (200 × 90 × 7 cm)
Alargos para anclajes 20’(50 cm) ambos lados
Peso 5 lbs (2.3 kg)
Peso máximo 220 lbs (100 kg)
Condiciones de funcionamiento 10°C to 40°C (50°F to 104°F),10% to 75% RH; 700~1060hPa
Condiciones de almacenaje y transporte -18°C to 43°C(0°F to 110°F),10% to 95% RH
Piezas aplicadas de tipo BF
Clasicación IP IP21: Protección contra proyecciones de agua y partículas
Deutsch
Einführung
Danke, dass Sie sich für den Kauf einer Rossmax Bubble-Typ Matratze entschieden haben. Mit der richtigen Pege
und Anwendung, wird Ihre Matratze Ihnen viele Jahre eine zuverlässige Behandlung bieten. Wir empfehlen Ihnen,
diese Gebrauchsanweisung gründlich zu lesen. Die Matratze entlastet durch sequenzielles Ablassen und Aufblasen
alternativer Luftzellen bei ungefähr 6 minütigen Zeitintervallen. Die Matratze verringert das Auftreten von Dekubitus
und optimiert gleichzeitig den Komfort des Patienten, Langzeitpege von Patienten mit Druckgeschwüren.
Achtung: Beachten Sie die beiliegenden Dokumente. Lesen Sie diese Bedienanleitung vor Verwendung sorg-
fältig durch. Bitte bewahren Sie diese Bedienanleitung auf.
Vorsichtsmassnahmen für das Produkt
1. Das Rauchen in der Nähe der Pumpe ist untersagt.
2. Halten Sie die Pumpe von heissen Oberächen fern.
3. Explosionsgefahr falls in Gegenwart von brennbaren Anästhetika verwendet.
4. Betreiben Sie dieses Produkt nicht, wenn das Kabel oder der Stecker beschädigt ist. Falls das Gerät nicht richtig
funktioniert, wenden Sie sich bei Bedarf an den Rossmax Kundenservice.
5. Ersetzen Sie die Sicherungen wie gekennzeichnet: T1A 250V
6. Nicht geeignet für Patienten mit Rückenmarksverletzungen.
7. Sorgfältige Aufsicht ist notwendig, wenn dieses Produkt in der Nähe von Kindern benutz wird.
8. Das Produkt ist nur für den Zweck, der in dieser Gebrauchsanweisung beschrieben ist. Verwendung einer anderen
Matratze ist vom Hersteller nicht empfohlen.
9. Verändern Sie dieses Produkt nicht ohne Genehmigung des Herstellers.
10. Wenn Sie vermuten eine allergische Reaktion zu haben oder gehabt haben, konsultieren Sie unverzüglich Ihren
Arzt.
11. Führen Sie weder Service noch Pege des Gerätes während des Gebrauchs durch.
Benutzung
1. Legen Sie die Matratze auf das Bettgestell mit dem Schlauchende am Fußteil des Bettrahmens. Sichern Sie die
Matratze am Bettrahmen, falls verfügbar.
2. Mit Hilfe der integrierten Haken, sichern Sie die Pumpe am Fussende des Bettes oder platzieren Sie diese auf einer
glatten, achen Oberäche.
3. Schliessen Sie die Luftschläuche von der Matratze an die Pumpe an.
Hinweis: Überprüfen und stellen Sie sicher, dass die Luftschläuche nicht geknickt oder unter der Matratze fest
hängen.
4. Schliessen Sie die Pumpe an einer Steckdose (Wand) an. Stellen Sie sicher, dass das Netzkabel vor Gefahrenquellen
geschützt ist.
Hinweis: Nach der Installation, rollen Sie die zusätzliche Länge des Kabels sauber zusammen, falls vorhanden, um
Unfälle zu vermeiden.
5. Schalten Sie den Netzschalter auf der Schalttafel der Pumpe ein. Die Pumpe beginnt nun die Matratze aufzublasen.
Hinweis: Die Pumpe darf nur mit der Matratze vom Hersteller verwendet werden. Verwenden Sie die Pumpe nicht
für andere Zwecke.
6. Während der Ination, stellen Sie den Druck, basierend auf dem Patientenkomfort, ein. Dazu drehen Sie den
Druckregler im Uhrzeigersinn (1-10) um die Straheit zu erhöhen.
Hinweis: Jedes Mal, wenn Sie das Gerät in Betrieb nehmen, ist es empfohlen, den Druck maximal einzustellen und
dann das Gewichtlevel einzustellen um den gewünschten Weichheitsgrad zu erreichen.
Reinigung und Desinfektion
1. Wischen Sie die Pumpeneinheit mit einem feuchten Tuch und einem milden Reinigungsmittel. Stellen Sie sicher,
dass das Reinigungsmittel keine chemische Wirkung bei Kontakt mit Kunststo erzeugt.
2. Wischen Sie die Matratze mit warmem Wasser und einem milden Reinigungsmittel ab. Vor erneutem Gebrauch,
stellen Sie sicher, dass die Matratze gut luftgetrocknet ist.
Hinweis:
• Verwenden Sie keine Phenolbasis für die Reinigung.
• Setzten Sie die Matratze nicht direkter Sonneneinstrahlung aus.
Fehlerbehebung
Symptome Prüfpunkt / Korrektur
Stromversorgung ist nicht
eingestellt • Prüfen Sie, ob der Stecker an das Stromnetz angeschlossen ist.
• Prüfen Sie, ob eine Sicherung durch gebrannt ist.
Zu hohe Luftverdrängung
durch Körpermasse • Druckeinstellung kann für den Patienten unzureichend sein, verändern
Sie den Druck und warten Sie ein paar Minuten für den besten Komfort.
Die Matratze ist zu wenig
aufgeblasen. Überprüfen Sie, ob die Matratzenauage am Bettrahmen befestigt ist.
Keine Luftzufuhr aus einigen
Röhrenanschlüssen Das ist normal, da es sich um ein Wechseldrucksystem handelt. Die
Luftauslässe der verschiedenen Anschlüsse zirkulieren.
Hinweis: Wenn der Druckpegel konstant niedrig ist, prüfen Sie allfälliges Ausströmen (Röhren oder Schläuche).
Wenn nötig, ersetzen Sie die beschädigten Röhren oder Schläuche oder kontaktieren Sie den Rossmax Kundenser-
vice.
Technische Daten
Pumpe
Abmessungen (L x B x H) 26.5 x 13.5 x 10 cm
Geweicht 1.4 kg
Wechselstromquelle AC 230V/50Hz oder AC 220V/60Hz oder AC 110V/60Hz
Zyklus 6 mins
Matratze
Abmessungen (L x B x H) 200 × 90 × 7 cm
Erweiterungsschlaufen 50 cm auf beiden Seiten
Geweicht 2.3 kg
Gewichtskapazität 100 kg
Betriebszustand 10°C bis 40°C, 10% bis 75% rF; 700~1060hPa
Aufbewahrungs- und Transportzustand -18°C bis +43°C, 10% bis 95% rF
Verbundene Geräte des Typs BF
IP Klassizierung IP21, Schutz gegen schädliches Eindringen von Wasser und Staub
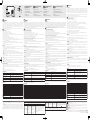
Name/Function of
each parts
1. Control Panel
2. ON/OFF Switch
3. Pressure Adjust Knob
4. Hanger
5. Air Hose Port
Nombre / Función de
cada parte
1. Panel de control
2. Interruptor puesta en marcha
3. Regulador de presión
4. Colgador
5. Conexión manguera aire
Name/Funktion jedes
Einzelteils
1. Schalttafel
2. ON/OFF Schalter
3. Druckregler
4. Aufhänger
5. Luftschlauch-Anschluss
Nom / fonction de chaque
pièce
1. Panneau de commande
2. Interrupteur Marche / Arrêt
3. Bouton de réglage de la pression
4. Crochet
5. Orice du tuyau d'air
2
13
45
English
Introduction
Thank you for purchasing Rossmax bubble air mattress. With proper care and use, your air mattress will
provide you with many years of reliable treatments. We encourage you to thoroughly read this guide-
book to learn about setting up and the features of your air mattress. The mattress relieves pressure by
sequentially deating and inating alternate air cells on approximately 6 minutes timed intervals. It is
intended to help and reduce the incidence of pressure ulcers while optimizing patient comfort, long
term care of patients suering from pressure ulcers.
Attention: Consult the accompanying documents. Please read this manual carefully before use.
Please be sure to keep this manual.
Product caution
1. Do not smoke on or near the pump.
2. Keep the pump away from heated surfaces.
3. Explosion risk if used in the presence of ammable anesthetics.
4. Never operate this product if it has a damaged cord or plug, if it is not working properly, please contact
Rossmax service if necessary.
5. Replace fuse as marked: T1A 250V.
6. Do not use with patients who have a spinal cord injury.
7. Close supervision is necessary when this product is used on or near children.
8. Use this product only for its intended use as described in this manual. Do not use other mattress not
recommended by manufacturer.
9. Do not modify this product without authorization of the manufacturer.
10. If you suspect that you may have had or are having an allergic reaction, please consult your physician
immediately.
11. Do not service or maintain device while in use.
How to use
1. Place the mattress on the bed frame with the hose end at the foot section of the bed frame, Secure the
mattress rmly by xing the ags to the bed frame if available.
2. Using the integrated hangers, securely hang the pump on the bed end at the foot end or place on a
smooth at surface.
3. Connect the air hoses from the mattress to the pump unit.
Note: Check and ensure the air horses are not kinked or tucked under mattress.
4. Plug the pump into a wall electrical outlet. Be sure the power cord is safely away from possible hazards.
Note: After installation, the extra length of power cord, if any, should be neatly arranged to avoid any
tripping accidents.
5. Turn on the power switch on the control panel of the pump. The pump will begin to inate the mat-
tress.
Note: The pump should only be used with mattress recommended by manufacturer. Do not use it for
any other purpose.
6. While ination, adjust the pressure setting based upon patient comfort level by turning the pressure
adjustment knob clockwise to increase rmness.
Note: Every time the mattress is set up for use, it is recommended that the pressure rst to be set to
max., and then adjust air mattress weight levels to the desired softness after set up has been completed.
Clean and disinfection
1. Wipe the pump unit with a damp cloth and mild detergent. If other detergent is used, choose one that
will have no chemical eects on the surface of the plastic case of the pump unit.
2. Wipe down the mattress with warm water containing a mild detergent and air dried thoroughly before
use.
Note:
• Do not use phenolic based product for cleaning.
• After cleaning, dry the mattress without direct exposure sunlight.
Troubleshooting
Symptoms Check point/Correction
Power is not ON • Check if the plug is connected to mains.
• Check for a blown fuse.
Patient is bottoming out • Pressure setting might be inadequate for the patient, adjust
higher pressure and wait for a few minutes for best comfort.
Mattress form is loose Check if the mattress is xed to the bed frame by ags.
No air produced from some air
outlets of the air tube connector This is normal since there is alternating mode, air outlets take
turns to produce air during their cycle time.
Note: If the pressure level is consistently low, check for any leakage (tubes or air hoses). If necessary,
replace any damaged tube or hoses or contact Rossmax service if necessary.
Specication
Pump unit
Dimension (L x W x H) 26.5 ×13.5 ×10 cm
Weight 3 lbs (1.4 kg)
AC power source AC 230V/50Hz or AC 220V/60Hz or AC 110V/60Hz
Cycle time 6 mins
Mattress
Dimension (L x W x H) 79" × 35" × 3" (200 × 90 × 7 cm)
Extension ags 20"(50 cm) of both sides
Weight 5 lbs (2.3 kg)
Weight Capacity 220 lbs (100 kg)
Operating Condition 10°C to 40°C (50°F to 104°F),10% to 75% RH; 700~1060hPa
Storage & Transportation Condition -18°C to 43°C(0°F to 110°F),10% to 95% RH
Type BF applied parts
IP Classication IP21: Protection against harmful ingress of water and
particulate matter
WARNING: The symbol on this product means that it's an electronic product and following the European directive 2012/19/EU the electronic products have to be dispose on
your local recycling centre for safe treatment.
ACHTUNG: Das Symbol auf diesem Produkt bedeutet, dass es sich um ein elektronisches Gerät entsprechend der europäischen Richtlinie 2012/19/EU handelt, und dass das
elektronische Gerät über das lokale Recyclingzentrum sicher entsorgt werden muss.
OSTRZEŻENIE: Symbol umieszczony na urządzeniu oznacza, że stanowi ono produkt elektroniczny spełniający wszystkie wymogi europejskiej Dyrektywy 2012/19/EU. Dla zapewnie-
nia odpowiedniej utylizacji, produkty elektroniczne muszą być przekazywane do miejscowych punktów zbiórki w celu przeznaczenia ich do recyklingu.
ADVERTENCIA: Este símbolo en el producto signica que se trata de un producto electrónico y, en conformidad con la Directiva Europea 2012/19/EU, los productos electrónicos
deberán desecharse en su centro de reciclaje local para un tratamiento seguro.
ПРЕДУПРЕЖДЕНИЕ: Данный символ на изделии означает, что это электронный продукт и, в соответствии с европейской директивой 2012/19/EU, должен быть утили-
зирован в местном центре утилизации.
AVERTISSEMENT: le symbole gurant sur ce produit signie qu’il s’agit d’un produit électronique et, conformément à la directive européenne 2012/19/EU, les produits électroniques
usagés doivent être apportés dans un point de collecte pour leur recyclage.
EU
EU
Electromagnetic Compatibility Information
1. This device needs to be installed and put into service in accordance with the information provided in the
user manual.
2. WARNING: Portable RF communications equipment (including peripherals such as antenna cables and
external antennas) should be used no closer than 30 cm (12 inches) to any part of the AM30, including ca-
bles specied by the manufacturer. Otherwise, degradation of the performance of this device could result.
If higher IMMUNITY TEST LEVELS than those specied in Table 9 are used, the minimum separation distance
may be lowered. Lower minimum separation distances shall be calculated using the equation specied in
8.10.
Manufacturer’s declaration-electromagnetic immunity
The AM30 is intended for use in the electromagnetic environment specied below. The customer or the
user of the AM30 should assure that is used in such and environment.
Immunity test IEC 60601 test level Compliance level Electromagnetic environment-guidance
Conducted RF
IEC 61000-4-6
3 Vrms:
0,15 MHz – 80 MHz
6 Vrms: in ISM and
amateur radio
bands between
0,15 MHz and 80
MHz
80 % AM at 1 kHz
3 Vrms:
0,15 MHz – 80 MHz
6 Vrms: in ISM and
amateur radio
bands between
0,15 MHz and 80
MHz
80 % AM at 1 kHz
Portable and mobile RF communications equip-
ment should be used no closer to any part of the
AM30 including cables, than the recommended
separation distance calculated from the equation
applicable to the frequency of the transmitter.
Recommended separation distance:
d = 1,2 √P, d = 1,2 √P 80MHz to 800 MHz, d = 2,3 √P
800MHz to 2,7 GHz
Radiated RF
IEC 61000-4-3
10 V/m
80 MHz – 2,7 GHz
80 % AM at 1 kHz
10 V/m
80 MHz – 2,7 GHz
80 % AM at 1 kHz
Where P is the maximum output power rating of
the transmitter in watts (W) according to the trans-
mitter manufacturer and d is the recommended
separation distance in metres (m). Interference
may occur in the vicinity of equipment marked
with the following symbol:
NOTE1: At 80 MHz and 800 MHz, the higher frequency range applies.
NOTE2: These guidelines may not apply in all situations. Electromagnetic propagation is aected by ab-
sorption and reection from structures, objects and people.
More information on EMC compliance of the device can be obtained from Rossmax website: www.rossmax.
com.
-
 1
1
-
 2
2


Rossmax AM30 Air Mattress Bubble Type Instrukcja obsługi
- Typ
- Instrukcja obsługi
- Niniejsza instrukcja jest również odpowiednia dla
Powiązane artykuły
Inne dokumenty
-
mothercare Carnaby Cot Bed instrukcja
-
-
-
-
-
-
-
Indesit XWE 81283X W EU.C instrukcja
-
-
 Winncare PA0010115 Instrukcja obsługi
