Inalto IBC178.1 Skrócona instrukcja obsługi
- Kategoria
- Chłodziarki do wina
- Typ
- Skrócona instrukcja obsługi

MODEL/IBC178.1 WWW.INALTO.HOUSE
QUICK START GUIDE
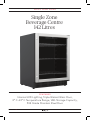
Single Zone
Beverage Centre
142 Litres
FEATURES
Internal LED Lighting, Triple Glazed Glass Door,
0º C–22º C Temperature Range, 142L Storage Capacity,
304 Grade Stainless Steel Door

MODEL/IBC178.1 WWW.INALTO.HOUSE
QUICK START GUIDE
INSTALLATION
The appliance is designed to be built-in,
recessed or free standing installation.
The minimum space required is:
830H x 615W x 605D (mm)
For a complete guide, refer to user manual,
page 9–11.
SUPPORT
Telephone: 1300 11 4357
Email: support@residentiagroup.com.au
DETAILS
Size (mm):
820—880H x 595W x 575D
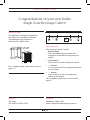
Congratulations on your new InAlto
Single Zone Beverage Centre!
THE CONTROLS
Your Beverage Centre Controls
1 Power Button
Press and hold the power button for 6
seconds to switch the beverage centre on
and off.
2 Light Button
Press to turn the internal light on and off.
3 “+” Button
Press to increase the set temperature shown
on the display.
4 “-” Button
Press to decrease the set temperature
shown on the display.
For a complete guide, refer to user manual,
page 11.
Normal Height After Adjust
This appliance comes with height adjustable feet which allows the appliance to be installed under bench and ensures
the appliance is stable and level. Just screw the bottom feet anticlockwise to raise the height up to 880mm or clockwise
to lower the height to 820mm. See below photos.
Adjustable feet
Levelling feet
The appliance must be installed level in order to work properly. If the unit is not level, the doors and magnetic seal
alignments will not be covered properly.
To level the unit, adjust one or both levelling feet at the base of the unit.
820
880
The wine cooler is designed to defrost automatically every 4 hours. The defrost process will last for 20 minutes.
During defrost, the compressor stops working and fan keeps on running for 20 minutes.
The wine cooler is equipped with an alarm that will sound if the door is open for more than 60 seconds. Close the door
or press any key once to switch off the alarm.
o o
It is recommended that you install appliance in a place where the ambient temperature is between 16 C - 32 C. If the
ambient temperature is above or below recommended temperature, the performance of the unit may be affected. For
example, placing your unit in extremely cold or hot conditions may cause interior temperatures to fluctuate. The
operation temperature range may not be reached.
To switch the power on/off
Press and hold the power button for 6 seconds to switch the wine cooler on.
Press and hold the power button for 6 seconds again to switch the wine cooler off.
To change the temperature
Continue to press the “+” or “-” buttons until the required temperature is shown on the display
o o
The preset temperature is 12 C/54 F.
To change the temperature display from Fahrenheit to Celsius, or Celsius to Fahrenheit, press “+” and “-” button at the
same time for 2 seconds. Tips, please see the “ ” symbol on control panel.
The display shows the current internal temperature when the wine cooler is on.
Optimal temperature selection
o
Whilst wine is best stored at temperatures between 13 and 15 C , your wine can also be stored at drinking temperature.
o o
As a guide for red wine this is between 15 and 17 C, and for white wine between 12 and 13 C.
To use the internal light
Press the light button to switch the light on or off.
To turn the light ON when door opens, press the light button for 6 seconds, the display with show ‘OP’ which means
door controls function is ON
To turn the light function OFF, press the light button for 6 seconds, the display will show ‘CL’, which means the door
control function is OFF.
To lock the whole panel
Press power button and light button at the same time for one second, all the buttons on panel will be locked.
Press power button and light button once again, all the buttons will be unlocked.
Tips, please see the “ ” symbol on control panel.
3 4
Key:
1 - Power button
2 - Light button
3 - “+” button
4 - “-” button
12
Defrosting
Door alarm
Controls
1 2
54
6
Light bulb replacement
The internal light is a LED type. To replace the lamp, please speak to after sales service provider.
Power Failure
If the power failure lasts for up to 24 hours, keep the door closed. This will allow the stored bottles to stay cold as
long as possible. If it lasts longer than 24 hours, it is advised to empty the wine cooler compartment
and temporarily store the bottles in a portable wine chiller.
Short vacation
There is no need to disconnect the appliance from the mains if you will be away for two to three weeks.
Long vacation
Remove all the wine if you are away for three weeks or more. Unplug the appliance and leave the
doors open to provide air circulation to prevent odour and mould.
If the refrigerating appliance is left empty for long periods, switch off, defrost, clean, dry, and leave the
door open to prevent mould developing within the appliance.
Do not use hard brushes, steel wool, wire brushes, abrasives, or solvents like, alcohol or acetone,
boiling water, acids or alkaline to clean this appliance, as it may damage or deform the surface or
interior.
3
Installation of your appliance
The appliance is designed for built-in, recessed or free standing
installation. The minimum space required is :
615mm W x 605mm D X 830mm H ( refer to right photo)
IMPORTANT: Failure to follow the instructions regarding installation
and ventilation may void the warranty supplied with your
appliance.
615
610
830-890
595
575
820
~880
90
30
10mm
30mm
Installing the stainless steel handle
Door seal
Installing your Beverage Centre
beverage centre
To install the handle, follow the instructions below:
1. Peel back door seal along the right hand side
of door. You will find a screw hole at the top
and lower of the door where you have
peeled the seal back. (please refer to
the diagram)
2. Take out the screws and spacers from
bag at back of cabinet. Place the
spacers onto screws and then put
the screws in the hole where the
handle is to be installed. Please make
sure the spacer is correctly in place
before you put the screws in the hole.
3. Align the handle with screws,
tighten the screws using a screw
driver until the handle is both flush
and secured tightly against the
door side. (DO NOT over-tighten as
this may cause damage to the door
surface)
4. After handle fixed well, put the door
seal back to the door to cover the
hole.
-
 1
1
-
 2
2


Inalto IBC178.1 Skrócona instrukcja obsługi
- Kategoria
- Chłodziarki do wina
- Typ
- Skrócona instrukcja obsługi
w innych językach
- English: Inalto IBC178.1 Quick start guide