Hama 00187261 Instrukcja obsługi
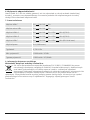
- Kategoria
- Banki mocy
- Typ
- Instrukcja obsługi
Niniejsza instrukcja jest również odpowiednia dla

E
F
D
GB
NL
PL
CZ
RUS
Operating Instructions
Bedienungsanleitung
Mode d‘emploi
Instrucciones de uso
Руководство по эксплуатации
Gebruiksaanwijzing
Instrukcja obsługi
Használati útmutató
Návod kpoužití
Návod na použitie
Manual de instruçõe
Manual de utilizare
Работна инструкция
10000mAh
SK
P
RO
BG
H
00
187261
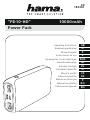
“PD10-HD”
Power Pack

2
Thank you for choosing aHama product.
Take your time and read the following instructions and information completely.Please keep these
instructions in asafe place for futurereference. If you sell the device, please pass these operating
instructions on to the new owner.
1. Explanation of Warning Symbols and Notes
Warning
This symbol is used to indicate safety instructions or to draw your attention to specichazards
and risks.
Note
This symbol is used to indicate additional information or important notes.
High-density lithium-polymer cells
This product contains high-density lithium-polymer cells. High-density cells weredeveloped mainly
for smartphone production in order to meet the high capacity and performance demands using a
minimum amount of space. This new generation of lithium-polymer cells enables alightweight and
compact design along with acomparatively high capacity.
2. Package Contents
•Power Pack “PD10-HD”, 10000 mAh
•USB-C to USB-C cable
•These operating instructions
3. Safety Notes
•The product is intended for private, non-commercial use only.
•Use the product for its intended purpose only.
•Protect the product from dirt, moistureand overheating, and only use it in adry environment.
•Donot use the product in the immediate vicinity of heaters or other heat sources or in direct
sunlight.
•Keep this product, as all electrical products, out of the reach of children!
•Donot drop the product and do not expose it to any major shocks.
•Donot operate the product outside the power limits given in the specications.
•Donot open the device or continue to operate it if it becomes damaged.
•Dispose of packaging material immediately according to locally applicable regulations.
•Since the battery is integrated and cannot be removed, you will need to dispose of the product as
awhole. Do this in compliance with the legal requirements.
•Donot modify the product in any way.Doing so voids the warranty.
•Donot use the product in areas wherethe use of electronic devices is not permitted.
•Donot attempt to service or repair the product yourself.Leave any and all service work to qualied
experts.
•Donot throw the battery or the product into re.
•Donot tamper with or damage/heat/disassemble the batteries/rechargeable batteries.
G Operating instruction

3
4. Operation
4.1 Charging the Power Pack
Warning –Battery
•Donot charge the power pack using your PC or the notebook. The charging currents can
damage the USB port of the PC/notebook.
•Only use suitable charging devices or USB connections for charging.
•Asarule, do not charge devices or USB connections that aredefective and do not try to repair
them yourself.
•Donot overcharge the product or allow the battery to completely discharge.
•Avoid storing, charging or using the device in extreme temperatures and extremely low
atmospheric pressure(for example, at high altitudes).
•When stored over along period of time, batteries should be charged regularly (at least every
three months).
•Begin charging the power pack by connecting the included USB-C to USB-C cable to the power
pack’sUSB-C (IN 5V/3A; 9V/2A)port and to asuitable USB-C charger.Alternatively,the power
pack can also be charged via the Micro-USB port. Forthis purpose, connect aMicro-USB cable to
the Micro-USB input (IN 5V/3A; 9V/2A)onthe power pack and to asuitable USB charger.Please
refer to the operating instructions for the USB charger used.
•Charging begins and ends automatically.
•Charge the Power Pack fully beforeusing it for the rst time.
Note –Capacity
•The capacity is always shown when the Power Pack is charging.
•Each status LED corresponds to 25% of the capacity.When an LED is permanently illuminated,
this indicates that this capacity level has already been reached. The Power Pack is charged to at
least 75% if three LEDs areilluminated, and the fourth is ashing.
•Ifall four status LEDs light up, the full capacity is available.
•Press the button of the Power Pack to switch it on and to check its current capacity.
•Toswitch the power pack off,press the button twice until the status LEDs go out.
4.2 Charging terminal devices
Warning –Connecting terminal devices
•Beforeconnecting aterminal device, check whether the power output of the charger can supply
sucient power for the device.
•Ensurethat the total power consumption of the connected terminal device does not exceed
3000 mA.
•Please refer to the instructions in the operating manual of your terminal device.
•Itisessential that you observe these specications and the safety instructions regarding the
power supply of your devices.
•The power pack must not be charged and discharged at the same time!
•Please do not use the USB and USB-C outputs simultaneously for charging, as this reduces the
charging current considerably.Asaresult, the charging time is greatly increased and the power
pack may be overloaded.

4
Warning
•Never connect the charging cable of the Power Pack to both the input and the output of the
Power Pack at the same time. This could damage the battery.
•Donot connect any terminal devices while the Power Pack is charging. This could damage the
Power Pack and the connected device.
•Connect the included USB-C charging cable to the USB-C port on the power pack (OUT 5V/3A;
9V/2A; 12V/1.5A –18W PD)and to the USB-C port on your terminal device (mobile phone,
smartphone, etc.).
•The Micro-USB charging/connecting cable included may not be suitable for the USB connection on
your terminal device. In this case, use the USB cable that was included with your terminal device.
•When using the USB-Aoutput (OUT 5V/3A; 9V/2A; 12V/1.5A –QC3.0)for charging, please
connect asuitable USB charging cable to the power pack’sUSB-Aoutput and to the port of your
terminal device.
•Charging begins automatically.The status LEDs show the remaining capacity when the Power Pack
is charging.
•The current battery status of your terminal device will appear on this device.
•Press the button on the power pack twice to stop charging and switch it off.The status LEDs
should switch off.
•The Power Pack will automatically switch off if it is not connected to aterminal device.
Note –Optimised charging
Optimised charging means that the Power Pack recognises the connected terminal device and
supplies it with the optimal current to minimise charging time. Please note that the maximum
power output of the power pack is 3000 mA.
Note –Power Delivery /QC3.0, 2.0
•Plug &go: No manual setup necessary,just connect and start:
Voltage and power areautomatically congured by Power Delivery /QC3.0, 2.0.
•For ecient and optimised charging, the Power Delivery (PD) /QC3.0, 2.0 function must be
supported by your terminal device.
•With the large quantity of PD/QC-enabled terminal devices with different rmwareversions, it
can happen that the function is not fully supported.
5. Care and Maintenance
Only clean this product with aslightly damp, lint-free cloth and do not use aggressive cleaning
agents.

5
6. Warranty Disclaimer
Hama GmbH &CoKGassumes no liability and provides no warranty for damage resulting from
improper installation/mounting, improper use of the product or from failuretoobserve the operating
instructions and/or safety notes.
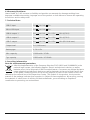
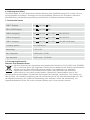
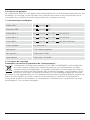
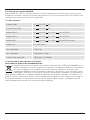
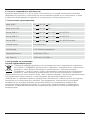
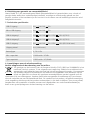
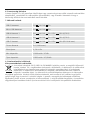
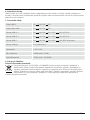
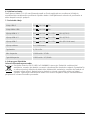
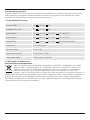
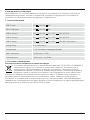
7. Technical Data
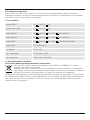
USB-C input 5V 3A /9V 2A
Micro-USB input 5V 3A /9V 2A
USB-Aoutput 15V3A /9V 2A /12V 1.5 A(QC3.0)
USB-Aoutput 25V3A /9V 2A /12V 1.5 A(QC3.0)
USB-C output 5V 3A /9V 2A /12V 1.5 A(PD 18Wmax.)
Output total 3A(18 Wmax.)
Battery type 3.7V/Li-Po
Min. capacity 10000mAh /37Wh
Typ. capacity
10250mAh /37.93 Wh
8. Recycling Information
Note on environmental protection:
After the implementation of the European Directive 2012/19/EU and 2006/66/EU in the
national legal system, the following applies: Electric and electronic devices as well as
batteries must not be disposed of with household waste. Consumers areobliged by law to
return electrical and electronic devices as well as batteries at the end of their service lives
to the public collecting points set up for this purpose or point of sale. Details to this are
dened by the national law of the respective country.This symbol on the product, the instruction
manual or the package indicates that aproduct is subject to these regulations. By recycling, reusing
the materials or other forms of utilising old devices/batteries, you aremaking an important
contribution to protecting our environment.

6
Vielen Dank, dass Sie sich für ein Hama Produkt entschieden haben!
Nehmen Sie sich Zeit und lesen Sie die folgenden Anweisungen und Hinweise zunächst ganz durch.
Bewahren Sie diese Bedienungsanleitung anschließend an einem sicheren Ort auf,umbei Bedarf
darin nachschlagen zu können. Sollten Sie das Gerät veräußern, geben Sie diese Bedienungsanleitung
an den neuen Eigentümer weiter.
1. Erklärung von Warnsymbolen und Hinweisen
Warnung
Wirdverwendet, um Sicherheitshinweise zu kennzeichnen oder um Aufmerksamkeit auf besondere
Gefahren und Risiken zu lenken.
Hinweis
Wirdverwendet, um zusätzlich Informationen oder wichtige Hinweise zu kennzeichnen.
High Density Li-Polymer-Zellen
Dieses Produkt beinhaltet High Density Li-Polymer-Zellen. High Density-Zellen wurden
überwiegend für die Smartphone-Produktion entwickelt um den mittlerweile sehr hohen
Ansprüchen an Kapazität und Leistung bei geringem Platzbedarf gerecht werden zu können.
Diese neue Generation von Li-Polymer-Zellen ermöglicht eine leichte und kompakte Bauform bei
vergleichsweise hoher Kapazität.
2. Packungsinhalt
•Power Pack “PD10-HD”, 10000 mAh
•USB-C auf USB-C-Kabel
•diese Bedienungsanleitung
3. Sicherheitshinweise
•Das Produkt ist für den privaten, nicht-gewerblichen Haushaltsgebrauch vorgesehen.
•Verwenden Sie das Produkt ausschließlich für den dazu vorgesehenen Zweck.
•Schützen Sie das Produkt vor Schmutz, Feuchtigkeit und Überhitzung und verwenden Sie es nur in
trockenen Umgebungen.
•Betreiben Sie das Produkt nicht in unmittelbarer Nähe der Heizung, anderer Hitzequellen oder in
direkter Sonneneinstrahlung.
•Dieses Produkt gehört, wie alle elektrischen Produkte, nicht in Kinderhände!
•Lassen Sie das Produkt nicht fallen und setzen Sie es keinen heftigen Erschütterungen aus.
•Betreiben Sie das Produkt nicht außerhalb seiner in den technischen Daten angegebenen
Leistungsgrenzen.
•Öffnen Sie das Produkt nicht und betreiben Sie es bei Beschädigungen nicht weiter.
•Entsorgen Sie das Verpackungsmaterial sofort gemäß den örtlich gültigen Entsorgungsvorschriften.
•Der Akku ist fest eingebaut und kann nicht entfernt werden, entsorgen Sie das Produkt als Ganzes
gemäß den gesetzlichen Bestimmungen.
•Nehmen Sie keine Veränderungen am Produkt vor.Dadurch verlieren Sie jegliche
Gewährleistungsansprüche.
•Benutzen Sie das Produkt nicht in Bereichen, in denen elektronische Produkte nicht erlaubt sind.
•Versuchen Sie nicht, das Produkt selbst zu warten oder zu reparieren. Überlassen Sie jegliche
Wartungsarbeit dem zuständigen Fachpersonal.
•Werfen Sie den Akku bzw.das Produkt nicht ins Feuer.
•Verändern und/oder deformieren/erhitzen/zerlegen Sie Akkus/Batterien nicht.
D Bedienungsanleitung

7
4. Betrieb
4.1. Laden des Power Pack
Warnung –Akku
•Laden Sie das Power Pack nicht über Ihren PC oder das Notebook. Die Ladeströme können den
USB Port des PC oder Notebooks beschädigen.
•Verwenden Sie nur geeignete Ladegeräte oder USB-Anschlüsse zum Auaden.
•Verwenden Sie defekte Ladegeräte oder USB-Anschlüsse generell nicht mehr und versuchen Sie
nicht, diese zu reparieren.
•Überladen oder tiefentladen Sie das Produkt nicht.
•Vermeiden Sie Lagerung, Laden und Benutzung bei extremen Temperaturen und extrem
niedrigem Luftdruck (wie z.B. in großen Höhen).
•Laden Sie bei längerer Lagerung regelmäßig (mind. vierteljährig) nach.
•Starten Sie den Ladevorgang des Power Pack, indem Sie das beiliegende USB-C auf USB-C-
Kabel an den USB-C-Anschluss des Power Packs (IN 5V/3A; 9V/2A)und an ein geeignetes
USB-C-Ladegerät anschließen. Alternativ kann das Power Pack auch über die Micro-USB-Buchse
geladen werden. Schließen Sie hierzu ein Micro-USB-Kabel an den Micro-USB-Eingang (IN
5V/3A; 9V/2A)des Power Packs und ein geeignetes USB-Ladegerät an. Beachten Sie hierzu die
Bedienungsanleitung des jeweils verwendeten USB-Ladegeräts.
•Der Ladevorgang startet und endet automatisch.
•Laden Sie vor dem ersten Gebrauch das Power Pack zunächst einmal vollständig auf.
Hinweis –Kapazität
•Während des Ladevorgangs des Power Packs wirddie Kapazität dauerhaft angezeigt.
•Jede Status-LED entspricht 25 %der Kapazität. Das dauerhafte Leuchten einer LED signalisiert
die bereits erreichte Kapazität. Leuchten drei LEDs auf,und die vierte blinkt, ist das Power Pack
zu mind. 75 %geladen.
•Leuchten alle vier Status-LEDs, ist die volle Kapazität verfügbar.
•Drücken Sie die Taste des Power Packs, um dieses einzuschalten und die aktuelle Kapazität des
Power Packs zu erfahren.
•Drücken Sie die Taste zwei Mal bis die Status-LEDs erlöschen, um das Power Pack
auszuschalten.
4.2. Laden von Endgeräten
Warnung –Anschluss von Endgeräten
•Prüfen Sie vor Anschluss eines Endgerätes, ob dieses mit der Stromabgabe des Power Packs
ausreichend versorgt werden kann.
•Stellen Sie sicher,dass die gesamte Stromaufnahme des angeschlossenen Endgerätes 3000 mA
nicht überschreitet.
•Beachten Sie die Hinweise in der Bedienungsanleitung Ihres Endgerätes.
•Beachten Sie unbedingt die dort aufgeführten Angaben und Sicherheitshinweise zur
Stromversorgung Ihrer Geräte.
•Das Power Pack darf nicht gleichzeitig geladen und entladen werden!
•Bitte laden Sie nicht gleichzeitig an beiden Ausgängen USB und USB-C, da dadurch der
Ladestrom stark verringert wird. Die Ladedauer erhöht sich dadurch stark und das Power Pack
kann unter Umständen überlastet werden.

8
Warnung
•Schließen Sie das Ladekabel des Power Packs nie an dessen Ein- und Ausgang gleichzeitig an.
Der Akku kann dadurch beschädigt werden.
•Schließen Sie während des Ladevorgangs des Power Packs keine Endgeräte an. Dadurch können
das Power Pack und die angeschlossenen Endgeräte beschädigt werden.
•Verbinden Sie das beiliegende USB-C-Ladekabel mit dem USB-C-Anschluss des Power Packs (OUT
5V/3A; 9V/2A; 12V/1,5A –18W PD)und mit dem USB-C-Anschluss Ihres Endgerätes (Handy,
Smartphone, etc.).
•Unter Umständen ist das beiliegende Lade-/ Verbindungskabel für den endgeräteseitigen USB-
Anschluss unpassend. Verwenden Sie dann das USB-Kabel des Endgerätes.
•Bei Verwendung des USB-A-Ausgangs (OUT 5V/3A; 9V/2A; 12V/1,5A –QC3.0)für den
Ladevorgang verbinden sie bitte ein geeignetes USB-Ladekabel mit dem USB-A-Ausgang der Power
Pack und dem Anschluss Ihres Endgerätes.
•Der Ladevorgang startet automatisch. Während des Ladevorgangs zeigen die Status-LEDs die noch
verfügbareKapazität des Power Packs an.
•Der aktuelle Akku-Ladestatus Ihres Endgerätes wirdauf diesem angezeigt.
•Beenden Sie den Ladevorgang und schalten Sie das Power Pack aus, indem Sie die Taste des Power
Packs zwei Mal drücken. Die Status-LEDs erlöschen.
•Für den Fall, dass kein Endgerät angeschlossen wird, schaltet sich das Power Pack automatisch ab.
Hinweis –Optimiertes Laden
Optimiertes Laden bedeutet, dass das Power Pack das angeschlossene Endgerät erkennt, mit der
optimalen Stromstärke versorgt und dadurch die Ladezeit auf ein Minimum reduziert. Beachten Sie,
dass die jeweilige Stromabgabe des Powerpacks maximal 3000 mA beträgt.
Hinweis –Power Delivery /QC3.0, 2.0
•Plug &Go: Keine manuellen Einstellungen notwendig, anschließen und starten:
Durch Power Delivery/QC3.0, 2.0 werden Spannung und Leistung automatisch eingestellt.
•Beachten Sie, dass für ezientes und optimiertes Laden die PD (Power Delivery) /QC3.0, 2.0
Funktion von Ihrem Endgerät unterstützt werden muss.
•Bei der großen Menge an PD/QC-fähigen Endgeräten mit unterschiedlichen Firmwareständen,
kann es vorkommen, dass die Funktion nicht vollständig unterstützt wird.
5. Wartung und Pflege
Reinigen Sie dieses Produkt nur mit einem fusselfreien, leicht feuchten Tuch und verwenden Sie keine
aggressiven Reiniger.

9
6. Haftungsausschluss
Die Hama GmbH &CoKGübernimmt keinerlei Haftung oder Gewährleistung für Sc häden, die aus
unsachgemäßer Installation, Montage und unsachgemäßem Gebrauch des Produktes oder einer
Nichtbeachtung der Bedienungsanleitung und/oder der Sicherheitshinweise resultieren.
7. Technische Daten
USB-C Eingang 5V 3A /9V 2A
Micro-USB-Eingang 5V 3A /9V 2A
USB-A-Ausgang 15V3A /9V 2A /12V 1,5 A(QC3.0)
USB-A-Ausgang 25V3A /9V 2A /12V 1,5 A(QC3.0)
USB-C Ausgang 5V 3A /9V 2A /12V 1,5 A(PD 18Wmax.)
Ausgang gesamt 3A (18Wmax.)
Batterietyp 3,7V/Li-Po
Min. Kapazität 10000mAh /37Wh
Typ. Kapazität 10250mAh /37,93 Wh
8. Entsorgungshinweise
Hinweis zum Umweltschutz:
Ab dem Zeitpunkt der Umsetzung der europäischen Richtlinien 2012/19/EU und 2006/66/
EG in nationales Recht gilt folgendes: Elektrische und elektronische Geräte sowie Batterien
dürfen nicht mit dem Hausmüll entsorgt werden. Der Verbraucher ist gesetzlich
verpichtet, elektrische und elektronische Geräte sowie Batterien am Ende ihrer
Lebensdauer an den dafür eingerichteten, öffentlichen Sammelstellen oder an die
Verkaufsstelle zurückzugeben. Einzelheiten dazu regelt das jeweilige Landesrecht. Das Symbol auf
dem Produkt, der Gebrauchsanleitung oder der Verpackung weist auf diese Bestimmungen hin. Mit
der Wiederverwertung, der stoichen Verwertung oder anderen Formen der Verwertung von
Altgeräten/Batterien leisten Sie einen wichtigen Beitrag zum Schutz unserer Umwelt.

10
Nous vous remercions d’avoir choisi un produit Hama.
Veuillez prendreletemps de lirel‘ensemble des remarques et consignes suivantes. Veuillez conserver
ce mode d‘emploi àportée de main andepouvoir le consulter en cas de besoin. Transmettez-le au
nouveau propriétaireavec l’appareil le cas échéant.
1. Explication des symboles d‘avertissement et des remarques
Avertissement
Ce symbole est utilisé pour indiquer des consignes de sécurité ou pour attirer votreattention sur
des dangers et risques particuliers.
Remarque
Ce symbole est utilisé pour indiquer des informations supplémentaires ou des remarques
importantes.
Cellules lithium-polymèrehaute densité
Ce produit contient des cellules lithium-polymèrehaute densité. Les cellules lithium-polymère
haute densité ont été principalement développées pour la production de smartphones ande
satisfairedes exigences élevées en matièredecapacité et de performances dans un format
miniaturisé. Cette nouvelle génération de cellules lithium-polymèrepermet d’obtenir un produit
léger et compact avec une forte capacité.
2. Contenu de l‘emballage
•Bloc d‘alimentation “PD10-HD”, 10000mAh
•Câble USB-C vers USB-C
•Mode d‘emploi
3. Consignes de sécurité
•Ceproduit est destiné àune installation domestique non commerciale.
•Utilisez le produit exclusivement conformément àsadestination.
•Protégez le produit de toute saleté, humidité, surchauffe et utilisez-le uniquement dans des locaux
secs.
•N’utilisez pas le produit àproximité immédiate d‘un chauffage, d’autres sources de chaleur ou
exposé aux rayons directs du soleil.
•Cet appareil, comme tout appareil électrique, doit êtregardé hors de portée des enfants !
•Protégez le produit des secousses violentes et évitez tout choc ou toute chute.
•N‘utilisez pas le produit en dehors des limites de puissance indiquées dans les caractéristiques
techniques.
•Netentez pas d‘ouvrir le produit en cas de détérioration et cessez de l’utiliser.
•Recyclez les matériaux d’emballage conformément aux prescriptions locales en vigueur.
•Labatterie est installée de façon permanente et ne peut pas êtreretirée ;recyclez le produit en
bloc conformément aux directives légales.
•N’apportez aucune modication àl’appareil. Des modications vous feraient perdrevos droits de
garantie.
•N‘utilisez pas le produit dans les zones dans lesquelles l‘utilisation d‘appareils électroniques est
interdite.
•Netentez pas de réparer l’appareil vous-même ni d’effectuer des travaux d’entretien. Déléguez
tous travaux d‘entretien àdes techniciens qualiés.
•Nejetez pas le produit ni aucune batterie dans un feu.
•Nemodiez pas et/ou ne déformez/chauffez/désassemblez pas les batteries/piles.
F Mode d‘emploi

11
4. Fonctionnement
4.1 Charge de la batterie
Avertissement –Concernant les batteries
•Nerechargez pas le bloc d’alimentation sur votreordinateur de bureau ou portable. Le courant
de charge est susceptible d’endommager le port USB de l’ordinateur utilisé.
•Utilisez exclusivement un chargeur approprié ou une connexion USB lors de la recharge.
•Cessez d‘utiliser tout chargeur défectueux ou toute connexion USB défectueuse et ne tentez pas
de réparer ces derniers.
•Nesurchargez ou ne déchargez pas totalement le produit.
•Évitez de stocker,charger et utiliser le produit àdes températures extrêmes et àune pression
atmosphérique extrêmement basse (à haute altitude, par exemple).
•Rechargez régulièrement le produit (au moins une fois par trimestre) en cas de longue période
de stockage.
•Démarrez la charge du bloc d'alimentation en connectant le câble USB-C vers USB-C fourni au port
USB-C du bloc d’alimentation (IN 5V/3A ;9V/2A)etàunchargeur USB-C adapté. Vous pouvez
également charger le bloc d'alimentation via le port micro-USB. Lorsque vous utilisez un câble
micro-USB, connectez ce dernier au port micro-USB (IN 5V/3A ;9V/2A)dubloc d’alimentation et
àunchargeur USB adapté. Veuillez également consulter le mode d’emploi du chargeur USB utilisé.
•Lecycle de charge commence et se termine automatiquement.
•Veuillez charger entièrement le bloc d‘alimentation lors de la premièreutilisation.
Remarque –Capacité
•Lacapacité du bloc d‘alimentation apparaît en permanence pendant le cycle de charge.
•Chaque LED d’état correspond à25%delacapacité. L’allumage en permanence d’un voyant
LED indique la capacité atteinte. La charge du bloc d’alimentation atteint au moins 75 %
lorsque trois voyants LED sont allumés et le quatrième clignote.
•Lapleine capacité est disponible lorsque les quatrevoyants LED s‘allument.
•Appuyez sur la touche du bloc d‘alimentation andevérier la capacité actuelle du bloc
d‘alimentation.
•Appuyez deux fois sur la touche jusqu’à extinction des LED d’état andemettrelebloc
d’alimentation hors tension.
4.2 Charge d'appareils
Avertissement –Concernant la connexion‚ d‘appareils
•Avant de raccorder un appareil, veuillez contrôler que le débit de courant du bloc d‘alimentation
est susant pour ce type d‘appareil.
•Assurez-vous que la consommation totale de courant de l’appareil branché ne dépasse pas
3000 mA.
•Veuillez respecter les consignes du mode d‘emploi de votreappareil.
•Veuillez impérativement respecter les indications et les consignes de sécurité mentionnées
concernant l‘alimentation en électricité de vos appareils.
•Nechargez et déchargez pas simultanément le bloc d’alimentation.
•N’utilisez pas simultanément les deux sorties USB et USB-C pour recharger des appareils ;cela
diminuerait fortement le courant de charge, prolongerait excessivement la durée de la recharge
et serait susceptible de surcharger le bloc d'alimentation.

12
Avertissement
•Nebranchez en aucun cas le câble de charge du bloc d‘alimentation simultanément àson
entrée et àsasortie. Risque de détérioration de la batterie.
•Neconnectez aucun appareil pendant le cycle de charge du bloc d‘alimentation. Risque de
détérioration du bloc d‘alimentation et des appareils connectés.
•Branchez le câble de charge USB-C fourni au port USB-C du bloc d'alimentation (OUT 5V/3A
;9V/2A; 12V/1,5A –18W PD)etauport USB-C de votreappareil (téléphone portable,
smartphone, etc.).
•Ilest possible que le câble Micro-USB de connexion /decharge fourni ne soit pas compatible avec
le port USB de votreappareil. Utilisez, dans ce cas, le câble USB de votreappareil.
•Lorsque vous utilisez la sortie USB-A(OUT 5V/3A ;9V/2A ;12V/1,5A –QC3.0)pour effectuer
une recharge, veuillez brancher un câble de charge USB adapté au port USB-Adubloc
d’alimentation et au port de votreappareil.
•Lecycle de charge commence automatiquement. Les voyants LED indiquent la capacité disponible
du bloc d‘alimentation pendant la charge.
•L‘état actuel de charge de la batterie de votreappareil apparaît sur ce dernier.
•Appuyez deux fois sur la touche du bloc d'alimentation andeterminer le cycle de charge et
mettrelebloc d'alimentation hors tension. Les voyants LED s‘éteignent.
•Lebloc d’alimentation se met automatiquement hors tension lorsqu’aucun appareil n’est branché.
Remarque –Optimised charging
Une optimisation de la charge signieque le bloc d’alimentation reconnaît l’appareil connecté,
l’alimente avec la puissance électrique optimale et réduit ainsi le temps de charge au maximum.
Veuillez noter que le courant de sortie du bloc d’alimentation est d’au maximum 3000 mA.
Remarque –Power Delivery /QC3.0, 2.0
•Plug &Go:aucun réglage manuel nécessaire;ilsutdeconnecter l’appareil pour pouvoir
l'utiliser :latension et la puissance sont réglées automatiquement grâce àlafonction Power
Delivery /QC3.0, 2.0 (alimentation en énergie).
•Veuillez noter que la fonction PD (« Power Delivery ») /QC3.0, 2.0 doit êtreprise en charge par
votreappareil pour garantir une charge ecace et optimisée.
•Enraison du grand nombred’appareils PD /QCdotés de microprogrammes différents sur le
marché, il est possible que la fonction PD ne soit pas totalement prise en charge.
5. Soins et entretien
Nettoyez le bloc d‘alimentation uniquement àl’aide d’un chiffon non breux légèrement humide ;
évitez tout détergent agressif.

13
6. Exclusion de garantie
La société Hama GmbH &CoKGdécline toute responsabilité en cas de dommages provoqués par une
installation, un montage ou une utilisation non conformes du produit ou encoreprovoqués par un
non respect des consignes du mode d‘emploi et/ou des consignes de sécurité.
7. Caractéristiques techniques
Entrée USB-C 5V 3A /9V 2A
Port microUSB 5V 3A /9V 2A
Sortie USB-A1 5V 3A /9V 2A /12V 1,5 A(QC3.0)
Sortie USB-A2 5V 3A /9V 2A /12V 1,5 A(QC3.0)
Sortie USB-C 5V 3A /9V 2A /12V 1,5 A(PD 18Wmax.)
Sortie complète 3A(18Wmax.)
Type de pile 3,7V/Lithium-polymère
Min capacité 10000mAh /37Wh
Type capacité
10250mAh /37,93 Wh
8. Consignes de recyclage
Remarques concernant la protection de l´environnement :
Conformément àladirective européenne 2012/19/EU et 2006/66/CE, et and‘atteindre
un certain nombred‘objectifs en matièredeprotection de l‘environnement, les règles
suivantes doivent êtreappliquées: Les appareils électriques et électroniques ainsi que les
batteries ne doivent pas êtreéliminés avec les déchets ménagers. Le pictogramme “picto”
présent sur le produit, son manuel d‘utilisation ou son emballage indique que le produit
est soumis àcette réglementation. Le consommateur doit retourner le produit/la batterie usagé(e) aux
points de collecte prévus àcet effet. Il peut aussi les remettreàunrevendeur.Enpermettant le
recyclage des produits et des batteries, le consommateur contribueraainsi àlaprotection de notre
environnement. C‘est un geste écologique.

14
Le agradecemos que se haya decidido por un producto de Hama.
Tómese tiempo yléase primerolas siguientes instrucciones eindicaciones. Después, guarde estas
instrucciones de manejo en un lugar seguroparapoder consultarlas cuando sea necesario. Si vende
el aparato, entregue estas instrucciones de manejo al nuevo propietario.
1. Explicación de los símbolos de aviso ydelas indicaciones
Aviso
Se utiliza paracaracterizar las indicaciones de seguridad oparallamar la atención sobrepeligros
yriesgos especiales.
Nota
Se utiliza paracaracterizar informaciones adicionales oindicaciones importantes.
Células de polímeros de litio de alta densidad
Este producto contiene células de polímeros de litio de alta densidad. Las células de polímeros de
litio de alta densidad se han desarrollado principalmente paralaproducción de smartphones para
satisfacer los elevados requerimientos de capacidad ypotencia con reducida necesidad de espacio.
Esta nueva generación de células de polímeros de litio permite un diseño ligeroycompacto con
una elevada capacidad.
2. Contenido del paquete
•Universal Power Pack “PD10-HD”, 10000mAh
•Cable USB-C aUSB-C
•Estas instrucciones de manejo
3. Instrucciones de seguridad
•Elproducto es paraeluso doméstico privado, no comercial.
•Emplee el producto exclusivamente paralafunción paralaque fue diseñado.
•Utilice el producto sólo conectado auna toma de corriente autorizada. La toma de corriente debe
estar colocada cerca del producto ydeforma accesible.
•Noopereelproducto en las inmediaciones de la calefacción, de otras fuentes de calor obajo la
radiación directa del sol.
•Este aparato, como todos los aparatos eléctricos, no debe estar en manos de los niños.
•Nodeje caer el producto ni lo someta asacudidas fuertes.
•Noopereelproducto fueradelos límites de potencia indicados en los datos técnicos.
•Noabraelproducto ynolosiga operando de presentar deterioros.
•Deseche el material de embalaje en conformidad con las disposiciones locales sobreeldesecho vigentes.
•Labatería recargable está montada de forma ja ynosepuede retirar,deseche el producto como
una unidad yenconformidad con los reglamentos locales
•Norealice cambios en el aparato. Esto conllevaría la pérdida de todos los derechos de la garantía.
•Noutilice el producto en áreas donde no se permitan aparatos electrónicos.
•Nointente mantener oreparar el aparato por cuenta propia. Encomiende cualquier trabajo de
mantenimiento al personal especializado competente.
•Noarroje la batería oelproducto al fuego.
•Nomodique ni deforme/caliente/desensamble las pilas recargables/baterías.
E Instrucciones de uso

15
4. Funcionamiento
4.1 Carga de la batería
Aviso –Pila recargable
•Nocargue el Power Pack através de su PC oportátil. Las corrientes de carga pueden dañar el
puerto USB del PC oportátil.
•Utilice sólo cargadores adecuados oconexiones USB paracargar.
•Nosiga utilizando cargadores oconexiones USB defectuosos ynointente repararlos.
•Nosobrecargue ni descargue totalmente el producto.
•Evite almacenar,cargar yutilizar el despertador atemperaturas extremas ycon presiones de aire
exageradamente bajas (p. ej. bajas temperaturas).
•Encaso de almacenamiento prolongado, cargue regularmente (mín. trimestralmente).
•Inicie el proceso de carga del Power Pack conectando el cable USB-C aUSB-C adjunto al puerto
USB-C del Power Pack (IN 5V/3A; 9V/2A)yauncargador USB-C adecuado. Alternativamente, el
Power Pack se puede cargar también mediante el conector hembraMicro-USB. Para ello, conecte
un cable Micro-USB alaentrada Micro-USB (IN 5V/3A; 9V/2A)del Power Pack yuncargador
USB. Tenga en cuenta las instrucciones de uso del cargador USB utilizado en cada caso.
•Lacarga se inicia y naliza de forma automática.
•Antes de utilizar por primeravez el Power Pack, cárguelo por completo.
Nota –Capacidad
•Lacapacidad se muestraentodo momento durante el proceso de carga del Power Pack.
•Cada LED de estado se corresponde con un 25 %delacapacidad. Si un LED se muestra
iluminado de forma continua, indica la capacidad ya alcanzada. Si se iluminan tres LEDs yel
cuarto LED parpadea, el Power Pack cuenta con una carga mínima del 75 %.
•Siseiluminan el cuatroLEDs de estado, dispone de capacidad de carga plena.
•Pulse la tecla del Power Pack paraencenderlo yconsultar la capacidad actual del Power Pack.
•Paraapagar el Power Pack, pulse la tecla dos veces hasta que los LED de estado se apaguen.
4.2 Carga de terminales
Aviso –Conexión de terminales
•Antes de conectar un terminal, compruebe si éste se puede alimentar de manerasuciente con
la salida de corriente del Power Pack.
•Asegúrese de que el consumo de corriente total del terminal conectado no superalos
3000
mA.
•Observe las indicaciones contenidas en las instrucciones de manejo de su terminal.
•Observe siemprelos datos ylas indicaciones de seguridad relativos alaalimentación de
corriente de sus dispositivos contenidos en las mismas.
•¡El Power Pack no debe cargarse ydescargarse simultáneamente!
•Nocargue simultáneamente en ambas salidas USB yUSB-C ya que ello reduce fuertemente la
corriente de carga. Eso aumenta notablemente el tiempo de carga yelPower Pack puede verse
sobrecargado bajo determinadas circunstancias.

16
Aviso
•Noconecte el cable de carga del Power Pack asupropia entrada ysalida simultáneamente.
Podría provocar el deteriorodelabatería.
•Noconecte ningún terminal durante el proceso de carga del Power Pack. Podría dañar el Power
Pack ylos terminales conectados.
•Conecte el cable de carga USB-C adjunto con el puerto USB-C del Power Pack (OUT 5V/3A;
9V/2A; 12V/1,5A –18W PD)ycon el puerto USB-C de su terminal (teléfono móvil, smartphone,
etc.).
•Encasos concretos, es posible que el cable de carga/conexión Micro-USB adjunto no sea
compatible con el puerto USB del terminal. En tal caso, utilice el cable USB del terminal.
•Encaso de emplear la salida USB-A(OUT 5V/3A; 9V/2A; 12V/1,5A –QC3.0)paraelproceso de
carga, conecte un cable de carga USB adecuado con la salida USB-Adel Power Pack yelpuerto
de su terminal.
•Lacarga se inicia de forma automática. Durante el proceso de carga, la capacidad restante del
Power Pack se muestraatravés de los LEDs de estado.
•Podrá visualizar el estado actual de la carga de su terminal en el mismo.
•Finalice el proceso de carga yapague el Power Pack pulsando dos veces la tecla del Power Pack.
LosLEDs de estado se apagan.
•Encaso de no conectar ningún terminal, el Power Pack se apaga automáticamente.
Nota –Carga optimizada
La carga optimizada signica que el Power Pack reconoce el terminal conectado ylesuministrala
intensidad de corriente óptima, reduciéndose el tiempo de carga al mínimo .Tenga en cuenta que
la salida de corriente correspondiente al Power Pack es de máximo 3000 mA.
Nota –Power Delivery/QC3.0, 2.0
•Plug &Go: No es necesario efectuar ningún ajuste manual, basta con conectar yempezar:
gracias alafuncionalidad Power Delivery /QC3.0, 2.0, la tensión ylapotencia se ajustan
automáticamente.
•Tenga en cuenta que, parauna carga eciente yoptimizada, Beachten Sie, su terminal debe ser
compatible con la función PD (Power Delivery)/QC3.0, 2.0.
•Dado el gran númerodeterminales compatibles con PD/QCydiferentes versiones de rmware,
puede ocurrir que ciertos terminales no sean íntegramente compatibles con la función.
5. Mantenimiento ycuidado
Limpie este producto sólo con un paño ligeramente humedecido que no deje pelusas ynoutilice
detergentes agresivos.

17
6. Exclusión de responsabilidad
Hama GmbH &CoKGnoseresponsabiliza ni concede garantía por los daños que surjan por una
instalación, montaje omanejo incorrectos del producto opor la no observación de las instrucciones
de manejo y/o de las instrucciones de seguridad.
7. Datos técnicos
Entrada USB-C 5V 3A /9V 2A
Entrada MicroUSB 5V 3A /9V 2A
Salida USB-A1 5V 3A /9V 2A /12V 1,5 A(QC3.0)
Salida USB-A2 5V 3A /9V 2A /12V 1,5 A(QC3.0)
Salida USB-C 5V
3A /9V 2A /12V 1,5 A(PD 18Wmax.)
Salida total 3A (18Wmax.)
Tipo de batería 3,7V/Li-Po
Min. capacidad
10000mAh /37Wh
Indicación de capacidad
10250mAh /37,93 Wh
8. Instrucciones para desecho yreciclaje
Nota sobrelaprotección medioambiental:
Después de la puesta en marcha de la directiva Europea 2012/19/EU y2006/66/EU en el
sistema legislativo nacional, se aplicaralosiguiente: Losaparatos eléctricos yelectrónicos,
así como las baterías, no se deben evacuar en la basuradoméstica. El usuario está
legalmente obligado allevar los aparatos eléctricos yelectrónicos, así como pilas ypilas
recargables, al nal de su vida útil alos puntos de recogida comunales oadevolverlos al
lugar donde los adquirió. Losdetalles quedaran denidos por la ley de cada país. El símbolo en el
producto, en las instrucciones de uso oenelembalaje hace referencia aello. Gracias al reciclaje, al
reciclaje del material oaotras formas de reciclaje de aparatos/pilas usados, contribuye Usted de
forma importante alaprotección de nuestromedio ambiente.

18
Благодарим за покупку изделия фирмы Hama.
внимательно ознакомьтесь снастоящей инструкцией. Храните инструкцию внадежном месте
для справок вбудущем. Вслучае передачи изделия другому лицу приложите иэту инструкцию.
1. Предупредительные пиктограммы иинструкции
Внимание
Данным значком отмечены инструкции, несоблюдение которых можетпривести копасной
ситуации.
Примечание
Дополнительная или важная информация.
Литий-полимерные элементы c высокой плотностью зарядки
Аккумулятор состоит из литий-полимерных элементов свысокой плотностью зарядки.
Элементы свысокой плотностью зарядки разработаны специально для смартфонов, в
производстве которых предъявляютсяповышенные требования кемкости имощности при
соблюдении малых размеров. Новое поколение литий-полимерных элементов позволяют
добиться легкой компактной конструкции исравнительно высокой емкости.
2. Комплект поставки
• Универсальный аккумулятор аккумуляторный блок питания “PD10-HD”, 10000мАч
• Кабель USB-C -USB-C
• Настоящая инструкция
3. Техника безопасности
• Изделие предназначено толькодля домашнегоприменения.
• Запрещается использовать не по назначению.
• Беречь от грязи, влаги иисточников тепла. Эксплуатировать тольковсухих условиях.
• Не эксплуатировать внепосредственной близости снагревательными приборами, беречь от
прямых солнечных лучей.
• Не давать детям!
• Не ронять. Беречь от сильных ударов.
• Соблюдатьтехнические характеристики.
• Изделие не открывать. Запрещается эксплуатировать неисправное изделие.
• Утилизировать упаковку всоответствии сместными нормами.
• Аккумулятор замене не подлежит. Утилизацию продуктапроизводить целиком согласно
нормативам.
• Запрещается вносить изменения вконструкцию. Впротивном случае гарантийные
обязательства аннулируются.
• Не применять взапретных зонах.
• Запрещается самостоятельно ремонтировать устройство. Ремонт разрешается производить
толькоквалифицированному персоналу.
• Аккумулятор иизделие не бросать вогонь!
• Батареи не деформировать, не нагревать, не разбирать.
R Руководство по эксплуатации

19
4. Эксплуатация
4.1 Зарядка аккумуляторного блока питания
Внимание – Аккумулятор
• Не заряжайте аккумуляторный блок питания от ПК или ноутбука. Зарядные токи могут
повредить USB- портПКили ноутбука.
• Применять толькосоответствующие зарядные устройства.
• Запрещается эксплуатировать иремонтировать неисправные устройства.
• Не подвергатьаккумуляторы глубокой разрядкеиперезарядке.
• Избегайте хранения, зарядки ииспользования при экстремальных температурах и
экстремально низком атмосферном давлении (например, на большой высоте).
• При длительном хранении заряжать не режеодногораза втри месяца.
• Чтобы зарядить аккумуляторный блок питания, спомощью кабеля USB-C (вкомплекте)
соедините разъем USB-C аккумуляторногоблока (IN 5V/3A; 9V/2A) ссоответствующим
зарядным устройством USB-C. Аккумуляторный блок питания такжеможно зарядить
через гнездо Micro-USB. Для этого подключите кабель Micro-USB квходу Micro-USB (IN
5V/3A; 9V/2A) аккумуляторногоблока иксоответствующему зарядному устройству USB.
Соблюдайте инструкцию по эксплуатации зарядногоустройства USB.
• Процессзарядки происходит автоматически.
• Перед началом эксплуатации аккумуляторный блок питания необходимо один раз зарядить
полностью.
Примечание – Емкость
• Во время зарядки текущая емкость отображается непрерывно.
• Каждая лампа индикации соответствует 25% емкости. Непрерывно горящая лампа
показывает, чтомакс. емкость достигнута. Если три лампы горят, ачетвертаямигает,
значит аккумуляторный блок заряжен миним. на 75%.
• Если батарея заряжена полностью, горят все 4 светодиодные лампы.
• Чтобы включить блок питания ипроверить еготекущую емкость, нажмите кнопку на
панели.
• Для выключения аккумуляторногоблока дважды нажмите кнопку, чтобы погасли
светодиодные индикаторы состояния.
4.2 Зарядка оконечных устройств
Внимание – Подключение оконечных устройств
• Перед подключением заряжаемогоустройства убедитесь, чтоего характеристики
соответствуютаккумуляторному блоку питания.
• Общий потребляемый токвсехподключенных устройств не должен превышать 3000 мА.
• Соблюдайте инструкции по эксплуатации устройств.
• Соблюдайте правила техники безопасности по питанию устройств.
• Аккумуляторный блок питания запрещается одновременно заряжать иразряжать.
• Не подключайте одновременно выходы USB и USB-C, таккак вэтомслучае зарядный
токзначительно снижается. Время зарядки при этомсильноувеличивается, что, при
определенных обстоятельствах, можетпривести кперегрузкеаккумуляторногоблока.

20
Внимание
• Запрещается соединять кабелям вход ивыход аккумуляторногоблока. Этоможетстать
причиной выходааккумулятораизстроя.
• Не подключайте оконечные устройства во время зарядки аккумуляторногоблока питания.
Впротивном случае это можетпривести квыходуизстроя блока питания иоконечного
устройства.
• Подключите кабель USB-C (вкомплекте) кразъему USB-C аккумуляторногоблока (OUT
5V/3A; 9V/2A; 12V/1,5A –18W PD). Затем соедините егосразъемом USB-C заряжаемого
устройства (мобильноготелефона, смартфона ит.д.).
•USB-кабель смикроразъемом из комплектааккумуляторногоблока можетнеподойти к
оконечному устройству. Вэтомслучае воспользуйтесь USB-кабелем устройства.
• При использовании выхода USB-A(OUT 5V/3A; 9V/2A; 12V/1,5A –QC3.0) для зарядки
подключите соответствующий кабель USB квыходу USB-A аккумуляторногоблокапитания и
кразъему конечногоустройства.
• Процессзагрузки начнется автоматически. Во время зарядки текущая емкость отображается
светодиодными лампами индикации.
• Ходзарядки смотрите на дисплее оконечногоустройства.
• Чтобы отключить процессзарядки ивыключить блок питания, дважды нажмите кнопку на
блокепитания. Лампы индикации должны погаснуть.
• Если заряжаемое устройство не подключено, аккумуляторный блок автоматически
выключается.
Примечание – Оптимальная зарядка
Режим оптимальной зарядки обеспечивает опознавание устройства, выбор тока
оптимальной величины иобеспечение минимальноговремени зарядки. Максимальный
выходной токаккумуляторногоблока питания составляет 3000 мА.
Примечание –Power Delivery /QC3.0, 2.0
• Готовкработе: Ручных настроек не требуется, достаточно подключить изапустить:
технология Power Delivery/QC3.0, 2.0 автоматически регулирует напряжение имощность.
• Обратите внимание: для эффективной иоптимизированной зарядки ваше устройство
должно поддерживать функцию PD (Power Delivery)/QC3.0, 2.0.
• При большом количестве устройств споддержкой PD/QC ипрошивками разных версий может
случиться так, чтовозможности использования функции будут ограничены.
5. Уход итехническое обслуживание
Чистку изделия производить толькобезворсовой слегка влажной салфеткой. Запрещается
применять агрессивные чистящие средства.
Strona się ładuje...
Strona się ładuje...
Strona się ładuje...
Strona się ładuje...
Strona się ładuje...
Strona się ładuje...
Strona się ładuje...
Strona się ładuje...
Strona się ładuje...
Strona się ładuje...
Strona się ładuje...
Strona się ładuje...
Strona się ładuje...
Strona się ładuje...
Strona się ładuje...
Strona się ładuje...
Strona się ładuje...
Strona się ładuje...
Strona się ładuje...
Strona się ładuje...
Strona się ładuje...
Strona się ładuje...
Strona się ładuje...
Strona się ładuje...
Strona się ładuje...
Strona się ładuje...
Strona się ładuje...
Strona się ładuje...
Strona się ładuje...
Strona się ładuje...
Strona się ładuje...
Strona się ładuje...
Strona się ładuje...
Strona się ładuje...
-
 1
1
-
 2
2
-
 3
3
-
 4
4
-
 5
5
-
 6
6
-
 7
7
-
 8
8
-
 9
9
-
 10
10
-
 11
11
-
 12
12
-
 13
13
-
 14
14
-
 15
15
-
 16
16
-
 17
17
-
 18
18
-
 19
19
-
 20
20
-
 21
21
-
 22
22
-
 23
23
-
 24
24
-
 25
25
-
 26
26
-
 27
27
-
 28
28
-
 29
29
-
 30
30
-
 31
31
-
 32
32
-
 33
33
-
 34
34
-
 35
35
-
 36
36
-
 37
37
-
 38
38
-
 39
39
-
 40
40
-
 41
41
-
 42
42
-
 43
43
-
 44
44
-
 45
45
-
 46
46
-
 47
47
-
 48
48
-
 49
49
-
 50
50
-
 51
51
-
 52
52
-
 53
53
-
 54
54


Hama 00187261 Instrukcja obsługi
- Kategoria
- Banki mocy
- Typ
- Instrukcja obsługi
- Niniejsza instrukcja jest również odpowiednia dla
w innych językach
- čeština: Hama 00187261 Návod k obsluze
- español: Hama 00187261 El manual del propietario
- Deutsch: Hama 00187261 Bedienungsanleitung
- slovenčina: Hama 00187261 Návod na obsluhu
- português: Hama 00187261 Manual do proprietário
- français: Hama 00187261 Le manuel du propriétaire
- English: Hama 00187261 Owner's manual
- русский: Hama 00187261 Инструкция по применению
- Nederlands: Hama 00187261 de handleiding
- română: Hama 00187261 Manualul proprietarului
Powiązane artykuły
-
Hama PD10-HD Instrukcja obsługi
-
Hama 00183285 Instrukcja obsługi
-
Hama 00183278 Instrukcja obsługi
-
Hama 00187257 Instrukcja obsługi
-
Hama 00188307 Supreme 10HD Power Pack 10000mAh Instrukcja obsługi
-
Hama 00200012 Instrukcja obsługi
-
Hama 00188306 Instrukcja obsługi
-
Hama 00037182 Power Pack 20000mAh Instrukcja obsługi
-
Hama 00187239 Instrukcja obsługi
-
