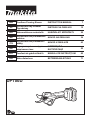
Makita UP100D Instrukcja obsługi
- Kategoria
- Elektronarzędzia
- Typ
- Instrukcja obsługi

UP100D
EN Cordless Pruning Shears INSTRUCTION MANUAL 7
PL Akumulatorowy Sekator
Ogrodniczy INSTRUKCJA OBSŁUGI 15
HU Akkumulátoros metszőolló HASZNÁLATI KÉZIKÖNYV 25
SK Akumulátorové prerezávacie
nožnice NÁVOD NA OBSLUHU 34
CS Akumulátorové prořezávací
nůžky NÁVOD K OBSLUZE 43
UK Акумуляторні ножиці для
підрізання гілок ІНСТРУКЦІЯ З
ЕКСПЛУАТАЦІЇ 52
RO Foarfecă de grădină fără r MANUAL DE INSTRUCŢIUNI 62
DE Akku-Astschere BETRIEBSANLEITUNG 71

2
1
1
2
34
56
Fig.1
1
2
3
Fig.2
1
2
Fig.3
1
2
Fig.4
1
2
Fig.5
1
2
Fig.6
13
2
Fig.7
1
2
Fig.8

3
1
Fig.9
1
Fig.10
1
2
3
4
Fig.11
1
3
2
4
Fig.12
1
Fig.13
1
Fig.14
1
2
Fig.15
1
Fig.16

4
Fig.17
1
Fig.18
Fig.19
Fig.20
Fig.21
Fig.22
Fig.23
1
Fig.24

5
Fig.25
1
Fig.26
1
Fig.27
1
Fig.28
Fig.29
1
Fig.30
1
2
Fig.31
1
Fig.32

6
12
Fig.33
1
Fig.34

7ENGLISH
ENGLISH (Original instructions)
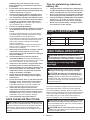
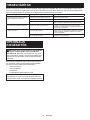
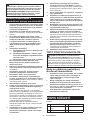
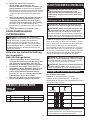
SPECIFICATIONS
Model: UP100D
Max. cutting capacity 25 mm
Overall length
(Without battery)
259 mm
Rated voltage D.C. 10.8 V - 12 V max
Net weight *1 0.68 kg
*2 0.89 - 1.1 kg
• Duetoourcontinuingprogramofresearchanddevelopment,thespecicationshereinaresubjecttochange
without notice.
• Specicationsmaydierfromcountrytocountry.
*1: Weight without the battery and holster.
*2:Thelightestandheaviestcombinationofweight,accordingtoEPTA-Procedure01/2014.Theweightmaydier
depending on the attachment(s), including the battery cartridge(s).
Applicable battery cartridge and charger
Battery cartridge BL1016 / BL1021B / BL1041B
Charger DC10SA / DC10SB / DC10WC / DC10WD / DC18RE
• Some of the battery cartridges and chargers listed above may not be available depending on your region of
residence.
WARNING: Only use the battery cartridges and chargers listed above. Use of any other battery cartridges
andchargersmaycauseinjuryand/orre.
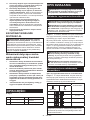
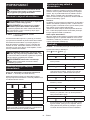
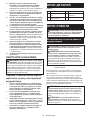
Symbols
The followings show the symbols which may be used
for the equipment. Be sure that you understand their
meaning before use.
Take particular care and attention.
Read instruction manual.
Danger;beawareofthrownobjects.
Keep bystanders away.
DANGER - Keep hands away from blade.
Do not expose to moisture.
Ni-MH
Li-ion
Only for EU countries
Due to the presence of hazardous com-
ponents in the equipment, waste electrical
and electronic equipment, accumulators
and batteries may have a negative impact
on the environment and human health.
Do not dispose of electrical and electronic
appliances or batteries with household
waste!
In accordance with the European Directive
on waste electrical and electronic equip-
ment and on accumulators and batteries
and waste accumulators and batteries,
as well as their adaptation to national law,
waste electrical equipment, batteries and
accumulators should be stored separately
and delivered to a separate collection point
for municipal waste, operating in accor-
dance with the regulations on environmen-
tal protection.
This is indicated by the symbol of the
crossed-out wheeled bin placed on the
equipment.
Intended use
The tool is intended for pruning twigs or branches.
Noise
The typical A-weighted noise level determined accord-
ing to EN62841-4-5:
Sound pressure level (LpA) : 70 dB(A) or less
Uncertainty (K) : 3 dB (A)
The noise level under working may exceed 80 dB (A).

8ENGLISH
NOTE:
The declared noise emission value(s) has been
measured in accordance with a standard test method
and may be used for comparing one tool with another.
NOTE:
The declared noise emission value(s) may
also be used in a preliminary assessment of exposure.
WARNING: Wear ear protection.
WARNING: The noise emission during actual
use of the power tool can dier from the declared
value(s) depending on the ways in which the
tool is used especially what kind of workpiece is
processed.
WARNING: Be sure to identify safety mea-
sures to protect the operator that are based on an
estimation of exposure in the actual conditions of
use (taking account of all parts of the operating
cycle such as the times when the tool is switched
o and when it is running idle in addition to the
trigger time).
Vibration
The vibration total value (tri-axial vector sum) deter-
mined according to EN62841-4-5:
Vibration emission (ah) : 2.5 m/s2 or less
Uncertainty (K) : 1.5 m/s2
NOTE: The declared vibration total value(s) has been
measured in accordance with a standard test method
and may be used for comparing one tool with another.
NOTE: The declared vibration total value(s) may also
be used in a preliminary assessment of exposure.
WARNING: The vibration emission during
actual use of the power tool can dier from the
declared value(s) depending on the ways in which
the tool is used especially what kind of workpiece
is processed.
WARNING: Be sure to identify safety mea-
sures to protect the operator that are based on an
estimation of exposure in the actual conditions of
use (taking account of all parts of the operating
cycle such as the times when the tool is switched
o and when it is running idle in addition to the
trigger time).
Declarations of Conformity
For European countries only
The Declarations of conformity are included in Annex A
to this instruction manual.
SAFETY WARNINGS
General power tool safety warnings
WARNING Read all safety warnings, instruc-
tions, illustrations and specications provided with
this power tool. Failure to follow all instructions listed
belowmayresultinelectricshock,reand/orserious
injury.
Save all warnings and instruc-
tions for future reference.
The term "power tool" in the warnings refers to your
mains-operated (corded) power tool or battery-operated
(cordless) power tool.
Pruning shears safety warnings
1. Do not use the pruning shear in bad weather
conditions, especially when there is a risk of
lightning. This decreases the risk of being struck
by lightning.
2. Keep all power cords and cables away from
cutting area. Power cords or cables may be
hidden and can be accidentally cut by the blade.
3. Hold the pruning shear by insulated gripping
surfaces only, because the blade may contact
hidden wiring. Blades contacting a "live" wire
may make exposed metal parts of the pruning
shear "live" and could give the operator an electric
shock.
4. Keep all parts of the body away from the blade.
Do not remove cut material or hold material to
be cut when blades are moving.
5. When clearing jammed material or servicing
the pruning shear, make sure the power switch
is o and the battery pack is removed or dis-
connected. Unexpected actuation of the pruning
shearwhileclearingjammedmaterialorservicing
mayresultinseriouspersonalinjury.
6. Carry the pruning shear by the handle with the
blade stopped and taking care not to operate
the power switch. Proper carrying of the pruning
shear will decrease the risk of inadvertent starting
andresultantpersonalinjuryfromtheblades.
7. Check the hedges and bushes for foreign
objects, such as wire fences or hidden wiring
before operating the tool.
8. Hold the tool rmly when using the tool.
9. The tool is intended to be used by the operator
at ground level. Do not use the tool on ladders
or any other unstable support.
Additional Safety Instructions
1. Use personal protective equipment. Always
wear eye protection. Protective equipment such
as a dust mask, non-skid safety shoes, hard hat or
hearing protection used for appropriate conditions
willreducepersonalinjuries.
2. This tool is for pruning branches. Do not use it
foranyjobexceptthatforwhichitisintended.
3. Never allow children, persons with reduced
physical, sensory or mental capabilities or
lack of experience and knowledge or people
unfamiliar with these instructions to use the
tool. Local regulations may restrict the age of
the operator.
4. Children should be supervised to ensure that
they do not play with the appliance.
5. Never operate the tool while people, especially
children, or pets are nearby.
6. Do not overreach and keep balance at all
times. Always be sure of footing on slopes and to
walk, never run.

9ENGLISH
7. Do not touch moving hazardous parts before
the tool is disconnected from the mains and/or
the battery pack is removed from the tool.
8. Always wear substantial footwear and long
trousers while operating the tool.
9. Disconnect the supply and/or remove the
battery pack from the tool:
• whenever the tool is left by the user,
• before clearing a blockage,
• before checking, cleaning or working on the
tool,
• afterstrikingaforeignobjecttoinspectthe
tool for damage,
• if the tool starts to vibrate abnormally, for
immediately check.
10. Never operate the tool with defective guards
or shields, or without safety devices, or if the
cord is damaged or worn.
11. Avoid using the tool in bad weather conditions
especially when there is a risk of lightning.
12. Don’t use the tool or perform battery charging
operations in the rain.
13. Don’t leave the tool in rain or wet locations.
14. Be careful not to catch foreign matter between
the shear blades.Iftheshearbladesarejammed
withforeignmatter,immediatelyswitchothetool
and disconnect the battery from the tool. Then
remove the foreign matter from the shear blades.
15. Never hold the branch you are pruning with
your free hand. Keep your free hand away from
the cutting area. Never touch the shear blades,
they are very sharp and you may cut yourself.
16. Don’t force the tool to make it cut. You could
slipandinjureyourselforcutsomethingelse
unintentionally.
17.
Avoid cutting electrical wires that may be hidden.
18. Always check the shear blades carefully
before operation.
19. Handle the shear blades with extreme care to
prevent cuts or injury from the shear blades.
20. Disconnect the battery from the tool after each
use and before attempting to perform inspec-
tion or maintenance.
21. When not in use, always keep the tool in its
holster.
Battery tool use and care
1. Avoid dangerous environment. Don't use the
tool in damp or wet locations or expose it to
rain. Water entering the tool will increase the
risk of electric shock.
2. Recharge only with the charger specied by
the manufacturer. A charger that is suitable for
onetypeofbatterypackmaycreateariskofre
when used with another battery pack.
3. Use power tools only with specically desig-
nated battery packs. Use of any other battery
packsmaycreateariskofinjuryandre.
4. When battery pack is not in use, keep it away
from other metal objects, like paper clips,
coins, keys, nails, screws or other small metal
objects, that can make a connection from one
terminal to another. Shorting the battery termi-
nalstogethermaycauseburnsorare.
5. Under abusive conditions, liquid may be
ejected from the battery; avoid contact. If con-
tact accidentally occurs, ush with water. If
liquid contacts eyes, additionally seek medical
help.Liquidejectedfromthebatterymaycause
irritation or burns.
6. Do not dispose of the battery(ies) in a re. The
cell may explode. Check with local codes for
possible special disposal instructions.
7. Do not open or mutilate the battery(ies).
Released electrolyte is corrosive and may
cause damage to the eyes or skin. It may be
toxic if swallowed.
8.
Do not charge battery in rain, or in wet locations.
Service
1. Have your power tool serviced by a qualied
repair person using only identical replacement
parts. This will ensure that the safety of the power
tool is maintained.
2. Follow instruction for lubricating and chang-
ing accessories.
3.
Keep handles dry, clean and free from oil and grease.
WARNING: DO NOT let comfort or familiarity
with product (gained from repeated use) replace
strict adherence to safety rules for the subject
product. MISUSE or failure to follow the safety
rules stated in this instruction manual may cause
serious personal injury.
SAVE THESE INSTRUCTIONS.
WARNING: DO NOT let comfort or familiarity
with product (gained from repeated use) replace
strict adherence to safety rules for the subject
product. MISUSE or failure to follow the safety
rules stated in this instruction manual may cause
serious personal injury.
Important safety instructions for
battery cartridge
1. Before using battery cartridge, read all instruc-
tions and cautionary markings on (1) battery
charger, (2) battery, and (3) product using
battery.
2. Do not disassemble or tamper with the battery
cartridge.Itmayresultinare,excessiveheat,
or explosion.
3. If operating time has become excessively
shorter, stop operating immediately. It may
result in a risk of overheating, possible burns
and even an explosion.
4.
If electrolyte gets into your eyes, rinse them out
with clear water and seek medical attention right
away. It may result in loss of your eyesight.
5. Do not short the battery cartridge:
(1) Do not touch the terminals with any con-
ductive material.
(2) Avoid storing battery cartridge in a con-
tainer with other metal objects such as
nails, coins, etc.
(3) Do not expose battery cartridge to water
or rain.

10 ENGLISH
A battery short can cause a large current
ow, overheating, possible burns and even a
breakdown.
6. Do not store and use the tool and battery car-
tridge in locations where the temperature may
reach or exceed 50 °C (122 °F).
7. Do not incinerate the battery cartridge even if
it is severely damaged or is completely worn
out. The battery cartridge can explode in a re.
8. Do not nail, cut, crush, throw, drop the battery
cartridge, or hit against a hard object to the
battery cartridge. Such conduct may result in a
re,excessiveheat,orexplosion.
9. Do not use a damaged battery.
10. The contained lithium-ion batteries are subject
to the Dangerous Goods Legislation require-
ments.
For commercial transports e.g. by third parties,
forwarding agents, special requirement on pack-
aging and labeling must be observed.
For preparation of the item being shipped, consult-
ing an expert for hazardous material is required.
Please also observe possibly more detailed
national regulations.
Tapeormaskoopencontactsandpackupthe
battery in such a manner that it cannot move
around in the packaging.
11. When disposing the battery cartridge, remove
it from the tool and dispose of it in a safe
place. Follow your local regulations relating to
disposal of battery.
12. Use the batteries only with the products
specied by Makita. Installing the batteries to
non-compliantproductsmayresultinare,exces-
sive heat, explosion, or leak of electrolyte.
13. If the tool is not used for a long period of time,
the battery must be removed from the tool.
14. During and after use, the battery cartridge may
take on heat which can cause burns or low
temperature burns. Pay attention to the han-
dling of hot battery cartridges.
15. Do not touch the terminal of the tool imme-
diately after use as it may get hot enough to
cause burns.
16. Do not allow chips, dust, or soil stuck into the
terminals, holes, and grooves of the battery
cartridge.Itmaycauseheating,catchingre,
burst and malfunction of the tool or battery car-
tridge,resultinginburnsorpersonalinjury.
17. Unless the tool supports the use near
high-voltage electrical power lines, do not use
the battery cartridge near high-voltage electri-
cal power lines. It may result in a malfunction or
breakdown of the tool or battery cartridge.
18. Keep the battery away from children.
SAVE THESE INSTRUCTIONS.
CAUTION: Only use genuine Makita batteries.
Use of non-genuine Makita batteries, or batteries that
have been altered, may result in the battery bursting
causingres,personalinjuryanddamage.Itwill
also void the Makita warranty for the Makita tool and
charger.
Tips for maintaining maximum
battery life
1.
Charge the battery cartridge before completely dis-
charged. Always stop tool operation and charge the
battery cartridge when you notice less tool power.
2.
Never recharge a fully charged battery cartridge.
Overcharging shortens the battery service life.
3.
Charge the battery cartridge with room tempera-
ture at 10 °C - 40 °C (50 °F - 104 °F). Let a hot
battery cartridge cool down before charging it.
4. When not using the battery cartridge, remove
it from the tool or the charger.
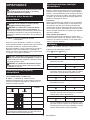
PARTS DESCRIPTION
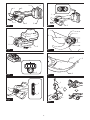
►Fig.1
1Shear blade 2Indicator lamp
3Angleadjustment
button
4Main power button
5Battery cartridge 6Switch trigger
FUNCTIONAL DESCRIPTION
CAUTION: Always be sure that the tool is
switched o and the battery cartridge is removed
before adjusting or checking function on the tool.
Installing or removing battery
cartridge
CAUTION: Always switch o the tool before
installing or removing of the battery cartridge.
CAUTION: Hold the tool and the battery car-
tridge rmly when installing or removing battery
cartridge. Failure to hold the tool and the battery
cartridgermlymaycausethemtoslipoyourhands
and result in damage to the tool and battery cartridge
andapersonalinjury.
►Fig.2: 1. Red indicator 2. Button 3. Battery cartridge
To remove the battery cartridge, slide it from the tool
while sliding the button on the front of the cartridge.
To install the battery cartridge, align the tongue on the
battery cartridge with the groove in the housing and slip
it into place. Insert it all the way until it locks in place
with a little click. If you can see the red indicator as
showninthegure,itisnotlockedcompletely.
CAUTION: Always install the battery cartridge
fully until the red indicator cannot be seen. If not,
itmayaccidentallyfalloutofthetool,causinginjuryto
you or someone around you.
CAUTION: Do not install the battery cartridge
forcibly. If the cartridge does not slide in easily, it is
not being inserted correctly.

11 ENGLISH
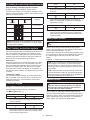
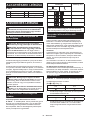
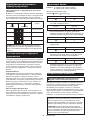
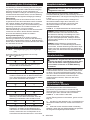
Indicating the remaining battery capacity
Only for battery cartridges with the indicator
►Fig.3: 1. Indicator lamps 2. Check button
Press the check button on the battery cartridge to indi-
cate the remaining battery capacity. The indicator lamps
light up for a few seconds.
Indicator lamps Remaining
capacity
Lighted O
75% to 100%
50% to 75%
25% to 50%
0% to 25%
NOTE: Depending on the conditions of use and the
ambienttemperature,theindicationmaydierslightly
from the actual capacity.
Tool / battery protection system
The tool is equipped with a tool/battery protection sys-
tem.Thissystemautomaticallycutsopowertothe
motor to extend tool and battery life. The tool will auto-
matically stop during operation if the tool or battery is
placed under one of the following conditions:
Overloaded:
The tool is operated in a manner that causes it to draw
an abnormally high current. In this situation, turn the
tooloandstoptheapplicationthatcausedthetoolto
become overloaded. Then turn the tool on to restart.
If the tool does not start, the battery is overheated. In
this situation, let the battery cool before turning the tool
on again.
Low battery voltage:
The remaining battery capacity is too low and the tool
will not operate. If you turn the tool on, the motor runs
again but stops soon. In this situation, remove and
recharge the battery.
Indicator lamps
►Fig.4:
1. Indicator lamp (green) 2. Indicator lamp (red)
The meaning of indicator lamps is as follows:
(On: O: Blinking: )
Green Red
• Green lamp lights up: the tool is turned on and
ready to operate.
Green Red
• Green lamp is blinking: the tool is turned on and in
the standby mode. To return to the normal mode,
pull the switch trigger twice.
Green Red
• Red lamp is blinking: the remaining battery capac-
ity is low.
Green Red
• Green lamp and red lamp light up: the tool or
battery is overheated, or the tool is overloaded, or
the battery runs out.
Green Red
• Red lamp lights up: An abnormality has occurred.
Turnothetool,andthenbackon.Iftheabnor-
mality persists, ask your local authorized service
center for repair.
Main power button
WARNING: Always turn o the tool when not
in use.
To turn on the tool, press and hold the main power
button. The tool starts up in the standby mode and the
green indicator lamp blinks in green.
Toturnothetool,pullandholdtheswitchtriggermore
than 3 seconds to close the shear blades, then release
the switch trigger, and then press the main power
button.
►Fig.5: 1. Main power button 2. Switch trigger
NOTE: This tool shifts to the standby mode when the
switch trigger is not pulled for a certain period after
the tool is turned on. When the green indicator lamp
is blinking, pull the switch trigger twice to return to the
normal mode.
NOTE:Thistoolemploystheautopower-ofunction.
To avoid unintentional start up, the tool automatically
shuts down when the switch trigger is not pulled for a
certain period after the tool is turned on.
Switch action
CAUTION: Before installing the battery car-
tridge into the tool, always check to see that the
switch trigger actuates properly and returns to
the "OFF" position when released.
Turn on the tool, and pull the switch trigger twice to
open the upper shear blade. The green indicator lamp
lights up in green. When you pull the switch trigger, the
upper shear blade closes, and when you release the
switch trigger, the upper shear blade opens.

12 ENGLISH
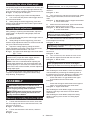
Switching the shear blade angle
The opening angle of the shear blades can be set in two
levels. You can switch the opening angle between fully
open and half-open according to the branches to be cut.
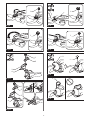
►Fig.6: 1. Fully open 2. Half-open
To switch the opening angle, follow the steps below.
1. Turn on the tool and pull the switch trigger twice to
open the shear blades.
2. While pulling the switch trigger fully, press and
holdtheangleadjustmentbuttonuntilthegreenindica-
tor lamp blinks twice.
Cutting depth adjustment
Aftergrindingorreplacingtheshearblade,adjustthe
cuttingdepth.Toadjustthecuttingdepth,followthe
steps below.
1. Turn on the tool and pull the switch trigger twice to
open the shear blades.
2. While pulling the switch trigger fully, press and
holdtheangleadjustmentbuttonforafewsecondsuntil
the green indicator lamp blinks fast.
3. Adjustthecuttingdepthbypullingtheswitch
trigger repeatedly so that the overlap of the tips of the
upper and lower shear blades is 1 to 3 mm.
►Fig.7: (1) Upper shear blade (2) Lower shear blade
(3) 1 - 3 mm
NOTE: The upper blade returns to the shallowest
position when you pull the switch trigger after the
upper blade reaches the deepest position.
NOTE:Ifthetoolisoverloadedwhileadjustingthe
cuttingdepthadjustment,thegreenlampblinksand
redlamplightsup.Inthiscase,turnothetool,then
removethecauseoftheoverload,andthenadjustthe
cutting depth again.
4. Pressandholdtheangleadjustmentbuttonto
completetheadjustment.Thegreenindicatorlamp
stops blinking, and lights up.
ASSEMBLY
CAUTION: Always be sure that the tool is
switched o and the battery cartridge is removed
before carrying out any work on the tool.
CAUTION: When replacing the shear blades,
always wear gloves so that your hands do not
directly contact the blades.
Removing or installing the shear blades
1. Loosen the bolts with the hex wrench, then slide
the cover slightly and remove the bolts and cover, and
then turn over the tool.
►Fig.8: 1. Bolt 2. Cover
2. Loosen the bolt with the hex wrench, and then
remove it.
►Fig.9: 1. Bolt
NOTICE: Do not loosen the nut before loosening
the bolt. Otherwise, the nut may be damaged.
3. Loosen the nut with the box wrench, and then
remove it.
►Fig.10: 1. Nut
4. Turn over the tool, and then remove the bolt, blade
holder, upper shear blade, and lower shear blade in
order.
►Fig.11: 1. Bolt 2. Blade holder 3. Upper shear blade
4. Lower shear blade
5. Attach the lower shear blade, upper shear blade,
blade holder, and bolt to the tool in order.
►Fig.12: 1. Bolt 2. Blade holder 3. Upper shear blade
4. Lower shear blade
NOTICE: When attaching the upper shear blade,
make sure that the upper shear blade is placed in
the direction shown in the gure.
6. Turn over the tool, and then attach the nut to the
tool and tighten it manually.
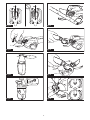
►Fig.13: 1. Nut
NOTICE: The recommended tightening torque is
approximately 0.5 N•m.
7. Attach the bolt to the tool and tighten it with the
hex wrench.
►Fig.14: 1. Bolt
8. Turn over the tool, then attach the cover to the
tool, and then tighten the bolts with the hex wrench.
►Fig.15: 1. Bolt 2. Cover
NOTICE: Tighten the bolts with the hex wrench
in the upright position as shown in the gure.
Tightening the bolts too much may damage the bolts.
►Fig.16: 1. Hex wrench
After installing the shear blades, check the clearance
ofshearbladesbyconrmingthefollowingpoints.If
theclearanceisnotproper,adjustitbyreferringtothe
sectionforadjustmentforshearbladesclearance.
• Check that there is no gap between the upper
shear blade and lower shear blade.
►Fig.17
• Check that the upper shear blade moves approxi-
mately 3 mm toward the lower shear blade.
►Fig.18: 1. Upper shear blade
After installing the shear blades, apply oil to the shear
blades by referring to the section for shear blade
maintenance.
Afterinstallingtheshearblades,adjustthecutting
depth by referring to the section for cutting depth
adjustment.

13 ENGLISH
OPERATION
CAUTION: Always hold the tool rmly. And
keep rm footing.
CAUTION: Do not put any of your body parts
near the shear blades during operation.
CAUTION: Before use, inspect if the shear
blades, blade bolts or other parts are not worn or
damaged. Replace worn or damaged parts for safe
operation.
NOTICE:
If the shear blades are stuck in a branch
during operation, do not twist the tool. Release
the switch trigger and turn o the tool, and then
pull the shear blades straight out slowly from the
branch. Otherwise the shear blades may be damaged.
NOTICE:
In case you cut too thick branch or
something too hard, the overload protection works
and the tool stops. In this case, release the switch
trigger and turn o the tool, and then pull the shear
blades straight out slowly from the branch.
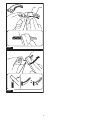
Using the holster
Pass the belt through the opening of the holster as
showninthegure,andthenputontheholster.
►Fig.19
Insertthetoolintotheholster.Youcanxthetoolwith
the strap. Before inserting the tool into the holster, close
the upper shear blade by pulling the switch trigger more
than3seconds,andturnothetool.
►Fig.20
Pruning operation
►Fig.21
Maintain your proper footing and balance at all times
and cut branches one by one. The maximum thickness
of branches which can be cut with the tool is approxi-
mately 25 mm.
MAINTENANCE
CAUTION: Always be sure that the tool is
switched o and the battery cartridge is removed
before attempting to perform inspection or
maintenance.
CAUTION: Wear safety gloves when handling
the shear blade. Otherwise it may result in personal
injury.
NOTICE: Never use gasoline, benzine, thinner,
alcohol or the like. Discoloration, deformation or
cracks may result.
To maintain product SAFETY and RELIABILITY,
repairs,anyothermaintenanceoradjustmentshould
be performed by Makita Authorized or Factory Service
Centers, always using Makita replacement parts.
Shear blade maintenance
NOTICE: Failure to perform blade maintenance
may cause excessive blade friction and shorten
the operating time per battery charge.
Before the operation or once per hour during operation,
apply low-viscosity oil (machine oil, or spray-type lubri-
cating oil) to the shear blades.
►Fig.22
►Fig.23
Apply oil through the lubrication hole by pressing the
hole with the tip of the oil bottle.
►Fig.24: 1. Lubrication hole
After the operation, remove dust from the shear blades
withawiredbrush,wipethemowithaclothandthen
apply low-viscosity oil (machine oil, or spray-type lubri-
cating oil) to the shear blades.
►Fig.25
Adjustment for shear blades
clearance
NOTICE: Adjust the clearance of shear blades
properly. Too loose clearance may result in dull
cut, and too tight blade clearance may result in
overload for the motor and short running time of
the tool.
Adjusttheclearanceofshearbladesasfollows:
1. Loosen the bolt with the hex wrench, and then
remove it.
►Fig.26: 1. Bolt
NOTICE: Do not loosen the nut before loosening
the bolt. Otherwise, the nut may be damaged.
2. Loosen the nut with the box wrench, and then
tighten it manually.
►Fig.27: 1. Nut
NOTICE: The recommended tightening torque is
approximately 0.5 N•m.
3. Attach the bolt to the tool and tighten it with the
hex wrench.
►Fig.28: 1. Bolt
4. Check that there is no gap between the upper
shear blade and lower shear blade.
►Fig.29
Check that the upper shear blade moves approximately
3 mm toward the lower shear blade.
►Fig.30: 1. Upper shear blade
Grinding the shear blades
NOTE: When grinding the shear blades, adding water
to the grinding stone will make the grinding smoother.
Afterthegrinding,besuretowipeotheshear
blades with a dry cloth.
Turnothetoolandremovethebatterycartridge,and
remove the shear blades from the tool.

14 ENGLISH
Upper shear blade
1. Grind the upper shear blade with the grinding
stoneasshowninthegure.
►Fig.31: 1. Upper shear blade 2. Grinding stone
2. Remove the burrs from the back side of the shear
blade by lightly applying the grinding stone to the shear
blade.
►Fig.32: 1. Grinding stone
NOTICE: When sharpening the back side of
shear blade, lightly apply the grinding stone,
and do not sharpen the shear blade too much.
Otherwise, the clearance may become too much, or
the life of shear blade may be shortened.
• Afterinstallingtheshearblades,adjusttheclear-
ance of shear blades by referring to the section for
adjustmentforshearbladesclearance.
• After installing the shear blades, apply oil to the
shear blades by referring to the section for shear
blade maintenance.
• Afterinstallingtheshearblades,adjustthecutting
depth by referring to the section for cutting depth
adjustment.
Lower shear blade
1. Grind the lower shear blade with the grinding
stone in the direction of the arrow as shown in the
gure.
►Fig.33: 1. Grinding stone 2. Lower shear blade
2. Remove the burrs from the back side of the shear
blade by lightly applying the grinding stone to the shear
blade.
►Fig.34: 1. Grinding stone
NOTICE: When sharpening the back side of
shear blade, lightly apply the grinding stone,
and do not sharpen the shear blade too much.
Otherwise, the clearance may become too much, or
the life of shear blade may be shortened.
• Afterinstallingtheshearblades,adjusttheclear-
ance of shear blades by referring to the section for
adjustmentforshearbladesclearance.
• After installing the shear blades, apply oil to the
shear blades by referring to the section for shear
blade maintenance.
• Afterinstallingtheshearblades,adjustthecutting
depth by referring to the section for cutting depth
adjustment.
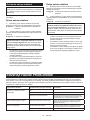
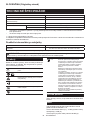
TROUBLESHOOTING
Beforeaskingforrepairs,conductyourowninspectionrst.Ifyoundaproblemthatisnotexplainedinthemanual,
do not attempt to dismantle the tool. Instead, ask Makita Authorized Service Centers, always using Makita replace-
ment parts for repairs.
State of abnormality Probable cause (malfunction) Remedy
The shear blade does not move even
after pulling the switch trigger.
The battery is low. Charge the battery.
Thetoolisturnedo. Turn on the tool.
Switch trigger defect. Stop using the tool immediately, and ask your local
authorized service center for repair.
The shear blades are stuck on the
branch.
The branch is too thick or too hard. Releasetheswitchtriggerandturnothetool.
Then pull the shear blades straight out slowly from
the branch.
The cut is not smooth. The shear blades are dull. Sharpentheshearblades,andadjusttheblade
clearance,andperformcuttingdepthadjustment.
The shear blades are worn out. Replace the shear blades.
OPTIONAL ACCESSORIES
CAUTION: These accessories or attachments
are recommended for use with your Makita tool
specied in this manual. The use of any other
accessories or attachments might present a risk of
injurytopersons.Onlyuseaccessoryorattachment
for its stated purpose.
If you need any assistance for more details regard-
ing these accessories, ask your local Makita Service
Center.
• Upper shear blade
• Lower shear blade
• Grinding stone
• Makita genuine battery and charger
NOTE: Some items in the list may be included in the
tool package as standard accessories. They may
dierfromcountrytocountry.

15 POLSKI
POLSKI (Instrukcja oryginalna)
DANE TECHNICZNE
Model: UP100D
Maks.zakrescięcia 25 mm
Długośćcałkowita
(bez akumulatora)
259 mm
Napięcieznamionowe Prądstały10,8V–12Vmaks.
Masa netto *1 0,68 kg
*2 0,89–1,1kg
• Wzwiązkuzestaleprowadzonymprzeznasząrmęprogramembadawczo-rozwojowymniniejszedanemogą
uleczmianombezwcześniejszegopowiadomienia.
• Danetechnicznemogąróżnićsięwzależnościodkraju.
*1: Masa bez akumulatora i kabury.
*2:MasanajlżejszejinajcięższejkonguracjizgodniezprocedurąEPTA01/2014.Masamożebyćróżnawzależno-
ściodosprzętu,wtymakumulatorów.
Kompatybilne akumulatory i ładowarki
Akumulator BL1016 / BL1021B / BL1041B
Ładowarka DC10SA / DC10SB / DC10WC / DC10WD / DC18RE
• Pewnezwymienionychpowyżejakumulatorówiładowarekmogąbyćniedostępnewregioniezamieszkania
użytkownika.
OSTRZEŻENIE: Należy używać wyłącznie akumulatorów i ładowarek wymienionych powyżej.
Używanieinnychakumulatorówiładowarekmożestwarzaćryzykowystąpieniaobrażeńciałalubpożaru.
Symbole
Poniżejpokazanosymbole,jakiemogąbyćzastoso-
wanenaurządzeniu.Przedrozpoczęciemużytkowania
należyzapoznaćsięzichznaczeniem.
Zachowaćszczególnąostrożność.
Przeczytaćinstrukcjęobsługi.
Niebezpieczeństwo;uważaćnawyrzucane
przedmioty.
Osobypostronnepowinnyprzebywaćw
bezpiecznejodległości.
NIEBEZPIECZEŃSTWO—Niezbliżaćrąk
do ostrza.
Chronićprzedwilgocią.
Ni-MH
Li-ion
DotyczytylkopaństwUE
Zuwaginaobecnośćwsprzęcienie-
bezpiecznychskładników,zużytysprzęt
elektryczny, elektroniczny, akumulatory
orazbateriemogąpowodowaćnegatywny
wpływnaśrodowiskoizdrowieludzi.
Niewyrzucajurządzeńelektrycznych,
elektronicznychlubakumulatorówwrazz
odpadami z gospodarstwa domowego!
ZgodniezEuropejskąDyrektywąwsprawie
zużytegosprzętuelektrycznegoielektro-
nicznegoorazdotyczącąakumulatorówi
bateriiorazzużytychakumulatorówibaterii,
atakżedostosowaniemichdoprawa
krajowego,zużyteurządzeniaelektryczne,
elektroniczne,baterieiakumulatory,należy
składowaćosobnoiprzekazywaćdopunktu
selektywnejzbiórkiodpadówkomunalnych,
działającegozgodniezprzepisamidotyczą-
cymiochronyśrodowiska.
Informujeotymsymbolprzekreślonego
kołowegokonteneranaodpadyumiesz-
czonynasprzęcie.
Przeznaczenie
Narzędziejestprzeznaczonedoprzycinaniagałęzi.
Hałas
TypowyrównoważnypoziomdźwiękuAokreślonyw
oparciuonormęEN62841-4-5:
Poziomciśnieniaakustycznego(LpA):70dB(A)lubmniej
Niepewność(K):3dB(A)
Poziomhałasupodczaspracymożeprzekraczać80dB(A).

16 POLSKI
WSKAZÓWKA:Deklarowanawartośćemisjihałasu
zostałazmierzonazgodniezestandardowąmetodą
testowąimożnająwykorzystaćdoporównywania
narzędzi.
WSKAZÓWKA:Deklarowanąwartośćemisjihałasu
możnatakżewykorzystaćwewstępnejocenie
narażenia.
OSTRZEŻENIE: Nosić ochronniki słuchu.
OSTRZEŻENIE: Poziom hałasu wytwa-
rzanego podczas rzeczywistego użytkowania
elektronarzędzia może się różnić od wartości
deklarowanej w zależności od sposobu użytko-
wania narzędzia, a w szczególności od rodzaju
obrabianego elementu.
OSTRZEŻENIE: W oparciu o szacowane
narażenie w rzeczywistych warunkach użytkowa-
nia należy określić środki bezpieczeństwa w celu
zapewnienia ochrony operatora (uwzględniając
wszystkie elementy cyklu działania, tj. czas, kiedy
narzędzie jest wyłączone i kiedy pracuje na biegu
jałowym, a także czas, kiedy jest włączone).
Drgania
Całkowitawartośćpoziomudrgań(sumawektoróww3
osiach)określonazgodnieznormąEN62841-4-5:
Emisjadrgań(ah): 2,5 m/s2lubmniej
Niepewność(K):1,5m/s2
WSKAZÓWKA:Deklarowanawartośćpoziomu
drgańzostałazmierzonazgodniezestandardową
metodątestowąimożnająwykorzystaćdoporówny-
wanianarzędzi.
WSKAZÓWKA:Deklarowanąwartośćpoziomu
drgańmożnatakżewykorzystaćwewstępnejocenie
narażenia.
OSTRZEŻENIE: Drgania wytwarzane pod-
czas rzeczywistego użytkowania elektronarzędzia
mogą się różnić od wartości deklarowanej w
zależności od sposobu użytkowania narzędzia,
a w szczególności od rodzaju obrabianego
elementu.
OSTRZEŻENIE: W oparciu o szacowane
narażenie w rzeczywistych warunkach użytkowa-
nia należy określić środki bezpieczeństwa w celu
zapewnienia ochrony operatora (uwzględniając
wszystkie elementy cyklu działania, tj. czas, kiedy
narzędzie jest wyłączone i kiedy pracuje na biegu
jałowym, a także czas, kiedy jest włączone).
Deklaracje zgodności
Dotyczy tylko krajów europejskich
DeklaracjezgodnościsądołączonejakozałącznikAdo
niniejszejinstrukcjiobsługi.
OSTRZEŻENIA
DOTYCZĄCE
BEZPIECZEŃSTWA
Ogólne zasady bezpiecznej
eksploatacji elektronarzędzi
OSTRZEŻENIE Należy zapoznać się z wszyst-
kimi ostrzeżeniami dotyczącymi bezpieczeństwa,
instrukcjami, ilustracjami i danymi technicz-
nymi dołączonymi do tego elektronarzędzia.
Niezastosowaniesiędowszystkichpodanychponiżej
instrukcjimożeprowadzićdoporażeniaprądemelek-
trycznym,pożarui/lubpoważnychobrażeńciała.
Wszystkie ostrzeżenia i instruk-
cje należy zachować do wykorzy-
stania w przyszłości.
Pojęcie„elektronarzędzie”,występującewwymienio-
nychtuostrzeżeniach,odnosisiędoelektronarzędzia
zasilanegozsiecielektrycznej(zprzewodemzasilają-
cym)lubdoelektronarzędziaakumulatorowego(bez
przewoduzasilającego).
Ostrzeżenia dotyczące
bezpieczeństwa dla sekatora
ogrodniczego
1. Nie należy używać sekatora ogrodniczego przy
złej pogodzie, w szczególności jeśli istnieje
ryzyko wyładowań atmosferycznych.Dzięki
temuzmniejszysięryzykoporażeniapiorunem.
2. Nie należy zbliżać przewodów zasilających
ani innych przewodów do obszaru cięcia.
Przewodyzasilającelubinneprzewodymogą
byćukryteizostaćprzypadkowoprzecięteprzez
ostrze.
3. Ponieważ ostrze może zetknąć się z ukrytymi
przewodami elektrycznymi, sekator ogrod-
niczy należy trzymać tylko za izolowane
uchwyty.Zetknięcieostrzyzprzewodemelek-
trycznymznajdującymsiępodnapięciemspowo-
duje,żeodsłonięteelementymetalowesekatora
ogrodniczegorównieżznajdąsiępodnapięciem,
stwarzającryzykoporażeniaoperatoraprądem
elektrycznym.
4. Nie wolno zbliżać żadnych części ciała do
ostrza. Ciętego materiału nie wolno usuwać
ani przytrzymywać, kiedy ostrza są w ruchu.
5. Podczas usuwania zakleszczonego materiału
lub serwisowania sekatora ogrodniczego
należy upewnić się, że przełącznik zasilania
jest wyłączony, a akumulator został wyjęty
lub odłączony. Nieoczekiwane uruchomienie
sekatora ogrodniczego podczas usuwania zak-
leszczonegomateriałulubserwisowaniamoże
doprowadzićdopoważnychobrażeńciała.

17 POLSKI
6. Sekator ogrodniczy należy przenosić po
zatrzymaniu ostrza, trzymając go za uchwyt
i zachowując ostrożność, aby nie nacisnąć
przełącznika zasilania.Prawidłoweprzenoszenie
sekatoraogrodniczegozmniejszyryzykoprzypad-
kowegouruchomieniaiobrażeńciałaspowodowa-
nych przez ostrza.
7. Przed uruchomieniem narzędzia należy spraw-
dzić, czy w żywopłocie lub krzewach nie ma
elementów takich jak ogrodzenia z drutu lub
niewidoczne przewody elektryczne.
8. Narzędzie należy trzymać pewnie podczas
pracy.
9. Operator używający narzędzia powinien znaj-
dować się na poziomie podłoża. Nie można
używać narzędzia na drabinie lub innej niesta-
bilnej podporze.
Dodatkowe zalecenia dotyczące
bezpieczeństwa
1. Używać środków ochrony osobistej. Zawsze
nosić okulary ochronne.Odpowiednieśrodki
ochrony,takiejakmaskaprzeciwpyłowa,
ochronneobuwieantypoślizgowe,kaskczy
ochronnikisłuchu,dostosowanedopanujących
warunków,zmniejszająryzykoobrażeń.
2. Narzędzie służy do przycinania gałęzi. Nie
używaćnarzędziadozadańniezgodnychzjego
przeznaczeniem.
3. Narzędzie nie może być użytkowane przez
dzieci, osoby, które nie przeczytały niniejszej
instrukcji, osoby niebędące w pełni władz
zycznych, poznawczych lub umysłowych ani
niemające odpowiedniej wiedzy i doświadcze-
nia. Lokalne przepisy mogą ograniczać wiek
operatora.
4. Należy pilnować, aby dzieci nie bawiły się
urządzeniem.
5. Nie wolno użytkować narzędzia, gdy w pobliżu
znajdują się inne osoby, zwłaszcza dzieci, oraz
zwierzęta.
6. Nie należy się nadmiernie wychylać i zawsze
pamiętać o utrzymywaniu równowagi. Podczas
używanianarzędzianależychodzić,aniebiegać,
atakżezadbaćoodpowiednieoparciedlanógna
pochyłościach.
7. Nie dotykać ruchomych niebezpiecznych czę-
ści narzędzia przed odłączeniem go od zasila-
nia sieciowego i/lub wyjęciem akumulatora.
8. Podczas używania narzędzia używać odpo-
wiedniego obuwia oraz spodni z długimi
nogawkami.
9. Odłączyć zasilanie i/lub wyjąć akumulator z
narzędzia w następujących przypadkach:
• poodłożeniunarzędziaprzezużytkownika;
• przedusunięciemblokady;
• przed sprawdzaniem, czyszczeniem lub
konserwacjąnarzędzia;
• po uderzeniu w przedmiot w celu sprawdze-
nianarzędziapodkątemuszkodzeń;
• gdynarzędziezaczynadrgaćwnietypowy
sposób—należynatychmiastsprawdzić
przyczynę.
10. Nigdy nie użytkować narzędzia z uszkodzo-
nymi osłonami i pokrywami, bez zabezpieczeń
ani z uszkodzonym lub zużytym przewodem.
11. Unikać korzystania z narzędzia przy złej pogo-
dzie, w szczególności podczas burzy.
12. Nie używać narzędzia ani nie ładować akumu-
latora podczas deszczu.
13. Nie pozostawiać narzędzia na deszczu ani w
wilgotnym miejscu.
14. Uważać, aby pomiędzy ostrza sekatora nie
dostały się niepożądane przedmioty. W przy-
padkuzacięciaostrzysekatoraprzezniepożądany
przedmiotnatychmiastwyłączyćnarzędziei
odłączyćodniegoakumulator.Następnieusu-
nąćprzedmiotznajdującysięmiędzyostrzami
sekatora.
15. Nigdy nie należy trzymać przycinanej gałęzi
wolną ręką.Niewolnozbliżaćwolnejrękido
strefycięcia.Niedotykaćostrzysekatora,ponie-
ważsąonebardzoostreimogądoprowadzićdo
skaleczenia.
16. Nie używać siły w celu wykonania cięcia.
Grozitopoślizgnięciem,odniesieniemobrażeń
lubprzypadkowymprzecięciemniepożądanych
przedmiotów.
17. Uważać, aby nie przeciąć przewodów elek-
trycznych, które mogą być niewidoczne.
18. Zawsze dokładnie sprawdzać stan ostrzy seka-
tora przed jego uruchomieniem.
19. Posługiwać się ostrzami z najwyższą ostrożno-
ścią, aby uniknąć skaleczeń lub obrażeń.
20. Po każdym użyciu oraz przed przystąpieniem
do kontroli lub konserwacji narzędzia należy
odłączyć od niego akumulator.
21. Nieużywane narzędzie przechowywać w
kaburze.
Użytkowanie narzędzi akumulatorowych i dbałość
o nie
1. Unikać niebezpiecznych warunków pracy.
Nie wolno używać narzędzia w otoczeniu wil-
gotnym, mokrym ani narażać go na działanie
deszczu. Woda, która dostanie się do wnętrza
narzędzia, zwiększa ryzyko porażenia prądem
elektrycznym.
2. Akumulator należy ładować wyłącznie przy
użyciu określonej przez producenta łado-
warki.Ładowarkaprzeznaczonadojednegotypu
akumulatoramożestwarzaćzagrożeniepoża-
rem,gdybędzieużywanadoładowaniainnego
akumulatora.
3. Do zasilania elektronarzędzi używać tylko
specjalnie do tego celu przeznaczonych aku-
mulatorów.Używanieinnychakumulatorówmoże
stwarzaćryzykowystąpieniaobrażeńciałalub
pożaru.
4. Gdy akumulator nie jest używany, należy
zabezpieczyć go przed kontaktem z metalo-
wymi przedmiotami, typu spinacze, monety,
klucze, gwoździe, wkręty lub innymi metalo-
wymi drobiazgami, które mogą powodować
zwarcie styków akumulatora.Zwarciestyków
akumulatoragrozipoparzeniamilubpożarem.

18 POLSKI
5. W niewłaściwych warunkach eksploatacji
może dojść do wycieku elektrolitu z akumu-
latora. Nie należy go dotykać. W razie przy-
padkowego kontaktu należy przemyć skażoną
skórę wodą. W przypadku dostania się elek-
trolitu do oczu należy dodatkowo skorzystać
z porady lekarza.Elektrolitzakumulatoramoże
powodowaćpodrażnienialubpoparzenia.
6. Nie wolno wyrzucać akumulatorów do ognia.
Ogniwo może eksplodować. Należy zapoznać
się z obowiązującymi lokalnie przepisami,
które określają specjalne wytyczne dotyczące
pozbywania się odpadów.
7. Nie wolno otwierać ani niszczyć akumula-
torów. Uwolniony elektrolit jest substancją
żrącą, która może spowodować uszkodzenie
oczu lub skóry. Może być on trujący w razie
połknięcia.
8. Akumulatora nie należy ładować w deszczu ani
w wilgotnym otoczeniu.
Serwis
1. Elektronarzędzie powinno być serwisowane
przez wykwalikowany personel, z użyciem
wyłącznie oryginalnych części zamiennych.
Zapewnitozachowaniebezpieczeństwapracyz
elektronarzędziem.
2. Przestrzegać instrukcji smarowania i wymiany
akcesoriów.
3. Utrzymywać rękojeści suche, czyste i nieza-
brudzone olejem ani smarem.
OSTRZEŻENIE: NIE WOLNO pozwolić,
aby wygoda lub rutyna (nabyta w wyniku wielo-
krotnego używania urządzenia) zastąpiły ścisłe
przestrzeganie zasad bezpieczeństwa obsługi.
NIEWŁAŚCIWE UŻYTKOWANIE narzędzia lub
niestosowanie się do zasad bezpieczeństwa
podanych w niniejszej instrukcji obsługi może
prowadzić do poważnych obrażeń ciała.
ZACHOWAĆ NINIEJSZĄ
INSTRUKCJĘ.
OSTRZEŻENIE: NIE WOLNO pozwolić,
aby wygoda lub rutyna (nabyta w wyniku wielo-
krotnego używania urządzenia) zastąpiły ścisłe
przestrzeganie zasad bezpieczeństwa obsługi.
NIEWŁAŚCIWE UŻYTKOWANIE narzędzia lub
niestosowanie się do zasad bezpieczeństwa
podanych w niniejszej instrukcji obsługi może
prowadzić do poważnych obrażeń ciała.
Ważne zasady bezpieczeństwa
dotyczące akumulatora
1. Przed użyciem akumulatora zapoznać się ze
wszystkimi instrukcjami i znakami ostrze-
gawczymi na (1) ładowarce, (2) akumulatorze
i (3) produkcie, w którym będzie używany
akumulator.
2. Nie rozmontowywać ani modykować akumu-
latora.Możetospowodowaćpożar,przegrzanie
lub wybuch.
3. Jeśli czas działania uległ znacznemu skróce-
niu, należy natychmiast przerwać pracę. Może
bowiem dojść do przegrzania, ewentualnych
poparzeń, a nawet eksplozji.
4. W przypadku przedostania się elektrolitu do
oczu, przemyć je czystą wodą i niezwłocznie
uzyskać pomoc lekarską. Może on bowiem
spowodować utratę wzroku.
5. Nie doprowadzać do zwarcia akumulatora:
(1) Nie dotykać styków materiałami przewo-
dzącymi prąd.
(2) Unikać przechowywania akumulatora w
pojemniku z metalowymi przedmiotami,
takimi jak gwoździe, monety itp.
(3) Chronić akumulator przed deszczem lub
wodą.
Zwarcie prowadzi do przepływu prądu elek-
trycznego o dużym natężeniu i przegrzania
akumulatora, co w konsekwencji może grozić
poparzeniami a nawet awarią urządzenia.
6. Narzędzia i akumulatora nie wolno przechowy-
wać ani używać w miejscach, w których tempe-
ratura osiąga bądź przekracza 50°C (122°F).
7. Akumulatorów nie wolno spalać, również tych
poważnie uszkodzonych lub całkowicie zuży-
tych. Akumulator może eksplodować w ogniu.
8. Nie należy przecinać ani zgniatać akumulatora,
wbijać w niego gwoździ, rzucać nim, upusz-
czać, ani uderzać akumulatorem o twarde
obiekty.Takiedziałaniemożespowodowaćpożar,
przegrzanie lub wybuch.
9. Nie wolno używać uszkodzonego akumulatora.
10. Stanowiące wyposażenie akumulatory lito-
wo-jonowe podlegają przepisom dotyczącym
produktów niebezpiecznych.
Napotrzebytransportukomercyjnego,np.świad-
czonegoprzezrmytrzecieczyspedycyjne,
należyprzestrzegaćspecjalnychwymagańw
zakresie pakowania i oznaczania etykietami.
Przygotowanieproduktudowysyłkiwymaga
skonsultowaniasięzespecjalistąds.materiałów
niebezpiecznych.Należytakżeprzestrzegać
przepisówkrajowych,któremogąbyćbardziej
szczegółowe.
Zakleićtaśmąlubzaślepićotwartestykiakumula-
toraorazzabezpieczyćgo,abyniemógłsięprze-
suwaćwopakowaniu.
11. Jeśli zajdzie konieczność utylizacji akumula-
tora, należy wyjąć go z narzędzia i przekazać
w bezpieczne miejsce. Postępować zgodnie z
przepisami lokalnymi dotyczącymi utylizacji
akumulatorów.
12. Używać akumulatorów tylko z produktami
określonymi przez rmę Makita. Zastosowanie
akumulatorówwniezgodnychproduktachmoże
spowodowaćpożar,przegrzanie,wybuchlub
wyciek elektrolitu.
13. Jeśli narzędzie nie będzie używane przez dłuż-
szy czas, należy wyjąć z niego akumulator.
14. Przed użyciem akumulatora i po jego użyciu
akumulator może pozostawać nagrzany, co
może spowodować poparzenia lub poparzenia
w niskiej temperaturze. Z gorącym akumulato-
rem należy obchodzić się ostrożnie.

19 POLSKI
15. Nie należy dotykać styku narzędzia bezpośred-
nio po jego użyciu, ponieważ może on być na
tyle gorący, że spowoduje oparzenia.
16. Nie należy dopuszczać, aby wióry, kurz lub
brud gromadziły się na stykach, w otworach i
rowkach akumulatora.Możetodoprowadzićdo
przegrzania,pożaru,wybuchulubuszkodzenia
narzędzialubakumulatora,comożespowodować
oparzenialubobrażeniaciała.
17. Jeśli narzędzie nie jest przeznaczone do
użytku w pobliżu linii wysokiego napięcia,
nie należy korzystać z akumulatora w ich
sąsiedztwie.Możetospowodowaćnieprawidło-
wościwdziałaniulubuszkodzenienarzędzialub
akumulatora.
18. Przechowywać akumulator w miejscu niedo-
stępnym dla dzieci.
ZACHOWAĆ NINIEJSZE
INSTRUKCJE.
PRZESTROGA: Używać wyłącznie oryginal-
nych akumulatorów rmy Makita.Używanienie-
oryginalnychakumulatorówrminnychniżMakitalub
akumulatorów,którezostałyzmodykowane,może
spowodowaćwybuchakumulatoraipożar,obrażenia
ciałaorazzniszczeniemienia.Stanowitorównież
naruszeniewarunkówgwarancjirmyMakitadoty-
czącychnarzędziaiładowarki.
Wskazówki dotyczące zacho-
wania maksymalnej trwałości
akumulatora
1. Akumulator należy naładować zanim zostanie
do końca rozładowany. Po zauważeniu spadek
mocy narzędzia należy przerwać pracę i nała-
dować akumulator.
2. Nie wolno ładować powtórnie w pełni nałado-
wanego akumulatora. Przeładowanie akumula-
tora skraca jego trwałość.
3. Akumulator należy ładować w temperaturze
pokojowej w przedziale 10–40°C (50–104°F). W
przypadku gorącego akumulatora przed przy-
stąpieniem do ładowania należy poczekać, aż
ostygnie.
4. Jeśli akumulator nie jest używany, należy go
wyjąć z narzędzia lub ładowarki.
OPIS CZĘŚCI
►Rys.1
1Ostrze sekatora 2Lampkawskaźnika
3Przyciskregulacjikąta 4Głównyprzycisk
zasilania
5Akumulator 6Spustprzełącznika
OPIS DZIAŁANIA
PRZESTROGA: Przed przystąpieniem do regu-
lacji lub przeglądu narzędzia upewnić się, że jest
ono wyłączone, a akumulator został wyjęty.
Wkładanie i wyjmowanie akumulatora
PRZESTROGA: Przed włożeniem lub wyjęciem
akumulatora należy zawsze wyłączyć narzędzie.
PRZESTROGA: Podczas wkładania lub wyjmo-
wania akumulatora należy mocno trzymać narzę-
dzie i akumulator.Wprzeciwnymraziemogąsięone
wyślizgnąćzrąk,powodującuszkodzenienarzędzia
lubakumulatoraiobrażeniaciała.
►Rys.2:
1.Czerwonywskaźnik2. Przycisk 3. Akumulator
Abywyjąćakumulator,przesuńprzyciskznajdującysię
wprzedniejjegoczęściiwysuńakumulator.
Abywłożyćakumulator,wyrównaćwystępnaakumulato-
rzezrowkiemwobudowieiwsunąćgonaswojemiejsce.
Akumulatornależywsunąćdooporu,ażsięzatrzaśniena
miejscu,cojestsygnalizowanedelikatnymkliknięciem.
Jeślijestwidocznyczerwonywskaźnikpokazanyna
rysunku,akumulatorniezostałcałkowiciezablokowany.
PRZESTROGA: Akumulator należy włożyć
do końca, tak aby czerwony wskaźnik nie był
widoczny.Wprzeciwnymraziemożeprzypadkowo
wypaśćznarzędzia,powodującobrażeniaoperatora
lubosóbpostronnych.
PRZESTROGA: Nie wkładać akumulatora na
siłę.Jeśliakumulatorniedajesięswobodniewsunąć,
oznaczato,żezostałwłożonynieprawidłowo.
Wskazanie stanu naładowania
akumulatora
Tylko w przypadku akumulatorów ze wskaźnikiem
►Rys.3: 1.Lampkiwskaźnika2. Przycisk kontrolny
Nacisnąćprzyciskkontrolnynaakumulatorzewcelu
wyświetleniastanunaładowaniaakumulatora.Lampki
wskaźnikazaświecąsięprzezkilkasekund.
Lampki wskaźnika Poziom naładowa-
nia akumulatora
Świeci się Wył.
75–100%
50–75%
25–50%
0–25%
WSKAZÓWKA:Zależnieodwarunkówużytkowania
itemperaturyotoczenia,wskazywanypoziommoże
nieznaczniesięróżnićodrzeczywistegostanunała-
dowania akumulatora.

20 POLSKI
Układ zabezpieczenia narzędzia/akumulatora
Narzędziejestwyposażonewukładzabezpieczenia
narzędzia/akumulatora.Układautomatycznieodcina
zasilaniesilnikawceluwydłużeniatrwałościnarzędzia
iakumulatora.Narzędziezostanieautomatycznie
zatrzymanepodczaspracywnastępującychsytuacjach
związanychznarzędziemlubakumulatorem:
Przeciążenie:
Narzędziepracujewsposób,którypowodujepobór
nadmierniewysokiegoprądu.Wtakiejsytuacjinależy
wyłączyćnarzędzieizaprzestaćwykonywaniaczynno-
ścipowodującejjegoprzeciążenie.Następnienależy
włączyćnarzędziewceluponownegouruchomienia.
Jeślinarzędzienieuruchomisię,oznaczato,żeakumulator
jestprzegrzany.Wtakiejsytuacjiprzedponownymurucho-
mieniemnarzędzianależyodczekać,ażakumulatorostygnie.
Niskie napięcie akumulatora:
Stannaładowaniaakumulatorajestzbytniski,abynarzę-
dziemogłopracować.Wprzypadkuwłączenianarzędzia
silnikuruchomisięponownieipochwilisięzatrzyma.W
takiejsytuacjinależywyjąćakumulatorigonaładować.
Lampki wskaźnika
►Rys.4: 1.Lampkawskaźnika(zielona)2. Lampka
wskaźnika(czerwona)
Znaczenielampekwskaźnikajestnastępujące:
(Włączona: Wyłączona: Miga: )
Zielona Czerwona
• Zielonalampkaświecisię:narzędziejestwłą-
czone i gotowe do pracy.
Zielona Czerwona
• Zielonalampkamiga:narzędziejestwłączonei
znajdujesięwtrybieczuwania.Abypowrócićdo
trybunormalnego,należydwukrotniepociągnąć
spustprzełącznika.
Zielona Czerwona
• Czerwonalampkamiga:stannaładowaniaaku-
mulatorajestniski.
Zielona Czerwona
• Zielonaiczerwonalampkaświecąsię:doszło
doprzegrzanianarzędzialubakumulatora,nad-
miernegoobciążenianarzędzialubakumulator
wyczerpałsię.
Zielona Czerwona
• Czerwonalampkaświecisię:pojawiłasięniepra-
widłowość.Należywyłączyćnarzędzieiwłączyć
jeponownie.Jeśliniespowodujetousunięcia
nieprawidłowości,należyzlecićnaprawęwlokal-
nym autoryzowanym punkcie serwisowym.
Główny przycisk zasilania
OSTRZEŻENIE: Zawsze należy wyłączać
narzędzie, gdy nie jest używane.
Abywłączyćnarzędzie,należynacisnąćiprzytrzymać
głównyprzyciskzasilania.Narzędzieuruchomisięw
trybieczuwania,azielonalampkawskaźnikabędzie
migaćnazielono.
Abywyłączyćnarzędzie,należypociągnąćiprzytrzy-
maćspustprzełącznikaprzezponad3sekundy,aby
zamknąćostrzasekatora,anastępniezwolnićspust
przełącznikainacisnąćgłównyprzyciskzasilania.
►Rys.5: 1.Głównyprzyciskzasilania2. Spust
przełącznika
WSKAZÓWKA:Narzędzieprzechodziwtrybczuwa-
nia,jeśliużytkownikniepociągniespustuprzełącz-
nikaprzezokreślonyczaspowłączeniunarzędzia.
Abypowrócićdotrybunormalnego,gdymigazielona
lampkawskaźnika,należydwukrotniepociągnąć
spustprzełącznika.
WSKAZÓWKA:Tonarzędziejestwyposażonew
funkcjęautomatycznegowyłączania.Abyniedopu-
ścićdoprzypadkowegouruchomienia,narzędzie
automatyczniewyłączasię,jeśliużytkowniknie
pociągniespustuprzełącznikaprzezokreślonyczas
powłączeniunarzędzia.
Działanie przełącznika
PRZESTROGA: Przed włożeniem akumulatora
do narzędzia należy zawsze sprawdzić, czy spust
przełącznika działa prawidłowo i czy powraca do
położenia wyłączenia po jego zwolnieniu.
Włączyćnarzędzie,anastępniedwukrotniepociągnąć
spustprzełącznika,abyotworzyćgórneostrzeseka-
tora.Zielonalampkawskaźnikazaświecisięnazielono.
Popociągnięciuspustuprzełącznikagórneostrze
sekatorazamykasię,natomiastpozwolnieniuspustu
przełącznika—otwiera.
Zmiana kąta ostrza sekatora
Kątotwarciaostrzysekatoramożnaustawićwdwóch
poziomach.Istniejemożliwośćustawieniapełnego
otwarcialubotwarciadopołowyzależnieodgałęzi,
jakiemająbyćcięte.
►Rys.6: 1.Pełneotwarcie2.Otwarciedopołowy
Abyzmienićkątotwarcia,należywykonaćnastępujące
czynności.
1. Włączyćnarzędzie,anastępniedwukrotniepocią-
gnąćspustprzełącznika,abyotworzyćostrzasekatora.
2. Trzymającpociągniętydokońcaspustprzełącz-
nika,nacisnąćprzyciskregulacjikątaiprzytrzymać
domomentudwukrotnegomignięciazielonejlampki
wskaźnika.
Strona się ładuje...
Strona się ładuje...
Strona się ładuje...
Strona się ładuje...
Strona się ładuje...
Strona się ładuje...
Strona się ładuje...
Strona się ładuje...
Strona się ładuje...
Strona się ładuje...
Strona się ładuje...
Strona się ładuje...
Strona się ładuje...
Strona się ładuje...
Strona się ładuje...
Strona się ładuje...
Strona się ładuje...
Strona się ładuje...
Strona się ładuje...
Strona się ładuje...
Strona się ładuje...
Strona się ładuje...
Strona się ładuje...
Strona się ładuje...
Strona się ładuje...
Strona się ładuje...
Strona się ładuje...
Strona się ładuje...
Strona się ładuje...
Strona się ładuje...
Strona się ładuje...
Strona się ładuje...
Strona się ładuje...
Strona się ładuje...
Strona się ładuje...
Strona się ładuje...
Strona się ładuje...
Strona się ładuje...
Strona się ładuje...
Strona się ładuje...
Strona się ładuje...
Strona się ładuje...
Strona się ładuje...
Strona się ładuje...
Strona się ładuje...
Strona się ładuje...
Strona się ładuje...
Strona się ładuje...
Strona się ładuje...
Strona się ładuje...
Strona się ładuje...
Strona się ładuje...
Strona się ładuje...
Strona się ładuje...
Strona się ładuje...
Strona się ładuje...
Strona się ładuje...
Strona się ładuje...
Strona się ładuje...
Strona się ładuje...
-
 1
1
-
 2
2
-
 3
3
-
 4
4
-
 5
5
-
 6
6
-
 7
7
-
 8
8
-
 9
9
-
 10
10
-
 11
11
-
 12
12
-
 13
13
-
 14
14
-
 15
15
-
 16
16
-
 17
17
-
 18
18
-
 19
19
-
 20
20
-
 21
21
-
 22
22
-
 23
23
-
 24
24
-
 25
25
-
 26
26
-
 27
27
-
 28
28
-
 29
29
-
 30
30
-
 31
31
-
 32
32
-
 33
33
-
 34
34
-
 35
35
-
 36
36
-
 37
37
-
 38
38
-
 39
39
-
 40
40
-
 41
41
-
 42
42
-
 43
43
-
 44
44
-
 45
45
-
 46
46
-
 47
47
-
 48
48
-
 49
49
-
 50
50
-
 51
51
-
 52
52
-
 53
53
-
 54
54
-
 55
55
-
 56
56
-
 57
57
-
 58
58
-
 59
59
-
 60
60
-
 61
61
-
 62
62
-
 63
63
-
 64
64
-
 65
65
-
 66
66
-
 67
67
-
 68
68
-
 69
69
-
 70
70
-
 71
71
-
 72
72
-
 73
73
-
 74
74
-
 75
75
-
 76
76
-
 77
77
-
 78
78
-
 79
79
-
 80
80


Makita UP100D Instrukcja obsługi
- Kategoria
- Elektronarzędzia
- Typ
- Instrukcja obsługi
w innych językach
- Deutsch: Makita UP100D Benutzerhandbuch
- slovenčina: Makita UP100D Používateľská príručka
- română: Makita UP100D Manual de utilizare