


V 1.31
English ........................................................................................................................ 2
Polski ....................................................................................................................... 14
Magyar .................................................................................................................... 26
Slovenščina .............................................................................................................. 38
Česky ....................................................................................................................... 49
Slovenčina ................................................................................................................ 61
Deutsch ..................................................................................................................... 72

LIVARNO LUX LLES B2
2 - English
Content
Introduction ................................................................................................................ 3
Intended use ............................................................................................................... 3
Supplied items ............................................................................................................ 3
Technical data ............................................................................................................ 4
Safety instructions ...................................................................................................... 5
Copyright ................................................................................................................... 6
Prior to use ................................................................................................................. 6
The correct installation location ...................................................................................................................... 6
Required tools .................................................................................................................................................. 7
Prior to installation ........................................................................................................................................... 7
Installation ........................................................................................................................................................ 8
First use ...................................................................................................................... 9
Aligning the motion sensor ............................................................................................................................. 9
Setting light time (TIME) .................................................................................................................................. 9
Adjusting sensor sensitivity (SENS) ................................................................................................................ 9
Adjusting light sensitivity (LUX) ....................................................................................................................... 9
Cleaning / maintenance ............................................................................................ 10
Troubleshooting ....................................................................................................... 10
Environmental and disposal information .................................................................. 11
Conformity ............................................................................................................... 11
Warranty and servicing advice ................................................................................. 12

LIVARNO LUX LLES B2
English - 3
Introduction
Thank you for purchasing a LIVARNO LUX product.
Intended use
This energy-saving outdoor spotlight is not designed for commercial application. It is suitable for indoor
and outdoor use. The 23 watt energy-saving light bulb (10) provides good illumination. The motion sensor
detects movements and the energy-saving outdoor spotlight automatically switches itself on and off as a
result. This device meets all relevant norms and standards in conjunction with CE conformity. In the event
of any modification to the energy-saving outdoor spotlight that was not approved by the manufacturer,
compliance with these standards is no longer guaranteed.
Supplied items
Energy-saving outdoor spotlight LLES B2
Installation materials (2 screws and 2 plugs)
Operating instructions and safety instructions
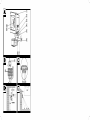
These operating instructions have a fold-out cover. The energy-saving outdoor spotlight is illustrated with
numbers on the inside cover. The numbers indicate the following:
1 Screw (front pane)
2 Screw (wall bracket)
3 Cable junction box
4 Cable bushing
5 Screw connection (cable bushing)
6 Wall bracket
7 Locking screw
8 Motion sensor
9 Front pane
10 Energy-saving light bulb (not dimmable)
11 Cable (power)
12 Screw terminal
13 LUX control
14 SENS control
15 TIME control

LIVARNO LUX LLES B2
4 - English
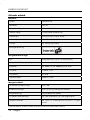
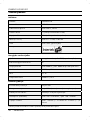
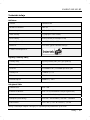
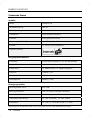
Technical data
Spotlight:
Brand: LIVARNO LUX
Model designation: LLES B2
Operating voltage: 220 – 240V
~
, 50Hz
Protection class: I (with earth conductor)
Protection rating: IP44 (splashing water protection category)
Dimensions (W x H x D): approx. 217 x 138.5 x 103 mm
Weight: approx. 1,035g (without light bulb)
Safety tested by:
Energy-saving light bulb:
Light bulb: Energy-saving light bulb E27 (only spiral bulb)
Energy efficiency class: A
Service life: approx. 8000 hours / approx. 8000 switching cycles
Luminous flux: 1300lm +/-5%
Power: 23 watts
Colour temperature: 6400K +/-10%
Motion sensor:
Sensor detection angle: 180° max.
Detection range: max. 12m (can be set via control dial)
Light sensitivity: can be set via control dial
Mechanical swivelling: approx. 150° horizontal / approx. 180° vertical
Light time: approx. 1 min +/- 15 sec to 15 min +/- 1.5 min
The technical data and design may be changed without notification.

LIVARNO LUX LLES B2
English - 5
Safety instructions
Before using this device for the first time, please read the following instructions carefully and take note of
the safety warnings, even if you are familiar with the use of electronic devices. Store these operating
instructions in a safe place for future reference. If you sell or pass on the device to someone else, be sure
to always include these operating instructions as they are an integral part of the device.
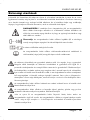
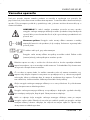
WARNING! This symbol indicates important information for safe operation of the
energy-saving outdoor spotlight and the safety of the user. Disregarding this
information can lead to material damage and/or health hazards and even death.
Fire hazard: Attach the energy-saving outdoor spotlight at a distance of at least
0.5m from illuminated materials. Excessive heat generation can cause a fire.
Any cracked protective cover must be replaced.
The energy-saving outdoor spotlight has an earth conductor. The earth conductor
(yellow/green) must be connected to the indicated terminal.
Electrical devices do not belong in the hands of children. Never allow children to use electrical
devices unsupervised. Children may not recognise potential risks. Always keep plastic packaging
away from children. It poses a suffocation risk.
If smoke is produced, or there are any unusual sounds or smells, turn the device off immediately.
In such cases, the device should not be used until it has been inspected by authorised service
personnel. Never inhale smoke from a potential device fire. If you have inhaled smoke, however,
consult a doctor. The inhalation of smoke can be harmful.
The housing of the energy-saving outdoor spotlight must not be damaged. There is a risk of an
electric shock if the housing is damaged.
Do not use the energy-saving outdoor spotlight in potentially explosive environments which
contain flammable gases, vapours or dust. It poses a risk of explosion.
Never open the housing of the energy-saving outdoor spotlight except to change the energy-
saving bulb. The circuit must be disconnected during all work on the energy-saving outdoor
spotlight, even when changing the light bulb! There is a risk of an electric shock if the housing is
open.

LIVARNO LUX LLES B2
6 - English
You must not hang any objects on the energy-saving outdoor spotlight. The housing is not
designed to carry loads. Otherwise, the energy-saving outdoor spotlight could be damaged.
Never use such optical instruments as a magnifying glass to look directly into the light beam. This
can lead to eye injuries. In the event of a suspected eye injury, consult a doctor immediately.
Copyright
All information contained in these instructions is subject to copyright and is provided for information
purposes only. It is only permitted to copy or duplicate data and information with the express and written
consent of the author. This also includes commercial use of the content and data. The text and illustrations
are based on the state of the art at the time of printing. Subject to change without notice.
Prior to use
Remove the energy-saving outdoor spotlight and the installation materials from the packaging.
Check the energy-saving outdoor spotlight for signs of damage. If damaged, the energy-saving outdoor
spotlight must not be used.
Only use energy-saving spiral light bulbs with E27 base and a maximum power of 23 watts!
Please note:
The supplied energy-saving light bulb is not dimmable. Do not use the energy-saving outdoor
spotlight with the supplied light bulb in circuits with dimmers.
The energy-saving light bulb (10) is stored within the spotlight so that it can be transported safely. Loosen
the 2 screws (1) with a Phillips screwdriver and carefully tilt the front pane (9) upwards. Remove the
packaging with the energy-saving light bulb (10). Open the packaging, remove the energy-saving light
bulb (10) and screw it into the socket in a clockwise direction. When doing so, handle the energy-saving
light bulb (10) by its base and not by its glass body. The bulb should only ever be handled with a cloth.
Close the front pane (9) downwards now and tighten the 2 screws (1) again.
The correct installation location
Select the installation location carefully and prepare well for the installation.
Place all individual parts, required tools and installation material so they are well arranged and ready
to hand.
The energy-saving outdoor spotlight may be mounted only on stable substrates, for example,
brickwork.

LIVARNO LUX LLES B2
English - 7
Do not install the energy-saving outdoor spotlight above a heat source or in the immediate vicinity of
other light sources. When selecting the installation location, also pay attention to the illustration [D] on
the inside cover.
Select the installation location so that the energy-saving outdoor spotlight is protected against wind,
rain and dirt.
Find out in advance which installation material is suitable for the installation location you selected.
Suitable installation material for concrete is included with the energy-saving outdoor spotlight.
Required tools
The following tools are not supplied. This list can be used for orientation. The exact nature of the required
tools depends on the individual on-site conditions.
Ladder
Voltage tester
Spirit level, folding ruler, pencil
Drill with drill bits
Phillips screwdriver, flat-bladed screwdriver
Spanner, combination pliers, side cutter
Prior to installation
The installation must be performed only by an authorised electrician!
The circuit must be disconnected during the installation!
When drilling the holes, make sure that no cables or pipes in the wall are damaged.
Before installation, familiarise yourself with the individual parts of the energy-saving outdoor spotlight
as well as the text and illustrations of these operating instructions and comply with them.
Make sure that the cable to which the energy-saving outdoor spotlight is to be connected is not live.
To ensure that this is the case, remove the appropriate circuit fuse from your fuse box or switch the
fuse to the "0" position.
Make sure that the cable is not live using a voltage tester!

LIVARNO LUX LLES B2
8 - English
Installation
Detach the wall bracket (6) from the energy-saving outdoor spotlight by removing the 2 screws (2)
with a Phillips screwdriver. Note that the wall bracket (6) is attached on both sides with a screw (2), a
spring washer and 2 other washers. Keep these parts safe until you are ready to assemble them.
Use the wall bracket (6) as a template to mark the two holes.
Then drill the two holes and attach the wall bracket (6) using the supplied wall plugs and screws or,
depending on the installation location, using other suitable plugs and screws.
Open the cable junction box (3) by loosening the four screws using a Phillips screwdriver and
removing the cover.
Loosen the 2 screws on the strain relief within the cable junction box (3) with a Phillips screwdriver
only to the extent that the cable (11) can be subsequently fed through it.
Loosen the screw connection (5) of the cable bushing (4), but do not completely unscrew it.
Remove approx. 5 to 8cm of the sheath of the cable (11).
First, route the cable (11) through the screw connection (5) and the cable bushing (4), and then
through the strain relief in the cable junction box (3). When routing the cable (11) through the cable
bushing (4), an internal rubber seal must be penetrated. A slight resistance may thus be felt.
Fix the cable (11) by tightening the 2 screws on the strain relief within the cable junction box (3). The
end of the cable sheath must be in the strain relief for this purpose. Do not clamp the individual wires!
Then tighten the previously loosened screw connection (5) of the cable bushing (4) in a clockwise
direction. This ensures the sealing of the cable (11).
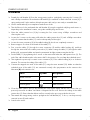
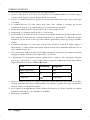
Connect the stripped wire ends of the cable (11) using the screw terminal (12). Make sure that the
individual wires of the cable (11) are connected correctly. Also pay attention in this context to the
illustration [B] on the inside cover.
Wire Symbol Designation
Black or brown L Phase
Blue N Neutral
Yellow/green Earth conductor
Close the cable junction box (3) by screwing the cover again tightly with the four screws that you
previously removed. A rubber seal which is integrated in the cover ensures the sealing of the cable
junction box (3). Ensure that the rubber seal lies correctly in the groove provided in the cover.
Then attach the energy-saving outdoor spotlight to the wall bracket (6). To do so, use the previously
removed screws (2) and washers.
Switch on the circuit.

LIVARNO LUX LLES B2
English - 9
First use
Aligning the motion sensor
Make sure that no movements that should not be detected (for example, on the pavements or
streets) occur in the detection range of the motion sensor (8).
It is best if you set the light sensitivity of the motion sensor (8) during the lighting conditions when
the energy-saving outdoor spotlight is supposed to be active.
Align the motion sensor (8) so that it can capture the desired range as well as possible. The view must
not be obstructed by objects or anything else.
You can align the motion sensor (8) horizontally by turning it.
To align the motion sensor (8) vertically, you must first loosen the locking screw (7). If the motion sensor
(8) is located in the desired position, you must tighten the locking screw (7) again.
Setting light time (TIME)
You use the TIME control (15) at the bottom of the motion sensor (8) to set the light time (approx. 1 min to
15 min). Turn the TIME control (15) clockwise (+ direction) to increase the light time or anti-clockwise (-
direction) to reduce the light time.
Adjusting sensor sensitivity (SENS)
You use the SENS control (14) at the bottom of the motion sensor (8) to adjust the sensor sensitivity. Turn
the SENS control (14) clockwise (+ direction) to increase the sensitivity or anti-clockwise (- direction) to
reduce the sensitivity. The higher the sensitivity, the greater the detection range (12 metres at the most).
Adjusting light sensitivity (LUX)
You use the LUX control (13) at the bottom of the motion sensor (8) to adjust the light sensitivity. Here, you
set the lighting conditions to which the twilight sensor responds and thus the energy-saving outdoor
spotlight is switched on or off.
Turn the LUX control (13) clockwise ( direction) so that the motion sensor (8) responds to brighter
lighting conditions.
Turn the LUX control (13) anti-clockwise ( direction) so that the motion sensor (8) responds to darker
lighting conditions.

LIVARNO LUX LLES B2
10 - English
Cleaning / maintenance
Maintenance
The energy-saving outdoor spotlight does not contain any parts that require maintenance.
Replacing the light bulb
The circuit must be disconnected during all work on the energy-saving outdoor spotlight, even
when changing the light bulb! There is a risk of an electric shock!
Only use energy-saving spiral light bulbs with E27 base and a maximum power of 23 watts!
Loosen the 2 screws (1) with a Phillips screwdriver and carefully tilt the front pane (9) downwards.
Unscrew the old/defective energy-saving light bulb (10) anti-clockwise out of the socket. Then screw a
new energy-saving light bulb of the same design (see "Technical data" section) clockwise into the socket.
When doing so, handle the energy-saving light bulb (10) by its base and not by its glass body. The bulb
should only ever be handled with a cloth. Close the front pane (9) upwards now and tighten the 2 screws
(1) again.
Switch on the circuit again.
Cleaning
The circuit must be disconnected during all work on the energy-saving outdoor spotlight, even
when cleaning it! There is a risk of an electric shock!
Ensure that no liquid can penetrate the housing of the energy-saving outdoor spotlight. There is
a risk of an electric shock.
To clean the energy-saving outdoor spotlight, use a soft, dry cloth and never use any solvent or cleaner
that would corrode the plastic materials. Use a slightly damp cloth for more stubborn dirt.
Troubleshooting
The light does not switch itself on
The motion sensor (8) is not aligned correctly. Correct the alignment.
The energy-saving light bulb (10) is faulty. Replace it.
The electrical connection is faulty. Get an authorised electrician to check the electrical connection.
The light switches on and off quickly
The sensor is disturbed by extraneous light or bright reflective surfaces. Remove the extraneous light
source or the disturbing surfaces.

LIVARNO LUX LLES B2
English - 11
The light does not switch off
Persons or objects are within the detection range of the motion sensor (8). Remove them.
The energy-saving outdoor spotlight moves in the wind, which continually triggers the motion sensor
(8). Attach the energy-saving outdoor spotlight only to a stable installation location.
Environmental and disposal information
When the crossed out wheelie bin symbol appears on a product, this indicates that the
product is subject to the European Directive 2012/19/EU. All old electrical and
electronic devices must be separated from normal household waste and disposed of at
designated state facilities. The light bulb must also be disposed of properly.
The device must not be disposed of with the household waste or bulky waste. You can
obtain information regarding collection points or collection times via your local
administration or local disposal services.
The device is operated with a compact fluorescent bulb. This contains complex electronic components and
must not be disposed of in normal household waste. You can obtain information regarding collection
points or collection times via your local administration or local disposal services.
Dispose of the packaging in an environmentally compatible manner. Cardboard can be put out for
municipal paper collections or brought to public collection points for recycling. Films and plastic used for
packaging the device are collected by your local disposal services and disposed of in an environmentally
compatible manner.
Conformity
This device meets the basic requirements and other relevant regulations of the EMC
Directive 2004/108/EC, the Low Voltage Directive 2006/95/EC, the ErP Directive
2009/125/EC and the RoHS Directive 2011/65/EU. The Declaration of
Conformity can be found at the end of these operating instructions.

LIVARNO LUX LLES B2
12 - English
Warranty and servicing advice
Warranty of TARGA GmbH
Dear Customer,
This device is sold with three years warranty from the date of purchase. In the event of product defects,
you have legal rights towards the seller. These statutory rights are not restricted by our warranty as
described below.
Warranty conditions
The warranty period commences upon the date of purchase. Please keep the original receipt in a safe
place as it is required as proof of purchase. If any material or manufacturing faults occur within three
years of purchase of this product, we will repair or replace the product free of charge as we deem
appropriate.
Warranty period and legal warranty rights
The warranty period is not extended in the event of a warranty claim. This also applies to replaced and
repaired parts. Any damage or defects discovered upon purchase must be reported immediately when the
product has been unpacked. Any repairs required after the warranty period will be subject to charge.
Scope of warranty
The device was carefully manufactured in compliance with stringent quality guidelines and subjected to
thorough testing before it left the works. The warranty applies to material and manufacturing faults. This
warranty does not cover product components which are subject to normal wear and which can therefore
be regarded as wearing parts, or damage to fragile components such as switches, rechargeable batteries
or components made of glass. This warranty is void if the product is damaged, incorrectly used or
serviced. To ensure correct use of the product, always comply fully with all instructions contained in the
user manual. The warnings and recommendations in the user manual regarding correct and incorrect use
and handling of the product must always be observed and complied with. The product is solely designed
for private use and is not suitable for commercial applications. The warranty is rendered void in the event
of incorrect handling and misuse, if it is subjected to force, and also if any person other than our
authorised service technicians interfere with the device. No new warranty period commences if the
product is repaired or replaced.
Submitting warranty claims
To ensure speedy handling of your complaint, please note the following:
- Before using your product for the first time, please read the enclosed documentation carefully.
Should any problems arise which cannot be solved in this way, please call our hotline.
- Always have your receipt, the product article number as well as the serial number (if available)
to hand as proof of purchase.
- If it is not possible to solve the problem on the phone, our hotline support staff will initiate further
servicing procedures depending on the fault.

LIVARNO LUX LLES B2
English - 13
Service
Phone: 0207 – 36 50 744
E-Mail: [email protected]
Phone: 01 – 242 15 83
E-Mail: [email protected]
Phone: 800 – 62 175
E-Mail: [email protected]
Phone: 800 – 92 496
E-Mail: [email protected]
IAN: 64955
Manufacturer
Please note that the following address is not a service address. First contact the service point stated above.
TARGA GmbH
Coesterweg 45
59494 SOEST
GERMANY

LIVARNO LUX LLES B2
14 - Polski
Spis treści
Wstęp ....................................................................................................................... 15
Użytkowanie zgodne z przeznaczeniem .................................................................. 15
Zakres dostawy ....................................................................................................... 15
Dane techniczne ....................................................................................................... 16
Wskazówki bezpieczeństwa .................................................................................... 17
Prawa autorskie ...................................................................................................... 18
Przed uruchomieniem ............................................................................................... 18
Odpowiednie miejsce montażu .................................................................................................................. 18
Potrzebne narzędzia .................................................................................................................................... 19
Przed montażem ........................................................................................................................................... 19
Montaż.......................................................................................................................................................... 20
Uruchomienie ........................................................................................................... 21
Ustawienie czujnika ruchu ........................................................................................................................... 21
Ustawienie czasu świecenia (TIME) ............................................................................................................ 21
Ustawienie czułości czujnika (SENS) .......................................................................................................... 21
Ustawienie czułości na światło (LUX) .......................................................................................................... 21
Konserwacja / czyszczenie....................................................................................... 22
Rozwiązywanie problemów .................................................................................... 22
Wskazówki dotyczące ochrony środowiska i prawidłowego usuwania .................. 23
Zgodność.................................................................................................................. 23
Informacje na temat gwarancji i serwisowania ........................................................ 24

LIVARNO LUX LLES B2
Polski - 15
Wstęp
Dziękujemy za zakup produktu LIVARNO LUX.
Użytkowanie zgodne z przeznaczeniem
Energooszczędna lampa zewnętrzna nie jest przeznaczona do użytku komercyjnego. Nadaje się ona do
pracy na otwartej przestrzeni i w pomieszczeniach. Energooszczędna świetlówka (10) o mocy 23 W
zapewnia dobre oświetlenie. Czujnik ruchu rejestruje ruch i automatycznie włącza oraz wyłącza
energooszczędną lampę zewnętrzną. Niniejsze urządzenie spełnia wymagania wszystkich odnośnych
norm i dyrektyw, związanych ze zgodnością CE. W przypadku nieuzgodnionych z producentem
modyfikacji energooszczędnej lampy zewnętrznej nie można zagwarantować spełnienia wymagań tych
norm.
Zakres dostawy
Energooszczędna lampa zewnętrzna LLES B2
Materiały montażowe (2 wkręty i 2 kołki rozporowe)
Instrukcja obsługi i wskazówki bezpieczeństwa
Niniejsza instrukcja ma odchylaną okładkę. Na wewnętrznej stronie odchylanej okładki jest
przedstawiona energooszczędna lampa zewnętrzna wraz z oznaczeniami liczbowymi. Liczby mają
następujące znaczenie:
1 Śruba (szyba przednia)
2 Śruba (uchwyt ścienny)
3 Puszka przyłączeniowa kabla
4 Przepust kablowy
5 Zacisk gwintowany przepustu kablowego
6 Uchwyt ścienny
7 Śruba ustalająca
8 Czujnik ruchu
9 Szyba przednia
10 Świetlówka energooszczędna (bez możliwości ściemniania)
11 Kabel zasilający
12 Kostka przyłączeniowa
13 Regulator LUX
14 Regulator SENS
15 Regulator TIME

LIVARNO LUX LLES B2
16 - Polski
Dane techniczne
Lampa:
Marka: LIVARNO LUX
Nazwa modelu: LLES B2
Napięcie zasilania: 220 – 240 V
~
, 50 Hz
Klasa ochrony: I (przy podłączeniu z przewodem ochronnym)
Stopień ochrony: IP44 (bryzgoszczelna)
Wymiary (S x W x G): ok. 217 x 138,5 x 103 mm
Masa: ok. 1035 g (bez świetlówki)
Sprawdzone bezpieczeństwo:
Świetlówka energooszczędna:
Źródło światła: świetlówka energooszczędna E27 (tylko spiralna)
Klasa wydajności energetycznej: A
Żywotność: ok. 8000 godzin / ok. 8000 cykli włączenia
Strumień świetlny: 1300 lm +/-5%
Moc: 23 W
Temperatura barwowa: 6400 K +/-10%
Czujnik ruchu:
Kąt widzenia czujnika: maks. 180°
Zasięg czujnika: maks. 12 m (ustawiany za pomocą regulatora
obrotowego)
Czułość na światło: ustawiana za pomocą regulatora obrotowego
Regulacja położenia (mechaniczna): ok. 150° w poziomie / ok. 180° w pionie
Czas świecenia: od ok. 1 min +/- 15 s do 15 min +/- 1,5 min
Zastrzegamy możliwość zmian danych technicznych i konstrukcyjnych bez wcześniejszego uprzedzenia.

LIVARNO LUX LLES B2
Polski - 17
Wskazówki bezpieczeństwa
Przed pierwszym użyciem urządzenia prosimy dokładnie zapoznać się z poniższymi instrukcjami. Należy
stosować się do wszystkich ostrzeżeń o zagrożeniach, nawet jeśli obsługa urządzeń elektronicznych jest
Ci dobrze znana. Niniejszą instrukcję obsługi należy starannie przechowywać do wykorzystania w
przyszłości. Jeżeli odstępujesz lub użyczasz urządzenie innej osobie, przekaż także tę instrukcję obsługi
– jest ona częścią składową urządzenia.
OSTRZEŻENIE! Ten symbol oznacza ważne wskazówki w sprawie bezpiecznej
eksploatacji zewnętrznej lampy energooszczędnej i ochrony użytkownika.
Nieprzestrzeganie może spowodować szkody materialne i/lub zagrożenie dla
zdrowia ze śmiercią włącznie.
Niebezpieczeństwo pożaru: zewnętrzną lampę energooszczędną należy
zamontować w odległości co najmniej 0,5 m od oświetlanych przedmiotów.
Nadmierne wydzielanie ciepła może spowodować pożar.
Każdą pękniętą osłonę należy wymienić.
Zewnętrzna lampa energooszczędna jest wyposażona w przyłącze przewodu
ochronnego. Przewód ochronny (żółto-zielony) musi być podłączony do tak
oznaczonego zacisku.
Urządzenia elektryczne należy trzymać poza zasięgiem dzieci. Nigdy nie należy pozwalać
dzieciom używać urządzeń elektrycznych bez nadzoru. Dzieci nie zawsze mogą prawidłowo
rozpoznać ewentualne zagrożenia. Folie z opakowań należy także przechowywać poza
zasięgiem dzieci. Istnieje niebezpieczeństwo uduszenia.
W razie stwierdzenia tworzenia się dymu, zauważenia dziwnych odgłosów lub zapachów
natychmiast wyłączyć urządzenie. W takich przypadkach urządzenia nie wolno dalej używać,
dopóki nie zostanie ono sprawdzone przez specjalistę. W żadnym przypadku nie wolno
wdychać dymu z możliwego pożaru urządzenia. O ile mimo to doszło do wdychania dymu,
należy udać się do lekarza. Wdychanie dymu może być szkodliwe dla zdrowia.
Nie wolno uszkodzić obudowy zewnętrznej lampy energooszczędnej. Przy uszkodzonej
obudowie istnieje zagrożenie dla życia na skutek porażenia prądem elektrycznym.
Nigdy nie używać zewnętrznej lampy energooszczędnej w przestrzeniach zagrożonych
wybuchem, w których znajdują się łatwopalne płyny, gazy lub pyły. Istnieje niebezpieczeństwo
eksplozji.
Nigdy nie otwierać obudowy zewnętrznej lampy energooszczędnej, za wyjątkiem wymiany
świetlówki. Podczas wszystkich prac przy zewnętrznej lampie energooszczędnej, w tym także

LIVARNO LUX LLES B2
18 - Polski
przy wymianie świetlówki, obwód prądowy musi być rozłączony! Przy otwartej obudowie
istnieje zagrożenie porażenia prądem elektrycznym.
Na zewnętrznej lampie energooszczędnej nie wolno wieszać żadnych przedmiotów. Obudowa
nie jest przewidziana do przenoszenia obciążeń. W przeciwnym razie może dojść do
uszkodzenia lampy.
W żadnym przypadku nie wolno używać instrumentów optycznych, jak np. szkło
powiększające, do patrzenia bezpośrednio w strumień światła. Mogłoby to spowodować
uszkodzenie wzroku. W razie podejrzenia uszkodzenia wzroku udać się do lekarza.
Prawa autorskie
Cała zawartość tej instrukcji obsługi jest chroniona prawem autorskim i jest udostępniana czytelnikowi
wyłącznie jako źródło informacji. Jakiekolwiek kopiowanie lub powielanie danych i informacji jest
zabronione bez wyraźnej i pisemnej zgody autora. Dotyczy to również komercyjnego wykorzystania
treści i danych. Tekst i ilustracje są zgodne ze stanem technicznym w chwili druku. Zmiany zastrzeżone.
Przed uruchomieniem
Wyjąć zewnętrzną lampę energooszczędną i materiały montażowe z opakowania.
Sprawdzić, czy lampa nie jest uszkodzona. W razie uszkodzenia nie wolno uruchamiać lampy.
Stosować wyłącznie świetlówki energooszczędne z trzonkiem E27 i o mocy maksymalnej
23 W!
Prosimy pamiętać:
załączona świetlówka energooszczędna nie nadaje się do ściemniania. Nie należy
stosować zewnętrznej lampy energooszczędnej z załączoną świetlówką w obwodach
prądowych ze ściemniaczem.
Dla bezpieczeństwa transportu świetlówka energooszczędna (10) znajduje się wewnątrz lampy. Za
pomocą wkrętaka krzyżowego wykręcić 2 śruby (1) i ostrożnie odchylić szybę przednią (9) do góry.
Wyjąć opakowanie ze świetlówką energooszczędną (10). Otworzyć opakowanie, wyjąć świetlówkę
(10) i wkręcić ją do oprawy, obracając w prawo. Świetlówkę (10) chwytać przy tym za trzonek, a nie za
szklany korpus. Zasadniczo świetlówkę należy chwytać tylko przez szmatkę. Teraz opuścić szybę
przednią (9) w dół i ponownie wkręcić 2 śruby (1).
Odpowiednie miejsce montażu
Miejsce montażu należy starannie wybrać i odpowiednio je przygotować.
Wszystkie części, potrzebne narzędzia i materiały montażowe należy mieć pod ręką, odpowiednio
uporządkowane.
Strona się ładuje...
Strona się ładuje...
Strona się ładuje...
Strona się ładuje...
Strona się ładuje...
Strona się ładuje...
Strona się ładuje...
Strona się ładuje...
Strona się ładuje...
Strona się ładuje...
Strona się ładuje...
Strona się ładuje...
Strona się ładuje...
Strona się ładuje...
Strona się ładuje...
Strona się ładuje...
Strona się ładuje...
Strona się ładuje...
Strona się ładuje...
Strona się ładuje...
Strona się ładuje...
Strona się ładuje...
Strona się ładuje...
Strona się ładuje...
Strona się ładuje...
Strona się ładuje...
Strona się ładuje...
Strona się ładuje...
Strona się ładuje...
Strona się ładuje...
Strona się ładuje...
Strona się ładuje...
Strona się ładuje...
Strona się ładuje...
Strona się ładuje...
Strona się ładuje...
Strona się ładuje...
Strona się ładuje...
Strona się ładuje...
Strona się ładuje...
Strona się ładuje...
Strona się ładuje...
Strona się ładuje...
Strona się ładuje...
Strona się ładuje...
Strona się ładuje...
Strona się ładuje...
Strona się ładuje...
Strona się ładuje...
Strona się ładuje...
Strona się ładuje...
Strona się ładuje...
Strona się ładuje...
Strona się ładuje...
Strona się ładuje...
Strona się ładuje...
Strona się ładuje...
Strona się ładuje...
Strona się ładuje...
Strona się ładuje...
Strona się ładuje...
Strona się ładuje...
Strona się ładuje...
Strona się ładuje...
Strona się ładuje...
Strona się ładuje...
-
 1
1
-
 2
2
-
 3
3
-
 4
4
-
 5
5
-
 6
6
-
 7
7
-
 8
8
-
 9
9
-
 10
10
-
 11
11
-
 12
12
-
 13
13
-
 14
14
-
 15
15
-
 16
16
-
 17
17
-
 18
18
-
 19
19
-
 20
20
-
 21
21
-
 22
22
-
 23
23
-
 24
24
-
 25
25
-
 26
26
-
 27
27
-
 28
28
-
 29
29
-
 30
30
-
 31
31
-
 32
32
-
 33
33
-
 34
34
-
 35
35
-
 36
36
-
 37
37
-
 38
38
-
 39
39
-
 40
40
-
 41
41
-
 42
42
-
 43
43
-
 44
44
-
 45
45
-
 46
46
-
 47
47
-
 48
48
-
 49
49
-
 50
50
-
 51
51
-
 52
52
-
 53
53
-
 54
54
-
 55
55
-
 56
56
-
 57
57
-
 58
58
-
 59
59
-
 60
60
-
 61
61
-
 62
62
-
 63
63
-
 64
64
-
 65
65
-
 66
66
-
 67
67
-
 68
68
-
 69
69
-
 70
70
-
 71
71
-
 72
72
-
 73
73
-
 74
74
-
 75
75
-
 76
76
-
 77
77
-
 78
78
-
 79
79
-
 80
80
-
 81
81
-
 82
82
-
 83
83
-
 84
84
-
 85
85
-
 86
86


w innych językach
- Deutsch: LIVARNO 64955 Bedienungsanleitung
- slovenčina: LIVARNO 64955 Návod na obsluhu
Powiązane artykuły
-
LIVARNO 110587 Instrukcja obsługi
-
-
-
-
-
-
-
-
-