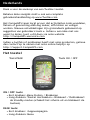
Holux TwoNav Sportiva Plus Quick Manual
- Kategoria
- Nawigatorzy
- Typ
- Quick Manual


English
Thank you for purchasing a TwoNav GPS device.
In addition to this Quick Guide, you can nd a complete user’s
manual at www.TwoNav.com
CompeGPS dedicates all its experience and effort to enable you
get the best out of your outdoor activities such as hiking, cycling,
geocaching… All new developments are based on suggestions and
feedback from users like you. If you would like to share your ideas
and proposals with CompeGPS, feel free to do it at:
http://CompeGPS.uservoice.com
If you have any questions or problems regarding the use of
our products, please contact the on-line technical support
department of CompeGPS at: http://Support.CompeGPS.com
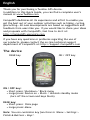
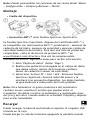
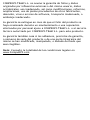
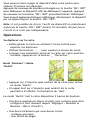
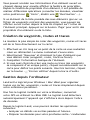
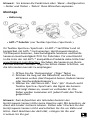
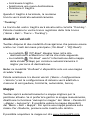
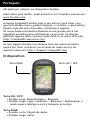
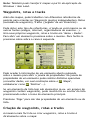
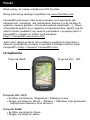
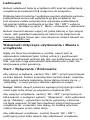
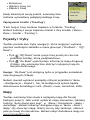
The device
ON / OFF key:
• Short press: Shutdown / Block menu
• Large press: Device on + Block / Unblock standby mode
(turn off the screen and keys block)
PAGE key:
• Short press: Data page
• Large press: Menu
Note: You can customize key functions in ‘Menu > Settings >
Fields & Buttons > Keys’.
ON / OFF keyPAGE key

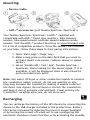
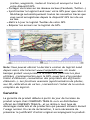
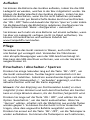
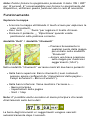
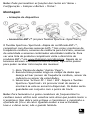
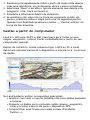
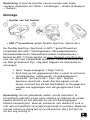
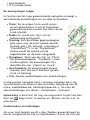
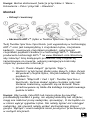
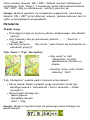
Mounting
• Device cradle
• ANT+™ accessories (just TwoNav Sportiva+/Sportiva2+)
Your TwoNav Sportiva+/Sportiva2+ is ANT+™ certied and
compatible with ANT+™ heart rate monitors, bike cadence
sensors, bike speed sensors and bike speed/cadence combo
sensors. Visit the ANT+™ product directory at www.thisisant.com
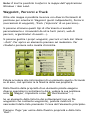
for a list of compatible products. Once the sensors are mounted
on your bike, follow these steps to start paring information:
1. Open ‘Data page’ (‘Page’ key).
2. Make a long press on the data eld that you want to
activate (heart rate sensor, cadence sensor or speed
sensor).
3. Select ‘Enable HR / Cad / SpS’. TwoNav Sportiva+/
Sportiva2+ starts looking for the sensor signal. If it is
available, it will be displayed. Data is also stored for
each recorded track point.
Note: Use water, ECG gel or other conductive liquids to moisten
the conductive rubber contact, do not use vaseline or oils,
they may insulate the transmitter making it unable to detect
the heart rate signals. Do not bend or stretch the transmitter
and keep it out of extreme cold and heat. Clean and dry the
transmitter carefully after use, do not store wet.
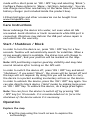
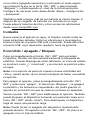
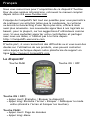
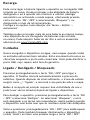
Recharging
You can recharge the battery of the GPS device by connecting the
device to the USB charger included in the product box. Battery
life can be increased by reducing the level of screen backlight
or by turning the screen off when not in use (conguring the
automatic shutdown screen function or by activating the standby

mode with a short press on ‘ON / OFF’ key and selecting ‘Block’).
Congure these options in ‘Menu > Settings> Autonomy’. You can
also charge more than one battery at the same time if you have a
battery charger (not included inside the product box).
Lithium batteries and other accessories can be bought from
www.CompeGPS.com
Care instructions
Never submerge the device into water, not even when all lids
are sealed. Avoid vibration or harsh movements while USB port is
connected. Vibrations may deform the USB port whose repair is
excluded from the warranty.
Start / Shutdown / Block
In order to turn the device on, press ‘ON / OFF’ key for a few
seconds. TwoNav will automatically search for satellites. When a
strong enough signal is available, the status icon will change to
‘connected’, and your position will be marked on the map.
Note: GPS positioning requires good sky visibility and may take
several minutes after turning on the GPS unit.
In order to switch the device off, press ‘ON / OFF’ key and select
‘Shutdown’. If you select ‘Block’, the screen will be turned off and
the keys will not respond. By doing this you will be able to carry
the device in a pocket avoiding involuntary actions on the device.
In order to unblock the device, press the ‘ON / OFF’ key again. You
can also directly block device (‘Hold’ mode) by making large press
on ‘ON / OFF’ key. To unblock the device, do a large press again.
Note: You can force the device to switch off by pressing ‘ON
/ OFF’ key for 10 seconds. It is recommended not to force the
shutdown of the device unless it is necessary.
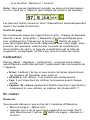
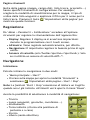
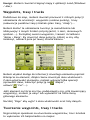
Operation
Explore the map
• Drag the map using the touch screen to explore the
surroundings.

‘Tool’ mode will show 2 button bars:
• At the top bar: Toolbar (its content can be congured from
‘Settings > Fields & Buttons > Toolbar’).
• At the bottom bar: Showing access to:
◦ Main menu
◦ Page tools
◦ Start / Stop
Note: You can also access to the main menu directly by clicking on
the data bar.
Toolbars and ‘Hint’ will be automatically hidden after 3 seconds.
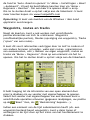
Page tools
Many of the application pages (map, data elds, track’s list,
properties...) have specic conguration tools. For example,
choose the display mode for maps, the way to order for waypoint
lists or apply a name lter to a list of tracks. Press the button
‘Page tools’ to show these tools.
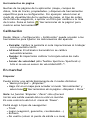
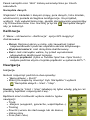
Calibration
In ‘Menu > Settings > Calibration’ you can adjust the GPS
instruments:
• Use the ‘Zoom’ buttons to adjust the zoom level.
• Press the
‘Re-center’ button when you wish return to your
current position.
• Shortly tap on any place of
the map in order to enter
the ‘Tool’ mode.
• Short tap again on the
map to show the ‘Hint’
information.
‘Data’ mode / ‘Tool’ mode

• Screen: Calibrate the screen in case you notice inaccuracies
while using the touch screen.
• Altimeter: The barometric altimeter is calibrated
automatically by default.
• Bearing: Before each departure it is very important to
calibrate the compass.
• Speed sensor (only TwoNav Sportiva+/Sportiva2+): Only if
using ANT+™ speed sensor.
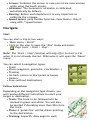
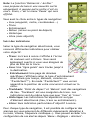
Navigate
Start
You can start a trip in two ways:
•‘Main menu > Start!’
• Click on the map to open the ‘Tool’ mode and select
‘Page tools > Start / Stop’.
Note: The ‘Start / Stop’ function will only offer to start a trip
when it is not already started. Otherwise it will open the ‘Pause’
menu.
You can select 6 navigation types:
• Track
• Place (waypoint, geocache, coordinates…)
• Training
• Go back (return to start point or home)
• Historic
• Free (without destination)
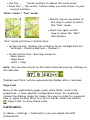
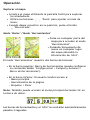
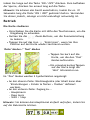
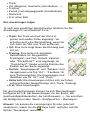
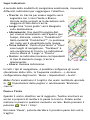
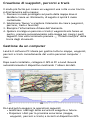
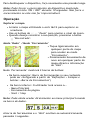
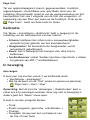
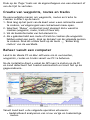
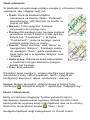
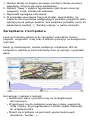
Follow indications
Depending on the navigation type chosen, you
will receive different indications to reach your
target or destination.
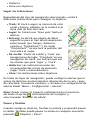
•Track: The track to be followed will be
marked in green and white. You will also
be alerted if deviating more than 50m from
the track.
•Place: A ‘guide line’ will be drawn pointing
to the destination.
•Training: A specic data page for each

•Historic: Indications will be the corresponding ones
depending on the navigation type (place, track or training).
•Free: Without indications.
In all navigation types, you can congure alerts (deviation from
route, speed range or heart rate...). Access alert conguration
from ‘Menu > Settings > Alerts’.
Note: You can review the track you have done so far by opening
the ‘Page tools’ and selecting ‘Trip review’.
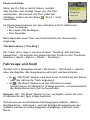
Pauseandnish
When your destination or objective is reached, TwoNav will
display an alert and propose to pause the trip. You can also pause
the trip at any time you wish. Just press
‘Start / Stop’.
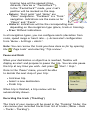
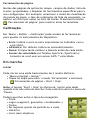
Recording the track (‘Tracklog’)
The track of your course will be saved in the ‘Tracklog’ folder. You
can review your recorded tracks from list of tracks (‘Menu > Data
> Tracks > Tracklog’).
Once in the ‘Pause’ menu, you will be able
to decide the next step of your trip:
• Continue trip
• Select a new destination
• Finish trip
When trip is nished, a trip review will be
automatically shown.
training type will be opened (time,
distance, calories or ‘TrackAttack™’).
In the ‘TrackAttack™’ mode, your rival’s
position will be marked on the map.
•Return: ‘Start point’ and ‘Home’ are
‘Place’ navigations. ‘Trackback’ is a ‘Track’
navigation. Indications are the same as for
‘Places’ and ‘Tracks’.

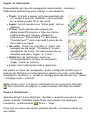
Vehicles and Modes
TwoNav has 2 navigation modes (‘On-Road’ / ‘Off-Road’) which
can be selected by pressing the tabs of the main menu:
• The ‘Off-Road’ mode draws a straight line to your
destination, or highlights the track you are following.
• The
‘On-road’ mode uses a routable map (V-Map) to
automatically calculate the best route to destination.
Note: ‘On-Road’ mode is only available when road maps (V-Map)
are available.
You can also choose among several vehicles (‘Menu>Conguration
> Vehicle’), so the system conguration will be adapted
accordingly (pedestrian, bike, car, boat).
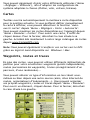
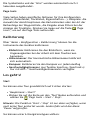
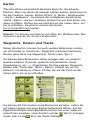
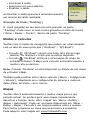
Maps
TwoNav automatically opens the best map based on your current
position. If you prefer to manage your maps manually, disable the
‘Auto-open maps’ option in ‘Menu > Settings > Map > Automap’.
You can see the available maps in ‘Menu > Data > Maps’. In order
to open a map, tap on it. To close it, uncheck the box on the left
side. You can purchase additional maps from www.CompeGPS.com
Note: You can also transfer maps from Land application (Windows
/ Mac).
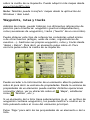
Waypoints, Routes and Tracks
In addition to maps, you can also work with different position
references for guidance: waypoints (separate points), routes (a
sequence of waypoints), tracks (itinerary ‘footprint’)...
You can get these references by creating them yourself or from
other sources (friends, webs, meeting planners, etc...). Manage
your own waypoints, routes and tracks from ‘Menu > Data’. In
order to open an item, tap on it. To close it, uncheck the box on
the left side.
You can access the information of an open element by clicking on

it and opening its properties window. From the properties window
of an element you can handle several operations (check data, see
its position on the ‘Map’, set it as ‘Destination’, etc.).
If an element of the list has sub-elements (e.g. a waypoints-le
contains waypoints), you can show or hide them in the list by
pressing the icon of the main element. Press ‘Page’ to exit the
properties window or ‘Data’ list.
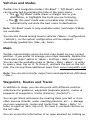
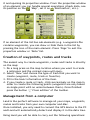
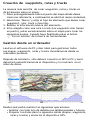
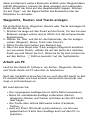
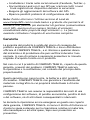
Creation of waypoints, routes and tracks
The easiest way to create waypoints, routes and tracks is directly
on the map:
1. Do a long press on the map location where you want to create
a reference and the context menu will open.
2. Select ‘New’ and choose the type of item that you want to
create (waypoint, route, track or favorite).
3. Fill in the basic information of the item.
4. If you create a route or track, click successively on the map in
order to create the following points (waypoints are only based
on single point with no union between them). Once nished
press the button ‘Close edition’ of the toolbar.
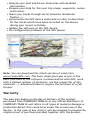
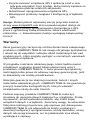
Management from a computer
Land is the perfect software to manage all your maps, waypoints,
routes and tracks from your own computer and Mac.
Once installed, you only need to connect the GPS device to the PC
and Land will automatically detect and display it in the data tree.
Using Land you will be able to carry out the following operations:

• Analyze your past and future itineraries with detailed
information.
• Prepare your data for the next trip (maps, waypoints, routes
and tracks).
• Share your tracks through social networks (Facebook,
Twitter...)
• Synchronize the GPS device with Land in order to download
all the tracks which have been recorded on the device
during your recent activities.
• Update the software of the GPS device.
• Fix conguration problems of the GPS device.
Note: You can download the latest version of Land from
www.CompeGPS.com. The basic mode gives you access to the
basic functions of the software (communication with GPS, work
with a limited number of elements, see the properties of the
elements...). Advanced features require the purchase of a full
license.
Warranty
The warranty begins on the day of delivery of the product
purchased from COMPEGPS TEAM SL or any ofcial distributor of
COMPEGPS TEAM SL and refers to all types of material damage or
production defect that could arise under the normal use of the
device. In the case of any claim it will be required to present the
original proof of purchase provided together with the product.

COMPEGPS TEAM SL and their authorized distributors reserve
the right to refuse a warranty repair if these documents are not
presented.
In case of a defect of a product of COMPEGPS TEAM SL which is
covered by this warranty, COMPEGPS TEAM SL assures the repair or
replacement within the limits of proportionality.
This warranty does not cover cells, batteries and other
consumables. COMPEGPS TEAM SL does not warrant the precision
of map material whose intellectual property belongs to third
parties.
COMPEGPS TEAM SL does not accept responsibility for the cost
of software conguration, loss of income, loss of software data
or any other collateral damages. When proceeding to repair the
product, COMPEGPS TEAM SL might be forced to delete the data
stored on the device. Please ensure, before shipping the product,
to have a backup of all the data of the device.
If during the repair it is discovered that the defect is not covered
by the warranty, COMPEGPS TEAM SL reserves the right to invoice
the customer for the expenses incurred by the repair in terms of
materials used, work and other costs, after presenting a budget.
COMPEGPS TEAM SL does not warrant defects and damages caused
by external factors or the user, such as accidental damages,
inadequate use or modications, rets, extensions, use of parts
from other manufacturers, carelessness, viruses or software
errors, inappropriate transport or packaging.
Warranty extinguishes in case that the defect of the products has
been caused by maintenance or repair carried out by other parties
than COMPEGPS TEAM SL or any technical service authorized by
COMPEGPS TEAM SL for this product. The warranty also expires
when the adhesive, safety seals or serial numbers of the product
or an integral part of the same have been modied, manipulated
or damaged in a way that makes them unreadable.
Note: Read all the legal conditions at www.CompeGPS.com

Español
Gracias por adquirir un dispositivo TwoNav.
Además de esta guía rápida, puede encontrar un completo manual
del usuario en www.TwoNav.com
El equipo de CompeGPS dedica todo su esfuerzo a hacer que
actividades como el senderismo, el ciclismo o el geocaching
resulten cada día más divertidas, ecientes y seguras.
Los nuevos desarrollos se basan en gran parte en las sugerencias
aportadas por usuarios como usted. Si desea compartir alguna
idea con nosotros, puede hacerlo desde el sitio web
http://CompeGPS.uservoice.com
Si tiene alguna duda o problema sobre nuestros productos, por
favor contáctenos a través de nuestro servicio de soporte on-line
en http://Support.CompeGPS.com
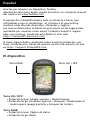
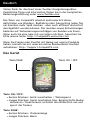
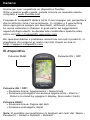
El dispositivo
Tecla ON / OFF:
• Pulsación breve: Apagar aparato / Menú bloqueo
• Pulsación larga: Encender aparato + Bloquea / Desbloquea el
modo espera (apaga pantalla y bloquea las teclas)
Tecla PAGE:
• Pulsación breve: Página de datos
• Pulsación larga: Menú
Tecla ON / OFFTecla PAGE

Nota: Puede personalizar las funciones de las teclas desde ‘Menú
>Conguración>CamposyBotones>Teclas’.
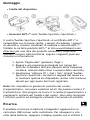
Montaje
• Cradle del dispositivo
• Accesorios ANT+™ (sólo TwoNav Sportiva+/Sportiva2+)
Su TwoNav Sportiva+/Sportiva2+ dispone del certicado ANT+™ y
es compatible con instrumentos ANT+™: pulsómetros , sensores de
cadencia de bicicleta, sensores de velocidad y sensores combo de
velocidad/cadencia de bicileta. Para leer una lista de productos
compatibles, visite el directorio de productos ANT+™ en
www.thisisant.com/directory. Una vez los sensores estén
montados en su bici, siga estos pasos para recibir información:
1. Abra ‘Página de datos’ (botón ‘Page’).
2. Realice una pulsación prolongada en el campo de datos
que desee activar (sensor de frecuencia cardíaca,
sensor de cadencia o sensor de velocidad).
3. Seleccione ‘Activar FC / Cad / VeS’. Entonces TwoNav
Sportiva+/Sportiva2+ buscará señal del sensor y la
mostrará si se encuentra disponible. Los datos también
se guardarán para cada punto del track grabado.
Nota:Parahumedecerlagomaconductoradelpulsómetro
cardíaco no use vaselina ni aceites que puedan aislar el
transmisor.Nodobleniestireelpulsómetroymanténgalolejos
delfríoydelcalor.Cuandoacabesuactividad,límpieloyséquelo
para evitar humedades.
Recargar
Puede recargar la batería enchufando el aparato al cargador USB
incluido en la caja.
Puede alargar la vida de la batería apagando la pantalla cuando

no la utilice (apagado automático o activando el modo espera
con pulsación breve en la tecla ‘ON / OFF’ y seleccionando
‘Bloquear’) o disminuyendo el nivel de la retroiluminación.
Congure las opciones como desee desde ‘Menú>Conguración
> Autonomía’.
También puede recargar más de una batería al mismo tiempo si
dispone de un cargador de baterías (no incluido en la caja)
Puede adquirir baterías de litio y otros accesorios adicionales
desde www.CompeGPS.com
Cuidados
Nunca sumerja el aparato en agua, ni siquiera cuando todas las
tapas estén bien selladas. Evite las vibraciones o movimientos
bruscos mientras el puerto USB esté conectado. Puede deformar
el puerto USB, cuya reparación quedaría fuera de garantía.
Encendido / Apagado / Bloqueo
Pulse prolongadamente el botón ‘ON / OFF’ para encender
el aparato. TwoNav iniciará automáticamente la búsqueda de
satélites. Cuando disponga de señal suciente, el icono de estado
se mostrará como ‘conectado’, y se marcará su posición sobre
el mapa.
Nota: Larecepcióndeposiciónrequierebuenavisibilidaddel
cieloypuedetardarvariosminutosdespuésdehaberencendido
el aparato.
Para apagar el aparato, pulse prolongadamente el botón ‘ON /
OFF’ y seleccione ‘Apagar’. Si selecciona ‘Bloquear’, se apagará
la pantalla y los botones no responderán. Así podrá guardar el
aparato en un bolsillo sin que se realicen acciones no deseadas.
Vuelva a pulsar ‘ON / OFF’ para desbloquear el aparato. También
puede bloquear el dispositivo haciendo una pulsación larga en la
tecla ‘ON / OFF’ (modo ‘Hold’). Para desbloquear el dispositivo,
haga de nuevo una pulsación larga.
Nota: Puede forzar el apagado del dispositivo manteniendo
pulsadodurante10segundoselbotón‘ON/OFF’.Nofuerceel
apagado si no es imprescindible.

Operación
Explorar el mapa
• Arrastre el mapa utilizando la pantalla táctil para explorar
los alrededores.
• Utilice los botones
‘Zoom’ para ajustar el nivel de
zoom.
• Cuando desee recentrar en su posición, pulse el botón
‘Recentrado’.
Modo ‘Datos’ / Modo ‘Herramientas’
• Pulse en cualquier parte del
mapa para acceder al modo
‘Herramientas’.
• Pulsando brevemente de
nuevo en cualquier lugar
del mapa obtendrá la
información de ‘Hint’.
El modo ‘Herramientas’ muestra dos barras de botones:
• En la barra superior: Barra de herramientas (puede congurar
su contenido desde ‘Conguración>Camposybotones>
Barra de herramientas’).
• En la barra inferior: El usuario tendrá acceso a:
◦ Menú principal
◦ Herramientas de la página
◦ Empezar / Parar
Nota: Tambiénpuedeaccederalmenúprincipalhaciendoclicen
la barra de datos.
Las barras de herramientas y el ‘Hint’ se ocultarán automáticamente
pasados 3 segundos.

Herramientas de página
Muchas de las páginas de la aplicación (mapa, campos de
datos, lista de tracks, propiedades…) disponen de herramientas
especícas para su conguración. Por ejemplo: seleccionar el
modo de visualización de la ventana de mapa, el tipo de orden
de la lista de waypoints, o aplicar un ltro por nombre a la lista
de tracks. Pulse el botón ‘Herramientas de la página’ para
mostrar estas herramientas.
Calibración
Desde ‘Menú>Conguración>Calibración’ puede acceder a las
herramientas para ajustar los instrumentos del aparato:
•Pantalla: Calibre la pantalla si nota imprecisiones al trabajar
con la pantalla táctil.
•Altímetro: El altímetro barométrico se calibra
automáticamente.
•Rumbo: Es importante calibrar la brújula antes de cada
salida.
•Sensor de velocidad (sólo TwoNav Sportiva+/Sportiva2+):
Sólo si se usa un sensor de velocidad ANT+™.
En marcha!
Empezar
Puede iniciar una salida básicamente de 2 modos distintos:
•‘Menú principal > ¡Empezar!’
• Haga clic en el mapa para acceder al modo ‘Herramientas’ y
seleccione
‘Herramientas de la página > Empezar / Parar’
Nota: Lafunción‘Empezar/Parar’sóloofrecerá
iniciarunasalidacuandoéstanoestéenmarcha.
En caso contrario abrirá el menú de ‘Pausa’.
Podrá elegir 6 tipos de navegación:
• Track
• Lugar (waypoint, geocache, coordenades...)
• Entreno
• De vuelta (volver al punto de salida o a casa)

•Track: El track a seguir se marcará de color
verde y blanco. Además, se le avisará si se
aleja más de 50m del track.
•Lugar: Se trazará una ‘línea guía’ hasta el
destino.
•Entreno: Se abrirá una página de datos
especícos para el tipo de entrenamiento
seleccionado (por tiempo, distancia,
calorías o ‘TrackAttack™’). En modo
‘TrackAttack™’ se marcará la posición del
rival sobre el mapa.
•De vuelta: ‘Punto de salida’ y ‘Casa’ son
navegaciones de lugar. ‘Trackback’ es una
navegación de track. Las indicaciones son
las mismas que para ‘lugar’ y ‘track’.
•Histórico: Las indicaciones serán las
correspondientes al tipo de elemento
(lugar, track o entrenamiento).
•Libre: Sin indicaciones sobre objetivos.
En todos los tipos de navegación, puede congurar alertas que le
avisen de distintos acontecimientos (desviación de la ruta, rango
de velocidad, frecuencia cardiaca…). Acceda a la conguración de
alertas desde ‘Menú>Conguración>Alertas’.
Nota: Puede revisar el trayecto realizado hasta el momento
abriendolaopción ‘Herramientas de la página’ y
seleccionando‘Revisióndesalida’.
Pausarynalizar
Cuando consiga su objetivo, TwoNav le avisará y propondrá pausar
la salida. También puede pausar la salida en cualquier momento,
pulsando ‘Empezar / Parar’.
• Histórico
• Libre (sin objetivo)
Seguir las indicaciones
Dependiendo del tipo de navegación seleccionado, recibirá
diferentes indicaciones para conseguir su objetivo.

Una vez en el menú de pausa, podrá decidir el
próximo paso en su salida:
• Continuar la salida
• Seleccionar un nuevo destino
• Finalizar la salida
Al nalizar la salida se mostrará automáticamente
una revisión de la salida realizada.
Grabación de track (‘Tracklog’)
El track (huella) de su recorrido se grabará en la carpeta
‘Tracklog’. Puede revisar sus tracks grabados desde la lista de
tracks (‘Menú > Datos > Tracks > Tracklog’).
Modos y vehículos
TwoNav tiene 2 modos de navegación (‘On-Road’ / ‘Off-Road’)
que pueden ser seleccionados con las pestañas del menú
principal:
• El modo ‘Off-Road’ trazará una línea recta hasta el lugar
destino, o resaltará el track que se esté siguiendo.
• El modo
‘On-road’ utilizará la información del mapa
rutable (V-Map) para calcular automáticamente la mejor
ruta a destino.
Nota: ElmodoOn-Roadsóloestádisponiblesidisponedeun
mapa de carreteras V-Map.
También puede elegir entre varios vehículos (‘Menú>Conguración
> Vehículo’), adaptándose la conguración del sistema a cada uno
de ellos (Peatón, bicicleta, coche, barco).
Mapas
TwoNav abrirá automáticamente el mejor mapa para su posición
actual. Si preere gestionar sus mapas manualmente, desactive la
función ‘Auto. Abrir mapas’ de ‘Menú>Conguración>Mapa>
Automapa’. Puede ver los mapas disponibles desde ‘Menú > Datos
> Mapas’. Para abrir un mapa pulse sobre él. Para cerrarlo pulse

sobre la casilla de su izquierda. Puede adquirir más mapas desde
www.CompeGPS.com
Nota: Tambiénpuedetransferirmapasdesdelaaplicaciónde
Windows / Mac Land.
Waypoints, rutas y tracks
Además de mapas, puede trabajar con diferentes referencias de
posición para orientarse: waypoints (puntos independientes),
rutas (sucesiones de waypoints), tracks (‘huella’ de un recorrido).
Puede obtener este tipo de referencias creándolas usted mismo
o de otras fuentes (amigos, webs de rutas, organizadores de
eventos...). Gestione sus propios waypoints, rutas y tracks desde
‘Menú > Datos’. Para abrir un elemento pulse sobre él. Para
cerrarlo pulse sobre la casilla de su izquierda.
Puede acceder a la información de un elemento abierto pulsando
sobre él para abrir su ventana de propiedades. Desde la ventana de
propiedades de un elemento puede realizar distintas operaciones
(consultar datos, ver su ubicación sobre el ‘Mapa’, establecer
como
‘Destino’, etc.).
Si un elemento de la lista tiene subelementos (p.ej. un archivo de
waypoints contiene waypoints), los puede mostrar u ocultar en la
lista pulsando sobre el icono del elemento principal.
Pulse ‘Page’ para salir de las propiedades de un elemento o de la
lista.

Creación de waypoints, rutas y tracks
La manera más sencilla de crear waypoints, rutas y tracks es
directamente sobre el mapa:
1. Pulse prolongadamente sobre el punto del mapa dónde desee
crear una referencia, a continuación se abrirá el menú contextual.
2. Seleccione ‘Nuevo’ y elija el tipo de elemento que desea crear
(waypoint, ruta, track o favorito).
3. Rellene la información básica del elemento.
4. Si ha elegido crear una ruta o track (los waypoints sólo tienen
un punto), pulse sucesivamente sobre el mapa para crear los
siguientes puntos. Cuando haya nalizado pulse el botón
‘Cerraredición’de la barra de herramientas.
Gestión desde un ordenador
Land es el software de PC y Mac ideal para gestionar todos
sus mapas, waypoints, rutas y tracks cómodamente desde su
ordenador personal.
Después de instalarlo, sólo deberá conectar el GPS al PC y Land
detectará automáticamente el dispositivo y lo mostrará en el
árbol de datos.
Desde Land podrá realizar las siguientes operaciones:
• Analizar con todo lujo de detalles sus salidas pasadas y futuras.
• Preparar los datos para la siguiente salida (mapas, waypoints,
rutas y tracks) y enviarlos al dispositivo GPS.
Strona się ładuje...
Strona się ładuje...
Strona się ładuje...
Strona się ładuje...
Strona się ładuje...
Strona się ładuje...
Strona się ładuje...
Strona się ładuje...
Strona się ładuje...
Strona się ładuje...
Strona się ładuje...
Strona się ładuje...
Strona się ładuje...
Strona się ładuje...
Strona się ładuje...
Strona się ładuje...
Strona się ładuje...
Strona się ładuje...
Strona się ładuje...
Strona się ładuje...
Strona się ładuje...
Strona się ładuje...
Strona się ładuje...
Strona się ładuje...
Strona się ładuje...
Strona się ładuje...
Strona się ładuje...
Strona się ładuje...
Strona się ładuje...
Strona się ładuje...
Strona się ładuje...
Strona się ładuje...
Strona się ładuje...
Strona się ładuje...
Strona się ładuje...
Strona się ładuje...
Strona się ładuje...
Strona się ładuje...
Strona się ładuje...
Strona się ładuje...
Strona się ładuje...
Strona się ładuje...
Strona się ładuje...
Strona się ładuje...
Strona się ładuje...
Strona się ładuje...
Strona się ładuje...
Strona się ładuje...
Strona się ładuje...
Strona się ładuje...
Strona się ładuje...
Strona się ładuje...
Strona się ładuje...
Strona się ładuje...
Strona się ładuje...
Strona się ładuje...
Strona się ładuje...
Strona się ładuje...
Strona się ładuje...
Strona się ładuje...
Strona się ładuje...
Strona się ładuje...
Strona się ładuje...
Strona się ładuje...
Strona się ładuje...
Strona się ładuje...
Strona się ładuje...
Strona się ładuje...
Strona się ładuje...
Strona się ładuje...
Strona się ładuje...
Strona się ładuje...
Strona się ładuje...
Strona się ładuje...
Strona się ładuje...
Strona się ładuje...
-
 1
1
-
 2
2
-
 3
3
-
 4
4
-
 5
5
-
 6
6
-
 7
7
-
 8
8
-
 9
9
-
 10
10
-
 11
11
-
 12
12
-
 13
13
-
 14
14
-
 15
15
-
 16
16
-
 17
17
-
 18
18
-
 19
19
-
 20
20
-
 21
21
-
 22
22
-
 23
23
-
 24
24
-
 25
25
-
 26
26
-
 27
27
-
 28
28
-
 29
29
-
 30
30
-
 31
31
-
 32
32
-
 33
33
-
 34
34
-
 35
35
-
 36
36
-
 37
37
-
 38
38
-
 39
39
-
 40
40
-
 41
41
-
 42
42
-
 43
43
-
 44
44
-
 45
45
-
 46
46
-
 47
47
-
 48
48
-
 49
49
-
 50
50
-
 51
51
-
 52
52
-
 53
53
-
 54
54
-
 55
55
-
 56
56
-
 57
57
-
 58
58
-
 59
59
-
 60
60
-
 61
61
-
 62
62
-
 63
63
-
 64
64
-
 65
65
-
 66
66
-
 67
67
-
 68
68
-
 69
69
-
 70
70
-
 71
71
-
 72
72
-
 73
73
-
 74
74
-
 75
75
-
 76
76
-
 77
77
-
 78
78
-
 79
79
-
 80
80
-
 81
81
-
 82
82
-
 83
83
-
 84
84
-
 85
85
-
 86
86
-
 87
87
-
 88
88
-
 89
89
-
 90
90
-
 91
91
-
 92
92
-
 93
93
-
 94
94
-
 95
95
-
 96
96


Holux TwoNav Sportiva Plus Quick Manual
- Kategoria
- Nawigatorzy
- Typ
- Quick Manual
w innych językach
- español: Holux TwoNav Sportiva Plus
- italiano: Holux TwoNav Sportiva Plus
- Deutsch: Holux TwoNav Sportiva Plus
- português: Holux TwoNav Sportiva Plus
- français: Holux TwoNav Sportiva Plus
- English: Holux TwoNav Sportiva Plus
- Nederlands: Holux TwoNav Sportiva Plus
Inne dokumenty
-
Garmin MAP PILOT Instrukcja obsługi
-
-
-
-
-
GEONAUTE KEYMAZE 300 GPS Instrukcja obsługi
-
 Smailo HD 4.3 Instrukcja obsługi
-
Sony nav-u NV-U70T Instrukcja obsługi
-
-
Sony HDR CX520VE Instrukcja obsługi
