Silvercrest SKT 2300 A1 Instrukcja obsługi
- Typ
- Instrukcja obsługi

English . . . . . . . . . . . . . . . . . . . . . . . . . . . . . . . . . . . . . . . . . . 3
Be sure to note the fold-out page.
Polski . . . . . . . . . . . . . . . . . . . . . . . . . . . . . . . . . . . . . . . . . 13
Proszę zwrócić uwagę na informacje umieszczone na wewnętrznej stronie okładki
Magyar . . . . . . . . . . . . . . . . . . . . . . . . . . . . . . . . . . . . . . . . 24
Kérjük, figyeljen a kinyitható oldalra
Slovensko . . . . . . . . . . . . . . . . . . . . . . . . . . . . . . . . . . . . . . 35
Prosimo, upoštevajte tekst na zavihani strani.
Česky . . . . . . . . . . . . . . . . . . . . . . . . . . . . . . . . . . . . . . . . . 46
Povšimněte si vyklápěcí strany
Slovensky . . . . . . . . . . . . . . . . . . . . . . . . . . . . . . . . . . . . . . 57
Prosím, všimnite si vyklápaciu stranu.
Deutsch . . . . . . . . . . . . . . . . . . . . . . . . . . . . . . . . . . . . . . . . 68
Bitte beachten Sie die Ausklappseite
SKT 2300 A1_10_V1.8_GB_PL_HU_SI_CZ_SK_DE


SKT
2300
A1
3
Contents
1.
Names of parts (see fold-out page). . . . . . . . . . . . . . . . . . . . . . . . . . . . . . . . . . . . . . . . . 3
2. Description . . . . . . . . . . . . . . . . . . . . . . . . . . . . . . . . . . . . . . . . . . . . . . . . . . . . . . . . . . 3
3. Safety information. . . . . . . . . . . . . . . . . . . . . . . . . . . . . . . . . . . . . . . . . . . . . . . . . . . . . 4
4. Unpacking, setting up and inserting the batteries. . . . . . . . . . . . . . . . . . . . . . . . . . . . . . . 7
5. Operating . . . . . . . . . . . . . . . . . . . . . . . . . . . . . . . . . . . . . . . . . . . . . . . . . . . . . . . . . . . 8
6. Cleaning . . . . . . . . . . . . . . . . . . . . . . . . . . . . . . . . . . . . . . . . . . . . . . . . . . . . . . . . . . . 10
7. Troubleshooting . . . . . . . . . . . . . . . . . . . . . . . . . . . . . . . . . . . . . . . . . . . . . . . . . . . . . . 11
8. Disposal . . . . . . . . . . . . . . . . . . . . . . . . . . . . . . . . . . . . . . . . . . . . . . . . . . . . . . . . . . . 11
9. Technical data . . . . . . . . . . . . . . . . . . . . . . . . . . . . . . . . . . . . . . . . . . . . . . . . . . . . . . . 12
10. Warranty . . . . . . . . . . . . . . . . . . . . . . . . . . . . . . . . . . . . . . . . . . . . . . . . . . . . . . . . . . 12
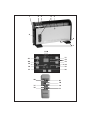
1.
Names of parts
(see fold-out page)
1
Handle
2
Control panel
3
Cover
4
Air outlet
5
W
arning symbol - “Do not cover”
6
Air inlet
7
Feet
8
Mains switch
9
Display
10
Indicator lights for timer
11
T
imer button
12
Indicator light for selected
unit of
measurement
13
Button for selecting unit of measurement
14
Indicator light for fan
15
Infrared receiver for remote control
16
Fan button
17
Button for selecting the heat setting
18
On/Of
f button
19
Indicator lights for the heat setting
20
Reduce temperature
21
Increase temperature
2.
Description
2.1
Intended purpose
This SilverCrest
SKT 2300 A1 convector
heater may be used to heat dry rooms.
This appliance is intended for private use
and is not suitable for commercial purposes.
The appliance is suitable for providing
auxiliary heating. It is not suitable for use on
its own to heat large spaces.
The appliance is floor standing only.
2.2
Scope of supply
•
1 convector heater
• 1 remote control
• 2 batteries type AAA/R03 1.5 V
• 2 feet
• 4 screws for feet
• 1 set of operating instructions

4
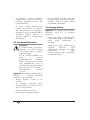
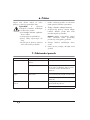
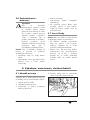
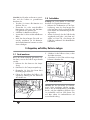
2.3
Symbols on the appliance
The adjacent symbol
5
war
ns
against covering the
appliance as this could cause
a build up of heat leading to
damage and the risk of fire.
3.
Safety information
3.1
Terms used
The following signalling ter
ms are found in
these Operating Instructions:
W
arning!
High risk. Disregarding the war
ning
may cause injury to life and limb.
Caution!
Medium risk. Disregarding the war
ning may
cause damage to property.
Note:
Low risk. Circumstances that should be taken
into account when dealing with this
appliance.
3.2
General information
•
Before using the appliance, be sure to
read these Operating Instructions carefully.
They are a component part of the
appliance and must be available at all
times.
• Use the appliance only for the purpose
described
(see “2.1 Intended purpose” on
page 3).
• Check whether the mains voltage (see
type plate on the appliance) agrees with
your mains voltage.
• This device is not intended to be used by
individuals (including children) with
limited physical, sensory or mental
capabilities or with a lack of experience
and/or lack of knowledge, unless
supervised by a person responsible for
their safety or they have received
instructions from such a person as to
how to use the device. Children should
always be supervised to ensure that they
do not play with the device.
• If there should be any malfunctions, the
appliance may only be repaired by our
Service Centre.
• The appliance must only be set up on a
firm, level, dry and non-flammable surface.
• Check that the power socket is easily
accessible so that you can pull out the
mains plug quickly if necessary.
3.3
Protection against electric shock
W
arning!
The following safety
information is intended to protect
you against electric shock.
• Only plug the appliance into a correctly
installed, earthed wall socket.
• Do not use the appliance if it has fallen
on the floor, received a hard blow or
fallen into water. In this case, please
contact our Service Centre. You will find
the service address in
“10. Warranty”
on page 12.
• The appliance must not under any
circumstances be used if it is damaged.
Have the device repaired in such cases
by a qualified specialist. You will find the

SKT
2300
A1
5
ser
vice address in “10. Warranty” on
page 12.
• If the mains cable for this appliance is
damaged, it must be replaced by the
manufacturer or a person with similar
qualifications in order to avoid a
hazard.
• Never use the appliance in the
immediate vicinity of a sink, bath tub,
shower or swimming pool as splashes
might enter the appliance.
• Water or other liquids must never be
allowed to enter the appliance. For this
reason:
–never use outdoors;
–never place containers filled with
liquid, such as drinking glasses, vases
etc. on the appliance;
– never use in a very damp environment
such as a bathroom.
If nonetheless liquid does enter the
appliance, unplug the mains plug
immediately and have the appliance
repaired by a qualified specialist. You
will find the service address in
“10. Warranty” on page 12.
• Never insert fingers or any objects
through the protective guards into the
inside of the appliance.
• Never touch the appliance, the mains
cord or the mains plug with moist hands.
• Always pull the mains cord out by the
plug. Never pull it by the cord itself.
• Ensure that the mains cable is not
kinked, twisted or crushed.
• Ensure that the mains cable is not
damaged on sharp edges.
• Keep the mains cord away from hot
surfaces (such as stove eyes).
• If you are not using the appliance for a
prolonged period of time, remove the
plug from the wall socket. Only then is
the appliance completely free of current.
• You should avoid using extension cords.
This is only allowed under very
particular conditions:
– The extension cord has to be suited for
the appliance's amperage.
– The extension cord must not be
installed "loose": it must not be
possible to trip over it or within the
reach of children.
– The extension cord must not by any
means be damaged.
– No other devices other than this
appliance must be connected to the
mains socket, as otherwise
overloading of the power supply
network could occur (multiple sockets
are not allowed!).
• The appliance must not be operated with
an external time switch or separate
remote control system, such as a wireless
remote control socket.
3.4
Protection against the danger of
fire
W
arning!
As the appliance works
at high temperatures, please
observe the following safety
information to prevent fire.
• While the appliance is operating, there
must be no flammable objects (e.g.
curtains, paper) in the immediate vicinity
of the appliance.
• Never use the appliance to dry textiles
or other items on, over or in front of the
appliance.
• To avoid overheating, the appliance must
never be covered.
• When setting up the appliance, maintain
a minimum distance of 1.5
m from other
appliances and the wall.
• Never operate the appliance in rooms
where there is a risk of explosion or in

6
the vicinity of fl
ammable gases or
liquids.
• The appliance must never be placed
immediately beneath a wall socket, as
the heat it generates could damage the
electrical installation.
• Always check that air can freely enter
and escape. Heat might otherwise build
up inside the appliance.
• Never leave the appliance running when
it is unattended. The presence of odour
is almost always an indication of
damage. If you notice any such odour,
unplug the mains plug immediately and
have the appliance inspected. You will
find the service address in
“10. Warranty” on page 12.
3.5
Protection against injury
W
arning!
To avoid injury, please
observe the following information.
• Ensure that it is not possible for anyone to
trip over or to get caught up in or step on
the mainscable.
• Once hot, if you wish to transport the
appliance, switch it off, pull out the
mains plug, and wait until the appliance
has cooled down. Otherwise you could
burn yourself on the hot surface.
3.6
For the safety of your child
W
arning!
Children often cannot
assess dangers correctly and are
injured as a result. Please therefore
observe the following:
• This product may only be used under
adult supervision to ensure that children
do not play with the appliance.
• Always take care to ensure the
appliance is kept out of the reach of
children at all times.
• The remote control contains batteries.
Ensure that they are kept out of the reach
of children and are not swallowed.
Ingested batteries can be highly
dangerous. Obtain medical assistance
immediately if batteries are swallowed.
3.7
Handling batteries
W
arning!
T
o prevent a risk of explosion,
normal batteries must not be
charged, heated or disposed of by
burning.
If battery acid has leaked, avoid
contact with skin, eyes and mucous
membranes to prevent injury. In the
event of contact with the acid, rinse
the affected areas immediately
with plenty of clean water and
contact a doctor at once.
Caution!
To avoid damaging the product
and ensure it functions correctly, please
note:
• Always replace all batteries at the same
time.
• Do not use different battery types or a
mixture of new and old batteries at the
same time.
• Do not short circuit the batteries.
• Do not use rechargeable batteries.
• Remove the batteries if the device is not
used for a long time. Leaking batteries
could damage the device.

SKT
2300 A1 7
3.8 Material damage
Caution! To avoid material damage, please
observe the following conditions.
• Remove the batteries from the remote
control if you are not using it for a
prolonged period of time. Leaking
batteries could damage the remote
control.
• Ensure that the feet are fitted correctly
(see “4.2 Setting up the appliance” on
page 7), otherwise the floor might be
scratched or scorched.
4. Unpacking, setting up and inserting the batteries
4.1 Mounting the appliance
Before the appliance can be used, the feet 7
must be screwed on as follows:
1. Unpack the appliance from the
packaging.
2. Remove the transport packaging.
3. Check that the appliance shows no signs
of damage.
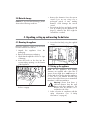
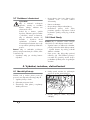
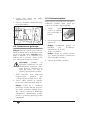
4. Insert the hooks on the feet into the
corresponding openings on the bottom
of the appliance:
5. Slide the feet to one side to allow the
hooks to engage.
6. Secure the feet firmly using the supplied
screws:
4.2 Setting up the appliance
Note: As the appliance and heating
elements are supplied with a thin film of
grease, there might be a
small amount of
smoke and odour the first time the appliance
is used. This is not harmful and will stop
after a short while. Please ensure meanwhile
that there is sufficient ventilation.
Warning! Ensure that there is
sufficient distance from the wall,
fixtures and other appliances. The
distance must be at least 1
m to
exclude the risk of fire.
1. Select a location in compliance with the
safety information
(see “3. Safety
information” on page 4).

8
2. Plug the mains plug into a wall socket
that complies with the technical data.
Note:If you have plugged other power
consumers into the same circuit, check
that the maximum load for the installed
fuse is not exceeded, as otherwise the
fuse will trip.
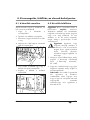
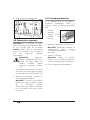
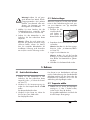
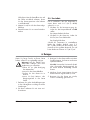
4.3 Inserting the batteries
If the appliance is new or the batteries in the
remote control are flat, new type AAA/R03
batteries must be inserted.
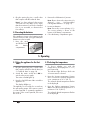
1. Press the catch
and lift the lid off
the battery
compartment.
2. Remove the old batteries if present.
Note: Please observe the instructions for
disposal
(see “8.2 Disposable/
rechargeable batteries” on page 11).
3. Insert new batteries.
Note: Ensure the correct polarity (+/–).
The correct polarity is shown on the
bottom of the battery compartment.
4. Close the battery compartment again.
5. Operating
5.1 Using the appliance for the first
time
1. Plug the mains plug into a wall socket
that complies with the technical data
(see
“9. Technical data” on page 12).
2. Switch the mains switch 8 to ON to
switch on the power supply.
The mains switch 8 lights up.
3. Press the On/Off button 18 to switch the
appliance on.
The display 9 lights up.
The appliance is now ready for use and can
be operated by means of the remote control
or control panel
2. To operate the appliance
by means of the control panel 2, first raise
the cover 3.
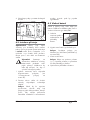
5.2 Selecting the temperature
1. To choose whether you wish the
temperature to be displayed in °C or °F,
press button
13.
The indicator light 12 shows which unit
of measurement is selected.
2. Press the “Increase temperature” button
21 to increase the desired temperature
up to a maximum of 35 °C (95 °F).
The selected desired temperature flashes
in the display
9.
3. Press the “Reduce temperature” button
20 to lower the desired temperature to a
minimum of 10 °C (50 °F).
The selected desired temperature flashes
in the display
9.

SKT 2300 A1 9
After a short time the temperature display
stops flashing and switches to the measured
value.
Note: The temperature is measured at the
appliance. It might be some time before the
entire room has also reached this
temperature.
As soon as the set temperature is reached,
the heating function switches off
automatically and the indicator lights
19 for
the heat settings flash. As soon as the
temperature falls below the desired
temperature, the heating function
automatically switches on again and the
indicator lights
19 for the heat settings are
constantly illuminated.
5.3 Setting the heat setting
The appliance has three heat settings:
– 1,000 watts
– 1,300 watts
– 2,300 watts
1. Press button 17 repeatedly until the
desired heat setting is set.
The relevant indicator light 19 lights up.
Notes:
– if both indicator lights 19 are
illuminated, the 2,300 watts heat
setting has been selected,
– if no indicator light 19 is illuminated,
the heating function is switched off,
– if the indicator lights 19 flash, the
desired temperature has been
reached.
2. Press the fan button 16 to switch the fan
on or off.
When the fan is switched on, the
indicator light
14 lights up.
Note: The fan might make a slight noise,
but it does ensure better circulation of
the heated air.
5.4 Setting the heating time
The appliance has a timer for setting the
heating time to between 1 and 15 hours.
The appliance switches off automatically
once the heating time has expired.
1. Press the timer button 11 repeatedly until
the desired number of hours is indicated
by the indicator lights
10.
Note: You will need to add together the
number of hours indicated by the
indicator lights
10. If, for example, 2H
and 8H are lit up, the heating time is 10
hours.
2. To switch off the timer, press the timer
button
11 repeatedly until none of the
indicator lights 10 is illuminated.
5.5 Thermal cut-out
For your safety the appliance has a thermal
cut-out.
If the temperature inside the appliance
becomes too high, the appliance switches
off automatically:
1. Switch the mains switch 8 to 0FF to
switch off the appliance.
2. Check whether the air inlet 6 or outlet 4
is obstructed and remove the cause.
If you cannot establish a cause and the
fault occurs repeatedly, have the
appliance repaired or else take it out of
use.
3. Wait for the appliance to cool down.
4. You can then continue to operate it
normally.

10
5.6 Frost protection
To prevent the temperature in a room falling
below 0
°C (32 °F), proceed as follows:
1. Switch the mains switch 8 to ON to
switch on the power supply.
The mains switch 8 lights up.
2. Press the On/Off button 18 to switch the
appliance on.
The display 9 lights up.
As soon as the temperature in the immediate
vicinity of the appliance falls significantly
below
5 °C (41 °F), the heater switches on
automatically at the highest heat setting and
heats the room to about 8
°C (46 °F).
6. Cleaning
To ensure your appliance gives you lasting
service, you should clean it regularly.
Warning! To avoid the danger of an
electric shock or burning:
– remove the mains plug before
each clean;
– allow the appliance to cool
down;
– never immerse the appliance in
water;
– never allow water or cleaning
agent to run into the appliance.
1. Carefully remove major dust deposits
from the protective guards with a
vacuum cleaner.
2. Remove any remaining dirt with a soft
brush.
3. Clean the outside of the appliance with a
damp cloth. You could also use a little
washing-up liquid.
Caution! Never use caustic or abrasive
cleaning agents, as this could damage
your appliance.
4. Wipe the appliance with a cloth
moistened with clear water.
5. Do not use the appliance again until it
has dried completely.

SKT 2300 A1 11
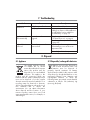
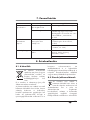
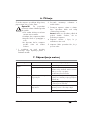
7. Troubleshooting
8. Disposal
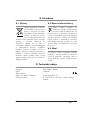
8.1 Appliance
The symbol with the crossed-
out rubbish bin on wheels
means that within the European
Union, the product must be
disposed of to a sorted rubbish
collection. This applies to the
product and all accessories which are
marked with this symbol. Marked products
must not be disposed of via the regular
domestic waste but must be handed in to a
recycling centre for electrical or electronic
devices. Recycling helps to reduce the use of
raw materials and to relieve the
environment.
You can obtain information
about disposal and the location of your
nearest recycling centre from your local
waste management service, for example, or
Yellow Pages.
8.2 Disposable/rechargeable batteries
Batteries must not be disposed of
with normal household waste. Flat
batteries must be disposed of
properly. Special containers for battery
disposal are provided for this purpose at the
shop where you bought the batteries or at a
municipal collection point. Batteries and
rechargeable batteries on which the
following letters are printed contain harmful
substances as follows: Cd (cadmium), Hg
(mercury), Pb
(lead).
Fault Cause Remedy
Appliance cannot be
switched on
Faulty fuse or wall socket Select another wall socket
Faulty appliance Have repairs carried out at a specialist
workshop or dispose of the appliance.
You will find the service address in
“10. Warranty” on page 12.
Appliance switches
off automatically
Thermal cut-out has
triggered
Allow the appliance to cool down (see
“5.5 Thermal cut-out” on page 9)
Clean the appliance (see “6. Cleaning”
on page 10)
Only cold air is
produced
Selected temperature has
been reached
Appliance switches on again
automatically as soon as the room
temperature falls
Select a higher desired temperature

12
8.3 Packaging
If you would like to dispose of the
packaging, please observe the
corresponding environmental regulations in
your country. Dispose of the packaging in
Germany via the collection of the dual
system ("Grüner Punkt").
9. Technical data
Power supply: 220 - 240 V~/50 Hz
Output: 2,000 - 2,300 watts
Protection class: I
Batteries for remote control: 2x type AAA/R03 1.5 V
Ambient conditions: 0 °C to +30 °C, max. 85 % relative humidity
10. Warranty
The warranty for your appliance is valid for
3 years from the date of purchase. The
warranty does not cover damage resulting
from improper connection, the use of
another manufacturer’s parts, normal wear
and tear, the use of force, improper use, or
attempts to carry out repairs yourself. The
appliance has been manufactured in
accordance with strict quality guidelines and
checked before leaving the factory.
Nonetheless, should operational faults
occur, please contact the Service Centre
first.
Please do not send in any appliance before
contacting our Service Centre.
To enable us to process your request quickly,
please have ready your proof of purchase
and the product number (for this appliance:
SKT
2300 A1).
Please contact our service hotline for
guarantee claims and technical matters:
00800/4212 4212
(Monday to Friday between
8 a.m. and 4 p.m.)

SKT 2300 A1 13
Spis treści
1. Nazwa części (patrz strona rozkładana) . . . . . . . . . . . . . . . . . . . . . . . . . . . . . . . . . . . . . . 13
2. Opis urządzenia . . . . . . . . . . . . . . . . . . . . . . . . . . . . . . . . . . . . . . . . . . . . . . . . . . . . . . . . . . 13
3. Zasady bezpieczeństwa. . . . . . . . . . . . . . . . . . . . . . . . . . . . . . . . . . . . . . . . . . . . . . . . . . . . 14
4. Rozpakowanie, ustawienie, zakładanie baterii . . . . . . . . . . . . . . . . . . . . . . . . . . . . . . . . 18
5. Obsługa . . . . . . . . . . . . . . . . . . . . . . . . . . . . . . . . . . . . . . . . . . . . . . . . . . . . . . . . . . . . . . . . . 19
6. Czyszczenie . . . . . . . . . . . . . . . . . . . . . . . . . . . . . . . . . . . . . . . . . . . . . . . . . . . . . . . . . . . . . . 21
7. Usuwanie usterek . . . . . . . . . . . . . . . . . . . . . . . . . . . . . . . . . . . . . . . . . . . . . . . . . . . . . . . . 22
8. Utylizacja. . . . . . . . . . . . . . . . . . . . . . . . . . . . . . . . . . . . . . . . . . . . . . . . . . . . . . . . . . . . . . . 22
9. Dane techniczne . . . . . . . . . . . . . . . . . . . . . . . . . . . . . . . . . . . . . . . . . . . . . . . . . . . . . . . . . 23
10. Gwarancja. . . . . . . . . . . . . . . . . . . . . . . . . . . . . . . . . . . . . . . . . . . . . . . . . . . . . . . . . . . . . . 23
1. Nazwa części (patrz strona rozkładana)
1 Uchwyt
2 Panel sterowania
3 Osłona
4 Wylot powietrza
5 Symbol ostrzegawczy „Nie otwierać“
6 Wlot powietrza
7 Nóżki
8 Wyłącznik główny
9 Wyświetlacz
10 Lampki kontrolne timera
11 Przycisk timer
12 Lampka kontrolna wybranej jednostki
miary
13 Przycisk wyboru jednostki miary
14 Lampka kontrolna wentylatora
15 Odbiornik sygnału podczerwieni z
pilota zdalnego sterowania
16 Przycisk wentylatora
17 Przycisk wyboru stopnia ogrzewania
18 Przycisk wł/wył
19 Lampki kontrolne stopnia ogrzewania
20 Zmniejszanie temperatury
21 Zwiększanie temperatury
2. Opis urządzenia
2.1 Zastosowanie
Konwektor SilverCrest SKT 2300 A1 służy
do ogrzewania suchych pomieszczeń
mieszkalnych.
Urządzenie przeznaczone jest do użytku
prywatnego, nie do stosowania w
działalności gospodarczej.
Urządzenie przeznaczone jest do
pełnienia funkcji ogrzewania
dodatkowego. Nie może pełnić funkcji
ogrzewania głównego w dużych
pomieszczeniach.
Urządzenie można stawiać wyłącznie na
podłodze.
2.2 Skład zestawu
• 1 konwektor
• 1 pilot zdalnego sterowania
• 2 baterie typ AAA/R03 1,5 V

14
• 2 nóżki
• 4 śruby do nóżek
• 1 instrukcja obsługi
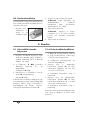
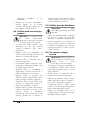
2.3 Oznaczenia na
urządzeniu
Przedstawiony obok symbol
5 ostrzega przed przykrywa-
niem urządzenia, ponieważ
grozi to przegrzaniem oraz
uszkodzeniem urządzenia i
pożarem.
3. Zasady bezpieczeństwa
3.1 Wyjaśnienie haseł
Instrukcja obsługi zawiera następujące
hasła ostrzegawcze:
Ostrzeżenie!
Wysokie ryzyko. Nieprzestrzeganie
tego ostrzeżenia grozi utratą
zdrowia lub życia.
Uwaga!
Średnie ryzyko. Nieprzestrzeganie tego
ostrzeżenia może spowodować szkody
materialne.
Wskazówka:
Niskie ryzyko. Kwestie, które należy
uwzględnić przy eksploatacji urządzenia.
3.2 Wskazówki ogólne
• Przed użyciem należy zapoznać się
dokładnie z instrukcją obsługi. Jest ona
częścią urządzenia i musi być zawsze
dostępna.
• Termowentylator należy zawsze stoso-
wać zgodnie z opisanym zastoso-
waniem (patrz "2.1 Zastosowanie" na
stronie 13).
• Sprawdzić, czy wymagane napięcie
sieciowe (patrz tabliczka znamionowa
urządzenia) zgodne jest z faktycznym
napięciem w sieci.
• Niniejsze urządzenie nie jest
przeznaczone dla osób (w tym dzieci)
o ograniczonych zdolnościach
fizycznych, sensorycznych lub
umysłowych, odznaczających się
brakiem doświadczenia lub wiedzy,
chyba że pozostają pod nadzorem
osoby odpowiedzialnej za ich
bezpieczeństwo lub otrzymają od niej
wskazówki dotyczące używania.
Dzieci powinny pozostawać pod
nadzorem, aby nie używały
urządzenia do zabawy.
• W przypadku ewentualnych usterek do
przeprowadzenia naprawy uprawniony
jest wyłącznie nasz serwis.
• Urządzenie można ustawiać wyłącznie
na stabilnym, równym, suchym
i niepalnym podłożu.
• Gniazdko sieciowe powinno być łatwo
dostępne, aby w razie potrzeby można
było szybko wyciągnąć wtyczkę.

SKT 2300 A1 15
3.3 Ochrona przed
porażeniem
elektrycznym
Ostrzeżenie! Poniższe zasady
bezpieczeństwa mają chronić
użytkowników przed porażeniem
prądem.
• Urządzenie należy podłączać tylko do
prawidłowo zainstalowanego
gniazdka z uziemieniem.
• Nie należy używać urządzenia, jeśli
spadło na podłogę, zostało mocno
obite lub upadło do wody. W takim
przypadku prosimy o kontakt z naszym
centrum serwisowym. Adres serwisu
znajduje się w punkcie
"10. Gwarancja" na stronie 23.
• W razie uszkodzenia urządzenia nie
należy w żadnym wypadku go
używać. Należy oddać urządzenie do
naprawy wykwalifikowanemu
personelowi. Adres serwisu znajduje
się w punkcie "10. Gwarancja" na
stronie 23.
• W razie uszkodzenia przewodu
sieciowego urządzenia musi on zostać
wymieniony przez producenta lub
podobnie wykwalifikowaną osobę, aby
uniknąć zagrożeń.
• Urządzenia nie należy nigdy używać
w bezpośredniej bliskości
zlewozmywaka, wanny, prysznica lub
basenu, ponieważ do urządzenia
mogłaby dostać się rozpryskiwana
woda.
• Do urządzenia nie może nigdy dostać
się woda ani inne płyny. Dlatego:
– nigdy nie stosować urządzenia na
zewnątrz
– nie stawiać na urządzeniu żadnych
naczyń z płynem, np. szklanek,
wazonów itp.
– nigdy nie stosować urządzenia w
wilgotnym otoczeniu, np. w łazience
Jeżeli do urządzenia dostaną się jakieś
płyny, należy natychmiast odłączyć
wtyczkę od sieci i oddać urządzenie
do naprawy przez wykwalifikowany
personel. Adres serwisu znajduje się w
punkcie "10. Gwarancja" na
stronie 23.
• Nigdy nie wkładać palców ani
przedmiotów przez kratkę ochronną do
wnętrza urządzenia.
• Nigdy nie chwytać urządzenia, kabla
sieciowego ani wtyczki mokrymi
dłońmi.
• Kabel sieciowy odłączać zawsze za
wtyczkę. Nigdy nie ciągnąć za sam
kabel.
• Nie załamywać i nie przygniatać kabla
sieciowego.
• Nie dopuścić do uszkodzenia kabla
sieciowego przez ostre krawędzie.
• Nie zbliżać kabla sieciowego do
gorących przedmiotów (np. płyty
kuchennej).
• Jeżeli urządzenie nie będzie używane
przez dłuższy czas, należy odłączyć
wtyczkę od sieci. Tylko wtedy
urządzenie jest całkowicie odłączone
od napięcia.
• Unikać stosowania przedłużaczy.
Dopuszczalne jest to tylko
w określonych warunkach:
– przedłużacz musi być przystosowany
do natężenia prądu pobieranego
przez urządzenie,
– przedłużacz nie może swobodnie
wisieć: nie może stanowić
przeszkody, o którą można by się
potknąć, i musi być niedostępny dla
dzieci,

16
– przedłużacz nie może być
uszkodzony,
– do przedłużacza nie można
podłączać żadnych innych urządzeń
poza piekarnikiem, gdyż może to
spowodować przeciążenie instalacji
elektrycznej (zakaz stosowania
przedłużaczy z kilkoma gniazdami!).
• Nie wolno użytkować urządzenia
z zewnętrznym przełącznikiem
czasowym lub oddzielnym systemem
telemechanicznym, jak na przykład
zdalnie sterowane gniazdo.
3.4 Ochrona
przeciwpożarowa
Ostrzeżenie! Ponieważ urząd-
zenie wytwarza wysokie tempera-
tury, należy przestrzegać
następujących zasad bez-
pieczeństwa, aby uniknąć
zagrożenia pożarem.
• Podczas pracy urządzenia w jego
bezpośrednim sąsiedztwie nie mogą
znajdować się żadne palne
przedmioty (np. zasłony, papier itp.).
• Nigdy nie stosować urządzenia do
suszenia przed nim, na nim lub nad nim
tekstyliów ani innych przedmiotów.
• Nie należy nigdy przykrywać
urządzenia, aby uniknąć przegrzania.
• Ustawiając urządzenie należy
zachować minimalny odstęp 1,5 m od
innych urządzeń lub od ściany.
• Nigdy nie należy używać urządzenia
w pomieszczeniach zagrożonych
wybuchem oraz w pobliżu gazów
palnych lub cieczy palnych.
• Urządzenia nie należy nigdy ustawiać
bezpośrednio poniżej gniazdka
ściennego, ponieważ wytwarzane
ciepło mogłoby spowodować
uszkodzenie instalacji elektrycznej.
• Zawsze upewniać się, że możliwy jest
swobodny wlot i wylot powietrza.
W przeciwnym razie może dojść do
przegrzania urządzenia.
• Nigdy nie pozostawiać włączonego
urządzenia bez nadzoru. Uszkodzenia
sygnalizowane są niemal zawsze
intensywnym zapachem. W tym
przypadku należy natychmiast
wyciągnąć wtyczkę z gniazdka i zlecić
sprawdzenie urządzenia. Adres
serwisu znajduje się w punkcie
"10. Gwarancja" na stronie 23.
3.5 Ochrona przed
uszkodzeniami ciała
Ostrzeżenie! Należy
przestrzegać następujących
wskazówek, aby uniknąć
uszkodzeń ciała.
• Kabel sieciowy powinien być ułożony w
sposób uniemożliwiający potknięcie się,
zaplątanie się w nim lub deptanie po nim.
• W celu przenoszenia gorącego
urządzenia należy wyłączyć
urządzenie, wyciągnąć wtyczkę z
gniazdka i zaczekać, aż urządzenie
ostygnie. Dotknięcie gorącej
powierzchni grozi oparzeniem.
3.6 Dla bezpieczeństwa
Twojego dziecka
Ostrzeżenie! Dzieci nie są
często w stanie prawidłowo
ocenić zagrożenia i mogą się
przez to zranić. Dlatego należy
pamiętać:
• Produktu należy używać wyłącznie
pod nadzorem osób dorosłych po to,
by dzieci nie bawiły się urządzeniem.

SKT 2300 A1 17
• Urządzenie musi zawsze pozostawać
poza zasięgiem dzieci.
• W pilocie zdalnego sterowania
znajdują się baterie. Uważać, by nigdy
nie dostały się w ręce dzieci i nie
zostały przez nie połknięte.
Połknięte baterie stanowią zagrożenie
dla życia. W razie połknięcia baterii,
natychmiast sprowadzić pomoc
lekarską.
• Uważać, aby folia z opakowania nie
stała się dla dziecka śmiertelną
pułapką. Folia z opakowania nie jest
zabawką.
3.7 Postępowanie z
bateriami
Ostrzeżenie!
Aby uniknąć zagrożenia
wybuchem, normalnych baterii nie
wolno ładować, ogrzewać lub
usuwać przez spalenie.
W przypadku wylania baterii,
należy unikać kontaktu ze skórą,
oczami i błonami śluzowymi. W
razie kontaktu z wylaną baterią,
zanieczyszczone miejsca
przemyć dużą ilością czystej
wody i niezwłocznie udać się do
lekarza.
Uwaga! By uniknąć uszkodzenia
urządzenia i zapewnić jego prawidłowe
funkcjonowanie należy przestrzegać
poniższych wskazówek:
• Zawsze wymieniać wszystkie baterie w
tym samym czasie.
• Nie stosować różnych typów baterii lub
nowych i starych baterii razem w tym
samym czasie.
• Nie zwierać baterii.
• Nie wolno stosować ponownie
ładowanych akumulatorów.
• Jeżeli urządzenie nie będzie używane
przez dłuższy czas, należy wyjąć
baterie. W innym razie wyciekające
baterie mogłyby uszkodzić urządzenie.
3.8 Szkody materialne
Uwaga! By uniknąć szkód materialnych
należy przestrzegać poniższych
wskazówek.
• Wyjąć baterie z pilota zdalnego
sterowania, jeśli nie będzie on
używany przez dłuższy czas.
Wyciekające baterie mogą uszkodzić
pilota zdalnego sterowania.
• Zamocować prawidłowo nóżki (patrz
"4.2 Ustawienie urządzenia" na
stronie 18). W przeciwnym razie
podłoga może zostać porysowana lub
przypalona.

18
4. Rozpakowanie, ustawienie, zakładanie baterii
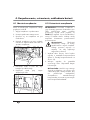
4.1 Montaż urządzenia
Przed uruchomieniem urządzenia należy
przykręcić nóżki 7:
1. Wyjąć urządzenie z opakowania.
2. Usunąć opakowanie transportowe.
3. Upewnić się, że urządzenie nie jest
uszkodzone.
4. Haczyki znajdujące się przy nóżkach
umieścić w odpowiednich otworach na
spodzie urządzenia:
5. Przesunąć nóżki w bok tak, aby
haczyki się zablokowały.
6. Przykręcić nóżki przy użyciu
dołączonych śrub:
4.2 Ustawienie urządzenia
Wskazówka! Ponieważ urządzenie i
jego elementy grzewcze dostarczane są w
lekko naoliwionym stanie, podczas
pierwszego użycia może pojawić się
lekki dym i zapach. Są one nieszkodliwe i
ustają w krótkim czasie. Należy wtedy
zapewnić dostateczne przewietrzenie
pomieszczenia.
Ostrzeżenie! Zachować
dostateczny odstęp od ściany,
umeblowania i innych urządzeń.
Odstęp powinien wynosić co
najmniej 1 m, aby wykluczyć
zagrożenie pożarem.
1. Wybrać takie miejsce, które będzie
zgodne z zasadami bezpieczeństwa
(patrz "3. Zasady bezpieczeństwa" na
stronie 14).
2. Włożyć wtyczkę do gniazdka
sieciowego, które odpowiada danym
technicznym.
Wskazówka: Jeżeli do tego samego
obwodu podłączone są jeszcze inne
odbiorniki prądu, należy uważać, aby
nie przekroczyć maksymalnej
obciążalności zainstalowanego
bezpiecznika, ponieważ w przeciwnym
razie bezpiecznik zadziała.

SKT 2300 A1 19
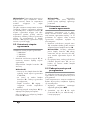
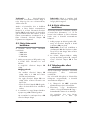
4.3 Zakładanie baterii
Jeśli urządzenie jest nowe lub baterie w
pilocie zdalnego sterowania się
rozładowały, należy założyć nowe baterie
typ AAA/R03.
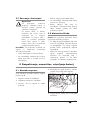
1. Nacisnąć na
zatrzask i zdjąć
pokrywę komory
na baterie.
2. Wyjąć stare baterie, jeśli znajdują się w
środku.
Wskazówka: Przestrzegać
wskazówek odnośnie utylizacji (patrz
"8.2 Baterie/Akumulatory" na
stronie 22).
3. Włożyć nowe baterie.
Wskazówka: Zwrócić uwagę na
właściwą polaryzację baterii (+/–).
Właściwa polaryzacja została
oznaczona na spodzie komory na
baterie.
4. Zamknąć komorę na baterie.
5. Obsługa
5.1 Uruchomienie
urządzenia
1. Włożyć wtyczkę do gniazdka
sieciowego, które odpowiada danym
technicznym (patrz "9. Dane
techniczne" na stronie 23).
2. Włączyć zasilanie ustawiając
wyłącznik główny 8 na ON.
Wyłącznik główny 8 świeci się.
3. Urządzenie włącza się po naciśnięciu
przycisku wł/wył 18.
Wyświetlacz 9 świeci się.
Urządzenie jest gotowe do pracy i może
być obsługiwane przy użyciu pilota
zdalnego sterowania lub panelu
sterowania 2. Przed obsługą urządzenia
przy użyciu panelu sterowania 2 należy
podnieść do góry osłonę 3.
5.2 Wybór temperatury
1. Wybrać czy temperatura ma być
wyświetlana w °C czy °F naciskając
przycisk 13.
Wybraną jednostkę pomiaru wskazuje
lampka kontrolna 12.
2. Nacisnąć przycisk „zwiększanie
temperatury“ 21, by zwiększyć
temperaturę zadaną do maksymalnie
35 °C (95 °F).
Wybrana temperatura zadana miga na
wyświetlaczu 9.
3. Nacisnąć przycisk „zmniejszanie
temperatury“ 20, by zmniejszyć
temperaturę zadaną do minimalnie
10 °C (50 °F).
Wybrana temperatura zadana miga na
wyświetlaczu 9.
Po krótkim czasie temperatura zadana
przestaje migać i przełącza się na
temperaturę rzeczywistą.
Strona się ładuje...
Strona się ładuje...
Strona się ładuje...
Strona się ładuje...
Strona się ładuje...
Strona się ładuje...
Strona się ładuje...
Strona się ładuje...
Strona się ładuje...
Strona się ładuje...
Strona się ładuje...
Strona się ładuje...
Strona się ładuje...
Strona się ładuje...
Strona się ładuje...
Strona się ładuje...
Strona się ładuje...
Strona się ładuje...
Strona się ładuje...
Strona się ładuje...
Strona się ładuje...
Strona się ładuje...
Strona się ładuje...
Strona się ładuje...
Strona się ładuje...
Strona się ładuje...
Strona się ładuje...
Strona się ładuje...
Strona się ładuje...
Strona się ładuje...
Strona się ładuje...
Strona się ładuje...
Strona się ładuje...
Strona się ładuje...
Strona się ładuje...
Strona się ładuje...
Strona się ładuje...
Strona się ładuje...
Strona się ładuje...
Strona się ładuje...
Strona się ładuje...
Strona się ładuje...
Strona się ładuje...
Strona się ładuje...
Strona się ładuje...
Strona się ładuje...
Strona się ładuje...
Strona się ładuje...
Strona się ładuje...
Strona się ładuje...
Strona się ładuje...
Strona się ładuje...
Strona się ładuje...
Strona się ładuje...
Strona się ładuje...
Strona się ładuje...
Strona się ładuje...
Strona się ładuje...
Strona się ładuje...
Strona się ładuje...
-
 1
1
-
 2
2
-
 3
3
-
 4
4
-
 5
5
-
 6
6
-
 7
7
-
 8
8
-
 9
9
-
 10
10
-
 11
11
-
 12
12
-
 13
13
-
 14
14
-
 15
15
-
 16
16
-
 17
17
-
 18
18
-
 19
19
-
 20
20
-
 21
21
-
 22
22
-
 23
23
-
 24
24
-
 25
25
-
 26
26
-
 27
27
-
 28
28
-
 29
29
-
 30
30
-
 31
31
-
 32
32
-
 33
33
-
 34
34
-
 35
35
-
 36
36
-
 37
37
-
 38
38
-
 39
39
-
 40
40
-
 41
41
-
 42
42
-
 43
43
-
 44
44
-
 45
45
-
 46
46
-
 47
47
-
 48
48
-
 49
49
-
 50
50
-
 51
51
-
 52
52
-
 53
53
-
 54
54
-
 55
55
-
 56
56
-
 57
57
-
 58
58
-
 59
59
-
 60
60
-
 61
61
-
 62
62
-
 63
63
-
 64
64
-
 65
65
-
 66
66
-
 67
67
-
 68
68
-
 69
69
-
 70
70
-
 71
71
-
 72
72
-
 73
73
-
 74
74
-
 75
75
-
 76
76
-
 77
77
-
 78
78
-
 79
79
-
 80
80


Silvercrest SKT 2300 A1 Instrukcja obsługi
- Typ
- Instrukcja obsługi
w innych językach
- slovenčina: Silvercrest SKT 2300 A1 Používateľská príručka
Powiązane artykuły
-
Silvercrest SKD 2300 A1 Operating Instructions Manual
-
Silvercrest SKT 2000 A1 Operating Instructions Manual
-
Silvercrest SHLF 2000 A1 Operating Instructions Manual
-
-
-
-
Silvercrest SKD 1000 A1 Operating Instructions Manual
Inne dokumenty
-
Güde Infrarot Heizstrahler GIH 900 Instrukcja obsługi
-
-
G de GIH 900 Instrukcja obsługi
-
-
LIVARNO 325481 Instrukcja obsługi
-
Yamaha DPX-530 Instrukcja obsługi
-
-
Perel CH0003 Instrukcja obsługi
-
G de GH 2000 Instrukcja obsługi
-
BOMANN EK 6023 CB Instrukcja obsługi